

Page 1

EQAXF01BXWP
USER MANUAL 1EN
Page 2

Welcome
Thank you for choosing ELECTROLUX. This manual contains
all the information you need to safely and correctly use your water
dispenser. Please read all the instructions prior to using the appliance,
and keep this manual in a secure place for future reference. Do not
remove the rating plate label which attached adhesive identification label
containing the code, model number, manufacturer and other information.
This label will be used by an ELECTROLUX authorized service
representative in the event that your water dispenser needs service.
Environmental Notice
The packaging material used is recyclable. We
recommend that you separate plastic, paper and
cardboard and give them to recycling agents.
To help preserve the environment, the refrigerant
used in this product is R134a (Hydrofluorocarbon HFC), which does not affect the ozone layer and
has little impact on the greenhouse effect.
According to WEEE (Waste of Electrical and
Electronic Equipment) guidelines, waste from
electrical and electronic devices should be
collected separately. If you need to remove of this
appliance in the future, do not throw it away with
the rest of your domestic garbage. Instead, please
take the appliance to the nearest WEEE collecting
agents, where available.
Page 3
Customer Care
10
12Troubleshooting
properties incident.
d
power
To avoid danger of suffocation, keep plastic bag away from babies and children.
Keep ventilation openings, in the appliance enclosure or in the built-in
structure, clear of obstruction.
Do not use mechanical devices or other means to accelerate the
defrosting process, other than those recommended by the manufacturer.
Page 4
1. This unit is designed for drinkable water only. Put bottles as specified inside
the cabinet before using.
43
3. This dispenser can provide hot, cold and room temperature water.
4. With the adoption of distinctive thermal isolation technology, this unit can
minimize thermal exchange between hot, room temperature and cold water.
5. Do not store explosive substances such as aerosol cans with a
flammable propellant in this appliance.
6. Regional restrictions
The heating method of machine can only be used within 1500m elevation.
Page 5
3. Recommend to install the anti-tilt bracket at the
back side of this water dispenser to prevent
the dispenser from falling down which could
cause injury.(Fig. )6
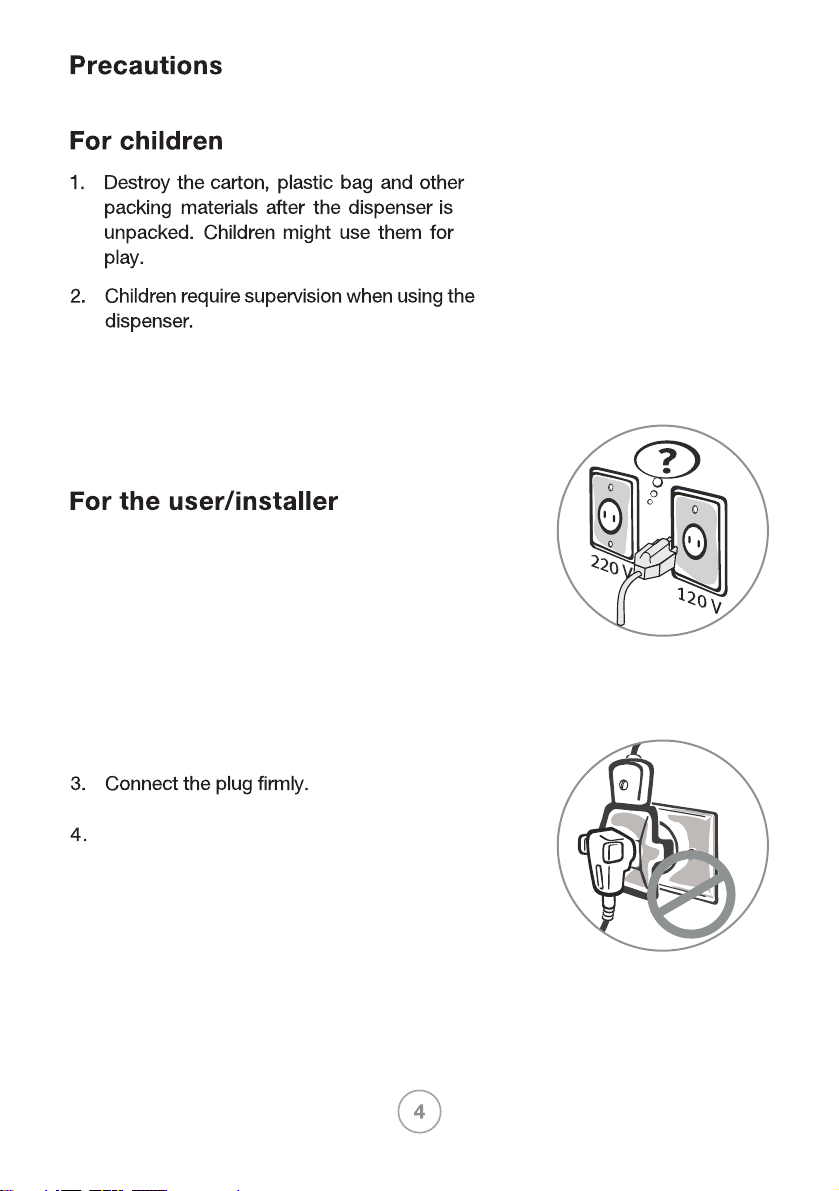
1. Plug the water dispenser directly into the
socket. The unit requires proper
grounding and the correct voltage (as
technical information specified on page 13
of this manual).(Fig. 1)
2. An appropriate length of power-supply cord
is provided to reduce the risks of becoming
entangled in, or tripping over a longer cord.
Do not use an extension cord or
plug adaptor.(Fig.2)
5. Choose a place that is near a grounded
electrical socket. Keep the dispenser at least
20cm away from walls and other appliances
and furnitures on all 4 sides.
Fig. 1
Fig. 2
6. Do not place the water dispenser sitting over the
power cord.
Page 6

(Fig. 3)
8. Use the switch when turning the heating/
cooling On/Off. Located at the at the left
side back of water dispenser.(page 6)
10. Keep the unit in a dry place and away from
direct sunlight. Do not place the machine on
paper or foam. Do not place anything
flammable beside this machine.(Fig. 4)
until the water can flow out from the hot water
spout when the hot water button be activated.
Fig. 3
12. Unplug the unit when the unit will not be
used for a long period to save electricity.
(Fig. 5)
14. Never use organic liquids polishing chemical
to clean the machine.
15. The thermostat to control temperature has
been set up by There is no manufacturer.
need to adjust it yourself.
Fig. 4
Fig. 5
Page 7
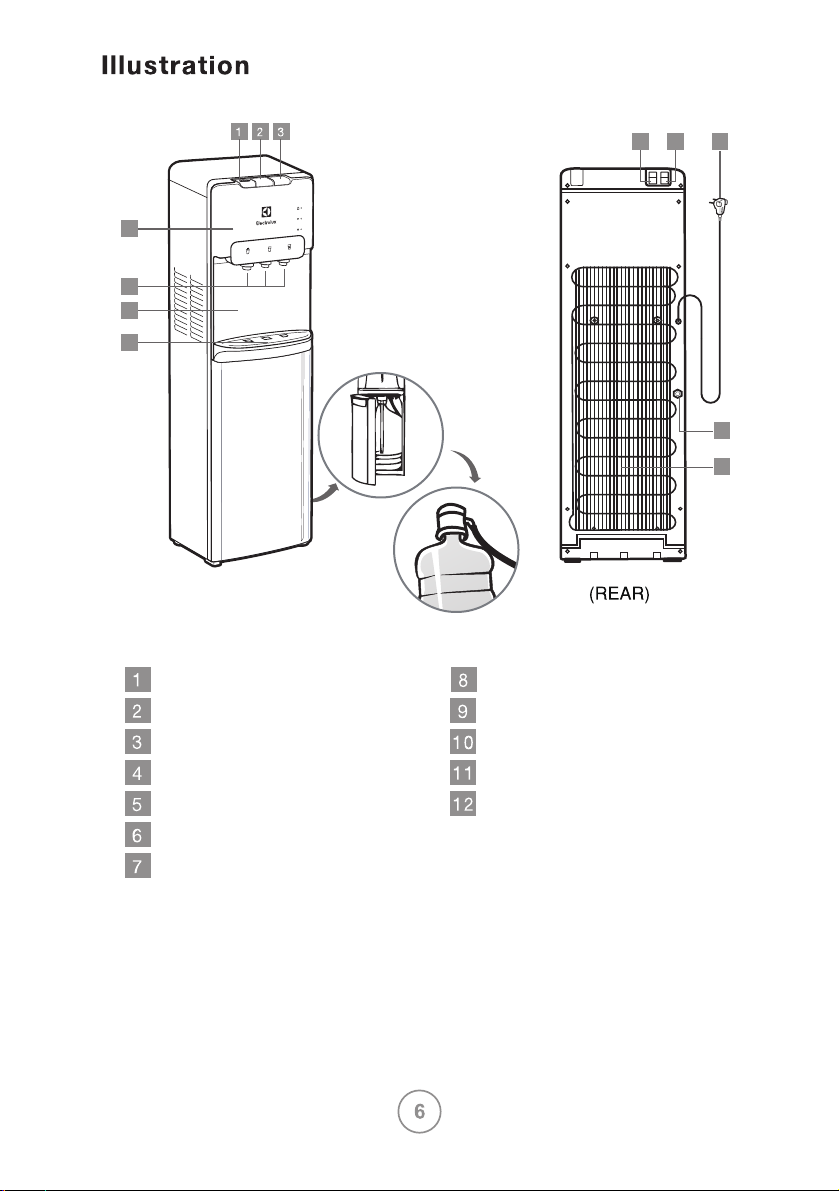
8
9
10
4
5
6
7
11
12
(FRONT)
button of hot w
ater
button of normal water
button of cold water
panel
spout
front carapace
drip tray
cooling switch
heating switch
power cord
drain hole
condenser
Page 8
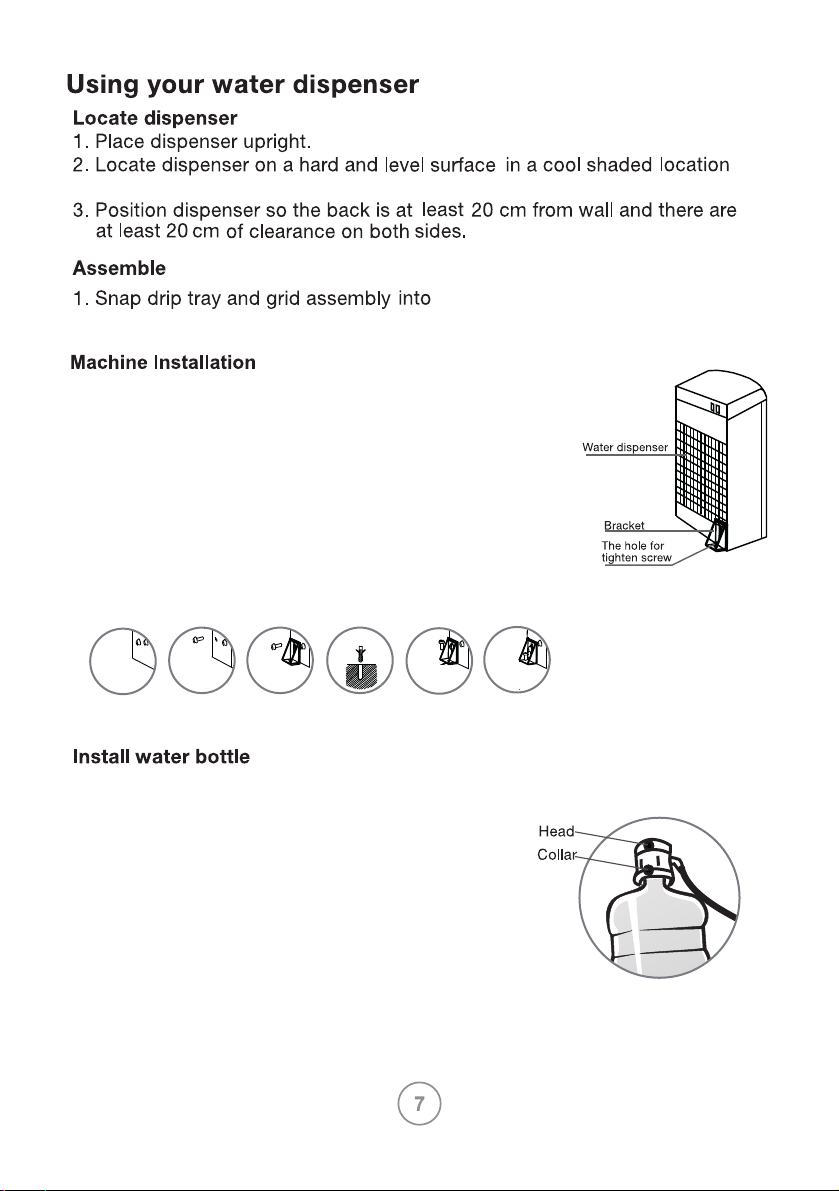
near a grounded socket. Do not plug in power cord yet.
front carapace.
Installing the floor Bracket kit(Fig.6)
1. Use 13 mm screw to fix the fixing bracket on the
side of base pan.
2. Drill out a screw hole(6 mm) on the floor.
3. Insert a screw anchor (wall plug) into the drilled hole.
4. Move water dispenser, Align fixing bracket hole
with screw hole of the floor.
5. Put the 25mm screw into the screw hole of fixing
bracket.
6. Tighten the screw.
1 1 1
2-3
4-5
6
Fig. 6
1. Open cabinet door.
2. Place fresh bottle outside of cabinet.
3. Remove the entire plastic cap from top
of bottle.
4. Clean outside of new bottle with a cloth.
5. Place probe assembly into bottle.
6. Slide collar with head down until it clicks
in place.
7. Slide bottle into cabinet and close door.
Fig. 7
Page 9
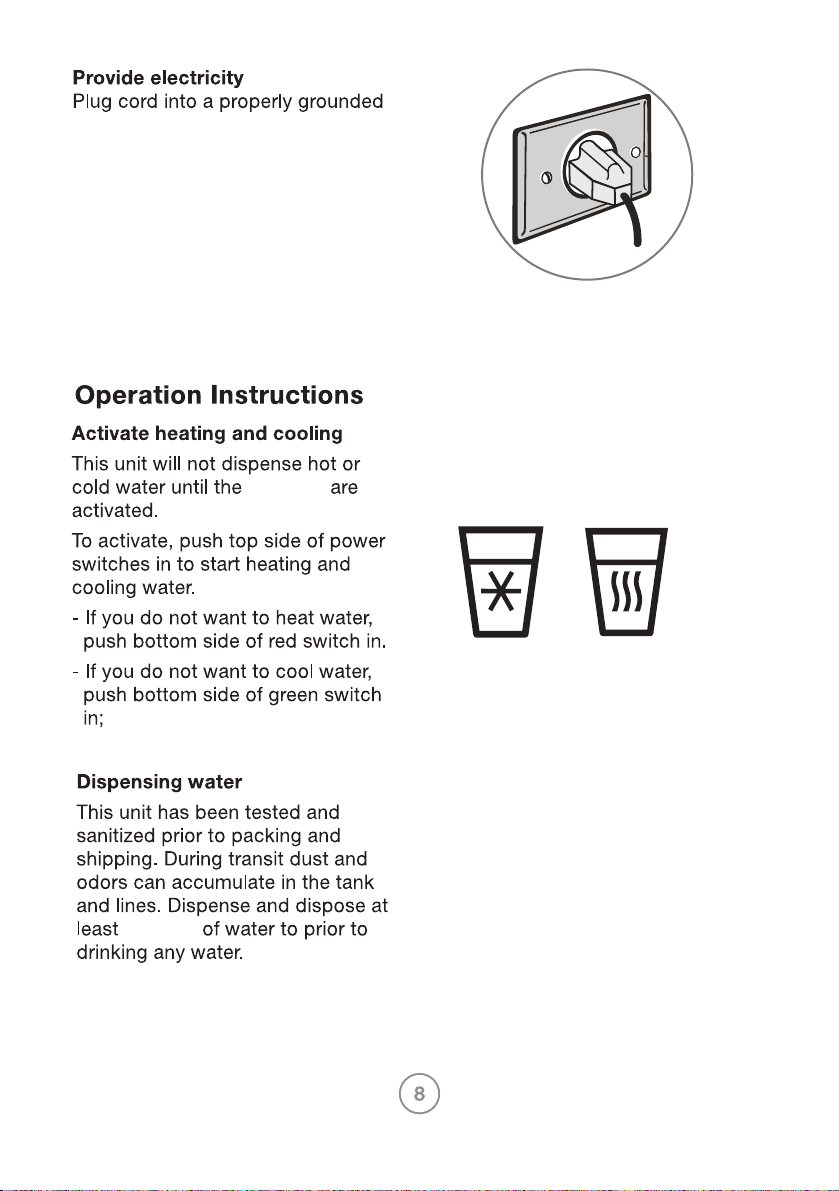
socket.
The pump will begin to move water
from the bottle to the hot and cold
tanks. It will take up to approximate
12 minutes to fill the tanks for the
first time. During this period the
pump will run continuously. This is
normal.
switches
Fig. 8
Fig. 9
one liter
Page 10
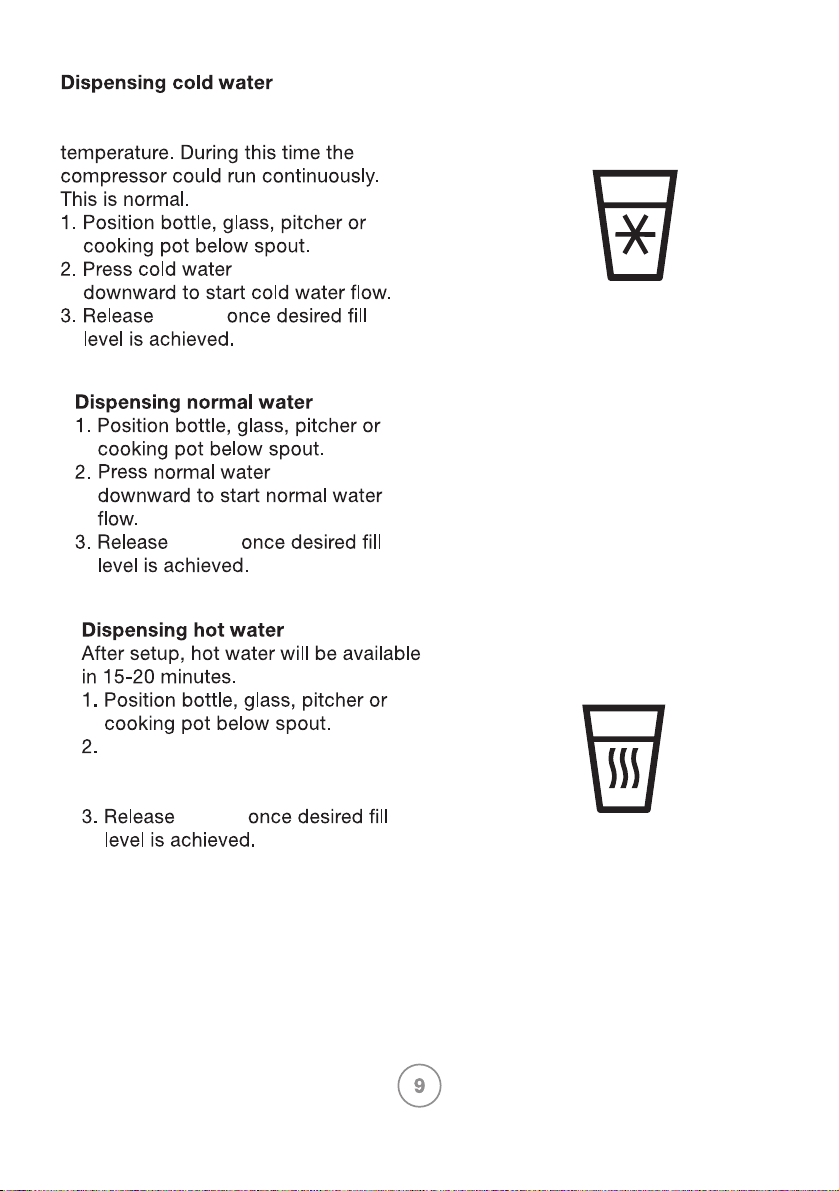
After setup, it will take up to approximate
1 hour get water to maximum cold
button
button
button
button
Push the red child lock button from
right to left and press hot water
downward to start hot water flow.
button
button
Fig 10.
Fig
.
11
Page 11
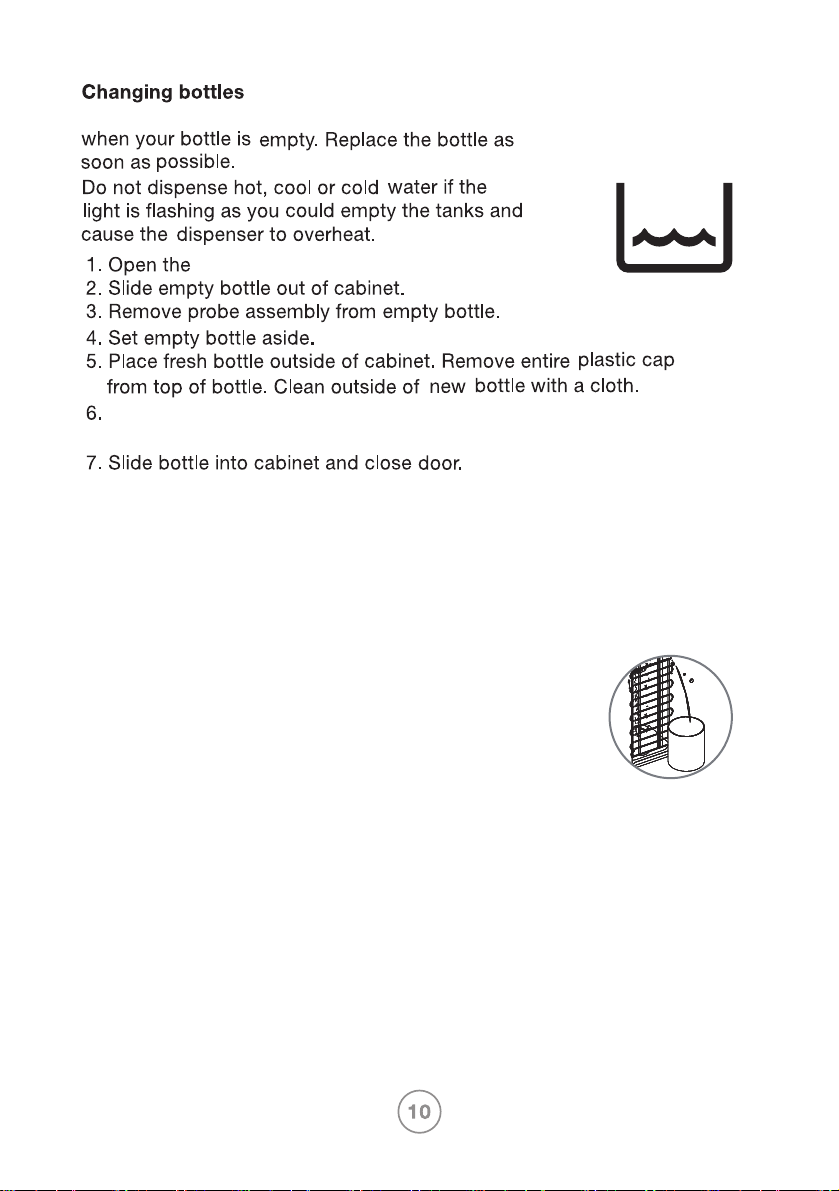
A flashing orange light on your function lights alerts you
orange
cabinet door.
Place probe assembly into bottle. Slide collar with head down
until it clicks in place.
Cleaning and maintenance
1. The unit has been factory disinfected, however,
it is advisable to clean the dispenser prior
to initial use.
2. Follow the step of “using your water dispenser
“ on page 7
3. Make sure unplug the water dispenser before
cleaning.
4. Dispense water from each spout till no water
flow out from spout.
5. Place a large bucket beneath the drain hole which
is on the back of water dispenser, then remove the
drain cap and drain out water.
6. Once draining finished, close the drain hole with
drain cap.
7. Follow “using your water dispenser “ on page 7
to use the water dispenser normally.
Fig.
Fig 13.
12
Page 12

Fig. 14
Mix 1 gallon of water with half pound of citric acid crystals, inject
into the machine and make sure the water can flow out from the hot water spout
when the hot water button be activated. Switch on the power and heat water,
30 minutes later, drain off the liquid and clean it with water two or three times.
Generally this should be done every six months.
CAUTION
Scald Hazard
Be careful on the hot water coming out
when tapping hot water and drain water from drain hole.
CAUTION
Water Leakage
Drain cap loose may cause water leakage and cause floor damage.
Please make sure it is tight enough before long term use.
WARNING
Electrical Shock Hazard
Unplug the water dispenser before cleaning and wiping up spilled
water on unit.
WARNING
Scald Hazard
Dispenser heats water to a temperature of 194°F (90°C).
Water temperatures above 125°F (52°C) can cause severe burns or scalding.
Children, the disabled and the elderly are at highest risk of being scalded.
Children should be supervised by an adult when using this product.
Page 13
Troubleshooting
Water dispenser does not work
• Make sure the water dispenser is properly connected to a working socket and
the heating/cooling switches are set ON.
Water is leaking
• Unplug the water dispenser, remove bottle and replace with new one.
• Make sure the drain cap at the back side of water dispenser is tighten enough.
No water is coming from the spout
• Make sure the bottle is not empty, if empty, replace it with new one.
• Make sure to completely depress the pushbutton controls.
• Make sure the connection tube inside the unit is not loose.
Cold water is not cold
• Make sure the water dispenser is properly connected to a working socket
• Make sure the green cooling switch is set ON.
• Wait until the COOLING indicator turns off, it takes up to approximate 1 hour to
cool the water in general.
• Make sure the back of the water dispenser is at least 20 cm away from a wall
and there is free airflow on all sides of the water dispenser.
Hot water is not hot
• Make sure the water dispenser is properly connected to a working socket.
• Make sure the red heating switch is set ON.
• Wait until the HEATING indicator turns off, it takes 15~20 minutes to heat the
water in general.
Dispenser is noisy
• Make sure water dispenser is placed on placid and solid surface.
• Compressor on and off operation will happen to control the cold water as
specification, it is normal.
Water tastes
• If dust and odor accumulates the tank, dispose the reservoir water and
replace bottle with a new one.
• Sanitize water dispenser or descale according to “Cleaning and maintenance”.
Sometimes when water is dispensed for more than 2 minutes, the pump fails
to take the necessary amount of water, in this case the lack of water indicator
light on control panel will turn on. If this happens, just open the cabinet door,
then close it, and wait for 2 minutes, then the dispenser will return to dispense
water.
Page 14
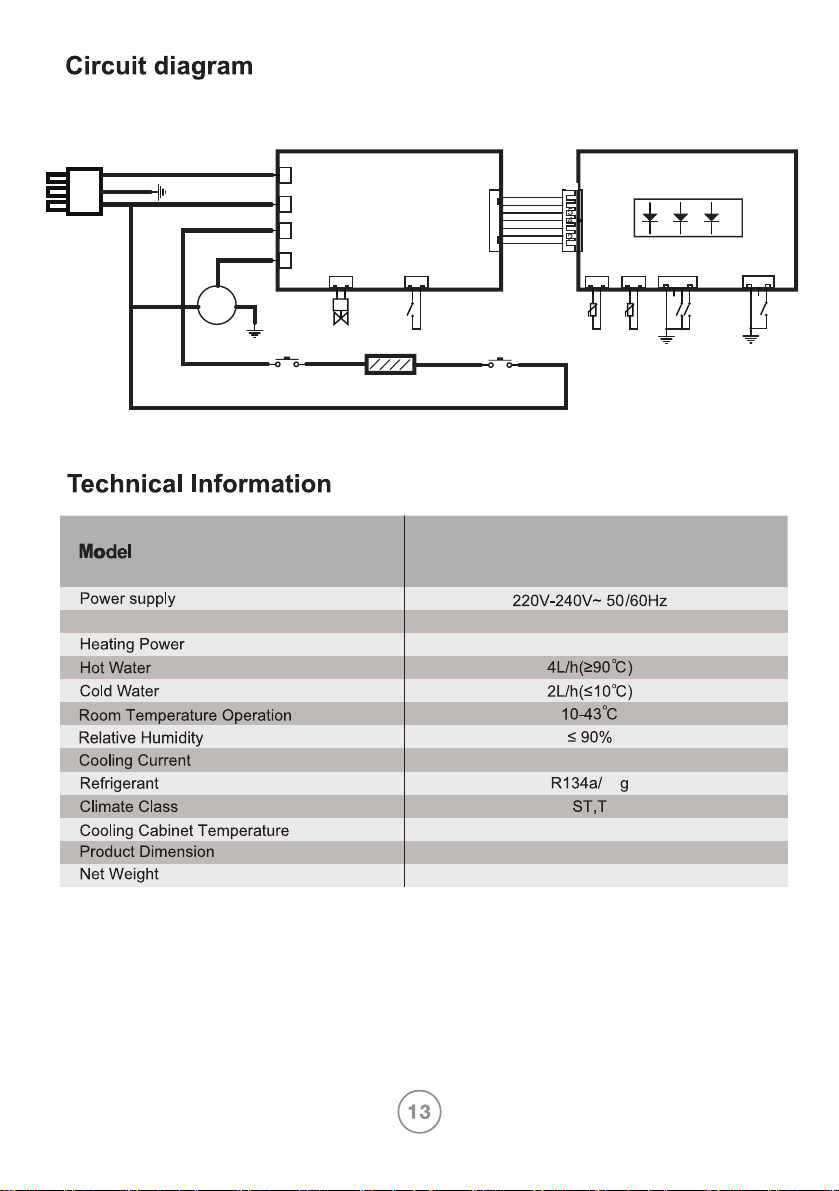
L
EARTH1
N
EARTH
N_COMP
N_HEATER1
COMP
L_COMP
EARTH2
EARTH
Hot Thermostat 1
1 P1
1 P2
POWER BOARD
1 P3
1 P4
CON5
1
PUM
KEY1
2
HEATER
CON3
1
FLOAT
2
N_HEATER2L_HEATER2L_HEATER1
CON1
7
6
5
4
3
2
CN7
KEY2
Hot Thermostat 2
EQAXF01BXWP
CP7
DISPLAY BOARD
CON5
7
6
5
4
3
2
1
CON1
1
LED2 LED3 LED41
CON2
2
2
1
HOT NTC
COOL NTC
GND
CON4
123
CON6
2
3
1
4
GND
HEAT SW
COOL SW
DOOR SW
Cooling Power
100W
420W
1.0A
32
N/A
L310mmxW374mmxH1040mm
14.7kg
Remarks: Above technical data is based on standard testing method, refer to GB/T 22090-2008
Page 15

Customer Care
Thailand
Call Center Tel : (+66 2) 725 9000
Electrolux Thailand Co.,Ltd.
Electrolux Building
14th Floor 1910 New Petchburi Road,
Bangkapi,Huay Kwang, Bangkok 10310
Office Tel : (+66 2) 7259100
Office Fax : (+66 2) 7259299
Email : [email protected]
Indonesia
Tel : (+62 21) 522 7180
PT. Electrolux Indonesia
Gedung Plaza Kuningan
Menara Utara 2nd Floor,
Suite 201, Jl. HR Rasuna Said
kav C 11-14, Karet Setiabudi
Jakarta Selatan 12940
Office Tel: (+62 21) 522 7099
Office Fax: (+62 21) 522 7097
Email : [email protected]
Vietnam
Domestic Toll Free : 1800-58-88-99
Tel : (+84 8) 3910 5465
Electrolux Vietnam Ltd.
Floor 9th, A&B Tower
76 Le Lai street - Ben Thanh Ward - District 1
Ho Chi Minh City đVietnam
Office Tel : (+84 8) 3910 5465
Office Fax : (+84 8) 3910 5470
Email : [email protected]
Philippines
Domestic Toll Free : 1-800-10-845-care 2273
Customer Care Hotline : (+63 2) 845 care 2273
Electrolux Philippines, Inc.
10th Floor. W5th Avenue Building
5th Avenue Corner 32nd Street
Bonifacio Global City,
Taguig Philippines 1634
Trunkline: +63 2 737- 4756
Website : www.electrolux.com.ph
Email : [email protected]
Singapore
CUSTOMER CARE HOTLINE : (+65) 6507 8699
Electrolux S.E.A. Pte Ltd.
11 Lorong 3 Toa Payoh
Jackson Square, Block B, #01-13/14/15
Singapore 319579
Office Tel : (+65) 6507 8900
Office Fax : (+65) 6356 5489
Email : [email protected]
Malaysia
Domestic Toll Free : 1300-88-11-22
Electrolux Home Appliances Sdn. Bhd.
Unit T2-7, 7th Floor, Tower 2 , Jaya33 Hyperoffice,
No. 3, Jalan Semangat, Seksyen 13,
46100 Petaling Jaya, Selangor
Office Tel : (+60 3) 7843 5999
Office Fax : (+60 3) 7955 5511
Email : [email protected]
Page 16
 Loading...