

Page 1
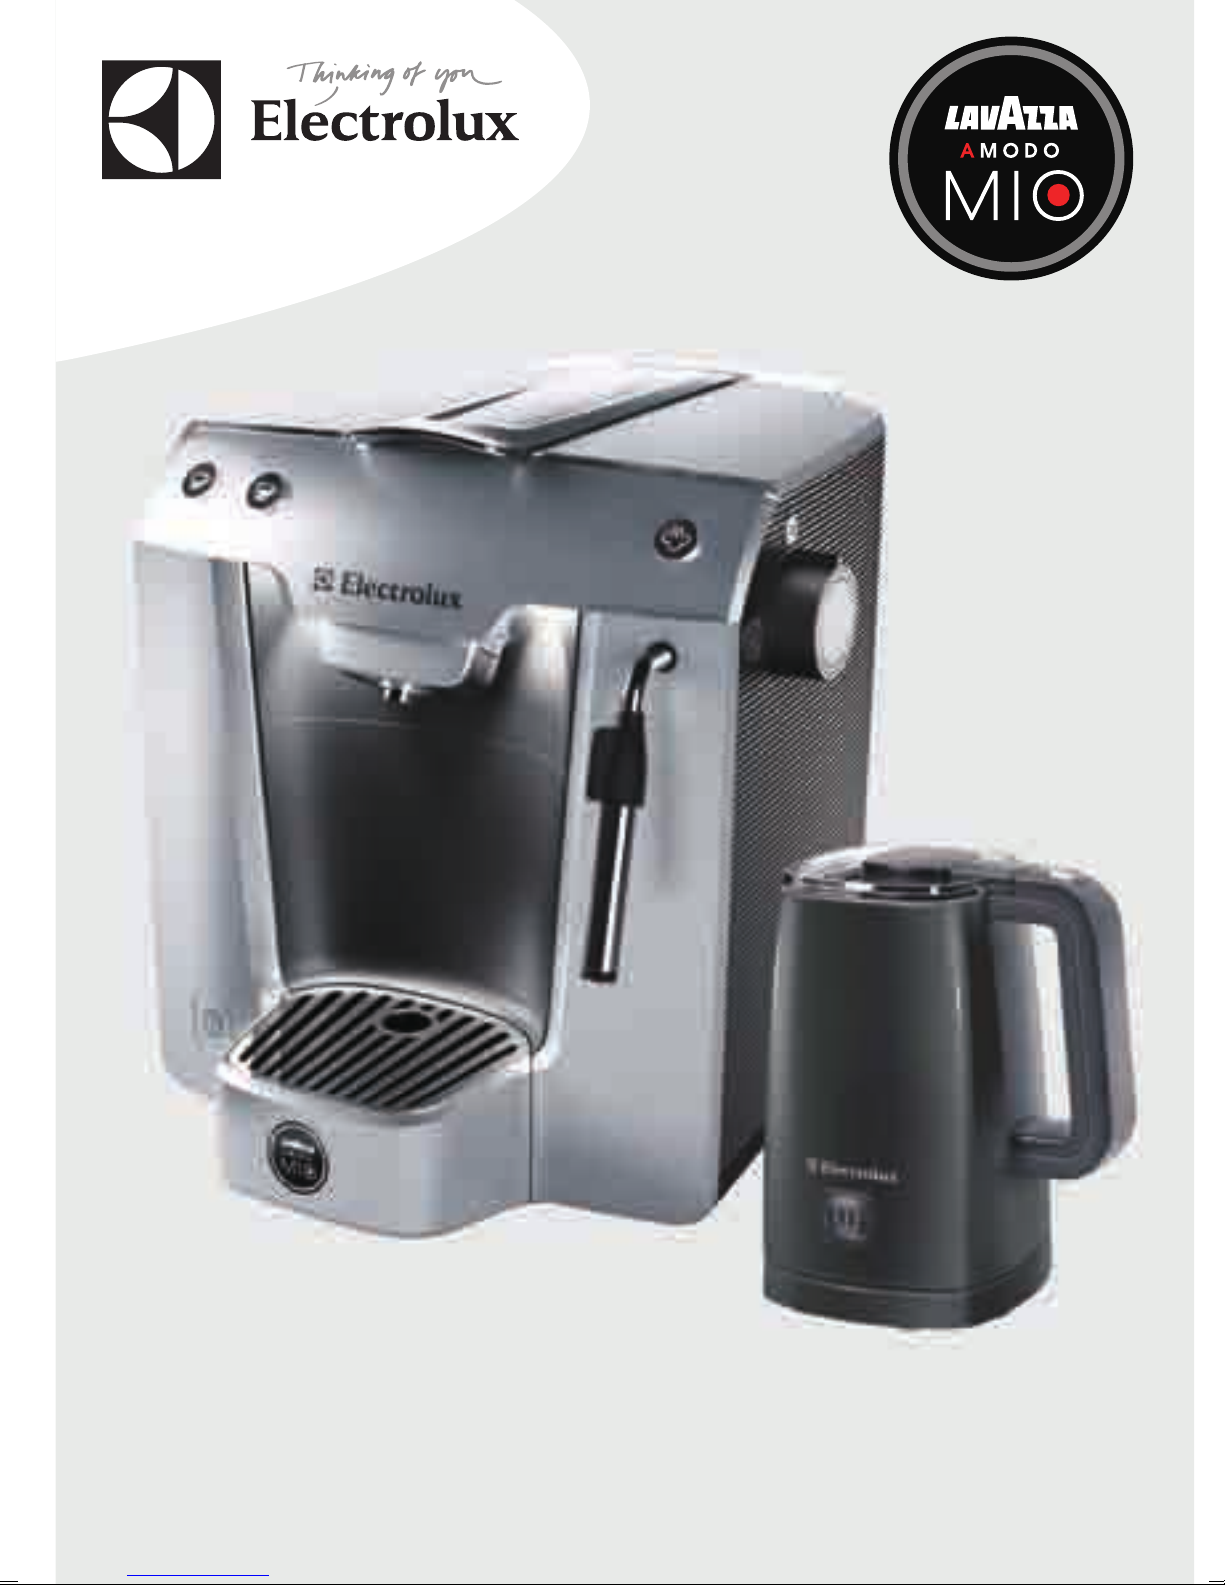
ELM 5250
.
EMS5010
EN
Page 2
2
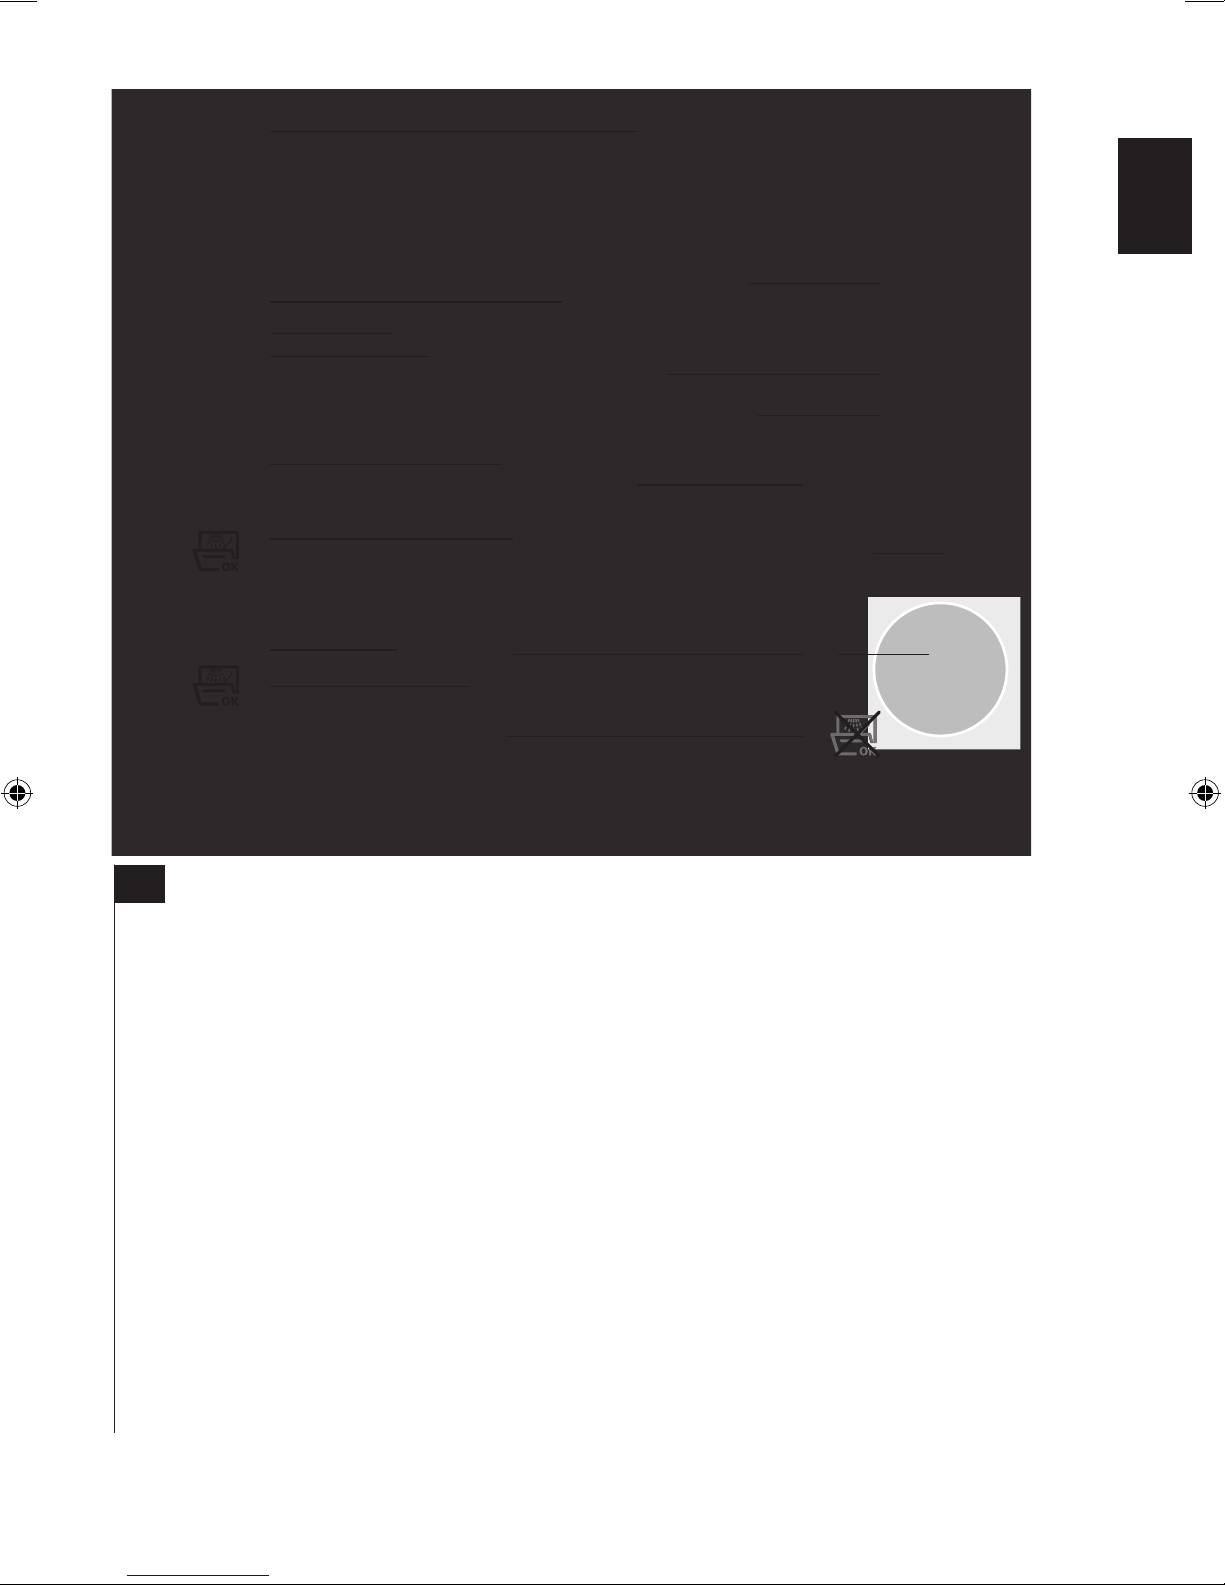
Components
A. ON/OFF button
B. Espresso button
C. Espresso lungo button
D. Lever
E. Capsule compartment
F. Water tank
G. Steam / hot water knob
H. Steam / hot water spout
I. Steam button
J. Coee spout
K. Cup support rack
L. Drip tray
M. Waste water indicator
N. Used capsules container
O. Power cord & plug
EN
A
B
C
D
E
F
G
H
I
J
K
M
N
O
L
No
EN
Espresso Machine ELM5250
Page 3
3
Safety advice
Read the following instruction carefully before using the machine for the
first time.
• This appliance is not intended for use
by persons (including children) with
reduced physical, sensory or mental
capabilities, or lack of experience
and knowledge, unless they have
been given supervision or instruction
concerning use of the appliance by a
person responsible for their safety.
• Children should be supervised to
ensure that they do not play with the
appliance.
• The appliance may only be connected
to a power supply whose voltage
and frequency comply with the
specifications on the rating plate!
• Never use or pick up the appliance if
– the supply cord is damaged,
– the housing is damaged.
• The appliance must only be connected
to an earthed socket. If necessary an
extension cable suitable for 10 A can
be used.
• If the appliance or the supply cord
is damaged, it must be replaced by
the manufacturer, its service agent or
similarly qualified person, in order to
avoid hazard.
• Always place the appliance on a flat,
level surface.
• Never leave the appliance unattended
while connected to the supply mains.
• The appliance and accessories
become hot during operation. Use
only designated handles and knobs.
Allow to cool down before cleaning or
storage.
•
The mains cable must not come into
contact with any hot parts of the
appliance.
• When the steam function is used there
can be some hot water dripping from
the brewing head. DANGER! The water
is hot, there is a risk for scalding.
• When opening the steam valve there
is a shot of hot water coming out.
Be careful and open the steam valve
slowly. DANGER! The water is hot,
there is a risk for scalding.
• Do not immerse the appliance in
water or any other liquid.
• Do not exceed the maximum
volume as indicated on the appliances.
• Fill the water tank only with cold
water, never with milk or other liquids.
• Do not use the appliance if the water
tank has not been filled.
• Do not use the appliance without the
drip tray or the drip grid.
• This appliance is intended for domestic use only. The manufacturer cannot
accept any liability for possible damage caused by improper or incorrect
use.
• Do not carry machine by the handle.
• This machine can only be used with
Lavazza A MODO MIO capsules. Do not
put your fingers or any other object
in the capsule compartment. The capsules can be used only once.
• If the steam function is used continuously over 1 hour time period, there
must be a pause of 2 min after each
steam use, otherwise the lever can
become hot.
• Never switch on the machine with
steam/hot water knob in steam position.
EN
EN
!
Getting started
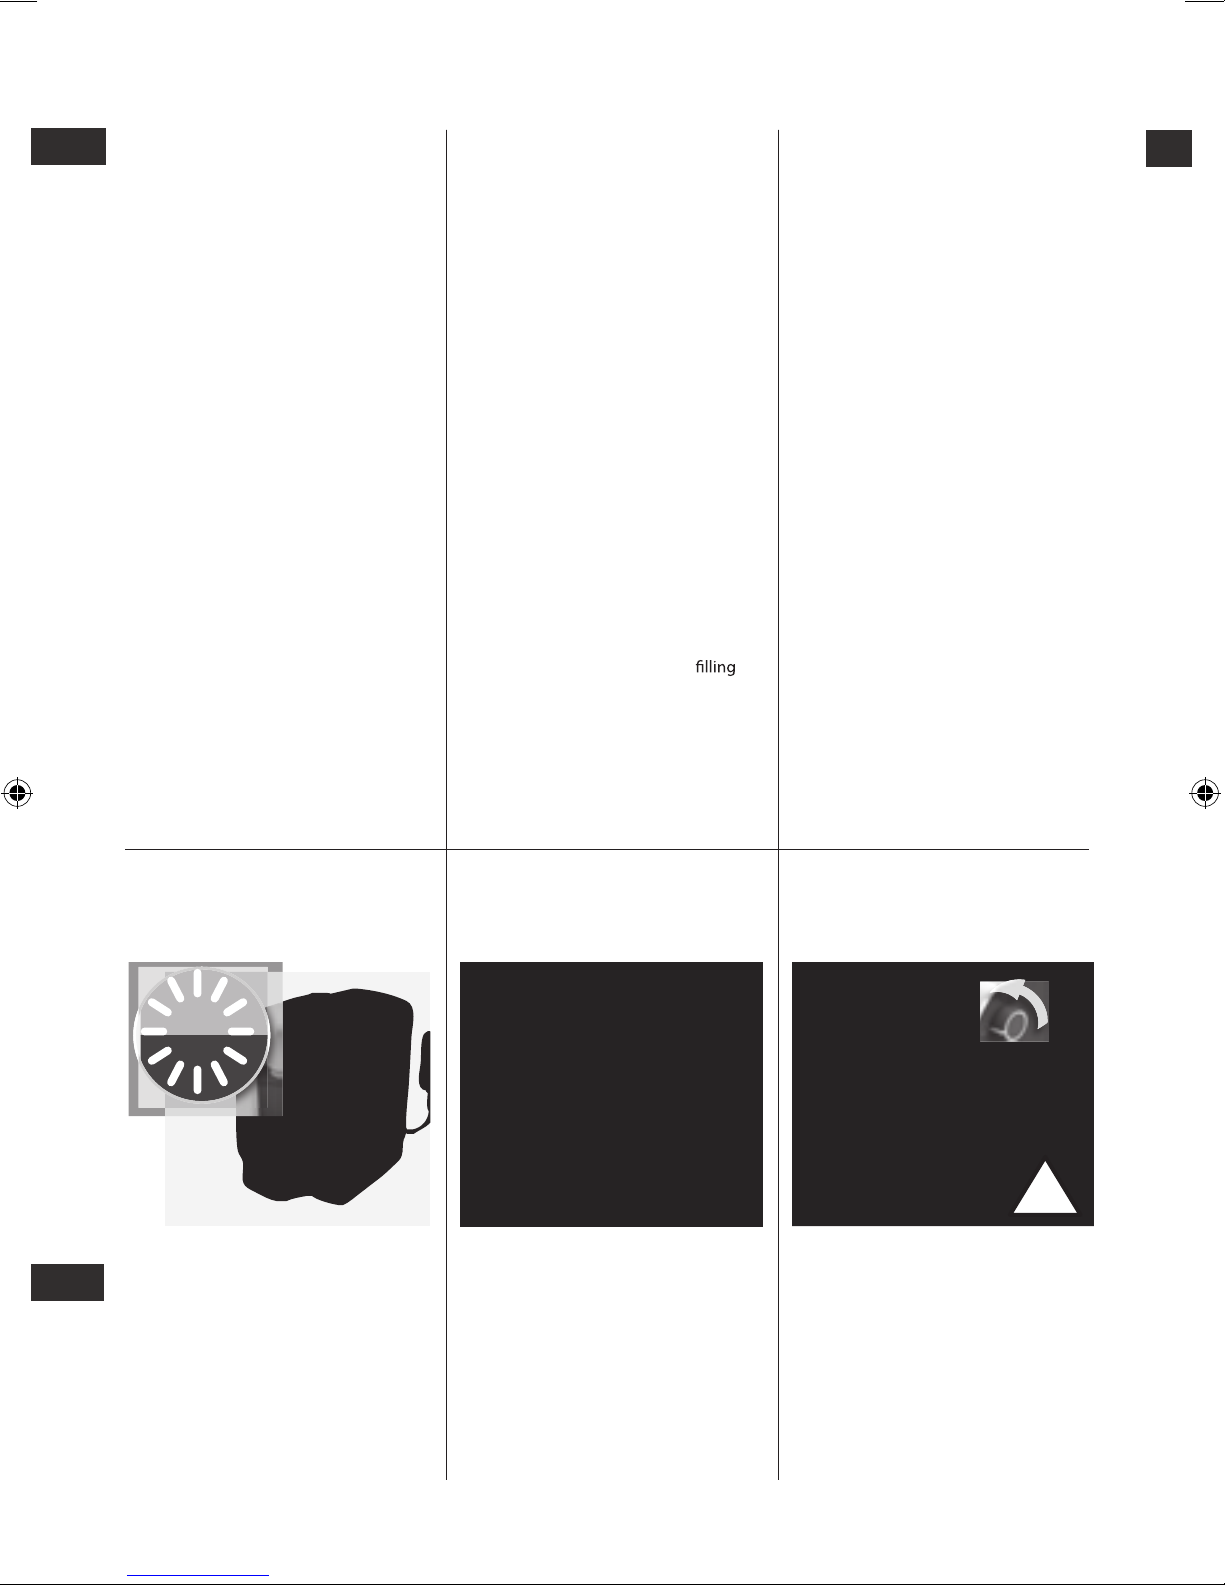
1. Place the machine on a flat surface
and fill the tank with cold, drinkable
and non sparkling water. (The machine
must not be used with empty tank!)
Plug the power cord into the mains
and press the ON button. The machine
is ready to use when the cup indicator
lights stop flashing and become
steady.
2. When starting the machine for the
first time: Place a bowl under the
steam/hot water pipe and turn the
knob to the steam/hot water position.
Run ½ of the container and turn the
knob back.
3. The machine must not be used with
empty tank! If you use it without
water for a too long time the auto
priming could be blocked. To prime
the circuit, place a bowl under the
hot water pipe and turn the knob to
the steam/hot water position. When a
steady flow comes out from the pipe,
turn the knob back.
Page 4
4
30 min Auto-off
Preparing coee
EN
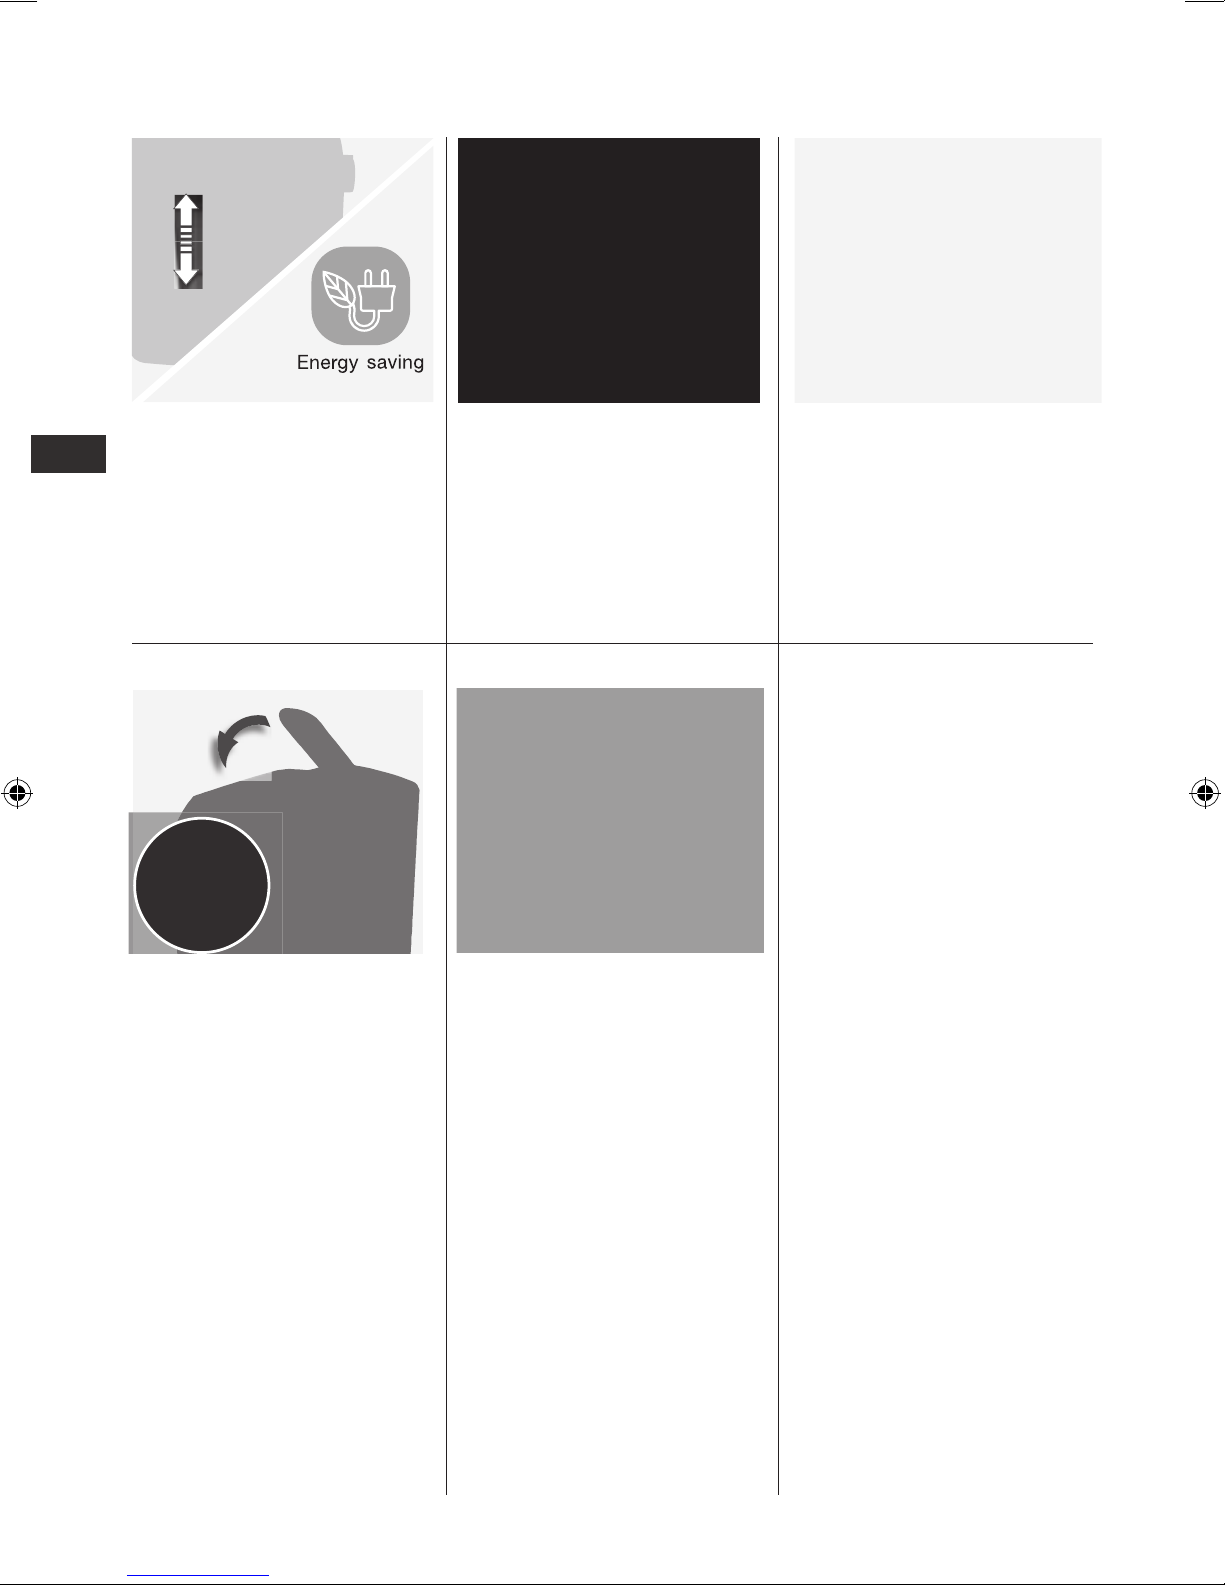
1. Adjust the coee spout height for
dierent cup sizes by either pulling it
down or pushing it up.
The machine is equipped with
an energy saving function that
automatically switches it o after
30 min of inactivity.
4. Lift the lever, insert a capsule in
the compartment. Close the lever
and press either Espresso or Espresso
lungo button. The machine will stop
automatically . When the coee is
ready, lift the lever and the capsule
falls down into the used capsules
container.
2. Light. The machine is equipped with a
lamp which lights up the cup support
rack. The light will be on during the
brewing time and will switch o a few
seconds after the cup is ready.
5. Programming coee amount. Place
a cup on the cup support rack. Press
and hold the espresso or espresso
lungo button. Release when desired
coee amount is reached. The
programmed quantity is memorized
by the machine.
3. A MODO MIO capsules. Only suitable
Lavazza “A MODO MIO” capsules
should be placed in the capsule
compartment. Single dose capsules
brew a single coee.
DO NOT use the capsules more than
once. Inserting 2 or more capsules can
cause the machine to malfunction.
Page 5
5
EN
Using hot water/Steam functions
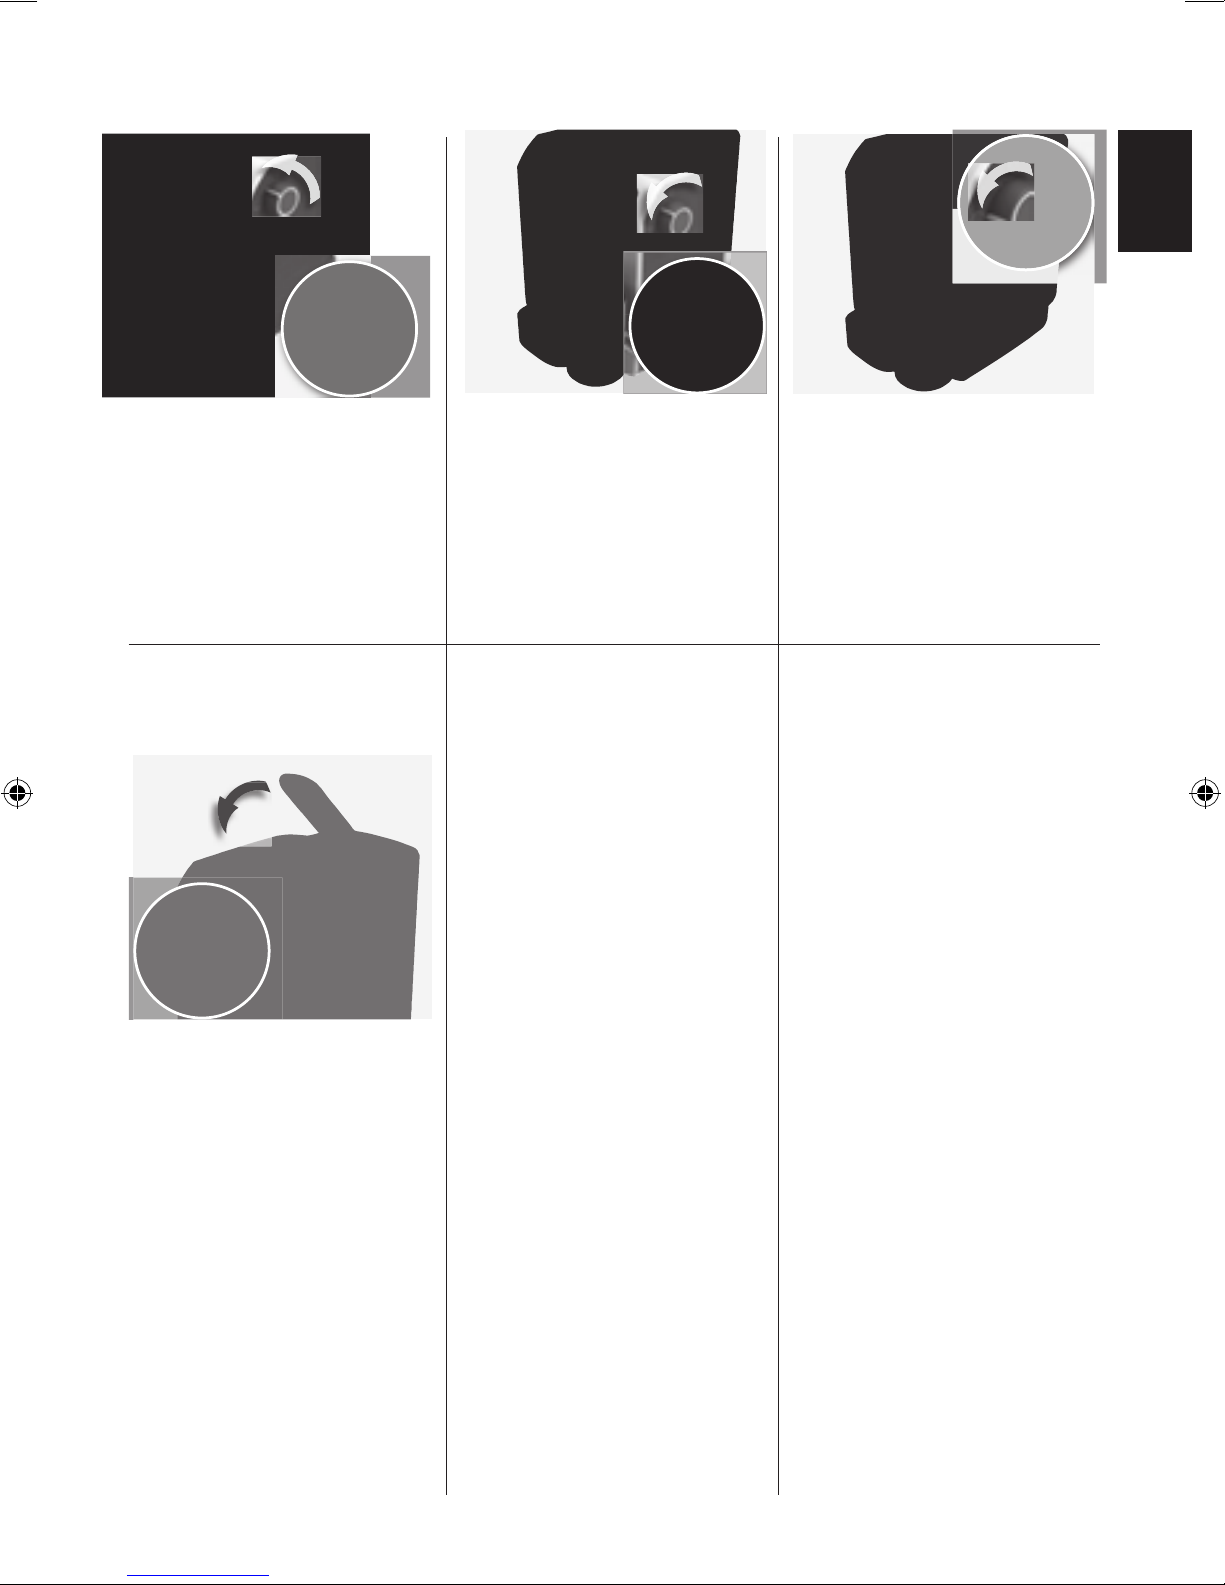
1. Hot water function. Place a cup under
the steam spout. Turn the knob to
steam/hot water position, and turn it
back to stop.
Preparing coee after steam
2. Steam can be used to froth milk
or to heat liquids. Press the steam
button. The light is flashing. When
steady, the machine is ready. Place
an empty container under the spout.
Turn knob to steam position for a few
seconds to purge residual water. Then
close the knob.
3. Fill 1/3 of a container with cold milk.
Immerse the steam spout into the milk
and turn the knob. Froth the milk by
swirling the container. When ready
turn the knob back. Caution: the
steam pipe is hot! Always use the
plastic handle when touching the
steam spout.
1. Preparing coee after steam. To
prepare coee, insert a capsule, close
the lever and press either the Espresso
or the Espresso lungo button (there is
a short cooling cycle before the coee
comes out).
Page 6
6
EN
Cleaning and care
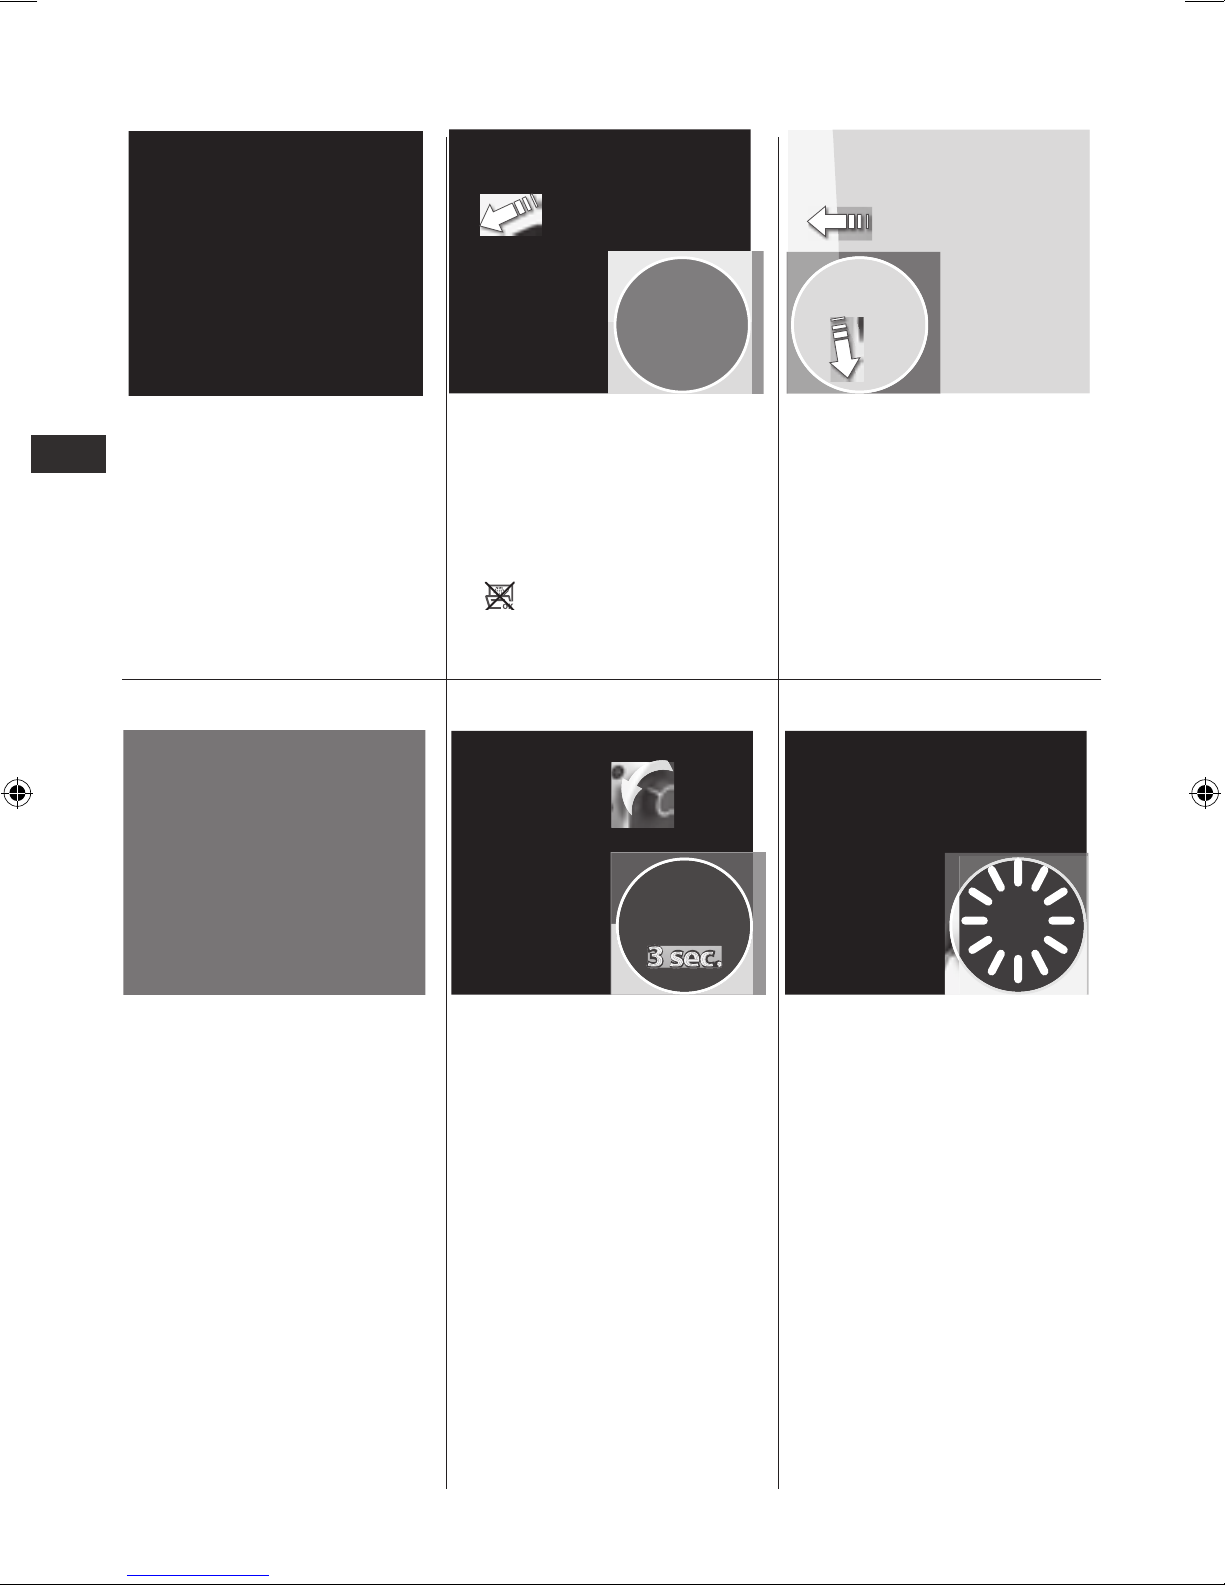
1. Turn the machine o , unplug the
cord and let the machine cool down.
Wipe all outer surfaces with a damp
cloth. Rinse the water tank once a day.
2. When the floating indicator is visible
above the grid, the drip tray must be
emptied. Lift out grid, tray and waste
container. Empty, rinse, dry and put
back in place. This procedure should
be carried out every two or three days
or after 10 brewed coees.
Drip tray is not dishwasher proof
(paint can be damaged).
3. Cleaning the coee spout. Pull the
spout fully down and remove it by
pulling it towards you. Clean and put
back in place.
Cleaning the steam spout. After
using the steam spout, dispense steam
for a few seconds. Clean the spout
externally with a damp cloth. For an
easier cleaning, the pipe can also be
removed.
1. Decalcifying. We recommend to
decalcify the machine regularly
depending on the water hardness
(2–3 months). We recommend to
use Electrolux decalcifying solution
EPD4/C/D/E/N/R (never use vinegar).
Remove and empty the water tank.
Fill the water tank with decalcifying
solution (follow product instructions).
2. Place a bowl under the spout. Turn on
the machine. Press steam button for
3 sec., then turn the knob to steam/
hot water position (steam led and
coee led will flash alternately during
the 30 minute decalcifying process).
3. When the decalcifying process is
finished, steam led will flash fast
in order to remind the user to turn
the knob back. Rinse the water tank
properly, fill it with fresh water and put
it back. Place a bowl under the spout.
Open the knob and rinse machine
until the tank is empty.
Page 7
7
EN
Troubleshooting
CNS
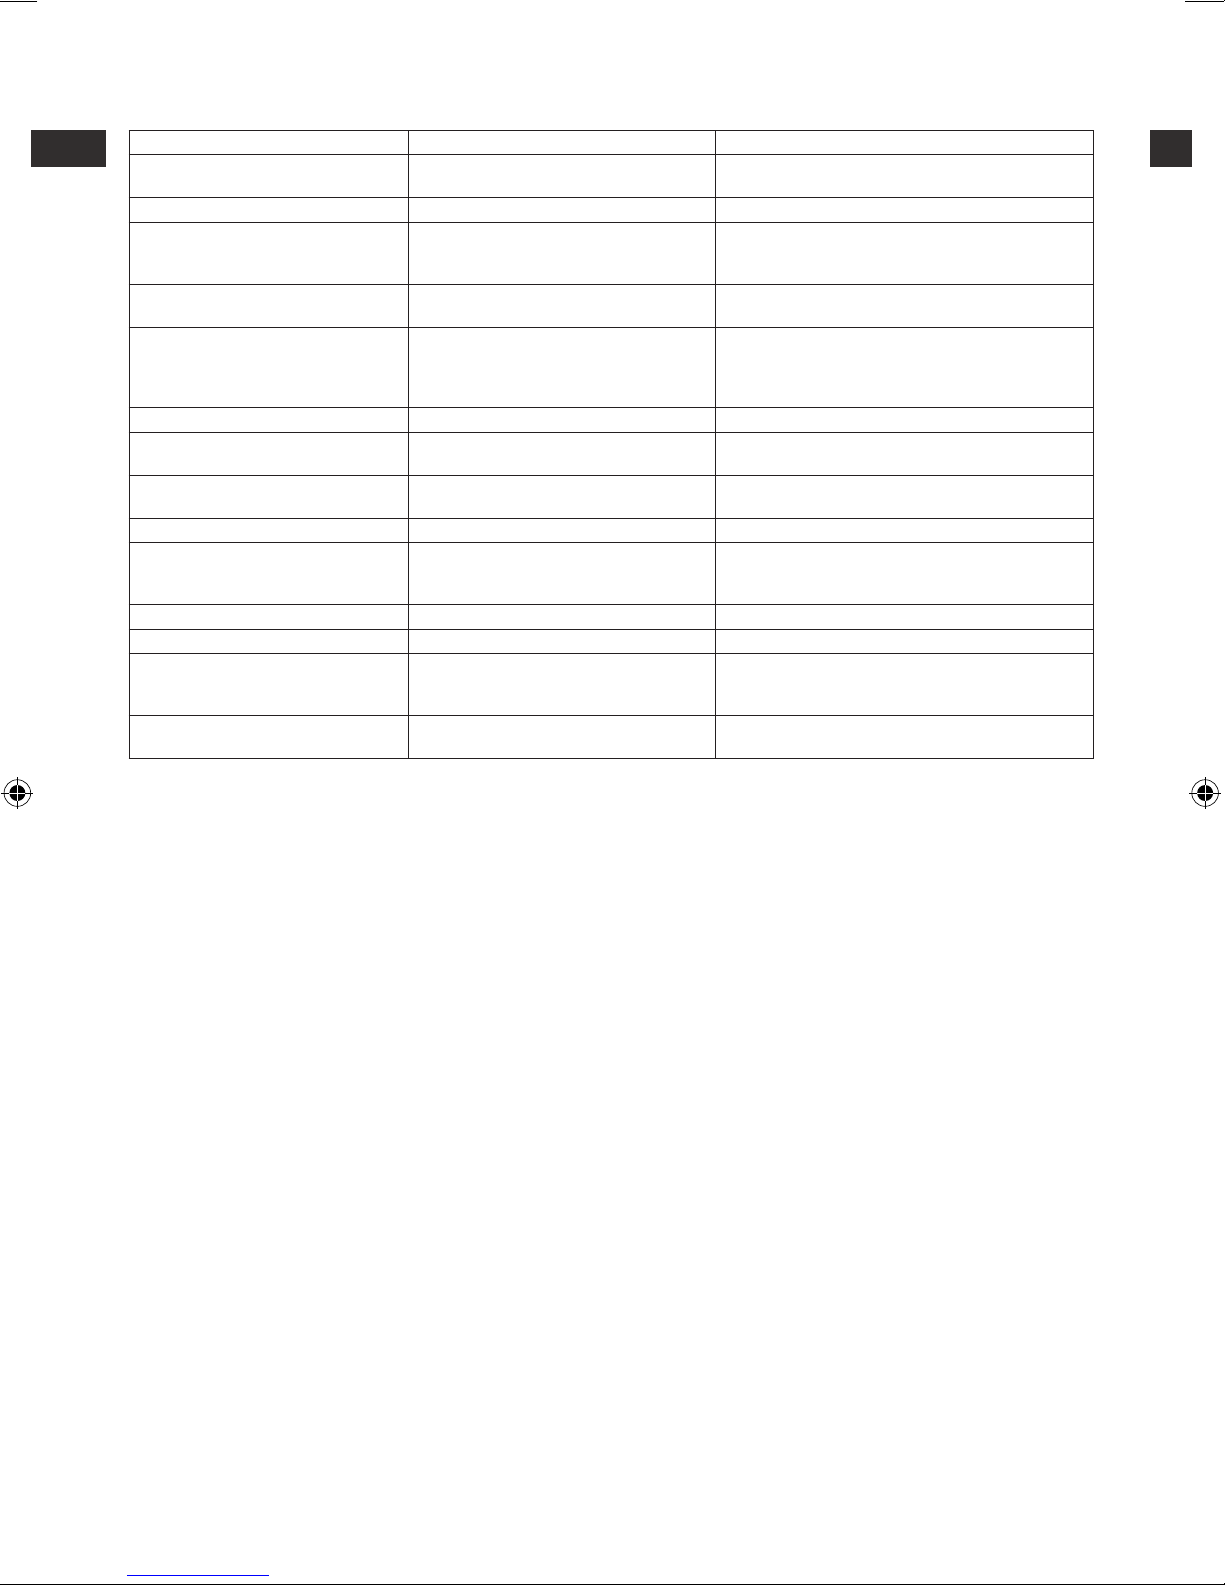
Problems Causes Solutions
The machine does not turn on. The machine is not connected to the
power source.
Connect the machine to the power source.
Contact Electrolux customer service.
The pump is very noisy. Both indicator
lights for small and big cups are flashing. No water flow.
No water in the tank. Fill the tank with fresh drinking water.
1. Prime the water circuit.
2. Check correct water tank position.
The loading lever doesn’t reach the
brewing position.
Capsule inserted incorrectly. Empty the used capsule compartment.
Repeat the sequence, open and close the lever. If
that is not enough remove the capsule manually from the compartment after unplugging the
machine.
The coee is cold. Preheat the cup with hot water.
The coee is brewed too fast, the
brewed coee is not creamy.
Capsule already used. Open the lever and insert a new capsule.
Coee is not brewed or brewed in
drips only.
Coee spout is clogged Clean the coee spout.
Circuit is not primed Prime the water circuit.
Hot water / steam is not dispensed. Hot water / steam spout is clogged. Clean the steam spout with a needle (the machine
needs to be unplugged and the steam / hot water
knob needs to be closed).
The milk does not froth. Not suitable milk. Use fresh, partially skimmed milk.
The milk is too hot. Use milk at refrigerator temperature.
The hot water / steam spout is clogged. Clean the steam spout with a needle (the machine
needs
to be unplugged and the steam / hot water
knob needs to be closed).
The machine requires a lot of time to
heat up.
The machine has limescale build up. Descale the machine.
Page 8
8
Components
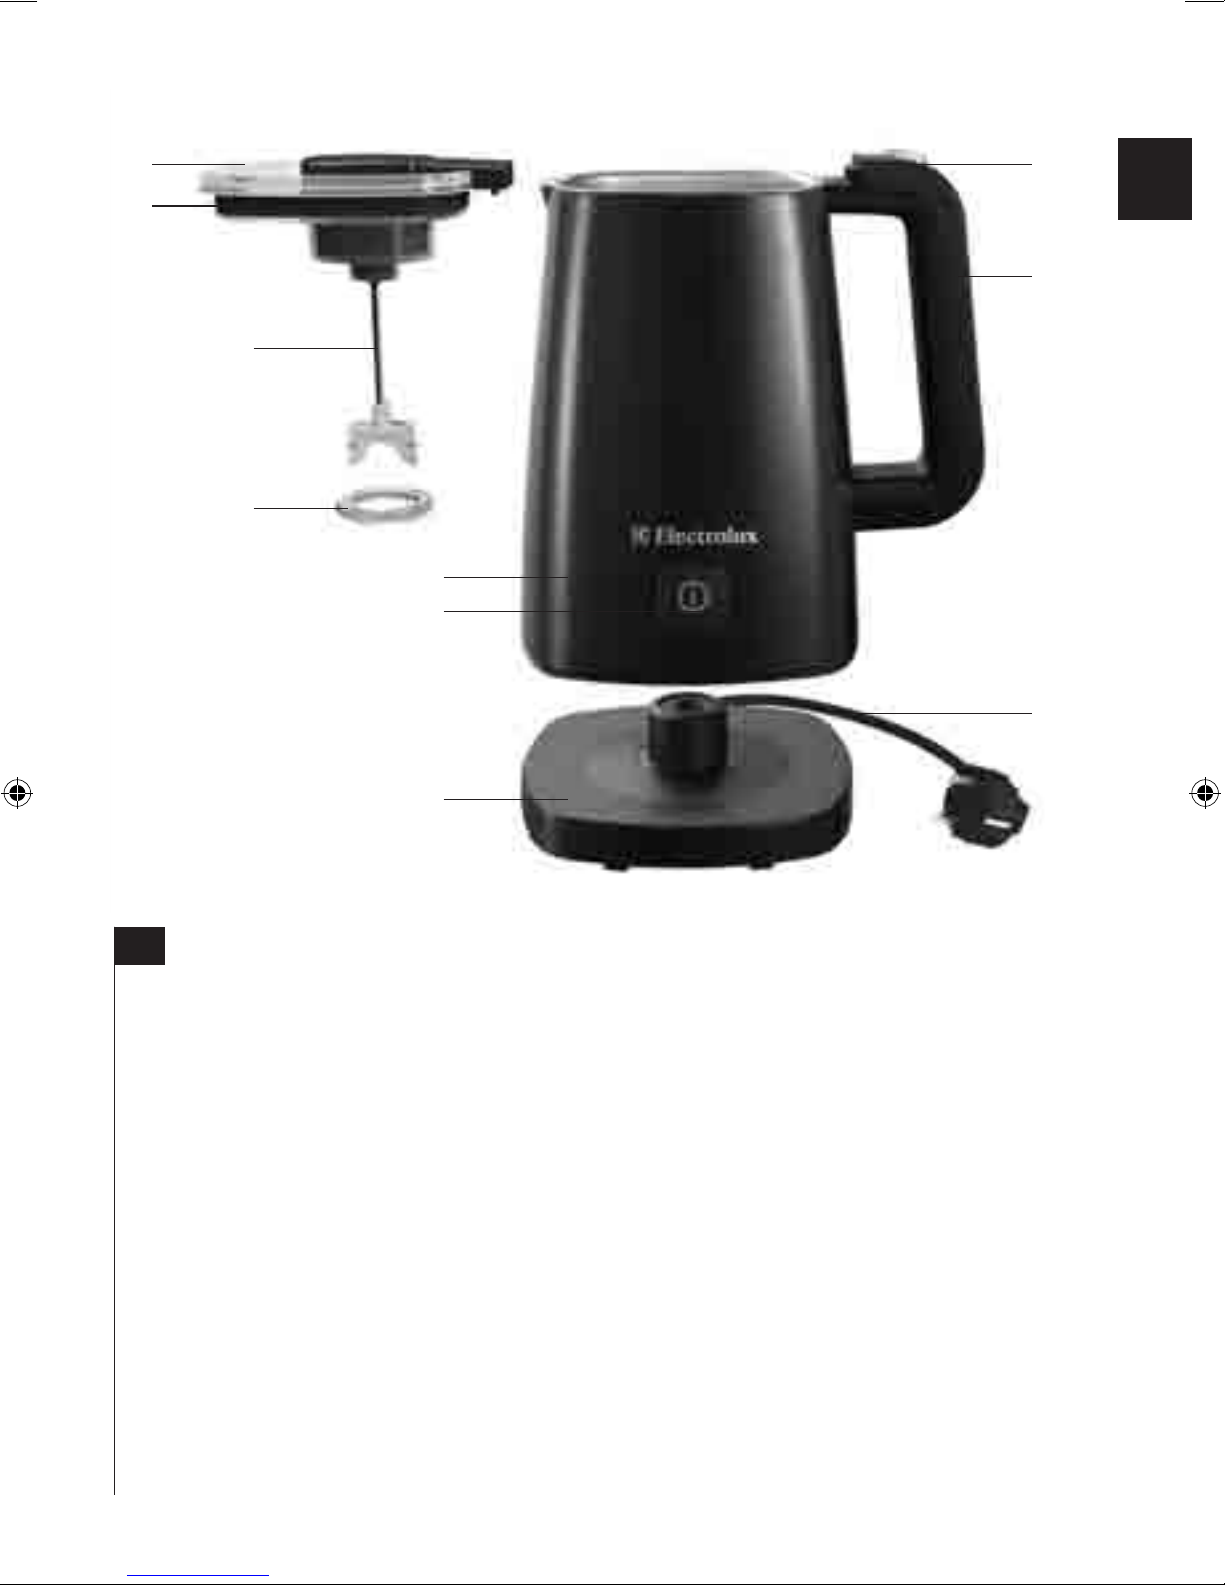
Milk Frother EMS5010
A. Pitcher
B. Start button with indicator
light
C. Release button
D. Handle
E. Lid
F. Sealing ring
G. Mixer rod
H. Whisk
I. Base station with cable
housing
J. Power cord and plug
EN
A
B
C
D
J
E
F
G
H
I
EN
Page 9
9
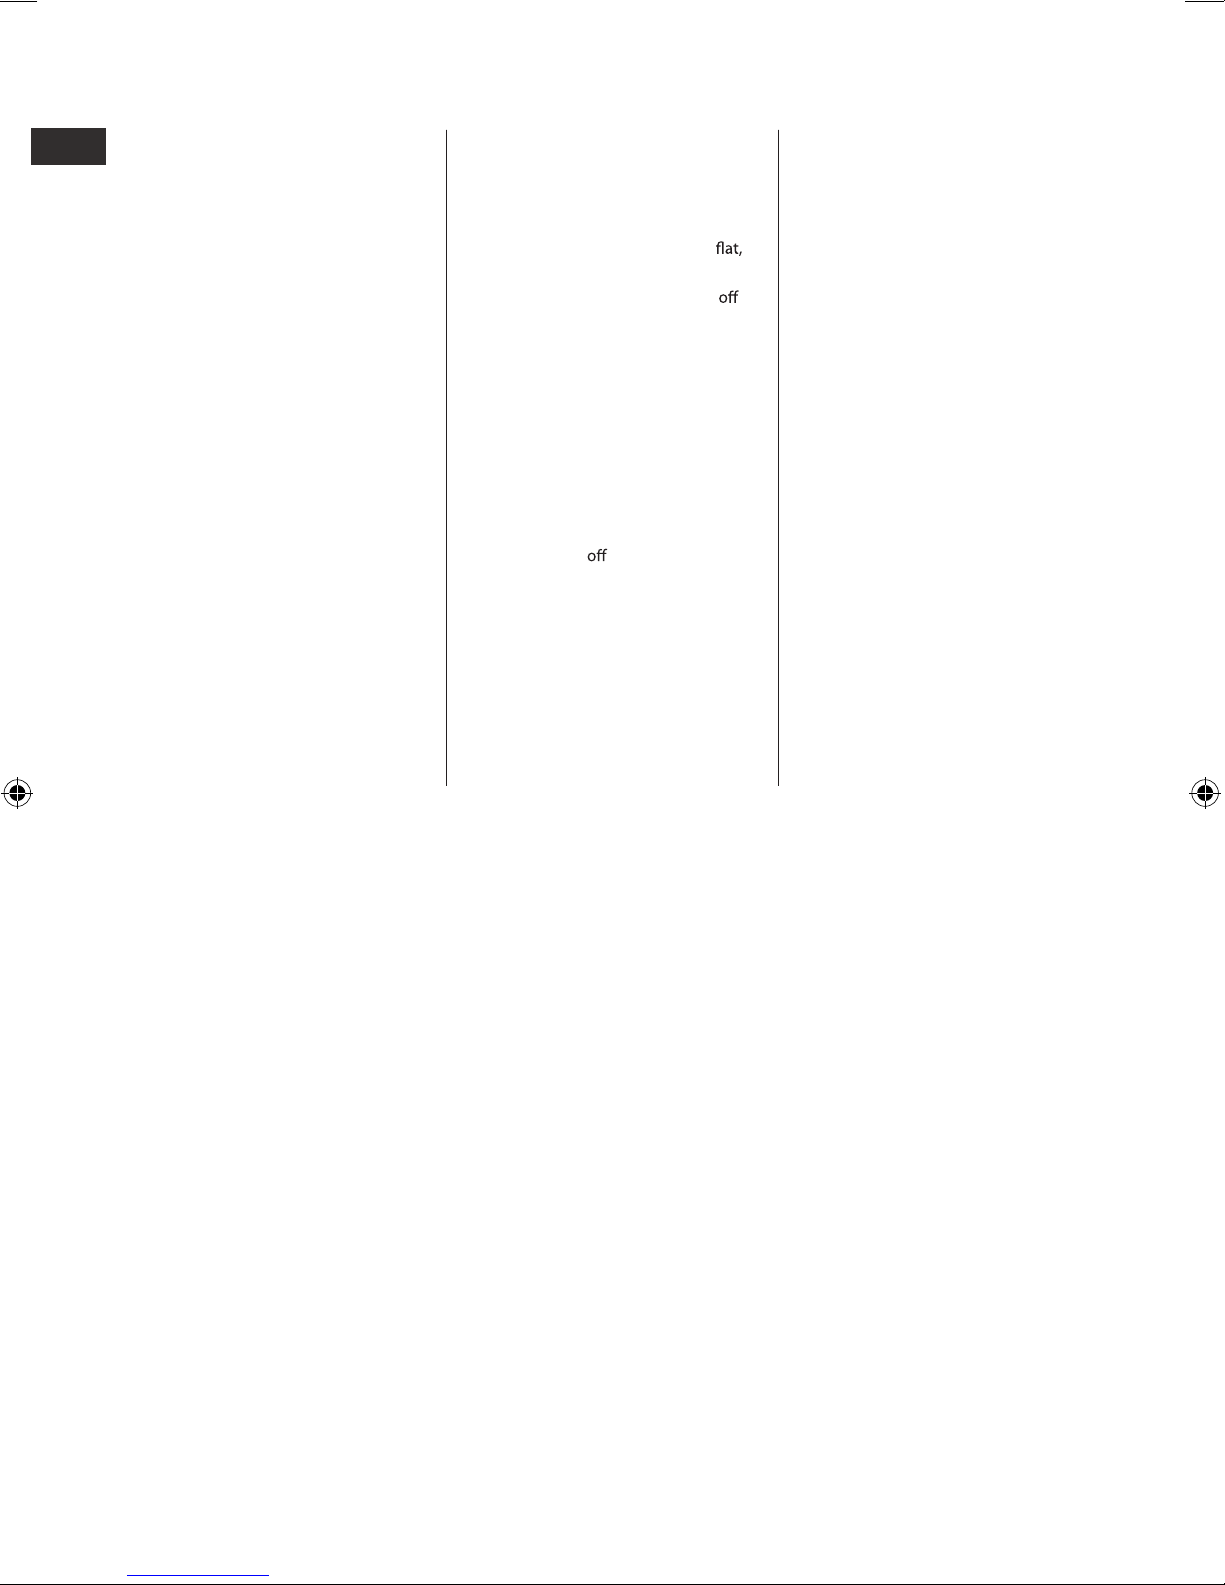
Safety advice
Read the following instruction
carefully before using the appliance for
the first time.
• This appliance is not intended for use
by persons (including children) with
reduced physical, sensory or mental
capabilities, or lack of experience
and knowledge, unless they have
been given supervision or instruction
concerning use of the appliance by a
person responsible for their safety.
• Children should be supervised to
ensure that they do not play with the
appliance.
• The appliance may only be connected
to a power supply whose voltage
and frequency comply with the
specifications on the rating plate!
• Never use or pick up the appliance if
– the supply cord is damaged,
– the housing is damaged.
• The appliance must only be connected
to an earthed socket. If necessary an
extension cable suitable for 10 A can
be used.
• If the appliance or the supply cord
is damaged, it must be replaced by
the manufacturer, its service agent or
similarly qualified person, in order to
avoid hazard.
• Always place the appliance on a
level surface.
• The appliance must be switched
and the mains plug withdrawn before
cleaning and maintenance.
• Pull the power plug from the outlet
before cleaning.
• Always allow the device to cool down
before cleaning.
• The pitcher has a non-stick coating on
the inside. Do not use any aggressive
or abrasive cleaning agents and no
solvents.
• Do not scrape
tough soiling with
hard objects.
• Never submerge the device base, the
pitcher, the lid, the power cable or the
power plug into water or other liquids.
• Do not clean the device or parts of it
with the dishwasher.
• Appliance is for indoor use only.
• This appliance is intended for
domestic use only. The manufacturer
cannot accept any liability for possible
damage caused by improper or
incorrect use.
EN
IT
Page 10
10
Getting Started
EN
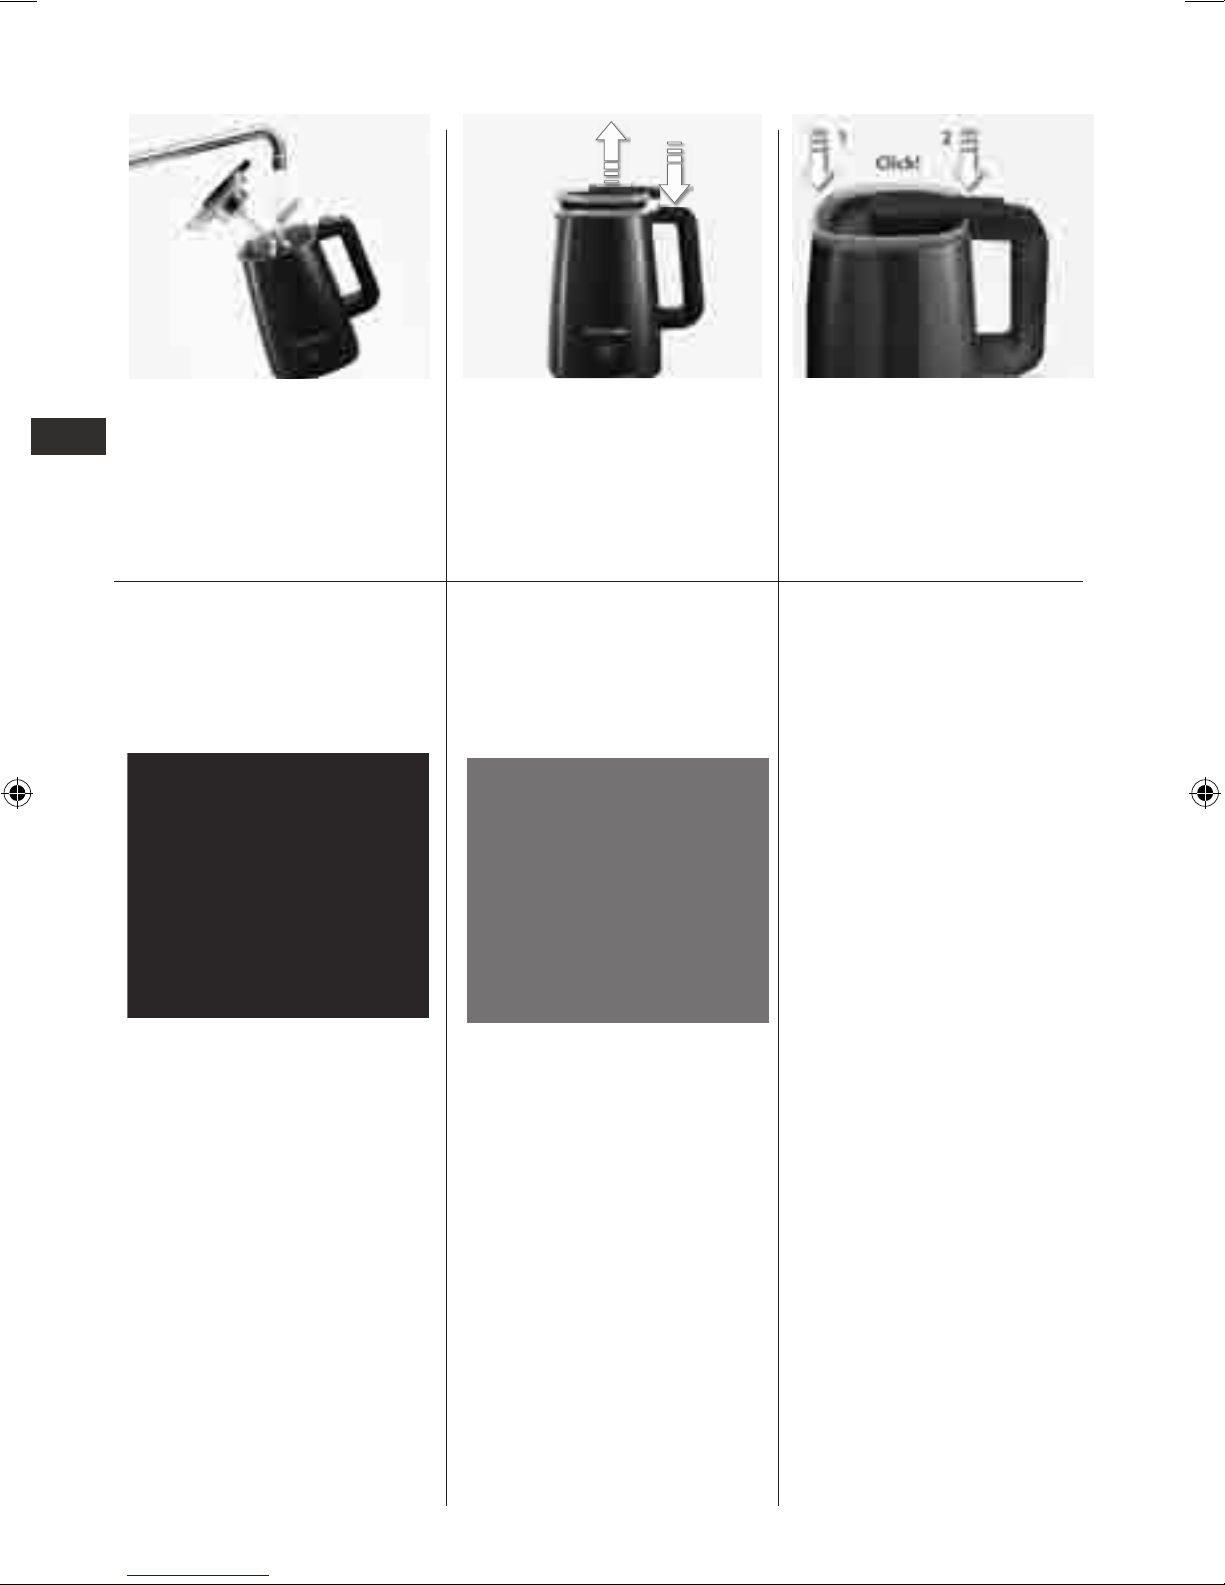
1. Before first use, be sure to clean
all parts thoroughly. Note! The
pitcher can be washed under the
tap, but it is not dishwasher safe
and should not be immersed into
the water.
Coee recipes
Cappuccino
2. To open the lid, push the release
button and remove the lid.
Cae Latte
3. To close the lid, position the lid by the
spout side first, then press firmly the
rear part until it clicks.
1. Froth the milk as de scribed, with
the whisk. We recommend to ll in
the minimum level for 1 cappuccino
and the maximum level for 2. Prepare
an espresso in a cappuccino cup, and
then fill the cup with the frothed milk.
1. Heat the milk as desribed, without
the whisk. Pour the milk into a latte
glass. Place the glass under the coee
spout and prepare an espresso.
Page 11
11
EN
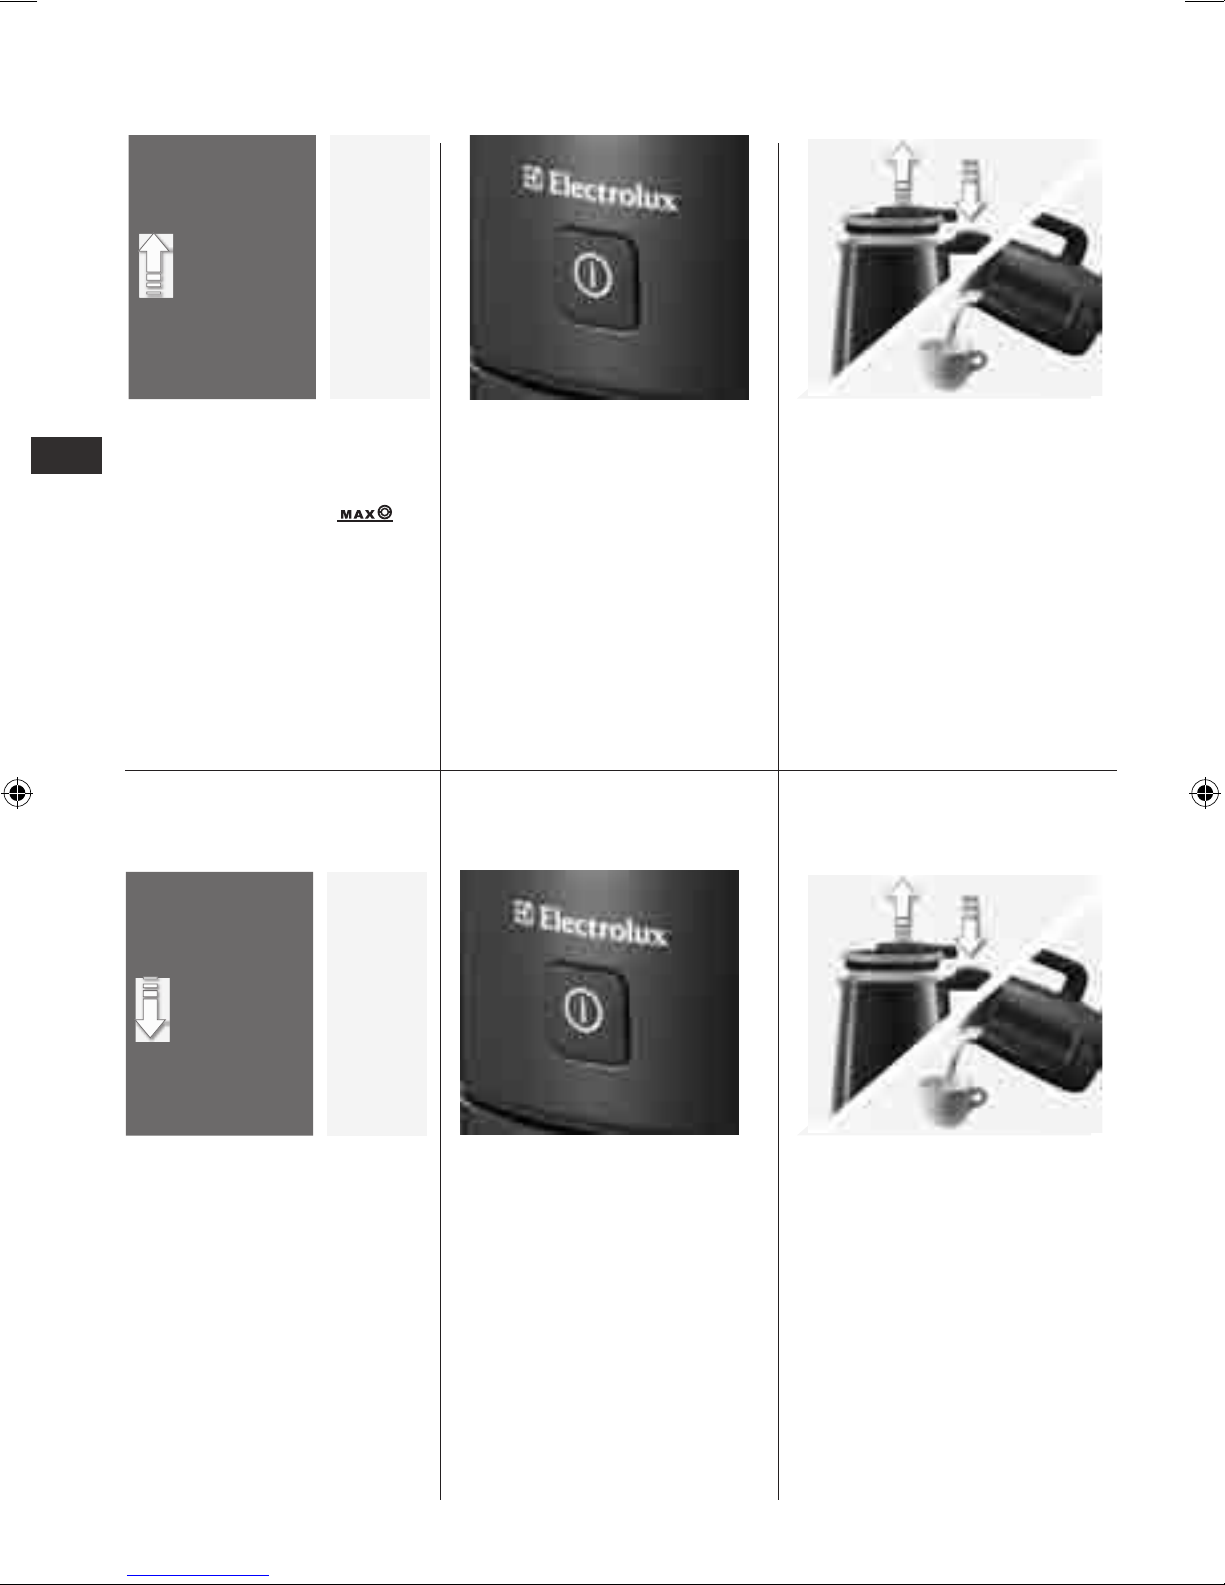
1. To froth milk, place the whisk onto
the mixer rod.
Pour cold milk into the pitcher up
to the MAX indicator line .
For best results, use full fat milk at a
temperature of 6-8 °C. Note! Do not
exceed the maximum amount of
150 ml, as it will cause the frothed
milk to overflow.
Place the lid back onto the pitcher and
close it firmly.
Plug in the power cord and turn on the
power.
2. For warm milk frothing, push the
start button once; the pilot lamp turns
red.
For cold milk frothing, push and hold
the start button for 3 seconds until
the pilot lamp turns blue.
The operation stops automatically
after 90 seconds. The preparation is
ready when the pilot lamp turns o.
3. When the fr oth ing p roc edure is
completed, push the release button
and remove the lid. Pour the milk into
the cup.
Once you are nished, clean all parts
st raight away as descri bed in the
Cleaning and care section.
Min.
liquid
95 ml
Max.
liquid
150 ml
Frothing Milk
Heating Milk
EN
IT
Min.
liquid
95 ml
Max.
liquid
250 ml
1. To heat milk, remove the whisk
used for frothing and fill the desired
amount of milk into the pitcher. Note!
Fill the pitcher with minimum 95 ml
and maximum 250 ml.
Place the lid back onto the pitcher and
close it firmly.
Plug in the power cord and turn on the
power.
2. Push the start button once. The pilot
lamp turns red.
The operation stops automatically
after 90 seconds. The preparation is
ready when the pilot lamp turns o.
3. W hen the preparation is ready.
push the release button and remove
the lid. Pour the milk into the cup.
Once you are nished, clean all parts
st raight away as descri bed in the
Cleaning and care section.
Page 12
12
EN
IT
Cleaning and care
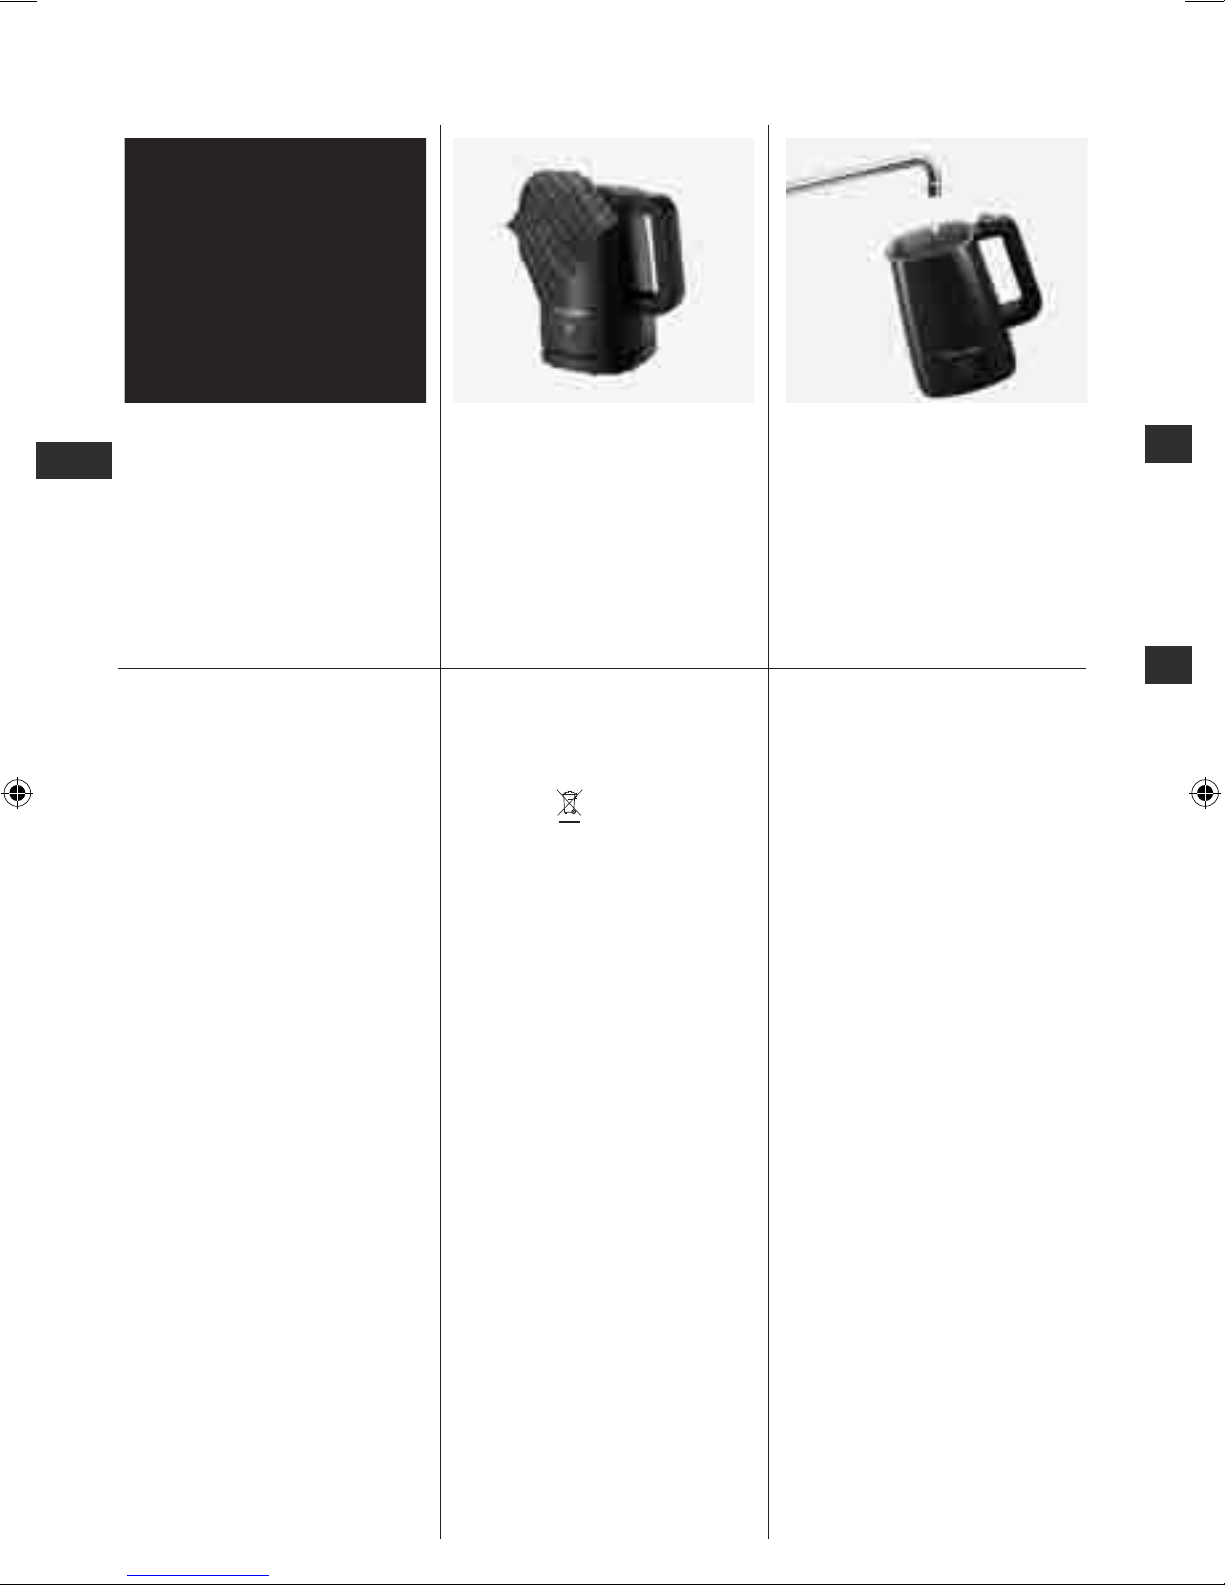
1. For be tter cleaning, re m ove th e
EN
whisk and sealing ring on the lid and
clean them separately.
Do not wet
the motor, it is not water proof
(water will damage the motor).
Disposal
Packaging materials
The packaging materials are environmentally friendly and can be recycled.
The plastic components are identied
by markings, e.g. >PE<, >PS<, etc. Please
dispose the packaging materials in the
appropriate container at the community
waste disposal facilities.
2. Clean the oute r surfac es of the
device and the lid with a soft damp
cloth. In case of heavy soiling, a mild
cleaning agent may be used.
Old appliance
The symbol
its packaging indicates that this product
may not be treated as household waste.
Instead it shall be handed over to the
applicable co llec tio n point for the
recyc ling of electr ical and elec tronic
equipment. By ens uri ng this product
is disposed of correctly, you will help
prevent potential negative consequences
for the environment and human health,
which could other wise be c aus ed by
inappropriate was te handling of this
product. For more detailed information
about recycling of this product, plea
contact yo ur local ci ty o ce, yo ur
household waste disposal service or the
shop where you purchased the product.
on the product or on
se
3. Rinse the pitcher with hot water
after use. In case of tough soiling
inside the pitcher, wash with a soap
solution and rinse well. Use a soft cloth
to prevent damage to the nonstick
coating.
Note! The pitcher can be
washed under the tap, but it is
not dishwasher safe and should
not be immersed into the water.
Page 13
WARRANTY
FOR SALES IN AUSTRALIA & NEW ZEALAND
SMALL DOMESTIC APPLIANCES
This document sets out the terms and conditions of the product warranties for Electrolux Appliances. It is an important document. Please keep it with your proof
of purchase documents in a safe place for future reference should you require service for your Appliance.
Important Notice: Before calling for service, please ensure that the steps listed in point 13 above have been followed.
FOR SERVICE AND SPARE PARTS FOR SERVICE AND SPARE PARTS
or to find the address of your nearest
service centre in Australia
ELECTROLUX FLOOR CARE
& SMALL APPLIANCES
or to find the address of your nearest
service centre in New Zealand
Please call 1300 366 366
Call charges apply
www.electrolux.com.au
Please call 0508 730 730
Free cal l (NZ onl y)
www.electrolux.co.nz
1. In this warrant y
(a) ‘acceptable quality’ as referred to in clause 10 of this warrant y has
the same meaning referred to in the ACL.
(b) ‘ACL’ means Trade Practices A mendment (Australian Consumer
Law) Act (No.2) 2010.
(c) ‘Appliance’ means any Electrolux product purchased by you
accompanied by this document.
(d) ‘ASC” means Electrolux Authorised Service Centre’.
(e) ‘Electrolux’ means Electrolux Pty Ltd of 57– 63 Fairchild Street,
Heatherton, VIC 3202 ABN 21 000 015 136 in respect of
Appliances purchased in Australia and Electrolux (NZ) Limited of
3-5 Niall Burgess Road, Mount Wellington, in respect of Appliances
purchased in New Zealand.
(f) `major failure’ as referred to in Clause 10 of this warranty has the
same meaning referred to in the ACL and includes a situation when
an Appliance cannot be repaired or it is uneconomic for Electrolux,
at its discretion, to repair an Appliance during the Warranty Period.
(g) ‘Warranty Period’ means:
(i) where the Appliance is used for personal, domestic or
household use (i.e. normal single family use) as set out in
the instruction manual, the Appliance is warranted against
manufacturing defects in Australia and New Zealand for
24 months following the date of original purchase of the
Appliance;
(ii) where the Appliance and accessories are used for
commercial purposes (including being used to directly assist
a business or where the Appliance is used in a multi-family
communal or share type environment), the Appliance
will then be warranted against manufacturing defects in
Australia for 3 months and in New Zealand for 3 months,
following the date of original purchase of the Appliance.
(h) ‘you’ means the purchaser of the Appliance not having purchased
the Appliance for re-sale, and ‘your’ has a corresponding meaning.
2. This warranty only applies to Appliances purchased and used in
Australia or New Zealand and is in addition to (and does not exclude,
restrict, or modify in any way) any non-excludable statutory warranties
in Australia or New Zealand.
3. During the Warranty Period Electrolux or its ASC will, at no extra
charge if your Appliance is readily accessible for ser vice, without
special equipment and subject to these terms and conditions, repair or
replace any par ts which it considers to be defective. Electrolux or its
ASC may use remanufactured parts to repair your A ppliance. You agree
that any replaced Appliances or parts become the property
of Electrolux.
4. Parts and Appliances not supplied by Electrolux are not covered by
this warranty.
5. You will bear the cost of transportation, travel and delivery of the
Appliance to and from Electrolux or its ASC. If you reside outside of the
service area, you will bear the cost of:
(a) travel of an authorised representative;
(b) transportation and delivery of the Appliance to and from Electrolux
or its ASC,
In all instances, unless the A ppliance is transported by Electrolux or an
Electrolux authorised representative, the Appliance is transported at the
owner’s cost and risk while in transit to and from Electrolux or its ASC.
6. Proof of purchase is required before you can make a claim under
this warranty.
7. You may not make a claim under this warranty unless the defect
claimed is due to faulty or defective parts or workmanship. Electrolux
is not liable in the following situations (which are not exhaustive):
(a) the Appliance is damaged by:
(i) accident
(ii) misuse or abuse, including failure to properly maintain
or service
(iii) normal wear and tear
(iv) power surges, electrical storm damage or incorrect
power supply
(v) incomplete or improper installation
(vi) incorrect, improper or inappropriate operation
(vii) insect or vermin infestation
(viii) failure to comply with any additional instructions supplied
with the Appliance;
(b) the Appliance is modified without authority from Electrolux
in writing;
(c) the Appliance’s serial number or warranty seal has been removed
or defaced;
(d) the Appliance was serviced or repaired by anyone other than
Electrolux, an authorised repairer or ASC.
8. This warranty, the contract to which it relates and the relationship
between you and Electrolux are governed by the law applicable where
the Appliance was purchased. Where the Appliance was purchased in
New Zealand for business purposes the Consumer Guarantee Act does
not apply.
9. To the extent permitted by law, Electrolux excludes all warranties and
liabilities (other than as contained in this document) including liability
for any loss or damage whether direct or indirect arising from your
purchase, use or non use of the Appliance.
10. For Appliances and services provided by Electrolux in Australia,
the Appliances come with a guarantee by Electrolux that cannot be
excluded under the Australian Consumer Law. You are entitled to a
replacement or refund for a major failure and for compensation for any
other reasonably foreseeable loss or damage. You are also entitled to
have the Appliance repaired or replaced if the Appliance fails to be of
acceptable quality and the failure does not amount to a major failure.
The benefits to you given by this warranty are in addition to your
other rights and remedies under a law in relation to the Appliances
or services to which the warranty relates.
11. At all times during the Warranty Period, Electrolux shall, at its
discretion, determine whether repair, replacement or refund will apply
if an Appliance has a valid warranty claim applicable to it.
12. For Appliances and services provided by Electrolux in New Zealand,
the Appliances come with a guarantee by Electrolux pursuant to the
provisions of the Consumer Guarantees Act, the Sale of Goods Act and
the Fair Trading Act.
13. To enquire about claiming under this warranty, please follow
these steps:
(a) carefully check the operating instructions, user manual and the
terms of this warranty;
(b) have the model and serial number of the Appliance available;
(c) have the proof of purchase (eg an invoice) available;
(d) telephone the numbers shown below.
14. You accept that if you make a warranty claim, Electrolux and its ASC
may exchange information in relation to you to enable Electrolux to
meet its obligations under this warranty.
P/N 85216
Page 14

15
www.electrolux.com.au
20111205- rev1
Available accessory-
Premium Descaler
 Loading...