

Page 1

EKK61500O
................................................ .............................................
EN COOKER USER MANUAL 2
RU КУХОННАЯ ПЛИТА ИНСТРУКЦИЯ ПО
ЭКСПЛУАТАЦИИ
28
Page 2
www.electrolux.com
2
CONTENTS
1. SAFETY INFORMATION . . . . . . . . . . . . . . . . . . . . . . . . . . . . . . . . . . . . . . . . . . . . . . . . . . . 3
2. SAFETY INSTRUCTIONS . . . . . . . . . . . . . . . . . . . . . . . . . . . . . . . . . . . . . . . . . . . . . . . . . . 4
3. PRODUCT DESCRIPTION . . . . . . . . . . . . . . . . . . . . . . . . . . . . . . . . . . . . . . . . . . . . . . . . . 7
4. BEFORE FIRST USE . . . . . . . . . . . . . . . . . . . . . . . . . . . . . . . . . . . . . . . . . . . . . . . . . . . . . . 8
5. HOB - DAILY USE . . . . . . . . . . . . . . . . . . . . . . . . . . . . . . . . . . . . . . . . . . . . . . . . . . . . . . . . 9
6. HOB - HELPFUL HINTS AND TIPS . . . . . . . . . . . . . . . . . . . . . . . . . . . . . . . . . . . . . . . . . . 10
7. HOB - CARE AND CLEANING . . . . . . . . . . . . . . . . . . . . . . . . . . . . . . . . . . . . . . . . . . . . . 10
8.
OVEN - DAILY USE . . . . . . . . . . . . . . . . . . . . . . . . . . . . . . . . . . . . . . . . . . . . . . . . . . . . . . 10
9. OVEN - USING THE ACCESSORIES . . . . . . . . . . . . . . . . . . . . . . . . . . . . . . . . . . . . . . . . . 12
10.
OVEN - HELPFUL HINTS AND TIPS . . . . . . . . . . . . . . . . . . . . . . . . . . . . . . . . . . . . . . . . . 13
11. OVEN - CARE AND CLEANING . . . . . . . . . . . . . . . . . . . . . . . . . . . . . . . . . . . . . . . . . . . . 18
12.
WHAT TO DO IF… . . . . . . . . . . . . . . . . . . . . . . . . . . . . . . . . . . . . . . . . . . . . . . . . . . . . . . 21
13. INSTALLATION . . . . . . . . . . . . . . . . . . . . . . . . . . . . . . . . . . . . . . . . . . . . . . . . . . . . . . . . . 22
14.
ENVIRONMENT CONCERNS . . . . . . . . . . . . . . . . . . . . . . . . . . . . . . . . . . . . . . . . . . . . . . 27
WE’RE THINKING OF YOU
Thank you for purchasing an Electrolux appliance. You’ve chosen a product that brings with it
decades of professional experience and innovation. Ingenious and stylish, it has been designed
with you in mind. So whenever you use it, you can be safe in the knowledge that you’ll get great
results every time.
Welcome to Electrolux.
Visit our website for:
Get usage advice, brochures, trouble shooter, service information:
www.electrolux.com
Register your product for better service:
www.electrolux.com/productregistration
Buy Accessories, Consumables and Original spare parts for your appliance:
www.electrolux.com/shop
CUSTOMER CARE AND SERVICE
We recommend the use of original spare parts.
When contacting Service, ensure that you have the following data available.
The information can be found on the rating plate. Model, PNC, Serial Number.
Warning / Caution-Safety information
General information and tips
Environmental information
Subject to change without notice.
Page 3

1. SAFETY INFORMATION
Before the installation and use of the appliance, carefully
read the supplied instructions. The manufacturer is not
responsible if an incorrect installation and use causes injuries and damages. Always keep the instructions with
the appliance for future reference.
1.1 Children and vulnerable people safety
WARNING!
Risk of suffocation, injury or permanent disability.
• This appliance can be used by children aged from 8
years and above and persons with reduced physical,
sensory or mental capabilities or lack of experience and
knowledge if they are supervised by an adult or a person who is responsible for their safety.
• Do not let children play with the appliance.
• Keep all packaging away from children.
• Keep children and pets away from the appliance when
it operates or when it cools down. Accessible parts are
hot.
• If the appliance has a child safety device, we recommend that you activate it.
• Cleaning and user maintenance shall not be made by
children without supervision.
ENGLISH 3
1.2 General Safety
• The appliance and its accessible parts become hot
during use. Do not touch the heating elements.
• Do not operate the appliance by means of an external
timer or separate remote-control system.
• Unattended cooking on a hob with fat or oil can be
dangerous and may result in fire.
Page 4
www.electrolux.com
4
• Never try to extinguish a fire with water, but switch off
• Do not store items on the cooking surfaces.
• Do not use a steam cleaner to clean the appliance.
• Metallic objects such as knives, forks, spoons and lids
• Do not use harsh abrasive cleaners or sharp metal
• To remove the shelf supports first pull the front of the
• Remove any spillage from the lid before opening. Let
the appliance and then cover flame e.g. with a lid or a
fire blanket.
should not be placed on the hob surface since they
can get hot.
scrapers to clean the glass door since they can scratch
the surface, which may result in shattering of the glass.
shelf support and then the rear end away from the side
walls. Install the shelf supports in the opposite sequence.
the hob surface cool down before closing the lid.
2.
SAFETY INSTRUCTIONS
This appliance is suitable for the following
markets: IL
RU
2.1 Installation
WARNING!
Only a qualified person must install this appliance.
• Remove all the packaging.
• Do not install or use a damaged appli-
ance.
• Obey the installation instruction sup-
plied with the appliance.
• Always be careful when you move the
appliance because it is heavy. Always
wear safety gloves.
• Do not pull the appliance by the handle.
• Keep the minimum distance from the
other appliances and units.
• Make sure that the appliance is installed
below and adjacent safe structures.
• The sides of the appliance must stay
adjacent to appliances or to units with
the same height.
• Do not install the appliance on a platform.
• Do not install the appliance adjacent to
a door or under a window. This prevents hot cookware to fall from the appliance when the door or the window is
opened.
Electrical connection
WARNING!
Risk of fire and electrical shock.
• All electrical connections should be
made by a qualified electrician.
• The appliance must be earthed.
• Make sure that the electrical information
on the rating plate agrees with the power supply. If not, contact an electrician.
Page 5

• Always use a correctly installed shockproof socket.
• Do not use multi-plug adapters and extension cables.
• Make sure not to cause damage to the
mains plug and to the mains cable.
Contact the Service or an electrician to
change a damaged mains cable.
• Do not let mains cables to come in
touch with the appliance door, specially
when the door is hot.
• The shock protection of live and insulated parts must be fastened in such a
way that it cannot be removed without
tools.
• Connect the mains plug to the mains
socket only at the end of the installation. Make sure that there is access to
the mains plug after the installation.
• If the mains socket is loose, do not
connect the mains plug.
• Do not pull the mains cable to disconnect the appliance. Always pull the
mains plug.
• Use only correct isolation devices: line
protecting cut-outs, fuses (screw type
fuses removed from the holder), earth
leakage trips and contactors.
• The electrical installation must have an
isolation device which lets you disconnect the appliance from the mains at all
poles. The isolation device must have a
contact opening width of minimum 3
mm.
Gas connection
• All gas connections should be made by
a qualified person.
• Make sure that there is air circulation
around the appliance.
• The information about the gas supply is
on the rating plate.
• This appliance is not connected to a
device, which evacuates the products
of combustion. Make sure to connect
the appliance according to current installation regulations. Pay attention to
requirements regarding adequate ventilation.
ENGLISH 5
2.2 Use
WARNING!
Risk of injury, burns or electric
shock.
• Use this appliance in a household environment.
• Do not change the specification of this
appliance.
• Make sure that the ventilation openings
are not blocked.
• Do not let the appliance stay unattended during operation.
• Deactivate the appliance after each
use.
• Internally the appliance becomes hot
when in operation. Do not touch the
heating elements that are in the appliance. Always use oven gloves to remove or put in oven accessories or
ovenware.
• Be careful, when you open the appliance door while the appliance is in operation. Hot air can release.
• Do not operate the appliance with wet
hands or when it has contact with water.
• Do not apply pressure on the open
door.
• Always keep the appliance door closed
when the appliance is in operation.
• Do not put cutlery or saucepan lids on
the cooking zones. They become hot.
• Set the cooking zone to “off” after use.
• Do not use the appliance as a work
surface or as a storage surface.
• Provide good ventilation in the room
where the appliance is installed.
• Use only stable cookware with the correct shape and diameter larger than the
dimensions of the burners.
• Make sure the flame does not go out
when you quickly turn the knob from
the maximum to the minimum position.
• Make sure pots are centrally positioned
on the rings and do not stick out over
edges of the cooking surface.
• Use only the accessories supplied with
the appliance.
• Do not install a flame diffuser on the
burner.
Page 6
www.electrolux.com
6
• Fats and oil when heated can release
• The vapours that very hot oil releases
• Used oil, that can contain food rem-
• Do not put flammable products or items
• Do not let sparks or open flames to
• Open the appliance door carefully. The
• To prevent damage or discoloration to
• Discoloration of the enamel has no ef-
• Use a deep baking tray for moist cakes.
• Do not keep hot cookware on the con-
• Do not let cookware to boil dry.
• Be careful not to let objects or cook-
• Do not activate the cooking zones with
WARNING!
Risk of fire or explosion.
flammable vapours. Keep flames or
heated objects away from fats and oils
when you cook with them.
can cause spontaneous combustion.
nants, can cause fire at a lower temperature than oil used for the first time.
that are wet with flammable products
in, near or on the appliance.
come in contact with the appliance
when you open the door.
use of ingredients with alcohol can
cause a mixture of alcohol and air.
WARNING!
Risk of damage to the appliance.
the enamel:
– Do not put ovenware or other objects
in the appliance directly on the bottom.
– Do not put aluminium foil directly on
the bottom of the appliance.
– do not put water directly into the hot
appliance.
– do not keep moist dishes and food in
the appliance after you finish the
cooking.
– be careful when you remove or install
the accessories.
fect on the performance of the appliance. It is not a defect in the sense of
the warranty law.
Fruit juices cause stains that can be
permanent.
trol panel.
ware fall on the appliance. The surface
can be damaged.
empty cookware or without cookware.
• Do not put aluminium foil on the appliance.
• Cookware made of cast iron, aluminium
or with a damaged bottom can cause
scratches on the glass ceramic. Always
lift these objects up when you have to
move them on the cooking surface.
Lid
• Do not change the specification of the
lid.
• Clean the lid regularly.
• Do not open the lid, when there are
spills on the surface.
• Do not close the lid until the hob and
oven are completely cold.
• Glass lids can shatter, when heated (if
applicable).
2.3 Care and Cleaning
WARNING!
Risk of injury, fire or damage to
the appliance.
• Before maintenance, deactivate the appliance and disconnect the mains plug
from the mains socket.
• Make sure the appliance is cold. There
is the risk that the glass panels can
break.
• Replace immediately the door glass
panels when they are damaged. Contact the Service.
• Be careful when you remove the door
from the appliance. The door is heavy!
• Clean regularly the appliance to prevent
the deterioration of the surface material.
• Remaining fat or food in the appliance
can cause fire.
• Clean the appliance with a moist soft
cloth. Only use neutral detergents. Do
not use abrasive products, abrasive
cleaning pads, solvents or metal objects.
• If you use an oven spray, obey the safety instructions on the packaging.
Page 7
• Do not clean the catalytic enamel (if applicable) with any kind of detergent.
• Do not clean the burners in the dishwasher.
2.4 Internal light
• The type of light bulb or halogen lamp
used for this appliance, is only for
household appliances. Do not use it for
house lighting.
WARNING!
Risk of electrical shock.
• Before replacing the lamp, disconnect
the appliance from the power supply.
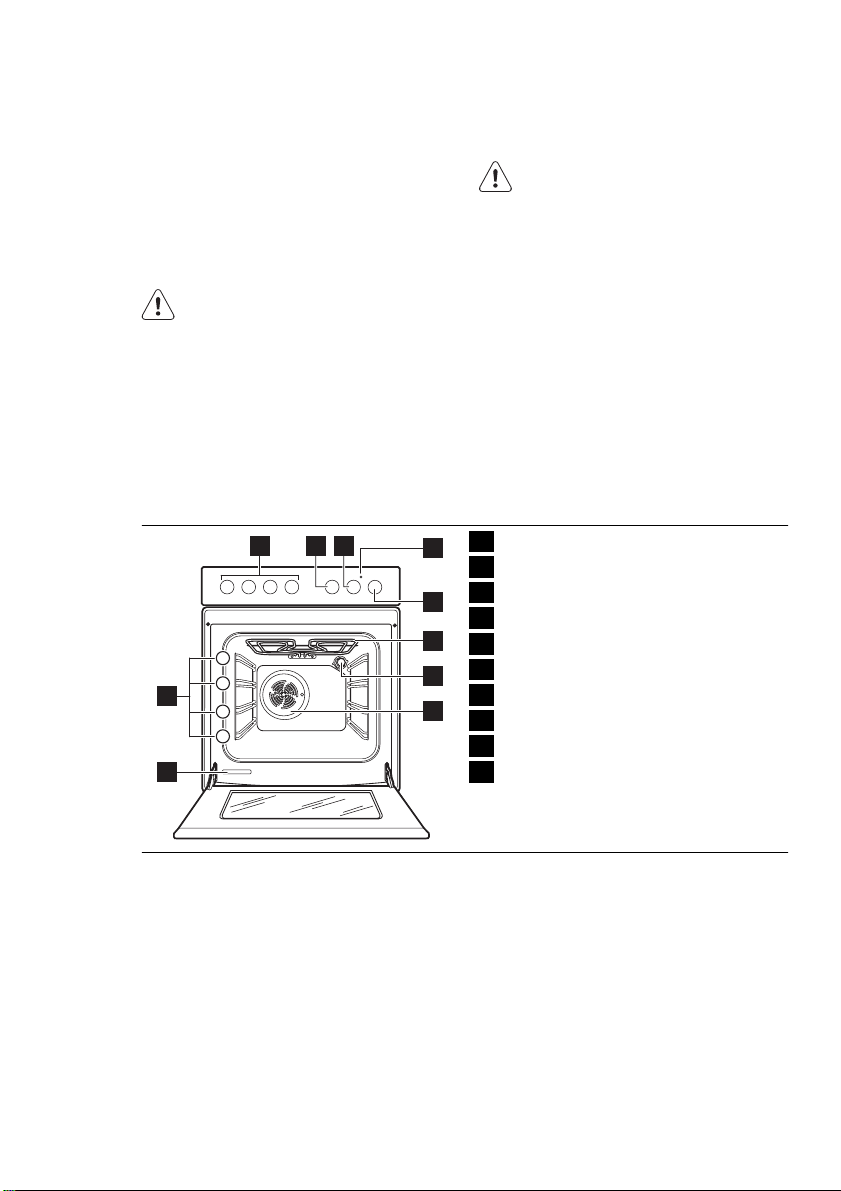
3. PRODUCT DESCRIPTION
3.1 General overview
1 2 3
4
10
3
2
1
9
• Only use lamps with the same specifications.
2.5 Disposal
WARNING!
Risk of injury or suffocation.
• Disconnect the appliance from the
mains supply.
• Cut off the mains cable and discard it.
• Remove the door catch to prevent children and pets to get closed in the appliance.
Knobs for the hob
1
4
5
6
7
8
Knob for the minute minder
2
Knob for the temperature
3
Temperature indicator
4
Knob for the oven functions
5
Heating element
6
Oven lamp
7
Fan
8
Rating plate
9
Shelf positions
10
ENGLISH 7
Page 8

www.electrolux.com
8
3.2 Cooking surface layout
1
4
2
3
3.3 Accessories
Oven shelf
•
For cookware, cake tins, roasts.
• Flat aluminized baking tray
For cakes and biscuits.
• Deep roasting pan
To bake and roast or as pan to collect
fat.
Optional telescopic runners
•
To put the shelves or trays on it. You
can order them separately.
Semi-rapid burner (63 mm)
1
Semi-rapid burner (63 mm)
2
Auxiliary burner (47 mm)
3
Triple Crown burner (126 mm)
4
Storage compartment
•
Below the oven is the storage compart-
ment.
To use the compartment, lift the lower
front door then pull down.
WARNING!
The storage compartment can become hot when the appliance operates.
4. BEFORE FIRST USE
WARNING!
Refer to "Safety information"
chapter.
CAUTION!
To open the oven door, always
hold the handle in the centre.
4.1 Initial Cleaning
• Remove all parts from the appliance.
• Clean the appliance before first use.
CAUTION!
Do not use abrasive cleaning
agents! This can damage the surface. Refer to chapter "Care and
Cleaning".
4.2 Pre-heating
1.
Set function and maximum temperature.
2.
Let the appliance operate without the
food for approximately 1 hour.
3.
Set function and maximum temperature.
4.
Let the appliance operate without the
food for approximately 10 minutes.
5.
Set function and maximum temperature.
6.
Let the appliance operate without the
food for approximately 10 minutes.
This is to burn off the residue in the appliance. The accessories can become more
Page 9
hot than usually. When you pre-heat the
appliance for the first time, the appliance
can make an odour and smoke. This is
5. HOB - DAILY USE
WARNING!
Refer to "Safety information"
chapter.
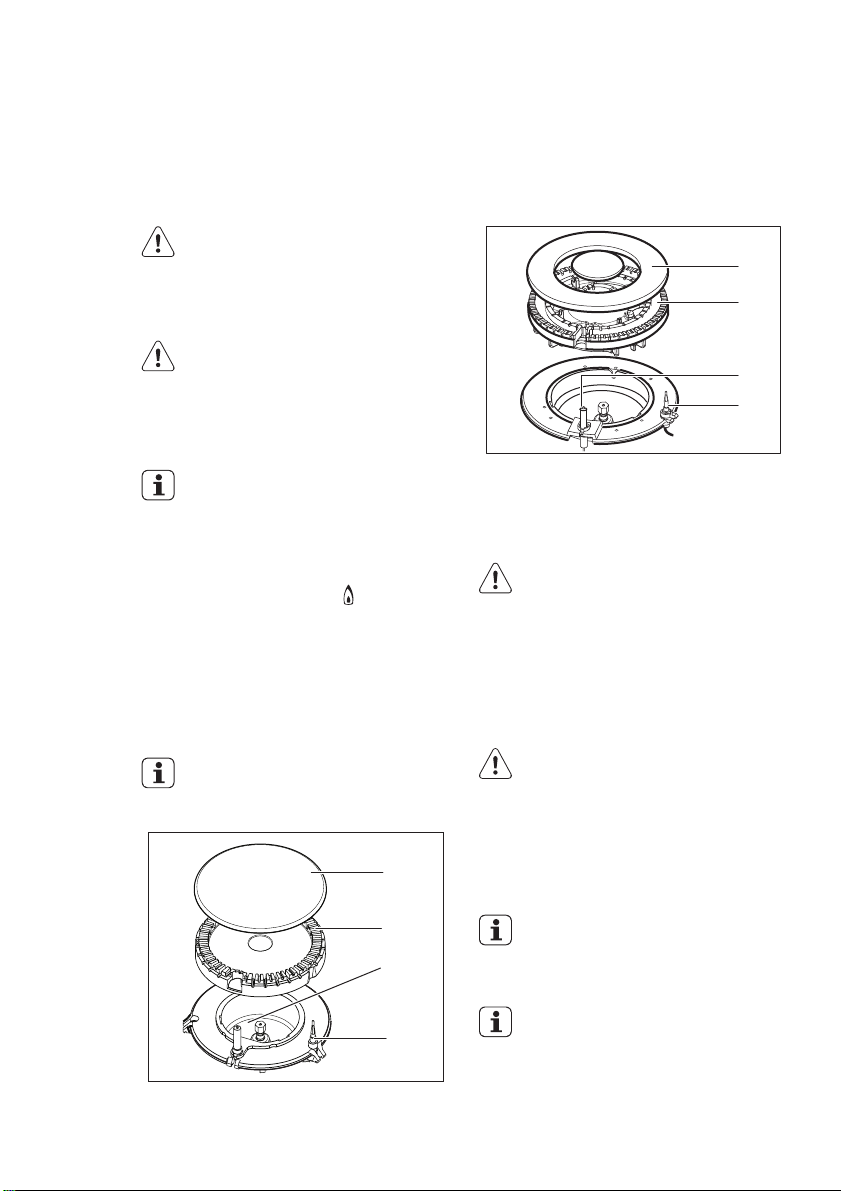
5.1 Ignition of the burner
WARNING!
Be very careful when you use
open fire in kitchen environment.
The manufacturer declines any responsibility in case of misuse of
the flame.
Always light the burner before you
put cookware on it.
To light the burner:
1.
Push the knob for the necessary
burner down completely and turn it to
the maximum position
push the knob, the spark generator
starts automatically.
2.
Keep the knob pushed for approximately 10 seconds. This lets the thermocouple warm up. If not, the gas
supply is interrupted.
3.
Adjust the flame after it is regular.
If after some tries the burner does
not light, check if the crown and
its cap are in the correct positions.
. When you
A
ENGLISH 9
the usual effect. Make sure the airflow is
sufficient.
A
B
C
D
A)
Burner cap
B)
Burner crown
C)
Ignition candle
D)
Thermocouple
WARNING!
Do not keep the control knob
pushed for more than 15 seconds.
If the burner does not light after
15 seconds, release the control
knob, turn it into off position and
try to light the burner again after
minimum 1 minute.
You can light the burner without
electrical device (e.g. when there
is no electricity in the kitchen). To
do so, put the flame near the
burner, push the related control
knob down and turn it counterclockwise to the maximum gas release position.
B
C
D
If the burner accidentally goes out,
turn the control knob to the off
position and try to light the burner
again after minimum 1 minute.
The spark generator can start automatically when you switch on
the mains, after installation or a
power cut. It is normal.
Page 10
www.electrolux.com
10
5.2 Turning the burner off
To put the flame out, turn the knob to the
symbol
.
6. HOB - HELPFUL HINTS AND TIPS
WARNING!
Always turn the flame down or
switch it off before you remove the
pans from the burner.
6.1 Energy savings
• If possible, always put the lids on the
pans.
Burner Diameters of cookware Recommended pot diame-
Triple Crown 160 - 240 mm 240 mm
Semi-rapid 140 - 240 mm 240 mm
Auxiliary 120 - 180 mm 180 mm
Use cookware with the bottom as thick
and flat as possible.
7. HOB - CARE AND CLEANING
WARNING!
Refer to "Safety information"
chapter.
WARNING!
Switch the appliance off and let it
cool down before you clean it.
WARNING!
For safety reasons, do not clean
the appliance with steam cleaners
or high-pressure cleaners.
WARNING!
Do not use abrasive cleaners,
steel wool pads or acids, they can
cause damage to the appliance.
• When the liquid starts to boil, turn down
the flame to barely simmer the liquid.
Use cookware with diameters applicable
to the size of burners.
ters
• Stainless steel parts wash with water,
and then dry with a soft cloth.
• The pan supports are not dishwasher
proof; they must be washed by hand.
• Make sure you position the pan supports correctly after cleaning.
• To make burners work correctly, make
sure that the arms of the pan supports
are in the centre of the burner.
• Be very careful when you replace
the pan supports to prevent the hob
top from damage.
After cleaning, dry the appliance with a
soft cloth.
• To clean the enamelled parts, cap and
crown, wash it with warm soapy water.
8. OVEN - DAILY USE
WARNING!
Refer to "Safety information"
chapter.
Page 11
8.1 Activating and deactivating
the appliance
1.
Turn the oven functions control knob
to an oven function.
2.
Turn the temperature control knob to
a temperature.
The temperature indicator comes on
while the temperature in the appliance
increases.
3.
To deactivate the appliance, turn the
oven functions control knob and the
temperature control knob to the Off
position.
8.2 Safety thermostat
To prevent dangerous overheating (due to
incorrect use of the appliance or defective
components), the oven has a safety thermostat, which interrupts the power supply. The oven switches back on again automatically, when the temperature drops.
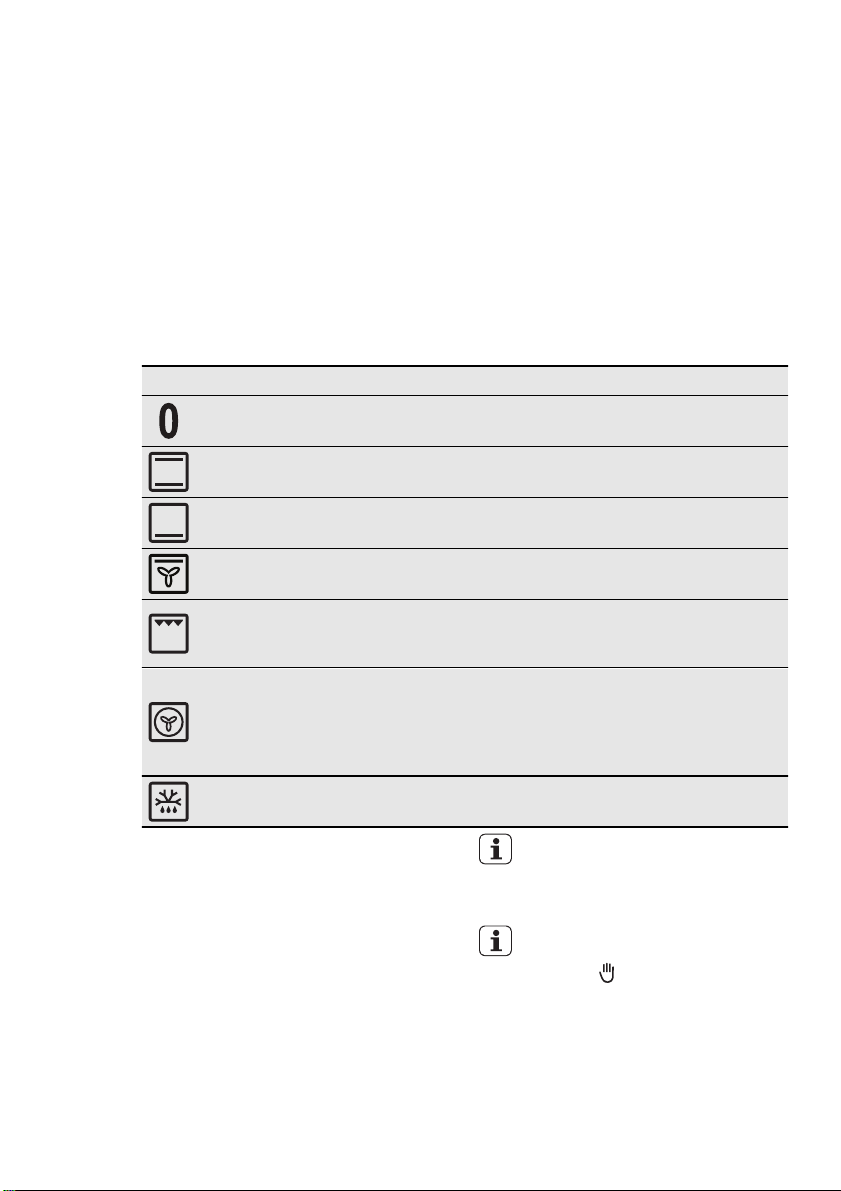
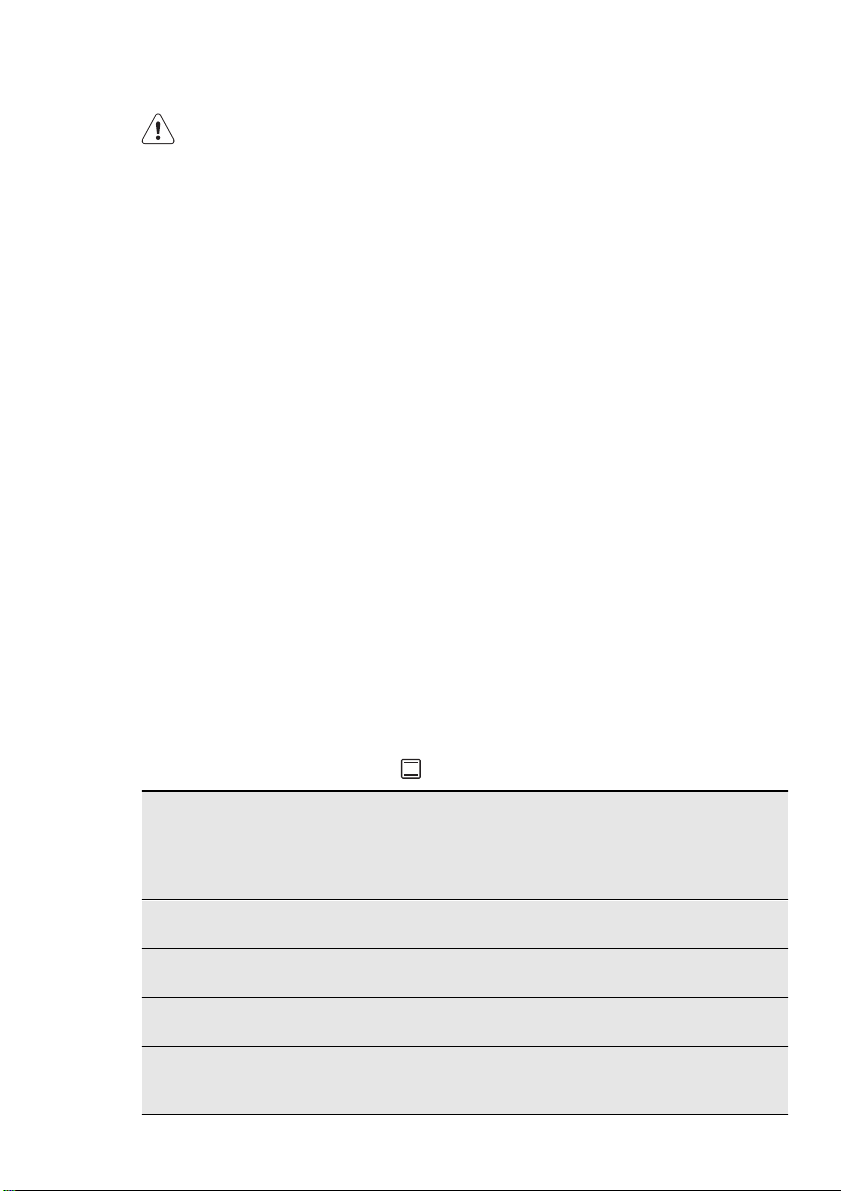
8.3 Oven functions
Oven function Application
Off position The appliance is OFF.
ENGLISH 11
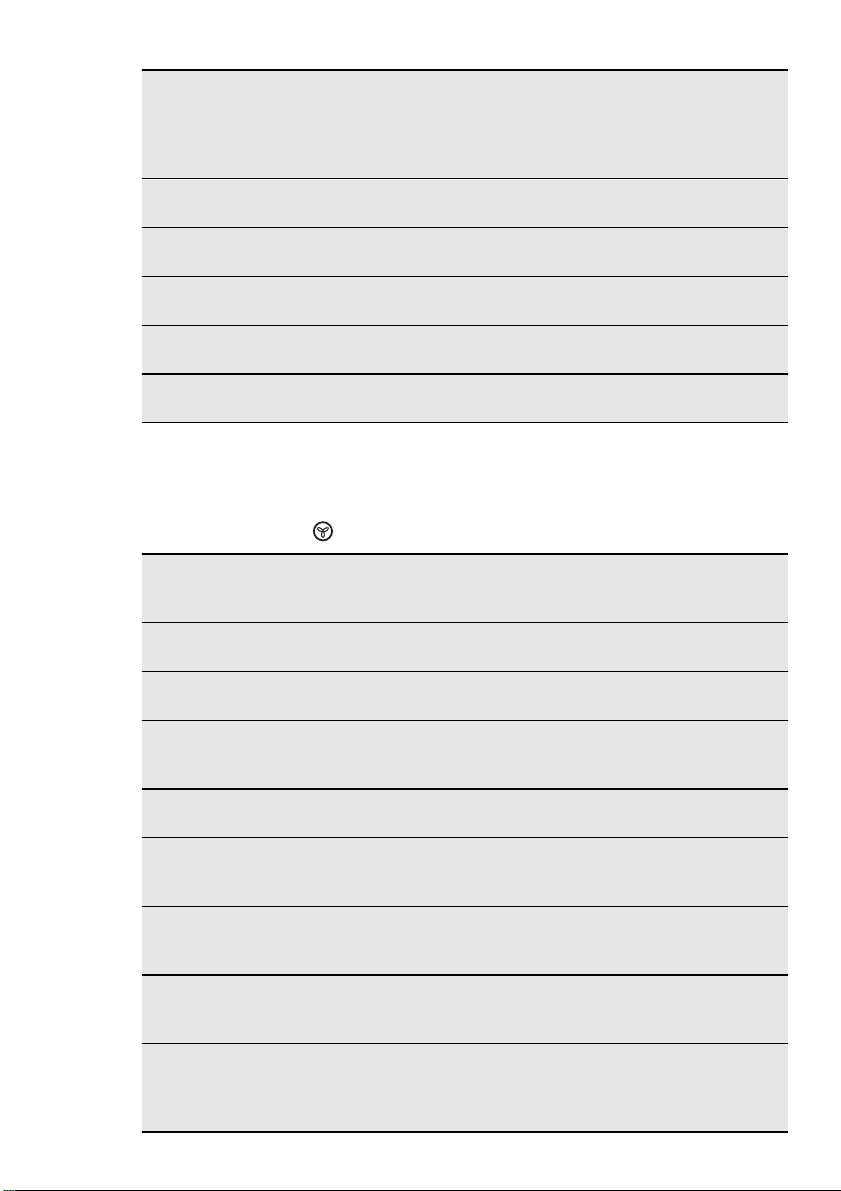
Conventional
Heats from the top and bottom elements. To bake and
cooking
Bottom heating
Heats only from the bottom of the oven. To bake cakes
element
Top heating ele-
ment with fan
Especially for easy food preparation as: meringue,
sponge cake, buttered cake, swiss roll.
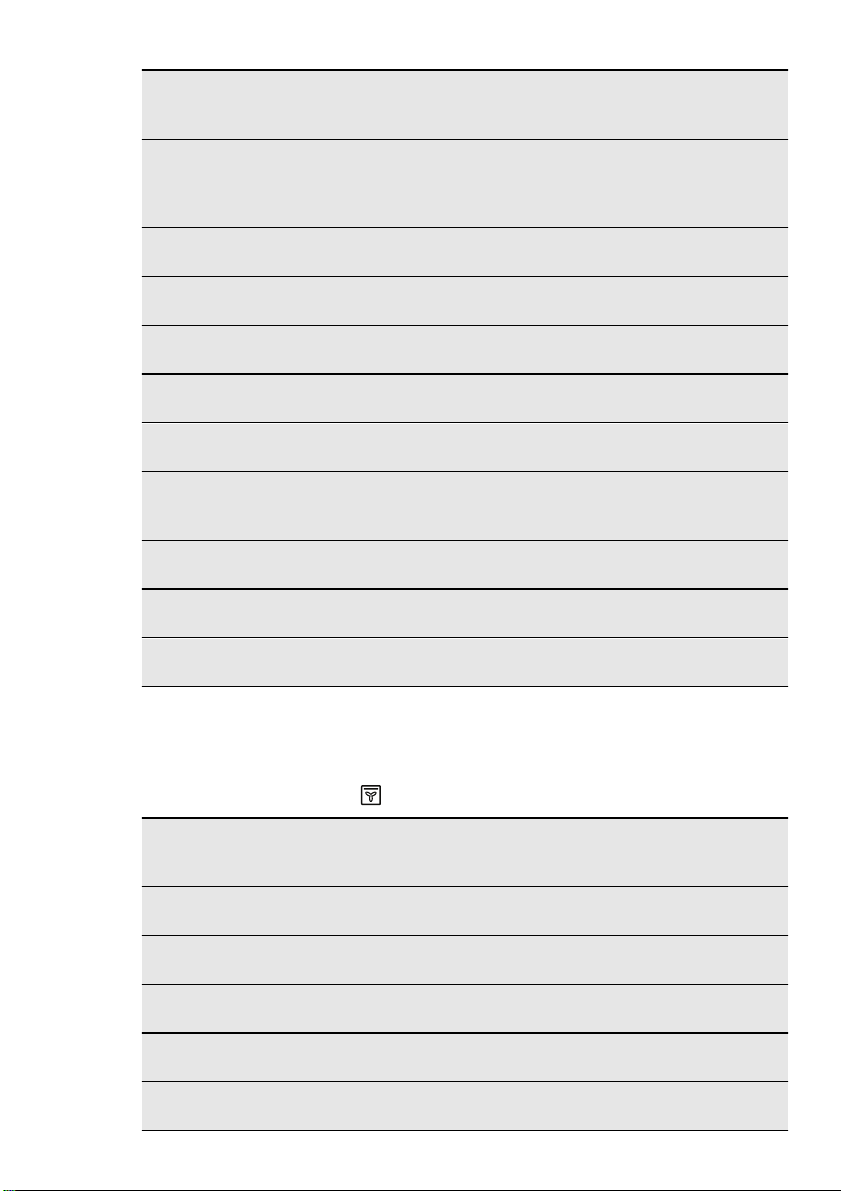
To grill flat food items in small quantities in the middle
Grill
of the shelf. To make toasts. Maximum temperature
To roast or roast and bake food with the same cooking
temperature on more than one shelf without flavour
Fan cooking
transference. When you use this function, decrease the
oven temperature by 20 - 40 °C from the standard
temperatures you use for Conventional cooking.
Defrost
To thaw frozen food. The temperature control knob
8.4 Timer - Minute minder
Use it to set a countdown time.
First turn the Minute minder control knob
(refer to "Product description") clockwise
as far as it goes. Then turn it counterclockwise to necessary time period. A signal sounds after the time period is completed and the appliance automatically
deactivates. Turn the control knobs for
oven functions and oven temperature to
the OFF position.
roast on one oven level.
with crispy or crusty bottom.
for this function is 210 °C.
must be on the off position.
In case of re-use of switch timer
wait that it finish all its functions
and it is completely at zero position.
To cook without a set time period,
turn the Minute minder control
knob to
.
Page 12
www.electrolux.com
12
9. OVEN - USING THE ACCESSORIES
WARNING!
Refer to "Safety information"
chapter.
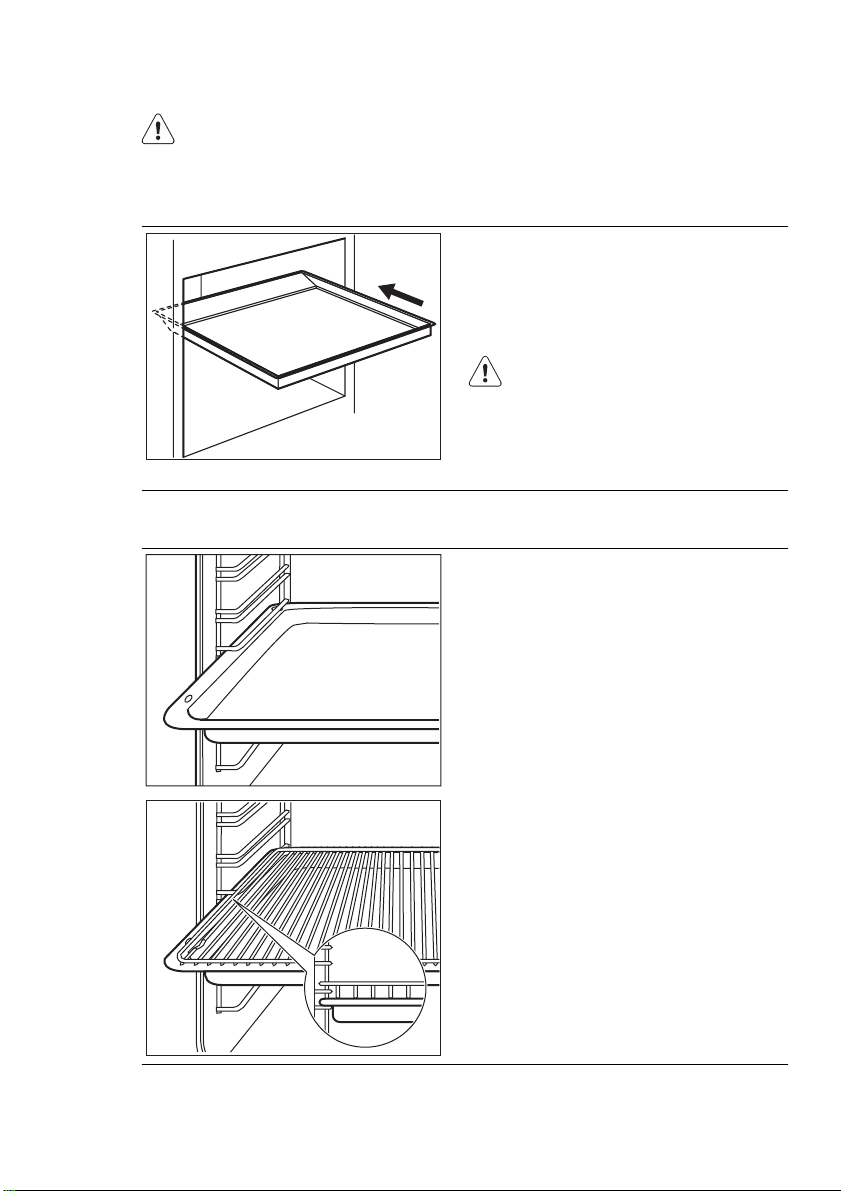
9.1 Inserting the baking tray
Put the tray in the centre of the oven cavity, between the front and rear wall. This
ensures that the heat can circulate in front
of and behind the baking tray. Make sure
that the tray is positioned like in the picture, with the angled slope in the rear.
9.2 Inserting the oven accessories
Put in the slide-in accessories so that the
double side edges are at the back of the
oven and point down to the bottom. Push
the slide-in accessories between the
guide-bars of one of the oven levels.
WARNING!
Do not push the baking tray all the
way to the rear wall of the oven
cavity. This prevents the heat from
circulating around the tray. The
food may be burnt, especially in
the rear part of the tray.
Inserting the oven shelf and deep
roasting pan together
Put the oven shelf on the deep roasting
pan. Push the deep roasting pan between
the guide-bars of one of the oven levels.
Page 13
10. OVEN - HELPFUL HINTS AND TIPS
ENGLISH 13
CAUTION!
Use a deep baking tray for very
moist cakes. Fruit juices can
cause permanent stains on the
enamel.
• The appliance has four shelf levels.
Count the shelf levels from the bottom
of the appliance floor.
• You can cook different dishes on two
levels at the same time. Place the
shelves on level 1 and 3.
• Moisture can condense in the appliance
or on the glass doors. This is normal.
Always stand back form the appliance
when you open the appliance door
while cooking. To decrease the condensation, run the appliance for 10 minutes before cooking.
• Wipe away moisture after every use of
the appliance.
• Do not put the objects directly on the
appliance floor and do not cover the
components with aluminium foil when
you cook. This can change the baking
results and damage the enamel coating.
10.1 Baking cakes
• Preheat the oven for approximately 10
minutes before baking.
• Do not open the oven door before 3/4
of the set cooking time is up.
• If you use two baking trays at the same
time, keep one level empty between
them.
10.2 Cooking meat and fish
• Do not cook meat with weight below 1
kg. Cooking too small quantities makes
the meat too dry.
• Use a dripping pan for very fatty food to
prevent the oven from stains that can
be permanent.
• Leave the meat for approximately 15
minutes before carving so that the juice
does not seep out.
• To prevent too much smoke in the oven
during roasting, add some water into
the dripping pan. To prevent the smoke
condensation, add water each time after it dries up.
10.3 Cooking times
Cooking times depend on the type of
food, its consistency, and volume.
Initially, monitor the performance when
you cook. Find the best settings (heat setting, cooking time, etc.) for your cookware, recipes and quantities when you
use this appliance.
10.4 Conventional cooking
Food
Pastry stripes (250 g) enamelled tray at lev-
Flat cake (1000 g) enamelled tray at lev-
Yeast cake with apples (2000 g)
Apple pie (1200 +
1200 g)
Tray type and shelf
level
el 3
el 2
enamelled tray at level 3
2 round aluminized
trays (diameter: 20
cm) at level 1
Cook-
Tempera-
ture (°C)
Preheat-
ing time
(min)
ing /
baking
time
(min)
150 - 25 - 30
160 - 170 10 30 - 35
170 - 190 - 40 - 50
180 - 200 15 50 - 60
Page 14

www.electrolux.com
14
Food
Tray type and shelf
level
Small cakes (500 g) enamelled tray at lev-
el 2
Fatless sponge cake
(350 g)
1 round aluminized
tray (diameter: 26
cm) at level 1
Drip pan cake (1500g)enamelled tray at lev-
el 2
Chicken, whole (1350g)oven shelf at level 2,
roasting tray at level
1
Chicken, half (1300 g) oven shelf at level 3,
roasting tray at level
1
Pork roast cutlet (600g)oven shelf at level 3,
roasting tray at level
1
Flan bread (800 g) enamelled tray at lev-
el 2
Stuffed yeast cake
(1200 g)
enamelled tray at level 2
Pizza (1000 g) enamelled tray at lev-
el 2
Cheese cake (2600g)enamelled tray at lev-
el 2
Swiss apple flan
(1900 g)
Christmas cake
(2400 g)
Quiche Lorraine
(1000 g)
Peasant bread (750 +
750 g)
enamelled tray at level 1
enamelled tray at level 2
1 round tray (diameter: 26 cm) at level 1
2 round aluminized
trays (diameter: 20
cm) at level 1
Romanian sponge
cake (600 + 600 g)
Romanian sponge
cake - traditional (600
2 round trays (length:
25 cm) at level 2
2 round trays (length:
20 cm) at level 2
+ 600 g)
Yeast buns (800 g) enamelled tray at lev-
el 2
Cook-
Tempera-
ture (°C)
Preheat-
ing time
(min)
ing /
baking
time
(min)
160 - 180 10 25 - 30
160 - 170 10 25 - 30
160 - 170 - 45 - 55
1)
200 - 220 - 60 - 70
190 - 210 - 30 - 35
190 - 210 - 30 - 35
230 - 250 20 10 - 15
170 - 180 10 - 15 25 - 35
200 - 220 10 - 15 30 - 40
170 - 190 - 60 - 70
200 - 220 10 - 15 30 - 40
170 - 180 10 - 15 55 - 65
2)
220 - 230 10 - 15 40 - 50
180 - 200
18
3)
60 - 70
160 - 170 10 40 - 50
160 - 170 - 30 - 40
200 - 210 10 - 15 10 - 15
Page 15
ENGLISH 15
Food
Tray type and shelf
level
Swiss roll (500 g) enamelled tray at lev-
Tempera-
ture (°C)
150 - 170 10 15 - 20
Preheat-
ing time
(min)
el 1
Meringue (400 g) enamelled tray at lev-
100 - 120 - 40 - 50
el 2
Crumble cake (1500g)enamelled tray at lev-
180 - 190 10 - 15 25 - 35
el 3
Sponge cake (600 g) enamelled tray at lev-
160 - 170 10 25 - 35
el 3
Buttered cake (600 g) enamelled tray at lev-
180 - 200 10 20 - 25
el 2
1)
After you deactivate the appliance, leave the cake in the oven for 7 minutes.
2)
After you deactivate the appliance, leave the cake in the oven for 10 minutes.
3)
Set the temperature to 250 °C for preheating.
10.5 Fan cooking
Food
Pastry stripes
(250 g)
Pastry stripes
(250 + 250 g)
Pastry stripes
(250 + 250 +
250 g)
Flat cake
(1000 g)
Flat cake
(1000 + 1000
g)
Flat cake
(1000 + 1000
+ 1000 g)
Yeast cake
with apples
(2000 g)
Apple pie
(1200 + 1200
g)
Tray type
and shelf lev-
el
enamelled tray
at level 3
enamelled tray
at level 1 or 3
enamelled tray
at level 1, 2 or
4
enamelled tray
at level 2
enamelled tray
at level 1 or 3
enamelled tray
at level 1, 2 or
4
enamelled tray
at level 3
2 round aluminized trays (diameter: 20
cm) at level 1
Temperature
(°C)
155 10 20
150 10 20
155 10 25
155 10 35
145 10 50
155 10 60
170 - 180 10 40 - 50
175 10 55
Preheating
time (mi-
nutes)
Cook-
ing /
baking
time
(min)
Cooking /
baking time
(minutes)
Page 16

www.electrolux.com
16
Food
Small cakes
(500 g)
Small cakes
(500 + 500 g)
Small cakes
(500 + 500 +
500 g)
Fatless
sponge cake
(350 g)
Drip pan cake
(1200 g)
Chicken,
whole (1400 g)
Pork roast
(600 g)
Flan bread
(800 g)
Stuffed yeast
cake (1200 g)
Pizza (1000 +
1000 g)
Cheese cake
(2600 g)
Swiss apple
flan (1900 g)
Christmas
cake (2400 g)
Quiche Lorraine (1000 g)
Peasant bread
(750 + 750 g)
Romanian
sponge cake
(600 + 600 g)
Tray type
and shelf lev-
el
enamelled tray
at level 2
enamelled tray
at level 1 or 3
enamelled tray
at level 1, 2 or
4
1 round aluminized tray (diameter: 26
cm) at level 3
enamelled tray
at level 3
oven shelf at
level 2, baking
tray at level 1
oven shelf at
level 2, baking
tray at level 1
enamelled tray
at level 2
enamelled tray
at level 3
enamelled tray
at level 1 or 3
enamelled tray
at level 2
enamelled tray
at level 3
enamelled tray
at level 3
1 round tray
(diameter: 26
cm) at level 2
enamelled tray
at level 3
2 aluminized
trays (length:
25 cm) at level
2
Temperature
(°C)
Preheating
time (mi-
nutes)
Cooking /
baking time
(minutes)
150 10 35
145 10 30
160 10 40
160 10 30
150 - 160 -
40 - 50
200 - 50
180 - 200 - 30 - 40
230 - 250 15 10 - 15
160 - 170 - 20 - 30
180 - 200 - 50 - 60
150 - 170 - 60 - 70
180 - 200 15 40 - 50
150 - 170 10
50 - 60
210 - 230 15 35 - 45
180 - 190
15
3)
50 - 60
150 - 170 10 40 - 50
1)
2)
Page 17
ENGLISH 17
Food
and shelf lev-
el
Tray type
Romanian
sponge cake traditional (600
+ 600 g)
Yeast buns
(800 g)
Yeast buns
(800 + 800 g)
2 aluminized
trays (length:
20 cm) at level
2
enamelled tray
at level 3
enamelled tray
at level 1 or 3
Swiss roll (500g)enamelled tray
Temperature
(°C)
160 - 170 - 30 - 40
190 10 15
200 10 15
150 - 170 10 10 - 15
Preheating
time (mi-
nutes)
at level 3
Meringue (400g)enamelled tray
100 - 120 - 50 - 60
at level 2
Meringue (400
+ 400 g)
Meringue (400
+ 400 + 400
g)
Crumble cake
(1500 g)
Sponge cake
(600 g)
Buttered cake
(600 + 600 g)
1)
After you deactivate the appliance, leave the cake in the oven for 7 minutes.
2)
After you deactivate the appliance, leave the cake in the oven for 10 minutes.
3)
Set the temperature to 230 °C for preheating.
enamelled tray
at level 1 or 3
enamelled tray
at level 1, 2 or
4
enamelled tray
at level 2
enamelled tray
at level 2
enamelled tray
at level 1 or 3
100 - 120 - 55 - 65
115 - 125 - 65 - 75
170 - 180 10 20 - 30
150- 170 10 20 - 30
150 - 170 10 20 - 30
Cooking /
baking time
(minutes)
10.6 Top heat with fan
Food
Pastry stripes
(250 g)
Flat cake (500g)enamelled tray
Pizza (1000 g) enamelled tray
Swiss roll (500g)enamelled tray
Meringue (400g)enamelled tray
Tray type
and shelf lev-
el
enamelled tray
at level 2
at level 2
at level 2
at level 2
at level 2
Preheating
time (mi-
nutes)
1)
20
1)
20
1)
20
1)
20
1)
10
Temperature
(°C)
Cooking /
baking time
(minutes)
150 - 160 20 - 25
160 - 170 30 - 35
200 - 210 30 - 40
160 - 170 20 - 30
110 - 120 50 - 60
Page 18
www.electrolux.com
18
Food
and shelf lev-
el
Tray type
Sponge cake
(600 g)
Buttered cake
(600 g)
Chicken,
whole (1200 g)
1)
Set the knob for the temperature to 250 °C.
enamelled tray
at level 2
enamelled tray
at level 2
enamelled tray
at level 2
Preheating
time (mi-
nutes)
20
20
- 220 - 230 45 - 55
Information on acrylamides
Important! According to the newest
scientific knowledge, if you brown food
(specially the one which contains starch),
11. OVEN - CARE AND CLEANING
WARNING!
Refer to "Safety information"
chapter.
• Clean the front of the appliance with a
soft cloth with warm water and cleaning
agent.
• To clean metal surfaces use a usual
cleaning agent
• Clean the oven interior after each use.
Thus you can remove dirt more easily
and it does not burn on.
Temperature
(°C)
1)
1)
acrylamides can pose a health risk. Thus,
we recommend that you cook at the
lowest temperatures and do not brown
food too much.
• Clean stubborn dirt with a special oven
• Clean all oven accessories (with a soft
• If you have nonstick accessories, do
160 - 170 25 - 30
160 - 170 25 - 30
cleaner.
cloth with warm water and cleaning
agent) after each use and let them dry.
not clean them using an aggressive
agents, sharp edged objects or dishwasher. It can destroy nonstick coating!
Cooking /
baking time
(minutes)
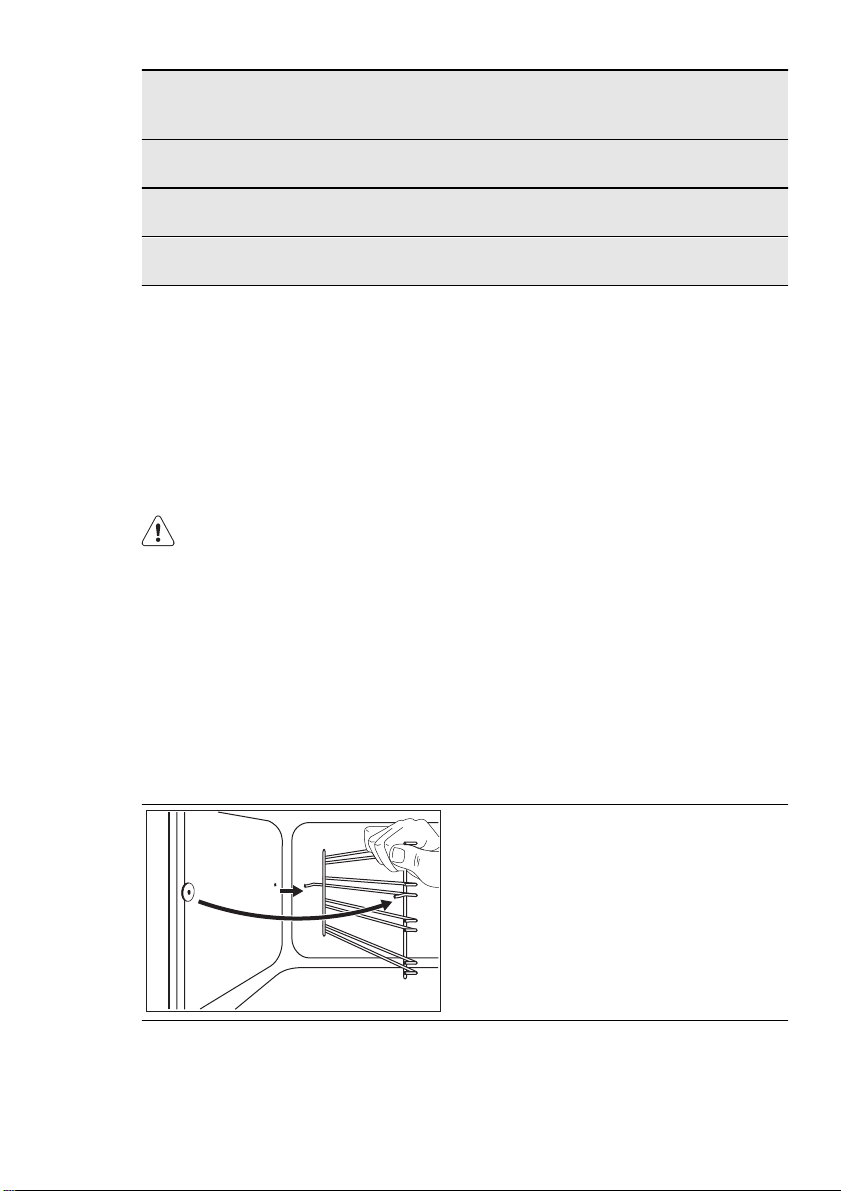
11.1 Removing the shelf supports
1
Install the shelf supports in the opposite
sequence.
2
You can remove the shelf supports to
clean the side walls.
1.
Pull the front of the shelf support
away from the side wall.
2.
Pull the rear end of the shelf support
away from the side wall and remove
it.
Page 19

The rounded ends of the shelf
supports must point to the front.
The oven door can close if you try
to remove the internal glass panel
before you remove the oven door.
11.2 Cleaning the oven door
The oven door has two glass panels. You
can remove the oven door and the internal glass panel to clean it.
Removing the oven door and the glass panel
1.
Open the door fully and hold the two
door hinges.
2.
Lift and turn the levers on the two
hinges.
ENGLISH 19
Page 20

www.electrolux.com
20
3.
Close the oven door to the first opening position (halfway). Then pull forward and remove the door from its
seat.
4.
Put the door on a soft cloth on a stable surface.
5.
Release the locking system to remove the internal glass panel.
90°
6.
Turn the two fasteners by 90° and remove them from their seats.
Page 21

7.
8.
2
1
Installing the door and the glass panel
When the cleaning is completed, install
the glass panel and the oven door. Do the
above steps in the opposite sequence.
The screen-printing zone must face the
inner side of the door. Make sure that after the installation the surface of the glass
panel frame on the screen-printing zones
is not rough when you touch it.
Make sure that you install the internal
glass panel in the seats correctly. Refer to
the illustration.
ENGLISH 21
Carefully lift (step 1) and remove (step
2) the glass panel.
Clean the glass panel with water and
soap. Dry the glass panel carefully.
11.3 Oven lamp
WARNING!
Be careful when you change the
oven lamp. There is a risk of electrical shock.
Before you change the oven lamp:
• Deactivate the oven.
• Remove the fuses in the fuse box or
deactivate the circuit breaker.
Put a cloth on the bottom of the
oven to prevent damage to the
oven light and glass cover.
12. WHAT TO DO IF…
Problem Possible cause Remedy
There is no spark when
lighting the gas
There is no spark when
lighting the gas
Replacing the oven lamp
1.
You can find the lamp glass cover at
the back of the cavity.
Turn the lamp glass cover counterclockwise to remove it.
2.
Clean the glass cover.
3.
Replace the oven lamp with an applicable 300 °C heat-resistant oven
lamp.
Use the same oven lamp type.
4.
Install the glass cover.
There is no electrical supply
There is no electrical supply
Make sure that the unit is
connected and the electrical supply is switched
on.
Examine the house electrical installation fuse.
Page 22

www.electrolux.com
22
There is no spark when
lighting the gas
The flame is blow out immediately after ignition
The gas ring burns unevenly
The appliance does not
operate
The oven does not heatupThe oven is not switchedonSwitch on the oven
Problem Possible cause Remedy
Burner cap and crown
are placed uneven
Make sure that the burner
cap and crown are in correct positions.
Thermocouple is not
heated sufficient
After lightning the flame,
keep the knob pushed for
approximately 5 seconds.
Burner crown is blocked
with food residues
Make sure that the injector is not blocked and the
burner crown is clear of
food particles.
The fuse in the fuse box
is released
Control the fuse. If the
fuse is released more
than one time, refer to a
qualified electrician.
The oven does not heatupThe necessary settings
The oven lamp does not
operate
Steam and condensation
settle on the food and in
the oven cavity
If you cannot find a solution to the problem yourself, contact your dealer or the
service centre.
We recommend that you write the data here:
Model (MOD.) .........................................
Product number (PNC) .........................................
Serial number (S.N.) .........................................
13. INSTALLATION
WARNING!
Refer to "Safety information"
chapter.
are not set
The oven lamp is defective
You left the dish in the
oven for too long
The necessary data for the service centre
is on the rating plate. The rating plate is
on the front frame of the oven cavity.
Control the settings
Replace the oven lamp
Do not leave the dishes in
the oven for longer than
15-20 minutes after the
cooking process ends
Page 23

ENGLISH 23
13.1 Location of the appliance
mm
NORMAL
POWER
B
Type
of gas
G30
pane
G31
G30
pane
G31
A
You can install your freestanding appliance with cabinets on one or two sides
and in the corner.
Minimum distances
Dimen-
sion
A 690
B 150
Gas burners
REDUC-
BURNER
ED
POWER
kW kW mbar mm g/h
Auxiliary
0,35 1,00 Butane
burner
0,31 0,85 Pro-
Semi-
0,43 2,00 Butane
rapid
burner
0,38 1,70 Pro-
13.2 Technical Data
Dimensions
Height 855 mm
Width 600 mm
Depth 600 mm
Total electricity
power
Gas Category I3B/P
Gas Supply G30 / G31 30
By-pass diameters
Burner Ø By-pass in
Auxiliary 29
Semi-rapid 32
Rapid 67
Pres-
sure
Injector
diameter
30 0,50 25,45 72,71
30 0,50 22,14 60,70
30 0,71 31,27
30 0,71 27,14
2035,6 W
1/100 mm
Usage
(mini-
mum
flame)
mbar
Usge:
(maxi-
mum
flame)
145,4
121,4
3
0
Page 24

www.electrolux.com
24
RE-
NORMAL
POWER
Type
of gas
BURNER
DUCED
POWER
kW kW mbar mm g/h
Triplecrown
burner
1,80 4,00 Butane
G30
1,60 3,50 Pro-
pane
G31
13.3 Gas Connection
Choose fixed connections or use a flexible
pipe in stainless steel in compliance with
the regulation in force. If you use flexible
metallic pipes, be careful they do not
come in touch with mobile parts or they
are not squeezed.
13.4 Flexible nonmetal pipes
connection
If it is possible to easily and fully control
the gas connection, you can use a flexible
pipe. You must tightly attach the flexible
pipe by clamps.
To install, use a pipe holder. Make sure
that you tightly attach the pipe holder to
the gasket, and then continue with the
gas connection. The flexible pipe is correct when:
– It cannot become hotter than room
temperature or higher than 30 °C.
– It is no longer than 1500 mm.
– It does not compress.
– It is not subject to traction or torsion.
– It does not make contact with sharp
edges or corners.
– You can easily examine it in order to
check its condition.
To preserve the flexible pipe, you must
regularly check if:
– It does not show cracks, cuts or burn
marks on the two ends and its length.
– The material is correctly elastic and not
hardened.
– The fastening clamps are not rusted.
– It is not expired.
If you can see one or more defects, do
not repair the pipe, but replace it.
Pres-
sure
Injector
diameter
(mini-
mum
flame)
30 1,01 130,88
30 1,01 114,26
After installation is complete, use
a soapy solution and never a
flame to see if you sealed all the
pipe fittings perfectly.
The gas supply ramp is on the rear side of
the control panel.
WARNING!
Before gas connection disconnect the mains plug from the
mains socket or switch off the
fuse in the fuse box. Close the
primary valve of the gas supply.
Usage
Usge:
(maxi-
mum
flame)
290,8
5
249,9
5
ABC
DE
A)
Gas connection point (only one point
is applicable for appliance)
B)
Gasket
C)
Adjustable connection
D)
Natural Gas pipe holder
E)
LPG pipe holder
The appliance is set to default
gas, to change the setting choose
pipe holder from the list. Always
use the gasket sealing
Page 25

13.5 Adjustment to different
types of gas
WARNING!
Let only an authorized person do
the adjustment to different types
of gas.
This appliance is for operation
with natural gas.
With the correct injectors, you can
also operate it with liquid gas.
WARNING!
Before replacing the injectors,
make sure that the gas knobs are
in the Off position and disconnect
the appliance from the electrical
supply. Let the appliance cool off
fully. There is a risk of injury.
13.6 Injectors replacement
1.
Remove the pan supports.
2.
Remove the caps and crowns of the
burner.
3.
With a socket spanner 7 remove the
injectors and replace them with the
ones which are necessary for the type
of gas you use.
4.
Assemble the parts, follow the same
procedure backwards.
5.
Replace the rating plate (it is near the
gas supply pipe) with the one for the
new type of gas supply. You can find
this plate in the package supplied
with the appliance.
ENGLISH 25
If the supply gas pressure is changeable
or different from the necessary pressure,
you must fit an applicable pressure adjuster on the gas supply pipe.
13.7 Adjustment of minimum
level
To adjust the minimum level of the burners:
1.
Light the burner.
2.
Turn the knob on the minimum position.
3.
Remove the knob.
4.
With a thin screwdriver, adjust the bypass screw position (A).
A
• If you change from natural gas to liquid
gas, fully tighten the adjustment screw
in.
• If you change from liquid gas to natural
gas, undo the by-pass screw approximately 1/4 of a turn.
WARNING!
Make sure the flame does not go
out when you quickly turn the
knob from the maximum position
to the minimum position.
Page 26

www.electrolux.com
26
13.8 Levelling
WARNING!
Before you assemble the adjustable feet, you must remove the accessories from the oven and the
adjustable feet from the plastic
bag.
1.
Open the lid of the appliance and disassemble the lid, the pan supports
and the 4 burner assemblies.
2.
Put the appliance on its lateral side
on a clean and smooth surface. Assemble the 4 adjustable feet pieces
into the feet support.
AB
Page 27

max. 5 mm
ENGLISH 27
3.
If the floor is not equally flat, use the
adjustable feet on the bottom of the
appliance to set a stable position for
the appliance. The length of the feet
must be no more than 5 mm.
4.
To install all the accessories, do the
first step in the opposite sequence.
13.9 Electrical installation
WARNING!
Only a qualified and competent
person must do the electrical installation.
14. ENVIRONMENT CONCERNS
Recycle the materials with the symbol
. Put the packaging in applicable
containers to recycle it.
Help protect the environment and human
health and to recycle waste of electrical
The manufacturer is not responsible if you do not follow safety precautions from chapter "Safety information".
This appliance is supplied with a main
plug and a main cable.
The power cable must not touch
the part of the appliance shown in
the illustration.
and electronic appliances. Do not dispose
appliances marked with the symbol
with the household waste. Return the
product to your local recycling facility or
contact your municipal office.
Page 28

www.electrolux.com
28
СОДЕРЖАНИЕ
1. СВЕДЕНИЯ ПО ТЕХНИКЕ БЕЗОПАСНОСТИ . . . . . . . . . . . . . . . . . . . . . . . . . . . . . . . . . . . . . . . . . . . . . . 29
2. УКАЗАНИЯ ПО БЕЗОПАСНОСТИ . . . . . . . . . . . . . . . . . . . . . . . . . . . . . . . . . . . . . . . . . . . . . . . . . . . . . . . 30
3. ОПИСАНИЕ ИЗДЕЛИЯ . . . . . . . . . . . . . . . . . . . . . . . . . . . . . . . . . . . . . . . . . . . . . . . . . . . . . . . . . . . . . . . . 34
4. ПЕРЕД ПЕРВЫМ ИСПОЛЬЗОВАНИЕМ . . . . . . . . . . . . . . . . . . . . . . . . . . . . . . . . . . . . . . . . . . . . . . . . . . 35
5. ВАРОЧНАЯ ПАНЕЛЬ - ЕЖЕДНЕВНОЕ ИСПОЛЬЗОВАНИЕ . . . . . . . . . . . . . . . . . . . . . . . . . . . . . . . . . . 35
6. ВАРОЧНАЯ ПАНЕЛЬ - ПОЛЕЗНЫЕ СОВЕТЫ . . . . . . . . . . . . . . . . . . . . . . . . . . . . . . . . . . . . . . . . . . . . . 36
7. ВАРОЧНАЯ ПАНЕЛЬ - УХОД И ЧИСТКА . . . . . . . . . . . . . . . . . . . . . . . . . . . . . . . . . . . . . . . . . . . . . . . . . 37
8. ДУХОВОЙ ШКАФ - ЕЖЕДНЕВНОЕ ИСПОЛЬЗОВАНИЕ . . . . . . . . . . . . . . . . . . . . . . . . . . . . . . . . . . . . . 37
9. ДУХОВОЙ ШКАФ - ИСПОЛЬЗОВАНИЕ ДОПОЛНИТЕЛЬНЫХ ПРИНАДЛЕЖНОСТЕЙ . . . . . . . . . . . . 38
10. ДУХОВОЙ ШКАФ - ПОЛЕЗНЫЕ СОВЕТЫ . . . . . . . . . . . . . . . . . . . . . . . . . . . . . . . . . . . . . . . . . . . . . . . . 40
11. ДУХОВОЙ ШКАФ - УХОД И ЧИСТКА . . . . . . . . . . . . . . . . . . . . . . . . . . . . . . . . . . . . . . . . . . . . . . . . . . . . . 46
12. ЧТО ДЕЛАТЬ, ЕСЛИ ... . . . . . . . . . . . . . . . . . . . . . . . . . . . . . . . . . . . . . . . . . . . . . . . . . . . . . . . . . . . . . . . . 50
13. УСТАНОВКА . . . . . . . . . . . . . . . . . . . . . . . . . . . . . . . . . . . . . . . . . . . . . . . . . . . . . . . . . . . . . . . . . . . . . . . . 51
14. ОХРАНА ОКРУЖАЮЩЕЙ СРЕДЫ . . . . . . . . . . . . . . . . . . . . . . . . . . . . . . . . . . . . . . . . . . . . . . . . . . . . . . . 55
МЫ ДУМАЕМ О ВАС
Благодарим Вас за приобретение прибора Electrolux. Вы выбрали изделие, за которым стоят десятилетия
профессионального опыта и инноваций. Уникальное и стильное, оно создавалось с заботой о Вас.
Поэтому когда бы Вы ни воспользовались им, Вы можете быть уверены: результаты всегда будут
превосходными.
Добро пожаловать в Electrolux!
На нашем веб-сайте Вы сможете:
Найти рекомендации по использованию изделий, руководства по эксплуатации, мастер
устранения неисправностей, информацию о техническом обслуживании:
www.electrolux.com
Зарегистрировать свое изделия для улучшения обслуживания:
www.electrolux.com/productregistration
Приобрести дополнительные принадлежности, расходные материалы и фирменные запасные
части для своего прибора:
www.electrolux.com/shop
ПОДДЕРЖКА ПОТРЕБИТЕЛЕЙ И СЕРВИСНОЕ ОБСЛУЖИВАНИЕ
Мы рекомендуем использовать оригинальные запчасти.
При обращении в сервис-центр следует иметь под рукой следующую информацию.
Данная информация находится на табличке с техническими данными. Модель, код изделия (PNC),
серийный номер.
Внимание / Важные сведения по технике безопасности.
Общая информация и рекомендации
Информация по защите окружающей среды
Право на изменения сохраняется.
Page 29

1. СВЕДЕНИЯ ПО ТЕХНИКЕ БЕЗОПАСНОСТИ
Перед установкой и эксплуатацией прибора внимательно озна‐
комьтесь с приложенным руководством. Производитель не не‐
сет ответственность за травмы и повреждения, полученные/
вызванные неправильной установкой и эксплуатацией. Поза‐
ботьтесь о том, чтобы данное руководство было у Вас под ру‐
кой на протяжении всего срока службы прибора.
1.1 Безопасность детей и лиц с ограниченными
возможностями
ВНИМАНИЕ!
Существует риск удушья, получения травм или стойких
нарушений нетрудоспособности.
• Данный прибор может эксплуатироваться детьми старше 8
лет и лицами с ограниченными физическими, сенсорными
или умственными способностями или с недостаточным опы‐
том или знаниями только при условии нахождения под прис‐
мотром лица, отвечающего за их безопасность.
• Не позволяйте детям играть с прибором.
• Храните все упаковочные материалы вне досягаемости де‐
тей.
• Не подпускайте детей и домашних животных к прибору, ко‐
гда он работает или остывает. Доступные для контакта ча‐
сти прибора сохраняют высокую температуру.
• Если прибор оснащен функцией «Защита от детей», реко‐
мендуется включить эту функцию.
• Очистка и доступное пользователю техническое обслужива‐
ние не должно производиться детьми без присмотра.
РУССКИЙ 29
1.2 Общие правила техники безопасности
• Прибор и его доступные для контакта части сильно нагре‐
ваются во время эксплуатации. Не прикасайтесь к нагрева‐
тельным элементам.
Page 30

www.electrolux.com
30
• Не эксплуатируйте данный прибор с помощью внешнего
• Оставление на варочной панели продуктов, готовящихся на
• Ни в коем случае не пытайтесь залить пламя водой; вместо
• Не используйте варочные панели для хранения каких-либо
• Не используйте пароочистители для очистки прибора.
• Не следует класть на варочную поверхность металлические
• Не используйте жесткие абразивные чистящие средства или
• Для извлечения направляющих для противня вытяните сна‐
• Перед открыванием удалите с крышки явные загрязнения.
таймера или отдельной системы дистанционного управле‐
ния.
жире или масле, может представлять опасность и привести
к пожару.
этого выключите прибор и накройте пламя, например, кры‐
шкой или противопожарным одеялом.
предметов.
предметы, такие, как ножи, вилки, ложки и крышки, так как
они могут нагреваться.
острые металлические скребки для чистки стеклянной двер‐
цы, так как ими можно поцарапать его поверхность, в ре‐
зультате чего стекло может лопнуть.
чала переднюю, а затем заднюю часть направляющей про‐
тивня из боковой стенки - движением, направленным от
стенки. Установка направляющих для противня производит‐
ся в обратном порядке.
Перед тем, как закрывать крышку, дайте варочной панели
остыть.
2.
УКАЗАНИЯ ПО БЕЗОПАСНОСТИ
Данный прибор подходит для следующих
рынков: IL
RU
2.1 Установка
ВНИМАНИЕ!
Установка прибора должна осуще‐
ствляться только квалифицирован‐
ным персоналом!
• Удалите всю упаковку.
Page 31

• Не устанавливайте и не подключайте при‐
бор, если он имеет повреждения.
• Следуйте приложенным к прибору инструк‐
циям по его установке.
• Прибор имеет большой вес: не забывайте
о мерах предосторожности при его переме‐
щении. Обязательно используйте защит‐
ные перчатки.
• При перемещении прибора не тяните его
за ручку.
• Выдерживайте минимально допустимые за‐
зоры между соседними приборами и пред‐
метами мебели.
• Убедитесь, что мебель под и рядом с при‐
бором надежно закреплена.
• Другие приборы или предметы мебели, на‐
ходящиеся по обе стороны прибора, дол‐
жны иметь ту же высоту.
• Не устанавливайте прибор на подставку.
• Не устанавливайте прибор возле дверей
или под окнами. Это позволит избежать па‐
дения с прибора кухонной посуды при от‐
крывании двери или окна.
Подключение к электросети
ВНИМАНИЕ!
Существует риск пожара и пораже‐
ния электрическим током.
• Все подключения к электросети должны
производиться квалифицированным элек‐
триком.
• Прибор необходимо заземлить.
• Убедитесь, что указанные на табличке с
техническими данными параметры элек‐
тропитания соответствуют параметрам
электросети. В противном случае обрат‐
итесь к электрику.
• Для подключения прибора необходимо ис‐
пользовать установленную надлежащим
образом электробезопасную розетку.
• Не используйте тройники и удлинители.
• Позаботьтесь о том, чтобы не повредить
вилку и сетевой кабель. Для замены повре‐
жденного сетевого кабеля обратитесь в
сервисный центр или к электрику.
• Не допускайте контакта сетевых кабелей с
дверцей прибора, особенно если дверца
сильно нагрета.
• Детали, защищающие токоведущие или
изолированные части прибора, должны
быть закреплены так, чтобы их было невоз‐
РУССКИЙ 31
можно удалить без специальных инстру‐
ментов.
• Вставляйте вилку сетевого кабеля в розет‐
ку только по окончании установки прибора.
Убедитесь, что после установки прибора к
вилке электропитания имеется свободный
доступ.
• Не подключайте прибор к розетке электро‐
питания, если она плохо закреплена или
если вилка неплотно входит в розетку.
• Не тяните за кабель электропитания для
отключения прибора от электросети. Все‐
гда беритесь за вилку сетевого кабеля.
• Используйте только подходящие устрой‐
ства для изоляции: предохранительные ав‐
томатические выключатели, плавкие пред‐
охранители (резьбовые плавкие предохра‐
нители, выкручивающиеся из гнезда), авто‐
маты защиты от тока утечки и замыкатели.
• Прибор должен быть подключен к электро‐
сети через устройство для изоляции, по‐
зволяющее отсоединять от сети все контак‐
ты. Устройство для изоляции должно обес‐
печивать зазор между разомкнутыми кон‐
тактами не менее 3 мм.
Подключение к газовой магистрали
• Все газовые подключения должны произво‐
диться квалифицированным специалистом.
• Убедитесь, что вокруг прибора имеется до‐
статочная вентиляция.
• Данные о подводе газа приведены на та‐
бличке с техническими данными.
• Данный прибор не соединяется с вытяж‐
ным устройством, удаляющим продукты го‐
рения. Удостоверьтесь, что подключение
прибора производится в соответствии с
действующими правилами. Уделите особое
внимание обеспечению надлежащей венти‐
ляции.
2.2 Эксплуатация
ВНИМАНИЕ!
Существует риск травмы, ожога или
поражения электрическим током.
• Используйте прибор в жилых помещениях.
• Не изменяйте параметры данного прибора.
• Удостоверьтесь, что вентиляционные от‐
верстия не закрыты.
• Не оставляйте прибор без присмотра во
время его работы.
Page 32

www.electrolux.com
32
• Прибор необходимо выключать после ка‐
• Во время работы прибора его внутренняя
• Соблюдайте осторожность, открывая двер‐
• При использовании прибора не касайтесь
• Не надавливайте на открытую дверцу при‐
• При работе прибора его дверца должна
• Не кладите на конфорки столовые приборы
• После каждого использования выключайте
• Не используйте прибор как столешницу или
• Обеспечьте достаточную вентиляцию по‐
• Пользуйтесь только устойчивой посудой
• Убедитесь, что пламя не гаснет при бы‐
• Удостоверьтесь, что посуда размещена по
• Используйте только принадлежности, по‐
• Не устанавливайте на горелку рассекатели
• При нагреве жиры и масла могут выделять
• Образуемые сильно нагретым маслом па‐
ждого использования.
камера сильно нагревается. Не прикасай‐
тесь к нагревательным элементам внутри
прибора. Помещая в прибор или извлекая
из него посуду или принадлежности духо‐
вого шкафа, всегда используйте кухонные
рукавицы.
цу прибора во время его работы. Может
произойти высвобождение горячего возду‐
ха.
его мокрыми руками. Не касайтесь прибо‐
ра, если на него попала вода.
бора.
быть закрыта.
или крышки кастрюль. Они могут сильно
нагреться.
конфорку.
подставку для каких-либо предметов.
мещения, в котором установлен прибор.
подходящей формы. Диаметр дна посуды
должен превышать размеры конфорок.
стром повороте ручки из максимального в
минимальное положение.
центру зон нагрева и не выдается за края
варочной панели.
ставляемые вместе с прибором.
пламени.
ВНИМАНИЕ!
Существует опасность возгорания
или взрыва.
легковоспламеняющиеся пары. Не допу‐
скайте присутствия открытого пламени и
нагретых предметов при использовании
для приготовления жиров и масел.
ры могут привести самопроизвольному воз‐
горанию.
• Использованное масло может содержать
остатки продуктов, что может привести к
его возгоранию при более низких темпера‐
турах по сравнению с маслом, которое ис‐
пользуется в первый раз.
• Не кладите на прибор, рядом с ним или
внутрь него легковоспламеняющиеся мате‐
риалы или изделия, пропитанные легково‐
спламеняющимися веществами.
• При открывании дверцы прибора рядом с
ним не должно быть искр или открытого
пламени.
• Соблюдайте осторожность, открывая двер‐
цу прибора. При использовании ингредиен‐
тов, содержащих алкоголь, может образ‐
овываться воздушно-спиртовая смесь.
ВНИМАНИЕ!
Существует риск повреждения при‐
бора.
• Для предупреждения повреждения и изме‐
нения цвета эмали:
– Не помещайте непосредственно на дно
прибора посуду и иные предметы.
– Не кладите непосредственно на дно при‐
бора алюминиевую фольгу.
– не наливайте в нагретый прибор воду.
– не храните влажную посуду и продукты в
приборе после окончания приготовления
пищи.
– соблюдайте осторожность при установке
и извлечении аксессуаров.
• Изменение цвета эмали не влияет на эф‐
фективность работы прибора. Оно не явл‐
яется дефектом с точки зрения закона о га‐
рантийных обязательствах.
• Для влажных пирогов используйте глубокий
противень. Соки из фруктов могут вызы‐
вать появление пятен, удалить которые бу‐
дет невозможно.
• Не ставьте на панель управления горячую
кухонную посуду.
• Не позволяйте жидкости полностью выки‐
пать из посуды.
• Не допускайте падения на поверхность
прибора каких-либо предметов или кухон‐
ной посуды. Это может привести к ее по‐
вреждению.
• Не включайте конфорки без кухонной посу‐
ды или с пустой кухонной посудой.
• Не кладите на прибор алюминиевую фоль‐
гу.
Page 33

• Стеклокерамическую поверхность можно
поцарапать, передвигая по нему чугунную
или алюминиевую посуду, а также посуду с
поврежденным дном. При перемещении по‐
добных предметов обязательно поднимай‐
те их с варочной поверхности.
Крышка
• Не изменяйте параметры данной крышки.
•Регулярно очищайте крышку.
• Не открывайте крышку, когда на поверхно‐
сти имеются брызги.
• Не закрывайте крышку до тех пор, пока ва‐
рочная панель и духовой шкаф полностью
не остынут.
• Стеклянная крышка может расколоться при
нагревании (если это применимо).
2.3 Уход и очистка
ВНИМАНИЕ!
Существует риск травмы, пожара или
повреждения прибора.
• Перед выполнением операций по очистке и
уходу выключите прибор и извлеките вилку
сетевого кабеля из розетки.
• Убедитесь, что прибор остыл. В противном
случае стеклянные панели могут треснуть.
• Поврежденные стеклянные панели следует
заменять незамедлительно. Обратитесь в
сервисный центр.
• Соблюдайте осторожность при снятии
дверцы с прибора. Дверца имеет большой
вес!
• Во избежание повреждения покрытия при‐
бора производите его регулярную очистку.
РУССКИЙ 33
• Оставшиеся внутри прибора жир или остат‐
ки пищи могут стать причиной пожара.
• Очищайте прибор мягкой влажной тряпкой.
Используйте только нейтральное моющее
средство. Не используйте абразивные
средства, абразивные губки, растворители
или металлические предметы.
• В случае использования спрея для очистки
духового шкафа следуйте инструкции по
безопасности на его упаковке.
• Не очищайте каталитическую эмаль (если
прибор имеет соответствующее покрытие)
какими-либо моющими средствами.
• Не мойте горелки в посудомоечной маши‐
не.
2.4 Внутреннее освещение
• В приборе используется модуль подсветки
или галогеновая лампа, предназначенная
только для бытовых приборов. Не исполь‐
зуйте их для освещения дома.
ВНИМАНИЕ!
Существует опасность поражения
электрическим током.
• Перед заменой лампы отключите электро‐
питание прибора.
• Используйте только лампы той же специ‐
фикации.
2.5 Утилизация
ВНИМАНИЕ!
Существует опасность травмы или
удушья.
• Отключите прибор от сети электропитания.
• Отрежьте кабель электропитания и утили‐
зируйте его.
• Удалите защелку дверцы, чтобы предот‐
вратить риск ее запирания на случай, если
внутри прибора окажутся дети и домашние
животные.
Page 34

www.electrolux.com
34
3. ОПИСАНИЕ ИЗДЕЛИЯ
3.1 Общий обзор
1 2 3
4
10
3.2 Функциональные элементы варочной панели
3
2
1
9
4
5
6
7
8
Ручка управления таймером
2
Ручка регулировки температуры
3
Индикатор температуры
4
Ручка выбора режимов духового шкафа
5
Нагревательный элемент
6
Лампа освещения духового шкафа
7
Вентилятор
8
Табличка с техническими данными
9
Положение противней
10
Ручки управления варочной панелью
1
1
4
2
3
3.3 Принадлежности
• Полка духового шкафа
Для установки посуды, форм для выпечки,
размещения мяса для жаркого.
• Плоский алюминиевый противень для вы‐
печки
Для пирогов и печенья.
• Сотейник
Для выпекания кондитерских изделий, жар‐
ки мяса или для использования в качестве
противня для сбора жира.
Горелка для ускоренного приготовления
1
(63 мм)
Горелка для ускоренного приготовления
2
(63 мм)
Вспомогательная горелка (47 мм)
3
Горелка с тройным рассекателем (126
4
мм)
• Телескопические направляющие (не во
всех моделях)
Для установки на них полок или противней.
Доступны для приобретения отдельно.
• Отделение для хранения
Под духовым шкафом находится отделе‐
ние для хранения.
Для использования отделения поднимите
нижнюю переднюю дверцу, а затем потяни‐
те ее вниз.
ВНИМАНИЕ!
Отделение для хранения может на‐
греться во время работы прибора.
Page 35

4. ПЕРЕД ПЕРВЫМ ИСПОЛЬЗОВАНИЕМ
РУССКИЙ 35
ВНИМАНИЕ!
См. Главу "Сведения по технике
безопасности".
ПРЕДУПРЕЖДЕНИЕ!
Открывая дверцу духового шкафа,
всегда беритесь за центральную
часть ручки.
4.1 Предварительная чистка
духового шкафа
• Выньте из духового шкафа все съемные
элементы.
• Перед первым использованием вымойте
духовой шкаф.
ПРЕДУПРЕЖДЕНИЕ!
Не используйте для чистки абразив‐
ные моющие средства! Они могут
привести к повреждению поверхно‐
сти. См. раздел "Уход и чистка".
2.
Дайте прибору поработать около часа.
Не ставьте в него пищу.
3.
Задайте функцию и максимальную
температуру.
4.
Дайте прибору поработать около 10 ми‐
нут. Не ставьте в него пищу.
5.
Задайте функцию и максимальную
температуру.
6.
Дайте прибору поработать около 10 ми‐
нут. Не ставьте в него пищу.
Это необходимо, чтобы в приборе выгорели
остатки. Принадлежности могут нагреться
больше, чем обычно. При использовании
предварительного разогрева прибора в пер‐
вый раз могут появиться запахи и дым. Это
обычное явление. Убедитесь, что есть доста‐
точная циркуляция воздуха.
4.2 Предварительный разогрев
1.
Задайте функцию и максимальную
температуру.
5. ВАРОЧНАЯ ПАНЕЛЬ - ЕЖЕДНЕВНОЕ ИСПОЛЬЗОВАНИЕ
ВНИМАНИЕ!
См. Главу "Сведения по технике
безопасности".
5.1 Розжиг горелки
ВНИМАНИЕ!
Будьте внимательны при использова‐
нии открытого огня на кухне. Изгото‐
витель не несет ответственность в
случае неправильного обращения с
огнем.
Всегда зажигайте горелку, прежде
чем поставить на нее посуду.
Включение горелки:
1.
Нажмите до упора на ручку нужной кон‐
форки и поверните ее вправо до макси‐
мальной отметки
ручку автоматически срабатывает роз‐
жиг.
. При нажатии на
2.
Держите ручку нажатой еще в течение
приблизительно 10 секунд. Это время
требуется для нагрева термопары. В про‐
тивном случае подача газа будет прекра‐
щена.
3.
Отрегулируйте пламя после того, как оно
станет равномерным.
Если после нескольких попыток раз‐
жечь горелку не удалось, проверьте
правильность положения рассекате‐
ля и крышки горелки.
Page 36

www.electrolux.com
36
Зажечь горелку можно и без системы
A
B
C
электророзжига (напрмер, когда в
электророзетках на кухне отсутствует
питание). Для этого необходимо под‐
нести пламя к горелке, нажать соот‐
ветствующую ручку управления и по‐
вернуть ее против часовой стрелки,
установив ее в положение макси‐
мальной подачи газа.
A)
Крышка горелки
B)
Рассекатель горелки
C)
Свеча зажигания
D)
Термопара
ВНИМАНИЕ!
Не держите ручку управления нажа‐
той более 15 секунд.
Если розжига горелки не происходит
через 15 секунд, отпустите ручку
управления, поверните ее в положе‐
ние «Выкл» и попытайтесь снова раз‐
жечь горелку, подождав по меньшей
мере 1 минуту.
D
A
B
C
D
Если горелка случайно погаснет, ус‐
тановите соответствующую ручку
управления в положение "Выкл" и по‐
пробуйте выполнить розжиг горелки
снова как минимум через 1 минуту.
Электророзжиг может срабатывать
автоматически при подаче электро‐
питания на прибор после установки
или восстановления электроснабже‐
ния. Это - нормальное явление.
5.2 Выключение горелки
Чтобы потушить пламя, поверните ручку на
символ
.
ВНИМАНИЕ!
Всегда уменьшайте или гасите пламя
перед тем, как снимать посуду с кон‐
форки.
6. ВАРОЧНАЯ ПАНЕЛЬ - ПОЛЕЗНЫЕ СОВЕТЫ
6.1 Экономия энергии
• По возможности всегда накрывайте посуду
крышками.
• Как только жидкость начинает закипать,
уменьшайте пламя горелки до самого низ‐
Горелка Диаметры посуды Рекомендуемые диаметры посуды
С тройным рас‐
секателем
160 - 240 мм 240 мм
кого уровня, достаточного для кипения
жидкости.
Используйте только ту посуду, диаметр кото‐
рой соответствует размерам конфорок.
Page 37

Горелка Диаметры посуды Рекомендуемые диаметры посуды
Ускоренного
140 - 240 мм 240 мм
приготовления
Вспомогатель‐
120 - 180 мм 180 мм
ная
Следует использовать посуду с как можно бо‐
лее толстым и плоским дном.
7. ВАРОЧНАЯ ПАНЕЛЬ - УХОД И ЧИСТКА
РУССКИЙ 37
ВНИМАНИЕ!
См. Главу "Сведения по технике
безопасности".
ВНИМАНИЕ!
Прежде чем приступать к чистке при‐
бора, выключите его и дайте ему ос‐
тыть.
ВНИМАНИЕ!
Из соображений вашей безопасности
запрещена очистка прибора от за‐
грязнений с помощью пароструйных
аппаратов или устройств мойки под
давлением.
ВНИМАНИЕ!
Никогда не используйте стальные
губки, а также кислотные или абра‐
зивные средства, т.к. они могут по‐
вредить поверхности духового шка‐
фа.
• Для того, чтобы очистить покрытые эмалью
детали, крышку и рассекатель горелки,
промойте их теплой водой с мылом.
• Детали из нержавеющей стали следует
промыть водой и затем вытереть насухо
мягкой тканью.
• Решетки конфорок не рассчитаны на мойку
в посудомоечной машине. Их необходимо
мыть вручную.
• Удостоверьтесь в правильности установки
решеток конфорок после их очистки.
• Для правильной работы горелок проверьте,
чтобы лапки решеток располагались по
центру горелки.
• Чтобы не повредить варочную панель,
будьте внимательны при установке подста‐
вок для посуды.
По завершении чистки следует протереть
прибор насухо мягкой тканью.
8. ДУХОВОЙ ШКАФ - ЕЖЕДНЕВНОЕ ИСПОЛЬЗОВАНИЕ
ВНИМАНИЕ!
См. Главу "Сведения по технике
безопасности".
3.
Чтобы отключить духовой шкаф, устано‐
вите ручку выбора режима духового шка‐
фа в положение «Выкл».
8.1 Включение и выключение
духового шкафа
1.
Установите ручку выбора режима духово‐
го шкафа на соответствующий режим.
2.
Поворотом ручки термостата задайте
нужную температуру.
При повышении температуры духового
шкафа включается индикатор температу‐
ры.
8.2 Предохранительный термостат
Для предотвращения опасного перегрева изза неправильного использования прибора или
неисправности какого-либо компонента духо‐
вой шкаф оборудован предохранительным
термостатом, отключающим электропитание
при необходимости. При снижении температу‐
ры духовой шкаф автоматически включается
снова.
Page 38

www.electrolux.com
38
8.3 Режимы духового шкафа
8.4 Таймер
Используется для того, чтобы задать время
обратного отсчета.
Сначала поверните ручку таймера (см. Главу
«Описание изделия») по часовой стрелке до
упора. Затем поверните ее против часовой
стрелки до отметки необходимого периода
времени. По окончании этого периода време‐
ни прибор выдает звуковой сигнал и автома‐
тически выключается. Поверните ручки выбо‐
ра режима духового шкафа и термостата в
положение «Выкл».
Режим духового шкафа Применение
Положение
«Выкл»
Верхний + нижний
нагрев
Нижний нагрева‐
тельный элемент
Верхний нагрева‐
тельный элемент
с вентилятором
Нагрев с помощью верхнего и нижнего нагревательных эле‐
ментов. Выпекание и жарка на одном уровне духового шка‐
Тепло поступает только снизу духового шкафа. Приготовле‐
ние пирогов с хрустящей корочкой или основой.
Особенно для удобства приготовления таких блюд как безе,
бисквиты, сливочный пирог, швейцарский рулет (рулет с
Прибор выключен.
фа.
джемом).
Приготовление на гриле небольшого количества тонких кус‐
Гриль
ков продуктов в центре решетки. Приготовление тостов.
Максимальная температура для этого режима составляет
210°C.
Этот режим позволяет одновременно готовить разные блю‐
да, требующие одинаковой температуры приготовления, на
разных уровнях и без взаимопроникновения запахов. При
Горячий воздух
использовании данной функции понизьте температуру духо‐
вого шкафа на 20°C – 40°C по сравнению со обычной темпе‐
ратурой, которую Вы выбираете при приготовлении в режи‐
ме «Верхний + нижний нагрев».
Размораживание
Размораживание замороженных продуктов. В этом режиме
ручка термостата должна находиться в положении «Выкл».
При необходимости повторного ис‐
пользования таймера дождитесь зав‐
ершения выполнения всех его функ‐
ций и возвращения его ручки в нуле‐
вое положение.
Для приготовления без заданного пе‐
риода времени поверните ручку тай‐
мера в позицию
.
9. ДУХОВОЙ ШКАФ - ИСПОЛЬЗОВАНИЕ ДОПОЛНИТЕЛЬНЫХ
ПРИНАДЛЕЖНОСТЕЙ
ВНИМАНИЕ!
См. Главу "Сведения по технике
безопасности".
Page 39

9.1 Вставьте противень для выпечки
Поместите противень в центре камеры духо‐
вого шкафа между передней и задней стенка‐
ми. Это обеспечит свободную циркуляцию
тепла спереди и сзади противня для выпечки.
Противень обязательно следует расположить
как показано на рисунке: скосом к задней
стенке камеры духового шкафа.
ВНИМАНИЕ!
Не сдвигайте противень для выпечки
к задней стенке камеры духового
шкафа до упора. Это не позволит
теплу свободно циркулировать вокруг
противня. Продукты могут подгореть,
особенно в задней части противня.
9.2 Установка принадлежностей для духового шкафа
Вставляйте выдвижные принадлежности та‐
ким образом, чтобы двухсторонние кромки
были расположены в задней части духового
шкафа по направлению вниз. Вставляйте вы‐
движные принадлежности между направляю‐
щими одного из уровней духового шкафа.
РУССКИЙ 39
Установка полки духового шкафа вместе с со‐
тейником
Уложите полку духового шкафа на сотейник.
Вставьте сотейник между направляющими од‐
ного из уровней духового шкафа.
Page 40

www.electrolux.com
40
10. ДУХОВОЙ ШКАФ - ПОЛЕЗНЫЕ СОВЕТЫ
ПРЕДУПРЕЖДЕНИЕ!
Для очень влажных пирогов исполь‐
зуйте глубокий противень. Фруктовые
соки могут оставить на эмали невы‐
водимые пятна.
• В приборе предусмотрено четыре уровня
установки полок. Уровни установки полок
отсчитываются от дна духового шкафа.
• Одновременно можно готовить разные
блюда на двух уровнях. Поместите полки
на уровни 1 и 3.
• В устройстве или на стеклянной дверце мо‐
жет конденсироваться влага. Это нормаль‐
но. Всегда отходите от прибора при откры‐
вании дверцы во время приготовления. Для
уменьшения конденсации прогрейте при‐
бор в течение 10 минут перед началом
приготовления.
• Всегда вытирайте влагу после каждого ис‐
пользования прибора.
• Запрещается помещать какие-либо пред‐
меты непосредственно на дно прибора и
накрывать его компоненты алюминиевой
фольгой во время приготовления. Это мо‐
жет изменить результаты приготовления и
повредить эмалевое покрытие.
10.1 Приготовление выпечных
блюд
• Перед началом приготовления выпечных
блюд прогрейте духовой шкаф в течение
примерно 10 минут.
• Не открывайте дверцу духового шкафа, по‐
ка не пройдет 3/4 времени приготовления.
• При одновременном использовании двух
противней для выпекания оставляйте меж‐
ду ними пустой уровень.
10.2 Приготовление мяса и рыбы
• Не рекомендуется приготовлять мясо ку‐
ском менее 1 кг. При приготовлении слиш‐
ком малого количества мяса блюдо полу‐
чается сухим.
• При приготовлении очень жирных блюд ис‐
пользуйте противень для сбора жира во из‐
бежание образования пятен, удаление ко‐
торых может оказаться невозможным.
• По окончании приготовления мяса реко‐
мендуется подождать не менее 15 минут
перед тем, как разрезать его - тогда оно ос‐
танется сочным.
• Во избежание образования чрезмерного
количества дыма при жарке мяса, налейте
немного воды в противень для сбора жира.
Во избежание конденсации дыма, доливай‐
те воду в противень для сбора жира по ме‐
ре испарения воды.
10.3 Продолжительность
приготовления
Продолжительность приготовления зависит
от вида продукта, его консистенции и объема.
Вначале, следите за готовностью пищи во
время приготовления. В процессе
эксплуатации прибора опытным путем найди‐
те оптимальные параметры (уровень мощно‐
сти нагрева, продолжительность приготов‐
ления и т.д.) для использумых вами посуды,
рецептов блюд и количества продуктов.
10.4 Верхний + нижний нагрев
Продукты
Полоски из теста (250 г) эмалированный проти‐
Плоский пирог (1000 г) эмалированный проти‐
Тип и положение про‐
тивня
вень на уровне 3
вень на уровне 2
Температу‐
ра (°C)
Время
предвари‐
тельного
прогрева
(мин)
Время
приготов‐
ления /
выпека‐
ния (мин)
150 - 25 - 30
160 - 170 10 30 - 35
Page 41

РУССКИЙ 41
Продукты
Дрожжевой пирог с
яблоками (2000 г)
Яблочный пирог (1200 г
+ 1200 г)
Тип и положение про‐
тивня
эмалированный проти‐
вень на уровне 3
2 круглых противня с
алюминиевым покры‐
тием (диаметр: 20 см)
на уровне 1
Маленькие пирожные
(500 г)
Нежирный бисквитный
пирог (350 г)
эмалированный проти‐
вень на уровне 2
1 круглый противень с
алюминиевым покры‐
тием (диаметр: 26 см)
на уровне 1
Пирог на противне
(1500 г)
Цыпленок, целиком
(1350 г)
эмалированный проти‐
вень на уровне 2
полка духового шкафа
на 2 уровне, поддон
для жарки на уровне 1
Цыпленок, половинка
(1300 г)
полка духового шкафа
на 3 уровне, поддон
для жарки на уровне 1
Свиные жареные от‐
бивные котлеты (600 г)
полка духового шкафа
на 3 уровне, поддон
для жарки на уровне 1
Открытый пирог (800 г) эмалированный проти‐
вень на уровне 2
Дрожжевой пирог с на‐
чинкой (1200 г)
эмалированный проти‐
вень на уровне 2
Пицца (1000 г) эмалированный проти‐
вень на уровне 2
Сырный торт (чизкейк)
(2600 г)
Швейцарский открытый
яблочный пирог (1900
эмалированный проти‐
вень на уровне 2
эмалированный проти‐
вень на уровне 1
г)
Рождественский пирог
(2400 г)
Открытый пирог «Киш
Лорен» (1000 г)
эмалированный проти‐
вень на уровне 2
1 круглый противень
(диаметр: 26 см) на
уровне 1
Температу‐
ра (°C)
Время
предвари‐
тельного
прогрева
(мин)
Время
приготов‐
ления /
выпека‐
ния (мин)
170 - 190 - 40 - 50
180 - 200 15 50 - 60
160 - 180 10 25 - 30
160 - 170 10 25 - 30
160 - 170 -
45 - 55
200 - 220 - 60 - 70
190 - 210 - 30 - 35
190 - 210 - 30 - 35
230 - 250 20 10 - 15
170 - 180 10 - 15 25 - 35
200 - 220 10 - 15 30 - 40
170 - 190 - 60 - 70
200 - 220 10 - 15 30 - 40
170 - 180 10 - 15
55 - 65
220 - 230 10 - 15 40 - 50
1)
2)
Page 42

www.electrolux.com
42
Продукты
Крестьянский хлеб (750
г + 750 г)
Тип и положение про‐
тивня
2 круглых противня с
алюминиевым покры‐
Температу‐
ра (°C)
180 - 200
тием (диаметр: 20 см)
на уровне 1
Румынский бисквит
(600 г + 600 г)
2 круглых противня
(размер: 25 см) на
160 - 170 10 40 - 50
уровне 2
Румынский бисквит –
традиционный (600 г +
600 г)
Булочки из дрожжевого
теста (800 г)
Швейцарский рулет
(500 г)
Безе (400 г) эмалированный проти‐
2 круглых противня
(размер: 20 см) на
уровне 2
эмалированный проти‐
вень на уровне 2
эмалированный проти‐
вень на уровне 1
160 - 170 - 30 - 40
200 - 210 10 - 15 10 - 15
150 - 170 10 15 - 20
100 - 120 - 40 - 50
вень на уровне 2
Пирог с обсыпкой (1500г)эмалированный проти‐
180 - 190 10 - 15 25 - 35
вень на уровне 3
Бисквитный пирог (600г)эмалированный проти‐
160 - 170 10 25 - 35
вень на уровне 3
Сливочный пирог (600г)эмалированный проти‐
180 - 200 10 20 - 25
вень на уровне 2
1)
После выключения прибора оставьте пирог в духовом шкафу на 7 минут.
2)
После выключения прибора оставьте пирог в духовом шкафу на 10 минут.
3)
Установите температуру 250°C для предварительного прогрева.
Время
предвари‐
тельного
прогрева
(мин)
3)
18
Время
приготов‐
ления /
выпека‐
ния (мин)
60 - 70
10.5 Режим конвекции
Продукты
Полоски из тес‐
та (250 г)
Полоски из тес‐
та (250 г + 250
г)
Полоски из тес‐
та (250 г + 250 г
+ 250 г)
Тип и положе‐
ние противня
эмалированный
противень на
уровне 3
эмалированный
противень на
уровне 1 или 3
эмалированный
противень на
уровне 1, 2 или
4
Температура
(°C)
рительного про‐
грева (в мину‐
тах)
155 10 20
150 10 20
155 10 25
Время предва‐
Время
приготовления /
выпекания (в
минутах)
Page 43

РУССКИЙ 43
Продукты
Плоский пирог
(1 кг)
Плоский пирог
(1 кг + 1 кг)
Плоский пирог
(1 кг + 1 кг + 1
кг)
Дрожжевой пи‐
рог с яблоками
(2 кг)
Яблочный пирог
(1,2 кг + 1,2 кг)
Маленькие пи‐
рожные (500 г)
Маленькие пи‐
рожные (500 г +
500 г)
Маленькие пи‐
рожные (500 г +
500 г + 500 г)
Нежирный бис‐
квитный пирог
(350 г)
Пирог на про‐
тивне (1,2 кг)
Цыпленок, це‐
ликом (1,4 кг)
Тип и положе‐
ние противня
эмалированный
противень на
уровне 2
эмалированный
противень на
уровне 1 или 3
эмалированный
противень на
уровне 1, 2 или
4
эмалированный
противень на
уровне 3
2 круглых про‐
тивня с алюми‐
ниевым покры‐
тием (диаметр:
20 см) на уров‐
не 1
эмалированный
противень на
уровне 2
эмалированный
противень на
уровне 1 или 3
эмалированный
противень на
уровне 1, 2 или
4
1 круглый про‐
тивень с алюми‐
ниевым покры‐
тием (диаметр:
26 см) на уров‐
не 3
эмалированный
противень на
уровне 3
полка духового
шкафа на 2
уровне, глубо‐
кий противень
на 1 уровне
Температура
(°C)
Время предва‐
рительного про‐
грева (в мину‐
тах)
Время
приготовления /
выпекания (в
минутах)
155 10 35
145 10 50
155 10 60
170 - 180 10 40 - 50
175 10 55
150 10 35
145 10 30
160 10 40
160 10 30
150 - 160 -
40 - 50
200 - 50
1)
Page 44

www.electrolux.com
44
Продукты
Жареная свини‐
на (600 г)
Открытый пирог
(800 г)
Дрожжевой пи‐
рог с начинкой
(1,2 кг)
Пицца (1 кг + 1
кг)
Сырный торт
(чизкейк) (2,6 кг)
Швейцарский
открытый
яблочный пирог
(1,9 кг)
Рождественский
пирог (2,4 кг)
Открытый пирог
«Киш Лорен» (1
кг)
Крестьянский
хлеб (750 г +
750 г)
Румынский бис‐
квит (600 г +
600 г)
Румынский бис‐
квит – тради‐
ционный (600 г
+ 600 г)
Булочки из
дрожжевого
теста (800 г)
Тип и положе‐
ние противня
полка духового
шкафа на 2
уровне, глубо‐
кий противень
на 1 уровне
эмалированный
противень на
уровне 2
эмалированный
противень на
уровне 3
эмалированный
противень на
уровне 1 или 3
эмалированный
противень на
уровне 2
эмалированный
противень на
уровне 3
эмалированный
противень на
уровне 3
1 круглый про‐
тивень (диа‐
метр: 26 см) на
уровне 2
эмалированный
противень на
уровне 3
2 противня с
алюминиевым
покрытием
(длина: 25 см)
на уровне 2
2 противня с
алюминиевым
покрытием
(длина: 20 см)
на уровне 2
эмалированный
противень на
уровне 3
Температура
(°C)
Время предва‐
рительного про‐
грева (в мину‐
тах)
Время
приготовления /
выпекания (в
минутах)
180 - 200 - 30 - 40
230 - 250 15 10 - 15
160 - 170 - 20 - 30
180 - 200 - 50 - 60
150 - 170 - 60 - 70
180 - 200 15 40 - 50
150 - 170 10
50 - 60
210 - 230 15 35 - 45
180 - 190
15
3)
50 - 60
150 - 170 10 40 - 50
160 - 170 - 30 - 40
190 10 15
2)
Page 45

РУССКИЙ 45
Время предва‐
Продукты
Тип и положе‐
ние противня
Температура
(°C)
рительного про‐
грева (в мину‐
тах)
Булочки из
дрожжевого
теста (800 г +
эмалированный
противень на
уровне 1 или 3
200 10 15
800 г)
Швейцарский
рулет (500 г)
эмалированный
противень на
150 - 170 10 10 - 15
уровне 3
Безе (400 г) эмалированный
100 - 120 - 50 - 60
противень на
уровне 2
Безе (400 г +
400 г)
эмалированный
противень на
100 - 120 - 55 - 65
уровне 1 или 3
Безе (400 г +
400 г + 400 г)
эмалированный
противень на
115 - 125 - 65 - 75
уровне 1, 2 или
4
Пирог с посып‐
кой (1,5 кг)
эмалированный
противень на
170 - 180 10 20 - 30
уровне 2
Бисквитный пи‐
рог (600 г)
эмалированный
противень на
150- 170 10 20 - 30
уровне 2
Сливочный пи‐
рог (600 г + 600
г)
1)
После выключения прибора оставьте пирог в духовом шкафу на 7 минут.
2)
После выключения прибора оставьте пирог в духовом шкафу на 10 минут.
3)
Установите температуру 230°C для предварительного прогрева.
эмалированный
противень на
уровне 1 или 3
150 - 170 10 20 - 30
Время
приготовления /
выпекания (в
минутах)
10.6 Верхний нагрев с вентилятором
Время предва‐
рительного про‐
грева (в мину‐
тах)
1)
20
1)
20
Продукты
Полоски из тес‐
та (250 г)
Плоский пирог
(500 г)
Тип и положе‐
ние противня
эмалированный
противень на
уровне 2
эмалированный
противень на
уровне 2
Температура
(°C)
приготовления /
выпекания (в
минутах)
150 - 160 20 - 25
160 - 170 30 - 35
Время
Page 46

www.electrolux.com
46
Время предва‐
Продукты
Тип и положе‐
ние противня
рительного про‐
грева (в мину‐
тах)
Пицца (1 кг) эмалированный
противень на
20
1)
уровне 2
Швейцарский
рулет (500 г)
эмалированный
противень на
20
1)
уровне 2
Безе (400 г) эмалированный
противень на
10
1)
уровне 2
Бисквитный пи‐
рог (600 г)
эмалированный
противень на
20
1)
уровне 2
Сливочный пи‐
рог (600 г)
эмалированный
противень на
20
1)
уровне 2
Цыпленок, це‐
ликом (1,2 кг)
эмалированный
противень на
- 220 - 230 45 - 55
уровне 2
1)
Поворотом ручки термостата задайте температуру 250°C.
Информация об акриламидах
ВАЖНО! Согласно самым последним
научным исследованиям жарка пищевых
продуктов (в частности,
крахмалосодержащих) может представлять
Температура
(°C)
приготовления /
выпекания (в
минутах)
200 - 210 30 - 40
160 - 170 20 - 30
110 - 120 50 - 60
160 - 170 25 - 30
160 - 170 25 - 30
опасность для здоровья из-за образования
акриламидов. Поэтому мы рекомендуем
жарить продукты при минимально возможной
температуре и не обжаривать их до
образования корочки интенсивного
коричневого цвета.
Время
11. ДУХОВОЙ ШКАФ - УХОД И ЧИСТКА
ВНИМАНИЕ!
См. Главу "Сведения по технике
безопасности".
• Протирайте переднюю панель прибора
мягкой тряпкой, смоченной в теплом рас‐
творе моющего средства.
• Для чистки металлических поверхностей
используйте обычное чистящее средство.
• Чистите камеру духового шкафа после ка‐
ждого применения. Это облегчает удале‐
ние загрязнений и предотвращает их при‐
горание.
• Стойкие загрязнения удаляйте специаль‐
ными чистящими средствами для духовых
шкафов.
• После каждого использования протирайте
• При наличии принадлежностей с антипри‐
все принадлежности духового шкафа (мяг‐
кой тряпкой, смоченной в теплой воде с до‐
бавлением моющего средства) и затем да‐
вайте им высохнуть.
гарным покрытием не используйте для их
чистки агрессивные средства, острые пред‐
меты и не мойте их в посудомоечной маши‐
не. В противном случае возможно повре‐
ждение антипригарного покрытия!
Page 47

11.1 Снятие направляющих для противня
Для очистки боковых стенок духового шкафа
направляющие для противня можно снять.
1.
1
2
2.
РУССКИЙ 47
Потяните переднюю часть направляю‐
щей для противня в сторону, противопо‐
ложную боковой стенке.
Вытяните заднюю часть направляющей
для противня из боковой стенки и сними‐
те ее.
Установка направляющих для противня про‐
изводится в обратном порядке.
Закругленные концы направляющих
для противня должны быть направле‐
ны вперед.
внутренняя стеклянная панель снимаются для
чистки.
Дверца духового шкафа может за‐
хлопнуться при попытке извлечь
внутреннюю стеклянную панель, если
предварительно не снять дверцу.
11.2 Очистка дверцы духового
шкафа
В дверце духового шкафа имеются две сте‐
клянные панели. И дверца духового шкафа, и
Снятие дверцы духового шкафа и стеклянной панели
1.
Откройте дверцу до конца и возьмитесь
за обе петли.
Page 48

www.electrolux.com
48
2.
Поднимите и поверните рычажки, распо‐
ложенные в обеих петлях.
3.
Прикройте дверцу до первого фиксируе‐
мого положения (наполовину). Затем вы‐
тяните дверцу вперед из ее гнезда.
4.
Положите дверцу на устойчивую поверх‐
ность, подложив мягкую ткань.
5.
Отожмите стопоры, чтобы снять внут‐
реннюю стеклянную панель.
Page 49

6.
Поверните два фиксатора на 90° и из‐
влеките их из своих гнезд.
90°
7.
Осторожно поднимите (этап 1) и выньте
(этап 2) стеклянную панель.
8.
Вымойте стеклянную панель водой с мы‐
лом. Тщательно вытрите стеклянную па‐
нель.
2
1
Установка дверцы духового шкафа и стеклянной панели
После окончания очистки установите стеклян‐
ную панель и дверцу духового шкафа. Выпол‐
ните перечисленные выше действия в обрат‐
ной последовательности.
Сторона с надписями должна быть обращена
к внутренней стороне дверцы. После установ‐
ки убедитесь, что поверхность рамки стеклян‐
ной панели не является грубой на ощупь там,
где расположены надписи.
Внутренняя стеклянная панель должна обяза‐
тельно находиться в своих направляющих.
См. рисунок.
11.3 Лампа освещения духового
шкафа
ВНИМАНИЕ!
При замене лампы освещения духо‐
вого шкафа будьте осторожны. Су‐
ществует опасность поражения элек‐
трическим током.
Прежде чем заменять лампу освещения
духового шкафа:
• Выключите духовой шкаф.
• Извлеките предохранители из электрощита
или отключите рубильник.
Положите ткань на дно духового шка‐
фа для предотвращения поврежде‐
ния лампы освещения и плафона.
Замена лампы освещения духового шкафа
1.
Плафон лампы находится в задней части
камеры духового шкафа.
Чтобы снять плафон, поверните его про‐
тив часовой стрелки.
2.
Очистите стеклянный плафон от грязи.
3.
Замените лампу освещения духового
шкафа на аналогичную, с жаростойко‐
стью 300°C.
Используйте лампу освещения духо‐
вого шкафа того же типа.
РУССКИЙ 49
Page 50

www.electrolux.com
50
4.
Установите плафон.
12. ЧТО ДЕЛАТЬ, ЕСЛИ ...
Неисправность Возможная причина Способ устранения
При поджиге нет искры. Отсутствует электропита‐
При поджиге нет искры. Отсутствует электропита‐
При поджиге нет искры. Крышка и рассекатель го‐
Пламя гаснет сразу после
розжига.
Газ горит неравномерно по
окружности горелки.
Прибор не работает. Сработал предохранитель
Духовой шкаф не нагре‐
вается.
Духовой шкаф не нагре‐
вается.
Лампа освещения духового
шкафа не работает.
На продуктах и внутренней
поверхности камеры духо‐
вого шкафа осаждаются пар
и конденсат.
Если самостоятельно справиться с пробле‐
мой не удается, обратитесь к продавцу или в
сервисный центр.
Данные, необходимые для сервисного цент‐
ра, находятся на табличке с техническими
Рекомендуем записать их здесь:
Название модели (MOD.) .........................................
PNC (номер изделия) .........................................
Серийный номер (S.N.) .........................................
ние.
ключен к электросети, а по‐
дача электроэнергии не от‐
ключена.
Проверьте предохранитель
Убедитесь, что прибор под‐
ние.
на домашнем электрощите.
Удостоверьтесь, что крышка
релки стоят неровно.
и рассекатель установлены
как следует.
Термопара недостаточно
нагрелась.
После появления пламени
подержите ручку нажатой
около 5 секунд.
Рассекатель горелки засо‐
рился остатками пищи.
Убедитесь, что инжектор не
засорен, а в рассекателе го‐
релки нет остатков пищи.
Проверьте предохранитель.
на распределительном щи‐
те.
Если предохранитель сра‐
ботает повторно, обрат‐
итесь к квалифицированно‐
му электрику.
Духовой шкаф не включен. Включите духовой шкаф.
Не заданы необходимые на‐
Проверьте настройки.
стройки
Лампа освещения духового
шкафа перегорела.
Блюда находились в духо‐
вом шкафу слишком долго.
Замените лампу освещения
духового шкафа.
После приготовления не ос‐
тавляйте блюда в духовом
шкафу более чем на 15-20
минут.
данными. Табличка с техническими данными
находится на передней рамке камеры духово‐
го шкафа.
Page 51

13. УСТАНОВКА
РУССКИЙ 51
ВНИМАНИЕ!
См. Главу "Сведения по технике
безопасности".
13.1 Место для установки прибора
A
Отдельно стоящий прибор можно устанав‐
ливать рядом с предметами мебели, между
ними или в углу.
Минимальные расстояния
Габариты мм
A 690
B
Габариты мм
B 150
13.2 Технические данные
Габаритные размеры
Высота 855 мм
Ширина 600 мм
Глубина 600 мм
Суммарная элек‐
трическая мощ‐
ность
Категория газа I3B/P
Подвод газа G30 / G31 30 мбар
Диаметры обводных клапанов
Горелка Ø обводного клапа‐
Вспомогательная 29
Ускоренного
приготовления
Повышенной мощ‐
ности
2035,6 Вт
на в 1/100 мм
32
67
Газовые горелки
ПОНИ‐
ЖЕН‐
ГОРЕЛ‐
КА
Вспомо‐
гатель‐
ная го‐
релка
Горелка
для уско‐
ренного
приготов
ления
НАЯ
МОЩ‐
НОСТЬ
кВт кВт мбар мм г/час
0,35 1 Бутан
0,31 0,85 Пропан
0,43 2 Бутан
0,38 1,7
ОБЫ‐
ЧНАЯ
МОЩ‐
НОСТЬ
Тип газа
G30
G31
G30
Пропан
G31
Давле‐
ние
30 0,5 25,45 72,71
30 0,5 22,14 60,7
30 0,71 31,27 145,43
30 0,71 27,14 121,4
Диаметр
форсунки
Расход
(минималь‐
ное пламя)
(макси‐
маль‐
пламя)
Рас‐
ход:
ное
Page 52

www.electrolux.com
52
ГОРЕЛ‐
КА
ПОНИ‐
ЖЕН‐
НАЯ
МОЩ‐
НОСТЬ
ОБЫ‐
ЧНАЯ
МОЩ‐
НОСТЬ
Тип газа
кВт кВт мбар мм г/час
Горелка
с трой‐
ным рас‐
секате‐
лем
1,8 4 Бутан
G30
1,6 3,5
Пропан
G31
13.3 Подсоединение к системе
газоснабжения
Для подключения следует использовать не‐
подвижное соединение либо гибкий шланг в
оплетке из нержавеющей стали в соответ‐
ствии с действующими нормами. При исполь‐
зовании гибких шлангов в металлической
оплетке необходимо тщательно проследить,
чтобы они не соприкасались с подвижными
элементами и не пережимались.
13.4 Гибкая неметаллическая
подводка
Если имеется возможность полного доступа к
месту подводки газа и контроля состояния по
всей ее длине, можно использовать гибкую
подводку. Необходимо плотно зафиксировать
хомутами гибкую подводку.
Для установки используйте трубодержатель.
Убедитесь, что трубодержатель плотно при‐
жат к уплотняющей прокладке, а затем при‐
ступайте к подключению линии подачи газа.
Использование гибкой подводки допускается,
если:
– Ее температура равна температуре в поме‐
щении или превышает ее не более, чем на
30°C.
– Ее длина не превышает 1500 мм.
– Она не сдавливается.
– Она не натянута и не перекручена.
– Он не касается острых кромок или углов.
– Ее можно легко осмотреть, чтобы прове‐
рить ее состояние.
Для обеспечения надлежащего состояния
гибкой подводки следует регулярно провер‐
ять ее:
Рас‐
Давле‐
ние
Диаметр
форсунки
Расход
(минималь‐
ное пламя)
ход:
(макси‐
маль‐
ное
пламя)
30 1,01 130,88 290,85
30 1,01 114,26 249,95
– На предмет отсутствия трещин, порезов,
следов горения - как на обоих концах, так и
по ее длине.
– На предмет надлежащей эластичности ма‐
териала гибкой подводки: шланг не должен
становиться жестким.
– На предмет отсутствия ржавчины на хому‐
тах, которыми крепится подводка.
– На предмет срока годности подводки.
В случае обнаружения одного или более де‐
фектов - не ремонтируйте шланг, а замените
его.
По окончании установки для провер‐
ки полной герметичности всех труб‐
ных соединений используйте мыль‐
ный раствор: использование пламени
запрещено.
Линия подачи газа находится на задней сто‐
роне панели управления.
ВНИМАНИЕ!
Перед подключением газа необходи‐
мо отключить вилку шнура питания
от розетки питания либо отключить
предохранитель, расположенный в
блоке предохранителей. Закройте ос‐
новной вентиль линии подачи газа.
ABC
DE
Page 53

A)
Точка подключения линии подачи газа
(допускается только одна точка подключе‐
ния газа для устройства)
B)
Прокладка
C)
Регулируемое соединение
D)
Трубодержатель для природного газа
E)
Трубодержатель для сжиженного газа
Устройство отрегулировано на пода‐
чу газа, используемого по умолча‐
нию. Чтобы изменить настройки, вы‐
берите трубодержатель из списка.
Всегда используйте уплотняющую
прокладку
13.5 Переоборудование на другие
типы газа
ВНИМАНИЕ!
Переоборудование на другие типы
газа должно выполняться только спе‐
циалистом авторизованного сервис‐
ного центра.
Этот прибор предназначен для рабо‐
ты на природном газе.
Допускается использование сжижен‐
ного газа при условии установки со‐
ответствующих инжекторов.
РУССКИЙ 53
4.
Установите детали на место, выполнив
вышеприведенную последовательность
действий в обратном порядке.
5.
Замените табличку с техническими дан‐
ными (размещенную вблизи трубы подво‐
да газа) табличкой, соответствующей но‐
вому типу используемого газа. Эта та‐
бличка находится в пакете с принадлеж‐
ностями, поставляемыми вместе с прибо‐
ром.
Если давление газа в системе газоснабжения
является непостоянным или отличается от
требуемого значения, необходимо установить
на трубу магистрали газоснабжения соответ‐
ствующее устройство для регулировки давле‐
ния.
13.7 Регулировка минимального
уровня пламени
Для установки минимального уровня пламени
выполните следующие действия:
1.
Зажгите горелку.
2.
Поверните ручку в положение, соответ‐
ствующее минимальному пламени.
3.
Снимите ручку.
4.
Тонкой отверткой отрегулируйте положе‐
ние винта обводного клапана (А).
ВНИМАНИЕ!
Перед заменой инжекторов убеди‐
тесь, что ручки управления подачей
газа находятся в выключенном поло‐
жении и отключите прибор от сети
электропитания. Дайте прибору пол‐
ностью остыть. Существует опас‐
ность получения травмы.
13.6 Замена форсунок
1.
Снимите решетки конфорок.
2.
Снимите с горелок крышки и рассекатели
пламени.
3.
С помощью торцевого ключа на 7 мм де‐
монтируйте форсунки и замените их на
те, которые соответствуют используемо‐
му типу газа.
A
• При переоборудовании с природного газа
на сжиженный газ закрутите регулировоч‐
ный винт до упора.
• При переходе с сжиженного на природный
газ открутите винт обводного клапана при‐
близительно на 1/4 оборота.
ВНИМАНИЕ!
Убедитесь, что пламя не гаснет при
быстром повороте ручки из макси‐
мального в минимальное положение.
Page 54

www.electrolux.com
54
13.8 Выравнивание
ВНИМАНИЕ!
Перед сборкой регулировочных но‐
жек необходимо извлечь из духового
шкафа дополнительные принадлеж‐
ности. Регулировочные ножки нахо‐
дятся в полиэтиленовом пакете.
1.
Откройте крышку прибора и снимите кры‐
шку, подставки для посуды и 4 горелки.
2.
Положите прибор на бок на чистую и
ровную поверхность. Установите 4 регу‐
лировочные ножки, установив их отвер‐
стия для ножек.
AB
Page 55

max. 5 mm
РУССКИЙ 55
3.
В случае, если пол неровный, для устой‐
чивой установки прибора используйте
регулировочные ножки в нижней части
прибора. Длина ножки не должна превы‐
шать 5 мм.
4.
Для установки всех принадлежностей
выполните первое действие в обратной
последовательности.
13.9 Электрическое подключение
ВНИМАНИЕ!
Электрическое подключение должно
выполняться только квалифициро‐
ванным и опытным специалистом.
14. ОХРАНА ОКРУЖАЮЩЕЙ СРЕДЫ
Материалы с символом
на переработку. Положите упаковку в
соответствующие контейнеры для сбора
вторичного сырья.
Принимая участие в переработке старого
электробытового оборудования, Вы
помогаете защитить окружающую среду и
следует сдавать
Производитель не несет ответствен‐
ность, если пользователь не соблю‐
дает меры безопасности, приведен‐
ные в Главе "Сведения по технике
безопасности".
Данный прибор поставляется с сетевым шну‐
ром и вилкой.
Сетевой шнур не должен касаться
частей прибора, показанных на ри‐
сунке.
здоровье человека. Не выбрасывайте вместе
с бытовыми отходами бытовую технику,
помеченную символом
изделие на местное предприятие по
переработке вторичного сырья или
обратитесь в свое муниципальное
управление.
. Доставьте
Page 56

www.electrolux.com
56
Page 57

РУССКИЙ 57
Page 58

www.electrolux.com
58
Page 59

РУССКИЙ 59
Page 60

www.electrolux.com/shop
892942790-C-252012
 Loading...