

Electrolux EFC926BAR Installation Manual
6 7
4. Remove protective plastic film, if present, from the hood
body and hang on the wall bracket.
Install the two anti-tilt fasteners.
RANGEHOOD INSTALL ATION
WARNING!
Refer to “Safety information” chapter.
BEFORE INSTALLATION
Before the installation of the appliance, record the information
below from the rating plate. The rating plate is on the bottom
of the appliance casing.
Model
PNC
Serial number
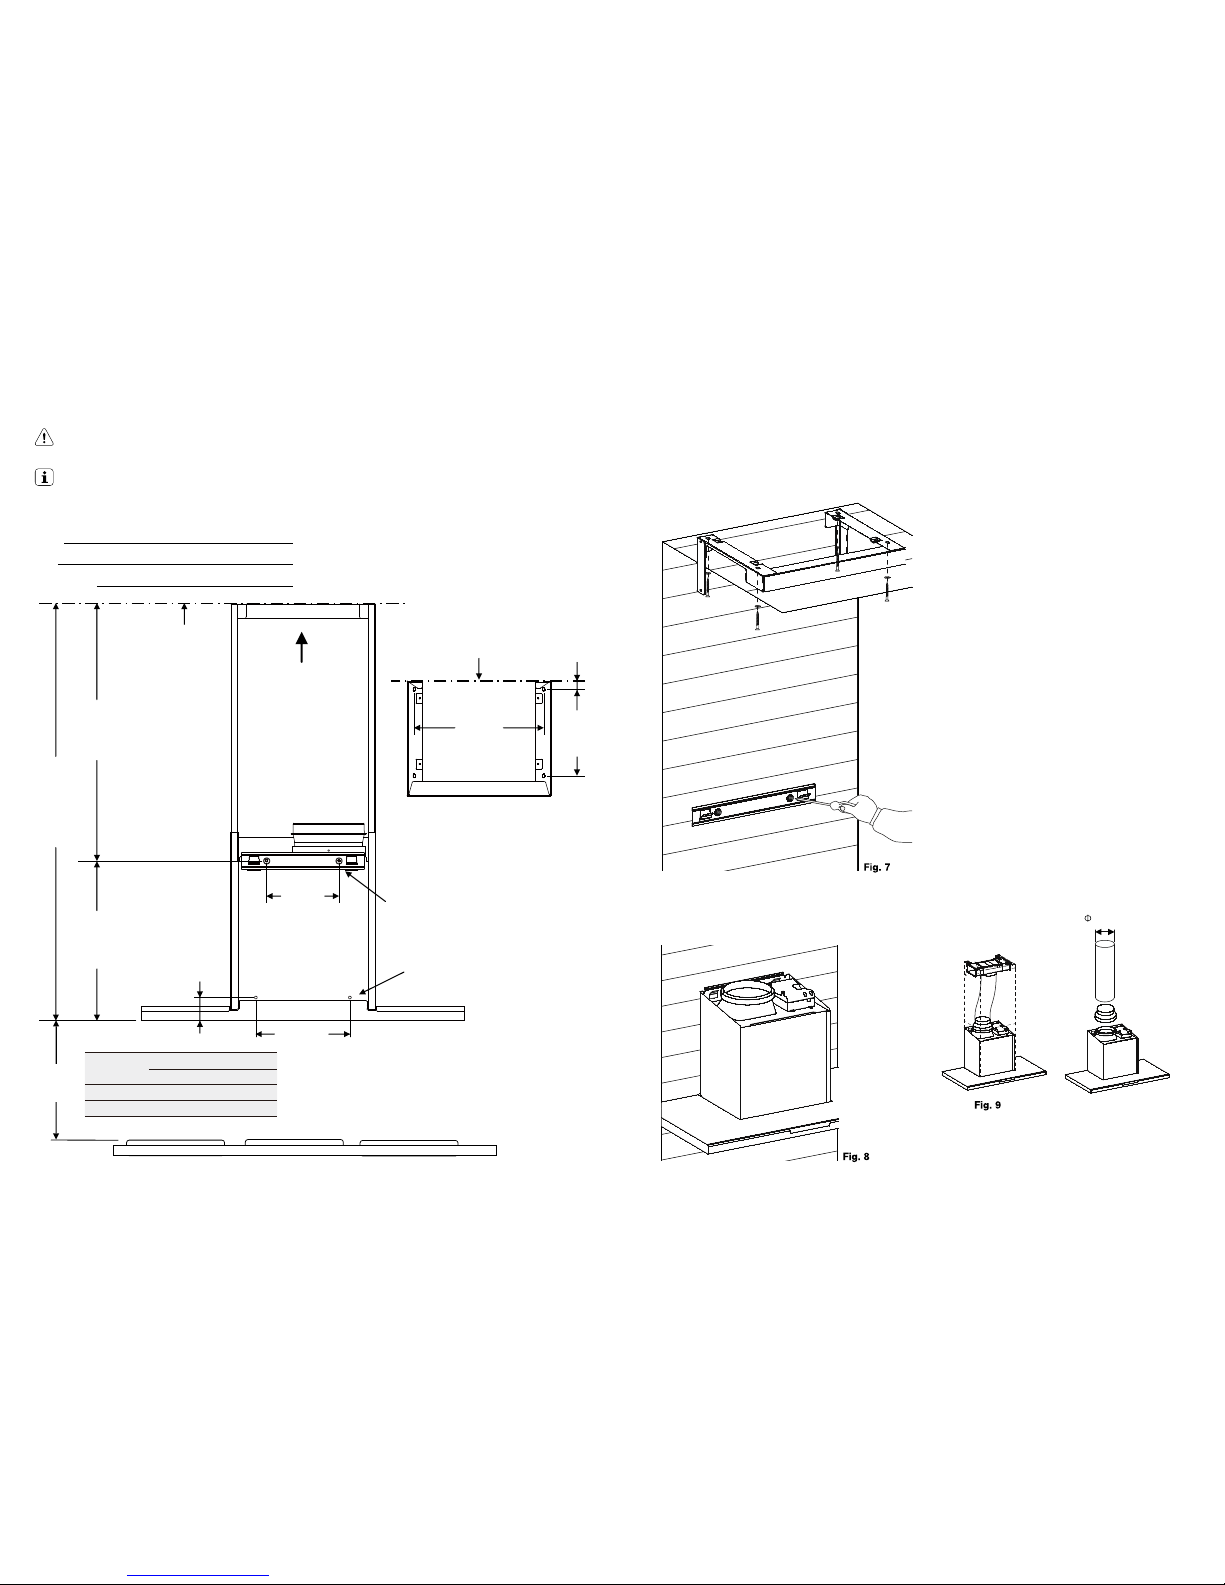
1.
2.
Using a spirit level mark a vertical centre line on the wall
where the hood is to be positioned, and a horizontal line
at the hood base position (refer diagram below).
NOTE: The height of the underside of the hood body must
be a minimum of 600mm* to a maximum height of 800mm.
* If the instructions of the hob specify a greater distance than the minimum above,
then that shall be the minimum height for installation.
Mark the location for flue cover wall mounting brackets
and cooker hood mounting points and anti-tilt fixing
points above the hood base using the hood base as
the reference point (Fig. 6).
RANGEHOOD INSTALL ATION (CONT)
3. Install flue cover wall mounting brackets with suitable
fixings. Install suitable screws for cooker hood mounting
points (to support a total weight of 30kg) to the wall as
marked (Fig. 6).
Depending on the preferred installation/ducting mode,
follow step 5a or 5b below.
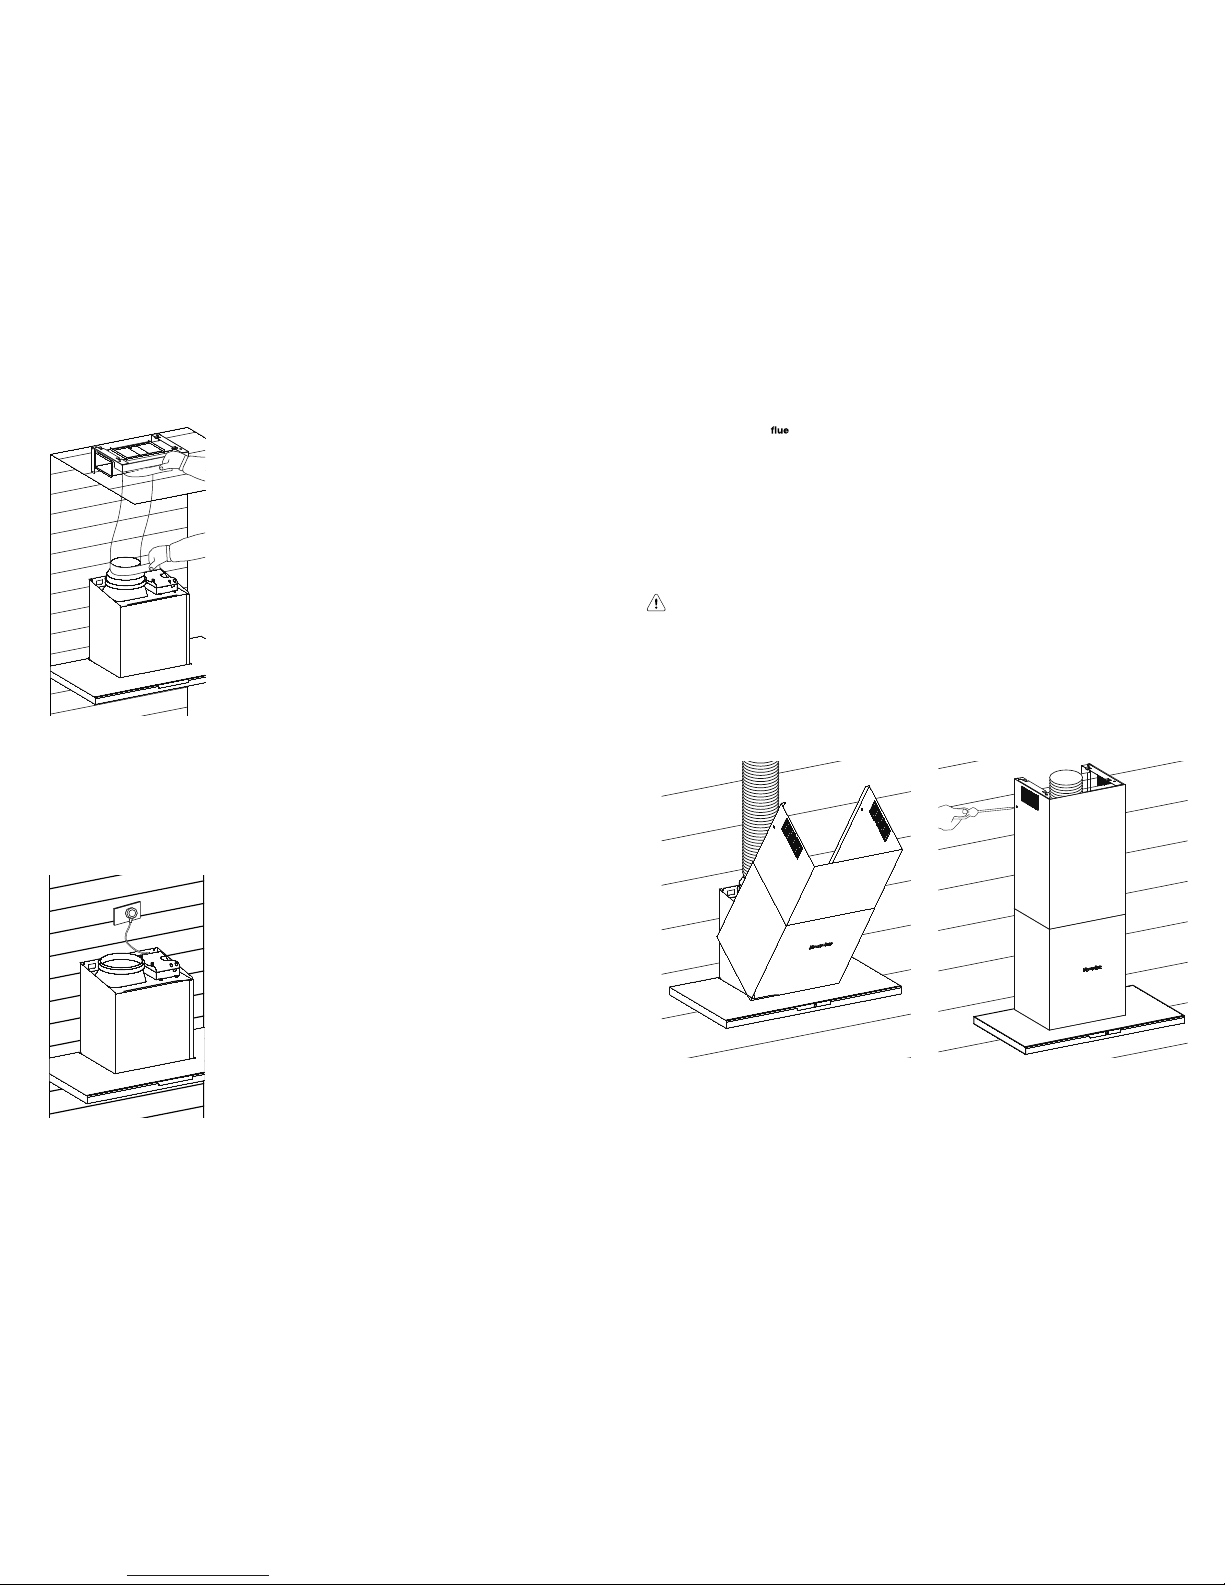
5a. Recirculating mode (Fig. 9).
Using the centre line, secure the recirculating T-piece to the
wall with suitable screws/fixings. Install flexible pipe between
T-piece and the exhaust transition duct. Use cable ties or
suitable duct tape to secure flexible pipe to T-piece and
transition duct (Fig. 11).
NOTE: When installed in recirculating mode, it is
recommended to use a carbon lter to prevent odours
being emitted back into the room.
5b. Ducted mode (Fig 10.)
The canopy rangehood has been supplied with a duct
transition and 150mm diameter flexible flue. Fit the flexible
flue to the duct transition (Fig. 10). Use cable ties or
suitable duct tape to secure flexible pipe to the duct
transition.
NOTE: For ducted mode, we recommend extending
ue pipe through the roof to external “china hat” to vent
exhaust externally. We do not recommend venting into
ceiling cavity.
NOTE: To ensure optimum performance of the
rangehood, the use of rigid ducting is recommended.
The use of bends should be avoided. All ducting must
be re retardant
Top of hob
Max. 1158
mm
ceiling
View A
View A
200 mm
260 mm
441 mm
DIM. A
240 mm
21 mm
58 mm
718 mm
installaon wall
360 mm
Fig. 6
Cooktop
type
DIM. A
minimum* maximum
Gas 650mm 800mm
Electric 600mm 800mm
150mm
Fig 10
Anti-tilt fixing points
Range hood mounting points
8 9
RANGEHOOD INSTALL ATION (CONT) RANGEHOOD INSTALL ATION (CONT)
Fig. 11
6. Electrical connection
Check that the installation complies with the standards
of local building, gas and electrical authorities. Before
connecting to the mains supply ensure that the mains
voltage corresponds to the voltage on the rating plate
inside the rangehood.
Fig. 12
installation of telescopic
covers
Separate the inner and outer flue covers. Carefully
reassemble the upper and lower flue covers sections by
sliding the inner into the outer flue cover. Carefully lower
the assembled upper and lower flue covers onto the top
of the rangehood body. and insert the flue cover into the
rangehood body approximately 5mm. Fix upper flue cover
to the wall mounting bracket with screws supplied. Ensure
that the upper section is extended.
NOTE: Carefully remove the plastic protect
ive coating,
if present, from the flue covers. Pay particular attention
when removing protective plastic coating from decals.
IMPORTANT!
Care must be taken to ensure the screws are not cross
threaded when attaching the upper flue cover. If installed
in recirculating mode, insert the carbon filter
To complete the rangehood installation, insert the three
Your Electrolux rangehood is now ready to use.
Fig. 13 Fig. 14
filters to the underside of the hood body. Place back edge
of filter into position and push up front edge so that the
filter clips into place.
 Loading...