

Electrolux E30GF74GPS Owner’s Manual
Use a Care Gu de
Gas Range
\
Finding Information
PLEASEREADANDSAVETHiSGUIDE
[] [] [] [] [] [] [] [] [] [] [] [] [] [] [] [] [] [] [] [] []
Thank you for choosing Electrolux, the new premium brand in home appliances.
This Use & Care Guide is part of our commitment to customer satisfaction and
product quality throughout the service life of your new appliance.
We view your purchase as the beginning of a relationship. To ensure our ability to
continue serving you, please use this page to record key product information.
Once you have your appliance installed, we suggest you keep this manual in a
safe place for future reference. Should any problems occur, refer to the
Troubleshooting section of this manual. This information wilt help you quickly
identify a problem and get it remedied. In the event you require assistance, please
contact the dealer where you purchased your appliance.
MAKEA RECORDFORQUICKREFERENCE
[] [] [] [] [] [] [] [] [] [] [] [] [] [] [] [] [] [] [] [] []
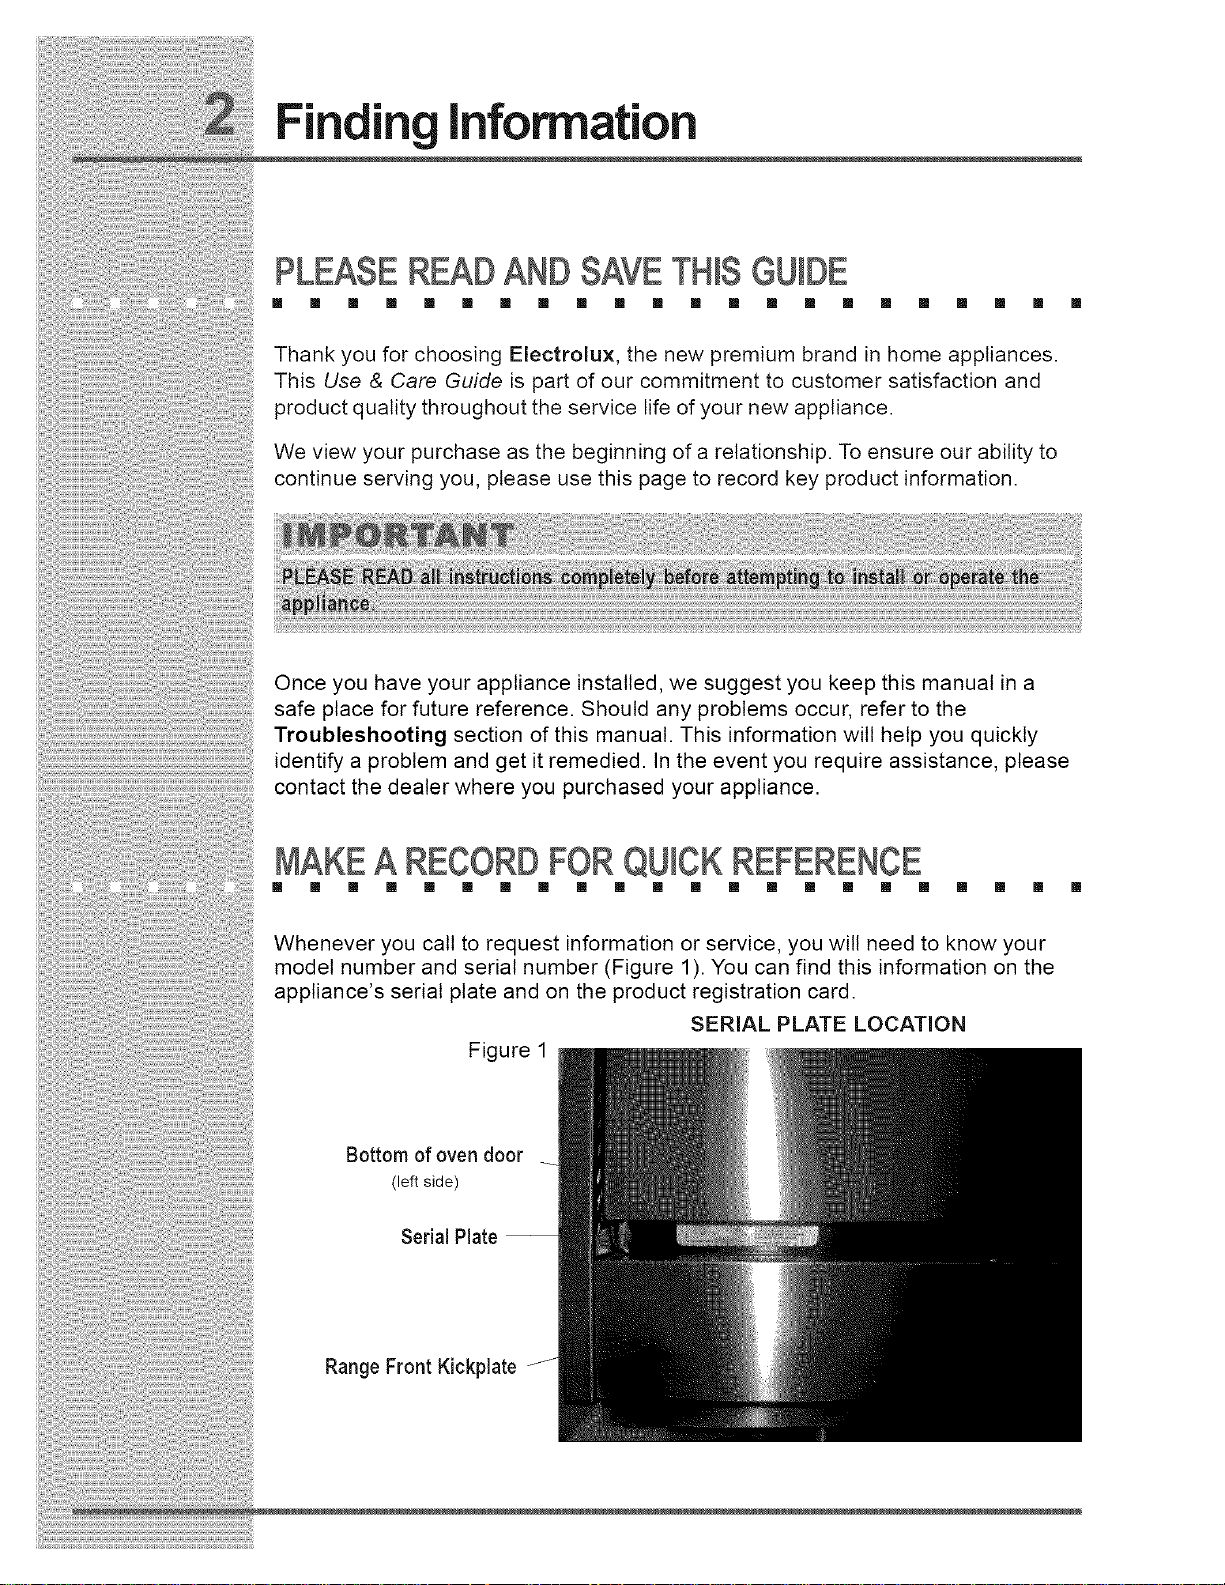
Whenever you call to request information or service, you will need to know your
model number and serial number (Figure 1). You can find this information on the
appliance's serial plate and on the product registration card.
SERIAL PLATE LOCATION
Figure 1
Bottom of oven door
(left side)
Serial Plate --
Range Front Kickplate

Finding Information
PRODUCT REGIST TIONCARD
[] [] [] [] [] [] [] [] [] [] [] [] [] [] [] [] [] [] [] [] []
The package containing this manual also includes your product registration
information. Warranty coverage begins at the time your Electrolux appliance was
purchased.
If you received a damaged product, immediately contact your dealer or builder. Do
not install or use a damaged appliance.
Please record the purchase date of your Electrotux appliance and your dealer's
name, address and telephone number.
Purchase Date
Electrolux Model Number
Electrolux Serial Number
Dealer Name
Dealer Address
Dealer Telephone
Keep this manual and the sales receipt together in a safe place for further
reference.
[] [] [] [] [] [] [] [] [] [] [] [] [] [] [] [] [] [] [] [] [] []
For toll-free telephone support in the U.S. and Canada:
1=877= 4ELECTROLUX (1=877=435=3287)
For online support and Intemet product information:
www.electroluxusa.com

Finding Information
TABLE OF CONTENTS
[] [] [] [] [] [] [] [] [] [] [] []
[] [] [] [] [] [] [] [] [] []
FindingInformation...........................................2
PleaseReadAndSaveThisGuide...................2
MakeARecordForQuickReference................2
Questions..........................................................3
TableOfContents..............................................4
Safety...................................................................5
ImportantSafetyInstructions..............................5
GeneralPrecautions..........................................6
FeatureOverview ..............................................10
Cooktop Features..............................................11
ProperBurnerAdjustments...............................11
BurnerLocations..............................................11
SealedBurnerConfigurations.........................12
BurnerRings..................................................12
BurnerIgniters................................................12
ControlKnobs.................................................13
PlacementofBurnerGrates.............................I3
SurfaceCooking ...............................................13
FlameAdjustment.............................................13
UtensilsforBestPerformance..........................14
UsingtheAccessoryGriddle............................14
UsingtheIntegratedGriddle.............................15
UsingtheWokStand .......................................16
UsingtheSimmerPlate......................................17
GettingStarted.................................................21
BeforeSettingOvenControls..........................21
ArrangingOvenRacks.....................................22
SettingOven Controls .....................................23
SelectorKnobFunction...................................23
OvenFunctions...............................................23
Cooking Instructions.......................................24
Baking.............................................................24
BakingProblems.............................................25
ConvectionBaking/Roasting............................25
Broiling............................................................29
Careand Cleaning............................................31
ChangingOvenLightBulb.................................31
CleaningTips..................................................32
CleaningStainlessSteelSurfaces....................35
CleaningPorcelainGrates...............................35
CleaningKnobsandBezels............................36
CleaningBurnerBases...................................36
CleaningBurnerRings....................................37
CleaningBurnerIgniters..................................37
CleaningGeneral..............................................38
Troubleshooting ...............................................39
Warranty............................................................40
Operation...........................................................18
BeforeCooking...............................................18
SettingSurfaceControls....................................18
OperatingtheControlValves...........................18
SettingtheBurnerFlameHeight......................20
EnergySavingTips..........................................20
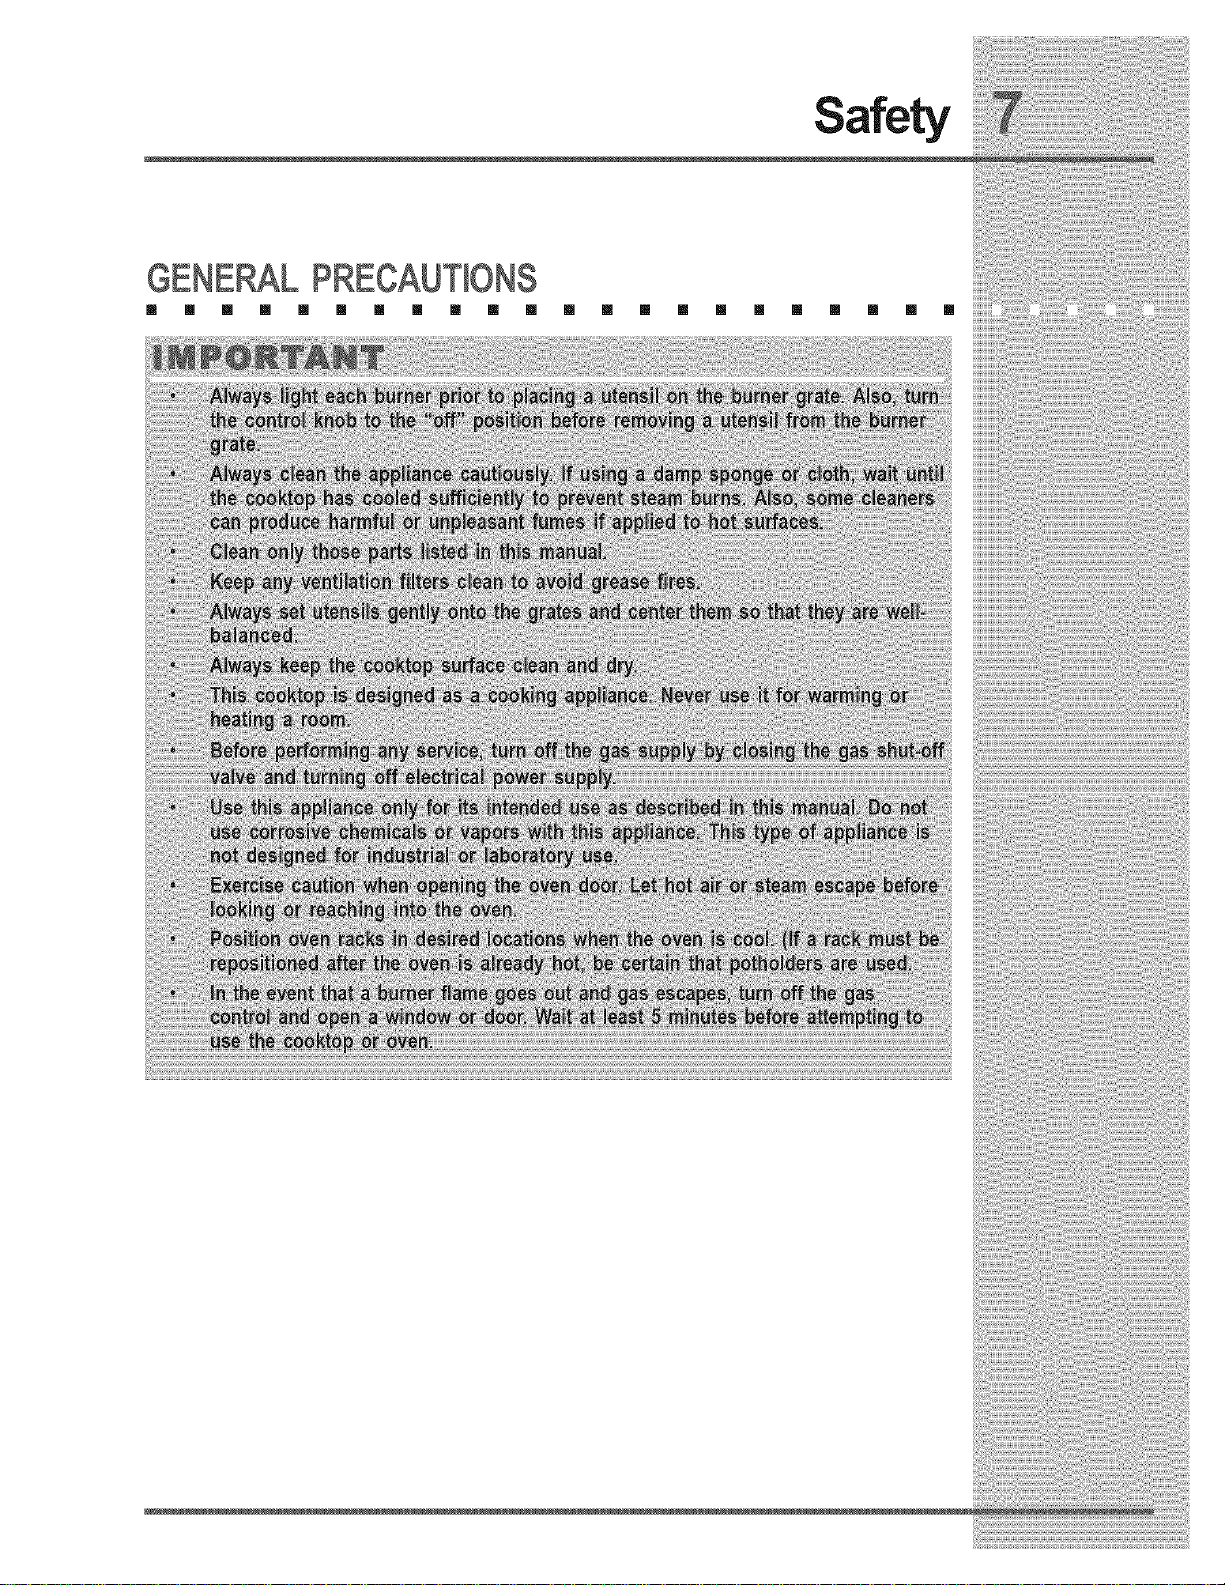
IMPORTANTSAFE_ INSTRUCTIONS
[] [] [] [] [] [] [] [] [] [] [] [] [] [] [] [] [] [] [] [] [] []
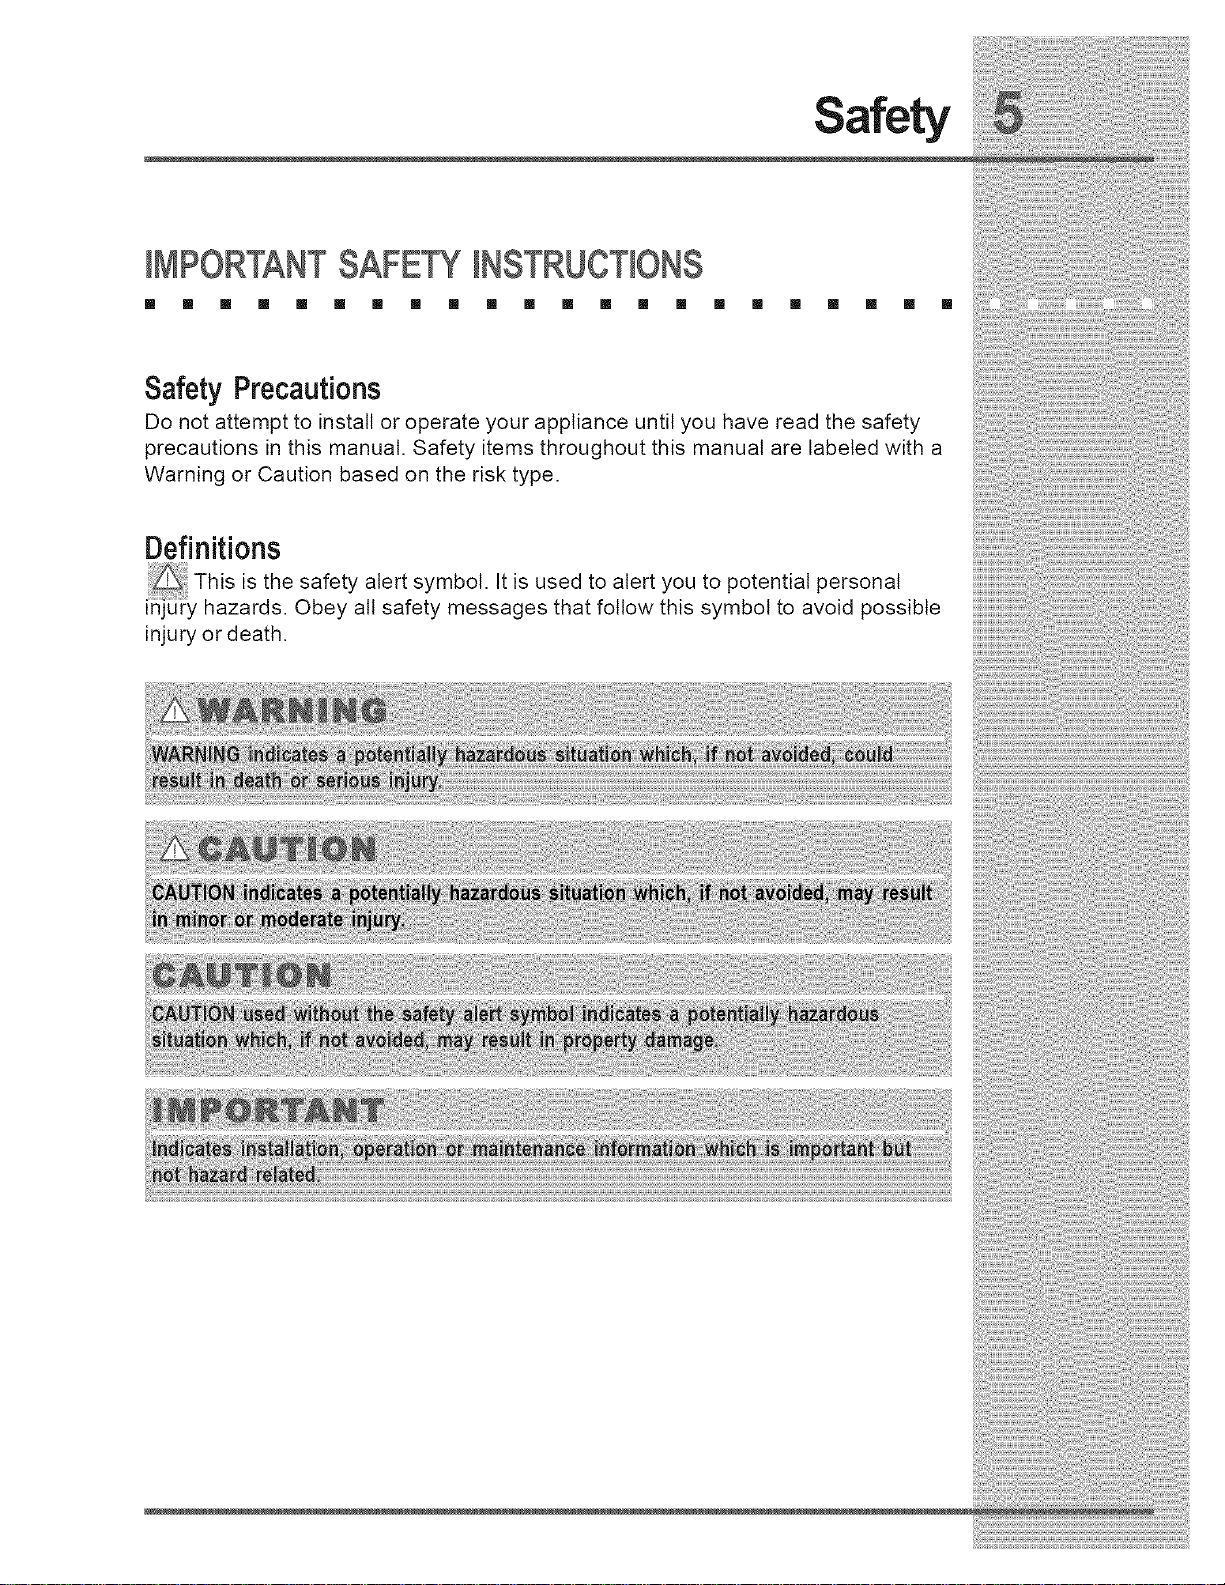
Safety Precautions
Do not attempt to install or operate your appliance until you have read the safety
precautions in this manual. Safety items throughout this manual are labeled with a
Warning or Caution based on the risk type.
Definitions
Thisisthesafetyalertsymbol.Itisusedtoalertyoutopotentialpersonal
injury hazards. Obey all safety messages that follow this symbol to avoid possible
injury or death.
iii_i_;!_!!i!!!i!!ii_!iii_i:ii_:_ii_ii!_ii_ii!_ii_i!i;_i!_!i!_!!i_i!_!_!_!i_;;_!;_i:;;;!i_;;i!i(iiiiiii!i!ii!;!ii!i!ii!;!i_!!i_!!_i!i!_i!i!_i!i!_i!i!_i!!_i¸ii:;ii¸;!I_ili;i;::_i_:il;::_i_:il;::_i_:il;::i!i!;il¸il;;ii:i!!_i_i!_i_i!_i_i!_ii!i_ii¸!iiii;¸iii!i;:;i_ii;¸i_i_ii;¸i_i!i!i!;i!¸;_i!;_ii_;_!_!_!_!i;_!i!i;i_i_i!%!i;_iii!;:_!_i!;i_i!;ill!i!;ii!!i_!_!!!_!!i!_i!!i!i;!_i;;i_i_¸i!_iiii:;iii:;iiiii!iiiii;;i;i;ilili_i_i_i_i_i_i_i_ii;i:;i;i:;i;i:;!i!i¸!i!i!i;i_iii!;_iiii!;_ii!;!i;iii:;i!il;i;i_i!i!i_i_!!ii_iii_i!i¸i!!i¸i!ii;ii;iiiii!;!il;ii!ii;i;!!i;ii!ii;i;!!i;il;:ii!;!;iil;i;iii!ii;ii!i!ii;!!!i¸ii_i!iii!!!i!;ili!ii;i¸i;i;ii!_i_iil¸iiiii!_i_iil¸iiiii!_i_iii_il;;!!!!!iii:iii!i;i!i;i!i;i!i_i;i!i_i;i!i_i;i!i_i;i!i:ii_;!i¸i;;¸i;;;¸i;;;¸i;;;¸ilil¸;ii_;[ili;_i_i;!i!ii;iii¸!_!i!!i!i_i!i!ii!!!i!i_i!il;ii!_!ii;iiii¸!I¸!_i_!_;!_i!_i_i!_i_i!_i_i!_i_i!_ii_i;ii;!ii;!ii;!ii;!!_!i!!!i_;!!_¸i!:!i_iiii!i¸I¸i;iii!;ii!_i!_!i!_!i!_!il;_il;!:!iiiiiii!iiii:!i!¸I
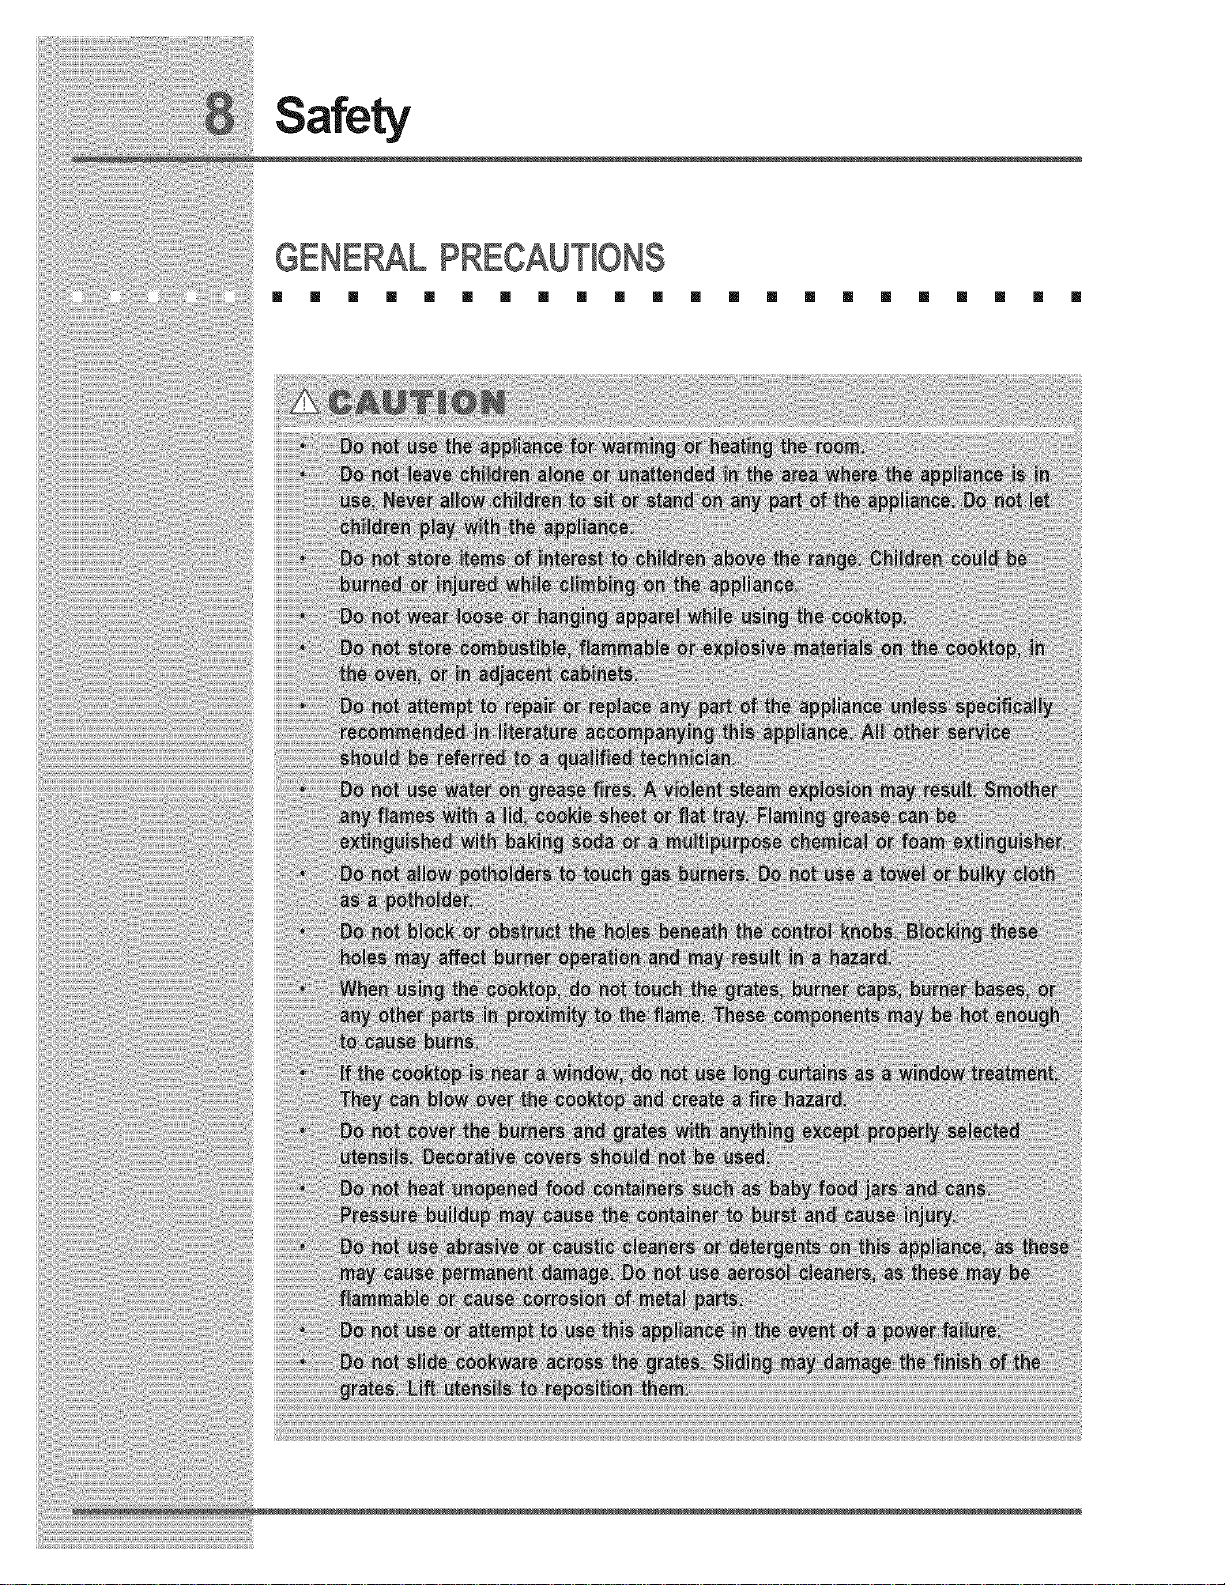
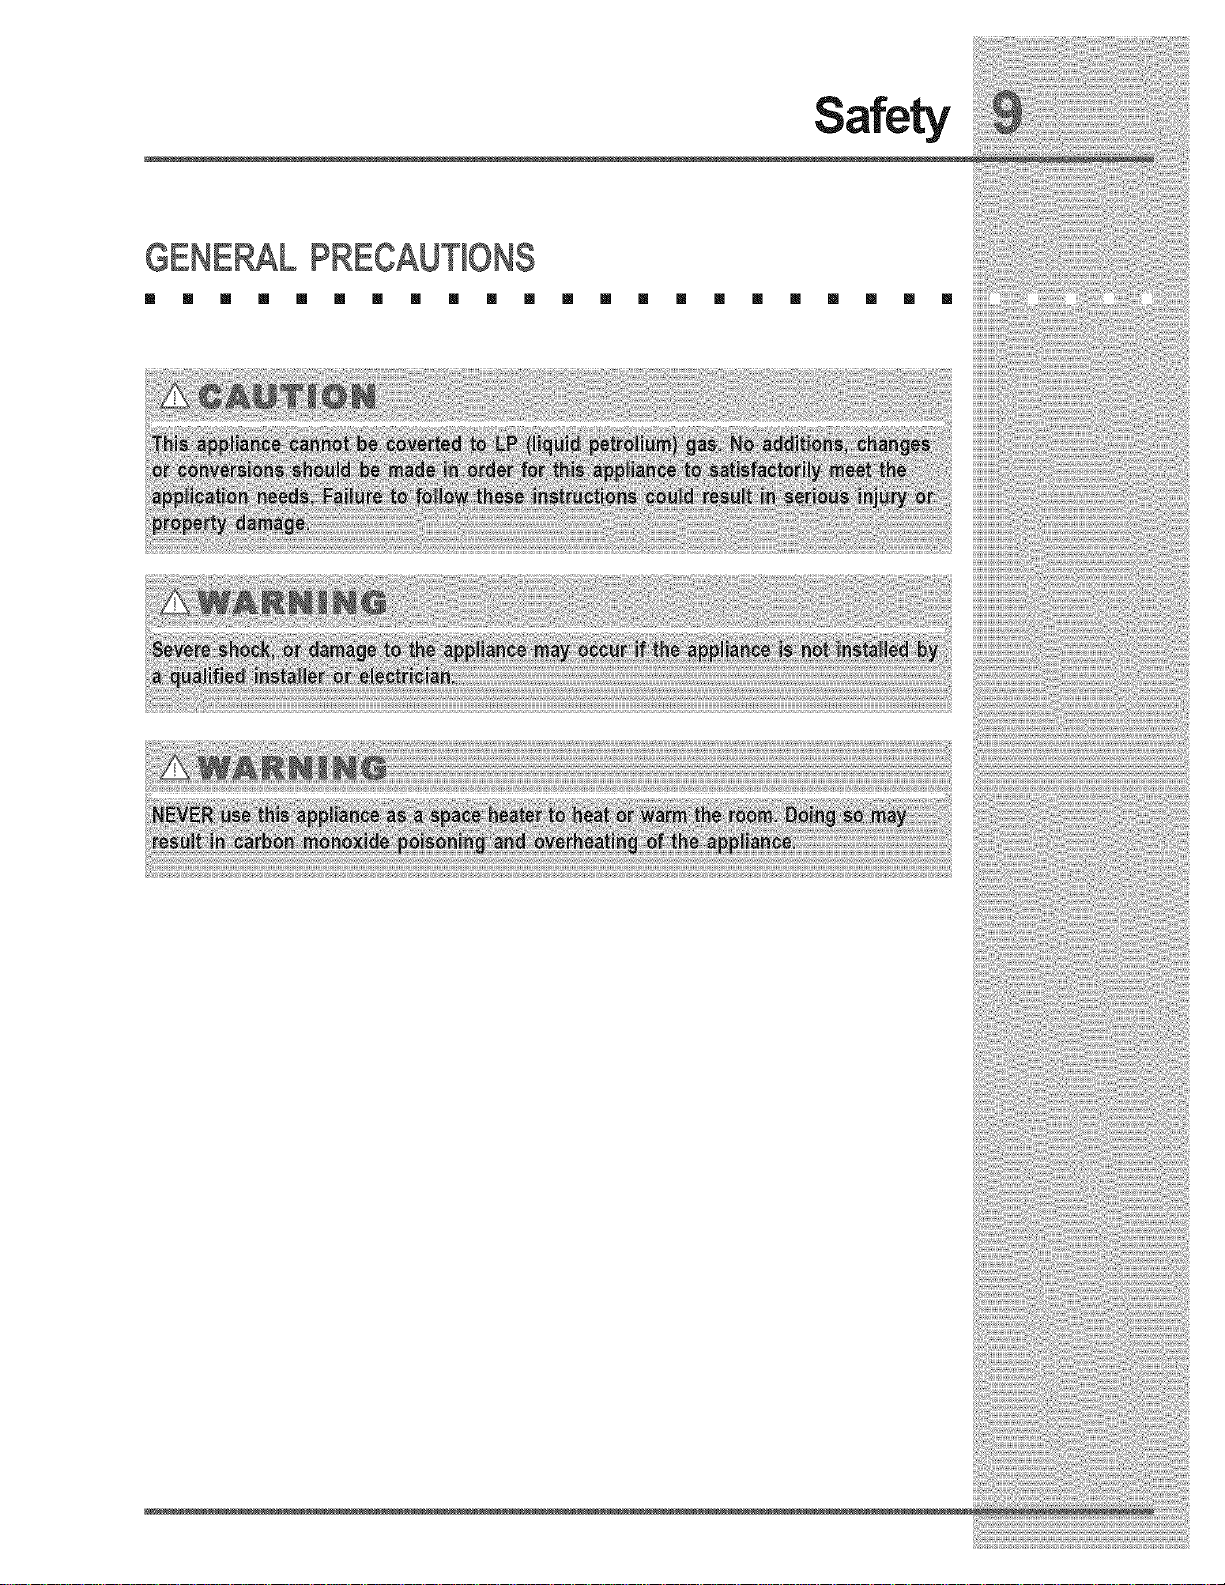
Safety
Safety
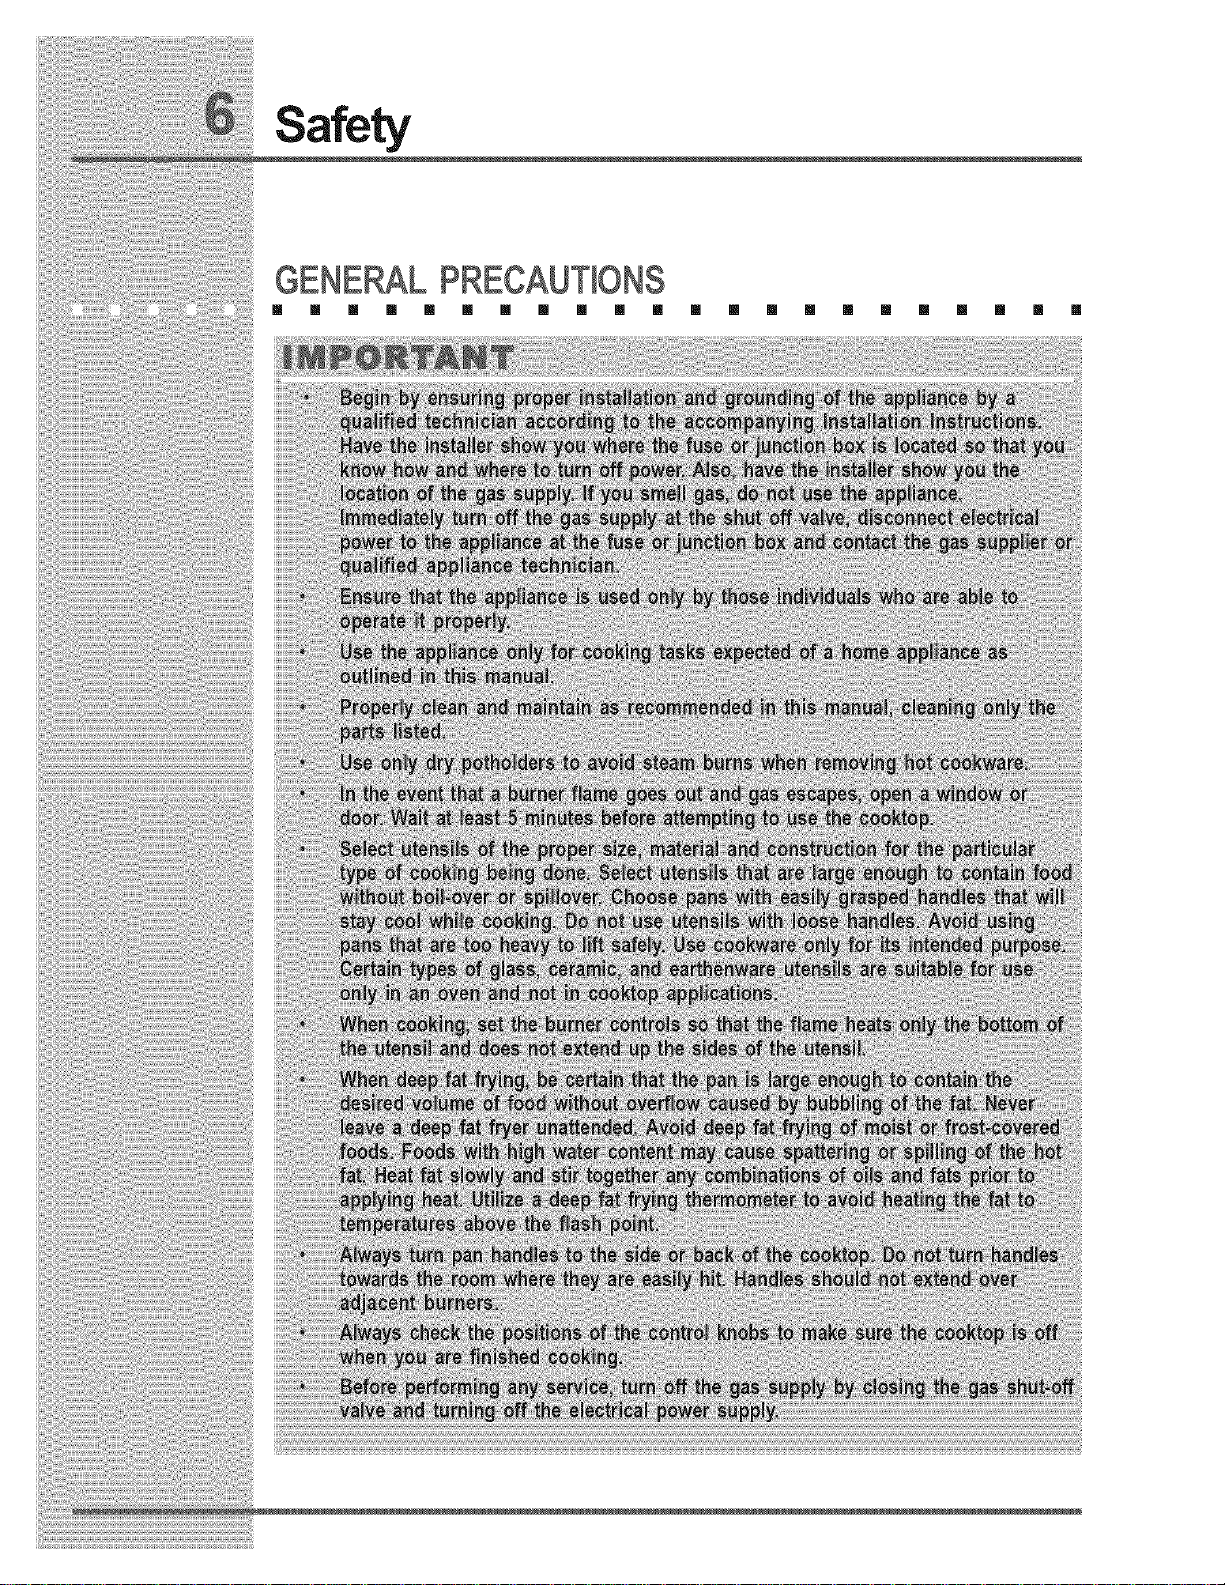
GENE_L PRECAUTIONS
m [] [] [] [] [] [] [] [] [] m [] [] [] [] [] m m [] [] [] []
GENE_L PRECAUTIONS
[] [] [] [] [] [] [] [] [] [] [] [] [] [] [] [] [] [] [] [] [] m
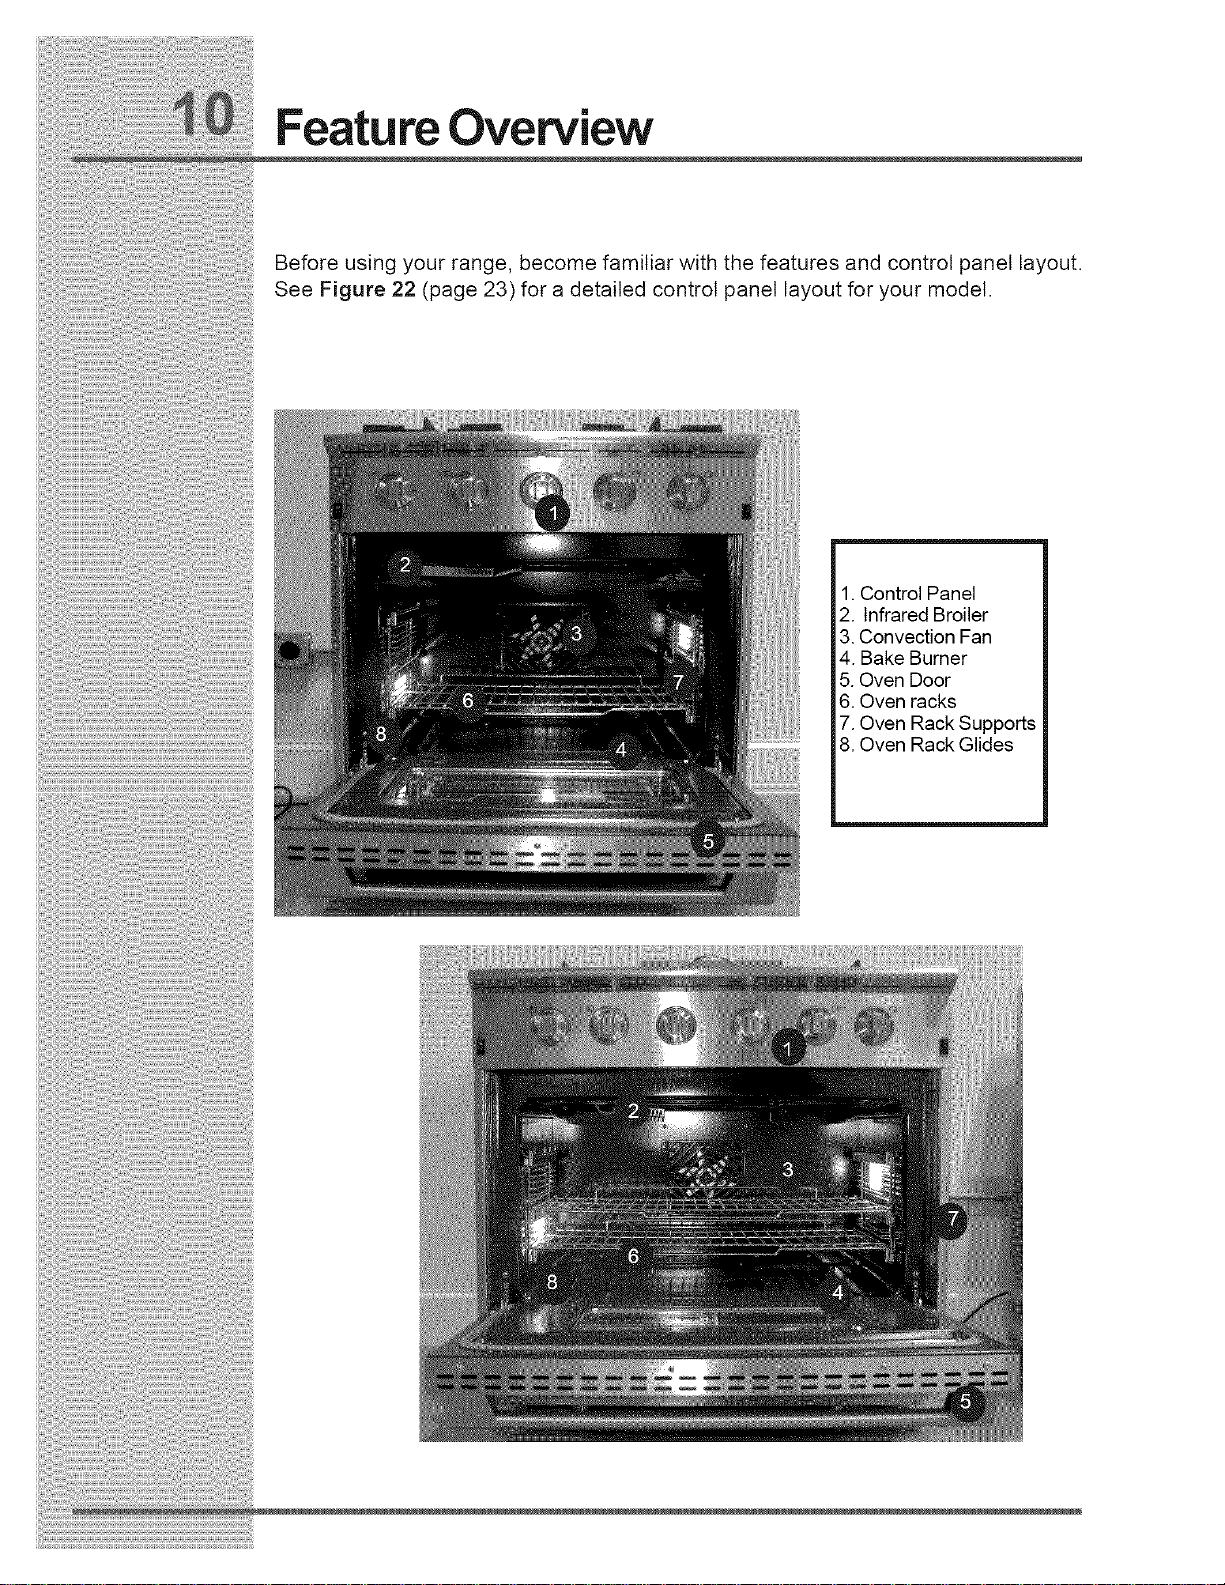
FeatureOverview
Before using your range, become familiar with the features and control panel layout.
See Figure 22 (page 23)for a detailed control panel layout for your model.
1.Control Panel
2. Infrared Broiler
3. Convection Fan
4. Bake Burner
5. Oven Door
6. Oven racks
7. Oven Rack Supports
8. Oven Rack Glides
Cooktop
PROPERBURNERADJUSTMENTS
[] [] [] [] [] [] [] [] [] [] [] [] [] [] [] [] [] [] [] [] [] []
The color of the flame is the key to proper burner adjustment. A good flame is clear,
blue and hardly visible in a well-lighted room. Each cone of flame should be steady
and sharply defined. Adjust or clean burner if flame is yellow-orange. To clean
burner, see instructions under Care & Cleaning.
[] [] [] [] [] [] [] [] [] [] [] [] [] [] [] [] [] [] [] [] [] []
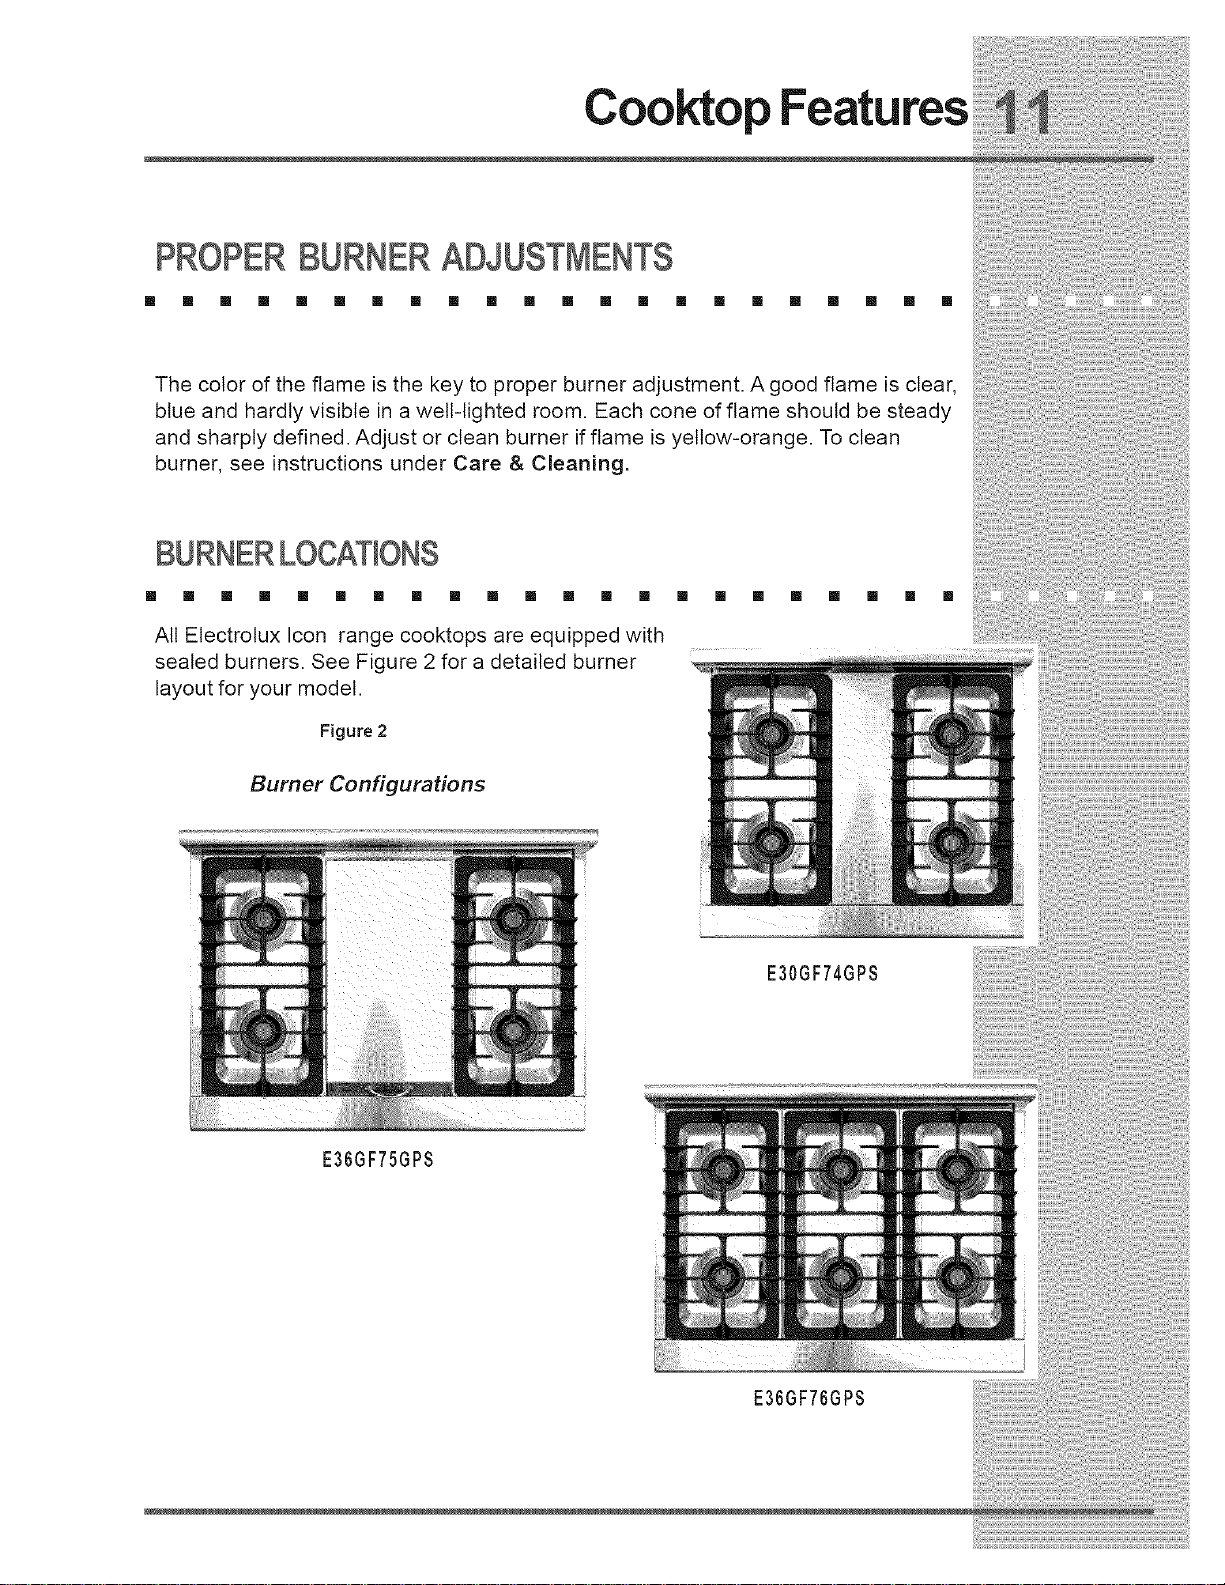
All Etectrolux Icon range cooktops are equipped with
sealed burners. See Figure 2 for a detailed burner
layout for your model.
Figure 2
Burner Configurations
E36GF75GPS
E30GF74GPS
E36GF76GPS
Cooktop Features
SEALEDBURNERCONFIGU TION
Im [] [] II [] [] [] II [] [] [] II [] [] [] II [] [] [] II [] []
On ICON all-gas ranges, there are a total of four (4) or six (6) burners, all rated with
a maximum of 15K btu. Additionally, all burners are equipped with a stow simmer
setting rated at 620 btu.
On ICON 36" all-gas ranges (Model EGF76GPS), there is a central griddle rated at
18.5K btu. The same 15K btu top burners are equipped with the low simmer
settings of 620 btu on this model.
BURNERBASE,HEAD& CAPS
[] [] [] [] [] [] [] [] [] [] [] [] [] [] [] [] [] [] [] [] [] []
The burner heads spread the flame evenly around the burner perimeters. The
burner heads must seat properly in the burner bases to enable proper cooktop
operation. To ensure proper seating, the burner heads are keyed using a hole
which aligns with the ignitor.
BURNERIGNFERS
[] [] [] [] [] [] [] [] [] [] [] [] [] [] [] [] [] [] [] [] [] []
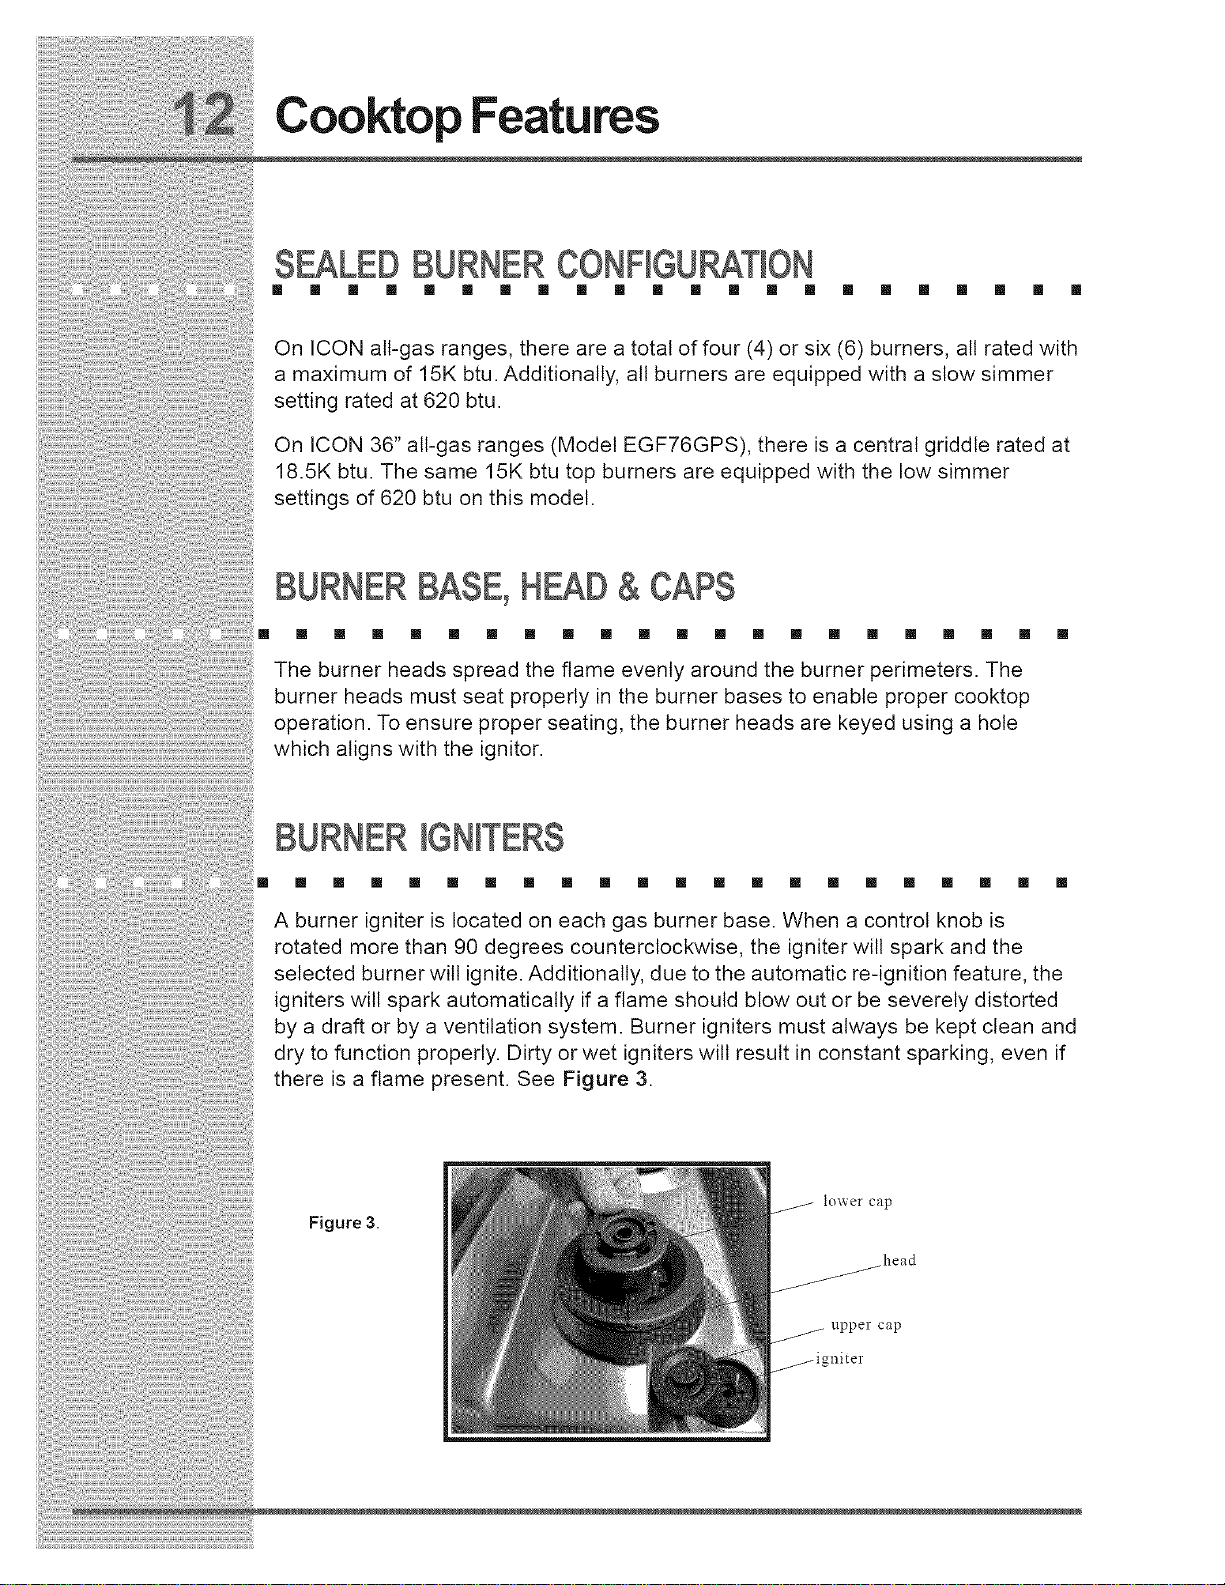
A burner igniter is located on each gas burner base. When a control knob is
rotated more than 90 degrees counterclockwise, the igniter will spark and the
selected burner will ignite. Additionally, due to the automatic re-ignition feature, the
igniters will spark automatically if a flame should blow out or be severely distorted
by a draft or by a ventilation system. Burner igniters must always be kept clean and
dry to function properly. Dirty or wet igniters wilt result in constant sparking, even if
there is a flame present. See Figure 3.
lower cap
Figure 3.
head
upper cap
" niter
 Loading...