

Electrolux TM, BM, AR, AF User Manual

user manual
refrigeration
environmental tip

Congratulations
Congratulations and thank you for choosing our products. We
are sure you will find your new appliance a pleasure to use.
Before you use the appliance, we recommend that you read
through the entire user manual, which provides the description
of the appliance and its functions.
To avoid the risks that are always present when you use
an electric appliance, it is important that the appliance is
installed correctly and that you read the safety instructions
carefully to avoid misuse and hazards.
We recommend that you keep this instruction booklet for
future reference and pass it on to any future owners.
After unpacking the appliance please check it is not
damaged. If in doubt, do not use the appliance but contact
your local Electrolux Customer Care Centre.
Contents
• Important safety instructions 1
• Installing your new appliance 2
• Ice station assembly 3
• Initial start up 4
• Electronic display controls – electronic models only 4
• Changing the temperature 4
• Manual (rotary) controls – manual models 6
• How to use the features of your appliance 7
• Care and maintenance 9
• General information 10
• Troubleshooting 11
• Warranty 12
electrolux refrigeration contents i
environmental tip
Information on disposal for users
• Most of the packing materials are recyclable. Please
dispose of those materials through your local recycling
depot or by placing them in appropriate collection
containers.
• If you wish to discard this product, please contact your
local authorities and ask for the correct method of disposal.

ii contents electrolux refrigeration electrolux refrigeration contents iii
Single door all refrigerator model (AR)Top mount freezer model (TM)
1
1
Sensor (electronic models only)
2 Freezer light (electronic models only)
3
Freezer air delivery vents
4
Adjustable wire shelf
5
Ice station with ice cube trays (where fitted)
6
Freezer air return vents
7 Sensor (electronic models only)
8
Deodoriser
9
Fridge and freezer temperature controls
(manual control models)
10
Deli compartment temperature controls
11
Repositional deli compartment
(where fitted, slideable on selected models)
12 Adjustable spill safe glass shelves
13
Fridge light
14
Spill safe slide away shelf (where fitted)
15
Crisper humidity controls
16
Crisper bins
17
Adjustable rollers
18
Freezer door bins
19
Dairy compartments
20
Adjustable door bins
21
Wine rack (where fitted)
22 Bottle twist holder (where fitted)
23
Full width door bin
24
Full width door bin (can bin on smaller models)
25
Stabilising foot
Bottom mount freezer model (BM)
2
3
4
5
6
7
8
9
10
11
13
15
16
17
18
19
20
22
23
25
21
12
14
5
1
2
3
4
6
8
7
9
10
11
13
12
14
15
17
16
18
24
19
20
22
21
1
Sensor (electronic models only)
2 Deodoriser
3
Fridge and freezer temperature controls
(manual control models)
4
Deli compartment temperature controls
5
Repositional deli compartment
(where fitted, slideable on selected models)
6
Fridge light
7 Spill safe slide away shelf (where fitted)
8
Wine rack (where fitted)
9
Adjustable spill safe glass shelves
10
Crisper humidity control
11
Full width crisper bin (where fitted)
12 Sensor (electronic models only)
13
Freezer air delivery bins
14
Ice station with ice cube tray(s) and bin
(where fitted)
15
Wire shelf
16
Freezer air return vents (hidden behind baskets)
17
Freezer baskets with clear fascia
18 Adjustable rollers
19
Dairy compartments
20
Adjustable door bins
21
Bottle twist holder (where fitted)
22 Full width bottle bin
23 Full width bottle bin (can bin on smaller models)
24
Stabilising foot
1
2
4
3
5
7
9
6
8
10
Single door all freezer model (AF)
8
Note: Product illustrations demonstrate various features but may not be completely in line
with current products.
Note: Product illustrations demonstrate various features but may not be completely in line
with current products.
23
24

Single door all refrigerator model (AR)Top mount freezer model (TM)
1 Deodoriser
2 Fridge temperature control
3
Deli compartment (slideable in selected models)
4
Fridge light
5
Wine rack (where fitted)
6
Spill safe slide away shelf (where fitted)
7 Adjustable spill safe glass shelves
8
Crisper humidity control
9
Full width crisper bin
10
Adjustable rollers
11
Dairy compartments
12
Adjustable door bins
13
Bottle twist holder
14
Full width bottle bins
15
Can bin
16
Stabilising foot
1
Freezer temperature control
2 Light
3
Air delivery vents
4
Ice station with ice tray(s) and bin
(where fitted)
5
Wire shelves
6 Return wire shelf
7
Freezer baskets with clear fascia
8
Stabilising foot
9
Adjustable rollers
1
2
4
3
5
7
9
6
8
10
11
12
14
13
16
Single door all freezer model (AF)
1
2
3
4
5
6
7
9
8
Note: Product illustrations demonstrate various features but may not be completely in line
with current products.
Note: Product illustrations demonstrate various features but may not be completely in line
with current products.
15
Please read the user manual carefully and store in a handy
place for later reference.
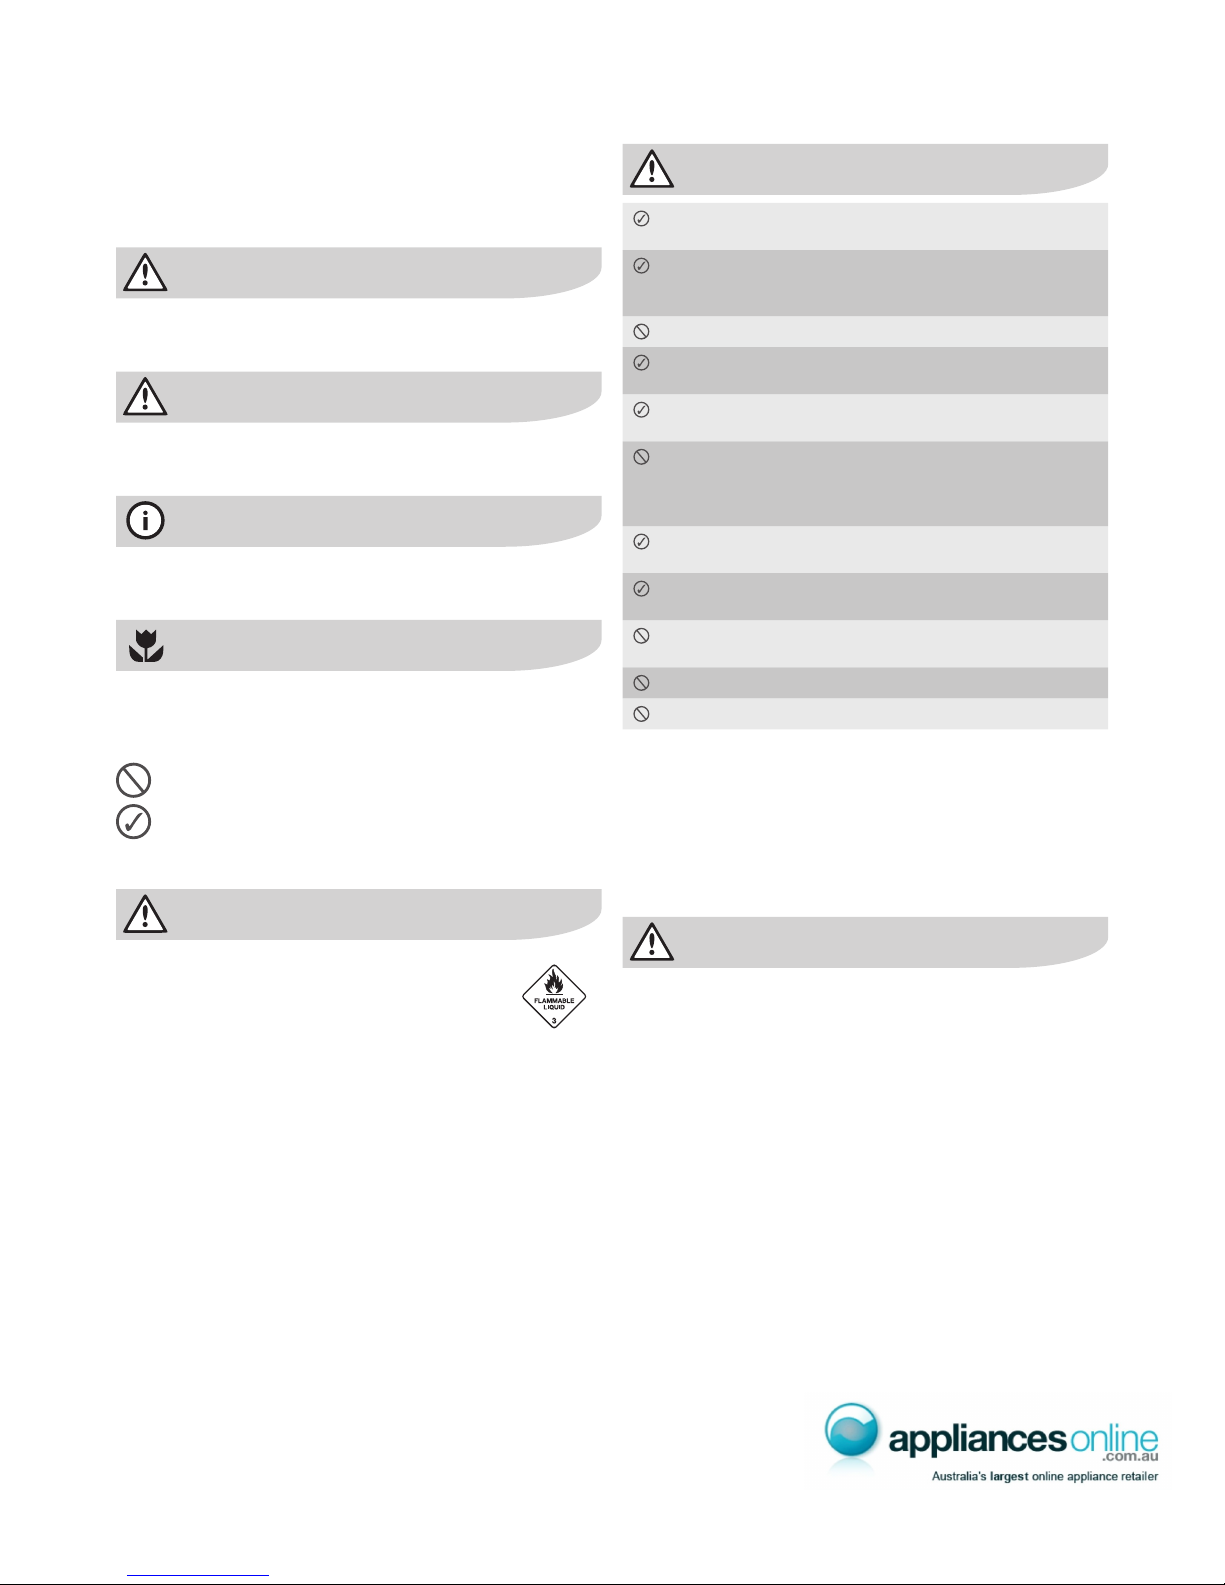
The symbols you will see in this booklet have these meanings:
warning
This symbol indicates information concerning your
personal safety
caution
This symbol indicates information on how to avoid
damaging the appliance
tips and information
This symbol indicates tips and information about use
of the appliance
environmental tip
This symbol indicates tips and information about
economical and ecological use of the appliance
Meanings of symbols used in this manual are shown below:
This symbol indicates never to do this
This symbol indicates always do this
warning
• If pressurised aerosol containers bear the word
‘flammable’ and/or a small flame symbol,
do not store them inside any refrigerator
or freezer.
If you do so you may cause an explosion.
• When you dispose of your old refrigerators
and freezers, remove any doors. Children can
suffocate if they get trapped inside.
• This appliance contains insulation formed with
flammable blowing gases. Avoid safety hazards by
carefully disposing of this appliance.
Important safety instructions
electrolux refrigeration important safety instructions 1
warning
The appliance must be plugged into its own
dedicated 220-240V, 50Hz AC electrical outlet.
Ensure that the electric outlet is properly earthed
to ground. Consult a qualified electrician if you are
unsure.
Do not use an extension cord or adapter plug.
If the power cord is damaged, it should be replaced
by a service technician or a qualified person.
Unplug the appliance before cleaning and before
changing the light bulb to avoid electric shock.
Never unplug the appliance by pulling on the power
cord. Always grip the plug firmly, and pull straight
out of the receptacle to prevent damaging the power
cord.
Choose a location that is not too cold - the
temperature should be above 10°C.
Put the appliance in a dry place, avoiding areas of
high moisture or humidity.
Don’t put the appliance in frosty or unprotected
areas, for example in a garage or on a verandah.
Don’t put the appliance in direct sunlight.
Don’t put the appliance near stoves, fires or heaters.
When correctly installed, your appliance should:
• have adequate clearance to the back and sides for air
circulation (refer to page 2).
• be aligned to the surrounding cupboards.
• have doors that will self-close from a partially open
position.
warning
• Have the stability foot in place (see diagram on page 2)
to prevent the appliance falling forward when a door
with heavy food load is opened.
2 installing your new appliance electrolux refrigeration
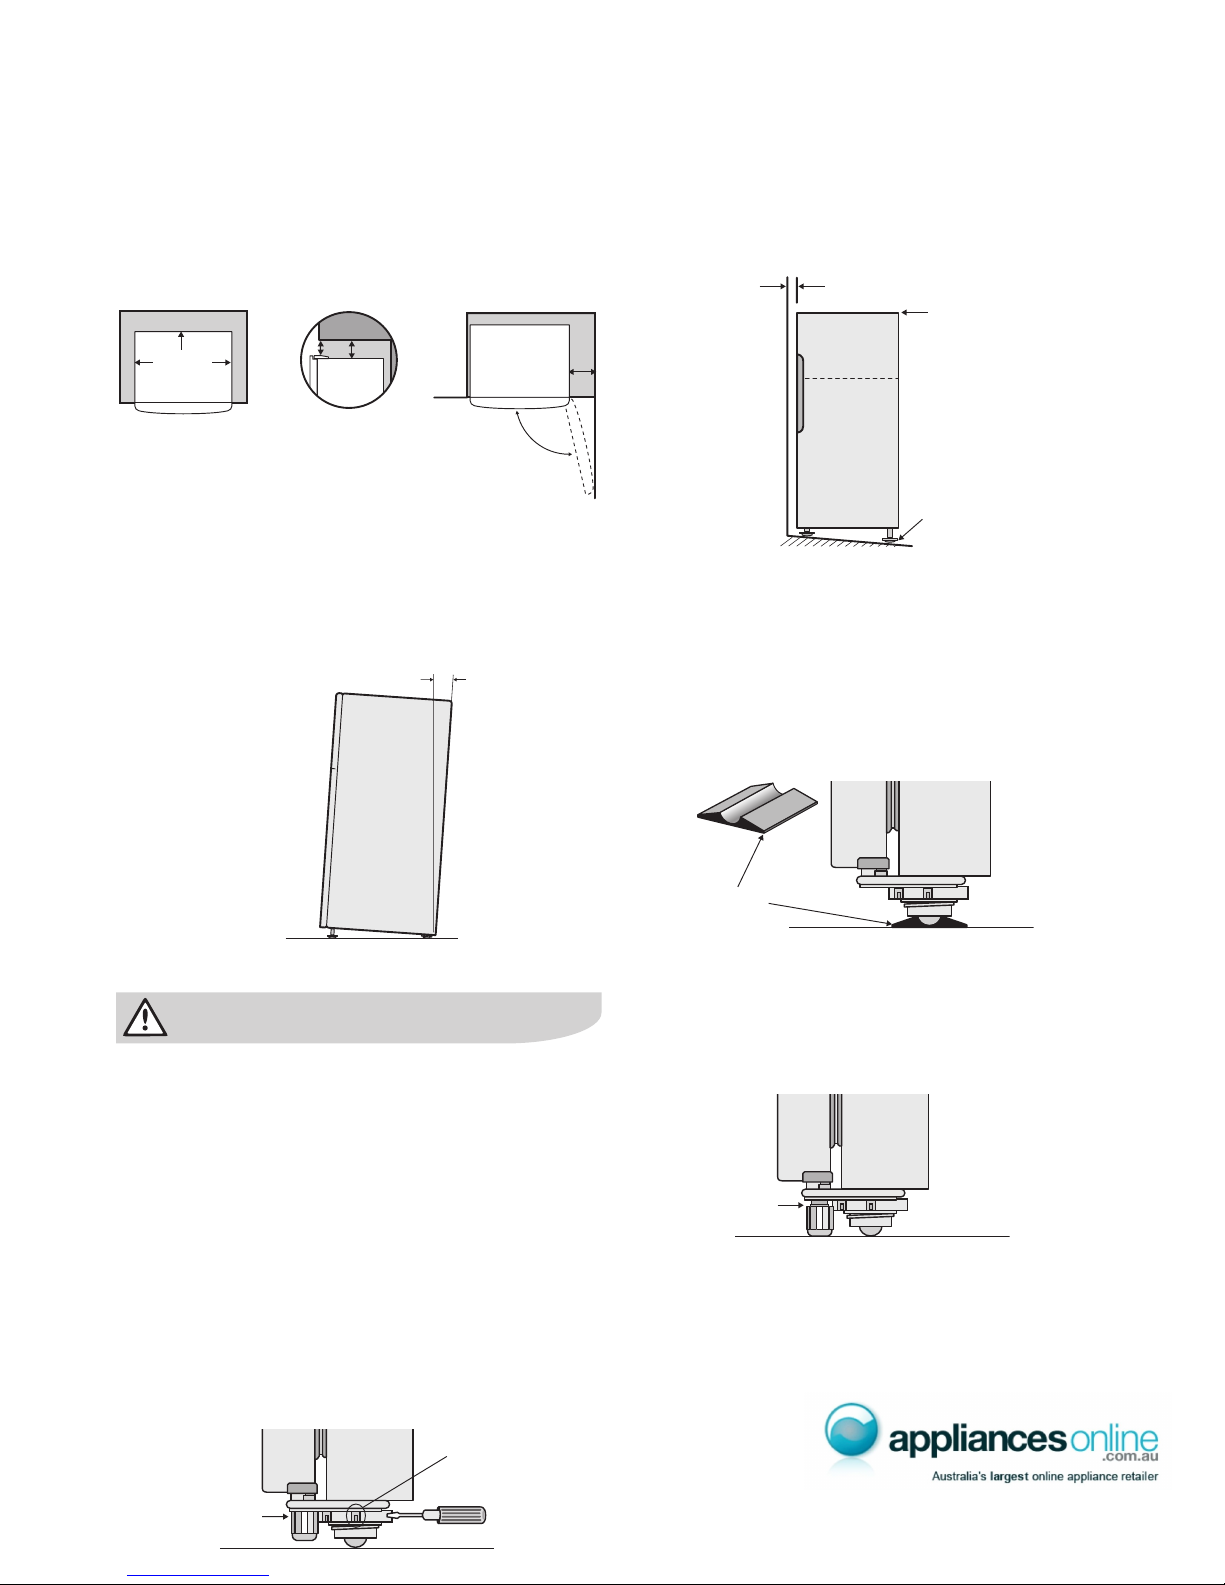
Clearance around your appliance
If you do not have a cupboard with a rear gap, the
recommended clearance area on top increases from 50mm
to 90mm (x) and from 32mm to 72mm (y).
When positioned in a corner area, spacing of at least 350mm
(400mm for E:Line models) on the hinge side will allow the doors
to open enough to enable the removal of bins and shelves.
Note:
Doors are designed to sit proud of cabinetry (not flush).
The clearances shown above are the recommended
minimum clearances. The clearance at the rear must not
exceed 75mm.
Installing your appliance
The appliance should arrive with the front adjustable
rollers wound down to tilt the top of the appliance
backwards by about 10-15mm from upright.
The stability foot should also be wound fully up so it will not
interfere with the operation of the rollers (see diagram in Step 3).
caution
The rollers are designed for forward or backward
movement only. They are not castors. Moving the
appliance sideways may damage your floor and
the rollers.
1. Roll the appliance into its final position.
2. The top of the appliance should be tilted back by
approximately 10-15mm (see diagram above). This will allow
the doors to self-close providing a consistent door seal.
3. If the appliance is not tilted back, you can adjust the
two front rollers by turning the large, plastic roller nut
(see diagram below). This will increase the height of the
rollers. One turn of the nut will tilt the appliance back
approximately 10mm. If you have difficulty turning the
roller nut you can have someone tilt the appliance back,
so that you have better access. Alternatively, you can
access the rollers from the side, using a flat screwdriver
to help you turn the nut (see diagram below).
4. Check the alignment of the appliance to the surrounding
cupboards. The top of the appliance should be level
from side to side (see diagram below). If you need to
adjust the level, use the adjustable rollers as discussed
in Step 3.
5. If the appliance now rocks from one corner to the
opposite rear corner, this means that the floor is
uneven; you will need to put some packing under one
of the rear rollers.You could use thin pieces of solid
material, such as thin board, vinyl floor tiles or laminate.
Place the packing so that it will sit under one of the rear
rollers when the appliance is rolled into position.
6. On certain floor surfaces the appliance may roll forward
during operation. Where provided a “Roller Stop” can
be placed under the front rollers.
7. You may now need to fine-tune the installation by
repeating Steps 3, 4 and 5.
8. When you have the appliance in final position, wind the
stability foot down until it just makes contact with the
floor. Whenever you need to move the appliance,
be sure to wind the foot back up so that the
appliance can roll freely.
9. Clean your appliance thoroughly following the
instructions on page 10 and wipe off any dust that has
accumulated during shipping.
10. Plug the appliance into the power point. Don’t use a
double adaptor. If you need to roll the appliance out
to get at the power point, remember to raise the
stability foot before you do so.
11. We recommend that you let your appliance run for two
to three hours before you put any food in it. This will
allow you to check that it is operating properly.
Congratulations! You have successfully installed your
new appliance.
Installing your new appliance
(x)
50mm
30mm
30mm
Recommended
airspace
CABINET
DOOR
350mm
(y)
10-15mm
Fixed rear
rollers
Height adjustable
front rollers
Top of refrigerator
is level ie. horizontal
Adjust front rollers
for uneveness of floor
eg. wind this roller
down or up
Aligned to
cupboards
ie. even gap
Large plastic
roller nut
Stability foot
wound up
Roller Stop
Stability foot
wound down
 Loading...