

Page 1

ECT-2
RF Remote Control
Rev1.3
Owner's Manual
Page 2

General use
Table of contents
Introduction ...................................................................................... 3
Before you start to use the system ................................................... 4
Installing the Batteries ..................................................................... 5
Charging the Batteries ..................................................................... 6
Connecting the Remote Controller .................................................. 7
Remote Control, Introduction and Illustration ................................ 8
Select Input Source .......................................................................... 9
Adjust the Balance in 2-Channel mode ......................................... 10
Adjust the Balance in 5.1-Channel mode ....................................... 11
View Amplifier data ...................................................................... 12
Monitor the bias current ................................................................. 13
Change source name ...................................................................... 14
How to adjust the input level ......................................................... 15
Use of IR (infrared) ........................................................................ 16
Multi player ................................................................................... 17
Multi player Normal mode ........................................................... 18
Multi player OSD mode ................................................................ 19
Multi player Div mode .................................................................. 20
Multiplayer mode overview ............................................................. 22
EC Master Control ......................................................................... 23
Spare .............................................................................................. 23
How to update firmware ................................................................ 24
Reset the system ............................................................................ 26
Tau, Norway
29.06.2007
2
Page 3

General use
1 GENERAL INFORMATION
1.1 Congratulations
Thank you for purchasing this product, one of the most advanced
remote controllers on the marked. The ETC-2 is a hybrid system.
This means that you can use it to control other units by using the on
board IR (infrared) transmitter, or by using the new two way radio
communication system implemented in some of the products from
Electrocompaniet.
1.2 Important References
In this manual we have used some simple rules to make it easier to
understand the meaning of the text.
SELECT:
We use capital letters for all references to buttons on the ECT-2
Balance:
Italic lower-case letters is used to describe text on the ECT-2 screen.
Balance:
Bold Italic lower-case letters is used as reference to another chapter
in this manual.
3
Page 4

General use
1.3 Before you start to use the system
Step 1
First of all you need to activate the batteries. Please remove the
plastic stick located on the right side.
If your remote controller came without installed batteries please follow the description "Installing the batteries"
Step 2
The next to do is to charge the remote controller. This has to be
done as described in the chapter "charging the batteries".
Step 3
When you are finished with step 1 and 2, you are ready to learn the
ECT-2 what units that is to be included in the communication list.
Please follow the procedure in chapter “Connecting the remote
controller” for this process.
When you are finished with these three steps you are ready to start
to use the remote controller.
However, we strongly advice you to read this manual carefully
before you start to use the product !
4
Page 5
1.4 Installing the batteries
How to insert the batteries:
Use 3 pcs. AAA rechargeable
batteries.
Gently unscrew the four screws
holding the top cover.
Remove the top cover.
Installing batteries
Insert the batteries in the
Socket with the + and - signs
according to the drawing.
It is very important to mount the
batteries in the order 3, 2, 1.
General use
Removing Batteries
Use a small screwdriver to bend
up the batteries in order 3, 2, 1.
After installing the batteries,
gently fasten the top cover.
Note !
Only rechargeable batteries of
type Ni-MH can be used.
5
1
2
3
Page 6
General use
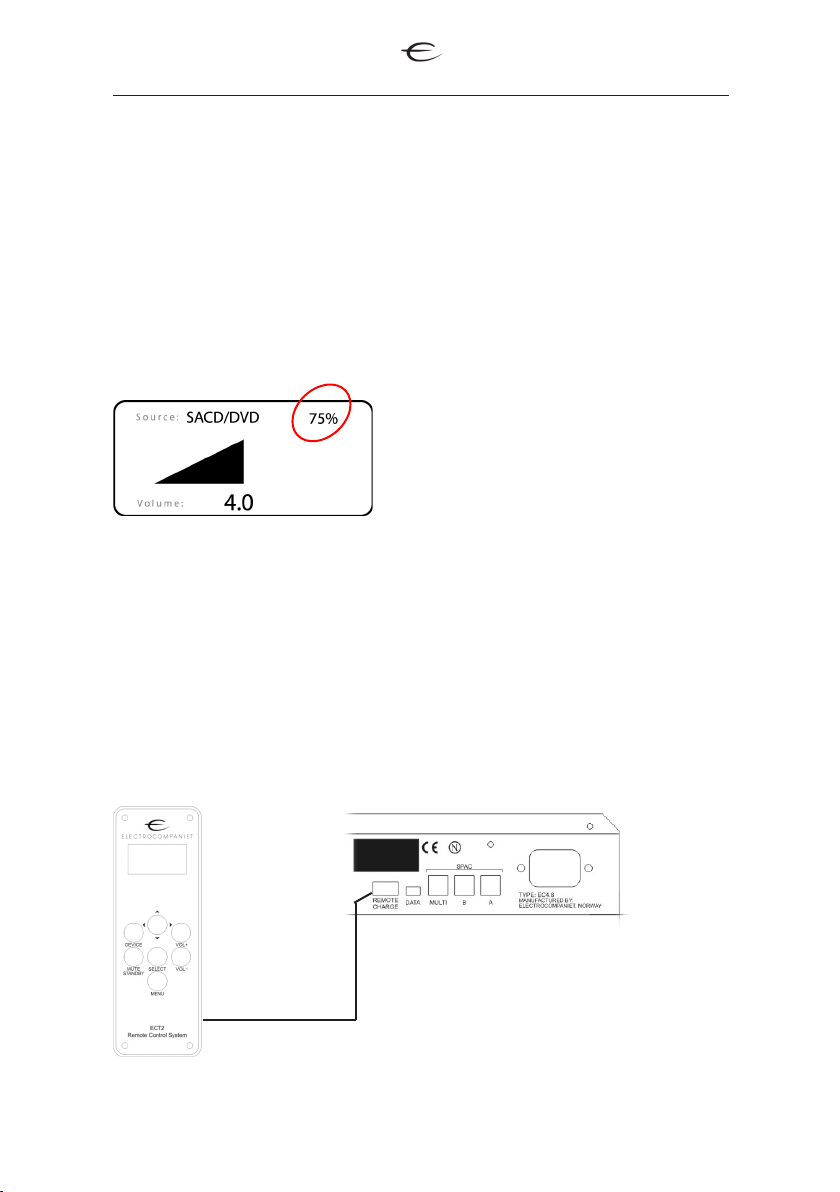
1.5 Charging the Batteries
The remote controller is charged through a standard USB cable,
included in the package with the ECT-2. Please connect this cable on
the rear side of EC4.8 / EC4.9.
If the EC4.8 / EC4.9 is turned off, please turn on the system to start
the charging. You can supervise the charging process by inspecting
the main screen on the ECT-2.
Battery Status
Example:
Connecting the ECT-2 to the EC4.8
Rear view of EC4.8
6
Page 7
General use
1.6 Connecting the ECT-2
The remote controller uses a two way communication system. To
know what product to control, the remote controller has to learn a
unique serial number stored in each product. Whit this number the
ECT-2 knows what unit to control.
This is an example showing how to include the preamplifier EC4.9
to the ECT-2:
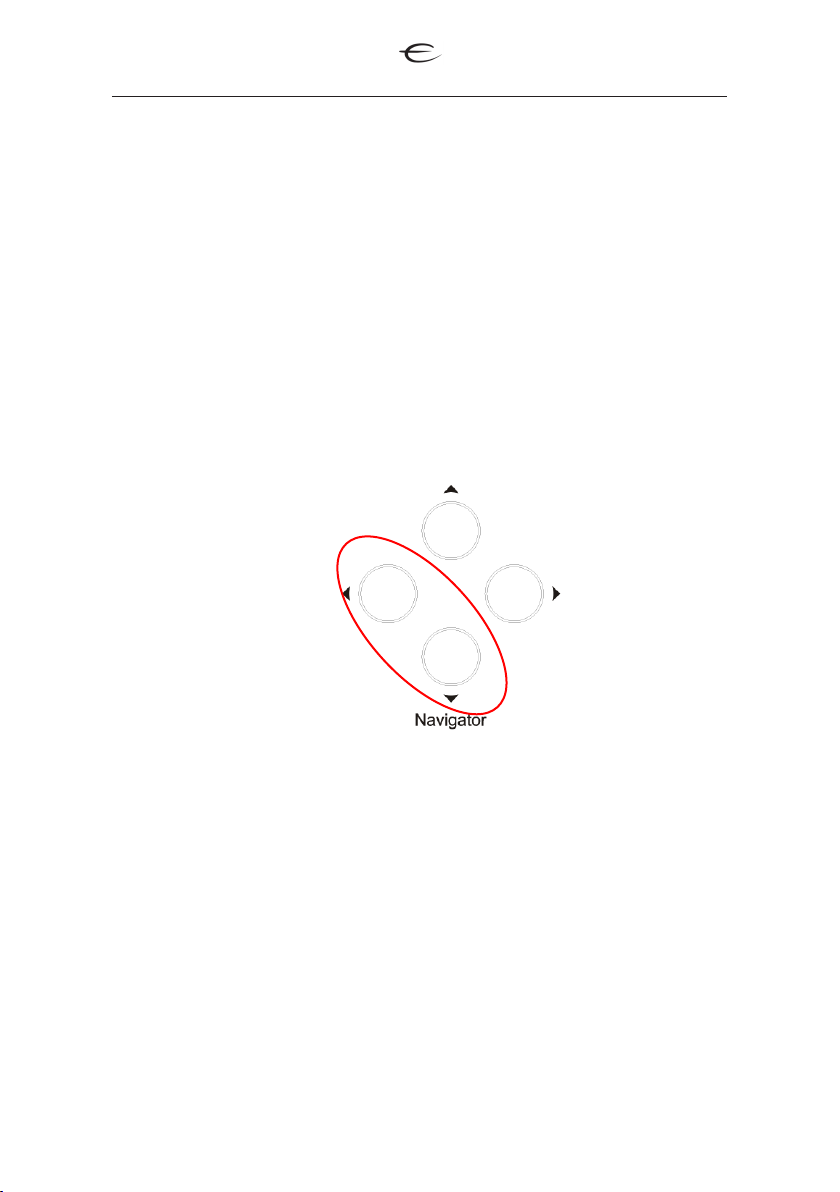
1: Turn off the EC4.9
2: Then press and hold the Navigator left and down buttons, and turn
on the EC4.9 while still pressing down the buttons.
Press and hold both
before powering on.
3:The display on EC4.9 will show "searching for remote control"
after power on.
4: Now, at the same time press the SELECT and DEVICE buttons on
the remote controller for a couple of seconds.
5: On the EC4.9, the display will change to "Device found".
6: Restart the EC4.9. i.e. turn of the EC4.9 wait for 5 seconds and
turn on the system again.
All products from Electrocompaniet need this procedure before
being used together with the ECT-2
7
Page 8
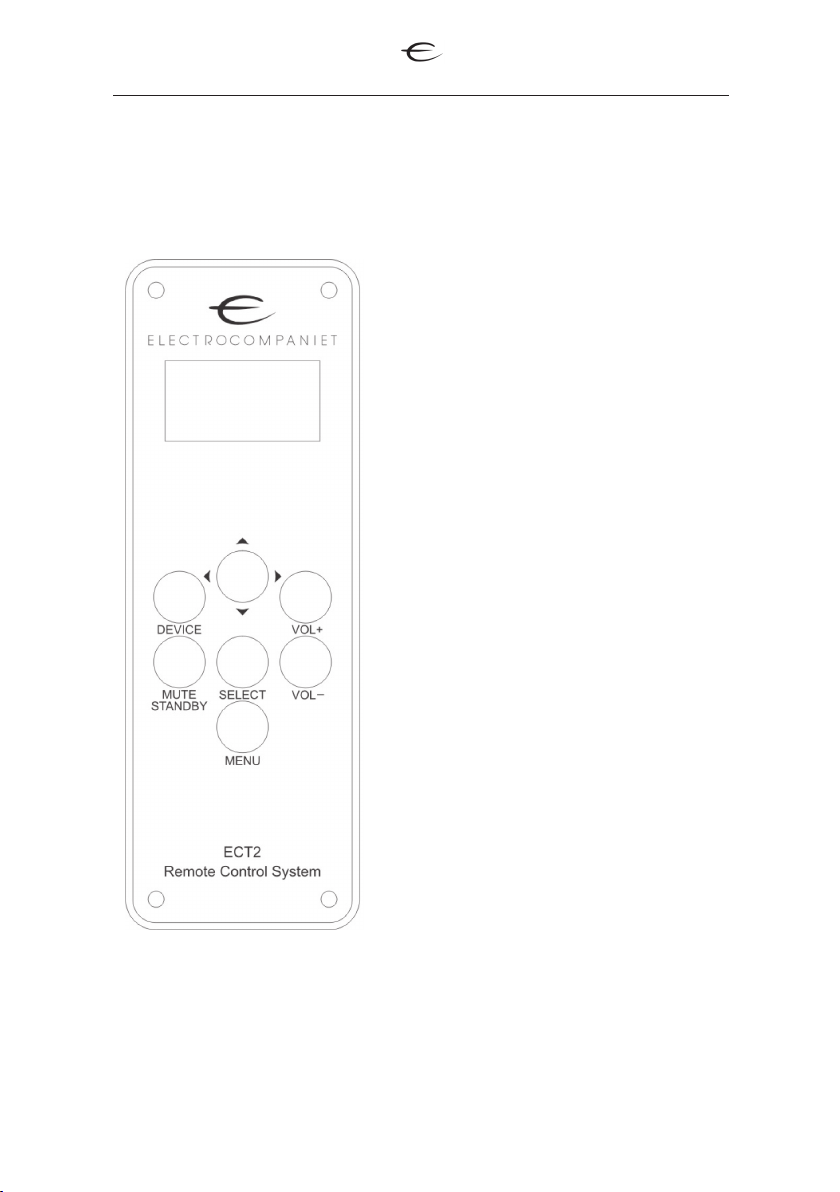
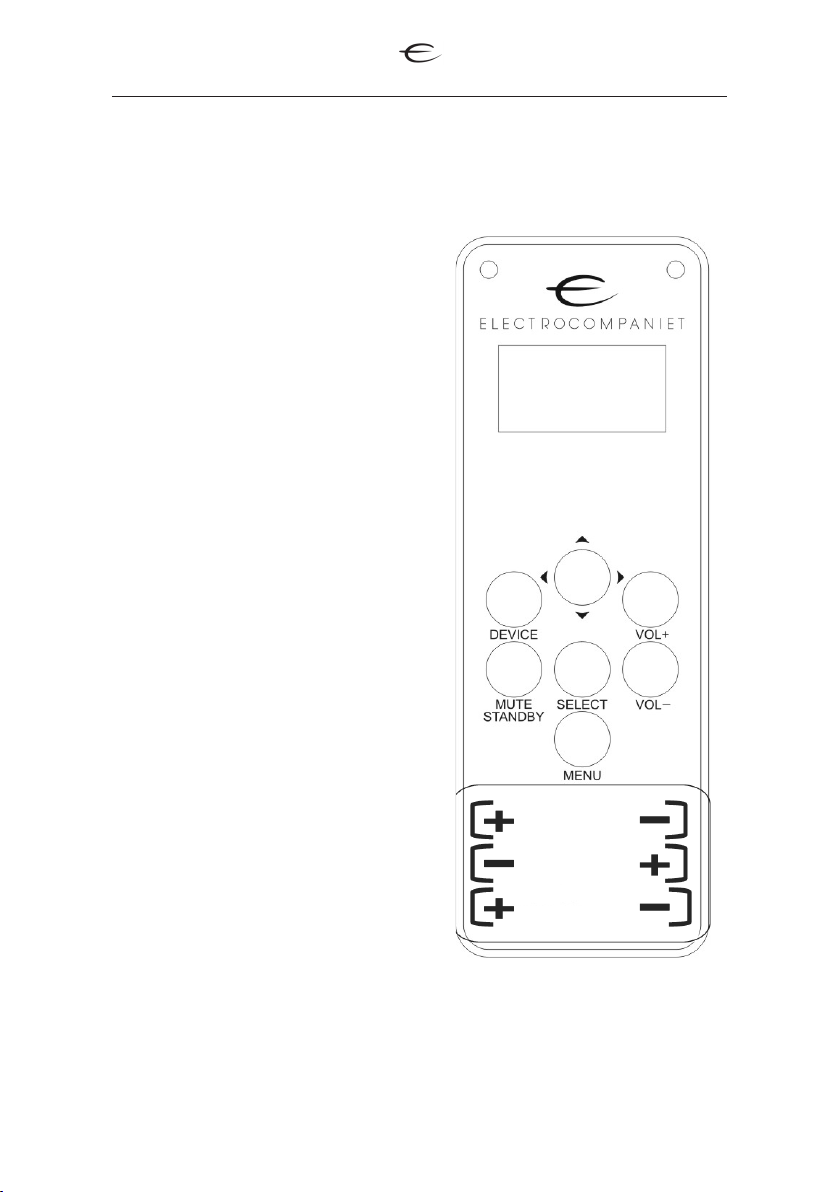
1.7 ECT-2 Illustration
General use
Device
Select the product to control and
display on the screen.
Preamp , IR, Multi player, Tuner
Joystick/selector
Button used to select input source
and to navigate in menus.
Volume +
Various functions - Volume,
setup, sound mode
Volume -
Various functions - Volume, subtitles, Audio mode.
Mute / Standby
Various functions - mute, standby, root menu, repeat.
Select
Confirm your selections
Menu
Selects the following menus:
Balance settings, Bias Currents,
and Advanced settings.
8
Page 9
2 THE PREAMP MENU
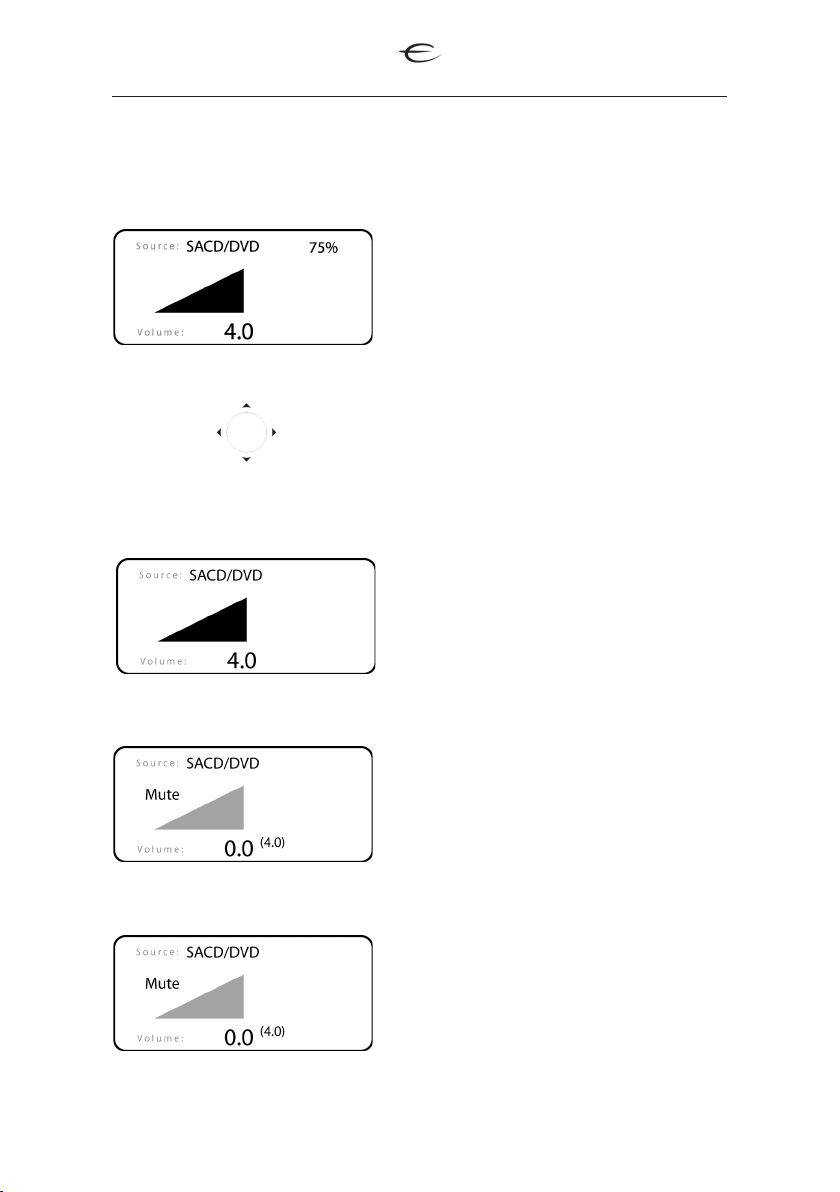
2.1 Select input source
Go to the Preamp menu by
repeatedly pressing the DEVICE
button.
Then press the joystick to the left or
to the right to jump from one device
to another. You will see the result
on the remote controller screen and
on the device you control.
Adjust the volume
Press the VOL+ button to raise the
volume. Press the VOL- to lower the
volume.
Preamp function
Mute the system
Press MUTE/STANDBY to silence
the device under control.
Standby
Press the MUTE/STANDBY button
for 3 seconds to activate the standby
function. Deselect the standby function by simply pressing any button
on the remote controller.
9
Page 10

Preamp function
2.2 How to adjust the balance in 2-Channel mode
Go to the Preamp menu by
repeatedly pressing the DEVICE
button.
Press the MENU button
Press the joystick up/down to highlight balance, press SELECT.
Locate channel to adjust using the
joystick (up/down/left/right). When
the marker is on the desired channel
press VOL+ or VOL - to adjust the
balance. When you are finished press
the button MENU to save and return
to the main screen.
Note the different function for the text in the left and right column.
We have marked the left column blue to make this easier to locate.
If you select one of these options you pan the system. For example is
the result from adjust Left/Right that all the speakers on the left side
and all the speakers for the right side are grouped together.
This makes the adjust much faster and easier. If you select one of
the options on the right side you adjust each loudspeaker individually.
10
Page 11

Preamp function
2.3 Adjust the balance in 5.1-channel mode
Go to the Preamp menu by
repeatedly pressing the DEVICE
button.
Press the button with name MENU
Press the joystick up/down to highlight balance, press SELECT.
Locate channel to adjust using the
joystick (up/down/left/right). When
the marker is on the desired channel press VOL+ or VOL- to adjust
the balance. When you are finished
press the button MENU to save
and return to the main screen.
Note the different function for the text in the left and right column.
We have marked the left column blue to make this easier to locate.
If you select one of these options you pan the system. For example is
the result from adjust Left/Right that all the speakers on the left side
and all the speakers for the right side are grouped together.
This makes the adjust much faster and easier. If you select one of
the options on the right side you adjust each loudspeaker individually.
11
Page 12

2.4 How to view Amp Data
Amp TEMP
A1 2 70
A2 1 75
A3 1 65
B1 2 70
B2 1 75
B3 1 65
Go to the Preamp menu by
repeatedly pressing the DEVICE
button.
Press the button with name MENU
Please use the joystick up/down to
highlight Amp Data.
Press SELECT to activate the func-
tion.
Display of current and temperature
for a six channel system.
Preamp function
12
Page 13

2.5 Monitor your bias current
Go to the Preamp menu by repeatedly pressing the DEVICE button.
Press the MENU button
Please use the joystick up/down to
highlight BiasCurrents.
Press SELECT to activate the function
Preamp function
Turn of all sources and make sure
there is no sound from your loudspeakers ( No energy).
The BiasCurrents will normally have
a value between 100 and 200.
To return to the main display press
the MENU button.
13
Page 14

Main menu
Balance settings
Amp Data
Bias Currents
Advanced settings
Preamp function
2.6 How to change source name
On some products, like the EC4.8 and EC4.9, you have the option
to change the name on all input sources to your own favorite name.
Please follow this procedure if you want to use this function.
Go to the Preamp menu by
repeatedly pressing the DEVICE
button.
Press the button with name MENU
Please use the joystick up/down to
highlight Advanced Settings
Press SELECT to activate the choice.
Use the joystick up/down to move the
marker to Source name.
Press SELECT to activate the choice.
Use the joystick to find the name you
want to change. Press SELECT
Use the joystick to move the marker
to the character you want to change.
Use the VOL+ or VOL- to find the
preferred character, press and hold
for fast change.
To save and return to the main display press SELECT.
To return without saving press MENU.
14
Page 15

Preamp function
2.7 How to adjust the input level
With this function you can adjust the input sensitivity to avoid different sources having different level of sound.
Go to the Preamp menu by
repeatedly pressing the DEVICE
button.
Press the button with name MENU
Use the joystick up/down to high
light Advanced Settings.
Press SELECT.
Press joystick down to highlight
Input Level.
Press SELECT.
Adjust the level up or down using
the VOL+ / VOL- buttons. Press
SELECT to save, press menu to quit
without saving.
Please note that you are adjusting the
current source only. If you want to
adjust another input level, you need
to select this source first.
15
Page 16

The IR function
3 THE IR FUNCTION
3.1 How to use the IR (Infra red) function
Press DEVICE until you see the IR
screen.
Make sure the CDIR is enabled in
EC Master Control menu.
See page 22 for more information
In this mode the joystick turn into the same function as the navigator
in the front of the product you want to control. The rest of the button
will have the standard preamp functions.
Depending on the product you want to control, the joystick has different functions.
The following picture shows the functions of the joystick when used
to control the EMC-1 reference CD player
Start
Step -
Step +
Stop
16
Page 17

Multi player
4 MULTI PLAYER
4.1 Normal, OSD and Div mode
Press Device until you come to the
multi player menu:
This window has different information depending on the selection of
sub-menu, (Normal, Osd and Div.)
The mostly used mode is called Normal, and gives you current
information of track number, time, Volume, and battery level.
By pressing MENU, you can jump between all the menus.
Normal:
This is the mode to use for normal playback of CD, SACD, DVD
etc. In this mode the volume button still work together with the preamplifier if available.
OSD:
This mode is the "On Screen Display menu". In this mode you can
use the joystick to navigate around the TV-screen, setting up your
DVD system, selecting subtitles etc.
Div:
This is a mode with some special options. Please read the chapter
"Using Div mode" for more information.
17
Page 18

4.2 Normal mode
If Normal is not highlighted, press
MENU until you get this mode.
This is the mode to be used for all normal playing.
In this mode the buttons on the ECT-2 have this function:
Device:
Used for selection of products.
Joystick:
Used for controlling play/stop/pause, step, open and close.
Vol+
Used for adjusting the volume.
Multi player
Vol-
Used for adjusting the volume.
Select
No function.
Mute:
Mute the sound.
A long press gives Standby.
Menu
Used to select next menu. ( Osd or Div mode)
18
Page 19

Multi player
4.3 OSD mode (On Screen Display)
When already in Multi player window, Press MENU until Osd is highlighted
You must have a television/projector connected to use this menu.
Use this menu for preparing a DVD for playing, selecting language,
sound and all other selections available from the manufacturer of the
DVD disc you are about to play.
For a detailed description of all functions, please look up the manual
for the EMP-1 player.
In this mode the buttons on the ECT-2 have this function:
Device:
Used for selection of products.
Joystick:
Used to navigate the menus on the television screen menu.
Vol+
Setup menu. Make sure you have a Television or projector connected.
Vol-
Subtitles.
Select
Stereo/multichannel.
Mute:
Root menu.
Menu:
Used to select new sub menu.
19
Page 20

Multi player
4.4 Div mode
When already in Multi player window, Press MENU until Div is highlighted
Generally, this sub-menu use the joystick to let you select all possible control commands that is not available from the OSD menu or
directly from buttons on the ECT-2 remote controller.
Device:
Used for selection of products.
Joystick:
Left/right, bring you trough all possible setup commands. See below for
more information.
Vol+
Sound mode.
This button select between stereo, virtual surround and multichannel.
Vol-
Audio mode
This button has different functions for CD, SACD and DVD. In SACD you
select between layers.
In DVD you select soundtrack like DTS, Dolby etc.
Select
Choice conrmation.
Mute
Repeat disc.
Menu:
Used to select new sub menu.
20
Page 21

Special function in Div mode
There are some buttons that do not have a dedicated button. To
make this function available you can use the joystick when in Div
menu.
Joystick:
Left/right, bring you trough all possible setup commands.
Joystick Up/down for changing of values
Select for activating the choice
Display Show detailed information of movie.
Shufe
Repeat Also available in DIV menu and button VOL-.
Repeat AB
DVD menu
Angle No function.
Audio DI
21
Page 22

Multi player
4.5 Function on buttons for different mode
Normal Mode
Used for operation of
cd/dvd players.
Device:
Used for selection of
products.
Joystick:
Used for controlling
play/stop/pause, step,
open and close.
Vol+
Used for adjusting
the volume
OSD mode
On Screen Display.
Used for DVD menus.
Device:
Used for selection of
products.
Joystick:
Used to navigate on the
menus on the television
screen menu
Vol+
Setup menu. Make sure
you have a Television or
projector connected.
Div mode
Special mode.
Device:
Used for selection of
products
Joystick:
Left/right, bring you
trough all possible
setup commands.
Vol+
Sound mode.
Vol-
Used for adjusting
the volume
Select
No function
Mute:
Mute the sound.
A long press gives
Standby.
Menu
Used to select new
sub menu.
Vol-
Subtitles
Select
Conrm of choice
Mute:
Root menu
Menu:
Used to select new sub
menu.
22
Vol-
Audio mode
Select
Conrm of choice
Mute
Repeat
Menu:
Used to select new
sub menu.
Table 1
Page 23

EC Master Control
5 EC Master Control
5.1 Special commands
Backlight:
Select the intensity of the VFD display for all products connected to
the remote controller.
Use the joystick up/down to select function.
Use the joystick left/right to select function.
The backlight will change for all connected products.
Enable CDIR:
The ECT-2 is a hybrid system. Both radio and infrared communication is supported.
Use this function to turn on/off the IR function.
Use the joystick up/down to select function
Use the joystick left/right to select function
If you turn off the CDIR function, the menu for use of the IR is
removed, to reduce the number of unused screens. Turn on this
function if you have an existing EMP-1 or other equipment that you
want to control with the Remote controller.
23
Page 24

Firmware
6 INSTALLING NEW FIRMWARE
6.1 How to update the firmware
With a personal computer you can easily upgrade the software for
the remote controller. Please use a browser and go to:
www.electrocompaniet.no
Press Download from Electrocompaniet home
page. Then select Software Updater.zip and
download the updater software .
Save the file on your disk and unzip.
1. Firmware update
Please follow the instruction on screen.
2. Get latest firmware
Download the latest firmware. The firmware will be
saved on your hard drive.
3. Install drivers
The first time you run this software you have to install
necessary drivers to your hard drive.
24
Page 25

Firmware
4. Detect Serial Port.
When you get this window, please connect your
USB cable between the computer and the
product you want to update.
5. Detect Current Firmware
When you get this window, use the automatic identification, or select the product you want to upgrade
from the list.
As soon as the system has detected current version,
please press next.
6. Firmware Detection Information
You will find a list with latest version, and also
the recommended version to install.
7. Download new firmware to board
If you want to reset all setup stored in your system,
please mark out the selection box.
Press start firmware upgrade to start programming
new firmware to your system.
When the upgrade is ready you get the message,
upgrade result: Upgrade successful.
8. Finished
The system is updated. Please remove the USB cable
and restart all systems by turning them off for 5 sec.
25
Page 26

Reset
7 RESET THE SYSTEM
7.1 How to reset the remote controller
If you for some reason want to reset the ECT-2, press the following
three buttons for 5 second:
MUTE, MENU, VOL-
This is only a reset of the ECT-2 processor. You do not loose any
setup or preset values.
26
27
Page 27

Page 28

DEALER
StickER
HERE
LOCAL DEALER
To avoid risk of fire or electric shock, do not expose this appliance to rain or moisture.
Do not remove cover. No user serviceable parts inside. Refer servicing to qualified service personal.
The warranty is void if the product is tampered with by non-authorised personnel. Use only
authorized Electrocompaniet service center.
Warning:
Verify line voltage before use.
28
 Loading...