

Page 1
USER MANUAL
MINI WILDLIFE CAMERA
Page 2

2
INTRODUCTION
Thank you for purchasing our mini wildlife camera. This device is
a special camera designed specifically for recording and
observing wildlife.
These easy to follow instructions will provide you with information
on the operation and functions of the camera, enabling you to get
the most from your new purchase.
Before using the product, please read this user manual carefully.
Page 3

3
SAFETY
Please read the following safety precautions carefully
before using the device.
Do not try to open the camera case by yourself.
Repairs can only be carried out by the manufacturer
or their authorized agents.
During operation the temperature of device may rise,
this is normal.
The camera must only be used with the accessories
provided.
Page 4
4
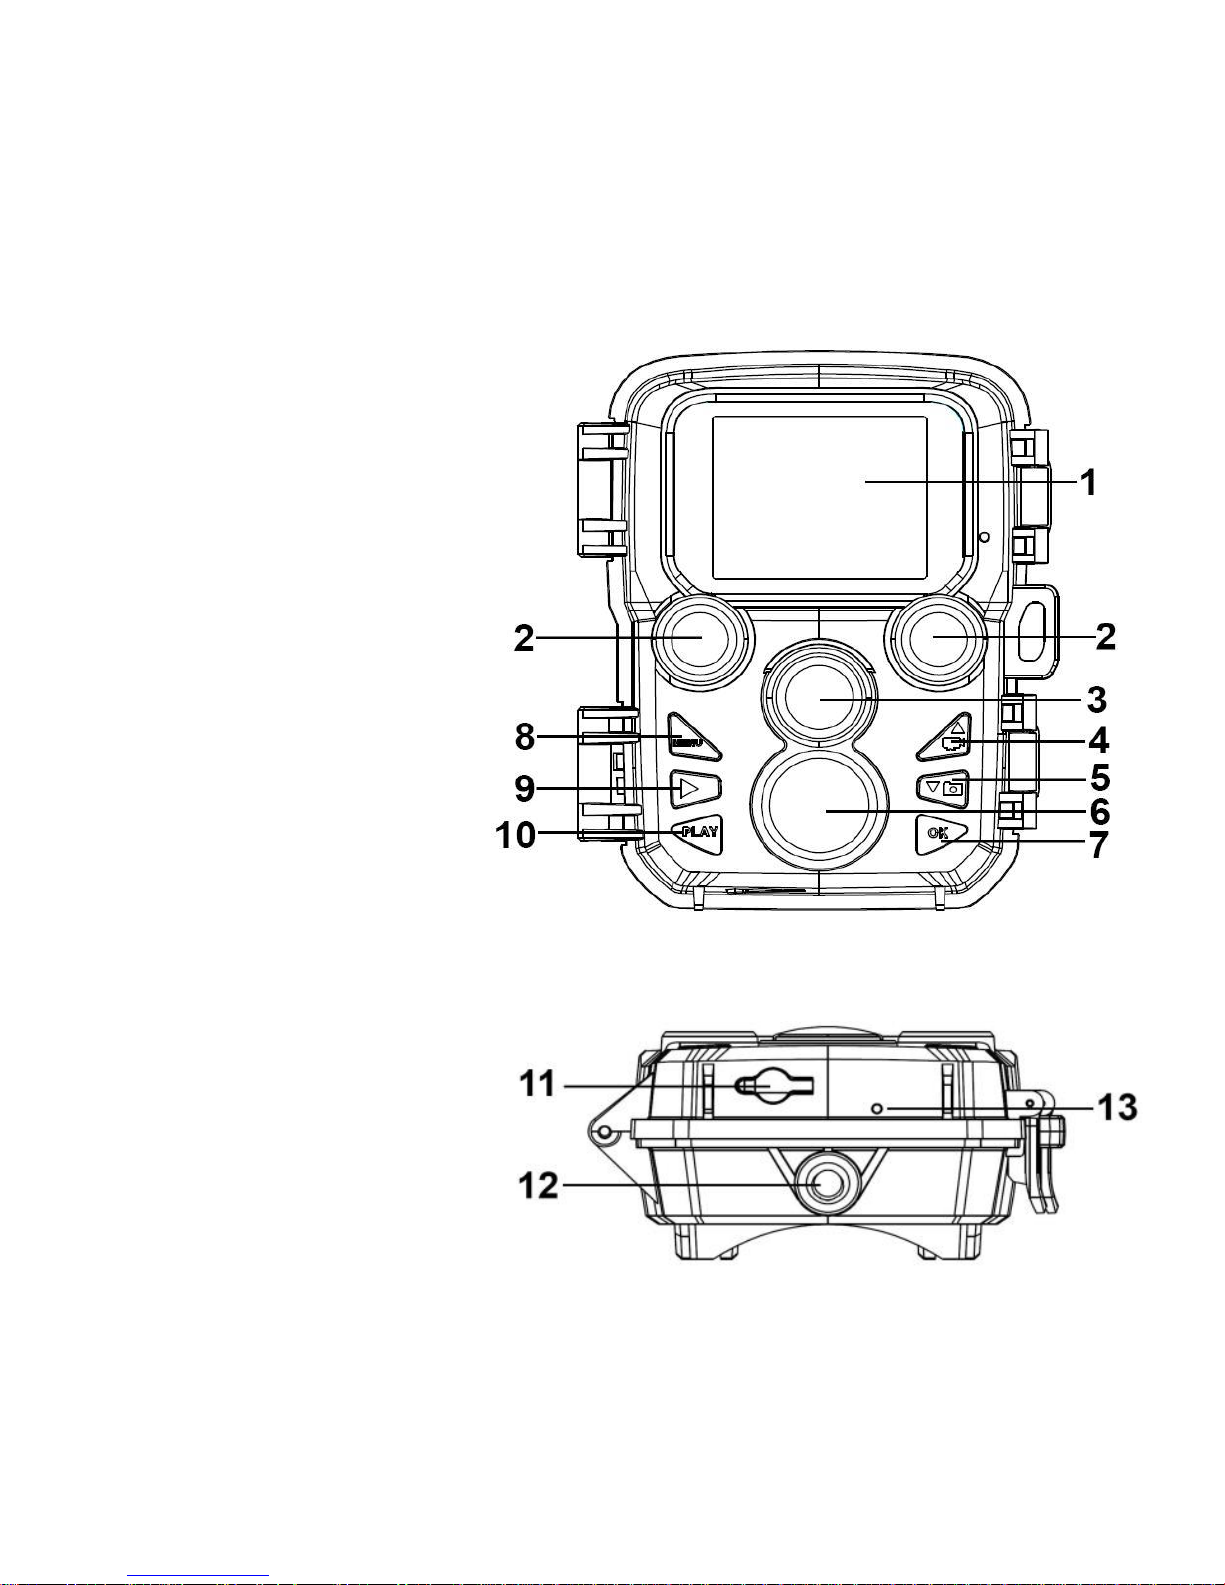
PARTS OF THE CAMERA
1. Display
2. Motion Sensors
3. Lens
4. Up/Video Button
5. Down/Capture Button
6. Front motion sensor
7. OK/Shot button
8. Menu Button
9. Right button
10. Playback button
11. DC adapter port
12. Tripod Slot
13. Microphone
Page 5
5
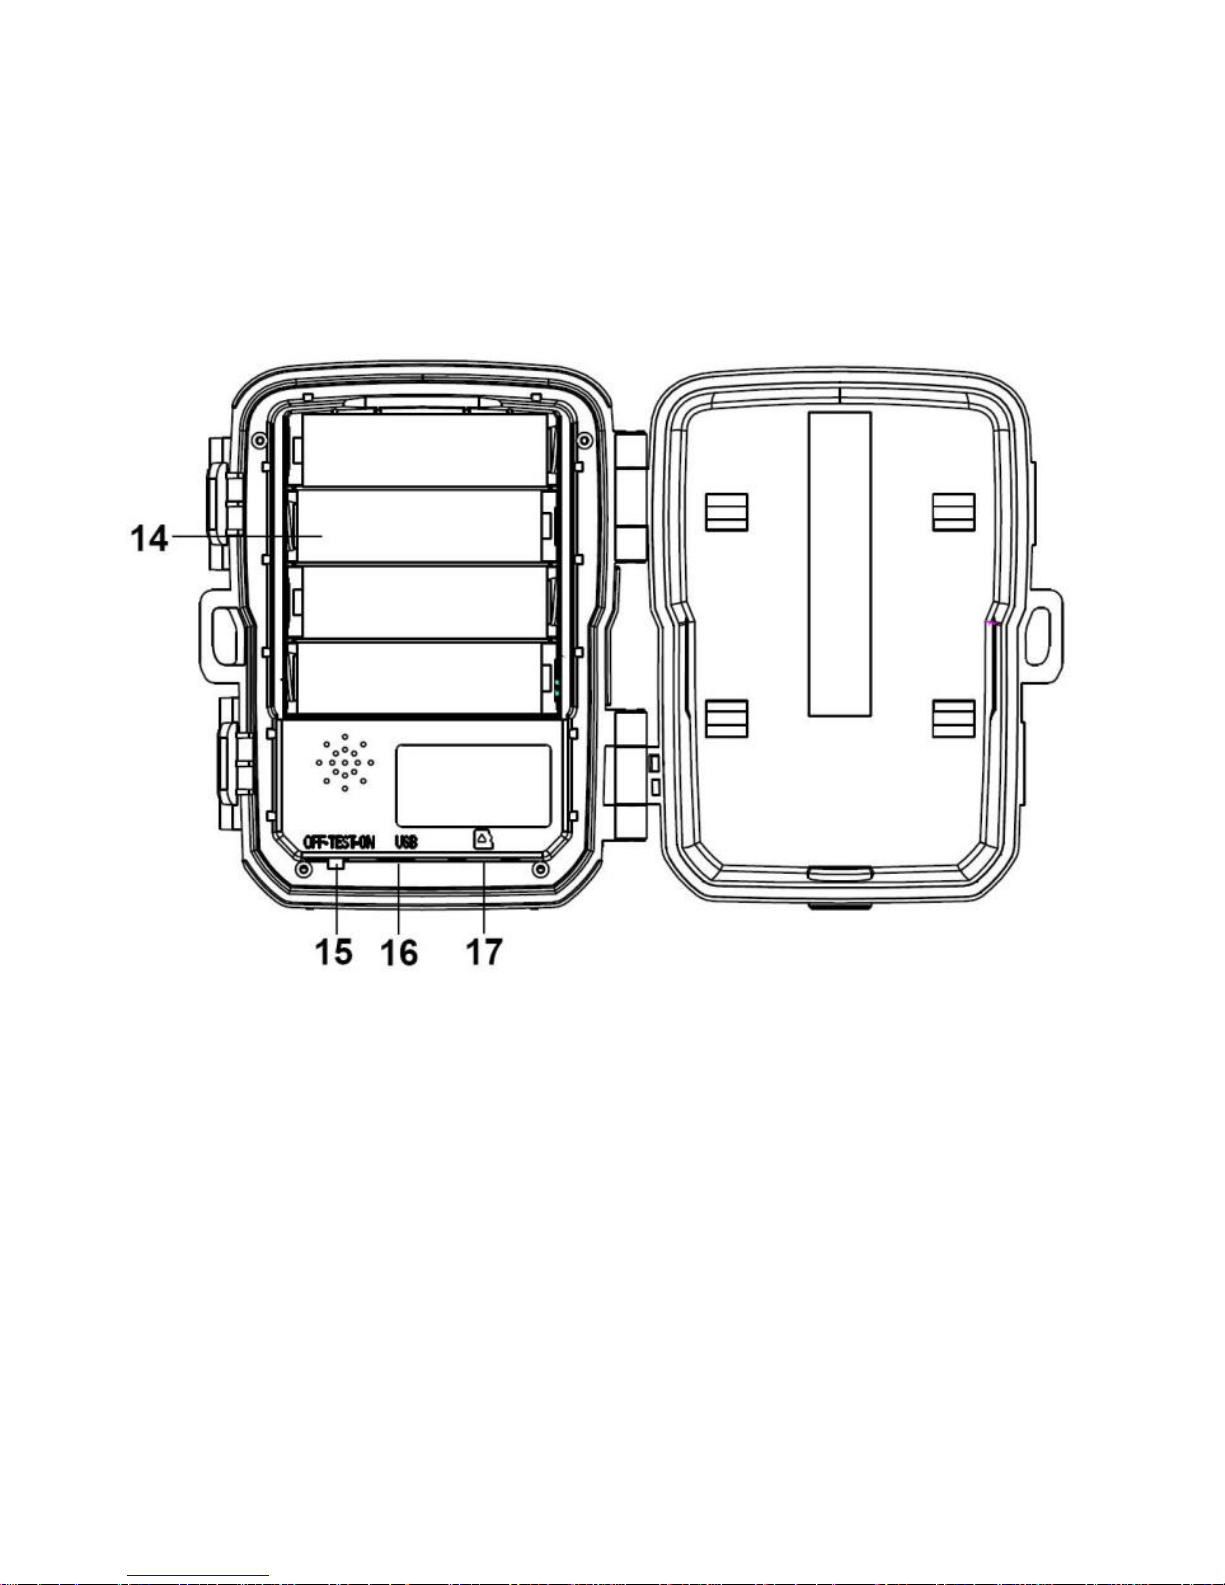
14. Battery compartment
15. ON-TEST-OFF button
16. USB jack
17. Micro SD card slot
Page 6

6
POWER SUPPLY
Before use, ensure that the batteries are inserted
Unlock the two clasps on the side and open the camera. Install
4 x 1.5V AA batteries. Please ensure they are installed the
correct way round.
If the camera is in low power, please connect the camera to a
power adapter (not provided) for power supply.
The camera can also be operated using a power adapter (not
supplied). The DC adaptor must supply a voltage of 6V with a
max current of at least 1.5A.
Unclip the rubber seal from the base of the camera and insert
the power adaptor into the socket on the cameras base.
Page 7

7
INSERTING THE MEMORY CARD
Since the camera has no built-in memory, A MicroSD card should be
inserted into the camera to enable videos and pictures to be saved.
The card must be formatted before use.
Supports MicroSD cards, up to 32GB.
To avoid malfunction, the memory card should be kept away from
water, strong vibrations, dust, heat sources and direct sunlight.
Do not insert the memory card forcibly. Please refer to the
markings on the camera to confirm the correct orientation.
Wait for the memory card to reach the ambient temperature
before use. Large fluctuations in temperature could cause a
malfunction.
When used outdoors the camera should be mounted in a
sheltered place, to avoid extremes of temperature or humidity.
Once the memory card is full, the camera will stop recording
automatically and the LEDs will go out, unless the endless
capture option is active.
Press the edge of the card gently to pop out and remove the
microSD card.
Page 8

8
BASIC OPERATION
TURN THE CAMERA ON AND OFF
To turn the camera on, slide the Mode Switch to “Test or On”.
To turn the camera off, slide the Mode Switch to “Off”.
System Setup
Slide the Mode Button to “Test”, to gain access to the system
setup.
1. Press the Menu button to enter the setup menu.
2. Press the Up/Down buttons to select the function to amend.
Then press OK to view the options available.
3. Press the Up/Down buttons to select the desired option.
Then press OK to confirm the selected option.
4. Press the Menu button to return to the previous menu or
exit setup.
Page 9

9
Setup menu and functions as below:
MODE
Set the working mode.
In Photo mode: The camera will just take pictures.
In Video mode: The camera will just record video.
In Photo & Video mode: The camera will take a photo first, and
then start to record video.
Options:【Photo】/【Video】/【Photo & Video】.
PHOTO RESOLUTION
Set the resolution of the picture taken. The higher the resolution,
the sharper the image will be, but the file size will also be larger.
Options:【12MP(4000x3000P)】/【8MP(3264x2448P)】/
【5MP(2592x1944P)】/【3MP(2048x1536P)】/【1MP(1280x960P)】
PHOTO SERIES
Set the number of photos the camera will take when operating in
Photo mode.
Options:【1 photo】/【2 photos in series】/【3 photos in series】
Page 10

10
VIDEO RESOLUTION
Set the resolution of videos recorded. Increasing the resolution
will decrease the length of video that can be stored.
Options:【 1920x1080P】/【1280x720P】/【720x480P】/【640x480P】
/【320x240P】.
TL VIDEO RESOLUTION
Set the resolution of time lapse video .
Options:【2592x1944P】/【2048x1536P】.
VIDEO LENGTH
Set the duration of each video recording when triggered in Video
or Photo and Video Mode.
Options:3 seconds~10 minutes.
AUDIO RECORDING
Select whether the camera will also record audio in Video or
Photo and Video Mode.
Options:【On】/【Off】.
Page 11

11
SHOT LAG
Set the delay that is applied after a video or photo is saved,
before the unit can be retriggered. This can be used to prevent
the storage been taken up with the same event.
Options:5 seconds~60 minutes.
IR DISTANCE
Set the distance covered by the Infrared when running in
darkness. Options:【Near】/【Middle】/【Far】.
SENSITIVITY MOTION SENSORS
Set the sensitivity of the motion sensor, depending on the location
of the camera.
When used indoors there is likely to be very little environmental
noise, so “High” can be used.
When used outdoors the “Middle” or “Low” options should be
used.
Choose “Low” if you find the camera is often triggered due to
movements in the environment. Temperature can also affect the
sensitivity.
Options:【Low】/【Middle】/【High】.
Page 12

12
TARGET RECORDING TIME
Set the target recording time. You are
able to set the start and stop time. The
camera will only work within the stated
time slot.
Options:【On】/【Off】.
TIME LAPSE
There are three options within the time lapse menu:
[Normal]: The camera will take pictures automatically at the set
time interval. For example, set the interval to 1 hour, the camera
will take a photo each hour.
[TL Video]: The time range can be set from 1 second to 24 hours.
For example, set the interval to 1 hour, the camera will take a
photo each hour. If the camera works for 24 hours, there will be
24 photos. These photos will then be converted into a video.
[Off]: Turn off the time lapse function.
Settings
Set target recording time
Start: Stop:
Hr:Min Hr:Min
00 00 00 00
MENU Back OK Select
Page 13

13
LANGUAGE
Set the language display on screen.
Options:【 English】/【German】/【Danish】/【Finnish】/【Swedish】
【Spanish】/【French】/【Italian】/【Dutch】/【Portuguese】/
【Simplified Chinese】/【Japanese】.
ENDLESS CAPTURE
Set the camera to record video in loop, so that when the memory
card is full it will record over the oldest recordings.
Options:【On】/【Off】.
TIME & DATE
Set the date and time on the camera.
The date format can be changed between:
dd/mm/yyyy, yyyy/mm/dd, mm/dd/yyyy.
The time format can be changed between 12 or 24 hours.
Options:【Set time & date】/【Time format】/【Date format】
Page 14

14
PHOTO STAMP
Choose whether to stamp the date and time on photos.
Options:【Time & date】/【Date】/【Off】.
PASSWORD PROTECTION
Set the power-on password of the camera. The password is four
digits,each digit ranges from 0 to 9.
Options:【On】/【Off】.
BEEP SOUND
Turn on/off sounds when buttons are pressed on the keypad.
Options:【On】/【Off】.
FORMAT MEMORY CARD
Formatting the memory card will delete all data permanently.
Before using a new memory card or one that has been used in
another device, it should be formatted.
Options:【Yes】/【No】.
Page 15

15
SERIAL NO.
Set a unique number for the camera. The number is four digits,
each digit ranges from 0 to 9 and A to Z.
Options:【On】/【Off】.
RESET SETTINGS
Restore the camera to factory default settings removing the
password, and any changes made to the settings.
Options:【On】/【Off】.
VERSION
Provides firmware information for the camera.
Page 16

16
TAKE PHOTOS、RECORD VIDEO、PLAYBACK
Slide the mode switch to “Test”. In this mode, you can take photos,
record video and playback files manually.
Take Photos: Press the Capture button to switch to photo mode.
Press the OK button to take a picture.
Record Video: Press the Video button to switch to video mode.
Press the OK button to start recording a video clip. Press OK
again to stop recording.
Playback: Press the Playback button to enter the playback
interface. Press the Up/Down buttons to select the photo or video.
To playback a video, select it and press OK to play.
The OK button can be pressed during playback to pause the
video. Press the Menu button to stop playback.
Pressing the Playback button exits the playback mode.
Page 17

17
PLAYBACK MENU
Delete current file: Delete the selected photo or video.
Options:【Cancel】/【Delete】.
Delete all files: Delete all photo and video files on the memory
card. Options:【Cancel】/【Delete】.
Activate slide show: Playback the photos as a slide show. Each
photo will display 3 seconds. Press OK to stop playback.
Write protect: Lock the file to help prevent accidental deletion.
Options:【Write-protect current file】/【Write-protect all files】/
【Unlock current file】/【Unlock all files】.
Page 18

18
WORKING MODE
Slide the mode switch to “On”. The screen will display a 15
second countdown. The LEDs and screen will then go out and the
camera will start to operate in accordance with the rules set up
within the menus. If animals enter the detection range of the
camera, it will be activated. If the animal continues to move into
the detection zone, the camera will take a picture or record video
automatically. When the animal leaves the detection zone, the
camera will return to standby mode.
NIGHT MODE
Please note that while recording at night the picture will be black
and white. In addition night time recording consumes additional
battery power, and the stability of the camera may be affected if
the battery level becomes low. As such avoid running at night with
low batteries, and replace the batteries when low.
Page 19
19
USING THE WALL BRACKET
You can mount the camera on a wall or tree by the supplied wall
bracket. Before mounting the wall bracket you should ensure that
all existing screws are tight. The best installation height distance
from the ground about 1 meter.
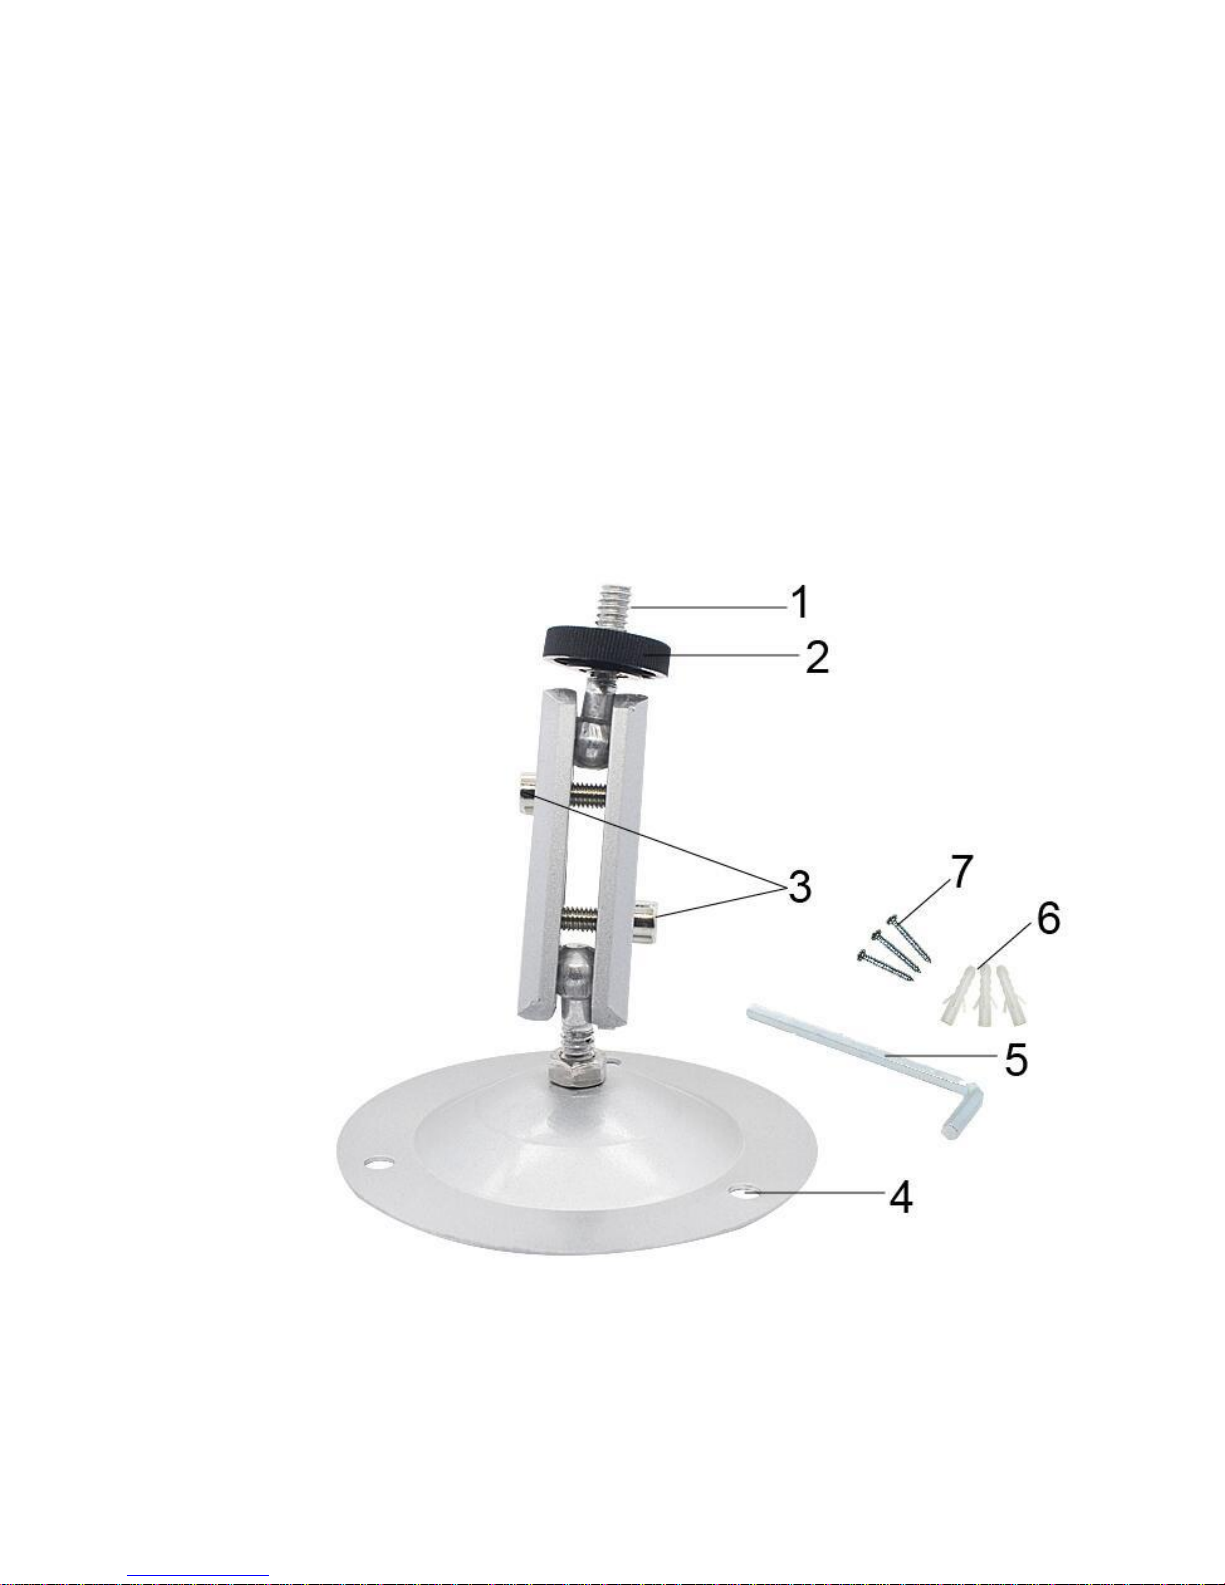
COMPONENTS
1. Tripod screw
2. Lock nut
3. Pivot bolts
4. Drill holes
5. Allen Key
6. Wall plugs
7. Screws
Page 20

20
MOUNTING THE WALL BRACKET
REQUIRED TOOLS
Drill
6 mm masonry/concrete drill bit
Phillips head screwdriver
CAUTION
Ensure that there are no electric lines, water or heating pipes
installed at the proposed drilling location.
The supplied wall plugs are only suitable for mounting on
concrete or stone.
Before starting the installation, please check your installation
location and source different fixings if required.
If in doubt, consult a professional.
Page 21

21
INSTALLATION
Mark the drill holes by holding the base of the bracket at the
desired mounting position and mark the position of the holes.
Use a drill with a 6 mm bit to drill the holes and insert the plugs
so that they sit flush with the wall.
Screw the bracket to the wall using the supplied screws.
Twist the tripod screw onto the camera (around three turns).
Set the camera to the desired position and use the locking nut
to fix in place
Adjust the angle of the camera buy untightening the pivot bolts,
and maneuver the camera, before retightening.
DOWNLOADING FILES TO A COMPUTER
There are two ways to download files from the memory card to a
computer:
By inserting the memory card into a card reader
By connecting the camera to a computer using the supplied
USB cable.
Page 22

22
USING A CARD READER
1. Remove the memory card from the camera and insert it into
a card reader. Then connect the card reader to a computer.
2. Open [My Computer] or [Windows Explorer] and
double-click the removable disk icon that represents the
memory card.
3. Copy image or video files from the “DCIM” folder on the
memory card to your computer.
CONNECTING THE CAMERA TO A PC USING A USB CABLE
1. Connect the camera to the computer via a USB cable. Turn
on the camera, the screen will display “MSDC“.
2. Open [My Computer] or [Windows Explorer]. A "Removable
Disk" appears in the drive list. Double-click the "Removable
Disk" icon to view its contents. All files are stored in the
folder named “DCIM”.
3. Copy the photos or files to your computer.
Page 23
23
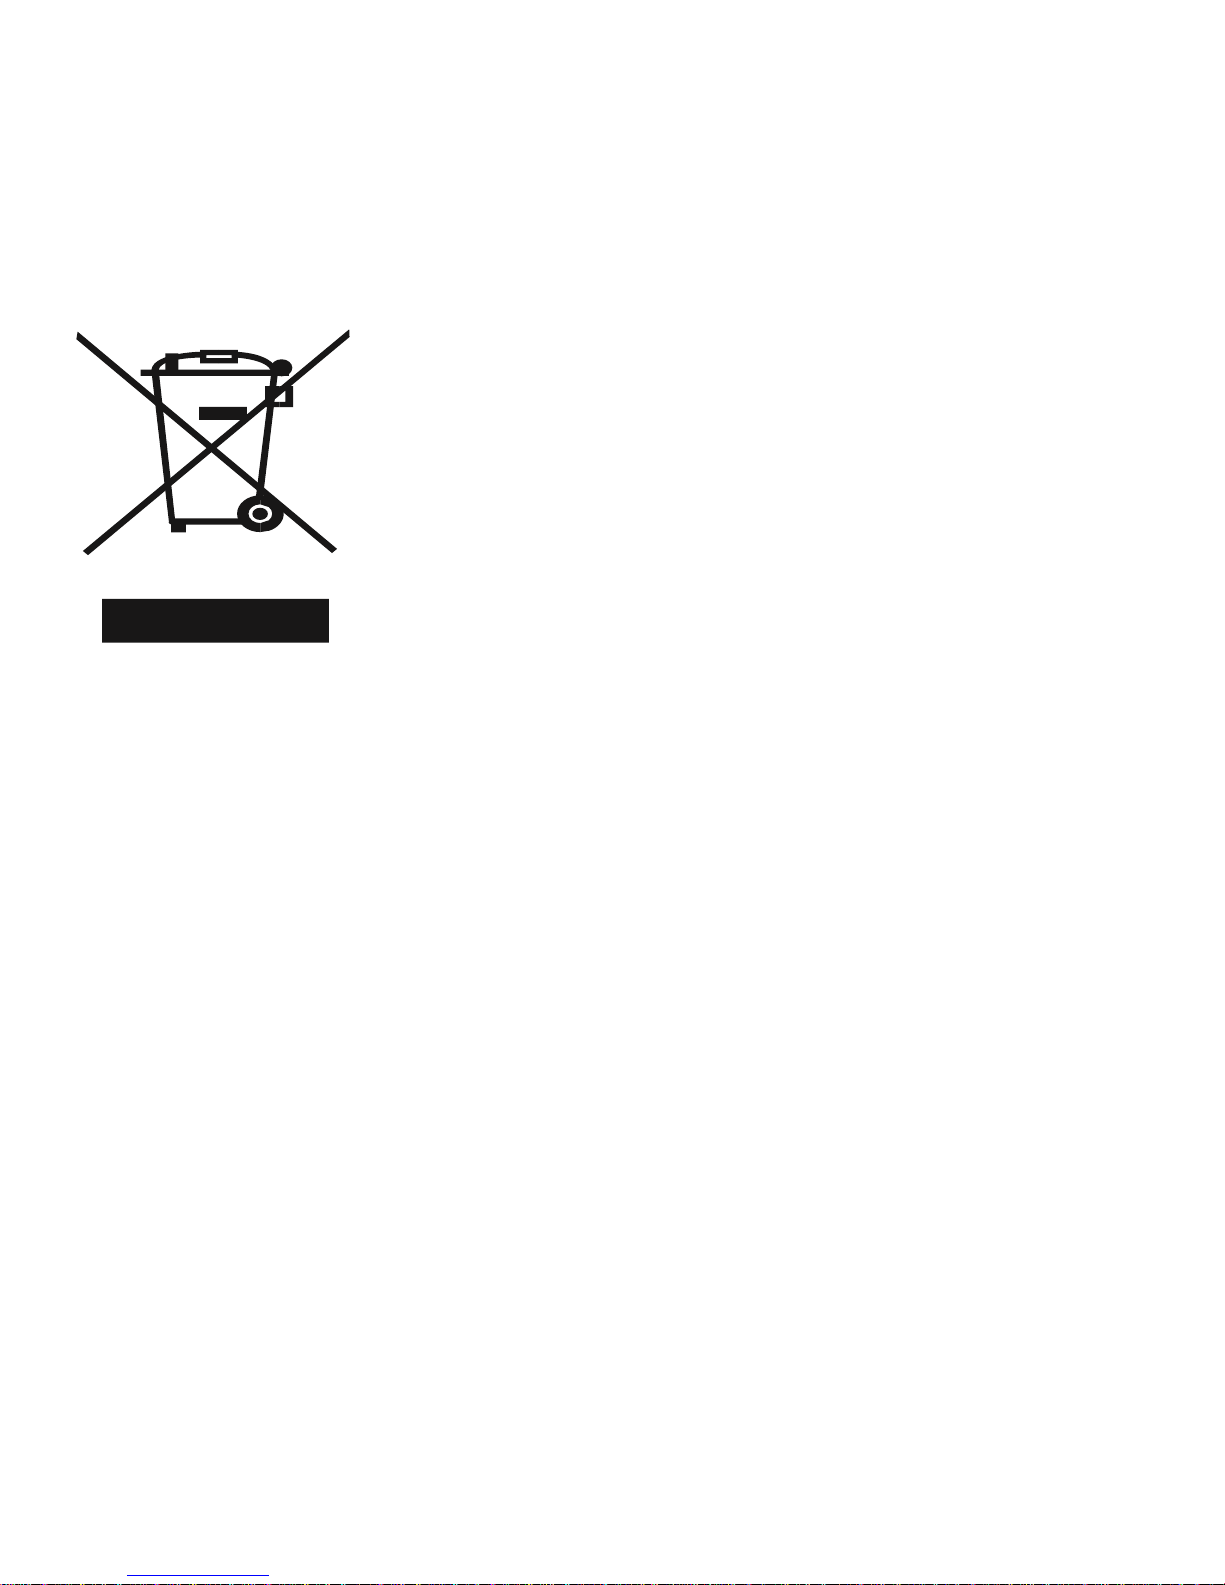
According to Waste of Electrical and Electronic
Equipment (WEEE) directive, WEEE should be
separately collected and treated. If at any time
in future you need to dispose of this product
please do NOT dispose of this product with
household waste. Please send this product to
WEEE collecting points where available.
electriQ UK Support
www.electriQ.co.uk/support
0871 620 1057
Office hours: 9AM - 5PM Monday to Friday
www.electriQ.co.uk
Unit J6, Lowfields Business Park
Lowfields Way, Elland
West Yorkshire, HX5 9DA
 Loading...