

Page 1
1
Thank you for choosing
Please read this user manual before u
sing this oven
and keep it safe for further reference
Visit our site www.electriQ.co.uk
for our entire range of Intelligent Electricals
HOV17D
Page 2

2
Contents
Safety Instructions 3
Features and Parts 8
Operation 9
Cooking Guide 12
Cooking Times Table 22
Cleaning and Maintenance 23
Troubleshooting 24
Page 3

3
SAFETY INSTRUCTIONS
Important
• Carefully read the instructions before
operating the unit
• This appliance is for indoor use only.
• Rating: This unit must be only connected
to a 220-240 V / 50 Hz earthed outlet. Always
check the rating label against your electrical
supply.
• If you are in any doubt about the
suitability of your electrical supply have it
checked and, if necessary, retested by a
qualified electrician.
• This halogen oven has been tested and is
safe to use. However, as with any electrical
appliances - use it with care.
• Disconnect the power plug from socket or
remove the power cord from the lid before
dismantling, assembling or cleaning.
• Do not clean the unit by spraying it or
immersing it in water.
Page 4

4
• Never operate this appliance if the cord
or plug is damaged. Ensure the power cord is
not stretched or exposed to sharp object/edges.
• Do not pull the mains cable to disconnect
the mains plug from the mains.
• Do not use the appliance if any part or
any accessory is damaged or defective.
• A damaged supply cord or plug should be
replaced by the manufacturer or a qualified
electrician in order to avoid a hazard.
• Avoid touching any moving parts of the
appliance.
• Make sure unit is assembled correctly
before use.
• Never insert fingers, or any other objects
into the moving parts of the appliance.
• This appliance is not intended for use by
persons (including children) with reduced
physical, sensory or mental capabilities. It is also
not intended for use by those with a lack of
experience and knowledge, unless they have
been given supervision or instruction
concerning the use of the appliance by a person
responsible for their safety.
Page 5

5
• Do not leave children unsupervised with
this appliance.
• Any service other than regular cleaning
should be only performed by an authorized
service representative. Failure to comply could
result in a voided warranty.
• Do not use the appliance for any other
purposes than its intended use.
• Always place the unit on a dry and stable
surface.
• Do not use the appliance in places with
high humidity (>80%RH)
• Do not immerse the appliance in water or
other liquids. If the appliance is immersed in
water or other liquids by mistake, do not touch
the appliance with your hands. Immediately
remove the mains plug from the wall socket. If
the appliance is immersed in water or other
liquids, discard it.
• Dispose of packaging properly keeping
plastic bags away from babies and young
children.
Page 6

6
Unit Safety Protection and Performance
Tips
• Make sure the unit is correctly
assembled. The control panel lid should fit
perfectly the cooking glass bowl
• The unit has a safety protection switch
that will stop the unit when you remove the lid.
If the safety protection mechanism is broken
please stop using the unit immediately.
• NEVER INSERT A KNIFE OR ANY OTHER
UTENSILS INTO THE CONVECTION OVEN. This
may damage the mechanism and cause a safety
hazard. Contact with exposed electrical parts
could result in electrical shock.
• Do not touch the hot glass bowl or glass
lid when removing items from the convection
oven. Use the tongues provided or alternative
implements. The temperature of the outer glass
surface may be high when the appliance is in
operation.
• Do not touch any hot metal accessory
with bare hands
• Allow the appliance to cool before
cleaning.
Page 7

7
• When heating food remove cardboard
lids from food containers and replace them with
aluminium foil before placing in the appliance.
When using aluminium foil, keep it from
touching the heating element on the lid. Never
use cling film, wood or plastic recipients, baking
sheets. Any container placed in this appliance
must not be sealed and must have enough
capacity to let liquids expand.
• DO NOT MOVE appliance when in
operation
• Ensure the power cord does not touch
the hot oven housing when in use
• Never leave the appliance unattended
when in use.
• Store the appliance indoors in a dry
location.
• Take care when opening the lid of the
appliance. Hot steam may come out
• This appliance is not intended to be
operated by means of an external timer or
separate remote-control system.
Page 8
8
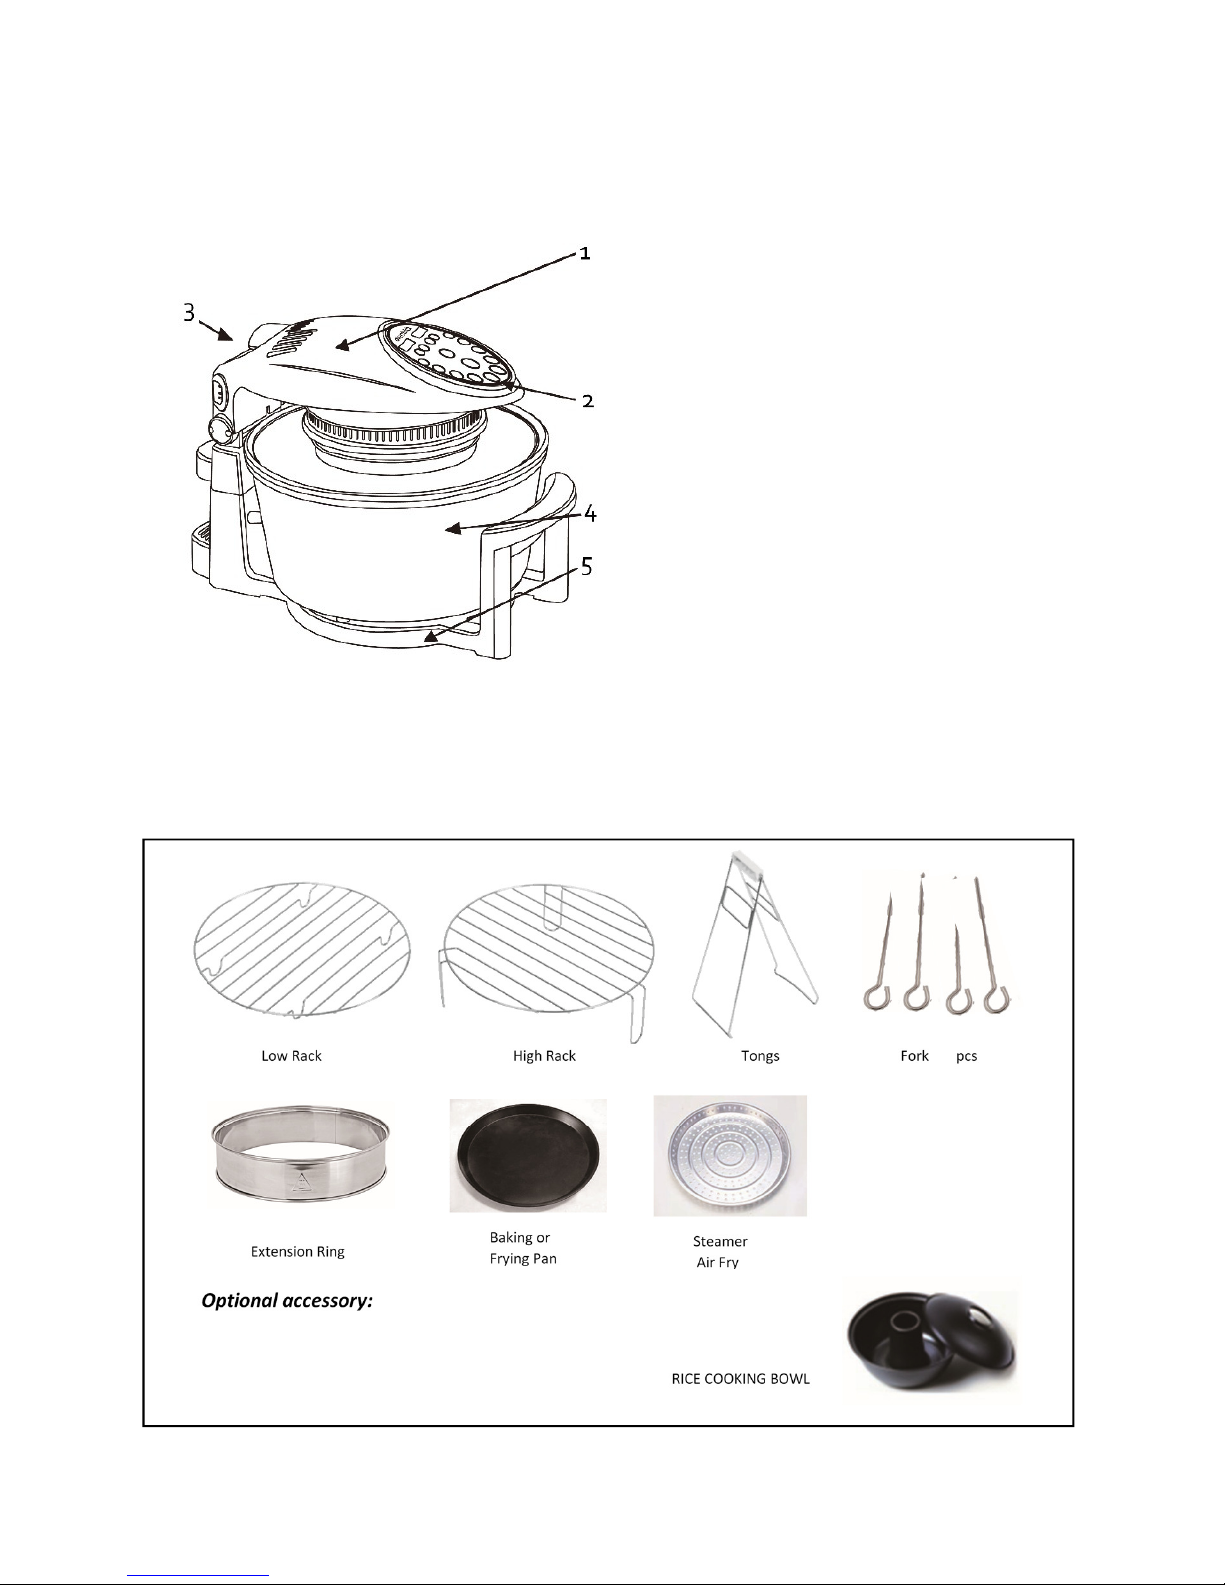
Features and Parts
1. Lid (with halogen bulb and
fan)
2. Control panel
3. Extension Arm
4. Glass Bowl
5. Stand
Accessories
Page 9

9
Operation
Control Panel
Your convection oven is very easy to use with simple digital
controls and pre-set programs for easy cooking. You can set
the cooking temperature from defrost to 250 Celsius and also
the cooking timer from 0 to 180 minutes which is usually the
most your food will need to cook.
Page 10

10
A: Cooking time led display
B: Cooking temperature led display
C / D: Cooking time adjustment button +/- (0-180)
E / F: Temperature adjustment button +/- (60-250⁰C)
Clean: This automatic self-cleaning function can help you to
clear away the grease stain in the bowl rapidly and easily.
You just need to put some water and a drop of washing up
liquid in the container than press this button. Make sure
you use the extension ring and do not over fill. After
emptying the bowl you can sterilize it using the Sterilize
function. Also Dry function will dry the bowl.
Sterilize: Before or after cooking, you can use this function
to sterilize the glass bowl. You also can use this function
to sterilize your tableware.
Turbo: You can force the oven to operate at the highest
temperature for 20 minutes
Easy pre-set functions for Poultry, Fish, Shellfish, Potatoes,
Pizza, Cakes enable fast one touch cooking. After
pressing Cancel button you will need to press pre-set
function again and Start button to start cooking again
Once you selected one of the programmed functions you
can still adjust cooking time or temperature using the
C/D or E/F functions. If you select temperature or
cooking time without pressing pre-set function first you
need to press the Start button to start cooking.
Cancel button will cancel operation at any time and put
the unit on standby.
Page 11

11
Choose the appropriate racks, trays, extension ring and
accessories and place them into the glass bowl. Extend the
oven capacity by using the supplied extender ring. You can
cook from frozen or use the defrost function. Fill the bowl
and racks with the cooking ingredients. Cover the bowl
with the lid and connect the mains to a power outlet. Set
the temperature control and timer as desired. You will find
suggestions for cooking temperatures and times in the
cooking guide table.
Note: The thermostat keeps the desired temperature until
the pre-set time has elapsed. The control lamp with its
halogen bulb indicates the heating process, it is normal for
the halogen light to turn on and off automatically in order
to control the target temperature.
If it becomes necessary to open the bowl during cooking,
for example to turn the food over, it is imperative to
observe the following instructions:
- Lift the lid by the handle only and make sure is fully
open at 90 degree angle before you remove food from
the bowl.
- For increased safety turn the appliance off by pressing
Cancel button
- Disconnect the plug from the mains or remove the
power lid from the back of the unit
Page 12

12
Warning:
Please note that he metal and glass parts are hot to touch.
When opening the lid of the convection oven, be careful with
escaping steam as it could cause burns if not careful.
To continue cooking, close the bowl lid and connect the
plug to the mains. The operation continues as soon as the
handle rests properly on the appliance. Please note that
you may readjust the timer if the cooking was interrupted
as this could affect your cooking time.
Note: After the pre-set time has elapsed, a signal will be
indicating the end of the cooking process. The fan and the
halogen lamp will automatically turn off and unit will enter
standby mode. If cooking is finished disconnect the power
supply.
Ending the cooking process
If you want to finish the cooking process, simply press the
Cancel button.
Cooking guide
Use the quick pre-sets for Poultry, Fish, Shellfish, Cakes, Pizza,
Potatoes but you can adjust them according to your needs by
simply pressing the temperature and timer controls, + will
increase the cooking time or cooking temperature, - will
decrease them.
Page 13

13
Instructions for roasting
•
Place the roast on the lower grill rack. Add some water, but
only covering the bottom of the glass bowl.
•
Turn the roast 1 or 2 times during cooking, basting it with
the gravy.
Instructions for grilling
•
Use the grill racks as dual stands in order to place the
ingredients at different levels.
•
Turn thick meat pieces after half of the cooking time has
elapsed.
•
Can also use the steamer / air fryer accessory sited on
racks.
Instructions for steaming
Fill the bottom of the bowl with some water and tasty herbs
and spices for steaming vegetables or fish. Use the steamer /
air fryer accessory.
Instructions for baking
•
You may place any heat resistant baking pan onto the
lower grill rack. Because of the air circulation the diameter
should be of maximum 26 cm or 40 cm if extender ring is
used.
•
If you want to bake a very juicy cake without a crust, attach
aluminium foil over the baking pan. Remove the foil shortly
before the cake is done, so the top of the cake may slightly
dry up.
Page 14

14
•
Cakes and other cookies are baked a little bit faster than in
other common ovens.
•
Place frozen pizza directly on the upper grill rack or in the
baking tray.
Instructions for toasting
•
You may toast bread and snacks without preheating the
oven.
•
Place the bakery products on one of the grill racks.
•
Slightly moisten bread rolls that are from the previous day.
This way they will crisp up nicely.
•
You may also warm up older snacks such as crackers, chips
or cookies. Bake them at maximum heat for a few minutes
only, so they will become crispy again.
Instructions for defrosting
•
The convection oven provides for a more evenly defrosting
process than a microwave.
•
Set the temperature control to 65-70⁰C (defrost). Check the
food every 5 to 10 minutes. Allow approximately 40
minutes per kg. Large items like meat joins should be
turned at least once during the defrosting process. Any
liquids or juices from thawed food should be thoroughly
cleaned from the bowl before cooking.
•
In order to cook frozen food, lower the specified
temperature by 20°C. The cooking time in the convection
oven is also 30 - 50 % shorter (e.g. 10 to 15 minutes instead
of 20 minutes).
Page 15

15
Instructions for reheating
Use lower temperatures when reheating in order not to burn
your food. Check the food every 5 to 10 minutes.
Note: These time specifications are for reference only and
may vary depending on the circumstances.
Grilling and Broiling
For broiling or grilling with a convection oven, the
temperature should be set between 220-250 ℃. Food should
be placed on the rack without covering. To bring the food
closer to source of the heating air, the High Rack should be
used. Add liquid smoke to water in the bowl if you like a
smoky flavors. Any other seasonings should be applied to the
surface of the meat.
If the fish or meat is lean, spray the rack or grill with non-stick
vegetable oil, or brush with cooking oil prior to arranging the
fish/ meat on the grill. This will minimize food sticking to the
grill. For browner or more seared surfaces, broil on both sides
as with thick stocks or steaks. For thinner pieces, no turning is
necessary.
Roasting
Lining only the bottom of the Bowl with aluminum foil
(leaving an inch of rim) will catch drippings if desired. To let
hot air freely circulate, use low Rack. Hot air cooks meat
evenly and seals in the juice. Turning and basting is not
necessary.
Page 16

16
Meat thermometer is recommended. However, without one,
go by the time temperature table given here, or follow the
chart given for the conventional or regular ovens and
subtract 25℃.
Roast Whole Chicken
Rinse chicken thoroughly and add desired seasonings. Spices
such as garlic, black pepper and salt are suggested. Before
roasting, allow seasonings to penetrate for a few hours. Base
of the bowl can be lined with aluminum foil to catch
drippings. Roast for approximately 30 minutes per 1 kg at
200℃.
Use extension ring if the chicken is large but make sure you
increase the cooking time and turn the chicken regularly.
Cooking Hints:
Cooking Hints:Cooking Hints:
Cooking Hints: Brush meat with oil before seasoning. When
using both grill racks, change the food after half of the cooking
time has elapsed if the upper food gets crispy faster.
Page 17

17
Whole Roasts
With Fatty portion facing upward put meat directly on low
rack. Put seasoning to your tastes. Insert meat
thermometer. Temperature for roasting is usually 25℃ less
than for regular or conventional roasting. Cooking time
depends on type and size of roast
Eggs
Hard or soft-boiled eggs are unbelievably easy in the
convection oven. For a start, there is no boiling involved!
Simply place up to 6 eggs into the pan and put the pan on
the High Rack. Set the temperature to 200 ℃. Set the Timer
(A/C) to 6 minutes for soft-boiled or 10 minutes for hardboiled. Always use the Tongs to carefully remove the eggs
after cooking.
Bread Rolls
To reheat fresh bread rolls, wrap each roll with foil, place
on the Low Rack and heat at 200 ℃ for 5-7 minutes. If the
rolls are a few days old they can be “refreshed” by brushing
them with a little milk, placing them on the High Rack and
heating for 6-9 minutes at 180 ℃.
Page 18

18
Pies
Pre-cooked (unfrozen) pies could not be easier. Place on
High Rack and cook for 8-12 minutes at 220℃. Frozen or
uncooked pies use the same position and temperature, but
increase the cooking time usually to 20-25 minutes. This
can vary depending on the size and content of the pie.
Baking and Steaming
•
The temperature for cooking of uncovered dishes is usually
20 ~ 30 ℃ lower than in the traditional oven. No preheating is necessary in convection oven when baking.
•
Ordinarily, the centre of a cake batter will be moist, while
the section closest to rim of the baking pan will be done
first. For this reason, a bunt cake pan or tube pan is better
to use than the larger layered cake pans.
•
No pre-heating is necessary in convection oven when
baking.
Page 19

19
FOOD
TEMPERATURE
(°C)
MINUTES
Brownies
150
18-
20
Buns
200
10-
12
Cakes, layer
150
18-20
Cakes, loaf
150
30-35
Cornbread
180
18-
20
Cookies: drop
160
8-10
Cookies: rolled
160
10-12
Muffins
180
12-
15
Pies/pastries/pie crust
200
8-
10
With filling (no top
crust)
160 25-30
With filling (two
crusts)
180 35-40
Breads, rolls
180
12-
15
Loaf
160
25-
30
* Times may vary, depending on depth and size of mixture.
Page 20

20
When selecting an appropriate cake tin to use, be sure that
it will fit comfortably in the Bowl. Always place the cake tin
on the Low Rack - never directly onto the bottom of the
Bowl. When using the recipes from elsewhere, deduct 20℃
from the recommended cooking temperature. Cooking
time depends entirely upon the size of cake you are making
but it is easy to monitor its progress with the see-through
glass Bowl.
Page 21

21
APPLICATION EXAMPLES
QUICK REFERENCE TABLE OF TIME AND TEMPERATURE
FOR COOKING VARIOUS FOODS
TEMP.
(
℃℃℃℃
)
BAKING CLASS
QUANTITY
MINUTES
200
Whole Chicken
2 1/4 kg
70-
75
200
Drumsticks
8 pie
ces
15
250
Fish
10 pie
ces
7-8
200
Clam
500 g
5-
7
250
Shrimps
500 g
5
250
Corn
4 pie
ces
10
150
Cake
1 case
20
250
Potato
500 g
25
250
Red Prawn
4 pie
ces
15
250
Crab Meat
500 g
10
Page 22

22
FOR MEATS WEIGHING FROM 1-1.5 KG, SET
TEMPERATURE AT 200℃℃℃℃ AND COOK FOR THE FOLLOWING
(APPROXIMATE) TIMES
TYPE OF MEAT
MINUTES
BEEF, BONELESS,
WHOLE ROAST
RARE:15
-20
MEDIUM:20-25
WELL DONE:25-30
BEEF, RIB ROAST,
RUMP OR CHUCK
RARE:15
-20
MEDIUM:20-25
WELL DONE:25-30
HAM WITH BONE &
FULLY COOKED
MEDIUM:12-15
LOIN (BONELESS)
WELL DONE:20
-25
LOIN WITH BONE
WELL DONE: 25
-30
Remember
Remember Remember
Remember –––– all times are a guideline only. Times may vary
all times are a guideline only. Times may vary all times are a guideline only. Times may vary
all times are a guideline only. Times may vary
depending on the time of cooking, temperature selected and
depending on the time of cooking, temperature selected and depending on the time of cooking, temperature selected and
depending on the time of cooking, temperature selected and
your individua
your individuayour individua
your individual preferences.
l preferences.l preferences.
l preferences.
RECEIPES
RECEIPES RECEIPES
RECEIPES Hundreds of delicious halogen oven recipes can be
found on halogenovenrecipes.co.uk
Page 23
23
Cooking Times Table without extension ring
Food Position in the bowl
Temperature
in °C
Cooking
time in minutes
Poultry
Chicken (whole) Lower grill rack 200 35 – 40
Chicken
Upper grill rack 200 15 – 20
Parts
Turkey Lower grill rack 200 60 – 90
Duck Lower grill rack 200 50 – 60
Fish
Fish Upper grill rack 200 7 -10
Sea shells, steamed Lower grill rack 160 3 – 5
Meat/ sausages
Roast beef (1.5 kg), medium done Lower grill rack 175 45 – 50
Steaks, medium done Lower grill rack 250 8 -10
Sausages, roasted Lower grill rack 200 10
Cakes
One layer Lower grill rack 175 15 – 20
Covered cake with filling Lower grill rack 175 30 – 35
Loaf Pan Lower grill rack 175 35 – 40
Pastry
Pie without filling Upper grill rack 200 10 – 12
Pie with filling Lower grill rack 175 25 – 30
Muffins Lower grill rack 175 15 – 18
Meringue Lower grill rack 175 5 – 8
Page 24

24
Food Position in the bowl
Temperature
in °C
Cooking time
in minutes
Yeast bread
Loaf Lower grill rack 175 15 – 20
Bread rolls Lower grill rack 175 15 – 20
Bread rolls, crisped up Lower grill rack 100 5 -10
Corn bread Lower grill rack 175 10 – 20
Frozen pizza Upper grill rack 200 10
If using the extension ring the lower grill settings become upper grill
settings.
This appliance is to be stored and used under the following
conditions: temperature – not less than +5 ℃; relative humidity- not
higher than 80%; aggressive impurities in the air: not allowable.
CLEANING & MAINTENANCE
Make sure the unit is unplugged before cleaning
Wait until it cooled down before cleaning
Before first use and continuing after each use, wipe off unit with a
damp cloth and dry thoroughly.
Use the Clean and Dry functions to clean the bowl quickly.
The glass bowl is dishwasher safe and can be immersed in water.
Do not immerse the lid into water for cleaning.
Protect the halogen lamp from water.
Water must not enter the control unit.
Do not use wire brushes or other abrasive objects.
Cleaning the Lid
Use a wet cloth to remove splashes and food stains from the lid. Use a
mild detergent in case of heavy staining.
Dry lid thoroughly. This item is not dishwasher safe.
Glass bowl, grill racks, tongs and expander ring
Clean these parts by hand in warm water with a mild detergent.
Rinse under clean water to remove soap residue; dry thoroughly.
Page 25
25
Self-cleaning: the bowl can be cleaned easily using the self-cleaning
function. Fill the bowl with water and add the extender ring. Pour
washing up liquid and set the thermostat to 100⁰C and timer to 10-15
minutes. When bowl has cooled down, empty the dirty water and wipe
it off or let it dry.
Warning: Do not pour cold water into the glass bowl when the bowl is
hot. Glass bowl must be cool before cleaning.
Troubleshooting
Issue
Possible cause
Solution
Appliance does
not function
Appliance is not
connected to the
mains
Appliance is
defective
Check the position of the lid
ensuring
is fully closed
Check another wall socket
Check fuse on the plug
Check safety catch
Please contact service centre
A whole piece of
food is cooked
unevenly
Air circulation is not
even
Place the food in the centre of the
bowl on a low rack
Do not stack food on a single level
Use the racks as dual stands
The food is
burnt on top but
not yet cooked
The food is too
close to the
halogen bulb
Place the food on the lower grill rack
or temporarily cover the food with
aluminium foil
Technical data
Model
HOV17D
Vo
ltage
220-240V~50Hz
Capacity
17 Litres
(12 litres bows + 5 litres extension ring)
Power Consumption
Max 1400 W
Timer
0-180 minutes
Pre-set functions
10
Dimensions mm (WxDxH)
460x340x350
/ 475x365x365
Weight kgs (net/ gross)
6.7 /7.8
All information pr
ovided is for reference only. Products specifications may
change due to continuous product development.
Page 26
26
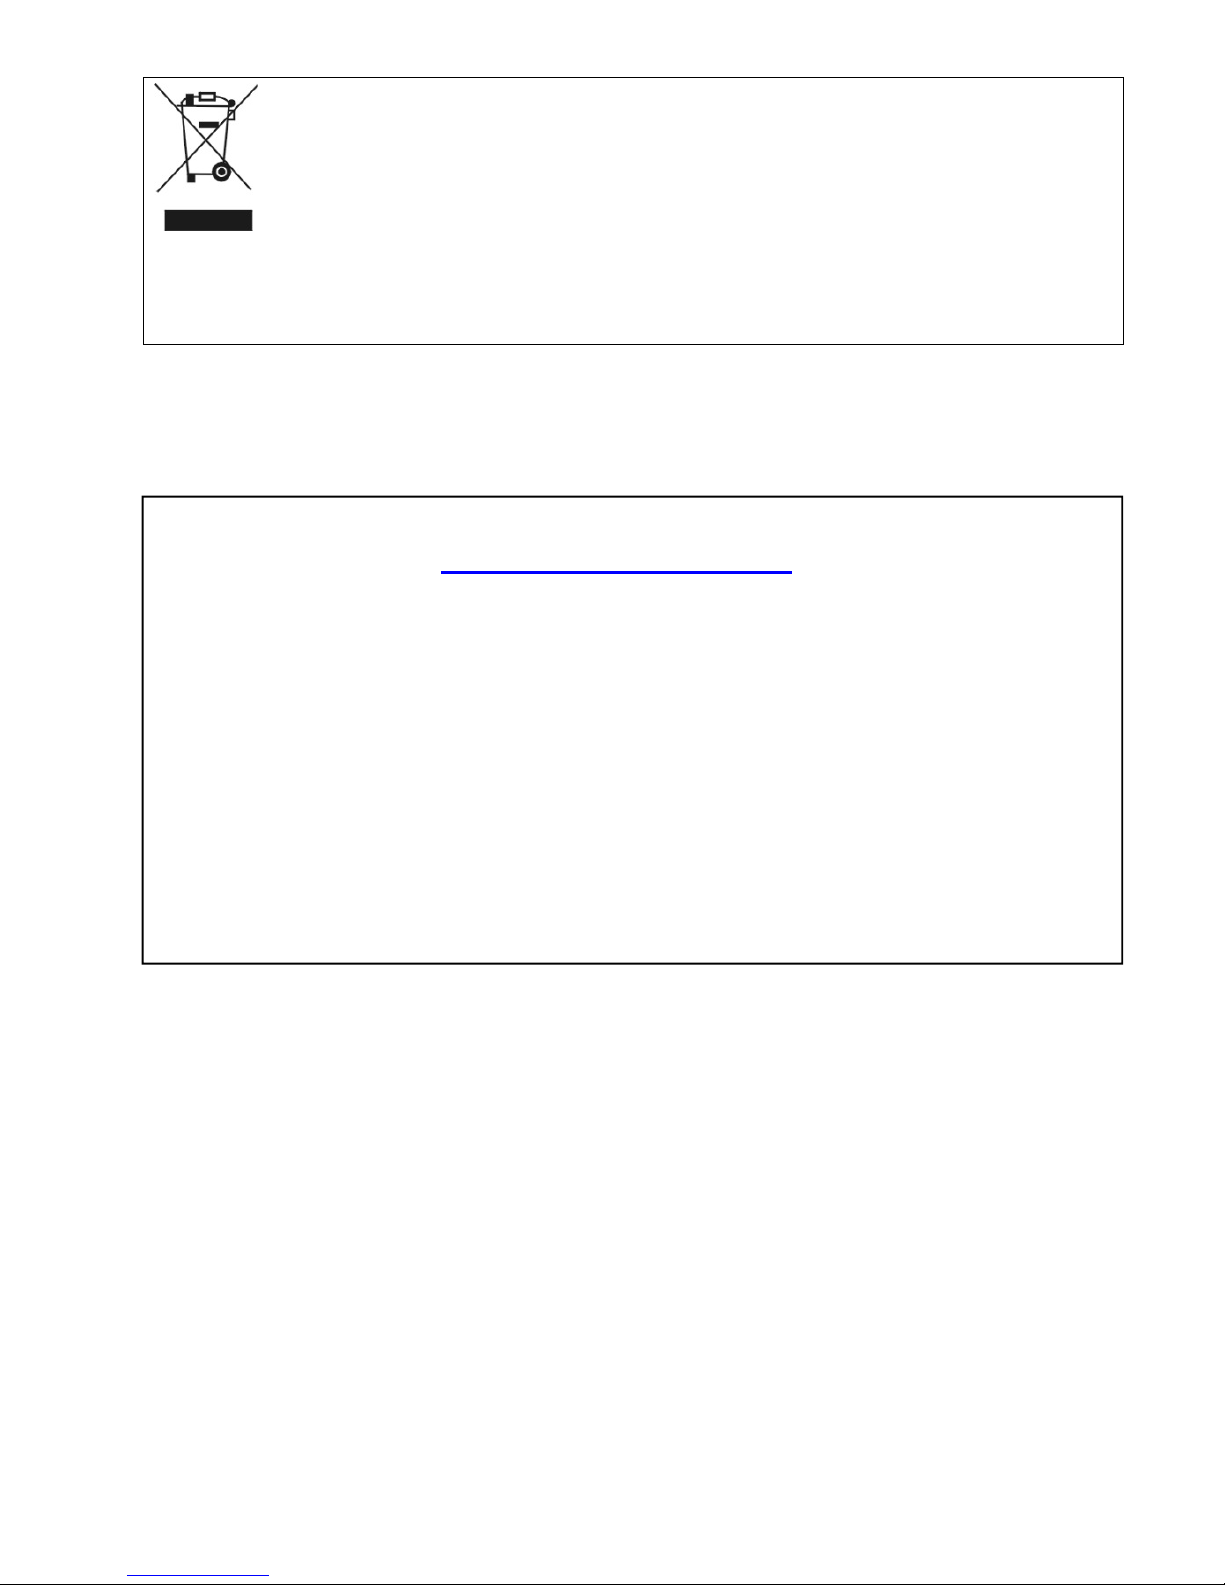
Disposal: Do not dispose this product as unsorted waste. Collection of such
waste must be handled separately as special treatment is necessary.
Recycling facilities are now available for all customers at which you can deposit
your old electrical products. Customers will be able to take any old electrical
equipment to participating sites run by their local councils. Please remember that
this equipment will be further handled during the recycling process, so please be
considerate when depositing your equipment. Please contact the local council for details of
your local household waste recycling centres.
Electri
Q UK SUPPORT
www.ElectriQ.co.uk/support
Please, for your own convenience, make these simple checks before calling
the service line.
If the unit still fails to operate
call: 0871 620 1057 or complete the online form.
1. Is the unit plugged into the mains? Is the fuse OK?
2. Switch the unit off. Restart the unit.
Office hours: 9AM - 5PM Monday to Friday
www.ElectrIQ.co.uk
Unit 2, The Nursery
Berristow Lane
South Normanton
Derbyshire, DE55 2FX
 Loading...