

Elation PP-DMX20L User Instructions

Introduction:
Thank you for purchasing the PP-DMX20L™ 4 channel power pack
from Elation. To optimize the performance of this product, please read
these operating instructions carefully and familiarize yourself with the
basic operations of this unit. The Elation® PP-DMX20L,™ is a four channel, DMX power pack. This unit has been tested at the factory before
being shipped to you. There is no assembly required.
PP-DMX20L
4 CHANNEL DMX
POWER PACK
The Elation
such as the Elation® Show Designer,
This unit allow you to control special effect lighting, that normally could
not be controlled, by a DMX controller. With this revision to our popular
PP-DMX20™ we have eliminated confusing dipswitches and replaced
them with an easy to use digital switching device that incorporates the
use of an easy to read LCD display.
® PP-DMX20L™ is controlled via a standard DMX controller
™
or the Elation® DMX Operator.™
Customer Support:
Elation® provides a customer support line to provide set up help and
answers to any question should you encounter problems during your
set up or initial operation. You may also visit us on the web at www.
elationlighting.com for any comments or suggestions.
Service Hours are Monday through Friday 10:00 a.m. to 5:00 p.m.
Pacific Standard Time.
Voice: (323) 582-3322
Fax: (323) 582-3108
E-mail: support@elationlighting.com
Warning!
To prevent or reduce the risk of electrical shock or fire, do not expose
this unit to rain or moisture. Clearing memory often may cause damage
to the memory chip, be careful not to re initialize your unit frequency
often to avoid this risk. Only use the recommended AC/DC power
adaptor.
User Instructions
Rev. 12/04
Elation Professional®
4295 Charter Street
Los Angeles Ca. 90058
www.elationlighing.com
Caution!
There are no user serviceable parts inside this unit. Do not attempt any
repairs yourself, doing so will void your manufactures warranty. In the
unlikely event your unit may require service, please contact Elation®.
©Elation Professional® - www.elationlighting.com - PP-DMX20L Instruction Manual Page 2
Set Up:
DMX512 IN
3-PIN XLR
REMOTE
CONTROL
INPUT
POWER
INPUT OUTPUT
SOUND
REMOTE
CONTRO
L
INPU
T
POWER
INPUT OUTPUT
SOUND
REMOTE
CONTRO
L
INPU
T
POWER
INPUT OUTPUT
DMX512
DMX+,DMX-,COMMON
1
2
3
Terminatio n reduces signal errors and
avo ids signa l tran smi ssion probl ems
and interference. It is always advi sable
to connect a DMX terminal, (Resistance
120 Ohm 1/4 W) between PIN 2 (DMX-)
and PIN 3 ( DMX +) of the last f ixtur e.
1
2
3
1
2
3
DMX +
DMX -
COMMON
DMX512 OUT
3-PIN XLR
POWER
SOUND
REMOTE
CONTRO
L
INPU
T
POWER
INPUT OUTPUT
1
2
3
Terminatio n reduces signal errors and
avo ids signa l tran smi ssion probl ems
and interference. It is always advi sable
to connect a DMX terminal, (Resistance
120 Ohm 1/4 W) between PIN 2 (DMX-)
and PIN 3 ( DMX +) of the last f ixtur e.
Power Supply: Before plugging your unit in be sure the source volt-
age in your area matches the required voltage for your Elation® PPDMX20L.™ The PP-DMX20L™ is available in a 115v and 230v version.
Because line voltage may vary from venue to venue, you should be sure
to plug your power supply into a matching wall outlet before attempting to operate you controller.
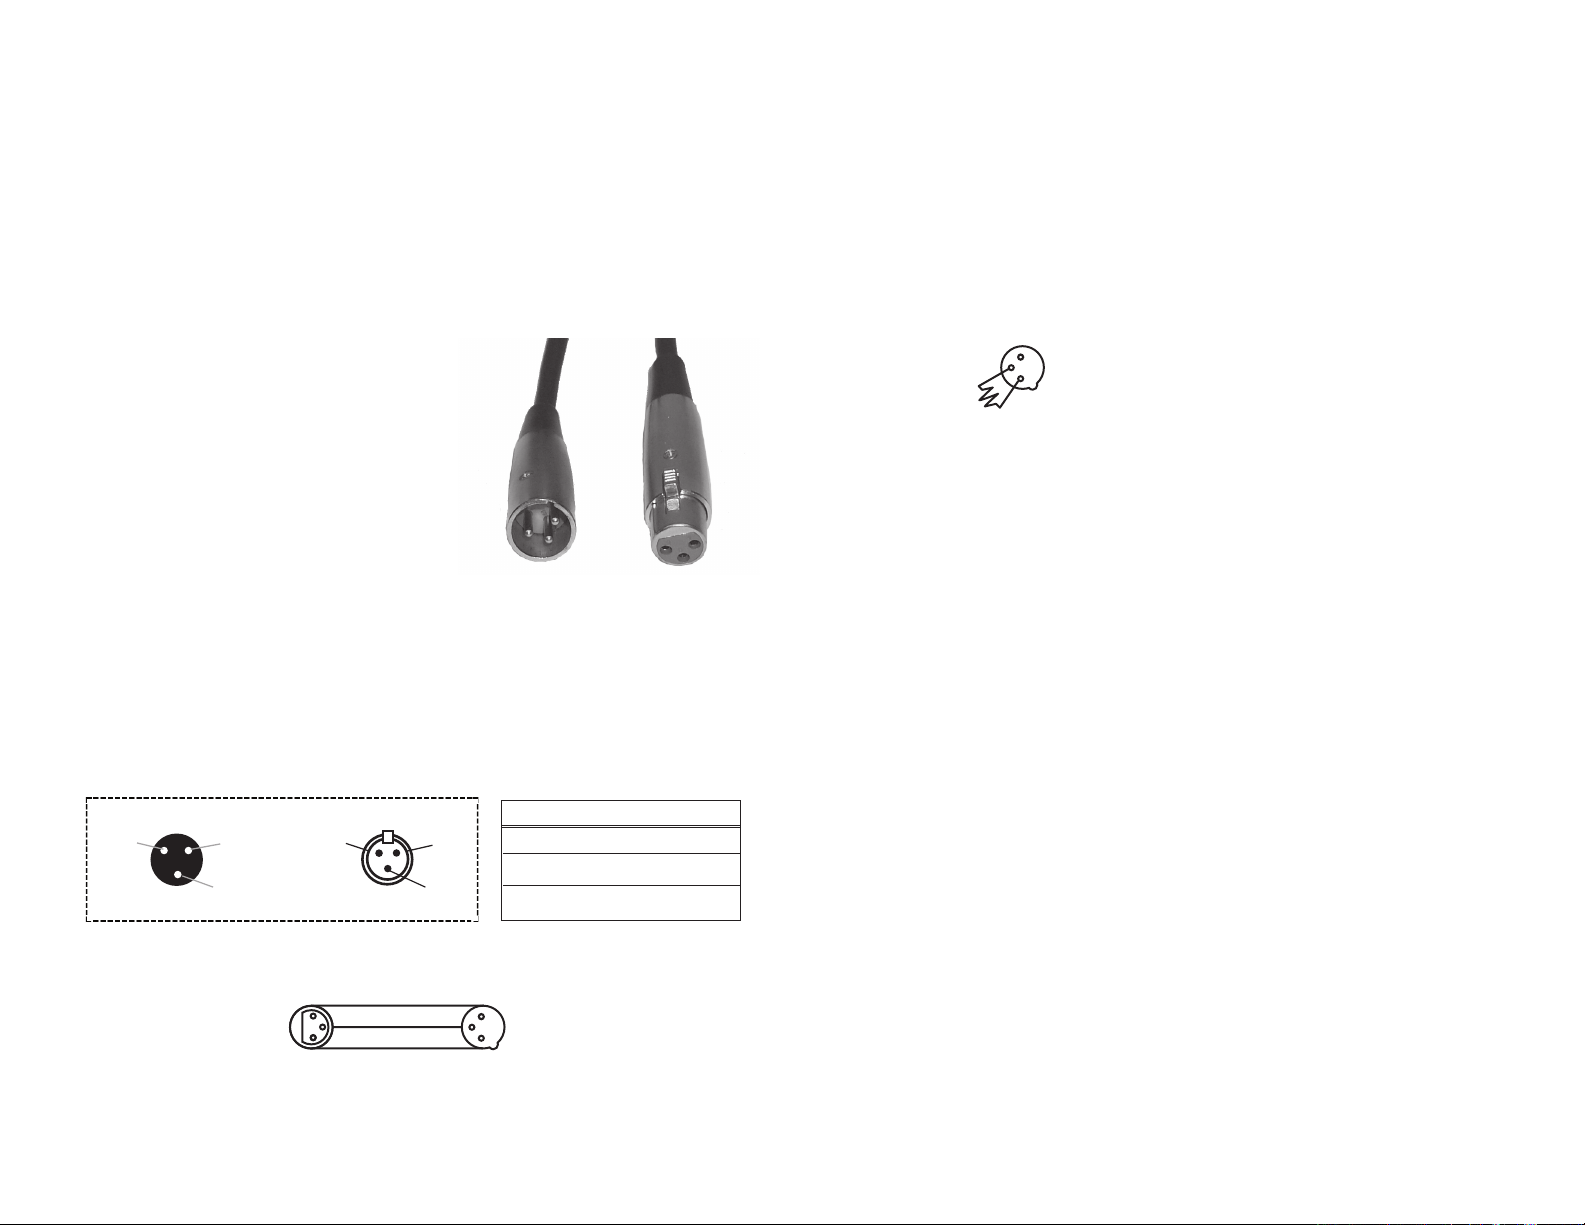
Data Cable (DMX Cable) Requirements:
Your power pack and your controller
require a standard 3-pin XLR connector
for data input and data output (Figure
1). If you are making your own cables
be sure to use standard two conductor shielded cable (This cable may be
purchased at almost all pro sound and
lighting stores). Your cables should
be made with a male and female XLR
connector on either end of the cable.
Also, remember that DMX cable must
be daisy chained and can not be “Y”ed or split.
Notice: Do not use the ground lug on the XLR connector. Do not con-
nect the cable’s shield conductor to the ground lug or allow the shield
conductor to come in contact with the XLR’s outer casing. Grounding
the shield could cause a short circuit and erratic behavior.
XLR MALE SOCKET
1 EARTH
2 COLD
3 HOT
XLR FEMALE SOCKET
COLD 2
1 EARTH
3 HOT
XLR Pin Configuration:
Pin 1 = Shield
Pin 2 = Data Compliment (negative)
Pin 3 = Data True (positive)
Figure 1
Special Note: Line Termination.
When longer runs of cable are used, you may need to use a terminator on the last unit to avoid erratic behavior. A terminator is a 90 - 120
ohm 1/4 watt resistor which is connected between pins 2 and 3 of
a male XLR connector (DATA + and DATA -). This unit is inserted in
the female XLR connector of the last unit in your daisy chain to terminate the line. Using a cable terminator will decrease the possibilities of
erratic behavior.
Figure 4
Product Description:
The PP-DMX20L,™ is 1, 2, or 4 channel DMX Power Pack. This pack
can serve as a stand alone chaser or a DMX power pack. This pack is
designed for zero-crossing circuitry which protects against inductive
loads, so it is safe for use with lighting effects that include transform
ers such as pin spots. Each channel comes with two 3-prong Edison
sockets inputs for a total of eight. This unit features XLR female and
male connection for DMX compatibility. Each channel is equipped
with a fuse for each channel, and a maximum output load of 6A per
channel or 15A total. This revision of our popular PP-DMX20L
a great new case design that makes it great for permanent or mobile
applications.
™
-
has
©Elation Professional® - www.elationlighting.com - PP-DMX20L Instruction Manual Page 3
Figure 2
Figure 3
©Elation Professional® - www.elationlighting.com - PP-DMX20L Instruction Manual Page 4
 Loading...