

EKLoop
Angled Bracket - 120mm
USER GUIDE

This product is intended for installation by expert users only.
Please consult with a qualified technician for installation. Improper
installation may result in damage to your equipment. EK Water
Blocks assumes no liability whatsoever, expressed or implied,
for the use of these products, nor their installation. The following
instructions are subject to change without notice. Please visit
our web site at www.ekwb.com for updates. Before installation,
please read important notice, disclosure, and warranty conditions
printed on the back of the box.
Before you start using this product please follow these basic guidelines:
Please, read the manual carefully before you begin with the
installation process!
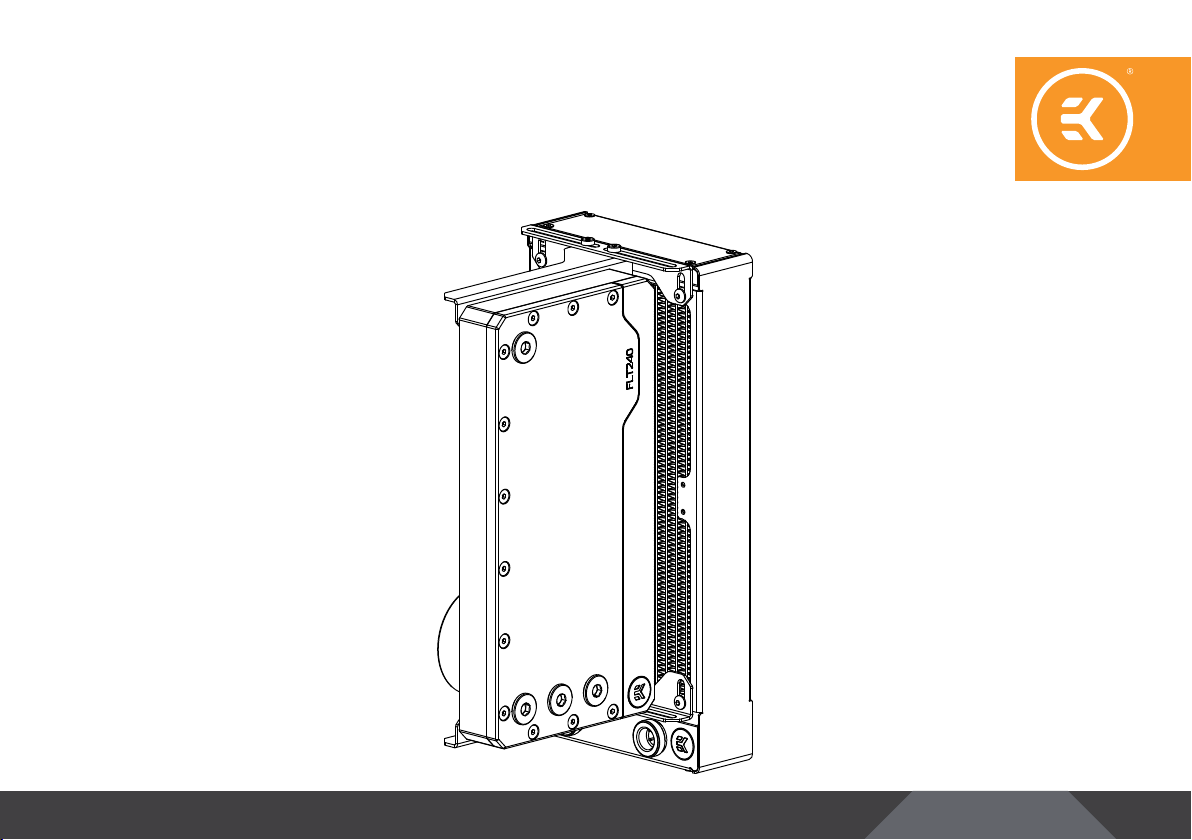
EK-Loop Angled Bracket 120mm is compatible with EK-Quantum
Kinetic FLT and EK-Quantum Volume FLT units.
TABLE OF CONTENT
BOX CONTENTS 4
ASSEMBLING THE EK-LOOP ANGLED BRACKET 5
INSTALLING THE EK-LOOP ANGLED BRACKET DIRECTLY INTO THE CASE 6
INSTALLING THE EK-LOOP ANGLED BRACKET ONTO THE RADIATOR 7
ATTACHING THE FLT RESERVOIR TO THE EK-LOOP ANGLED BRACKET 8
ATTACHING THE FITTINGS 9
SUPPORT AND SERVICE 10
SOCIAL MEDIA 10
- 3 -
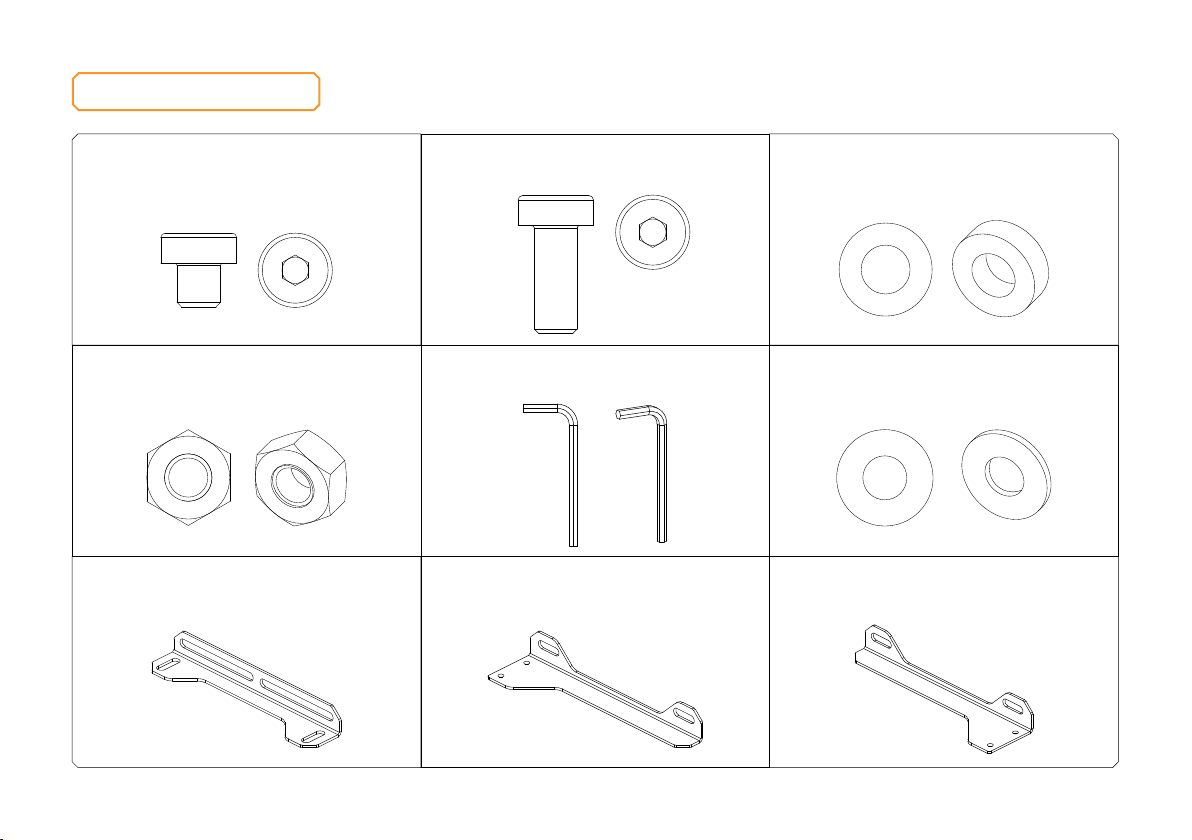
BOX CONTENTS
M4 X 4 Screws DIN 7984
(4 pcs)
M4 Nuts
(4 pcs)
EK-Loop Angled Bracket Base
(2 pcs)
M4 X 10 Screws DIN 7984
(8 pcs)
Allen Key 2.5mm
EK-Loop Angled Bracket - lef t part EK-Loop Angled Bracket - right part
Acetal Standoffs
(4 pcs)
M4 Steel Washers
(4 pcs)
- 4 -

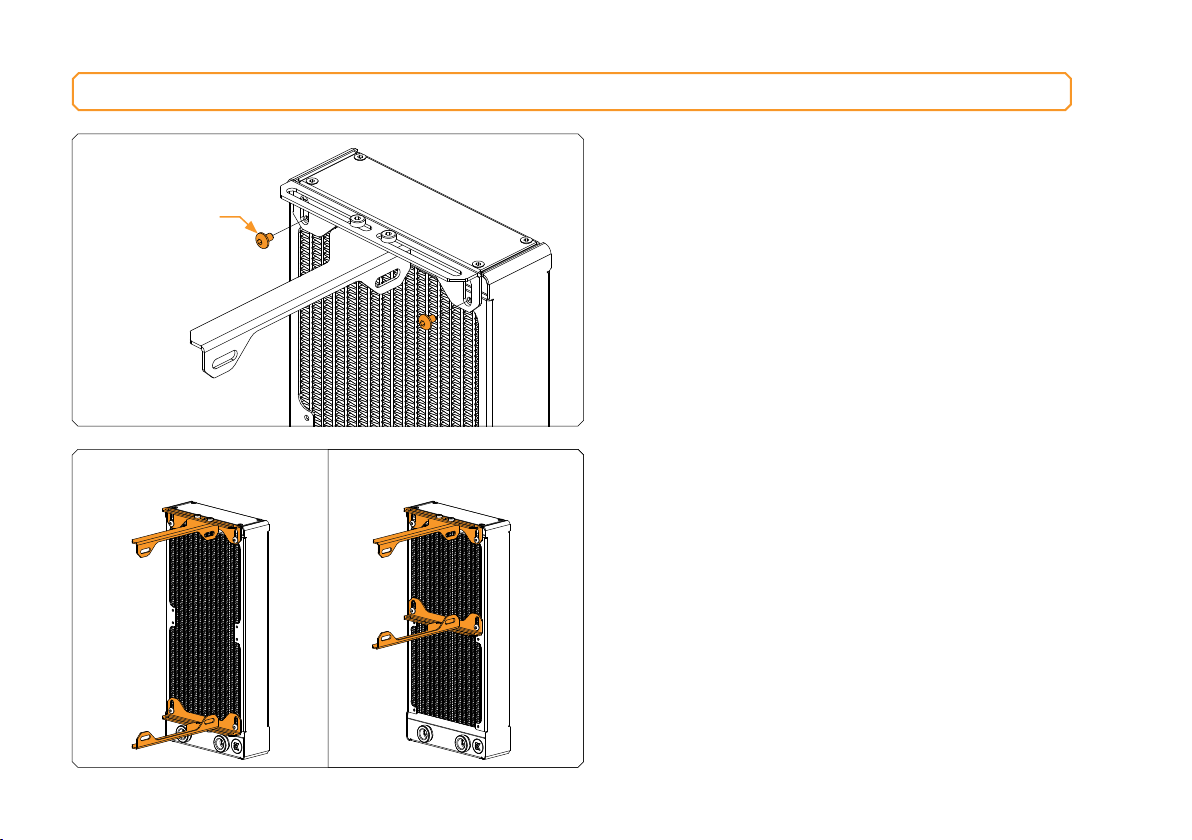
ASSEMBLING THE EK-LOOP ANGLED BRACKET
50mm 50mm
15
EK-Loop Angled Bracket base piece has four slot holes that allow
adjustability. Larger slot holes will enable adjusting of the bracket’s
position (50mm on each side). Side pieces can be screwed into the
base through one of the slots or both of them.
Smaller slot holes on the side allow for adjusting the position of the
bracket on the radiator.
For the assembly of the EK-Loop Angled Bracket, use M4 X 4 DIN
M4 x 4 DIN 7984 Screws
7984 screws (as shown in the picture). Side parts already have
threaded holes, so there is no need for additional washers and nuts.
Angled Bracket Base
EK-Loop
EK-Loop
Angled Bracket - side part
- 5 -

INSTALLING THE EK-LOOP ANGLED BRACKET DIRECTLY INTO THE CASE
M4 Nut
M4 Steel Washer
M4 x 10 7984DIN Screw
EK-Loop Angled Bracket can be mount directly into the case when
there is a place for a 120mm fan.
The FLT reservoir can also be mounted onto the EK-Loop Angled
Bracket and secured together into the chassis.
Alternatively, you can drill four Ø4.5mm holes in the most
suitable place on the wall of your computer chassis, using the
electric power drill.
EK-Loop Angled Bracket - 120mm can be installed directly into the
chassis, using the enclosed M4 X 10 DIN7984 screws, M4 steel
washers, and M4 nuts (as shown in the picture).
After securing the EK-Loop Angled Bracket into the chassis, you can
attach the FLT reservoir. (See chapter: Attaching the FLT Reservoir
to the EK-Loop Angled Bracket)
FLT Reservoir
- 6 -
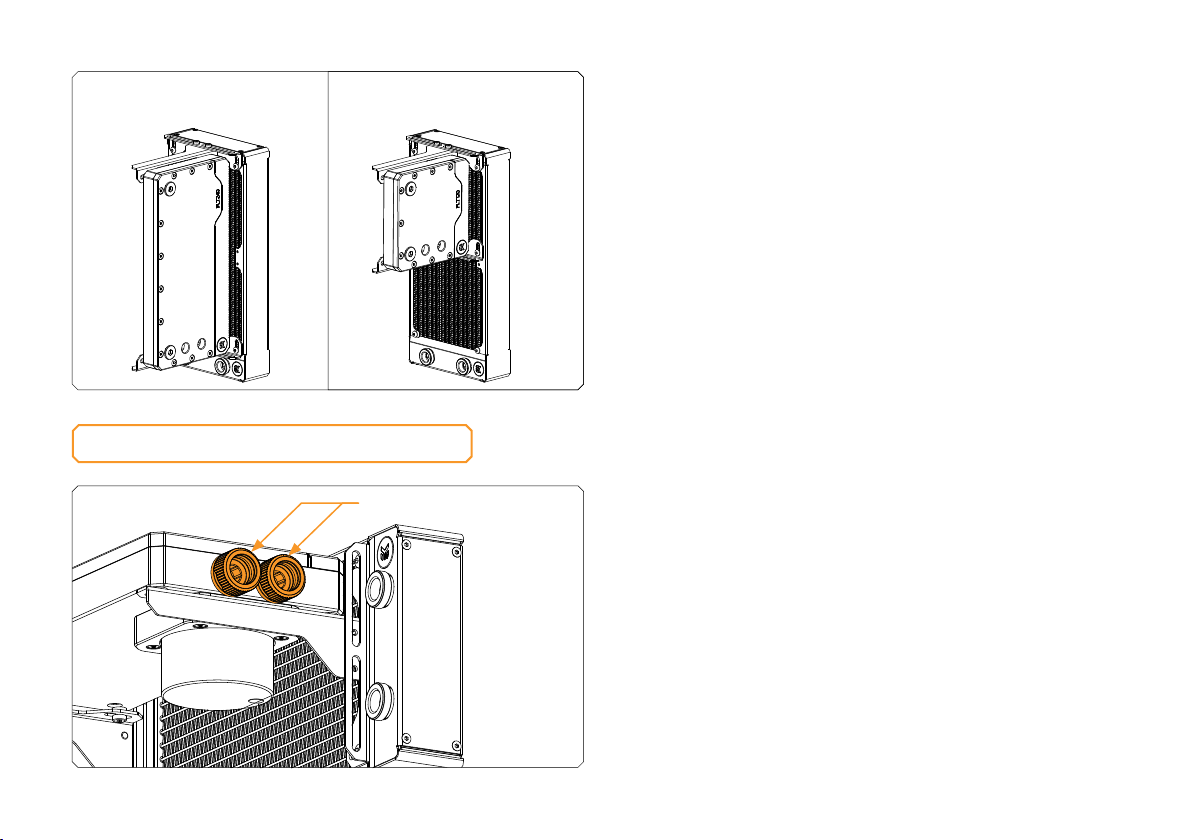
INSTALLING THE EK-LOOP ANGLED BRACKET ONTO THE RADIATOR
EK-Loop Angled Bracket can be mounted onto the radiator using the
UNC 6-32 x 5mm radiator mounting screws (as shown in the picture).
There is no need for additional nuts, just tighten the screws evenly
UNC 6-32 x 5mm
Screw
and do not use excessive force.
Option 1 Option 2: Only for 240 and
360mm Radiators
You can mount the bracket on each side of the radiator. On 240
and 360mm radiators, the bracket can also be at tached to the
middle holes.
- 7 -

ATTACHING THE FLT RESERVOIR TO THE EK-LOOP ANGLED BRACKET
Carefully position the FLT reservoir onto the EK-Loop angled bracket
and secure it with the enclosed M4 X 10 DIN 7984 screws and acetal
M4 x 10 DIN7984 Screw
Acetal Standoff
standof fs (as shown in the picture). While tightening the screws,
do not use excessive force. Make sure that all four (4) screws and
standof fs are adequately secured!
If you choose to use the holes in the middle, it is no longer
possible to move the FLT reservoir from or toward the radiator!
- 8 -
Option 1 Option 2: Only for 240 and
360mm Radiators
ATTACHING THE FITTINGS
EK-Fittings
When using the EK-Loop Angled Bracket with FLT products, we
recommend you use EK-Fittings because of their compatibility, and
there will be no reason to worry.
Before you attach the fittings, make sure the acetal standoffs
are placed correctly. Otherwise, you risk the possibility of
scratching your FLT product (especially when using EK-Torque
HTC-16 Fittings).
- 9 -

SUPPORT AND SERVICE
For assistance please contact:
http://support.ekwb.com/
EKWB d.o.o.
Pod lipami 18
1218 Komenda
Slovenia - EU
SOCIAL MEDIA
EKWaterBlocks
@EKWaterBlocks
ekwaterblocks
EKWBofficial
ekwaterblocks
 Loading...