

Page 1
g
g
g
jury
k
g
Before installation, visit our web site at
http://www.eizo.com to confirm the applicable EIZO
LCD monitor and the installation requirements of
this stand.
Thank you very much for choosing the EIZO product.
Please read this User’s Manual carefully to familiarize yourself with safe and effective usage procedures.
Please retain this manual for future reference.
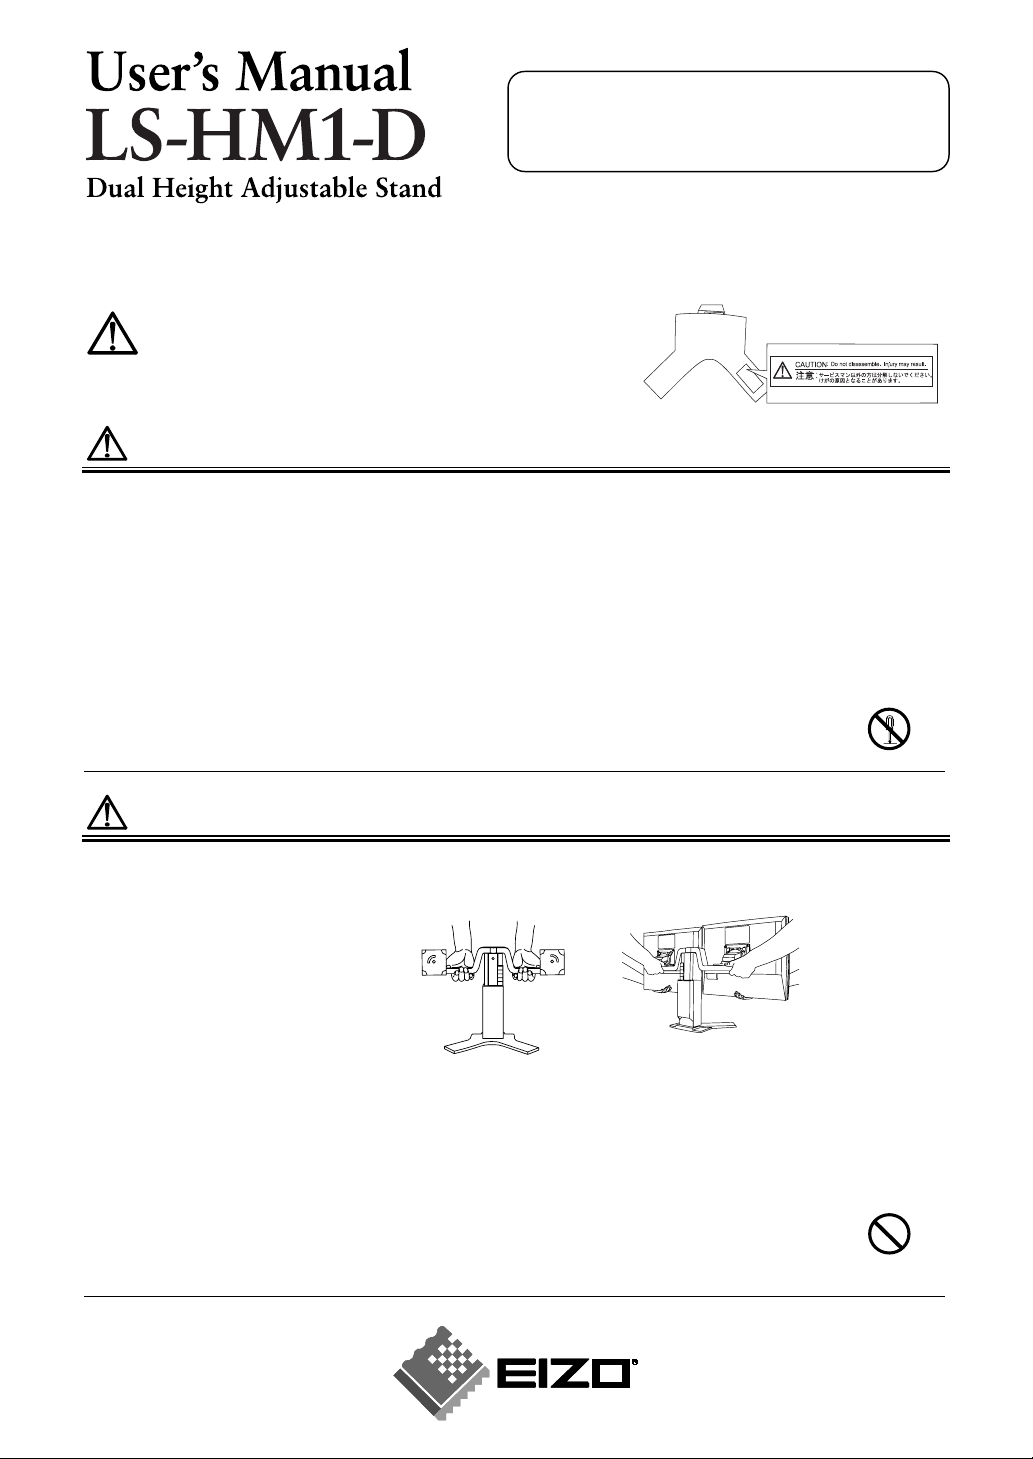
[Location of the Caution Statements (Bottom)]
PRECAUTIONS
To ensure personal safety and proper maintenance, please read this
section and the caution statements on the unit.
WARNING
Attach the applicable EIZO LCD monitors only.
Not doin
equipment damage.
Attach the two monitors.
Attachin
damage.
Attach the LCD monitor securely to the stand.
Install the monitor securely with using the enclosed screws in the stand package. Follow the
instructions on the user’s manual. Not doin
which may result in injury or equipment damage.
Do not disassemble.
The spring mechanism inside of the stand may result in in
disassembling.
so may cause the stand or monitor to drop, which may result in injury or
a monitor only may cause the stand to fall and result in injury or equipment
so may cause the monitor to come unattached,
or equipment damage when
CAUTION
Carry the stand with holding the arm of the stand
below figures.
Not doing so may result in the equipment damage.
Before attaching
Work with another person when attaching and adjusting height position.
Not doing so may result in injury or equipment damage.
Be careful not to pinch a finger when adjusting height and horizontal position.
When rotating the monitor for portrait display, make a space enough between a des
and a monitor not to pinch a finger.
Do not adjust the height or the angle with gripping the i·Sound, optional speaker (if
applicable).
Adjusting the height or the angle with gripping the i·Sound is dan
injury or equipment damage.
from underneath
as shown in the
Carry with another
person after attaching.
erous. It may result in
Page 2
Package Contents
Please contact your local dealer for assistance if any of the listed items are missing or damaged.
Stand
Stand Mouting Cover, 4 pcs
Stoppers for height adjustment (attached to the stand, detachable), 5 pcs
User’s Manual
Sheet (Compatible Screws List)
Mounting Screws, 8 pcs each
(For the compatible screws and monitors, refer to the ‘Compatible Screws List’.)
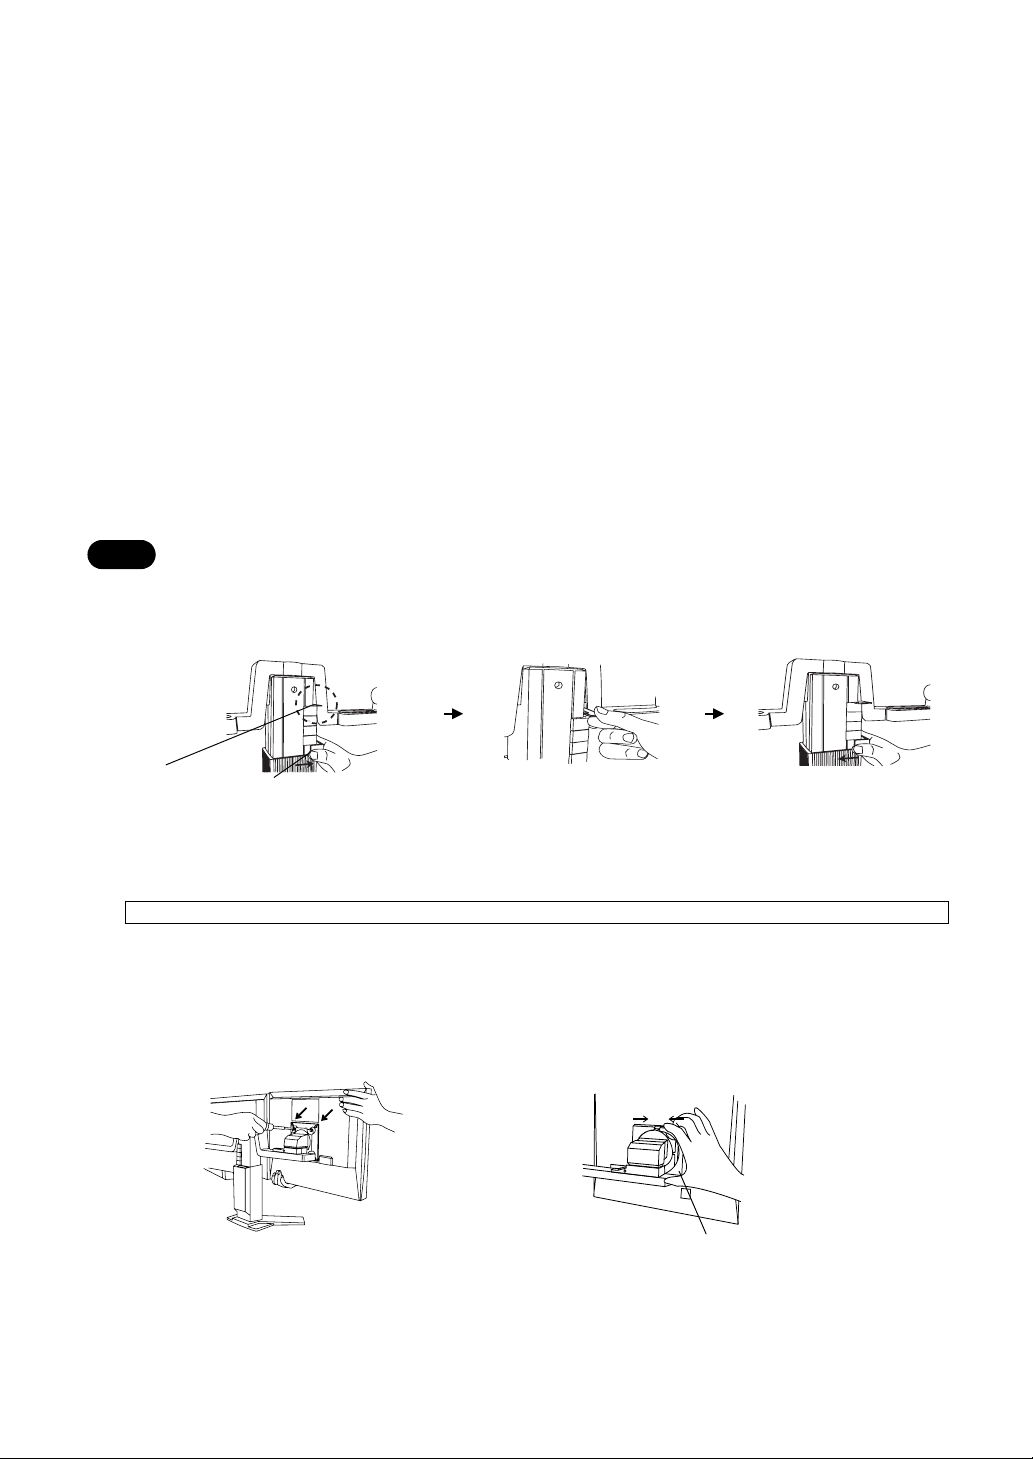
Note before Use
The paperboard is inserted on the stoppers of this stand for the protection of the stand in transport condition.
Remove the paperboard before use. The procedures are as follows.
1.
Detach the bottom one in five stoppers.
2.
Slide down other four stoppers and remove the paperboard.
3.
Reattach the detached stopper.
NOTE
When repacking and transporting the stand, reinsert the paperboard on the stoppers for the protection of
the stand.
1
________________________________
__________________________________
2 3
Paperboard
Stopper
How to attach
Use specified screws for tightening up referring to the ‘Compatible Screws List’.
1.
Position the monitor to fit the holes at the rear of the monitor to the shield plate of the stand. Tighten
the two screws at the top as a temporary stop then tighten the rest of screws. (Tighten the two screws at
the top securely after attaching all screws.)
2.
Attach the covers to the shield plate with sliding them rightward or leftward.
1
____________________________________
2
Covers
Page 3

How to adjust
____________________________________
Height Adjustment
Adjust the height with using the stoppers.
(Six stage height adjustable)
Attach or remove the stopper from the bottom one
by one with holding the arm of stand from
underneath.
Angle Adjustment
Hold the monitor with both hands and adjust the
monitor angle as desired.
Horizontal Position Adjustment
Grip the top and bottom sides of the monitor firmly
and slide it with lifting the bottom side of the
monitor to the front.
Lift up
Cable Connection
Connect the cables (ex. signal cable) to the monitor.
After connecting, lead the cables into the cable
holder.
(The cables are recommended to lead with slight sag
for the smooth motion of the stand when the height,
horizontal position and angle adjustments.)
Specifications
Height Adjustment
Range
Dimensions 604 (W) x 326 to 401 (H) x 212 (D) mm
Weight 6.8 kg (14.99 lbs.)
Dimensions
Cable Entrance
____________________________________
75 mm (3.0")
[Six stage height adjustment: bottom point, +15 (0.6"), +30 (1.2"),
+45 (1.8"), +60 (2.4"), +75 (3.0") mm]
(23.8" x 12.8" to 15.8" x 8.4")
Unit: mm (inch)
To p Front Side
Page 4

LIMITED WARRANTY
EIZO NANAO CORPORATION (“EIZO”) authorized distributors warrant to the original purchaser that the
product shall be free from defect in material and workmanship for a period of one (1) year from the date of
purchase. The service parts stock for the product shall be maintained for five (5) years after the production is
discontinued. This warranty is valid only in the countries where EIZO’s authorized distributors are located.
In the event of malfunction during the warranty period attributable directly to faulty material and/or
workmanship, EIZO and EIZO’s authorized distributors will, at their option, either repair or replace the faulty
product with the same or similar model. EIZO and EIZO’s authorized distributors shall have no obligation
under this warranty, however, in the following cases:
(a) Any defect caused by freight damage, modification, alteration, abuse, misuse, accident, incorrect
installation, disaster, faulty maintenance or improper repair by third party other than EIZO and
EIZO’s authorized distributors.
(b) Any deformation, discoloration, warping, or whatsoever due to normal deterioration of the product.
(c) Any incompatibility of the products with subsequent technical innovations or regulations.
(d) Any defect of the product caused by external equipment.
(e) Any defect of the product on which the original serial number has been altered or removed.
(f) Any exchange of products due to the normal depletion of consumables such as batteries.
To obtain service under this warranty, the original purchaser must deliver the product, freight prepaid, in its
original package or other adequate package affording an equal degree of protection, assuming the risk of
damage and/or loss in transit, to your local EIZO authorized distributor. The original purchaser must present
proof of purchase establishing the date of purchase of the product when requesting warranty service.
Warranty period for any replaced and/or repaired product under this warranty shall expire at the end of the
original warranty period.
EIZO OR EIZO'S AUTHORIZED DISTRIBUTORS ARE NOT RESPONSIBLE FOR ANY DAMAGE TO,
OR LOSS OF, DATA OR OTHER INFORMATION STORED IN ANY MEDIA OR ANY PART OF ANY
PRODUCT RETURNED TO EIZO OR EIZO'S AUTHORIZED DISTRIBUTORS FOR REPAIR.
EIZO AND EIZO'S AUTHORIZED DISTRIBUTORS MAKE NO FURTHER WARRANTIES, EXPRESS OR
IMPLIED, WITH RESPECT TO THE PRODUCT AND ITS QUALITY, PERFORMANCE,
MERCHANTABILITY OR FITNESS FOR ANY PARTICULAR USE. IN NO EVENT SHALL EIZO OR
EIZO'S AUTHORIZED DISTRIBUTORS BE LIABLE FOR ANY INCIDENTAL, INDIRECT, SPECIAL,
CONSEQUENTIAL OR OTHER DAMAGES WHATSOEVER (INCLUDING, WITHOUT LIMITATION,
DAMAGES FOR LOSS OF PROFIT, BUSINESS INTERRUPTION, LOSS OF BUSINESS INFORMATION,
OR ANY OTHER PECUNIARY LOSS) ARISING OUT OF THE USE OR INABILITY TO USE THE
PRODUCT OR IN ANY CONNECTION WITH THE PRODUCTS, WHETHER BASED ON CONTRACT,
TORT, NEGLIGENCE, STRICT LIABILITY OR OTHERWISE, EVEN IF EIZO OR EIZO'S AUTHORIZED
DISTRIBUTORS HAVE BEEN ADVISED OF THE POSSIBILITY OF SUCH DAMAGES. THIS
EXCLUSION ALSO INCLUDES ANY LIABILITY WHICH MAY ARISE OUT OF THIRD PARTY CLAIMS
AGAINST THE ORIGINAL PURCHASER. THE ESSENCE OF THE PROVISION IS TO LIMIT THE
POTENTIAL LIABILITY OF EIZO AND EIZO'S AUTHORIZED DISTRIBUTORS ARISING OUT OF THIS
LIMITED WARRANTY AND/OR SALES.
 Loading...