

Page 1
Operating Instructions
Electric Chainsaw
®
Art.-Nr.: 45.002.90 I.-Nr.: 01015
KSE
2040 WK
FA
Anl KSE 2040 WK SPK7 05.07.2006 10:19 Uhr Seite 1
Page 2
2
Important information about these instructions
A warning triangle marks all those instructions which
are important for safety reasons. Always observe
these as failure to do so could result in serious injury!
The illustrations referred to in the text are to be found
inside the front cover pages. Keep these open while
reading the instructions.
Anl KSE 2040 WK SPK7 05.07.2006 10:19 Uhr Seite 2
Page 3
3
1
2
4
10
11
3
1
2
6
5
9
8
C
11
10
A
B
7
12
13
14
4a
5
4
2
15
Anl KSE 2040 WK SPK7 05.07.2006 10:19 Uhr Seite 3
Page 4
4
3
1
7
8
9
10
11
4
15
Anl KSE 2040 WK SPK7 05.07.2006 10:19 Uhr Seite 4
Page 5
5
65
10
10.1
7
8
9
Max.
Min.
Anl KSE 2040 WK SPK7 05.07.2006 10:19 Uhr Seite 5
Page 6
6
10.2
11
10.3
10.4
12
13
B
A
A
Anl KSE 2040 WK SPK7 05.07.2006 10:19 Uhr Seite 6
Page 7
7
FA
Anl KSE 2040 WK SPK7 05.07.2006 10:19 Uhr Seite 7
Page 8
FA
8
Anl KSE 2040 WK SPK7 05.07.2006 10:19 Uhr Seite 8
Page 9
FA
9
1
2
3
4
Anl KSE 2040 WK SPK7 05.07.2006 10:19 Uhr Seite 9
Page 10
10
FA
Anl KSE 2040 WK SPK7 05.07.2006 10:19 Uhr Seite 10
Page 11

FA
11
Anl KSE 2040 WK SPK7 05.07.2006 10:19 Uhr Seite 11
Page 12

12
FA
Anl KSE 2040 WK SPK7 05.07.2006 10:19 Uhr Seite 12
Page 13

FA
13
Anl KSE 2040 WK SPK7 05.07.2006 10:19 Uhr Seite 13
Page 14

FA
14
Anl KSE 2040 WK SPK7 05.07.2006 10:19 Uhr Seite 14
Page 15

FA
15
Anl KSE 2040 WK SPK7 05.07.2006 10:19 Uhr Seite 15
Page 16

FA
16
Anl KSE 2040 WK SPK7 05.07.2006 10:19 Uhr Seite 16
Page 17

FA
17
Anl KSE 2040 WK SPK7 05.07.2006 10:19 Uhr Seite 17
Page 18

FA
18
Anl KSE 2040 WK SPK7 05.07.2006 10:19 Uhr Seite 18
Page 19

FA
19
Anl KSE 2040 WK SPK7 05.07.2006 10:19 Uhr Seite 19
Page 20

FA
20
Anl KSE 2040 WK SPK7 05.07.2006 10:19 Uhr Seite 20
Page 21

GB
21
1
2
3
4
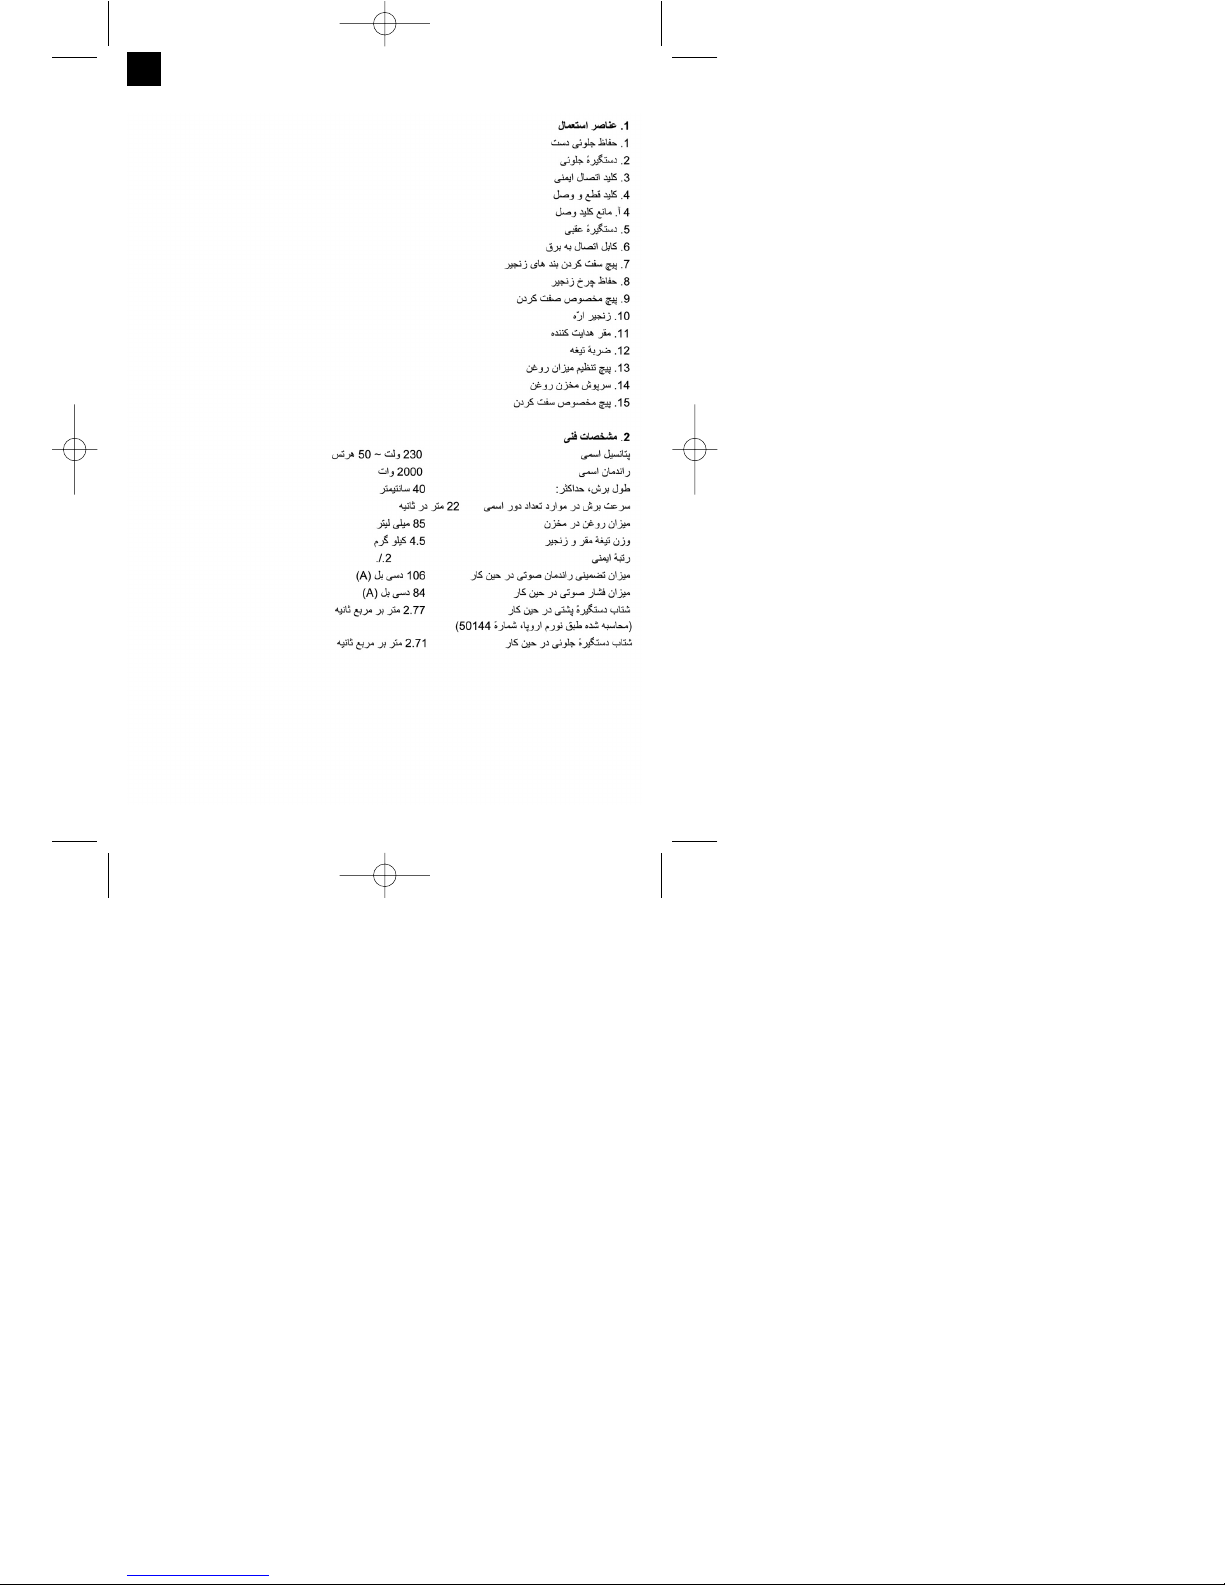
2. Technical data
Power Supply 230 V ~ 50 Hz
Power rating: 2000 W
Cutting length, max.: 40 cm
Cutting speed at rated rpm: 22 m/s
Oil tank capacity: 85 ml
Weight without sword + chain: 4,5 kg
Protection class: II /
쵭
Guaranteed sound power level under load: 106 dB(A)
Sound pressure level under load: 84 dB(A)
Acceleration Rear grip under load: 2,77 m/s
2
(calculated acc. to EN 50144) Front grip under load: 2,71 m/s
2
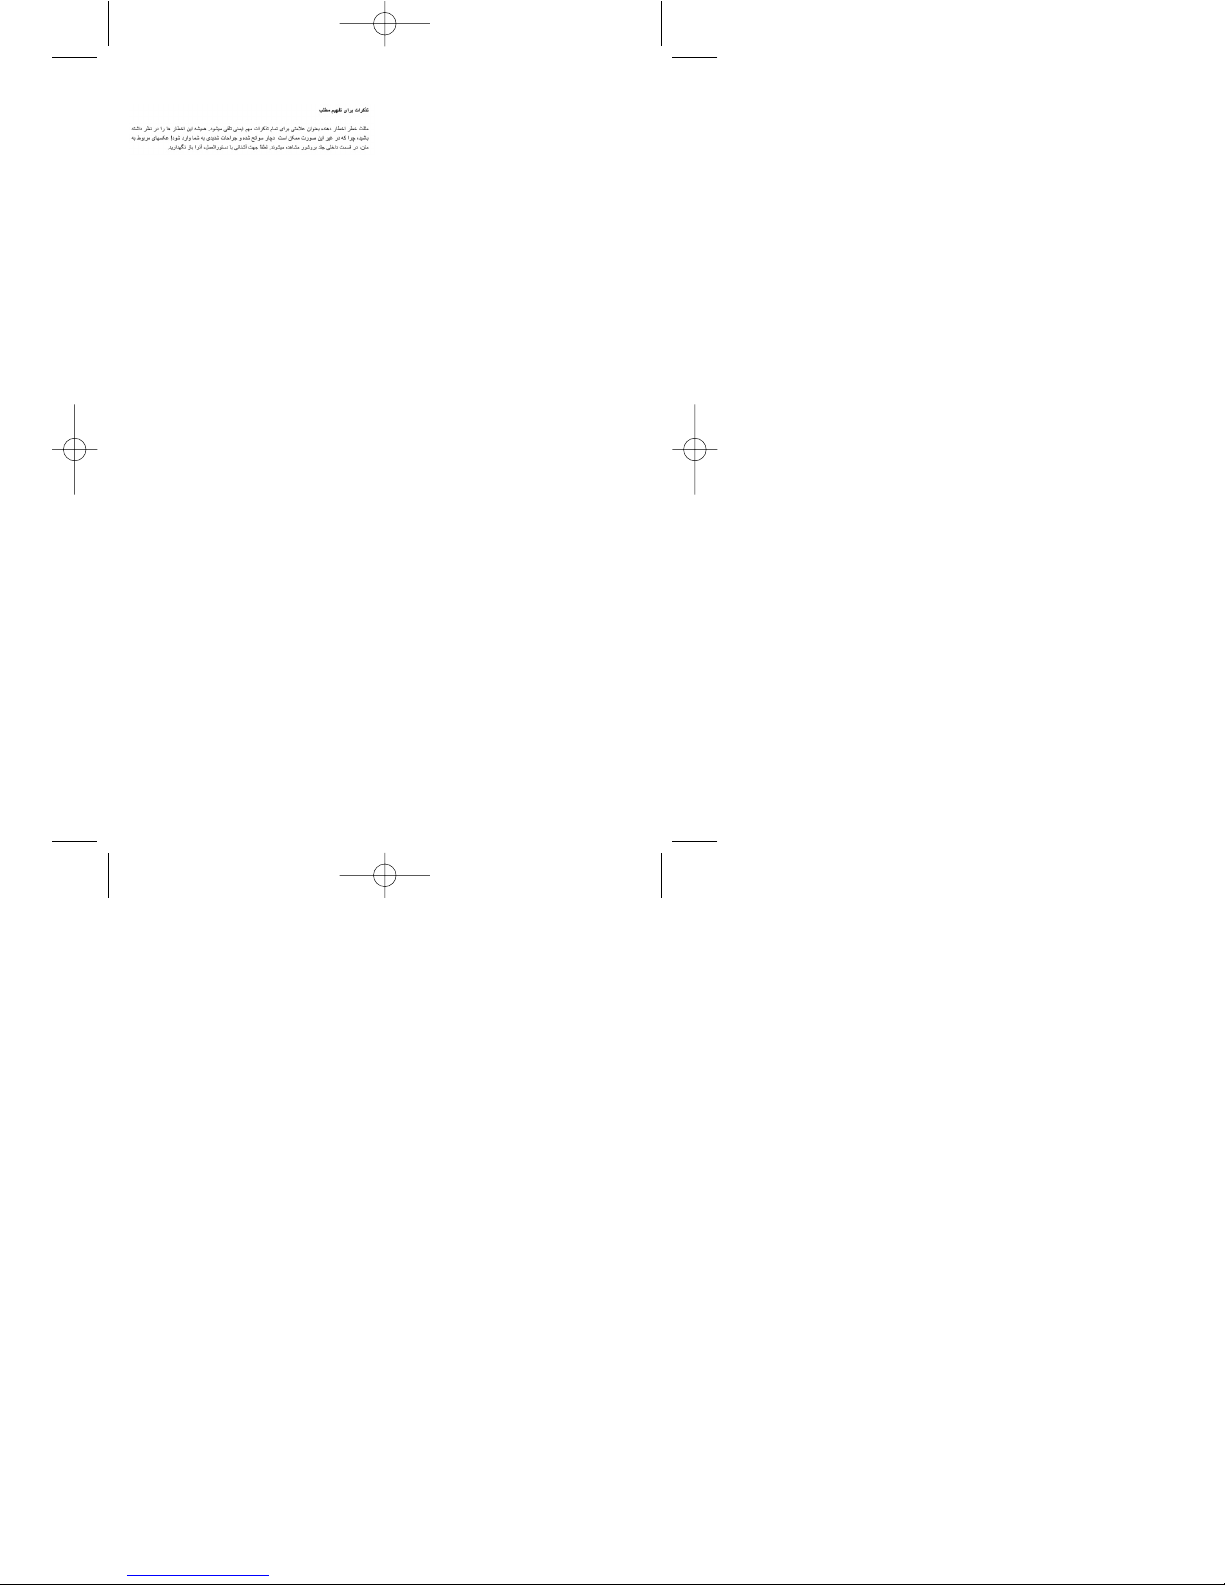
1. List of parts
1 Front finger guard
2 Front grip
3 Safety switch
4 On/Off switch
4a Power-on disable
5 Rear grip
6 Mains cable
7 Chain tensioning screw
8 Chain wheel cover
9 Fixing screw
10 Saw chain
11 Chain bar
12 Claw stop
13 Oil regulating screw
14 Oil tank cover
15 Fixing screw
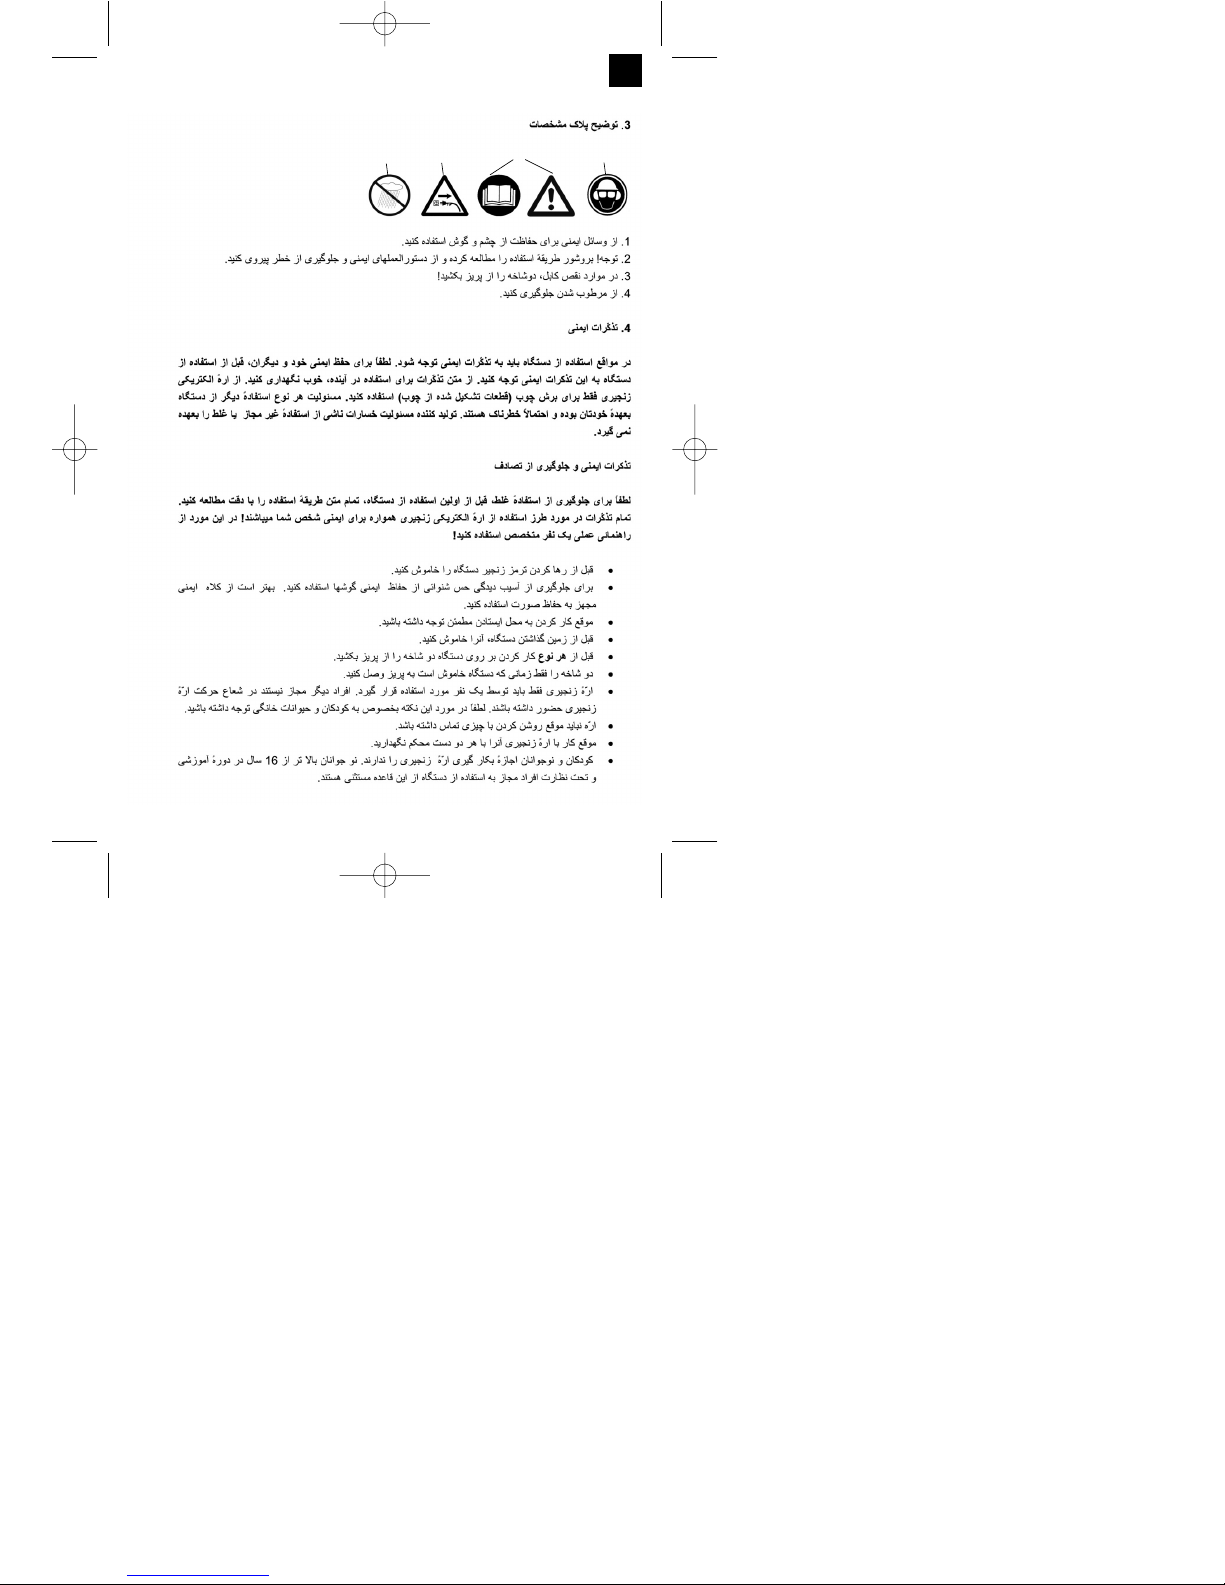
3. Explanation of the signs
1. Wear protective headgear, goggles and ear muffs
2. Important! Read the operating instructions and follow the warnings and safety instructions
3. If the cable is damaged, pull out the power plug immediately!
4. Protect from the damp
Anl KSE 2040 WK SPK7 05.07.2006 10:19 Uhr Seite 21
Page 22

4. Safety instructions
The safety instructions must be observed
when using the machine. For your own
safety and the safety of others, please read
this information carefully before using the
machine and keep it in a safe place for reference. Use the chainsaw only to saw wood
or objects made of wood. Any other types
of use are at your own risk and could well
be dangerous. The manufacturer cannot be
held liable for damage caused by improper
or incorrect usage.
Safety instructions and
accident prevention
To prevent the incorrect handling of the chainsaw, please read the operating instructions in
their entirety before using the machine for the
first time. All the information on the handling of
the chainsaw is relevant to your personal safety.
Ask a professional to show you how to use the
machine!
앬 Switch the machine off before releasing the
chain brake.
앬 To prevent damage to your hearing, wear ear
muffs; helmets with a visor are particularly
advantageous.
앬 Make sure you have a firm footing when working
with the chainsaw.
앬 Always switch off the machine before putting it
down.
앬 Always pull the plug out of the power socket
before doing any work on the machine.
앬 Only plug in when the machine is switched off.
앬 The chainsaw must be used only by one person
at a time. All other persons must stay clear of the
chainsaw’s area of swing. Children and pets in
particular must be kept well away at all times.
앬 The saw must not be touching anything when it
starts up.
앬 Hold the chainsaw firmly in both hands when
working with it!
앬 The chainsaw must not be operated by children
and young people. The only exception to this rule
are young persons of 16 years and over who can
use the chainsaw under supervision as part of
their training. Lend the saw only to those persons
who are familiar with this type of machine and
know how to handle it. Always pass on the operating instructions along with the chainsaw!
앬 The chainsaw may be operated only by persons
who are rested and in good health, i.e. in good
physical condition. If you start to tire, have a
break in good time. The chainsaw may not be
used after the consumption of alcohol.
앬 If the machine is not going to be used for a while
it must be set aside in such a way that no other
person is endangered.
앬 Before making a cut, always set the claw stop
before you start to saw.
앬 The power cable must always be behind the saw
operator.
앬 The power cable must always lead away from
the rear of the machine.
앬 Use only original accessories.
앬 Machines used outdoors must be connected
up to an earth-leakage circuit-breaker.
앬 When using an extension cable outdoors:
Check that it is approved for outdoor use and is
marked accordingly
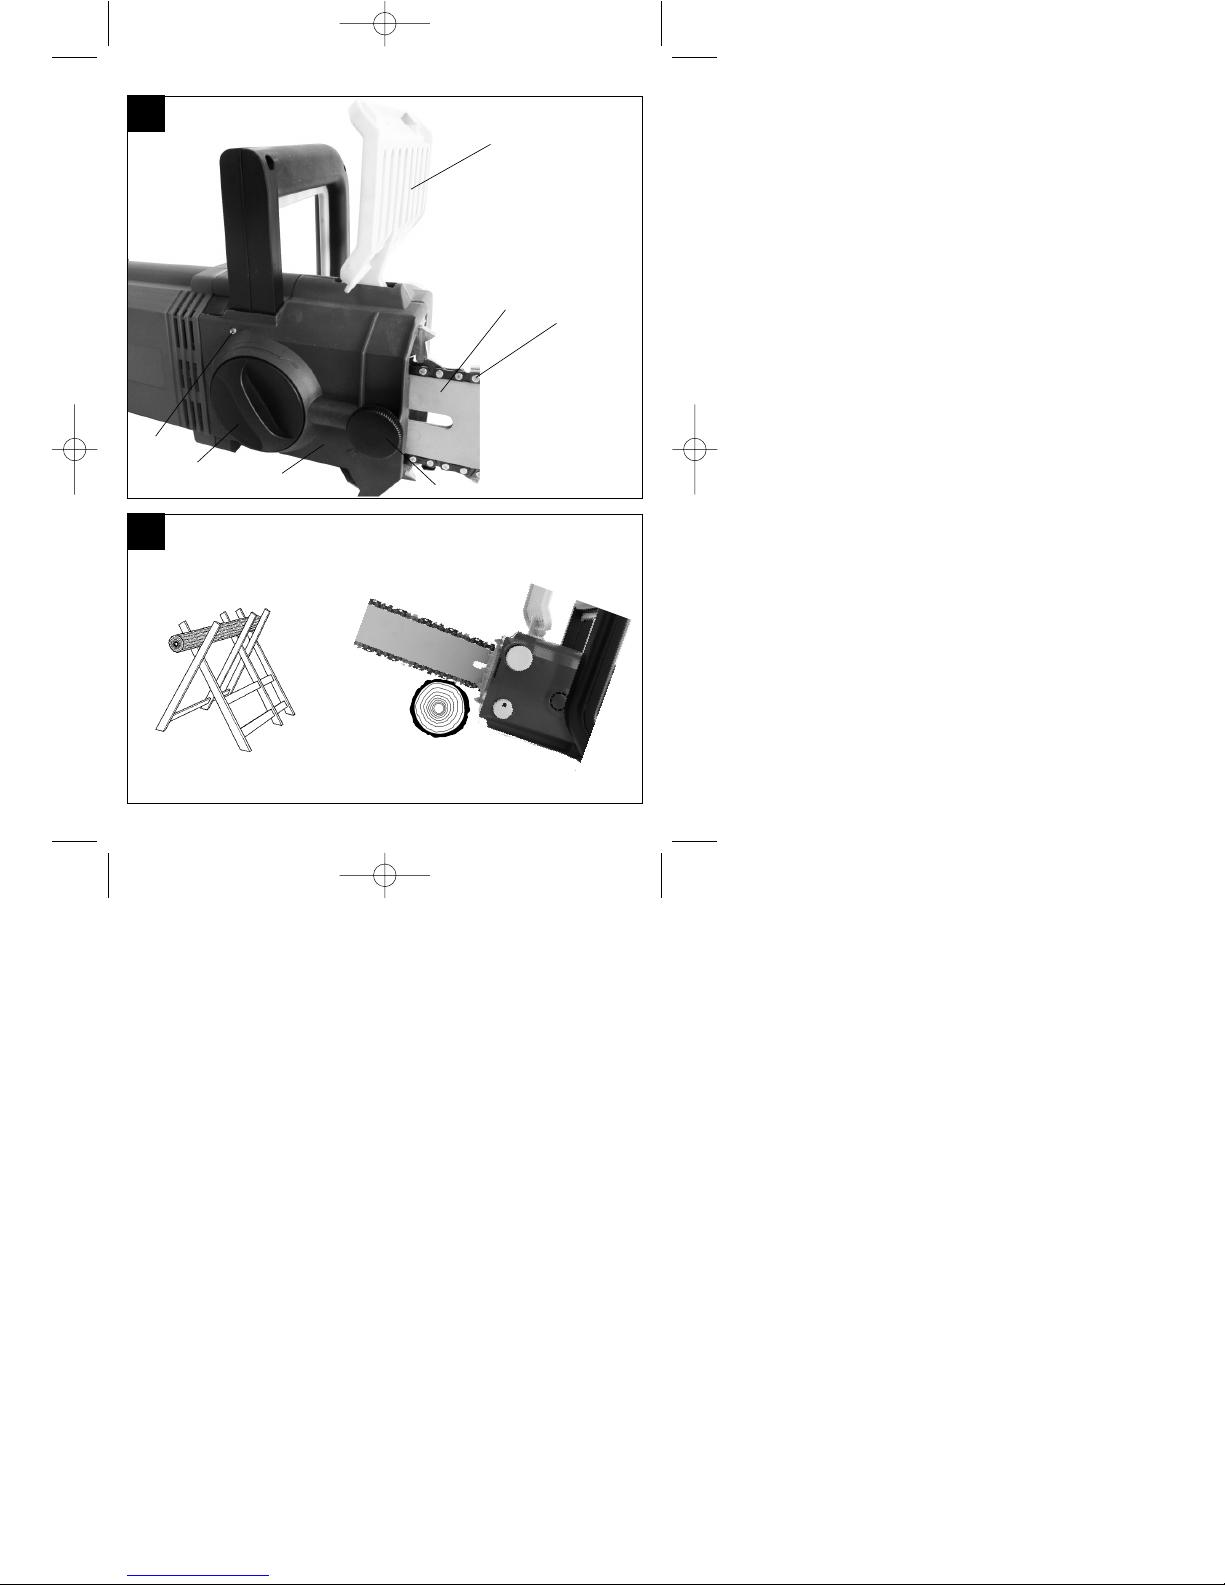
앬 Use a strong support when sawing converted
timber and thin branches (sawing trestle, Fig. 4).
Do not stack the timber and do not have it held
by a second person or with your foot.
앬 Logs must be secured in position.
앬 On sloping ground, always work facing upwards.
앬 Pull the saw out of the wood only when the saw
chain is running.
앬 If you are performing several cuts, switch off the
chainsaw in between cuts.
앬 Pay extra attention when cutting splintered wood.
Sawed off pieces of wood may be catapulted in
any direction (risk of injury!).
앬 Do not use the chainsaw to remove or sweep
away small pieces of wood or similar objects.
앬 Leave branch lopping work to trained personnel!
Risk of injury!
앬 Pay special attention to branches under tension.
Do not cut through freely suspended branches
from underneath.
앬 Never stand on the trunk when lopping off bran-
ches.
앬 The chainsaw may not be used for forest work,
i.e. for felling and lopping off branches in the
forest. Because of the cable connection the saw
operator does not have the necessary mobility
and his safety is not guaranteed!
앬 Always stand to the side of the tree being felled.
앬 When retreating after making the back cut, watch
out for falling branches.
앬 On slopes the saw operator should stand to the
upper or left or right side the trunk or lying tree,
never by its bottom.
앬 To prevent injury, damaged power cables may
only be replaced by the manufacturer or the
customer service center.
GB
22
Anl KSE 2040 WK SPK7 05.07.2006 10:19 Uhr Seite 22
Page 23

In order to prevent kick-back, please follow these
safety instructions:
앬 Never start cutting with the tip of the chain bar!
Always keep a close eye on the tip of the chain
bar!
앬 Never cut with the tip of the chain bar! Be
careful, when continuing cuts you are already
working on!
앬 Always start cuts with the chainsaw already run-
ning!
앬 Make sure that the saw chain is always properly
sharpened.
앬 Never cut through more than one branch at a
time! When lopping off branches, be careful not
to touch any other branches.
앬 When cross-cutting, pay attention to trunks stan-
ding very close to each other. If possible use a
sawing trestle.
5. Transporting the chainsaw
Before transporting the chainsaw, always remove the
plug from the power socket and slide the chain guard
over the rail and chain. If several cuts are to be performed with the chainsaw, the saw must be switched
off between cuts.
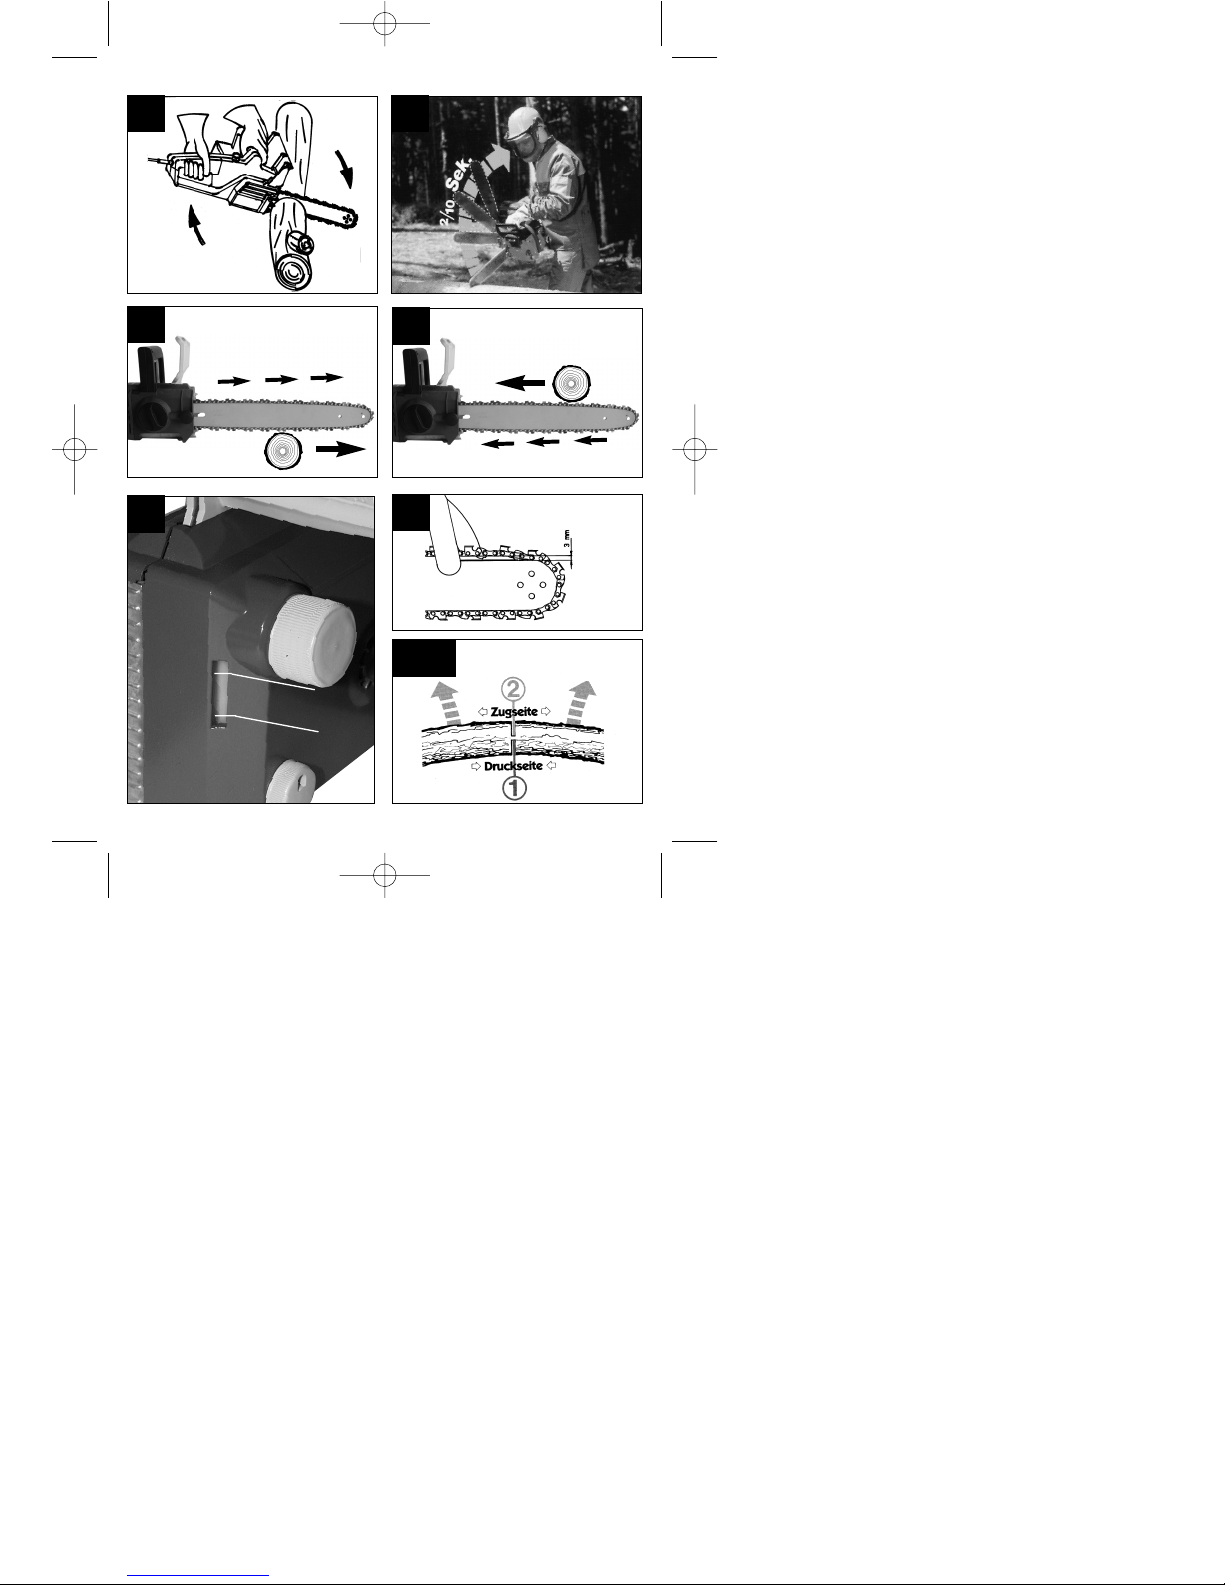
6. Before starting up
The voltage and current supply must comply with the
ratings on the type plate. Before commencing work,
always check that the chainsaw works properly and
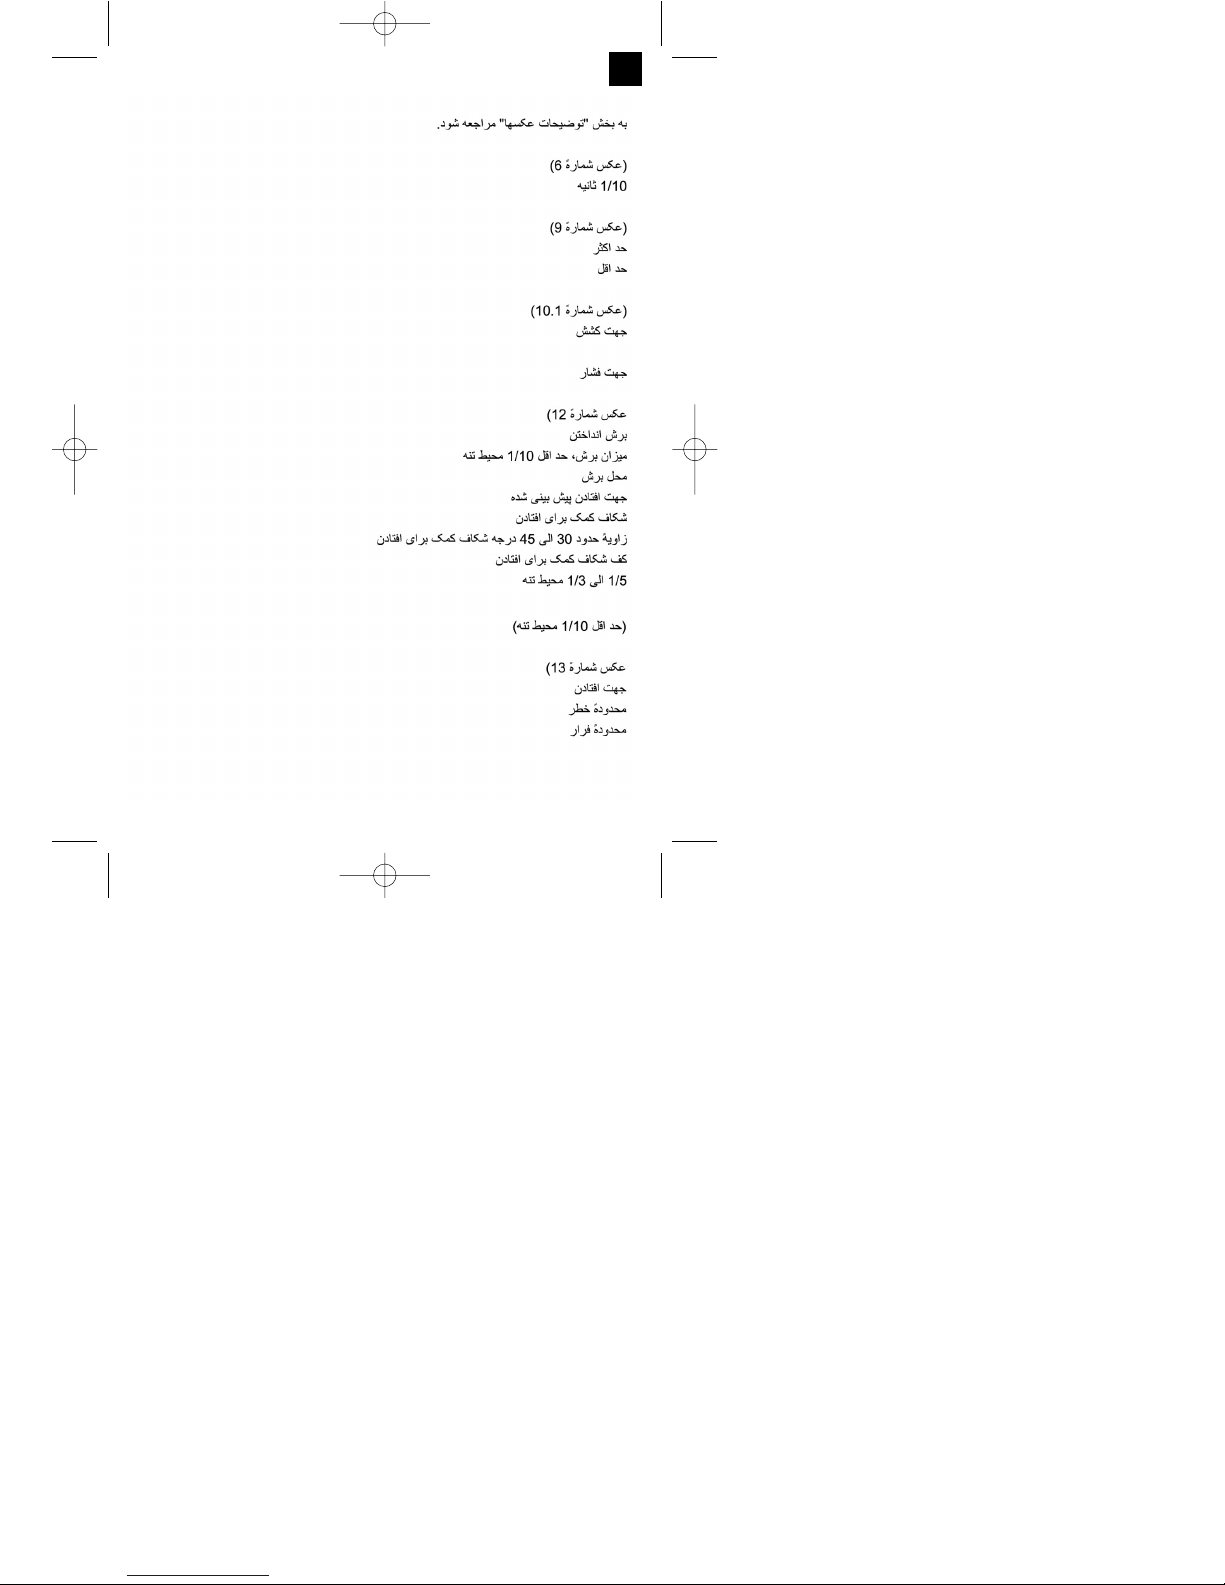
is safe to operate. Check also that the chain lubrication and the oil gauge are in good working order (see
Fig. 9). When the oil level is approx. 5 mm from the
bottom mark (marked with “Min” in the illustration),
you must top up with oil. When the oil level is above
this mark you can work without worry.
Switch on the chainsaw and hold it above light-colored ground. Be careful not to allow the chainsaw to
touch the ground. For safety reasons it is best to
keep a clearance of at least 20 cm. If you now see
growing traces of oil, the chain lubrication system is
working correctly. If there are no traces of oil at all,
try cleaning the oil outlet, the upper chain tensioning
borehole and the oil duct.
7. Assembling the chain bar and saw
chain (see Fig. 2/3)
Make sure that the power plug is disconnected
from the power supply!
Important: The front finger guard (1) must always
be in the top (vertical) position.
The chain bar and saw chain are delivered separately. To assemble, first unscrew the fastening screw (9)
and the screw (15) by turning them counter-clockwise and remove the chain wheel cover (8). To prevent injury on the sharp cutting edges, always wear
gloves when assembling, tensioning and checking
the chain. Before assembling the chain bar with
the saw chain, check the cutting direction of the
teeth (see Fig. 2)!
Hold the chain bar (11) vertically with the tip pointing
upwards and put on the saw chain (10), beginning at
the tip of the bar. Then assemble the chain bar
with the chain tensioner (A) and saw chain as follows: Place the chain bar with the saw chain on the
bar pin (B) so that the chain tensioner (A) faces outwards. Place the saw chain round the chain wheel
(C). Reattach the chain wheel cover (8) and gently
tighten the fastening screw (9).
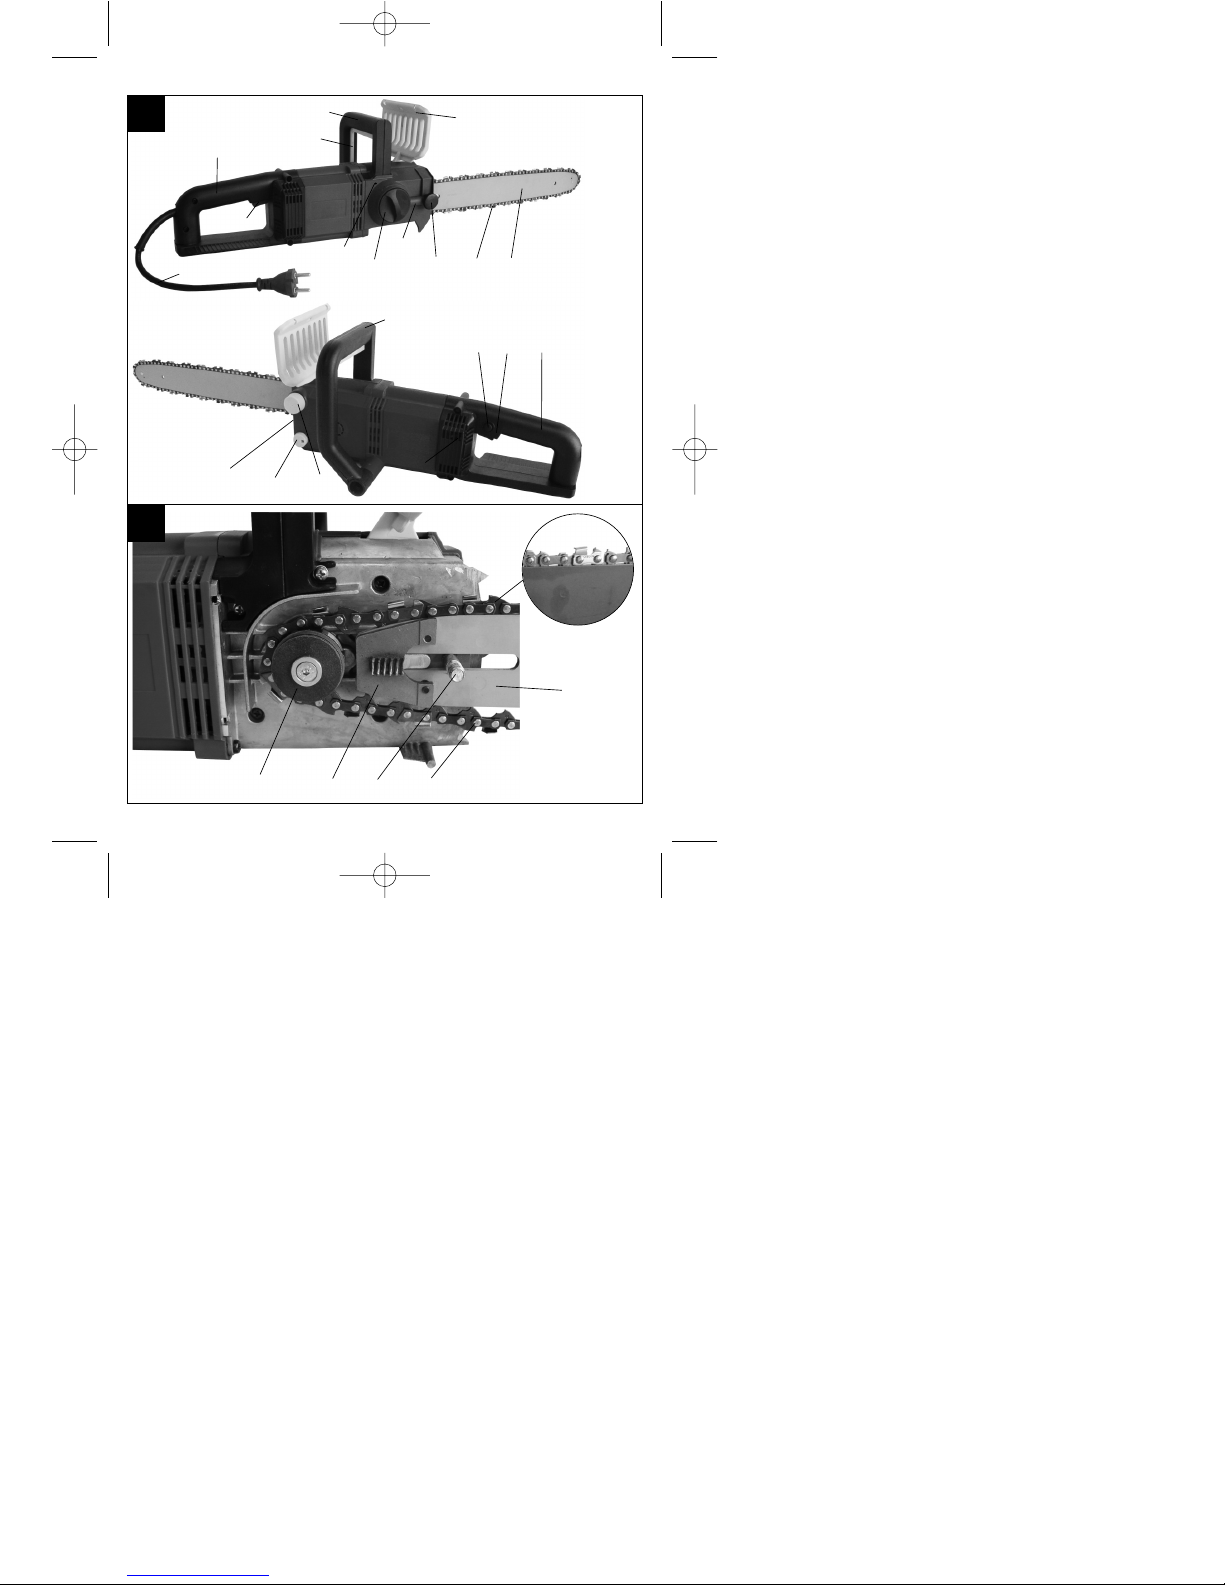
8. Tensioning the saw chain
Always pull out the power plug before doing any
work on the machine!
Wear safety gloves!
Make sure that the saw chain (10) is inside the guide
groove of the chain bar (11)! You can now tension
the chain correctly by turning the chain tensioning
screw (7) anticlockwise (turning it clockwise may
loosen the chain). Then tighten the fixing screw (9)
and insert the screw (15). Check the chain tension
again (see Fig. 10). Do not tension the saw chain
too tightly. When cold, it should be possible to lift
the chain in the middle of the chain bar approx. 3
mm. When warm, the saw chain will expand and
slacken. There is a danger of the saw chain jumping
off the rail altogether. Retension if necessary. If the
saw chain is retensioned when hot, it must be loosened again when the sawing work has been completed. Otherwise, the contraction which takes place as
the chain cools would result in excessively high tension. A new saw chain requires a running-in period of
approx. 5 minutes. Chain lubrication is very important
at this stage. After running in, check the chain tension and retension if necessary.
GB
23
Anl KSE 2040 WK SPK7 05.07.2006 10:19 Uhr Seite 23
Page 24

9. Filling with chain oil (see Fig. 9)
To prevent dirt getting inside the tank, clean the oil
tank cap before opening. Check the contents of the
oil tank by checking the oil gauge during sawing
work. Close the oil tank cap tightly and wipe away
any spills.
10. Chain lubrication
To prevent excessive wear, the saw chain and chain
bar must be evenly lubricated during operation.
Lubrication is automatic. Never work without chain
lubrication. If the chain runs dry, the entire cutting
apparatus will quickly become severely damaged. It
is therefore important to check both chain lubrication
and the oil gauge before every use (Fig. 9).
Never use the saw when the oil level is below the
„Minimum“ mark (Fig. 9).
앬 Minimum - When only approx. 5 mm of oil is visi-
ble at the lower rim of the oil gauge, you must
top up with oil.
앬 Maximum - Top up with oil until the window is
full.
11. Checking the automatic lubrication
Before commencing work, check the automatic chain
lubrication and oil gauge. Switch on the chainsaw
and hold it above light-colored ground. Be careful not
to allow the chainsaw to touch the ground. For safety
reasons it is best to keep a clearance of at least 20
cm. If you now see growing traces of oil, the chain
lubrication system is working correctly. If there are
no traces of oil at all, try cleaning the oil outlet or
contact your Customer Service.
Adjust the oil flow
Adjust the oil flow by turning the oil regulating screw
(13). In the case of damp and soft wood the oil flow
can be decreased (turn the oil regulating screw
clockwise); in the case of dry, hard wood more oil is
required for lubrication (turn the oil regulating screw
anti-clockwise)
12. Chain lubricants
The service life of saw chains and chain bars
depends to a large extent on the quality of the lubricant used. Old oil must not be used! Use only environment-friendly chain lubricant. Store chain lubricant only in containers which comply with the
regulations.
13. Chain bar
The chain bar is subjected to especially severe wear
and tear at the nose and on the bottom. To avoid
one-sided wear and tear, turn the chain bar over
every time you sharpen the chain.
14. Chain wheel
The chain wheel (Fig. 2/Item C) is subjected to
especially high wear and tear. If you notice deep
wear marks on the teeth, the chain wheel must be
replaced. A worn chain wheel curtails the service life
of the saw chain. Have the chain wheel replaced by
a specialist dealer or your Customer Service.
15. Chain guard
The chain guard must be clipped onto the chain and
sword as soon as the sawing work has been completed and whenever the machine has to be transported.
16. Chain brake
In the event of kick-back, the chain brake will be
actuated via the front finger guard (1). The front finger guard (1) is pushed forwards by the back of the
hand and this causes the chain brake to stop the
chainsaw, or rather the motor, within 0.10 s.
17. Releasing the chain brake
To be able to use your chainsaw again, you must
release the saw chain again. First switch off the
machine. Then push the front finger guard (1) back
into the vertical position until it locks in place. The
chain brake is now fully functional again.
18. Sharpening the saw chain
You can have your saw chain sharpened fast and
GB
24
Anl KSE 2040 WK SPK7 05.07.2006 10:19 Uhr Seite 24
Page 25

correctly by specialist dealers, from whom you can
also obtain chain sharpening equipment to enable
you to sharpen the chain yourself. Please follow the
corresponding operating instructions.
Take care of your tools. Keep your tools sharp
and clean to enable you to work well and safely.
Follow the maintenance regulations and the
instructions for changing tools.
19. Starting up (Fig. 9)
Always wear safety goggles, ear muffs, protective gloves and heavy-duty work clothes!
Never use the chainsaw when standing on a ladder,
in a tree or in any other instable places. Do not use
above shoulder height and do not saw with one
hand.
Use the saw only with approved extension cables
with the prescribed insulation and connections for
outdoor use (approved rubber-sheathed cables)
which fit the machine plug. To switch on, hold the
front handle with your left hand, then use your right
hand to hold the rear handle.
To switch on: Press the power-on disable (4a) with
your thumb, press the On/Off switch (4) and release
the power-on disable again.
If the chainsaw does not run, the
chainbrake must be released at the front
finger guard (1). Be sure to read the
sections „Chain brake“ and „Releasing the
chain brake“ on this point.
After switching on, the chainsaw will run immediately at high speed.
To switch off: Release the ON/OFF switch (4). Only
put down the chain saw after the chain has stopped
rotating!
After working with the chainsaw, you should
always: Clean the saw chain and chain bar. Attach
the chain guard.
Machine protection
Never use the machine in the rain or
in damp conditions.
If the extension cable is damaged,
pull the power plug immediately.
Never work with a damaged cable.
Check the machine for damage. Before using your
tool again, check the safety devices or any slightly
damaged parts to ensure that they are in good working order. Make sure the moving parts are working
correctly. All the parts must be correctly assembled
and meet all the conditions required to ensure that
the machine works correctly. Any damaged safety
devices and parts must be properly repaired or replaced immediately by a Customer Service workshop or
the company ISC-GmbH, unless there are instructions to the contrary in this operating manual.
Notes on working practice
Kick-back
앬 When cross-cutting always set the claw stop
against the timber you want to saw (see Fig. 4).
앬 Always set the claw stop before cross-cutting.
Only then switch on the machine and start
sawing into the wood. Pull the machine upwards
at the rear and lead the direction with the front
grip. Use the claw stop as a fulcrum. To reposition for further cutting, exert slight pressure on the
front grip. Pull the saw back slightly during this
process. Position the claw stop further down the
cut and pull up the rear grip once again (see Fig.
5).
앬 Plunge cuts and horizontal cuts may only be car-
ried out by professionals (high risk of kick-back;
see Fig. 6).
앬 For horizontal cuts, position the saw at the smal-
lest possible angle. This requires extreme caution, as the claw stop cannot be applied in this
case.
앬 If the chain gets stuck when sawing with the
upper side it may be thrust toward the operator.
For this reason you should saw wherever possible with the bottom side, as the chainsaw will
then be thrust away from the body towards the
wood (see Fig. 7 and 8).
앬 When lopping off branches, the chainsaw should
GB
25
i
Anl KSE 2040 WK SPK7 05.07.2006 10:19 Uhr Seite 25
Page 26

be supported wherever possible against the
trunk. Do not cut with the tip of the chain bar (risk
of kick-back; see Fig. 6).
앬 Watch out for trunks rolling towards you.
Kick-back!
앬 The chainsaw is likely to recoil if the tip of the
chain bar (especially the top quarter) accidentally
touches wood or any other solid objects. In this
case the saw will move uncontrollably and will be
hurled towards the operator at full power (risk of
injury!).
Fig. 6
You can avoid accidents by not sawing
with the tip of the chain bar as this may
cause the saw to rear up suddenly. Always
use the complete safety equipment and
clothes when working with the saw.
Make sure your work piece is firmly secu-
red.
Use clamps to stop the work piece from
slipping. This also makes it easier to operate the machine with both hands.
Kick-back will result in an uncontrollable motion of
the saw. This represents the danger of severe injuries. Never saw with a slack or blunt chain. A
poorly sharpened chain increases the risk of kickback. Never saw above shoulder height.
20. Tips on chainsaw use
Sawing up wood
(See Fig. 4 and 5)
To saw up wood, please observe the safety regulations and proceed as follows: Make sure the wood to
be sawed cannot slip. Clamp short pieces of wood in
place before sawing. Saw only wood or wooden
objects. When sawing, make sure that no stones or
nails are touched as these could be thrown out and
damage the saw chain. Avoid bringing the running
saw into contact with wire fences or the ground.
When lopping off branches, support the machine as
far as possible and do not saw with the tip of the
chain bar. Watch out for obstacles such as tree
stumps, roots, ditches and hillocks as these could
cause you to fall.
Remember:
The chainsaw must be running before it comes into
contact with the wood!
To switch on (Fig. 1): Press the safety lock-off (4a)
and ON/OFF switch (4). Place the lowest claw (12)
on the wood. Raise the chainsaw by the rear grip (5)
and saw into the wood. Move the chainsaw back a
little and place the claw (12) further down. Pay extra
attention when cutting splintered wood. Pieces of
wood may be catapulted in any direction.
To switch off: Release the ON/OFF switch.
Pull out the power plug.
Remove the chainsaw from the wood only with
the saw chain still running. Anyone who saws
without a stop can be pulled forward.
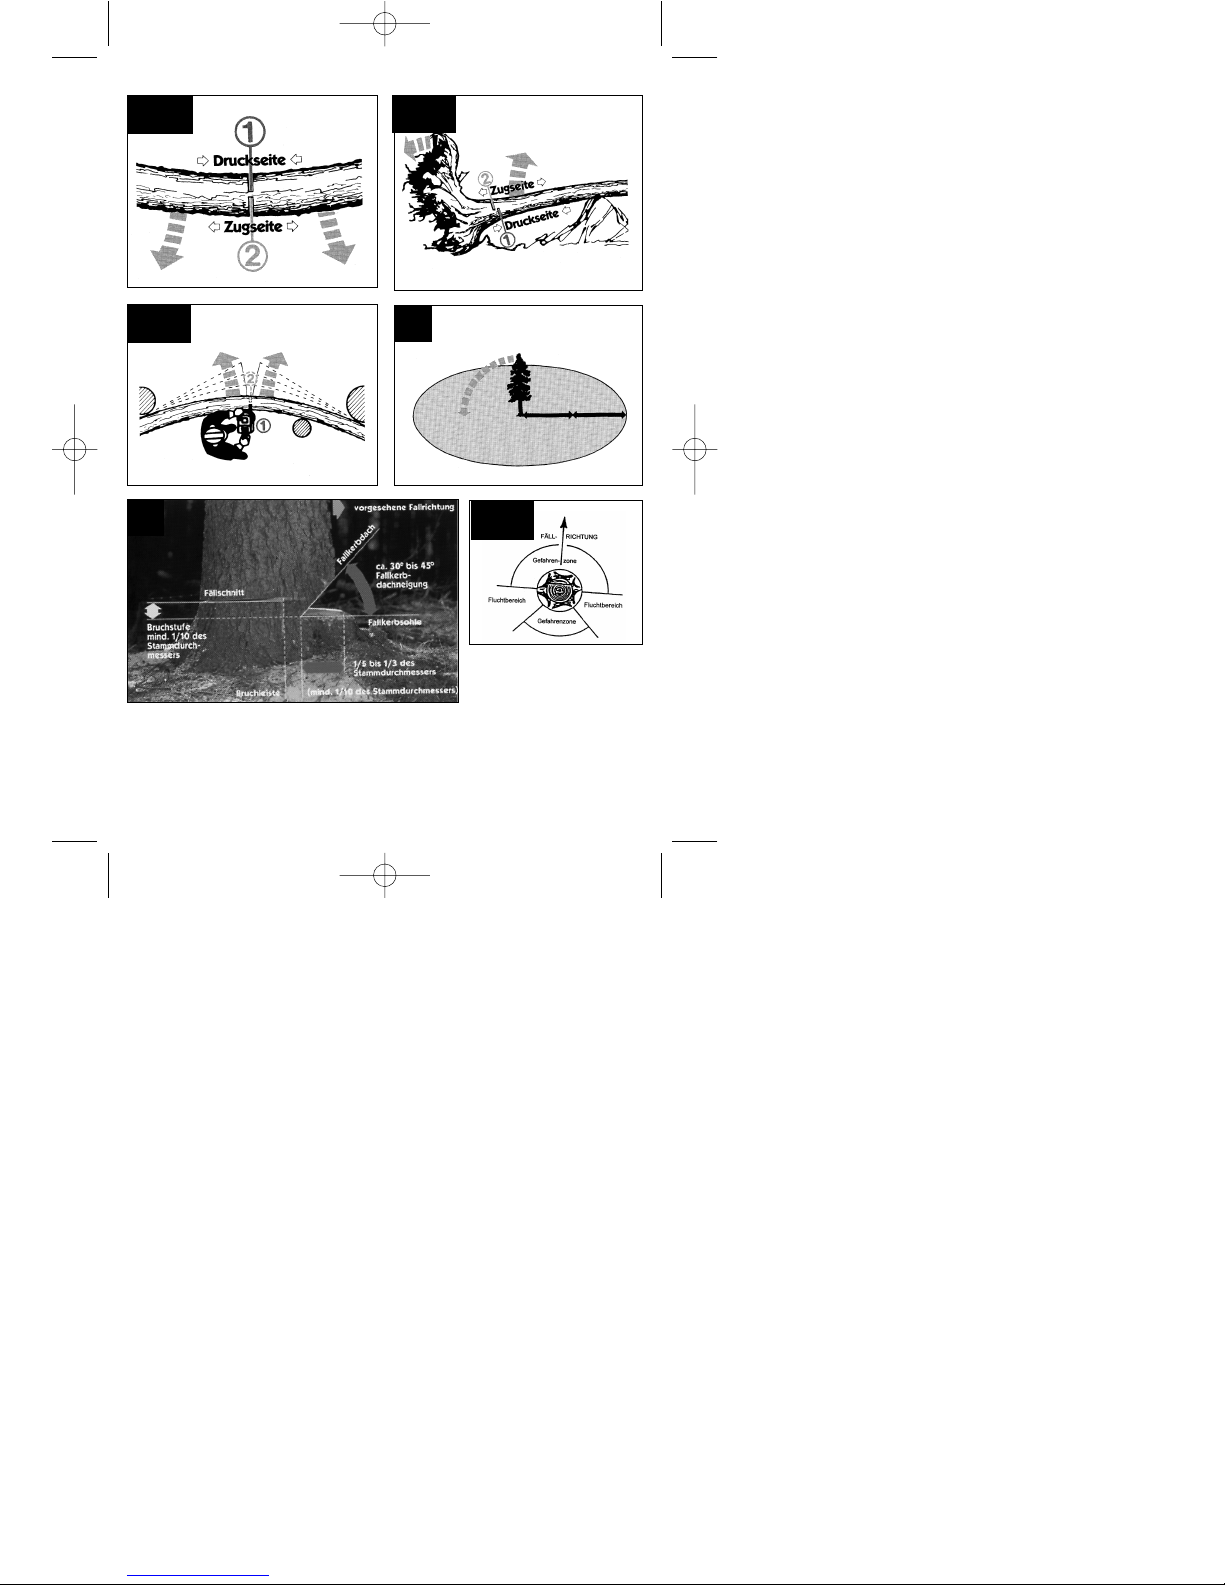
Wood under tension
Fig. 10.1: Top side of trunk under tension
Danger: Tree will rear up!
Fig. 10.2: Bottom side of trunk under
tension
Danger: Tree will move
downwards!
Fig. 10.3: Thick trunks and high tension
Danger: Tree will move suddenly
and with immense force!
Fig. 10.4: Both sides of trunk under
tension
Danger: Tree will move
sideways!
Felling trees
To fell trees, observe all the safety regulations
and proceed as follows:
The chainsaw may be used to fell only trees which
are smaller in diameter than the length of the chain
bar. Never try to extract a jammed saw with the
motor still running. If the saw chain gets jammed,
release it using a wooden wedge.
Remember:
Danger zone: Falling trees can bring down
other trees with them. The danger zone is therefore twice the length of the tree being felled.
(Fig. 11)
GB
26
Anl KSE 2040 WK SPK7 05.07.2006 10:19 Uhr Seite 26
Page 27

Important:
Prior to cutting you must plan and provide for an
escape area (A). This escape area must be located
behind the expected felling direction (B) (Fig. 13).
Important:
Before performing the final cut, make sure there are
no spectators, animals or obstacles in the felling
path.
Felling trees is dangerous and requires practice.
If you are a beginner or inexperienced, do not try
to teach yourself but seek professional training.
(Fig. 12)
Felling direction:
앬 First estimate the direction of fall, taking into
account the centre of gravity of the crown and
the wind direction. The chainsaw must be running before it comes into contact with the wood.
Switch on the chainsaw. Saw an undercut in the
tree in the direction of fall and then make a horizontal cut (back cut) on the side opposite to the
undercut.
앬 Make the undercut: This will give the tree direc-
tion and guidance.
앬 Check the direction of fall: If you have to correct
the undercut, always recut over the entire width.
앬 Call out „Timber!“
앬 Only now make the back cut, which must be hig-
her than the sole of the undercut. Insert wedges
in good time.
앬 Leave the bridge in place as it will function as a
hinge. If you cut through the bridge, the tree will
fall randomly.
앬 Fell the tree by driving a wedge into the back cut,
not by sawing through it.
앬 When the tree falls, step back and watch the
crown. Wait for the crown to stop swinging. Do
not continue working under branches which have
got stuck.
Do not fell trees:
앬 if you can no longer distinguish details within the
danger zone, e.g. owing to fog, rain, snow drifts
or twilight,
앬 if the direction of fall cannot be reliably estimated
owing to wind or gusts of wind. Felling work on
sloping ground, black ice, frozen or dewy ground
is safe only if you can get a firm foothold.
To switch off:
Pull the plug out of the power socket. To fell the tree,
you must drive a wedge into the back cut. When
retreating after making the back cut, watch out for
falling branches.
Maintenance and cleaning
Always pull the plug out of the power socket
before doing any work on the machine!
Keep the cooling vents on the motor housing clean
and unobstructed at all times. Only the maintenance
work described in these operating instructions may
be carried out. Any other maintenance work must be
carried out by our Customer Service. Do not modify
the chainsaw in any way as this could jeopardize its
safety. Should the machine fail despite our careful
manufacturing and inspection procedures, have it
repaired by an authorized Customer Service workshop. In the event of any inquiries and spare parts
orders, always quote the type designation and the 9digit order number.
Storage
Keep your chainsaw in a safe place. The unused
machine should be stored clean, on a flat surface
and in a dry place which is inaccessible to children.
21. Ordering replacement parts
Please quote the following data when ordering replacement parts:
앬 Type of machine
앬 Article number of the machine
앬 Identification number of the machine
앬 Replacement part number of the part required
For our latest prices and information please go to
www.isc-gmbh.info
GB
27
Anl KSE 2040 WK SPK7 05.07.2006 10:19 Uhr Seite 27
Page 28

GB
28
22. Troubleshooting
Fault Cause Remedy
Motor does not run No electricity Check socket, cable and plug.
Chain brake Damaged cable: Have repaired by
Customer Service. It is prohibited to patch
the cable with insulating tape.
Damaged switches have to be replaced
by a Customer Service workshop.
See section 16 and 17 „Chain brake“ and
„Releasing the chain brake“.
Chain does not move Chain brake Check the chain brake, release if
necessary.
Poor cutting performance Blunt chain Sharpen the chain
Chain wrongly fitted Check that the chain is fitted correctly
Chain tension Check the chain tension
Saw works only with difficulty Chain tension Check the chain tension
Chain jumps off sword
Chain becomes hot Chain lubrication Check oil level
Check chain lubrication
Never use tools with defective On/Off switches.
In the case of all other types of technical faults, please contact an authorized Customer Service workshop, our
Central Service Department, or your local dealer.
Anl KSE 2040 WK SPK7 05.07.2006 10:19 Uhr Seite 28
Page 29

29
Landau/Isar, den 31.05.2006
Elektro-Kettensäge KSE 2040 WK
Weichselgartner
Leiter QS Konzern
ISC GmbH
Eschenstraße 6
D-94405 Landau/Isar
Konformitätserklärung
98/37/EG
73/23/EWG_93/68/EEC
97/23/EG
89/336/EWG_93/68/EEC
90/396/EWG
89/686/EWG
87/404/EWG
R&TTED 1999/5/EG
2000/14/EG:
95/54/EG:
97/68/EG:
x
x
x
x
Art.-Nr.: 45.002.90 I.-Nr.: 01015 Archivierung: 4500290-09-4155050
Subject to change without notice
EN 50144-1; EN 50144-2-13; EN 55014-1; EN 55014-2; EN 61000-3-2;
EN 61000-3-11; KBV V;
TÜV Produkt-Service GmbH, Ridlerstraße 31, 80339 München
M6050824192226
D
erklärt folgende Konformität gemäß EU-Richtlinie
und Normen für Artikel
declares conformity with the EU Directive
and standards marked below for the article
F
déclare la conformité suivante selon la
directive CE et les normes concernant l’article
verklaart de volgende conformiteit in overeenstemming met de EU-richtlijn en normen voor
het artikel
E
declara la siguiente conformidad a tenor de la
directiva y normas de la UE para el artículo
P
declara a seguinte conformidade de acordo
com a directiva CE e normas para o artigo
S
förklarar följande överensstämmelse enl. EUdirektiv och standarder för artikeln
ilmoittaa seuraavaa Euroopan unionin direktiivien ja normien mukaista yhdenmukaisuutta
tuotteelle
erklærer herved følgende samsvar med EUdirektiv og standarder for artikkel
заявляет о соответствии товара
следующим директивам и нормам EC
izjavljuje sljedeću uskladjenost s odredbama i
normama EU za artikl.
declarå urmåtoarea conformitate cu linia directoare CE μi normele valabile pentru articolul.
ürün ile ilgili olarak AB Yönetmelikleri ve
Normlar∂ gere©ince aμa©∂daki uygunluk aç∂kla
mas∂n∂ sunar.
‰ЛПТУВИ ЩЛУ ·ОfiПФ˘ıЛ Ы˘МКˆУ›· Ы‡МКˆУ· МВ
ЩЛУ √‰ЛБ›· ∂∂ О·И Щ· ЪfiЩ˘Ф БИ· ЩФ ЪФ˚fiУ
I dichiara la seguente conformità secondo la
direttiva UE e le norme per l’articolo
attesterer følgende overensstemmelse i
henhold til EU-direktiv og standarder for
produkt
prohlašuje následující shodu podle směrnice
EU a norem pro výrobek.
H
a következő konformitást jelenti ki a termékekre vonatkozó EU-irányvonalak és normák
szerint
pojasnjuje sledečo skladnost po smernici EU
in normah za artikel.
deklaruje zgodność wymienionego poniżej
artykułu z następującymi normami na
podstawie dyrektywy WE.
vydáva nasledujúce prehlásenie o zhode podľa
smernice EÚ a noriem pre výrobok.
деклаpиpа следното съответствие съгласно
диpективите и ноpмите на ЕС за пpодукта.
заявляє про відповідність згідно з Директивою
ЄС та стандартами, чинними для даного товару
deklareerib vastavuse järgnevatele EL direktiivi
dele ja normidele
deklaruoja atitikti pagal ES direktyvas ir normas
straipsniui
izjavljuje sledeçi konformitet u skladu s odred
bom EZ i normama za artikl
Atbilstības sertifikāts apliecina zemāk minēto preču
atbilstību ES direktīvām un standartiem
EE
SCG
LWM= 104 dB; LWA= 106 dB
Gottelt
Product-Management
Anl KSE 2040 WK SPK7 05.07.2006 10:19 Uhr Seite 29
Page 30

WARRANTY CERTIFICATE
The product described in these instructions comes with a 2 year warranty covering defects. This 2-year warranty period begins with the passing of risk or when
the customer receives the product.
For warranty claims to be accepted, the product has to receive the correct maintenance and be put to the proper use as described in the operating instructions.
Your statutory rights of warranty are naturally unaffected during these 2
years.
This warranty applies in Germany, or in the respective country of the manufacturer’s main regional sales partner, as a supplement to local regulations. Please
note the details for contacting the customer service center responsible for your
region or the service address listed below.
30
GARANTIEURKUNDE
Auf das in der Anleitung bezeichnete Gerät geben wir 2 Jahre
Garantie, für den Fall, dass unser Produkt mangelhaft sein sollte.
Die 2-Jahres-Frist beginnt mit dem Gefahrenübergang oder der
Übernahme des Gerätes durch den Kunden. Voraussetzung für
die Geltendmachung der Garantie ist eine ordnungsgemäße
Wartung entsprechend der Bedienungsanleitung sowie die bestimmungsgemäße Benutzung unseres Gerätes.
Selbstverständlich bleiben Ihnen die gesetzlichen Gewährleistungsrechte innerhalb dieser 2 Jahre erhalten. Die Garan-
tie gilt für den Bereich der Bundesrepublik Deutschland oder der
jeweiligen Länder des regionalen Hauptvertriebspartners als Ergänzung der lokal gültigen gesetzlichen Vorschriften. Bitte beachten Sie Ihren Ansprechpartner des regional zuständigen Kundendienstes oder die unten aufgeführte Serviceadresse.
ISC GmbH · International Service Center
Eschenstraße 6 · D-94405 Landau/Isar (Germany)
Info-Tel. 0180-5 120 509 • Telefax 0180-5 835 830
Service- und Infoserver: http://www.isc-gmbh.info
Anl KSE 2040 WK SPK7 05.07.2006 10:19 Uhr Seite 30
Page 31

31
For EU countries only
Never place any electric tools in your household refuse.
To comply with European Directive 2002/96/EC concerning old electric and electronic equipment and its
implementation in national laws, old electric tools have to be separated from other waste and disposed of
in an environment-friendly fashion, e.g. by taking to a recycling depot.
Recycling alternative to the demand to return electrical devices:
As an alternative to returning the electrical device, the owner is obliged to cooperate in ensuring that the
device is properly recycled if ownership is relinquished. This can also be done by handing over the used
device to a returns center, which will dispose of it in accordance with national commercial and industrial
waste management legislation. This does not apply to the accessories and auxiliary equipment without
any electrical components which are included with the used device.
Anl KSE 2040 WK SPK7 05.07.2006 10:19 Uhr Seite 31
Page 32

The reprinting or reproduction by any other means, in whole or in part,
of documentation and papers accompanying products is permitted only
with the express consent of ISC GmbH.
Technical changes subject to change
EH 07/2006
Anl KSE 2040 WK SPK7 05.07.2006 10:19 Uhr Seite 32
 Loading...