

Page 1
DLP Projector
EIP-XSP2500
Owner’s Manual
Page 2

Introduction
Features
The projector equips high-performance of optical projection and user-friendly design
The projector offers the following features.
Short throw projection
Quick auto search speeding up the signal detecting process
Digital keystone correction and high quality full screen image re-scaling
Capable to display 16.7 million colors
Multi-language On-Screen Display (OSD) menus
Component HDTV compatibility (YPbPr)
Page 3

Table of Contents
Package Overview ...........................................................................................1
Standard Contents ....................................................................................1
Important Safety Instructions ...........................................................................2
Safety Labels ............................................................................................6
Projector Outlook .............................................................................................7
Connection.......................................................................................................9
Connect to Computer or Laptop for LAN Function.................................. 10
Remote Control.............................................................................................. 11
Controls and Functions........................................................................... 11
Remote Control Effective Range ............................................................12
Replacing the Battery .............................................................................12
Setting Up ......................................................................................................13
Power on the Projector ...........................................................................13
Power off the Projector ...........................................................................14
Positioning ..............................................................................................15
Projection Dimensions ................................................................................... 16
Menu Operation .............................................................................................18
Menu/ Source .........................................................................................18
Menu/ Picture..........................................................................................19
Menu/ Display .........................................................................................20
Menu/ System Setup-Basic.....................................................................21
Menu/ System Setup-Advance ...............................................................22
Menu/ Information...................................................................................23
Use LAN Function (Optional) ..................................................................24
Network Control for Web.........................................................................25
Maintenance ..................................................................................................27
Care of the Projector...............................................................................27
Cleaning the Lens...................................................................................27
Cleaning the Projector Case ...................................................................27
Storing the Projector ...............................................................................27
Transporting the Projector ......................................................................27
Lamp Information ...........................................................................................28
Getting to Know the Lamp Hour..............................................................28
Timing for Replacing the Lamp ...............................................................28
Replacing the Lamp................................................................................28
Resetting the Lamp Timer.......................................................................30
Trouble Shooting............................................................................................31
LED Indicator .................................................................................................32
i
Page 4

Specifications................................................................................................. 33
Projector Specification ............................................................................33
Configurations of Terminal ......................................................................34
Dimension......................................................................................................37
Timing Chart ..................................................................................................38
ii
Page 5
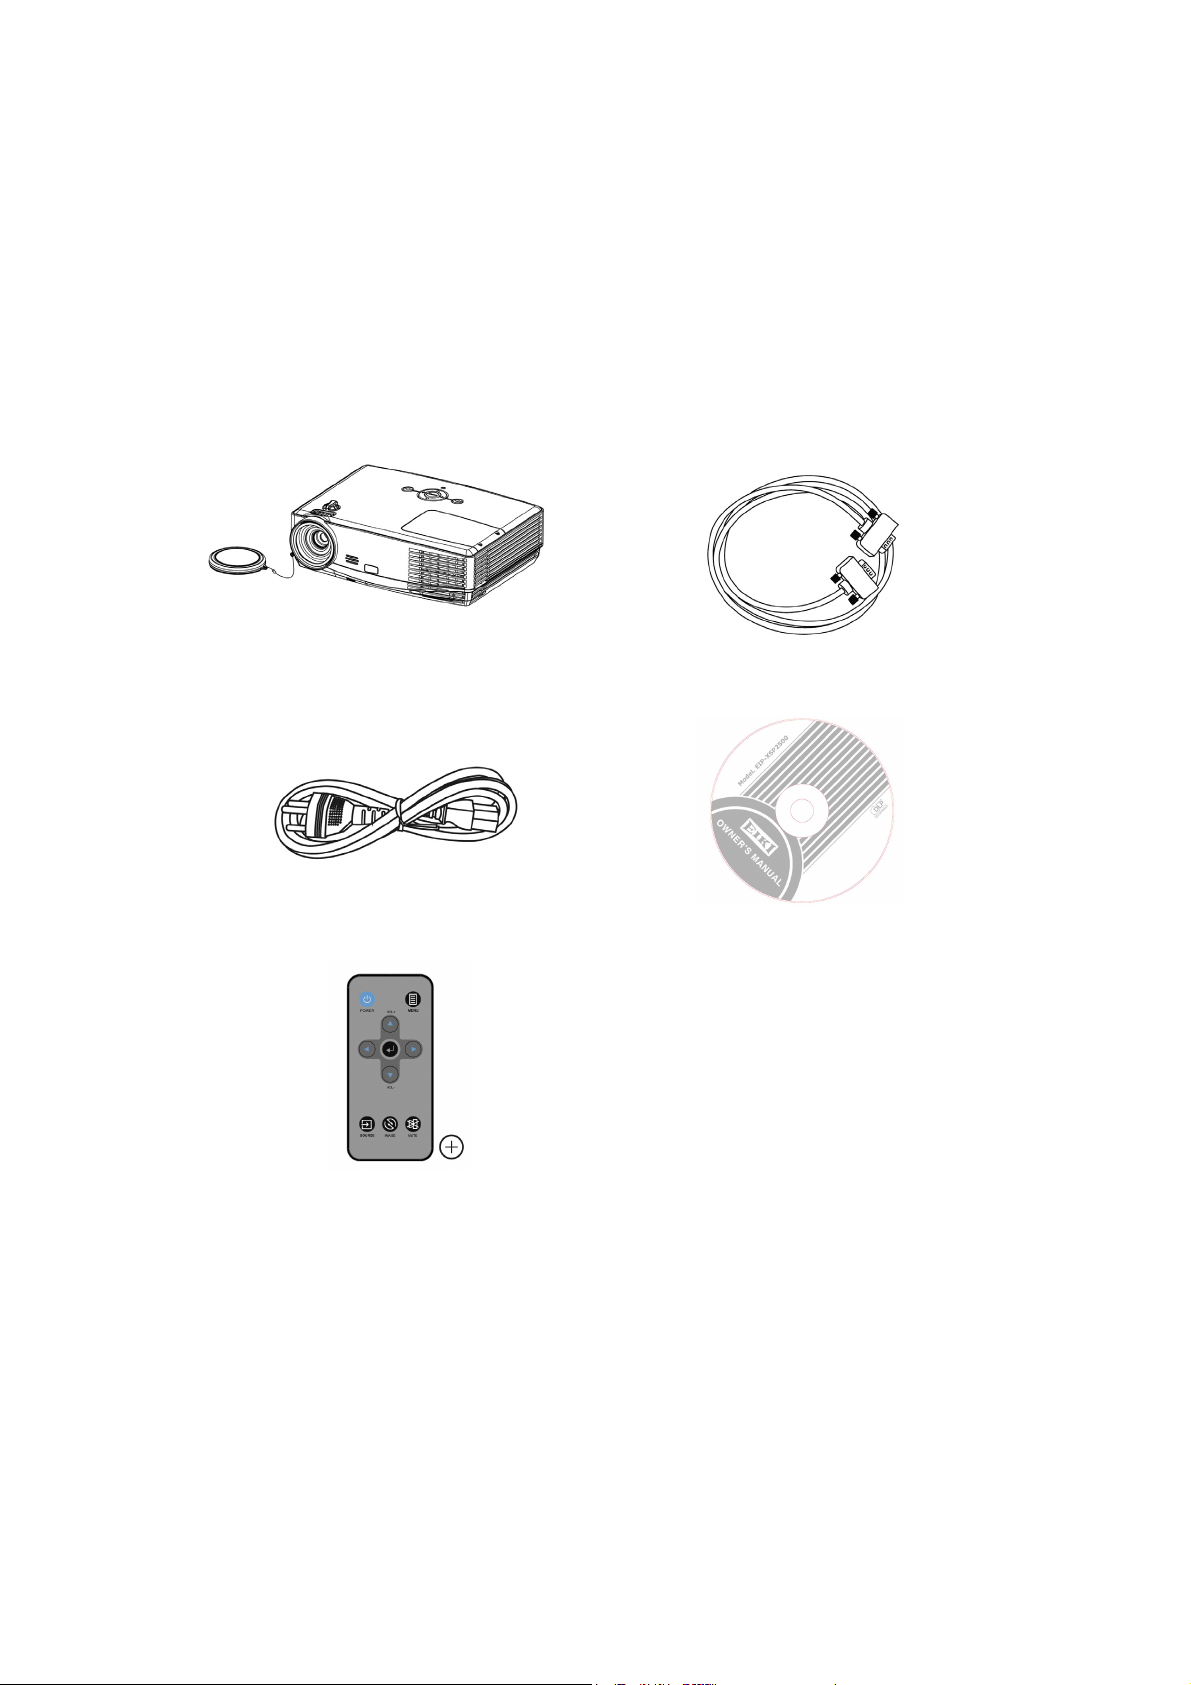
Package Overview
Carefully unpack and verify the package. The projector comes with all the items listed as below. Make
sure your unit is complete. Contact your dealer immediately if anything is missing.
Standard Contents
1. Projector 2. VGA Cable
3. Power cord 4. Owner’s manual CD
5. Remote control with Lithium battery CR2025
The supplied accessories will be suitable for your region. Due to the difference in applications for each
country, some regions may have different accessories.
1
Page 6
Important Safety Instructions
A
Safety Instructions
The projector is designed and tested to meet the latest standards for safety of information
technology equipment. However, to ensure safe use of this product, it is important that you
follow the instructions mentioned in this manual and marked on the product.
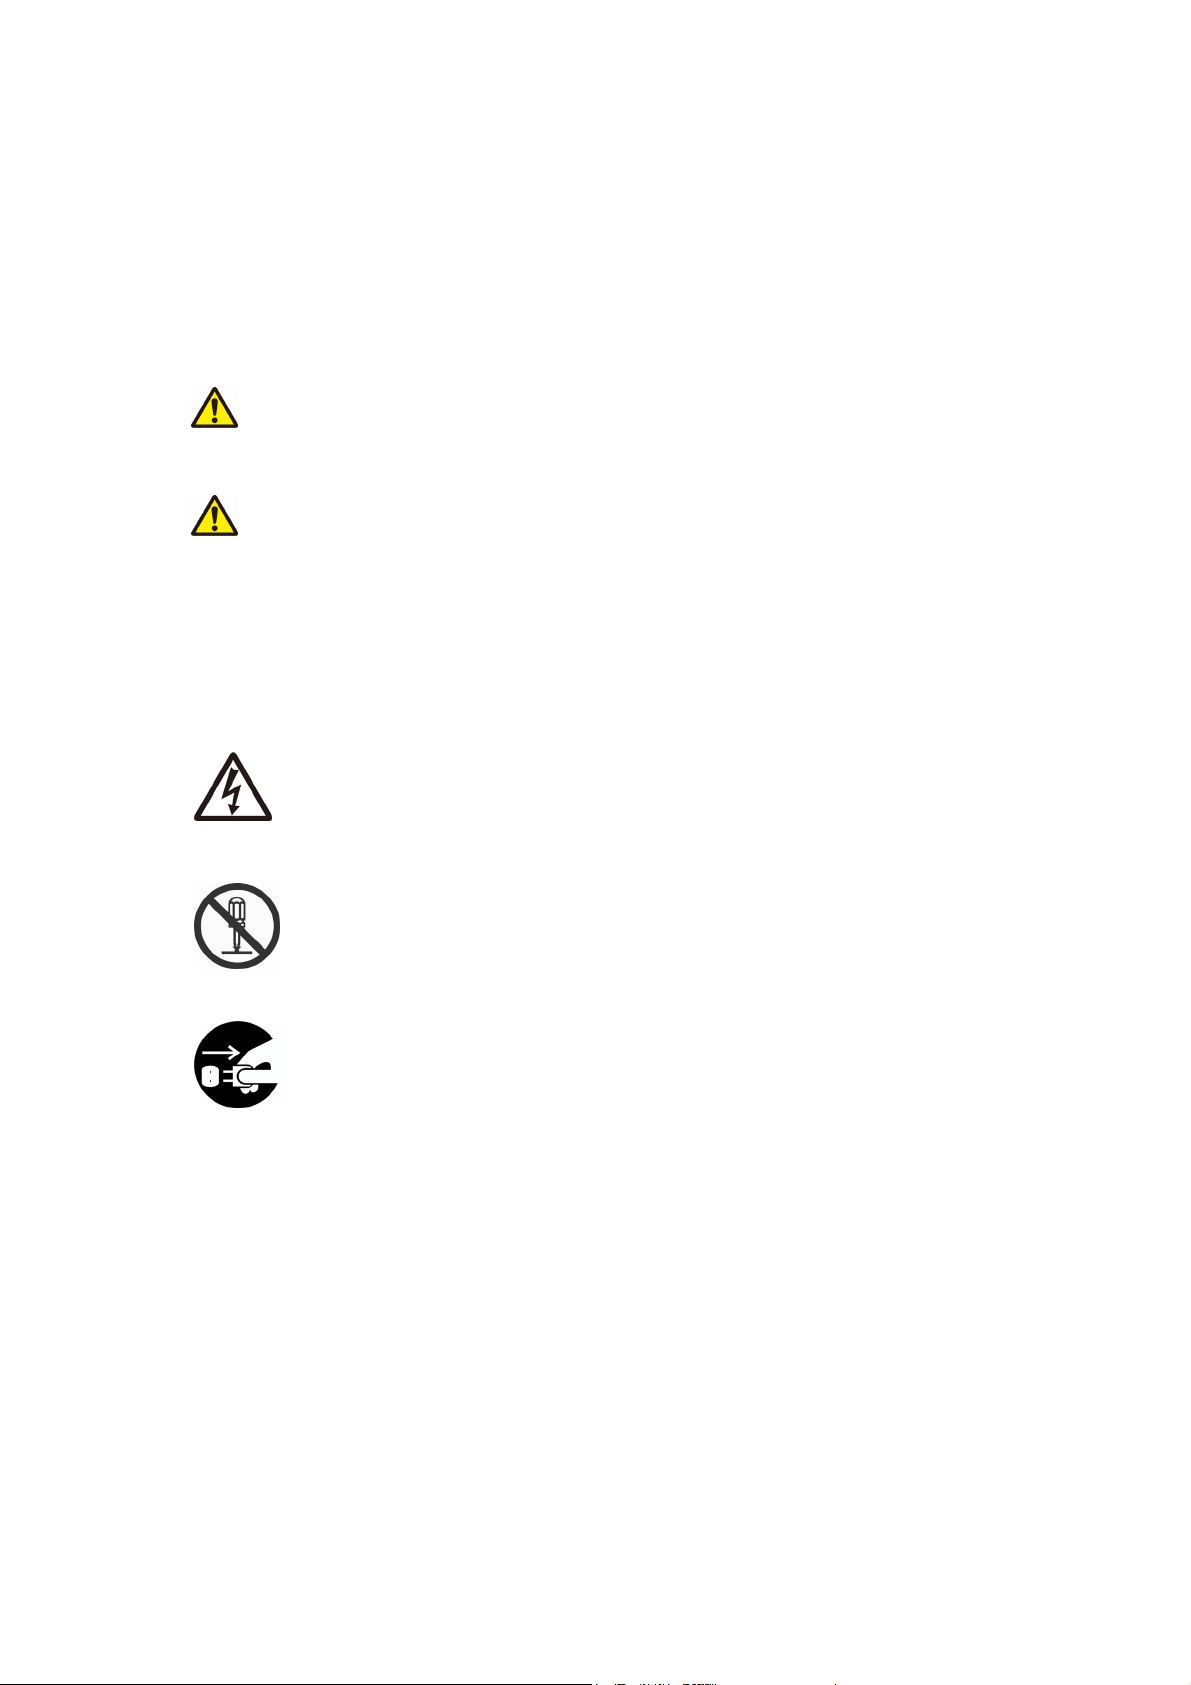
This symbol indicates information that, if ignored, could
WARNING
CAUTION
Typical Symbols
possibly result in personal injury or even death.
This symbol indicates information that, if ignored, could result in
personal injury or physical damage.
This symbol indicates an additional warning (including cautions).
n illustration is provided to clarify the contents (for example: the
illustration to the left indicates danger of electrical shock).
This symbol indicates a prohibited action. The contents will be clearly
indicated in an illustration or description near the symbol (for example:
the symbol to the left indicates that disassembly is prohibited).
This symbol indicates a compulsory action. The contents will be clearly
indicated in an illustration or description near the symbol
(for example: the symbol to the left shows that the power plug should be
disconnected from the power outlet).
2
Page 7
WARNING
If a problem should occur
If smoke or strange odors arise, continued use could result in fire or electrical shock. In such
case, immediately turn off the power switch and then disconnect the power plug from the
power outlet. After making sure that the smoke or odor has stopped, contact your dealer for
repairs. Never attempt to make repairs yourself because this is dangerous.
Do not use this projector if there is no image or sound, or if the sound is distorted. Continued
use could result in fire or electrical shock. In such case, immediately turn off the power switch;
disconnect the power plug from the power outlet and contact your dealer.
If water would enter the inside of this projector, immediately turn off the power switch,
disconnect the power plug from the power outlet and contact your dealer.
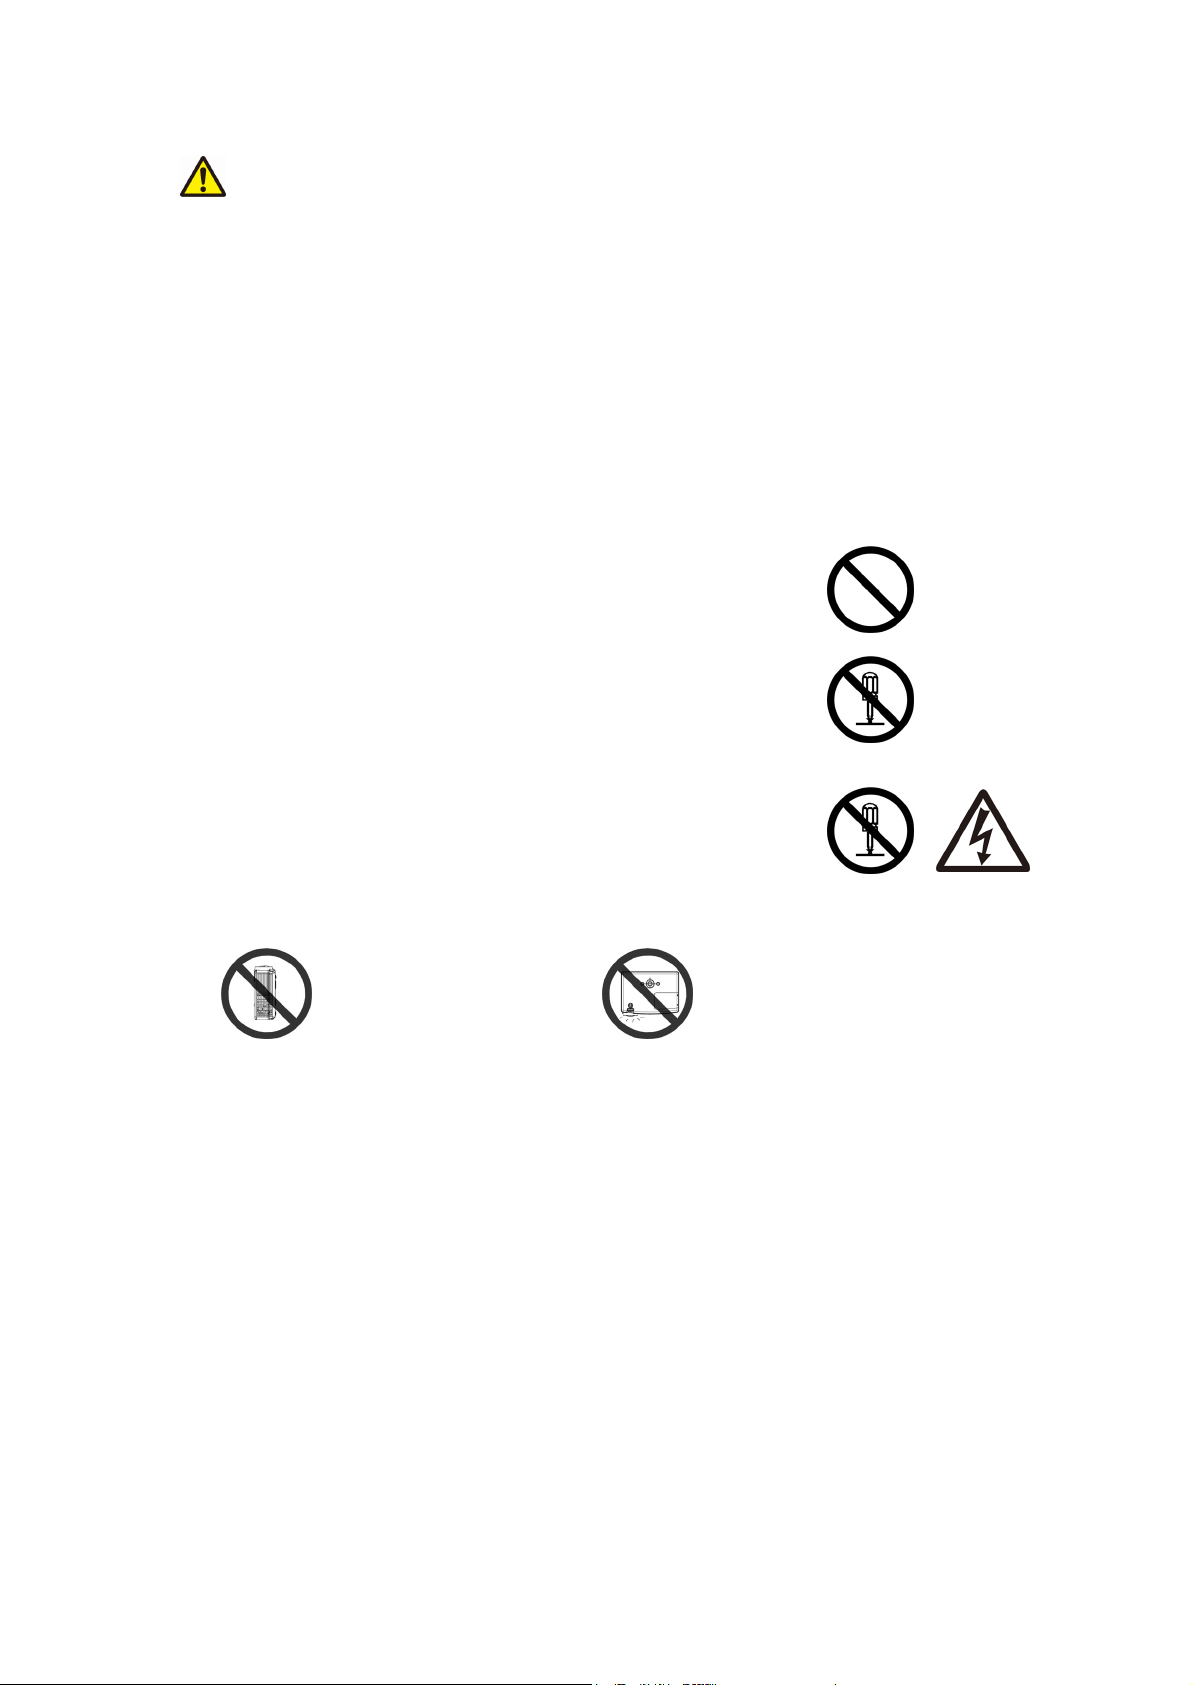
Do not install on an unstable surface.
Do not install this projector on an unstable surface such as a wobbly
stand or incline because this could result in the projector falling and
causing injury.
Do not open the cabinet.
Never open the cabinet. There is high voltage inside which can cause
electrical shock. Contact your dealer for internal inspection,
adjustment and repair.
Do not modify.
Do not modify this projector because this could result in fire or
electrical shock.
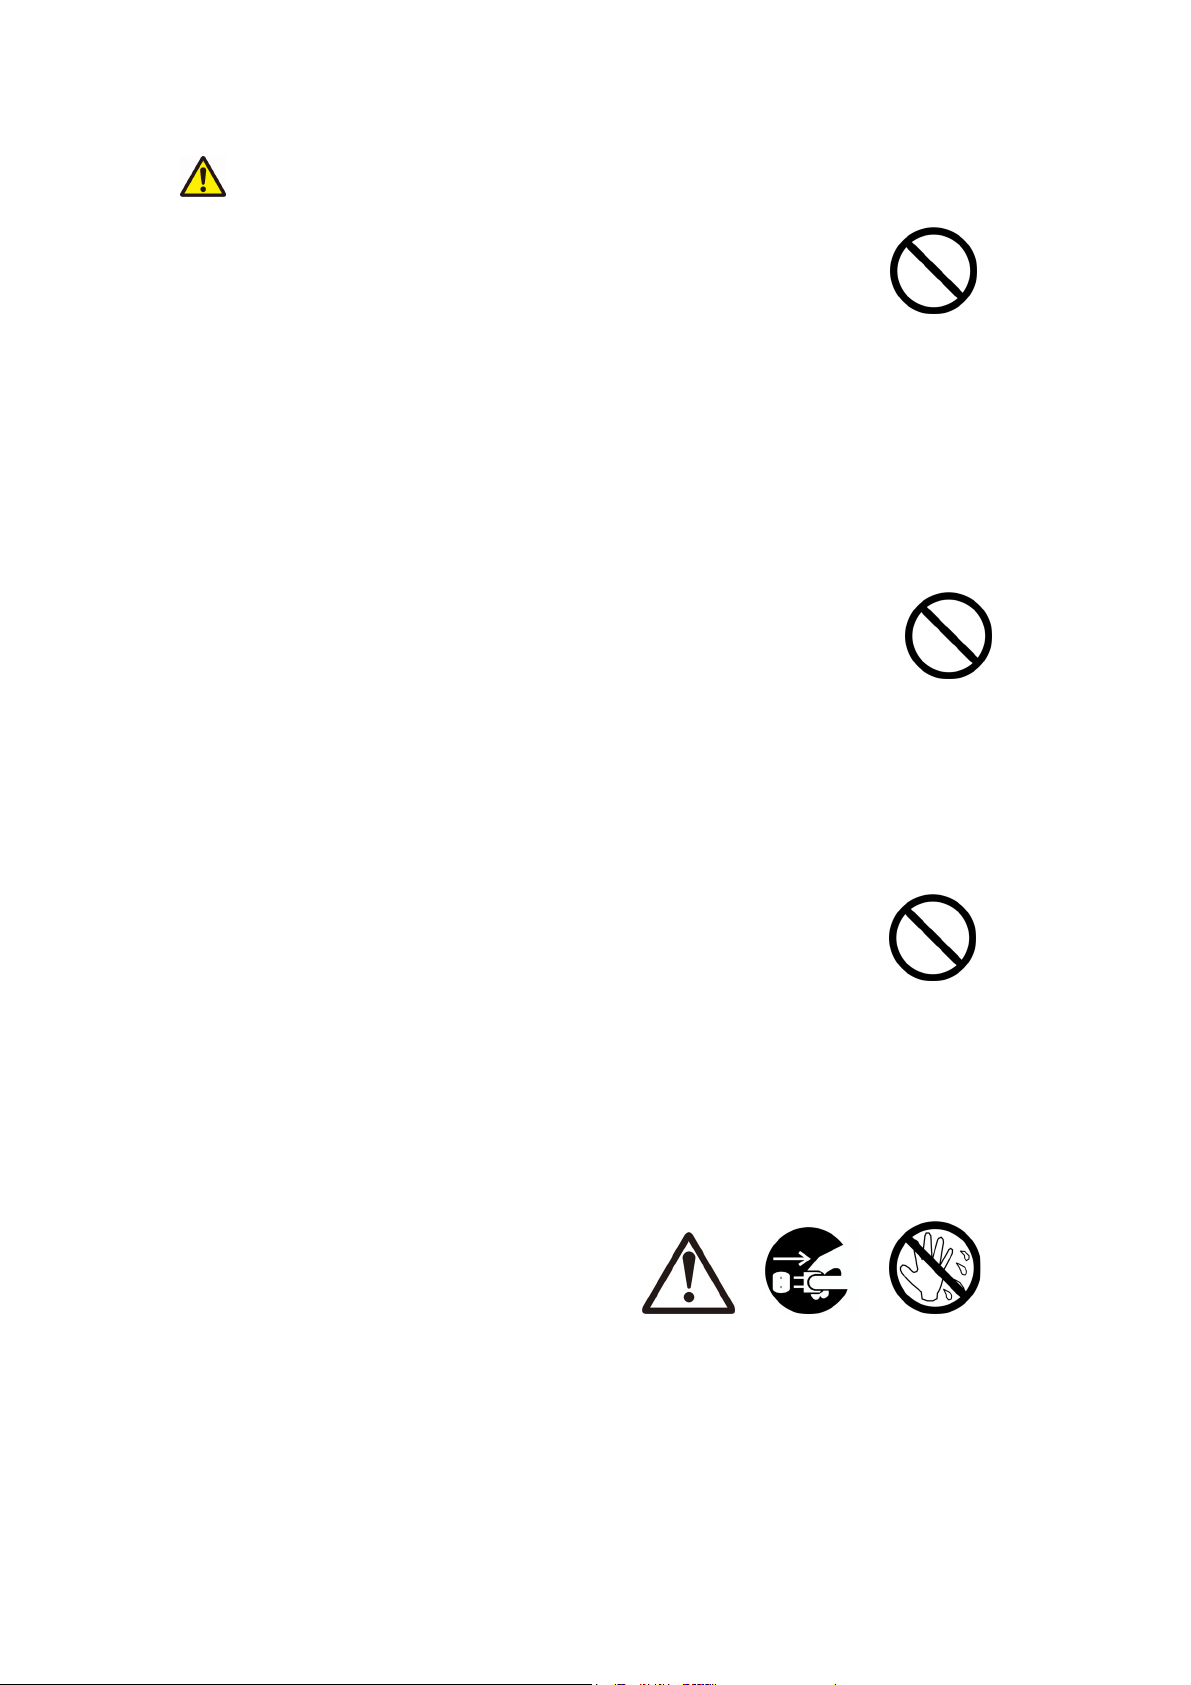
Do not place the projector upon
either side to project an image.
NO SIDEWARD NO DOWNWARD
Do not point the projector down to
project an image.
Do not use in the bathroom or near water site.
Do not expose this unit to rain or use near water… for example, in the bathroom, a wet
basement, near a swimming pool, etc…
Do not insert objects into the Projector.
Do not insert metal objects through the ventilation openings, etc., of this projector or drop such
objects inside because this could result in fire or electrical shock.
If a foreign object should enter this projector, immediately turn off the power switch,
disconnect the power plug from the power outlet and contact your dealer.
Continued use could result in fire or electrical shock. Use special caution in household and
where children are present.
3
Page 8
WARNING
Do not look through the lens when the lamp is on.
Never look through the lens when the lamp is on. The powerful light could
adversely affect vision. Use special caution in households where children
are present.
Avoid shock or impact on the projector.
If the projector should fall, resulting in damage to the cabinet, immediately
turn off the power switch, disconnect the power plug from the power outlet
and contact your dealer.
Continued use could result in fire or electrical shock.
Do not place this projector in a container containing liquid. Do not place flower vases,
flowerpots, cups, cosmetics, liquids such as water, etc., on top of this projector.
Do not use any power cable except those supplied with the projector.
The use of any other power cable could result in fire or electrical shock.
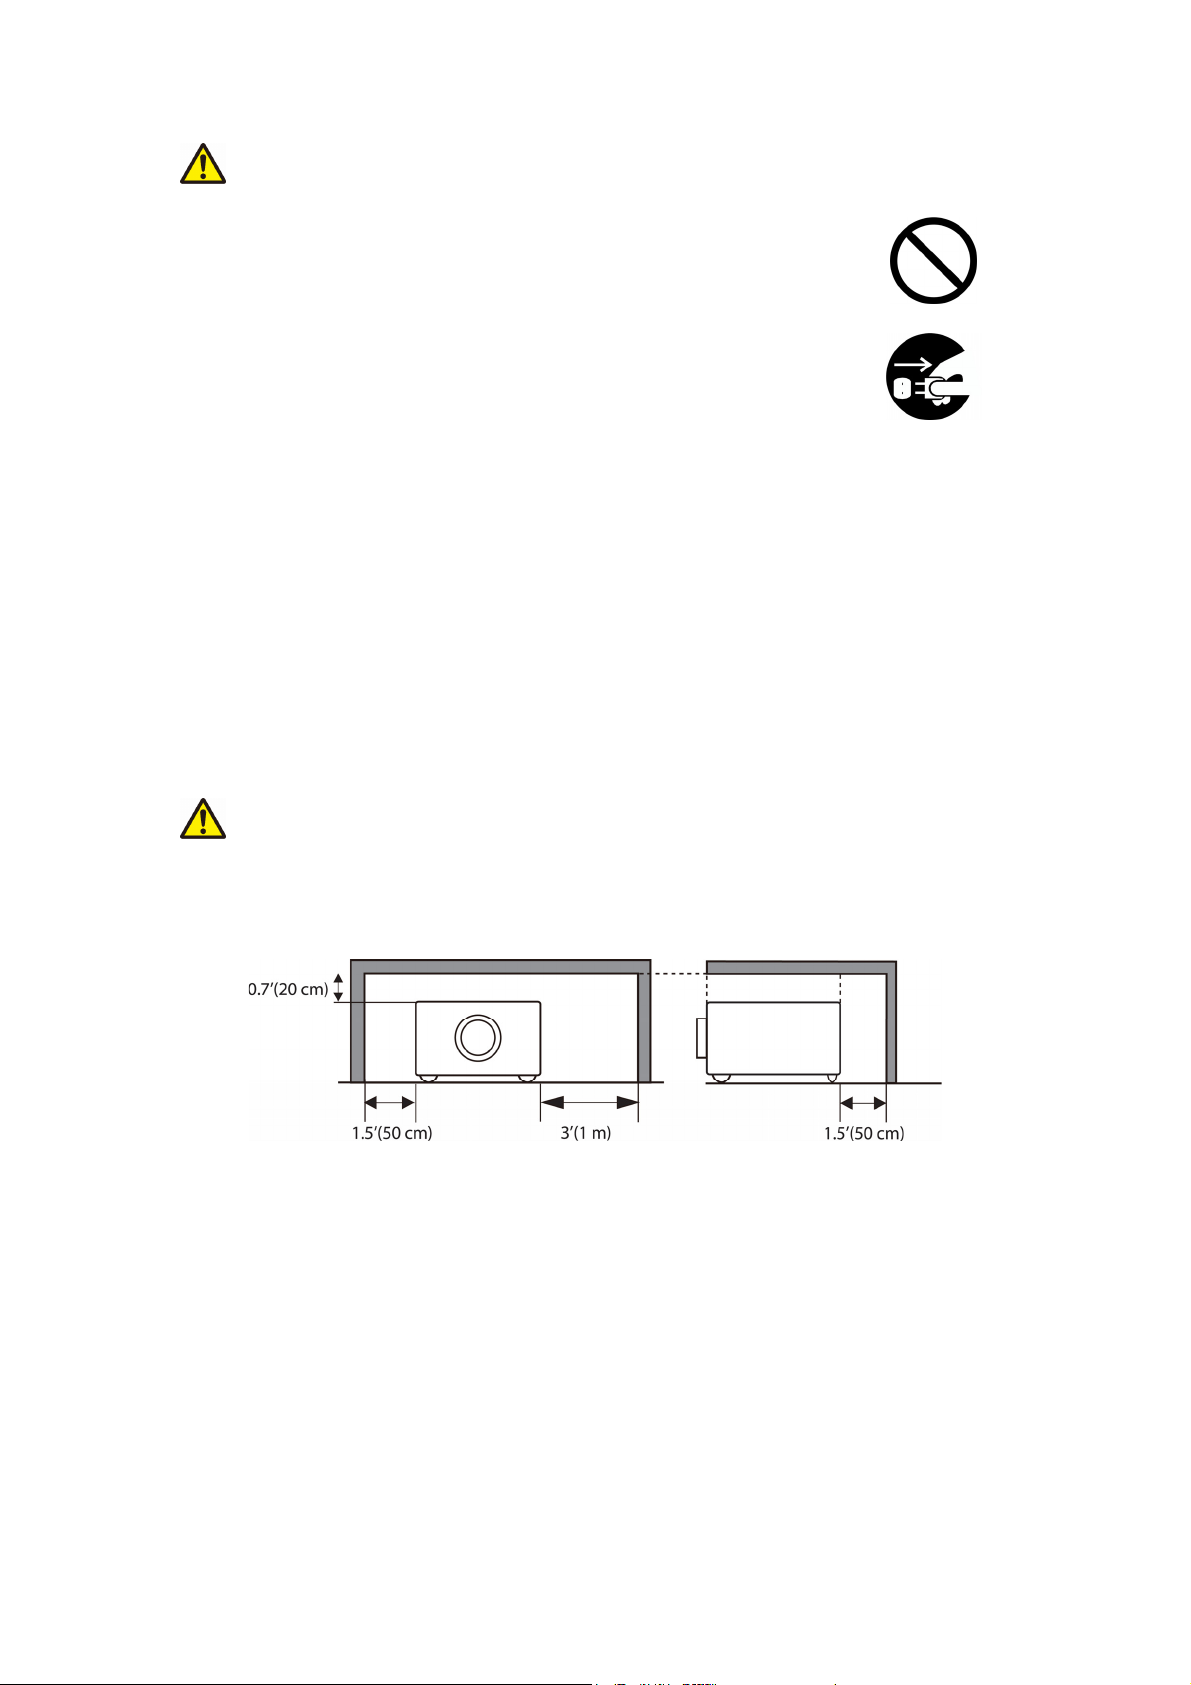
High temperatures are generated when the lamp is lit; so do not place objects in front of
the lens.
Allowing the proper amount of space on the top, sides, and rear of the projector cabinet is
critical for proper air circulation and cooling of the unit.
The dimension shown here indicate the minimum space required. If the projector is to be built
into a compartment or similarly enclosed, these minimum distances must be maintained.
Side and Top
Rear
4
Page 9
CAUTION
Placing heavy objects on top of this projector could result in loss of balance
or falling and cause personal injury or damage the projector.
Do not block the ventilation openings of this projector.
Blocking ventilation could lead to internal overheating which could result in fire.
Do not place this projector on its side during use or push it into a small, poorly ventilated
location.
Do not place this projector on a carpet or bedding or cover it with a tablecloth, etc.
Care and maintenance.
For safety purposes, disconnect the power plug from the power outlet before
starting the careand maintenance of this projector.
Battery usage.
Replace the batteries with the same type only.
Do not mix old and new batteries; this could result in fire or personal injury due to battery
cracking or leakage.
Make sure the plus and minus terminals are correctly aligned when loading the
batteries.
Incorrect loading could result in personal injury or contamination of
the surroundings due to battery cracking or leakage.
Have the projector interior cleaned regularly.
Contact your dealer to arrange for the service.
Accumulations of dust inside the projector can result in fire or malfunction if not cleaned for an
extended period.
Ask your dealer for details about internal cleaning.
5
Page 10
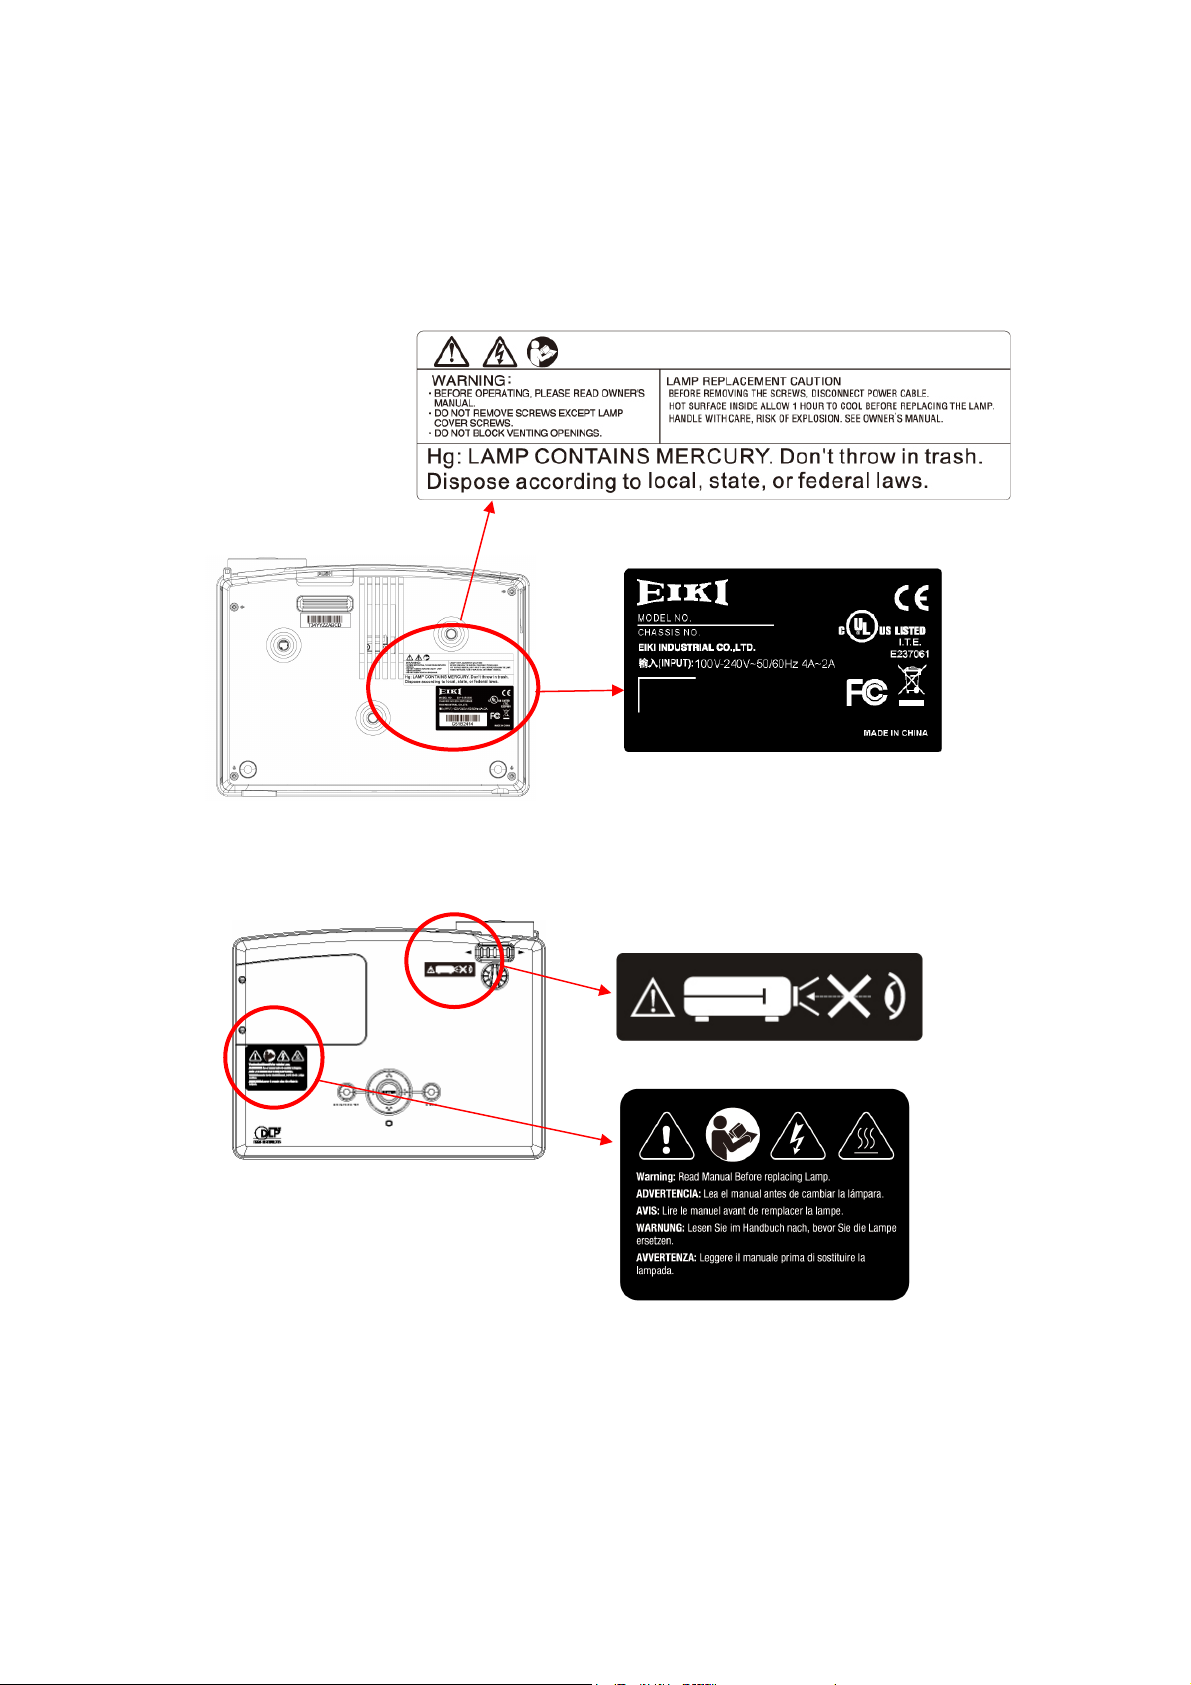
Safety Labels
Safety labels are used on or within the projector to alert you to items or areas requiring your
attention.
Warning Label
EMI Label
Warning Label
6
Page 11
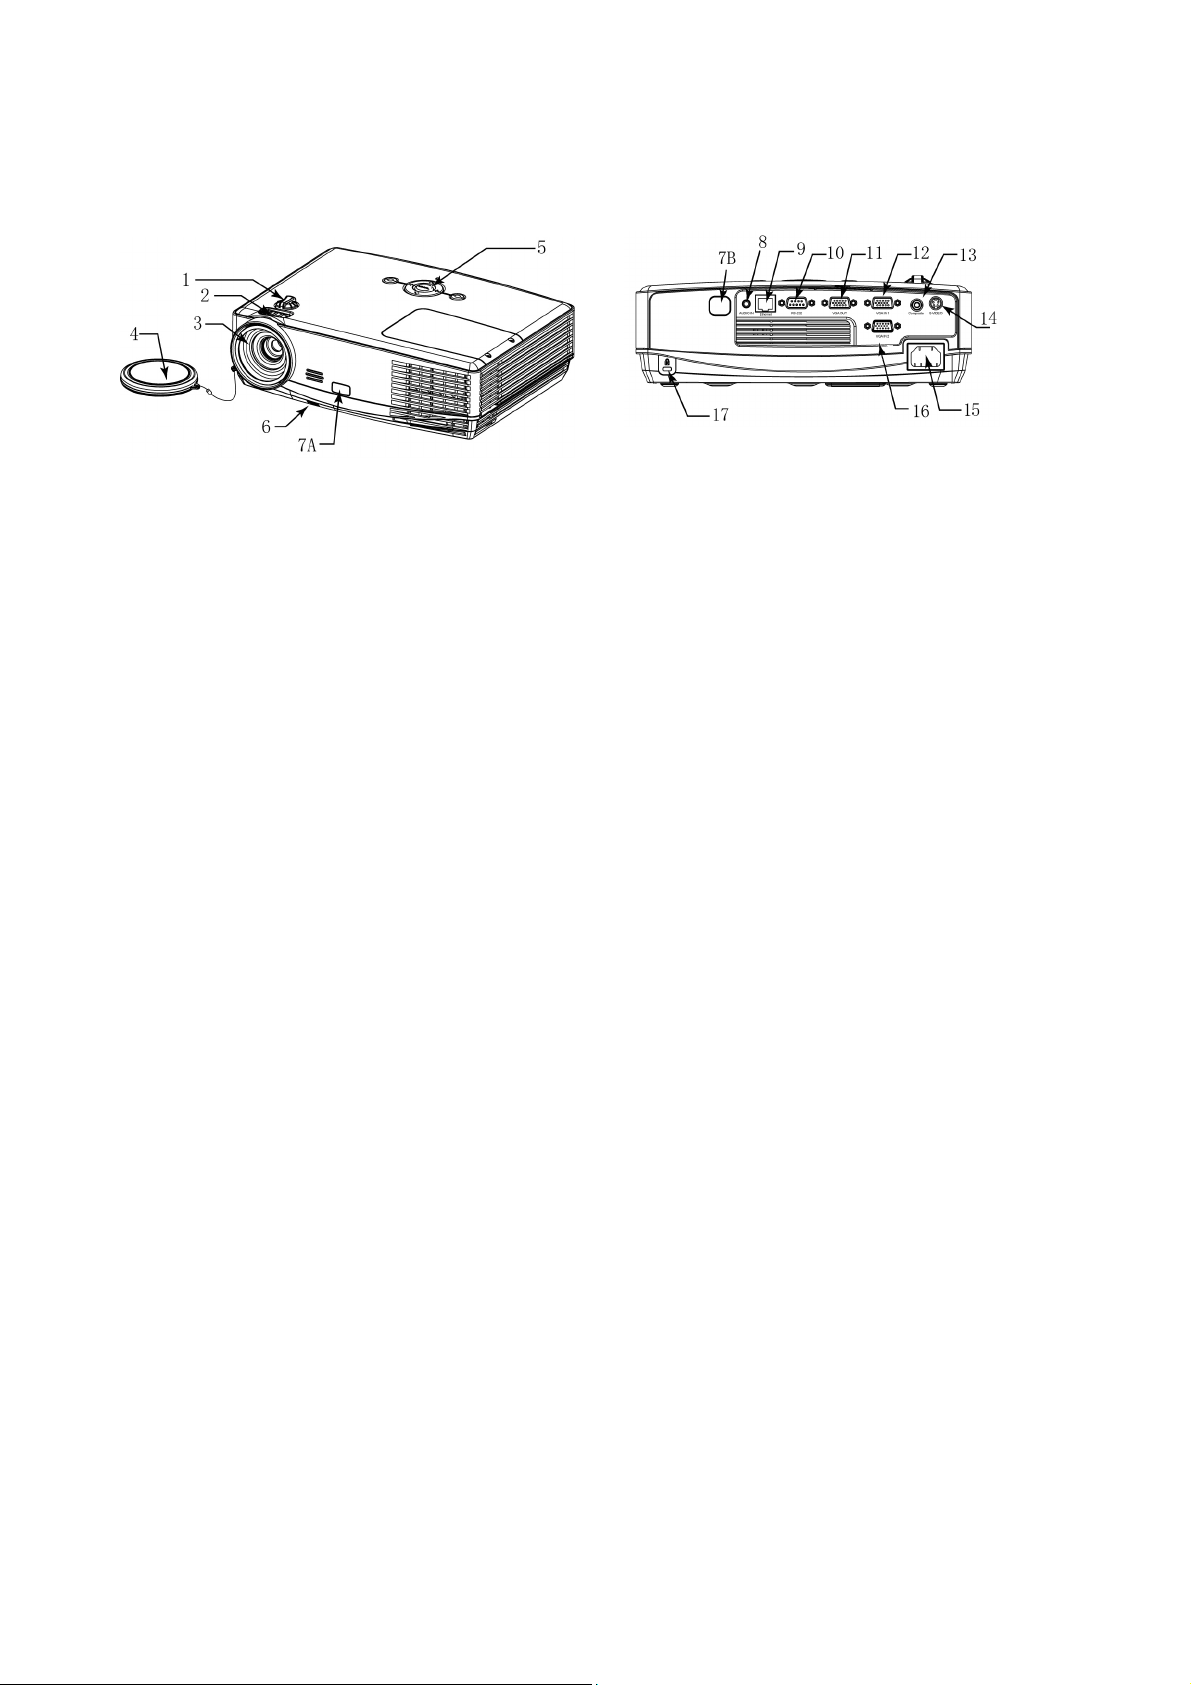
Projector Outlook
1. Lens Shift
Adjust the position of projection screen up and down.
2. Focus Ring
Use the focus ring to focus the projector image.
Rotate the focus ring until the image is clear.
3. Projection Lens
4. Lens Cover
5. Control Buttons
Operating system.
Rear
9. LAN
Network Control application (Please refer to page
24)
10. RS-232C
Serial data port for controlling the projector with a
computer or other RS-232C control device.
11. VGA OUT
Connect an external monitor to this connection to
view the “RGB IN” input.
6. Adjustable foot stand button
Press the button to lift or lower the adjustable foot
stand.
7A. Front IR receiver sensor
7B. Rear IR receiver sensor
8. Audio phone jack
12. VGA IN 1
Input signal from a computer.
13. Composite
Composite video signal from a video source.
14. S-Video
S-Video signal from a video source.
15. Power Cord
16. VGA IN 2
Input signal from a computer.
17. Kensington Security Slot
7
Page 12
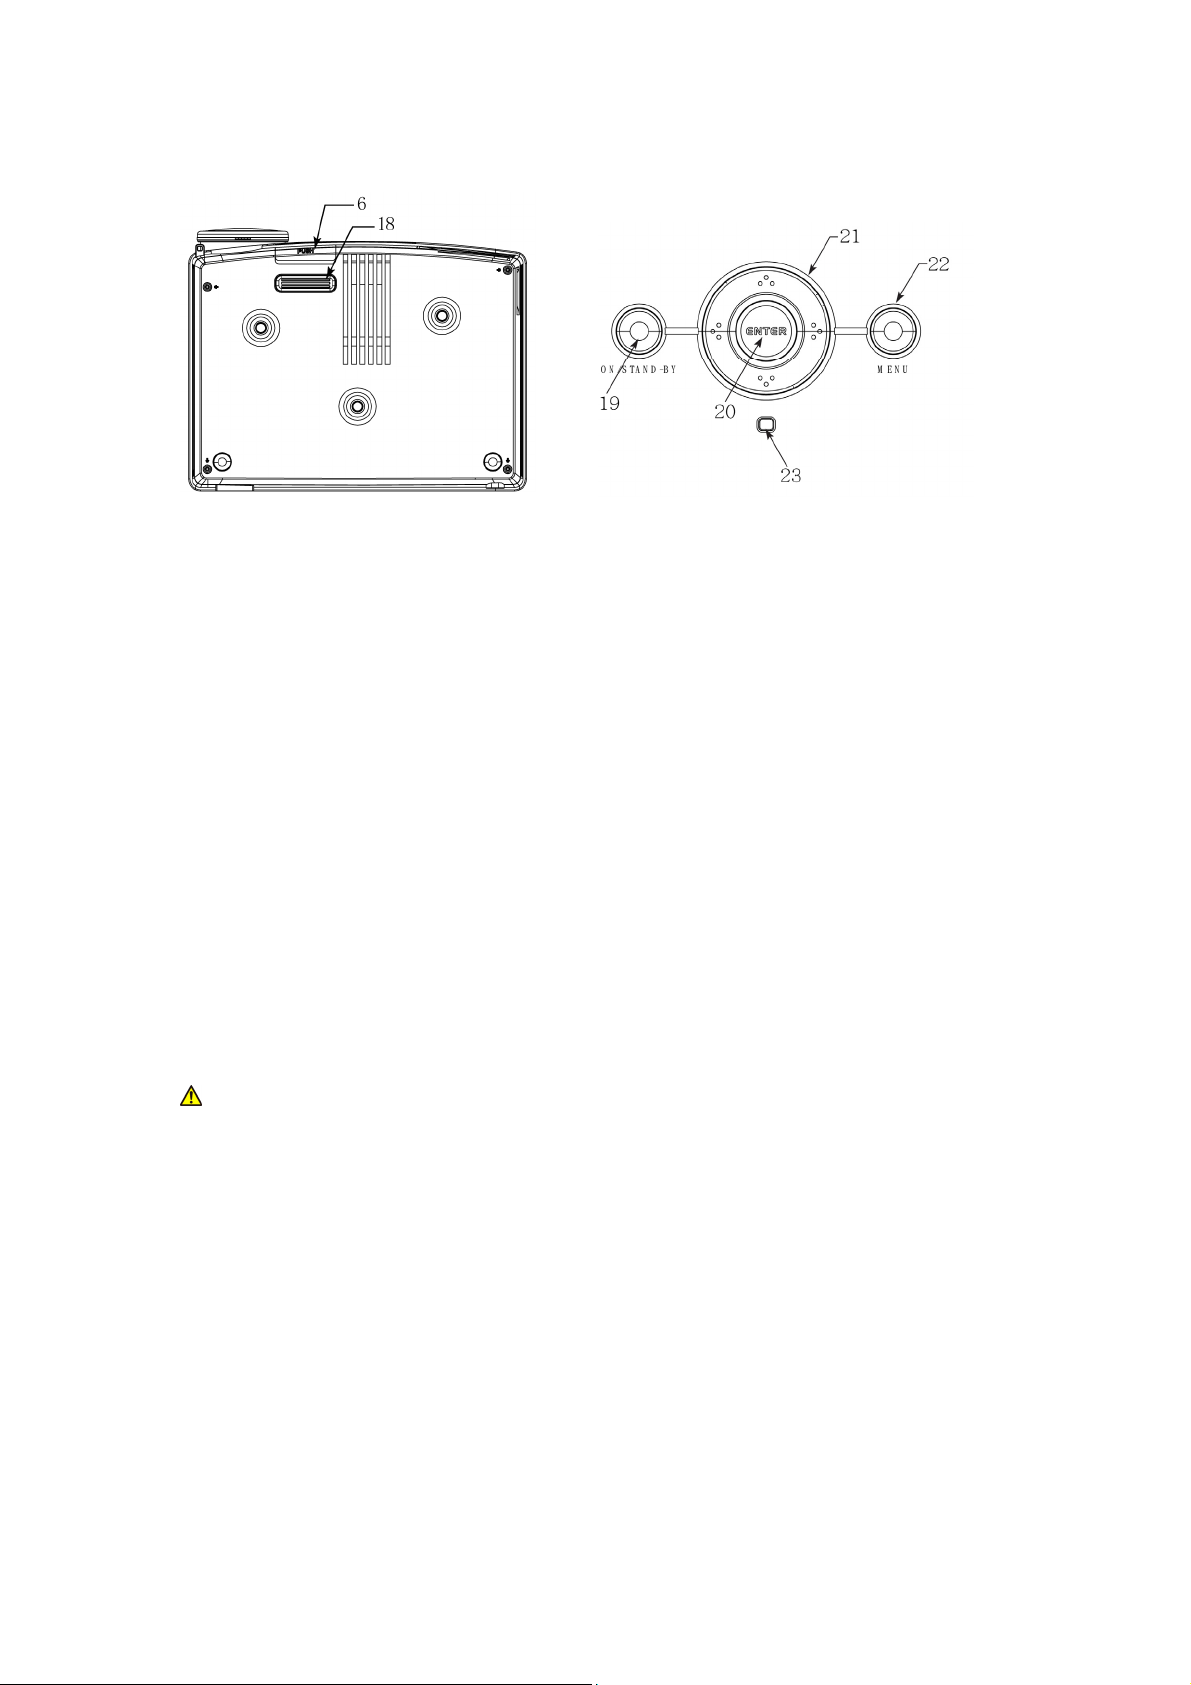
Bottom
Control Buttons
6. Adjustable Foot Stand button
Press the button to lift or lower the adjustable
foot stand.
18. Adjustable foot stand
Extent and retract to adjust the projection
angle.
19. ON/ STAND-BY button
To power on/ off the projector
20. Enter button
To execute the OSD selection
21. UP/ Down/ Left/Right button
To adjust the OSD menu
22. Menu button
To enter the OSD menu
23. LED indicator
To indicate the status of projector operation
Please refer page 32 for LED indicator
Warning
z THIS APPARATUS IS REQUIRED TO BE EARTHED.
z When installing the projector, connect the power plug to an easily accessible socket-outlet
near the projector. If errors occur during operating the projector, please switch the power
supply off, or disconnect the power plug.
8
Page 13
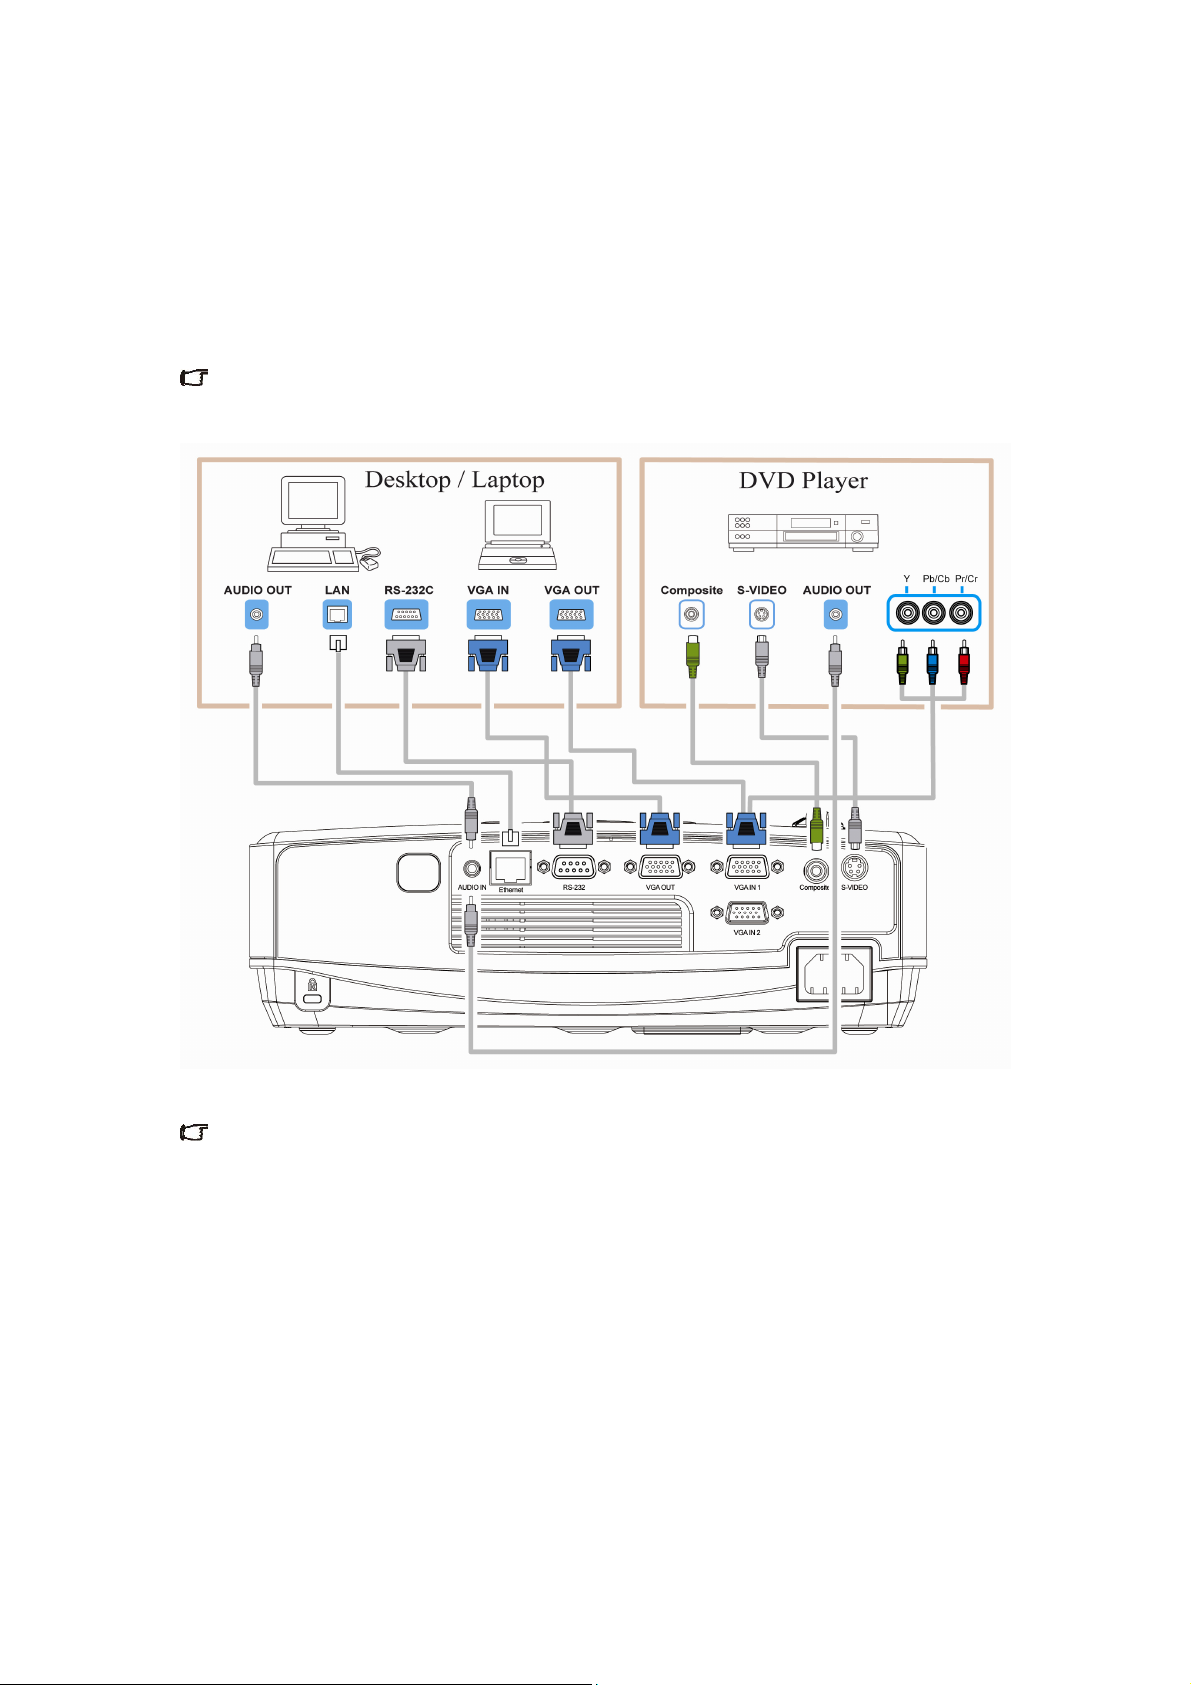
Connection
When connecting a signal source to the projector, be sure to:
1 Turn off the power of all devices before connection.
2 Use the correct signal cables for each source.
3 Ensure the cables are firmly inserted.
Some cables may not be included in the projector (see "Standard contents" on page 1).
They are commercially available in electronics stores.
Many laptops do not turn on their external video ports when connecting to a projector.
Usually press a key combo such as FN + F3 or CRT/LCD key to turn the external display on/off.
Locate a function key labeled as CRT/LCD or a function key with a monitor symbol on the
notebook. Press FN and the labeled function key simultaneously to. Refer to your laptop's
documentation to find your notebook's key combination
9
Page 14

Connect to Computer or Laptop for LAN Function
1 Connect different intra net ports via using LAN cables or link computer and projector through
IP router.
2 Press menu of the projector and select Information Item to find IP address
3 Input IP address to link the computer and projector so that the projector can be controlled by
computer.
■Note
To monitor and control the projector (including stand-by mode), the following conditions are
needed to be ready:
(1) Projector is powered on or in stand-by mode.
(2) Projector is connected to network.
(3) LED light of the projector network port shows normal. (Green light on, Orange twinkling)
(4) Green power mode is “OFF” (See page 21)
10
Page 15
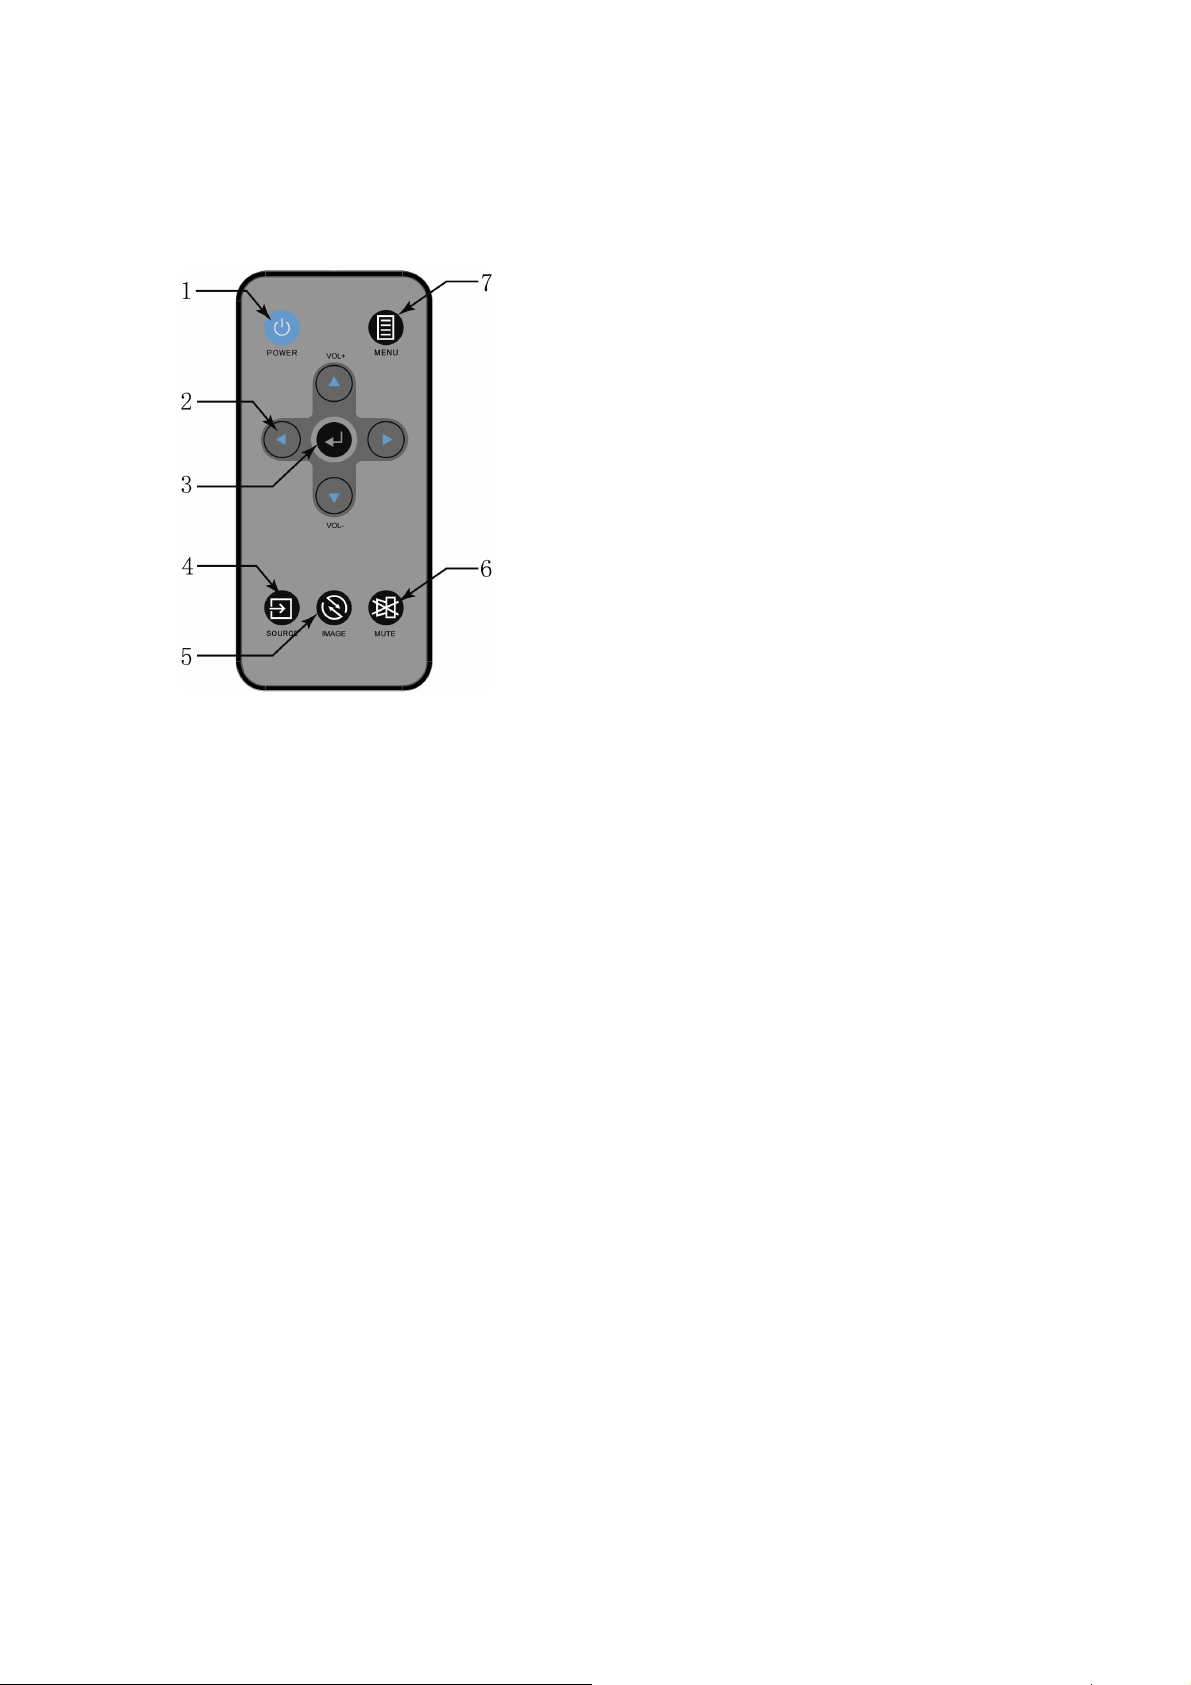
Remote Control
Controls and Functions
1. POWER
To turn on/off power.
2. Arrow keys ( Left/Right/ Up /Down)
To adjust the OSD menu.
3. Enter
To execute the OSD selection
4. Source
To select the input source
5. Image
To adjust the projection mode
6. Mute
To mute the projector sound.
7. MENU
To open or close the OSD menu
11
Page 16

Remote Control Effective Range
Infra-Red (IR) remote control sensor is located on the
front and rear of the projector. The remote control
must be held at an angle within 20 degrees
perpendicular to the projector's IR remote control
sensor to function correctly. The distance between the
remote control and the sensor should be within 5
meters (~ 16 feet).
Ensure there are no obstacles between the remote
control and the IR sensor on the projector that might
obstruct the infra-red.
Replacing the Battery
1. Pull out the battery, Please follow the illustrated
instructions. Push and hold the locking arm
while pulling out the battery holder.
2. Insert the new battery in the holder. Note the
positive polarity should face outward.
3. Please use Lithium Battery CR2025.
CAUTION
Avoid excessive heat and humidity.
Placing battery with incorrectly process may cause battery damaged.
Replace only with the same or equivalent type of battery recommended by the battery
manufacturer.
Dispose of the used battery in accordance with the battery manufacturer’s instructions.
Never throw batteries into a fire; it will cause batteries explosion.
If the batteries are dead or if you will not be using the remote control for a long time, remove the
batteries to prevent battery acid from leaking into the battery compartment.
12
Page 17

Setting Up
Power on the Projector
1. Complete peripheral connections (with a
Computer, VCR/DVD, etc.) before turning on the
projector
2. Plug the power cord firmly into the projector and
into a wall socket. The LED indicator flashes
Orange shown in Stand-by mode.
3. Remove the lens cap. If it is closed, it could
become deformed due to the heat produced by
the projection lamp.
4. Press ON/STAND-BY button on the projector or
POWER button on the remote control to start the
projector. The preparation display appears on the
screen and countdown starts.
5. After the countdown, the input source appears
on the screen.
If the frequency/resolution of the input signal exceeds the projector's operating range, you will
see the message 'Out of Range' displayed on a blank screen. Please change to an input signal
which is compatible with the projector's resolution or set the input signal to a lower setting.
13
Page 18

Power off the Projector
1. Press ON/STANDY-BY button on the projector or
POWER button on the remote control and the
confirmation message for shut-down displays on the
screen.
2. Press ON/STANDY-BY button on the projector or
POWER button on the remote control again to turn
off the projector. The LED indicator flashes red and
green, and the projection lamp shuts down. After the
projector is turned off, the cooling fans operate about
120 seconds. You cannot turn on the projector during
this cooling down period.
3. When the projector has cooled down enough, the
LED indicator lights orange and then you can turn on
the projector.
CAUTION
To protect the lamp, the projector will not respond to any commands during the cooling process.
Do not unplug the power cord before the projector shutdown sequence is completed or during
the 120-second cooling down process.
If the projector is not properly shut down, to protect the lamp, when you attempt to re-start the
projector, the fans will run for a few minutes to cool down. Press POWER again to start the
projector after the fans stop and the POWER indicator light steady orange.
Disconnect the power cord from the wall socket if the
projector will not be used in an extended period of time.
14
Page 19

Positioning
The Projector supports the following four different projection methods.
Front Table
Select this location with the projector placed
near the floor in front of the screen. This is the
most common way to position the projector for
quick setup and portability.
Rear Table
Place the projector in the rear of the screen.
This installation is required to have the screen
specialized for rear projection. Switch on the
projector and selection “System Setup- Basic”
in the function menu, and then select “Rear
Table” in “Projector Position”
Rear Ceiling
Mount the projector on the ceiling upside
down and in the rear of the screen. Switch on
the projector and selection “System Setup-
Basic” in the function menu, and then select
“Rear Ceiling” in “Projector Position”
Front Ceiling
Mount the projector on the ceiling upside
down and in the front of the screen. Switch on
the projector and selection “System Setup-
Basic” in the function menu, and then select
“Front Ceiling” in “Projector Position”
15
Page 20

Projection Dimensions
Refer to "Dimensions" on page 37 for the center of lens dimensions of this projector before
calculating the appropriate position.
z 4:3 image on a 4:3 screen
Image
Diagonal
(inch)
35
45
77
80
100
120
150
200
250
300
D, Projection
Distance(mm)
441 711 533 48 21
567 914 686 62 27
970 1565 1173 106 47
1008 1626 1219 110 49
1260 2032 1524 137 61
1512 2438 1829 165 73
1890 3048 2286 206 91
2520 4064 3048 274 122
3150 5080 3810 343 152
3780 6096 4572 411 183
width(mm)
image
H, image
height(mm)
Offset 109%
(mm)
Offset 104%
(mm)
Projection lens can be moved up and down with the lens shift function.
Above Offset (104~109%) means the adjustable range by using this lens shift function and
offset value is assumed image height as 100% and calculated.
This function makes the positioning of images easy to the screen.
16
Page 21

z 16:9 image on a 16:9 screen
Image
Diagonal
(inch)
35
45
60
77
100
120
150
200
250
300
D, Projection
Distance(mm)
480 775 436 112 90
618 996 560 123 95
824 1328 747 140 103
1057 1705 959 159 111
1373 2214 1245 185 122
1647 2657 1494 207 132
2059 3321 1868 241 147
2745 4428 2491 297 172
3432 5535 3113 353 197
4118 6641 3736 409 222
image
width(mm)
H, image
height(mm)
Offset 109%
(mm)
Offset 104%
(mm)
There is 3% tolerance among these numbers due to optical component variations. If the
projector is planned to be permanently installed, physically testing the projection size and
distance before installation is recommended; it is greatly helpful for you to determine the exact
mounting position and the projector therefore achieve optimal performance.
17
Page 22

Menu Operation
The projector is equipped with On-Screen Display (OSD) menus for proceeding various
adjustments and settings. Below is the overview of the OSD menu. To use the OSD menus,
please set them to your familiar language first.
Menu/ Source
1. Press MENU button of the remote control or projector to turn on the OSD.
2. Press
3. Press Enter Key to confirm the selection
4. Press the Menu button key to leave the Menu.
Features
Quick Auto Search
Main Input
button to select the beneath function for your needs.
Selection Description
ON Automatically search the next source.
OFF Retain the source selected last time.
VGA/YCbCr
VGA2/YCbCr2
Composite Video
S-Video
Select which Input is to be displayed on the projector.
(Default is VGA)
18
Page 23

Menu/ Picture
Shown only when Signal Source is attached
1. Press MENU button of remote control or projector to turn on the OSD.
2. Press
3. Press
4. Press the
5. Press Enter key to confirm the selection
6. Press MENU to leave the menu or press ▲ button to back to menu category after Enter key confirming the
selection.
Feature Selection Description
Picture mode
Brightness
Contrast -50 ~ 50
Color 0 ~ 200
Tint
Sharpness 0~31
button to Picture category.
button to select the beneath function for your needs.
button key to adjust the modes or function values
Dynamic mode Appropriate for playing colorful movies, video clips.
Presentation mode Maximize the brightness of the projected image.
User mode
0~100
(Dark ~ Bright)
0 ~10
(Reddish ~
Greenish)
Set the different image values, brightness, contrast, color,
tint, and sharpness.
Picture mode is “User Mode” only.
Adjust the brightness of the image.
Picture mode is “User Mode” only.
Adjust the contrast of the image.
Picture mode is “User Mode” only.
Adjust the intensity of the color in the image.
VGA have no this function support.
Picture mode is “user Mode” only.
Adjust the balance of red to green necessary for realistic
representation of Video signals.
VGA have no this function support.
Picture mode is “User Mode” only.
Adjust the image to make it look sharper.
(At higher values, will switch to detail enhancement)
NOTE: The apparent brightness of the projected image will vary depending on the ambient lighting
conditions. Input contrast/brightness signal settings in accordance with projection distance.
19
Page 24

Menu/ Display
Shown only when Signal Source is attached
1. Press MENU button of remote control or projector to turn on the OSD.
2. Press
3. Press
4. Press the
5. Press Enter key to confirm the selection
6. Press MENU button to leave the menu or press ▲ button to back to menu category after Enter key
confirming the selection.
Feature Selection Description
Aspect Ratio
Keystone -20° ~ +20° Vertical Keystone correction
Horizontal Position -5 ~ +5
Vertical Position -5 ~ +5
Phase 0 ~ 31
H Size -5 ~ +5
button to Display category.
button to select the beneath function for your needs.
button key to adjust the function values
Auto
Native
4:3
16:9
Select aspect ratio.
Adjust the horizontal position of the projected image (Only
VGA Active)
Different source timing obtains the different range, some
sources may obtain the narrow range.
Adjust the vertical position of the projected image (Only
VGA Active)
Different source timing obtains the different range, some
sources may obtain the narrow range.
Adjust the clock phase to reduce image distortion (Only
VGA Active)
Adjust the horizontal width of the image (Only VGA
Active)
Digital Zoom 0% ~100%
Digital Zoom is capable to scale part of the input image to
a larger size to increase visibility at a distance.
20
Page 25

Menu/ System Setup-Basic
1. Press MENU button of remote control or projector to turn on the OSD.
2. Press
3. Press
4. Press the
5. Press Enter key to confirm the selection
6. Press MENU button to leave the menu or press ▲ to back to menu category after Enter key confirming the
selection.
Feature Selection Description
Language
Projector position
Blank Screen
Green Power Mode
button to System Setup-Basic category.
button to select the beneath function for your needs.
button key to adjust the modes
English
Japanese
Traditional Chinese
Simplified Chinese
German
French
Italian
Front Table
Rear Table
Rear Ceiling
Front Ceiling
Black
Blue
Splash screen
ON
OFF
Select the Menu Language.
Select the projector position.
Select the screen when no input signal is detected.
Projector can not be turned on and off via using LAN.
Standby power is less than 1W.
Projector can be turned on and off via using LAN.
Standby power is more than 1W.
21
Page 26
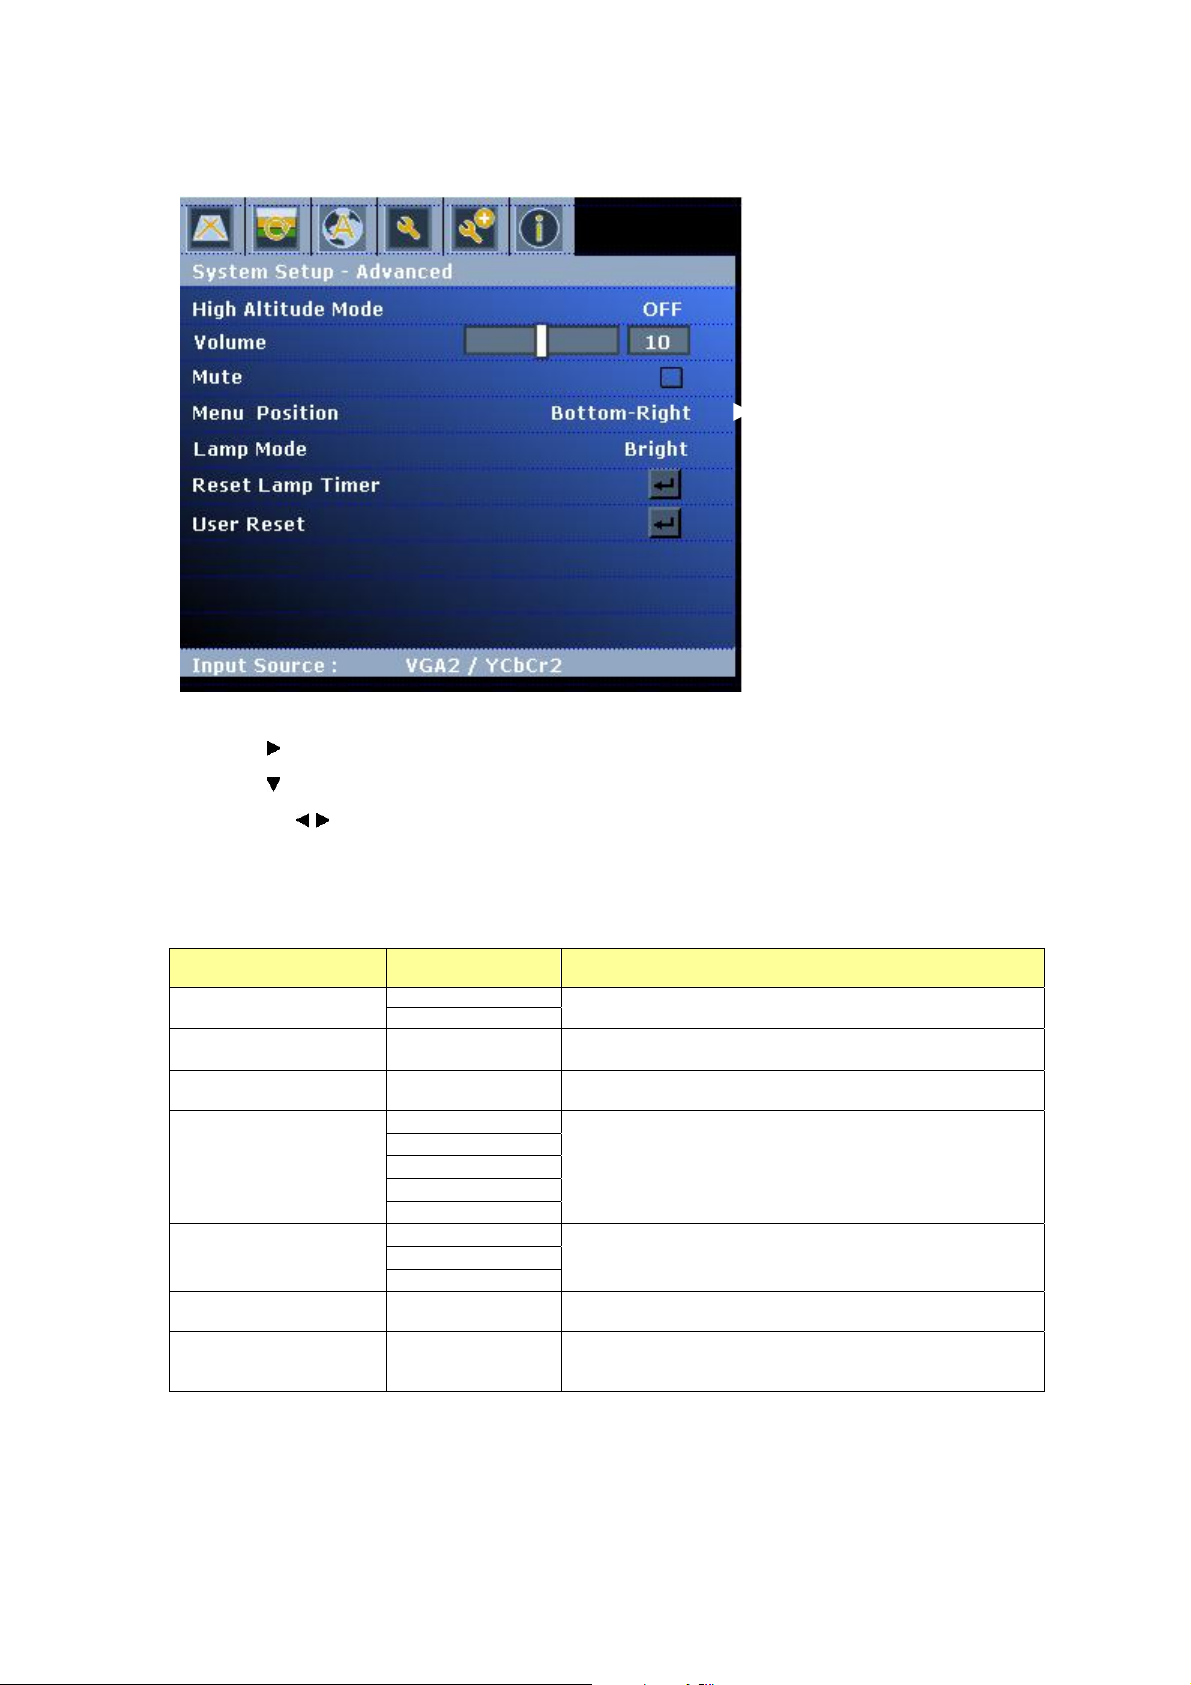
Menu/ System Setup-Advance
1. Press MENU button of remote control or projector to turn on the OSD.
2. Press
3. Press
4. Press the
5. Press Enter key to confirm the selection
6. Press MENU button to leave the menu or press ▲ button to back to menu category after Enter key
confirming the selection.
Feature Selection Description
High Altitude Mode
Volume 0~20
Mute
Menu Position
Lamp mode
Reset Lamp Timer
User Reset
button to System Setup-Advance category
button to select the beneath function for your needs.
button key to adjust the modes or values
ON
OFF
Set the Fan running at full speed. Default is set as OFF.
Adjust audio volume. When setting is 0, the sound is
muted automatically.
Mute the audio volume. Press ”Enter” key to Enable / Disable
this function.
Center
Top - Left
Top - Right
Bottom - Right
Bottom - Left
Bright
Normal
Eco
Select the Menu displays position.
Set the lamp mode.
After replacing to a new lamp, execute this function to reset
lamp timer.
“Language” , ”Projector position” and “High altitude mode” will
be remained as the mode that user originally set up. The
other setting will be reset as factory default.
22
Page 27

Menu/ Information
1. Press MENU button of remote control or projector to turn on the OSD.
2. Press
3. Press MENU button to leave the menu.
Feature Description
Active Source The current input source information.
Picture Mode The picture mode information.
Resolution The current source resolution information.
Equivalent lamp hour The used lamp hours information.
Color system The color space information.
IP Address IP address that RJ45 connector of unit linked to intranet.
button to Information category.
23
Page 28

Use LAN Function (Optional)
The function allows users to remote control the projector through computer system in “Intranet
environment”
(This function is optional; it’s available after complete setting).
Operation Instruction
1. Computer system links to intranet port and the projector links to another intranet port through LAN
cables.
2. Or use IP Router to connect Computer/ Intranet port/ Projector by LAN cables.
3. Adjust OSD of the unit to Information category to find IP address.
4. Input IP address to connect the computer and projector, then projector can be controlled by the
computer.
24
Page 29
Network Control for Web
Network Control is provided in visual interface, it can help user to monitor and manage the
projector(s) status in the local area network on Web.
Operation Procedure
1. Connect different intranet ports via using LAN cables or link computer and projector
through IP router.
2. Press menu of the projector and select Information Item to find IP address.
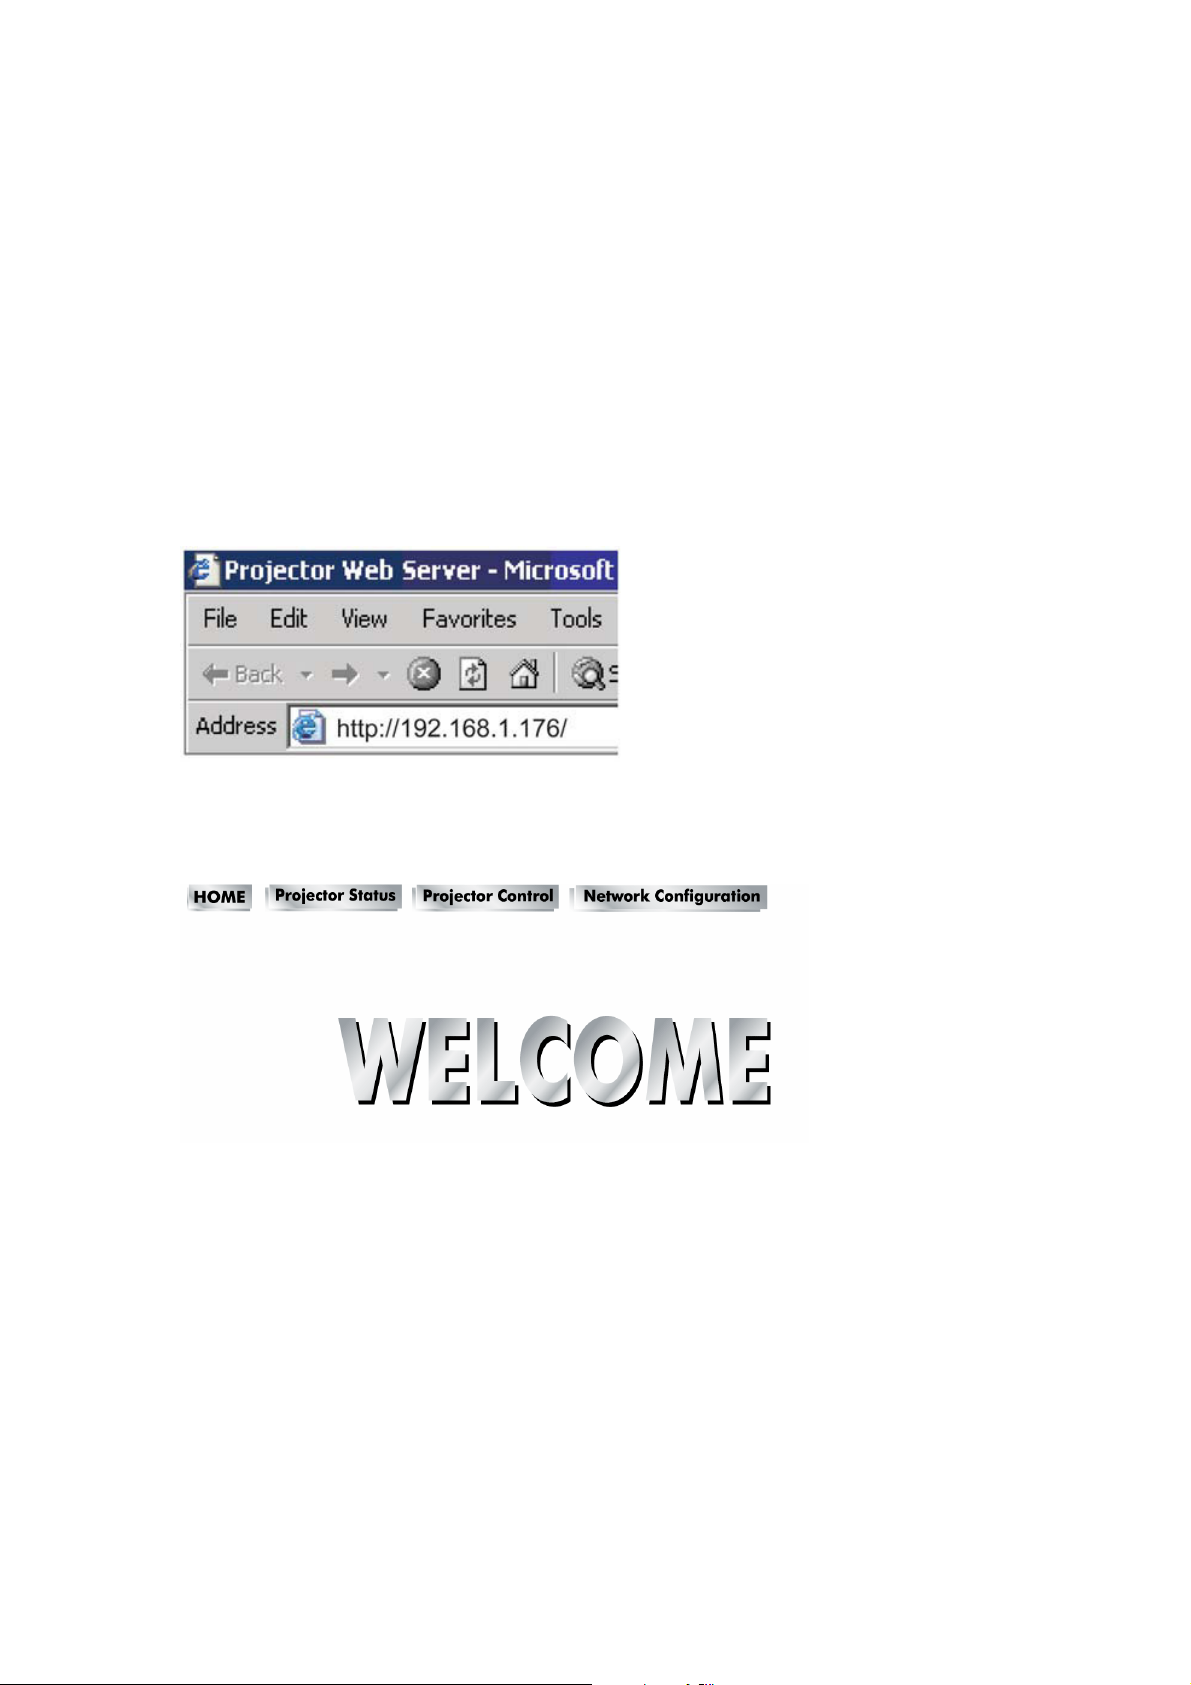
3. Enter "Given IP address (For example http://192.168.1.176/)" into the address bar of the
web browser and press “Enter” key or click “Go” button.
4. Click Function.
5. Enter Home and you can see the welcome page.
(Please refer to page 10)
6. Projector Status
Check the Projector Status to show current projector status and network configuration
settings.
25
Page 30
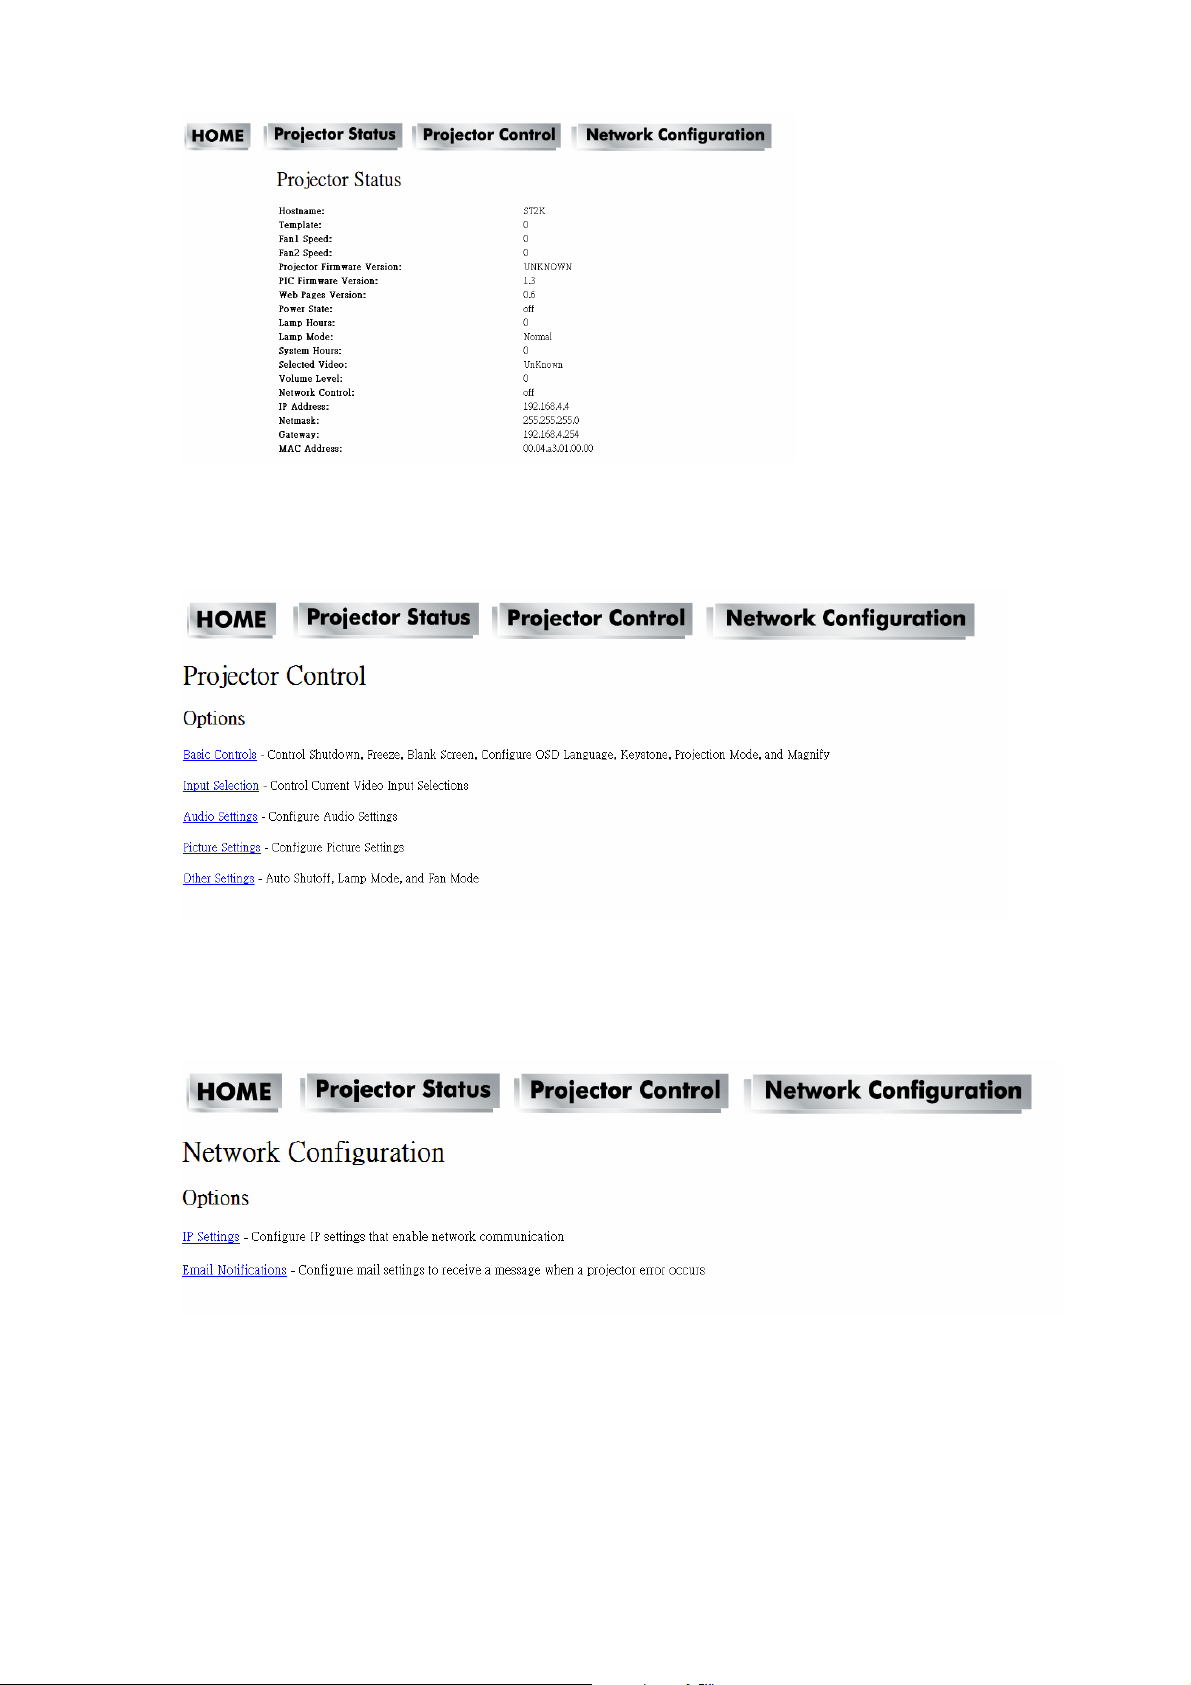
7. Projector Control:
Select projector’s detailed setting from this page.
8. Network Configuration.
Set up IP Settings and Email Notifications from this page.
26
Page 31

Maintenance
Care of the Projector
The projector needs maintenance. The only thing that users need to do on a regular basis is to keep the
lens clean.
Never remove any parts of the projector except the lamp. Contact your dealer if other parts need to
replace.
Cleaning the Lens
Clean the lens whenever you notice dirt or dust on the surface.
Use a canister of compressed air to remove dust.
If there are dirt or smears, use lens-cleaning paper or moisten soft cloth with lens cleaner and gently wipe
the lens surface.
CAUTION
Never rub the lens with abrasive materials.
Cleaning the Projector Case
Before cleaning the case, turn the projector off via using the proper shutdown procedure as described in
"Power off the projector" on page 14 and unplug the power cord.
To remove dirt or dust, wipe the case with a soft, lint-free cloth.
To remove stubborn dirt or stains, moisten a soft cloth with water and a neutral pH detergent. Then wipe
the case.
CAUTION
Never use wax, alcohol, benzene, thinner or other chemical detergents. These can damage the
case.
Storing the Projector
If you need to store the projector for an extended time, please follow the instructions below:
Make sure the temperature and humidity of the storage area are within the recommended range for the
projector. Please refer to "Specifications" on page 33 or consult your dealer about the range.
Retract the adjuster feet.
Remove the battery from the remote control.
Pack the projector in its original packing or equivalent.
Transporting the Projector
The projector shipped with its original packing or equivalent is recommended.
27
Page 32

Lamp Information
Getting to Know the Lamp Hour
When the projector is in operation, the duration (in hours) of lamp usage is automatically calculated by
the built-in timer.
To obtain the lamp hour information:
Press MENU button and then press
You will see the Equivalent lamp hour information displaying on the menu
To leave the menu, press MENU button.
button to the Information category
Timing for Replacing the Lamp
When a message appears “Please change the lamp”, please install a new lamp or consult your dealer.
An old lamp may cause a malfunction in the projector and the lamp may explode in some instance.
CAUTION
The Lamp indicator light and Temperature warning light will light up if the lamp becomes too hot.
Turn the power off and let the projector cool for 45 minutes. If the Lamp or Temp indicator still
lights up after turning the power on, please contact your dealer. See "Indicators" on page 32 for
details.
The following lamp warning displays will remind you to change the lamp.
Status Message
When the projection lamp of the projector reaches its end of
life, "Please change the lamp " will be shown every time
when the projector is on.
Replacing the Lamp
To remove the screws showed as 1 to open the lamp door showed as A
1.
28
Page 33

2. To remove the screws showed as 2 then use the handle showed as B to draw up the lamp holder
3.
To change the new lamp set and use the inverse procedure to reassemble the unit.
Replace Lamp Part No: 23040028
Contact your dealer for detailed instructions and new lamp preparation.
■ Note
To reduce the risk of injuries to fingers and damage to internal components, use caution when removing
lamp glass that has shattered into sharp pieces. Before replacing the lamp, clean the lamp compartment
and dispose of cleaning materials. Be careful of sharp edges in the lamp compartment. Wash hands after
lamp replacement.
Only manufacturer certified lamps are tested with this projector. Use of other lamps may cause electrical
shock and fire.
Turn the power off and disconnect the projector from the wall socket before replace the lamp.
29
Page 34

WARNING
Dispose of a lamp in accordance with the local recycling laws.
Do not put it to your trash.
Recycling Lamp’s laws of the USA, go to www.lamprecycle.org
Recycling Product’s laws of USA, go to www.eiae.org
Recycling Product’s laws of Canada, go to www.epsc.ca
For more information about recycling laws, please contact local government agency or dealer.
To reduce the risk of electrical shock, always turn the projector off and disconnect the power cord before
changing the lamp.
To reduce the risk of severe burns, allow the projector to cool for at least 45 minutes before replacing the
lamp.
To reduce the risk of injuries to fingers and damage to internal components, use caution when removing
lamp glass that has shattered into sharp pieces. Before replacing the lamp, clean the lamp compartment
and dispose of cleaning materials. Be careful of sharp edges in the lamp compartment. Wash hands after
lamp replacement.
Turn the power off and disconnect the projector from the wall socket before replace the lamp. Follow with
below instruction.
CAUTION Do not turn the power on with the lamp cover removed.
Resetting the Lamp Timer
1. Press MENU button of remote control or unit to turn on the OSD.
2. Press
3. Press
4. Press Enter Key
button to System Setup-Advance category
button to Reset Lamp Timer
to show the “confirm again” page and select OK to reset the lamp timer.
CAUTION Do not reset if the lamp is not new or replaced as this could cause damage.
30
Page 35

Trouble Shooting
No power Remedy
There is no power from the power
cord.
Attempting to turn the projector on
again during the cooling process.
Plug the power cord into the AC inlet on the projector, and plug the power
cord into the power outlet.
Wait until the cooling down process has completed.
No image/ Image
Remedy
adjustment
The video source is not turned on or
connected correctly.
The projector is not correctly
connected to the input signal device.
The input signal has not been
correctly selected.
The lens cover is still closed. Open the lens cover.
The projection lens is not correctly
focused.
Turn the video source on and check that the signal cable is connected
correctly.
Check the connection.
Select the correct input signal using MENU button on the projector or the
SOURCE button on the remote control.
Adjust the focus of the lens using the focus ring.
The projector and the screen are not
aligned properly.
No audio
Adjust the projection angle and direction as well as the height of the
projector if necessary.
The projector is not connected correctly.
Check audio cable if connect correctly.
The volume is set to minimum.
Adjust the volume.
Mute is turned on.
Press the MUTE button.
Remote control Remedy
The battery is out of power. Replace the battery with a new one.
There is an obstacle between the
remote control and the projector.
You are too far away from the
projector.
Remove the obstacle.
Stand within 5 meters of the projector.
31
Page 36

LED Indicator
LED status Condition Description
Green Always On Normal operation
Always On Stand by Orange
Flashing Powering up
Red
Green and Orange Green LED on first, then Orange LED
Green and Red RED and Green LED flashing (interlace)
Once every one second Fan error
Twice every one second Thermal error
Always On Power error
flashing
Red (0.5sec) → Green (0.5 sec)
Download mode
Cooling Mode
32
Page 37

Specifications
Projector Specification
All specifications are subject to change without notice.
General
Product name DLP Projector
Optical
Resolution 1024*768 XGA
Display system TI 0.55" DMDTM Type X
Lens F/Number F = 2.6
Lamp OSRAM 180-230W E20.6
Power Supply
Input Voltage 100V to 240V with 10% tolerance
Power consumption Normal operation: less than 300W; Stand By: less 1W
Mechanical
Dimensions 280.0(W) x 206.0(D) x 85.0(H)
Weight 3kg
Electrical Feature
Input Ports
Output Port -VGA out (D-sub 15 Pins)
- VGA in (D-sub 15 Pins) connector x 2 (Support component (YCbCr) signal)
- RJ45
- Composite
- AC power inlet
- Phone jack
- RS232C
- S-Video
Environmental Requirements
Operating temperature 5°C–35°C
Operating relative
humidity
Operating altitude (0-2000 m) above sea level
10-80% RH( Without condensation)
33
Page 38

Configurations of Terminal
Analog VGA Input/Output
(1) Support Component Signal
(2) Connections (15P HD-Sub)
(3) Pin Number Define
Pin NO. Signal Name Connection
1 R signal / Cr R / Cr
2 G signal / Y G / Y (Sync. On G)
3 B signal / Cb B / Cb
4 N.C. N.C.
5 GND GND
6 R return(GND) GND
7 G return(GND) GND
8 B return(GND) GND
9 N.C. N.C.
10 N.C. GND
11 Signal return(GND) N.C.
12 DDC data DDC/SDA
13 HSYNC/TTL/Comp.sync H
14 VSYNC V
15 DDC clock DDC/SCL
(4) Connector
z 15P HD-Sub
(5) Input signal polarity
z Video signal (RGB): Positive
z Sync: Positive, Negative
(6) Input level
z Signal: 0.7V ±0.2V p-p 75Ω terminate, NRZ
z Sync: TTL
(7) Composite Sync.
z TTL:Negative
34
Page 39

RS232C Control
(1) Communication Protocol
Items Specification
Standard Baud rate 9600 bps
Data length 8 bits
Parity None
Stop bit 1 bit
Flow Control None
(2) Connections
(3) Pin Number Define
1 No Connect 6 No Connect
2 RXD 7 RTS
3 TXD 8 CTS
4 No Connect 9 No Connect
5 SG
(3) RS232C Cable Define
PC Side Projector side with D-Sub Pin
RX 2 RX 2
TX 3 TX 3
GND 5 GND 5
35
Page 40

S-Video Signal
(1) S-Video Connections and Connector
(2) Pin Number Define
Pin NO. Signal Name Connection
1 Y Signal(GND) GND
2 C Signal(GND) GND
3 Y Signal Input Y
4 C Signal Input C
(3) Input signal polarity
z Composite signal sync: Negative
(4) Input level
z Y Signal: 1.0V ±0.2V p-p 75Ω terminate, NRZ
z Sync: 0.286V ±0.1V p-p
z Chromatic: 75Ω terminate, NRZ
z Burst: 0.286V ±20%
LAN Connector
(1) Connections
(2) Pin Number Define
1 TX + 6 No Connect
2 TX - 7 RX -
3 RX + 8 No Connect
4 No Connect 9 No Connect
36
Page 41

Dimension
37
Page 42

Timing Chart
Mode Resolution V(Hz)
58/57/27/07/06 084x046 AGV
58/07/06 004x027 AGV
58/57/27/07/06/65 006x008 AGVS
58/57/27/07/06 867x4201 AGX
06 468x2511 AGXS
06 288x2511 AGXS
06 4201x0821 AGXS
06 867x0821 AGXW
57/06 008x0821 AGXW
57/06 069x0821 AGV dauQ
57 867x4201 91 CAM
42.06 867x4201 CAM
Video / S-Video Source
Componet Sources
8.05 MACES
8.05 05LAP
5.06 CSTN
5.06 M-CSTN
49.95 )i525( i084
49.95 )p525(p084
05 )i526(i675
05 )p526(p675
06 )p057(p027
05 )p057(p027
03 *)i5211(i0801
52 *)i5211(i0801
*Half Sampling Only
Processing 540 lines
38
Page 43

U.S.A.
EIKI International, Inc.
30251 Esperanza
Rancho Santa Margarita
CA 92688-2132
U.S.A.
Tel: 800-242-3454 (949)-457-0200
Fax: 800-457-3454 (949)-457-7878
E-Mail: usa@eiki.com
Canada
EIKI CANADA - Eiki International, Inc.
P.O. Box 156, 310 First St. - Unit 2,
Midland, ON, L4R 4K8, Canada
Tel: 800-563-3454 (705)-527-4084
Fax: 800-567-4069 (705)-527-4087
E-Mail: canada@eiki.com
Deutschland & Österreich
EIKI Deutschland GmbH
Am Frauwald 12
65510 Idstein
Deutschland
Tel: +49-6126-9371-0
Fax: +49-6126-9371-14
E-Mail: info@eiki.de
Eastern Europe
EIKI CZECH SPOL. s.r.o.
Nad Cementárnou 1163/4a
Paraha 4, Podolí
147 00
Czech Republic
Tel: +420 241 410 928
+420 241 403 095
Fax: +420 241 409 435
E-Mail: easterneurope@eiki.de
China
EIKI (Shanghai) Co., Ltd.
LAKESIDE OASIS MIDDLE RING
BUSINESS CENTRE
Block 10, #16-07,
1628, Jin Sha Jiang Road
Shanghai, 200333
CHINA
Tel: 86-21-3251-3993
Service Hot line: 86-21-3251-3995
Fax: 86-21-3251-3997
E-mail: info@eiki-china.com
South East Asia
EIKI Industrial (M) Sdn Bhd
No. 3A-2C, 4th Floor, Jalan PJU 8/3A,
Perdana Business Centre,
Bandar Damansara Perdana,
47820 Petaling Jaya, Selangor
Malaysia
Tel: +603-7722-4362
Fax: +603-7722-4392
E-Mail: sales@eiki.my
Japan & Worldwide
EIKI Industrial Company Limited.
4-12 Banzai-Cho, Kita-Ku, Osaka,
530-0028 Japan
Tel: +81-6-6311-9479
Fax: +81-6-6311-8486
WorldWide Website http://www.eiki.com
 Loading...