


Server Adapters
User’s Guide
Server Karten Benutzerhandbuch

First Edition (August 1998) 206-765-01
DIVA Server BRI-2M, DIVA Server PRI, SCOM, Quadro, and S2M are trademarks of
Eicon Technology Corporation.
Microsoft, Windo ws, and Windo ws NT are registered trademarks of Microsoft Corporation.
OS/2 is a registered trademark of International Business Machines Corporation.
Adobe and Acrobat are trademarks of Adobe Systems Incorporated.
All other brand and product names are trademarks or registered trademarks of their
respective owners.
Changes are periodically made to the information herein; these changes will be incorporated
into new editions of the publication. Eicon Technology may make improvements and/or
changes in the products and/or programs described in this publication at any time.
If you wish to make comments about your Eicon Technology Server adapter or the
corresponding software, address them by E-mail to:
divaserver@eicon.com
If you wish to make comments about this publication, address them by E-mail to:
techpub@eicon.com.
T o contact Eicon Customer Support, refer to the “Customer Services” section in this manual.
Eicon Technology may use or distribute whatever information you supply in any way it
believes appropriate without incurring any obligations to you.
Copyright©1998 Eicon Technology Corporation. All rights reserved, including those to
reproduce this publication or parts thereof in any form without permission in writing from
Eicon Technology Corporation.

EICON TECHNOLOGY CORPORATION SINGLE USER LICENSE
AGREEMENT FOR USE OF SOFTWARE
This is a legal agreement between you, the end user, and Eicon Technology Corporation.
Y ou should carefully read the following terms and conditions before installing this softw are.
Installing the software indicates your acceptance of these terms and conditions. You assume
responsibility for the selection of the program to achieve your intended results, and for the
installation, use, and results obtained from the program.
Copyright
The software to be installed and documentation are owned by Eicon Technology
Corporation (“Eicon”) and its suppliers and are protected by copyright laws and
international treaty provisions. Therefore, you must treat the software like any other
copyrighted material except as expressly permitted in this License Agreement.
License
Under the terms and conditions of this License Agreement:
• The software may be used only in conjunction with a legally acquired Eicon Technology
ISDN adapter;
• You may make as many copies of the Eicon Technology software components and
documentation as you wish for your own personal use;
• You may not redistribute the Eicon Technology software components or documentation
without prior written permission from Eicon Technology;
• You may use the additional application software provided by Eicon’s suppliers with the
Eicon ISDN adapter with which they were originally sold. You may not copy or
redistribute these applications without prior written permission from the associated
supplier;
• You may transfer the software, documentation and license to another party if the other
party agrees to accept the terms and conditions of this Agreement. If you transfer the
software and documentation you must at the same time either transfer all copies whether
in printed or machine readable form to the same party or destroy any copies not transferred
to that party;
• You may not rent or lease the software. You may not reverse engineer, decompile or
disassemble the software. You may not use, copy, modify, or transfer the software and
documentation, or any copy, in whole or in part, except as expressly provided for in this
License Agreement;
• If you transfer possession of any copy of the software or documentation to another party
in any way other than that which is expressly permitted in this License Agreement, your
license is automatically terminated.
Term
The license is effective until terminated. You may terminate it at any time by destroying the
software Program and documentation together with all copies, modifications and merged
portions in any form. It will also terminate upon conditions set forth elsewhere in this
Agreement or if you fail to comply with any term or condition of this Agreement.
You agree upon such termination to destroy the Program and documentation together with
all copies thereof, modifications and merged portions in any form.
U.S. Government Restricted Rights
The Program and documentation are provided with RESTRICTED RIGHTS. Use,
duplication, or disclosure by the Government is subject to restrictions as set forth in
subparagraph (c)(1)(ii) of The Rights in Technical Data and Computer Software clause at
DFARS 252.227-7013 or in subparagraphs (c)(1) and (2) of the Commercial Computer
Software -- Restricted Rights at 48 CFR 52.227-19, as applicable.
Contractor/Manufacturer is: Eicon Technology Corporation
9800 Cavendish Blvd., Montreal, Quebec, H4M 2V9.

Limited Warranty (Software)
The only warranty Eicon makes is that the medium on which the Program is recorded will
be replaced without charge if Eicon, in good faith, determines that it was defective in
materials or workmanship and if returned to your supplier with a copy of your receipt within
ninety (90) days from the date you purchased it. Eicon offers no warranty for your
reproduction of the Program. This Limited Warranty is void if failure of the Program has
resulted from accident, misuse, abuse or misapplication.
Eicon's entire liability and your exclusive remedy shall be repair or replacement of the
Program that does not meet the above Limited Warranty. Any replacement Program will be
warranted for the remainder of the original warranty period.
Limited Warranty (Hardware)
Eicon T echnology Corporation w arrants to the original purchaser of this Eicon Technology
Hardware Product that it is to be in good working order for a period of five (5) years from
the date of purchase from Eicon Technology or an authorized Eicon Technology dealer.
Should this Product, in Eicon T echnology’ s opinion, f ail to be in good working order at any
time during this five year warranty period, Eicon Technology will, at its option, repair or
replace this Product at no additional charge except as set forth below. Repair parts and
replacement Products will be furnished on an exchange basis and will be either
reconditioned or new. All replaced parts and Products become property of Eicon
Technology . This Limited W arranty does not include service to repair damage to the Product
resulting from accident, disaster, misuse, abuse, or non-authorized alterations,
modifications, and/or repairs.
Products requiring Limited W arranty service during the warranty period should be deli vered
to Eicon Technology with proof of purchase. If the delivery is by mail, you agree to insure
the Product or assume the risk of loss or damage in transit. Y ou also agree to prepay shipping
charges to Eicon Technology and to use the original shipping container or equivalent.
No Other Warranties (Hardware and Software)
EICON DISCLAIMS ALL OTHER WARRANTIES, EITHER EXPRESS OR IMPLIED,
INCLUDING BUT NOT LIMITED TO IMPLIED WARRANTIES OF MERCHANTABILITY,
FITNESS FOR A PARTICULAR PURPOSE, LATENT DEFECTS AND NON-INFRINGEMENT,
WITH RESPECT TO THE HARDWARE, PROGRAM, AND THE ACCOMPANYING
DOCUMENTATION. THIS LIMITED WARRANTY GIVES YOU SPECIFIC LEGAL RIGHTS.
YOU MAY HAVE OTHERS, WHICH MAY VARY FROM PROVINCE TO PROVINCE OR FROM
STATE TO STATE.
No Liability For Consequential Damages
IN NO EVENT SHALL EICON OR ITS SUPPLIERS BE LIABLE FOR ANY DAMAGES
WHA TSOEVER (INCLUDING, WITHOUT LIMITATION, DAMAGES FOR LOSS OF BUSINESS
PROFITS, BUSINESS INTERRUPTION, LOSS OF BUSINESS INFORMATION OR OTHER
PECUNIARY LOSS AND INDIRECT , SPECIAL, CONSEQUENTIAL, INCIDENT AL, ECONOMIC
OR PUNITIVE DAMAGES ARISING OUT OF THE USE OF OR INABILITY TO USE THIS
PRODUCT , EVEN IF EICON OR ITS SUPPLIERS HAVE BEEN ADVISED OF THE POSSIBILITY
OF SUCH DAMAGES). BECA USE SOME JURISDICTIONS DO NO T ALLO W THE EXCLUSION
OR LIMITATION OF LIABILITY FOR CONSEQUENTIAL OR INCIDENTAL DAMAGES, THE
PRECEDING LIMITATION MAY NOT APPLY TO YOU IF YOU LIVE IN ONE OF THOSE
JURISDICTIONS.
Third-Party Software
In addition to the above-mentioned restrictions on liability , Eicon emphasizes that it shall be
responsible for absolutely no liability for any damage caused by or malfunction of software
licensed from third parties. Third-party software (including the Bonus Software) is provided
to you on a strictly AS IS basis. Eicon makes absolutely no representations and pro vides no
warranties whatsoever for third-party software and explicitly does not warrant that
third-party software is Year 2000 compliant.

Table of Contents
English
Introduction.....................................................................7
Installing Y our Serv er Adapter......................................10
Installing the Software...................................................15
Troubleshooting.............................................................27
Customer Services.........................................................29
Deutsch
Einführung.....................................................................31
Installieren Ihrer Server Karte.......................................34
Installieren der Software ...............................................39
Problemlösung...............................................................51
Kundendienst.................................................................53


Introduction
7
Introduction
This User’s Guide describes how to quickly install and configure your DIVA
Server adapter and the software under Windows NT and BackOffice Small
Business Server. In just a short time, you should be able to provide high-speed
Basic Rate Interface (BRI) or Primary Rate Interface (PRI) ISDN connectivity for
remote access, routing, and fax capabilities. Remote access and routing
capabilities are provided through Windows NT server. Fax capabilities require
third-party faxing software.
Note
To install any other Server adapter, see the online Server Adapters Hardware Installation Guide. To install the software under Windows NT 3.51,
Windows 95, Netware, DOS, OS/2, or Windows 3.11 (except DIVA Server PRI),
see the corresponding online documentation on the ISDN Software Suite
CD-ROM.
All Server adapters have been tested and found to comply with the
Electromagnetic compatibility, Safety and Network connection
regulations within the European Union, North America, and other major
territories. Read the regulatory information in the online Server
Adapters Hardware Installation Guide before installing and using your
adapter.
Online Documentation
The ISDN Software Suite CD-ROM includes comprehensive online manuals in
Adobe™ Acrobat™ portable document format (PDF). These manuals describe all
configuration parameters in detail. If you want to use any of the online manuals
during the installation, you should print the required pages before you start.
The ISDN Software Suite CD-ROM also includes readme files. The readme files
contain the most up-to-date information which did not make it into other manuals.
To view a PDF manual under Windows NT or Small Business Server:
1.
Insert the ISDN Software Suite CD-ROM into your CD-ROM drive.
2.
Under Windows NT or Small Business Server, click the “Start” button and
select “Run”.
3.
In the Run dialog box, type
driver letter).
4.
From the ISDN Software Suite Welcome screen, click the “Install Software/View Documentation” button.
5.
From the presented screen, you can view the documentation for your hardware and software. You can also install Acrobat Reader (if it is not already
installed).
D:\start.exe
(where D is your CD-ROM
ENGLISH

Introduction
8
To view a PDF manual under any other operating system:
ENGLISH
1.
Install Acrobat Reader (if it is not installed). Run the corresponding file
from the ISDN Software Suite CD-ROM:
Platform:
Windows 3.11 \doc\reader\win_3x\english\ar16e301.exe
DOS \doc\reader\dos\english\acrodos.exe
OS/2 \doc\reader\os2\english\aro2e30.exe
2.
Open the corresponding file from the ISDN Software Suite CD-ROM:
PDF Manual:
Server Adapters
Hardware Installation Guide
DIVA for Workgroups
Reference Guide
Server Adapters
Installation for DOS and OS/2
Path and file name:
Path and file name:
\doc\server\refguide\english\serves_e.pdf
\win_3x\doc\english\divawg_e.pdf
\dos\server\doc\english\servod_e.pdf
Help Web
The Eicon Technology Help Web, included on the ISDN Suite CD-ROM,
contains useful troubleshooting information. If you have problems with your
Server adapter and software, try the suggestions listed on the Help Web before
calling Customer Services.
To view the contents of the Help Web:
1.
Insert the ISDN Software Suite CD-ROM into your CD-ROM drive.
2.
Click the “Start” button and select “Run”.
3.
In the Run dialog box, type
D:\start.exe
(where D is your CD-ROM
drive letter).
4.
From the ISDN Software Suite Welcome screen, click “Help Web”.
Note
If you have Internet access, you can view the most up-to-date version of the
Help W eb at
www.eicon.com/support/ema
.
How to Proceed with the Installation
1.
Make sure you have all the items you need, as listed on page 9.
2.
Install your Server adapter as described on page 10.
3.
Connect your ISDN line as described in the installation procedure for your
Server adapter.
4.
Install the software as described on page 15.

Introduction
Before Y ou Start
Before you start, make sure you have the items you need to install your Server
adapter and the corresponding software.
9
Item Description
Computer Your computer must have:
• a free slot that corresponds to the bus type of your adapter
PCI
ISA (EISA
(
Server adapter
package
CD-ROM or
diskettes for your
operating system
ISDN Basic Rate
Interface (BRI) or
Primary Rate
Interface (PRI)
line(s)
Information about
your ISDN line
or
• an installed operating system:
Windows NT 3.51 (Service Pack 5),
Windows NT 4.0 (Service Pack 3),
BackOffice Small Business Server 4.0a (DIVA
Server BRI-2M only), Netware,
Windows for Workgroups 3.11 (except DIVA
Server PRI), DOS 5.0 or higher,
OS/2 2.x or higher
• at least 8 MBytes of free hard-disk space for the software
This includes:
• Server adapter
• cable(s) needed to connect your ISDN line
• ISDN Software Suite CD-ROM
You might be prompted to provide the CD-ROM or diskettes
for your operating system during the software installation.
ISDN lines are installed by your local telephone company.
Make sure that you get the appropriate line(s) for your
adapter.
North America and Japan only:
terminating device (NT1).
Your ISDN service provider has to supply the following
information:
• ISDN switch type: This usually depends on your
geographic location. Common switch types include
Euro-ISDN DSS1 (used in Europe), 1TR6 (used mainly
in PBX’s in Germany), NI-1 (used in North America),
and 5ESS (used in North America).
• ISDN phone numbers for each ISDN line
•
North America only:
for each ISDN line
))
ENGLISH
You might need a network
Service Profile Identifiers (SPIDs)

Installing Your Server Adapter
10
Installing Your Server Adapter
ENGLISH
The installation procedure depends on which Server adapter you have:
• If you are installing a DIVA Server BRI-2M, follow the instructions below.
• If you are installing a DIVA Server PRI, follow the instructions on page 12.
• If you are installing any other Server adapter, follow the instructions in the
Server Adapters Hardware Installation Guide
To reduce the risk of electrical shock:
Before you install your Server adapter or remove the cover from your
computer for any reason, disconnect the ISDN cable from the ISDN
network.
.
Installing DIVA Server BRI-2M
The DIVA Server BRI-2M is a Plug and Play adapter. As such, you do not hav e to
specify any hardware settings on the adapter.
To install the DIVA Server BRI-2M:
Step One: Insert the adapter into your computer
1.
For your safety, turn off the power to your computer and all peripheral
devices.
2.
Drain static electricity from your body by touching the metal chassis (the
unpainted metal at the back of your computer).
3.
Remove the power cord from your computer.
4.
Remove the cover of the computer as described in your computer’s manual.
5.
Locate a slot in your computer that has the same bus type as your adapter
(ISA or PCI), and firmly insert the adapter into the selected slot.
To avoid damaging your hardware, insert the adapter only into a slot
with the same bus type as the adapter (
ISA adapter into an EISA slot). Inserting the adapter into any other type
of slot can damage your adapter, your computer, or both.
6.
Firmly secure the adapter with a screw (or clip), to ensure that the adapter
is properly grounded to the computer’s chassis.
7.
Replace the cover of the computer as described in your computer’s manual.
Step Two: If necessary, update your system’s configuration
If you installed the DIVA Server BRI-2M into an EISA slot:
operating system can find and communicate with the adapter, you have to update
the system configuration. To do so, use the EISA Configuration Utility (included
with your computer) to add the Eicon T echnology EISA configuration file to your
system. The EISA configuration file (
Software Suite CD-ROM under
!gdi0009.cfg
\dos\server\install\bri_2m\!gdi0009.cfg
exception
) is included on the ISDN
: you can also insert an
To ensure that your
.
Installing Your Server Adapter
.
11
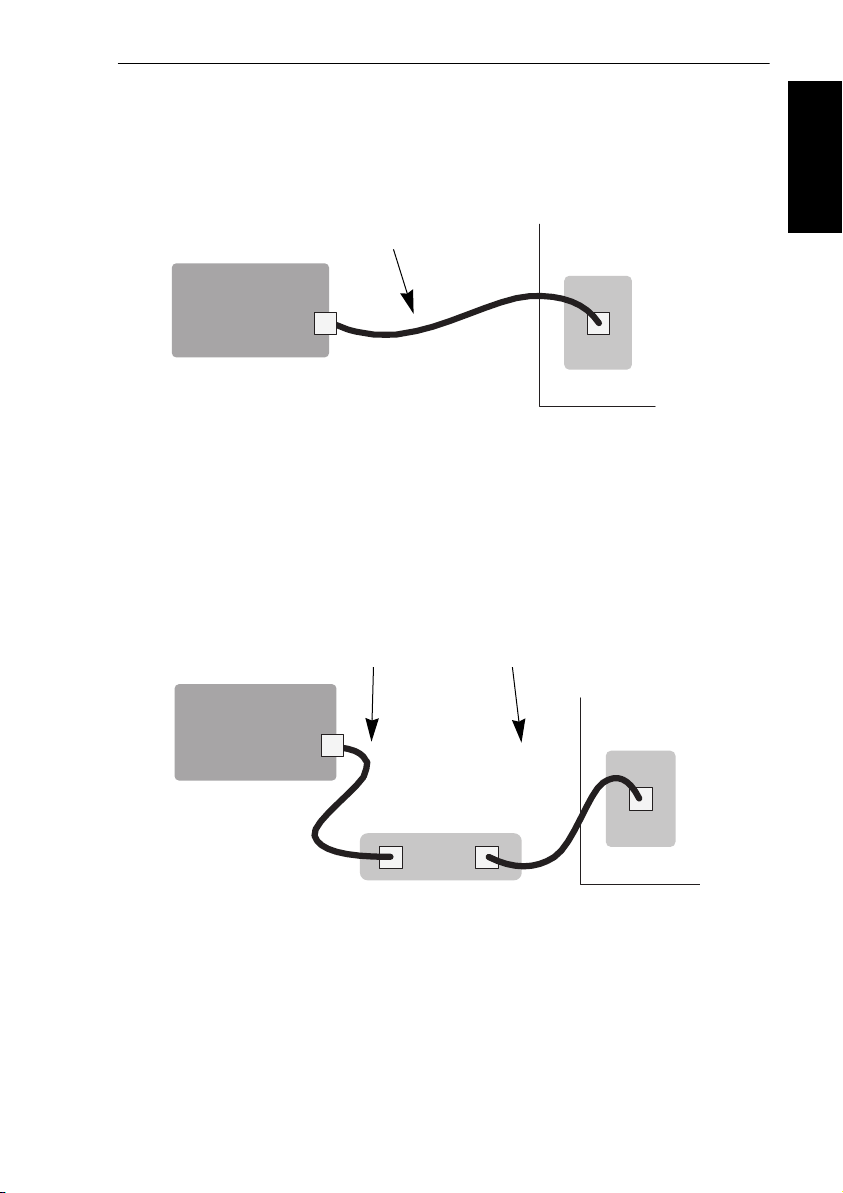
Step Three: Connect your ISDN line
In Europe and most countries worldwide:
In Europe as well as most countries outside of North America and Japan, connect
your ISDN line using the cable included with your Server adapter.
1. Take the cable
included with the
adapter.
Server
adapter
2. Plug one end into
the adapter.
ISDN wall jack with NT
3. Plug the other
end into the ISDN
wall jack.
In North America and Japan:
In North America and Japan, you need an NT1 to connect your ISDN line. You
can order an NT1 from Eicon Technology or from another supplier.
ENGLISH
Server
adapter
2. Plug one end
into the
adapter.
3. Plug the other end
1. Take the
cable
included
with the
adapter.
S/T jack
into the S/T jack.
4. Take the
cable
included
with the
NT1.
NT1
U jack
6. Plug the other end
into the U jack.
5. Plug one end into
the ISDN wall jack
ISDN wall jack

Installing Your Server Adapter
12
Installing DIVA Server PRI
ENGLISH
To install the DIVA Server PRI:
Step One: Insert the adapter into your computer
The DIVA Server PRI needs up to 20 Watts of power. If you have
several adapters installed in your system, make sure that the power
supply will not be overloaded when you install the DIVA Server PRI.
PRI signals can have telephone network voltages (TNV). Therefore,
PRI lines should be installed and maintained by service personnel only.
It may be hazardous if your computer is not properly plugged in and
grounded. This applies particularly to users in North America and
Australia.
1.
For your safety, turn off the power to your computer and all peripheral
devices.
2.
Drain static electricity from your body by touching the metal chassis (the
unpainted metal at the back of your computer).
3.
Remove the power cord from your computer.
4.
Remove the cover of the computer as described in your computer’s manual.
5.
DIVA Server PRI model
800-217-02
shown below. Verify that the two jumpers on your adapter use the default
settings:
only:
The default jumper settings are
Jumper
JP 701
JP 702
DIVA Server PRI
6.
Firmly insert the adapter into a free PCI slot, allowing the retainer to slide
Retainer
between the guides. Make sure that the adapter does not touch the CPU,
memory modules, or any other parts on the motherboard.
Note
If space does not permit the use of the retainer, simply remove it, and
then insert the card. The retainer is only an installation aid and does not
add functionality to the card.
To avoid damaging your hardware, insert the DIVA Server PRI
adapter only into a PCI slot. Inserting the adapter into any other
type of slot can damage your adapter, your computer, or both.
7.
Firmly secure the adapter with the screw (or clip), to ensure that the adapter
is properly grounded to the computer’s chassis.
8.
Replace the cover of the computer as described in your computer’s manual.

Installing Your Server Adapter
13
Step Two: Connect your ISDN line
PRI signals can have telephone network voltages (TNV). Therefore,
PRI lines should be installed and maintained by service personnel only.
It may be hazardous if your computer is not properly plugged in and
grounded. This applies particularly to users in North America and
Australia.
The DIVA Server PRI has a built-in CSU (channel service unit) to
protect the adapter from damage due to power surges. Ho wev er , you can
also use an external CSU, which allows you to test your ISDN line.
Use one of the cables included with the card to connect your ISDN line:
• RJ-45 to RJ-45
• RJ-45 to open-ended cables for connection to your NT
The cable you use depends on whether the ISDN line was installed with an RJ-45
jack or uses open-ended wire connections.
If the ISDN line is installed with an RJ-45 jack:
Use the supplied RJ-45 to RJ-45 cable:
ENGLISH
DIVA Server PRI
Pin 1 Receive + (RX +) Pin 1 twisted w. Receive- (RX -)
Pin 2 Receive - (RX -) Pin 2 twisted w. Receive+ (RX +)
Pin 4 Transmit + (TX +) Pin 4 twisted w. Transmit- (TX -)
Pin 5 Transmit - (TX -) Pin 5 twisted w. Transmit+ (TX +)
shielded plug overall shielded shielded plug foil shield
Note
For E1 Mode with 75 Ohm Impedance, use an external 75 Ohm Balun
Signals RJ-45
Terminal
Remarks
Adapter. You can purchase such an adapter from specialized stores.
Connect your ISDN line as shown:
1. Take the cable
included with the
Server
adapter
2. Plug one end into
the adapter.
adapter.
Primary Rate ISDN line
3. Plug the other
end into the NT,
CSU, or wall jack.

Installing Your Server Adapter
14
If the ISDN line uses open-ended wire connections:
ENGLISH
In some cases, you are required to connect to your network termination using the
open-ended connectors. The transmission (TX) leads and the receiving (RX)
leads are identified by color; transmission leads are blue and white-blue, receiving
leads are orange and white-orange.
Use the supplied RJ-45 with open ends cable:
DIVA Server PRI Signals Open Ends Remarks
Pin 1 Receive + (RX +) white-orange twisted w. Receive- (RX -)
Pin 2 Receive - (RX -) orange twisted w. Receive+ (RX +)
Pin 4 Transmit + (TX +) white-blue twisted w. Transmit- (TX -)
Pin 5 Transmit - (TX -) blue twisted w. Transmit+ (TX +)
shielded plug overall shielded shield foil shield
Note If your NT or external CSU is turned on while your computer is connected
to the ISDN network and the DIVA Server PRI is not connected or the wiring is
wrong, a layer 1 warning light appears at the switching center of the network
provider. If you are using an external CSU, a warning light appears on the CSU
as well. The network provider will then deactivate the ISDN line. If this occurs,
you must contact your network provider to re-enable your line.

Installing the Software 15
Installing the Software
Installing DIVA for Windows NT
This section describes how to install and configure DIVA for Windows NT under
Windows NT 4.0. For installation under Windows NT 3.51, see the readme file
under \win_nt\install\readme.txt on the ISDN Software Suite CD-ROM.
Before you install DIVA for Windows NT, take note of the following:
• Make sure that network services are installed on your system. If you do not
have a network interface card, install the MS Loopback adapter (this adapter
appears in the list of available adapters in the Network Control Panel).
• If you are using a Plug&Play ISA adapter (DIVA Server BRI), you should
enable resource allocation in your computer’s BIOS setup. Enabling resource
allocation ensures that the computer’s BIOS allocates hardware resources. In
some BIOS setups, you enable resource allocation by specifying that your
operating system is not Plug&Play.
To install DIVA for Windows NT:
Note Make sure you have your Windows NT CD-ROM or diskettes and informa-
tion about your ISDN line (see “Before You Start” on page 9).
Step One: Install your Server adapter as a network adapter
1. At the Windows NT console, logon as Administrator or equivalent.
2. Insert the ISDN Software Suite CD-ROM into your CD-ROM drive.
3. Click the “Start” button and select “Run”.
4. In the Run dialog box, type D:\start.exe (where D is your CD-ROM
drive letter).
5. From the ISDN Software Suite Welcome screen, click “Install Soft-
ware/View Documentation”.
6. If required, select “Windows NT 4.0” from “Select another operating
system”.
7. Click “Install/Update Software”.
The setup program copies files to your computer.
8. From the Select OEM Option dialog box, select your Server adapter, and
click “OK”.
9. If your computer has more than one bus type (for example, ISA and PCI),
the Active ISDN S0 Adapter dialog box appears. Select the bus type and
the bus number your adapter is using.
If you are using a Plug&Play ISA adapter and resource distribution is activated in your computer’s BIOS, you must select the “PnP BIOS” bus type.
This will ensure that hardware resources are allocated by your computer’s
BIOS.
10. Click “OK”.
ENGLISH

16 Installing the Software
The Eicon Adapter Setup dialog box appears:
ENGLISH
11. From “ISDN Protocol (Switch Type)”, select the switch type specified by
your ISDN service provider.
In general, if you are in Europe, select “Europe and other countries,
Euro-ISDN (E-DSS1)” (commonly referred to as ETSI standard).
12. If the hardware resources fields are not grayed out: Ensure that the default
hardware resources (“Interrupt Number” and “I/O Port Base Address”) are
not used by other devices in your computer . If necessary, change the default
values.
Note For the DIVA Server BRI-2M, you can use the following interrupts:
3, 4, 5, 7, 9, 10, 11, 12, 14, and 15.
To determine which hardware resources are used by other devices, click
“Launch W indows NT Diagnostics” and select the “Resources” tab:
• To view which interrupts are used by other devices, click “IRQ”.
• To view which I/O port base addresses are used by other devices, click
“I/O Port”.
• To return to the Eicon Adapter Setup dialog box, click “OK”.
13. From “ISDN Interface Type”, select the type of interface to which the
Server adapter is connected.
• “Standard”: The Server adapter is operated on a standard ISDN bus.
This option is available only if you are using a DIVA Server BRI-2M
adapter.
• “Point to Point”: The Server adapter is operated on a point to point (or
direct dialing) NT2 interface.
• “Leased Line”: The Server adapter is operated on a group 2 leased line.
Typically, BRI adapters use the Standard interface, and PRI adapters use the
Point to Point interface.

Installing the Software 17
14. If you are using the DIVA Server BRI-2M in North America: From the P age
box, click “SPID Settings”.
• In “Number of Terminals”, enter the number of logical terminals for the
ISDN line. If your ISDN service provider assigned only one ISDN
number for your ISDN line, select 1. Otherwise, select 2.
• In “Subscriber Numbers and SPIDs”, enter the subscriber numbers
(ISDN numbers) and SPIDs specified by your ISDN service provider.
Depending on your switch type, you have to enter either one or two
SPID numbers for your ISDN line. Enter these numbers directly,
without spaces or hyphens.
Click “OK”.
Note For information on advanced parameters such as ISDN Protocol Settings,
see the online help.
Step Two: Install the WAN-Miniport driver
1. From the displayed message box, click “Yes” to install the WAN Miniport
Driver. Installing the WAN Miniport driver allows you to use Dial-up
Networking over ISDN.
The Eicon WAN-Miniport Driver Setup dialog box appears:
ENGLISH
2. If you want to configure parameters such as shorthold settings, number
checking, and authentication features, check Advanced Parameters and
select the required option from the Page box. You are presented with
various parameters to configure. For more information, see the online help
or the online DIVA for Windows NT Reference Guide.
3. Click “OK”.
 Loading...