

EDIMAX ew-7228apn User guide

COPYRIGHT
Copyright © 2008/2009 by this company. All rights reserved. No part of this
publication may be reproduced, transmitted, transcribed, stored in a retrieval
system, or translated into any language or computer language, in any form or
by any means, electronic, mechanical, magnetic, optical, chemical, manual or
otherwise, without the prior written permission of this company
This company makes no representations or warranties, either expressed or
implied, with respect to the contents hereof and specifically disclaims any
warranties, merchantability or fitness for any particular purpose. Any software
described in this manual is sold or licensed "as is". Should the programs prove
defective following their purchase, the buyer (and not this company, its
distributor, or its dealer) assumes the entire cost of all necessary servicing,
repair, and any incidental or consequential damages resulting from any defect
in the software. Further, this company reserves the right to revise this
publication and to make changes from time to time in the contents thereof
without obligation to notify any person of such revision or changes.

Federal Communication Commission
Interference Statement
FCC Part 15
This equipment has been tested and found to comply with the limits for a Class B
digital device, pursuant to Part 15 of FCC Rules. These limits are designed to provide
reasonable protection against harmful interference in a residential installation. This
equipment generates, uses, and can radiate radio frequency energy and, if not installed
and used in accordance with the instructions, may cause harmful interference to radio
communications. However, there is no guarantee that interference will not occur in a
particular installation. If this equipment does cause harmful interference to radio or
television reception, which can be determined by turning the equipment off and on,
the user is encouraged to try to correct the interference by one or more of the
following measures:
1. Reorient or relocate the receiving antenna.
2. Increase the separation between the equipment and receiver.
3. Connect the equipment into an outlet on a circuit different from that to
which the receiver is connected.
4. Consult the dealer or an experienced radio technician for help.
FCC Caution
This equipment must be installed and operated in accordance with provided
instructions and a minimum 20 cm spacing must be provided between computer
mounted antenna and person‟s body (excluding extremities of hands, wrist and feet)
during wireless modes of operation.
This device complies with Part 15 of the FCC Rules. Operation is subject to the
following two conditions: (1) this device may not cause harmful interference, and (2)
this device must accept any interference received, including interference that may
cause undesired operation.

Any changes or modifications not expressly approved by the party responsible for
compliance could void the authority to operate equipment.
Federal Communication Commission (FCC) Radiation Exposure
Statement
This equipment complies with FCC radiation exposure set forth for an uncontrolled
environment. In order to avoid the possibility of exceeding the FCC radio frequency
exposure limits, human proximity to the antenna shall not be less than 20cm (8 inches)
during normal operation.
The antenna(s) used for this transmitter must not be co-located or operating in
conjunction with any other antenna or transmitter.

R&TTE Compliance Statement
This equipment complies with all the requirements of DIRECTIVE 1999/5/EC OF
THE EUROPEAN PARLIAMENT AND THE COUNCIL of March 9, 1999 on radio
equipment and telecommunication terminal Equipment and the mutual recognition of
their conformity (R&TTE).
The R&TTE Directive repeals and replaces in the directive 98/13/EEC
(Telecommunications Terminal Equipment and Satellite Earth Station Equipment) As
of April 8, 2000.
Safety
This equipment is designed with the utmost care for the safety of those who install
and use it. However, special attention must be paid to the dangers of electric shock
and static electricity when working with electrical equipment. All guidelines of this
and of the computer manufacture must therefore be allowed at all times to ensure the
safe use of the equipment.
EU Countries Intended for Use
The ETSI version of this device is intended for home and office use in Austria,
Belgium, Denmark, Finland, France, Germany, Greece, Ireland, Italy, Luxembourg,
the Netherlands, Portugal, Spain, Sweden, and the United Kingdom.
The ETSI version of this device is also authorized for use in EFTA member states:
Iceland, Liechtenstein, Norway, and Switzerland.
EU Countries Not intended for use
None.

C A T A L O G
Chapter I: Product Information ................................................................ 1
1-1 Product Introduction ........................................................................................ 1
1-2 Safety Information ........................................................................................... 2
1-3 System Requirements ...................................................................................... 3
1-4 Package Contents ............................................................................................. 4
1-5 Familiar with your new wireless access point ................................................. 5
Chapter II: System and Network Setup .................................................... 7
2-1 Installing the access point to your Network .................................................... 7
2-2 Connecting to wireless access point by web browser...................................... 8
2-2-1 Windows 95/98/Me IP address setup ............................................................... 8
2-2-2 Windows 2000 IP address setup ..................................................................... 10
2-2-3 Windows XP IP address setup ........................................................................ 12
2-2-4 Windows Vista IP address setup ..................................................................... 14
2-2-5 Connecting to Web Management Interface .................................................... 17
2-3 View System Status and Information ............................................................ 19
2-4 Select an Operating Mode for Wireless Access Point ................................... 21
2-4-1 AP Mode......................................................................................................... 23
2-4-1-1 Multiple ESSID .......................................................................................... 25
2-4-2 Station-Infrastructure ..................................................................................... 26
2-4-2-1 Wireless Site Survey ................................................................................... 28
2-4-3 AP Bridge-Point to Point Mode ..................................................................... 29
2-4-4 AP Bridge-Point to Multi-Point Mode ........................................................... 32
2-4-5 AP Bridge-WDS Mode .................................................................................. 34
2-4-6 Universal Repeater ......................................................................................... 36
2-5 WPS Setting ................................................................................................... 39
2-6 Advanced Wireless Settings........................................................................... 43
2-7 Wireless Security ........................................................................................... 46
2-7-1 Disable Security ............................................................................................. 48
2-7-2 WEP ............................................................................................................... 49
2-7-3 WPA Pre-shared Key ...................................................................................... 51
2-7-4 WPA RADIUS................................................................................................ 53
2-8 Radius Server ................................................................................................. 55
2-9 MAC Filtering ............................................................................................... 58
2-10 System Utilities............................................................................................ 60
2-10-1 Change Password ......................................................................................... 60

2-10-2 IP Address of the Wireless Access Point ...................................................... 61
2-10-3 DHCP Server ................................................................................................ 63
Chapter III: Advanced Configuration .................................................... 65
3-1 Configuration Backup and Restore................................................................ 65
3-2 Firmware Upgrade ......................................................................................... 66
3-3 System Reset.................................................................................................. 67
Chapter IV: Appendix .............................................................................. 68
4-1 Hardware Specification ................................................................................. 68
4-2 Troubleshooting ............................................................................................. 69
4-3 Glossary ......................................................................................................... 71

Chapter I: Product Information
1-1 Product Introduction
Thank you for purchasing this wireless access point! With this high
cost-efficiency wireless access point, computers and wireless devices
which are compatible with 802.11n can connect to existing wired
Ethernet network via this wireless access point, at the speed of 150Mbps.
Easy install procedures allows any computer users to setup a network
environment in very short time - within minutes, even inexperienced
users. Just follow the instructions given in this user manual, you can
complete the setup procedure and release the power of this access point
all by yourself!
Other features of this access point including:
Complies with IEEE 802.11b/g and compatible with 802.11n
standards.
Supports high data rate up to 150Mbps while connecting with
IEEE 802.11n devices.
Auto rate fallback in case of obstacles or interferences.
Supports point-to-point and point-to-multi point bridge function.
Supports WDS (Wireless Distributed System) repeater mode.
Supports Universal Repeater mode.
Supports AP Client mode.
Support 64/128-bit WEP, WPA, WPA2 and IEEE 802.1x wireless
securities
Supports WPS hardware button for easy wireless association
Provides MAC access control.
Provides hidden SSID function.
Supports Web-based configuration.
Firmware upgradeable via Web browser.
Support Green WLAN for smart Tx power saving, Implicit Rx
power saving and CPU offload.
1

1-2 Safety Information
In order to keep the safety of users and your properties, please follow the
following safety instructions:
1. This access point is designed for indoor use only; DO NOT place this
access point outdoor.
2. DO NOT put this access point at or near hot or humid places, like
kitchen or bathroom. Also, do not left this access point in the car in
summer.
3. DO NOT pull any connected cable with force; disconnect it from the
access point first.
4. If you want to place this access point at high places or hang on the wall,
please make sure the access point is firmly secured. Falling from high
places would damage the access point and its accessories, and warranty
will be void.
5. Accessories of this access point, like antenna and power supply, are
danger to small children under 3 years old. They may put the small parts
in their nose or month and it could cause serious damage to them. KEEP
THIS ACCESS POINT OUT THE REACH OF CHILDREN!
6. The access point will become hot when being used for long time (This
is normal and is not a malfunction). DO NOT put this access point on
paper, cloth, or other flammable materials.
7. There‟s no user-serviceable part inside the access point. If you found
that the access point is not working properly, please contact your dealer
of purchase and ask for help. DO NOT disassemble the access point,
warranty will be void.
8. If the access point falls into water when it‟s powered, DO NOT use
your hand to pick it up. Switch the electrical power off before you do
anything, or contact an experienced electrical technician for help.
9. If you smell something strange or even see some smoke coming out
from the access point or power supply, remove the power supply or
switch the electrical power off immediately, and call dealer of purchase
for help.
2

1-3 System Requirements
Computer (with Fast Ethernet adapter or wireless adapter) running
Windows98/2000/XP/Vista/7, Linux, Mac OS
Web browser (Microsoft Internet Explorer 4.0 or above, Firefox)
3

1-4 Package Contents
Before you starting to use this access point, please check if there‟s
anything missing in the package, and contact your dealer of purchase to
claim for missing items:
□ Wireless Range Extender (Access Point) x 1
□ CD (EZmax Setup Wizard, Multi-language Quick Installation
Guide & User Manual) x 1
□ Power Adapter x 1
□ 3dBi Antenna x 1
□ Accessories Kit x 1
□ Quick Installation Guide x 1
4
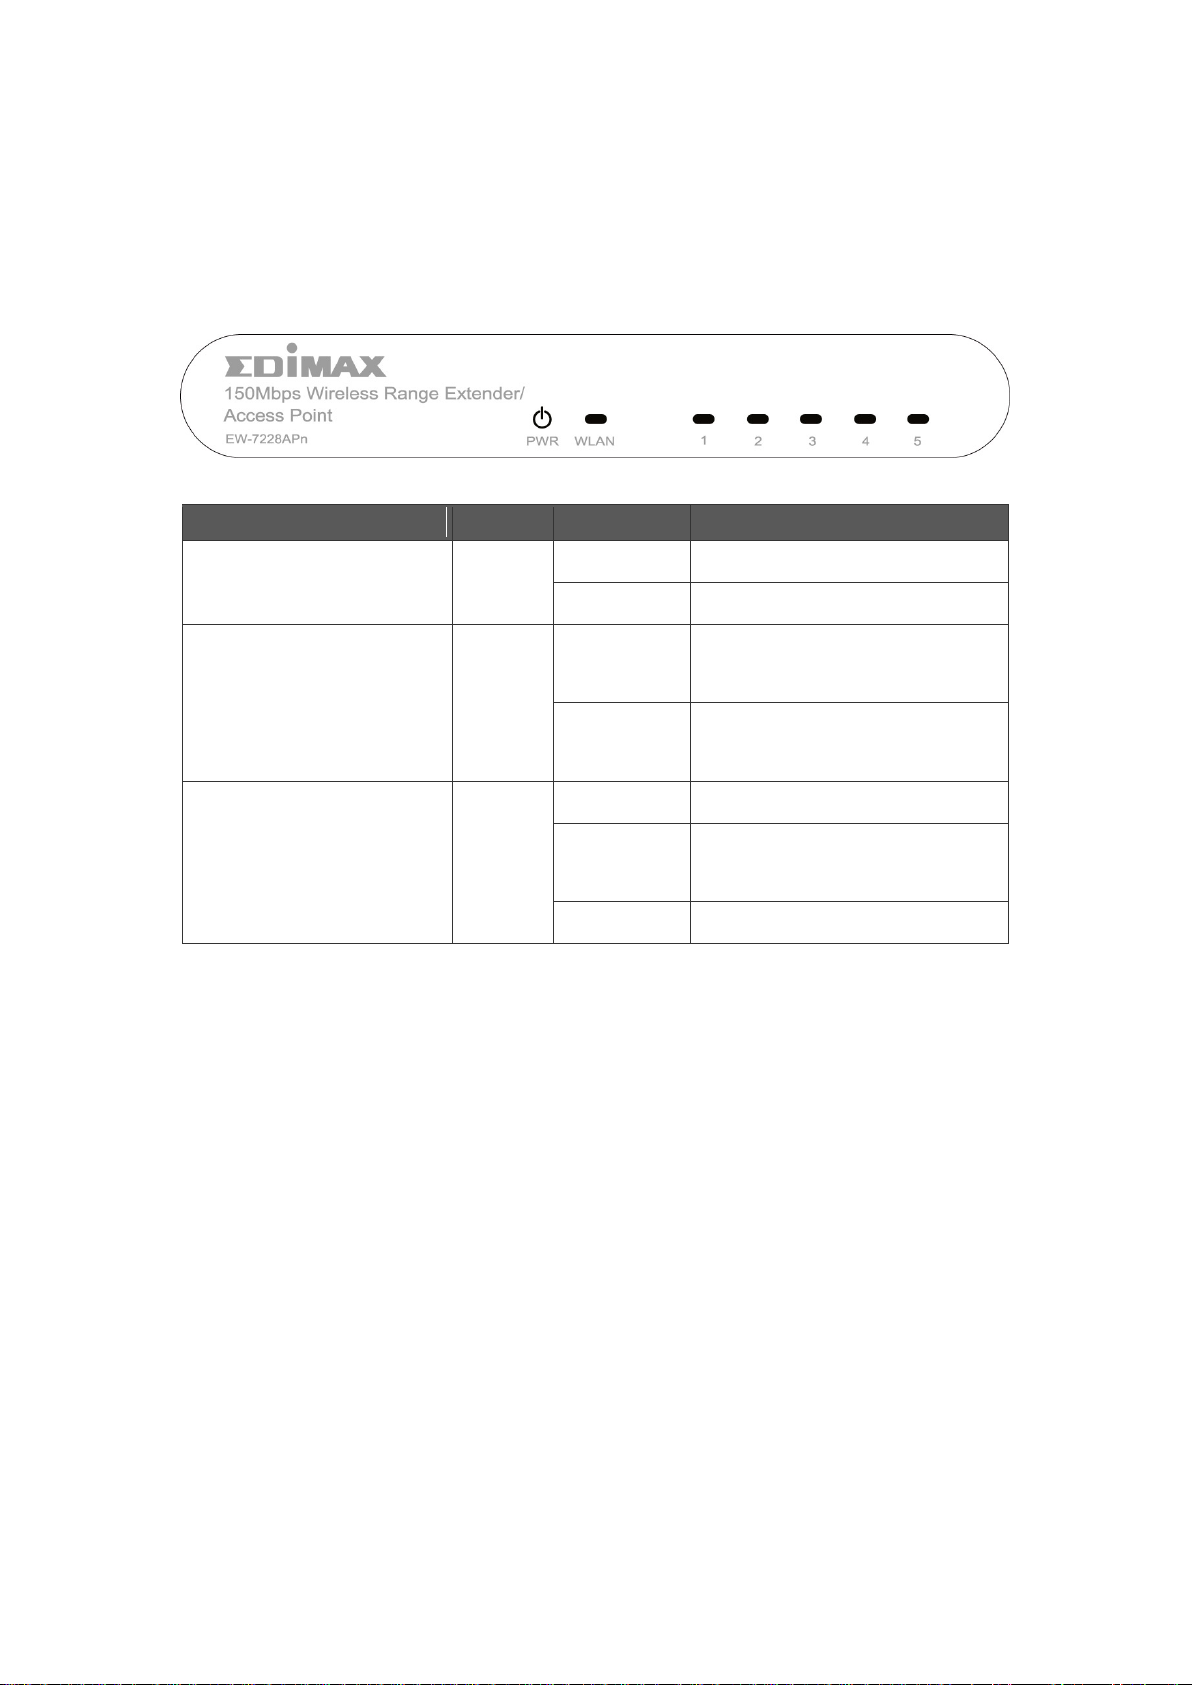
1-5 Familiar with your new wireless access point
LED
Color
Status
Description
PWR
(Power)
Green
Lit
Power is supplied.
Off
No Power.
WLAN
(Wireless LAN)
Orange
Flash
Wireless is transmitting or
receiving data.
Off
Wireless is not transmitting or
receiving data.
LAN 1~ 5
(Link / Act)
Green
On
A valid link is established.
Flash
It is transmitting or receiving
data.
Off
No link is established.
Upper Panel
5
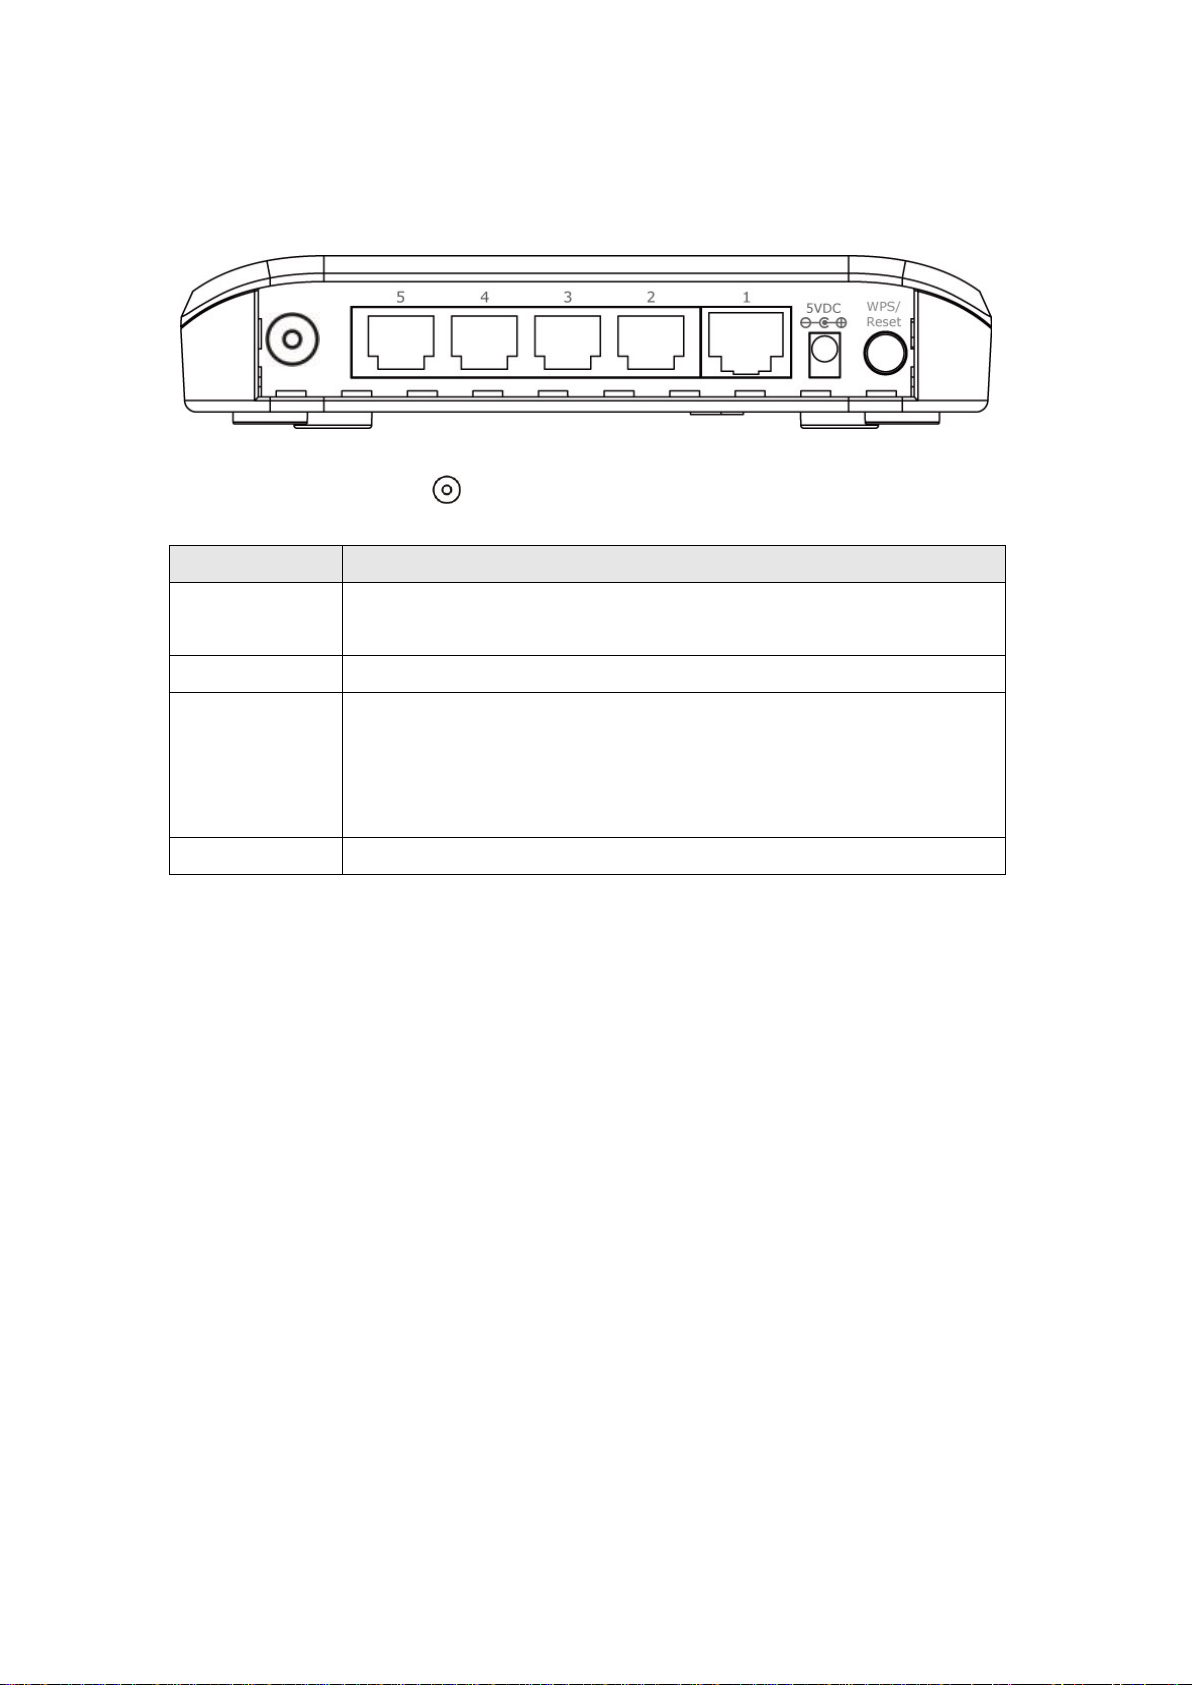
Back Panel
Item Name
Description
Antenna
1 reserve SMA antenna connectors for screwing 3dBi detachable
antennas enclosed with the product.
Power
Power connector, connects to A/C power adapter.
Reset / WPS
Reset the router to factory default settings (clear all settings) or
start WPS function. Press this button and hold for 10 seconds to
restore all settings to factory defaults, and press this button for less
than 5 seconds to start WPS function.
LAN 1~5
Local Area Network (LAN) port.
Antenna Connector
LAN 1~5
This LAN port is where you connect the Access Point to your Ethernet devices
(switch or router or other wired devices).
6

Chapter II: System and Network Setup
2-1 Installing the access point to your Network
Please follow the following instruction to build the network connection
between your new wireless access point and your computers, network
devices:
1. Connect the access point to ADSL modem, router, or switch/hub in
your network through the LAN port of the access point by Ethernet
cable.
2. Connect the A/C power adapter to the wall socket, and then connect it
to the „Power‟ socket of the access point.
3. Please check all LEDs on the front panel. „PWR‟ LED should be
steadily on, LAN LEDs should be on if the access point is correctly
connected to the ADSL modem, router or switch/hub. If PWD LED is
not on, or any LED you expected is not on, please recheck the cabling,
or jump to ‘4-2 Troubleshooting’ for possible reasons and solution.
7

2-2 Connecting to wireless access point by web browser
After the network connection is built, the next step you should do is
setup the access point with proper network parameters, so it can work
properly in your network environment.
Before you can connect to the access point and start configuration
procedures, your computer must be able to get an IP address
automatically (use dynamic IP address). If it‟s set to use static IP address,
or you‟re unsure, please follow the following instructions to configure
your computer to use dynamic IP address:
If the operating system of your computer is….
Windows 95/98/Me - please go to section 2-2-1
Windows 2000 - please go to section 2-2-2
Windows XP - please go to section 2-2-3
Windows Vista please go to section 2-2-4
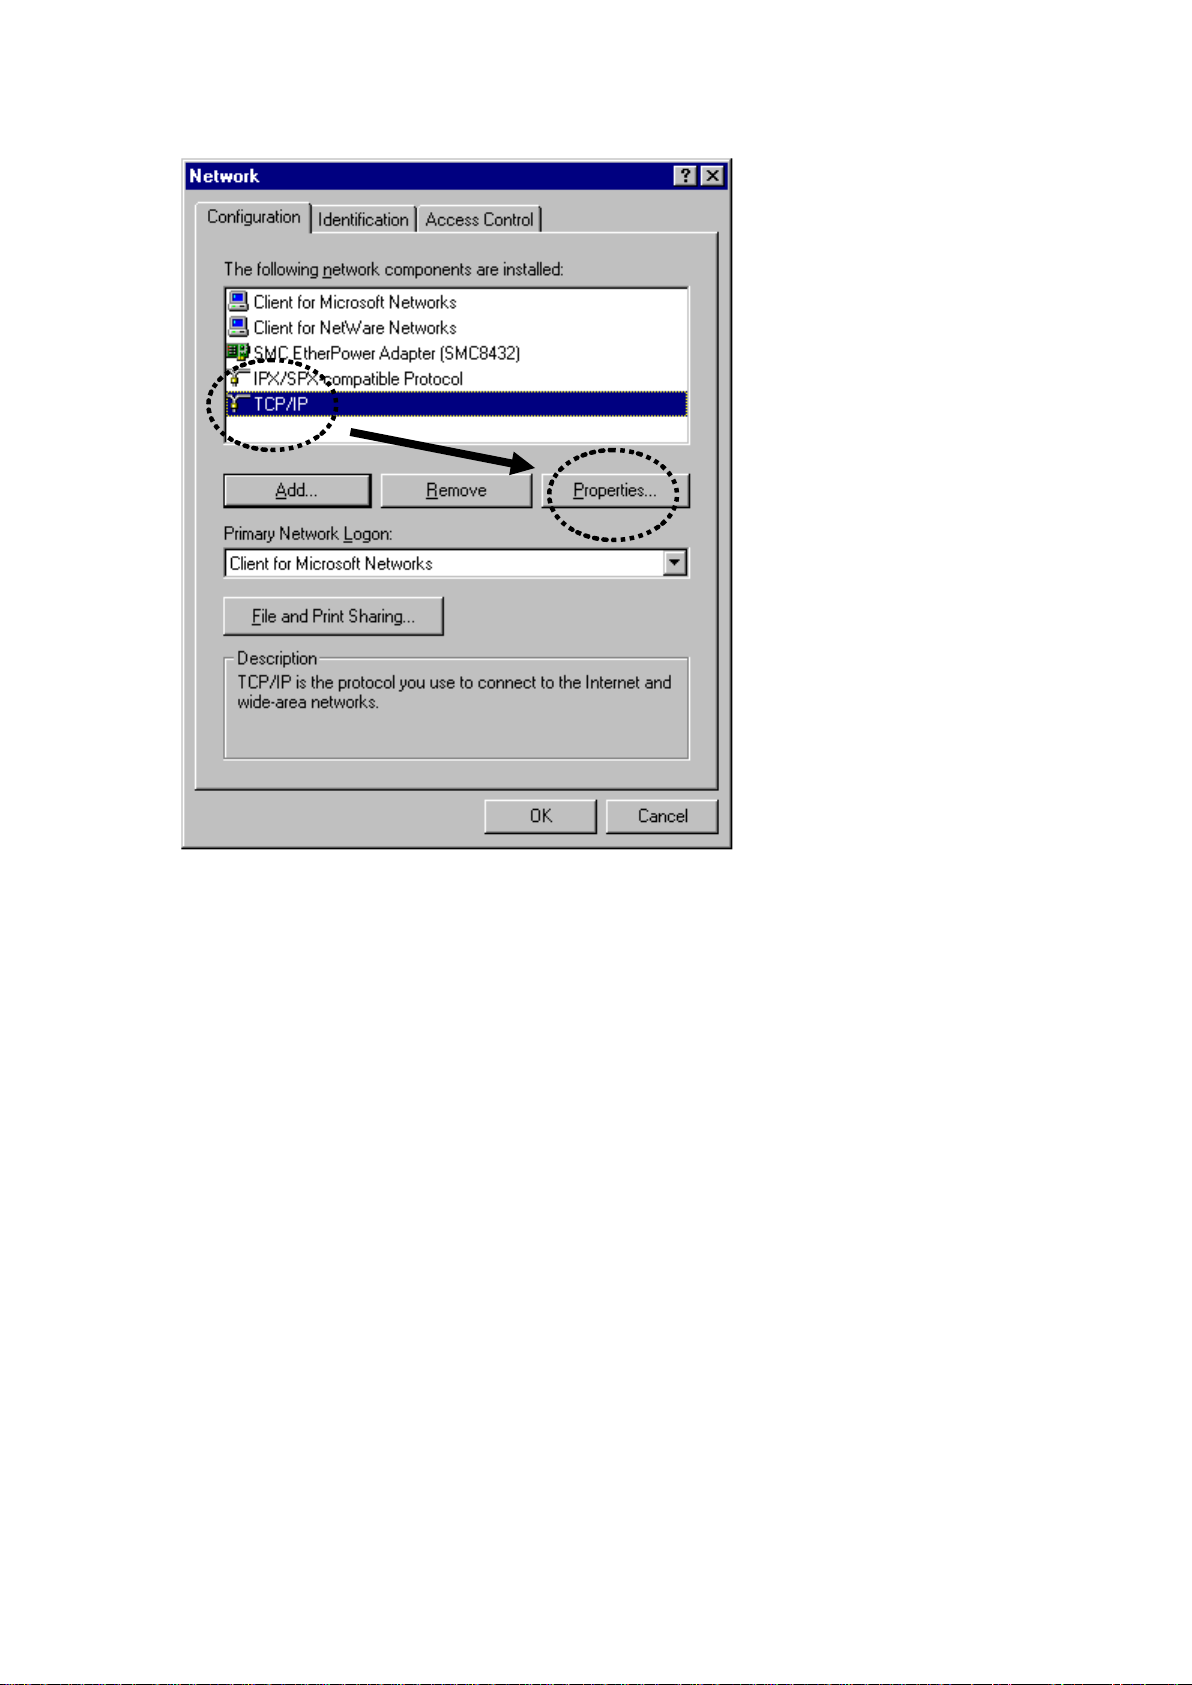
2-2-1 Windows 95/98/Me IP address setup
1. Click „Start‟ button (it should be located at lower-left corner of your
computer), then click control panel. Double-click Network icon, and
Network window will appear. Select „TCP/IP‟, then click „Properties‟.
8
2. Select „Specify an IP address‟, then input the following settings in
respective field:
IP address: 192.168.2.2
Subnet Mask: 255.255.255.0
click „OK‟ when finish.
9

2-2-2 Windows 2000 IP address setup
1. Click „Start‟ button (it should be located at lower-left corner of your
computer), then click control panel. Double-click Network and Dial-up
Connections icon, double click Local Area Connection, and Local Area
Connection Properties window will appear. Select „Internet Protocol
(TCP/IP)‟, then click „Properties‟
10

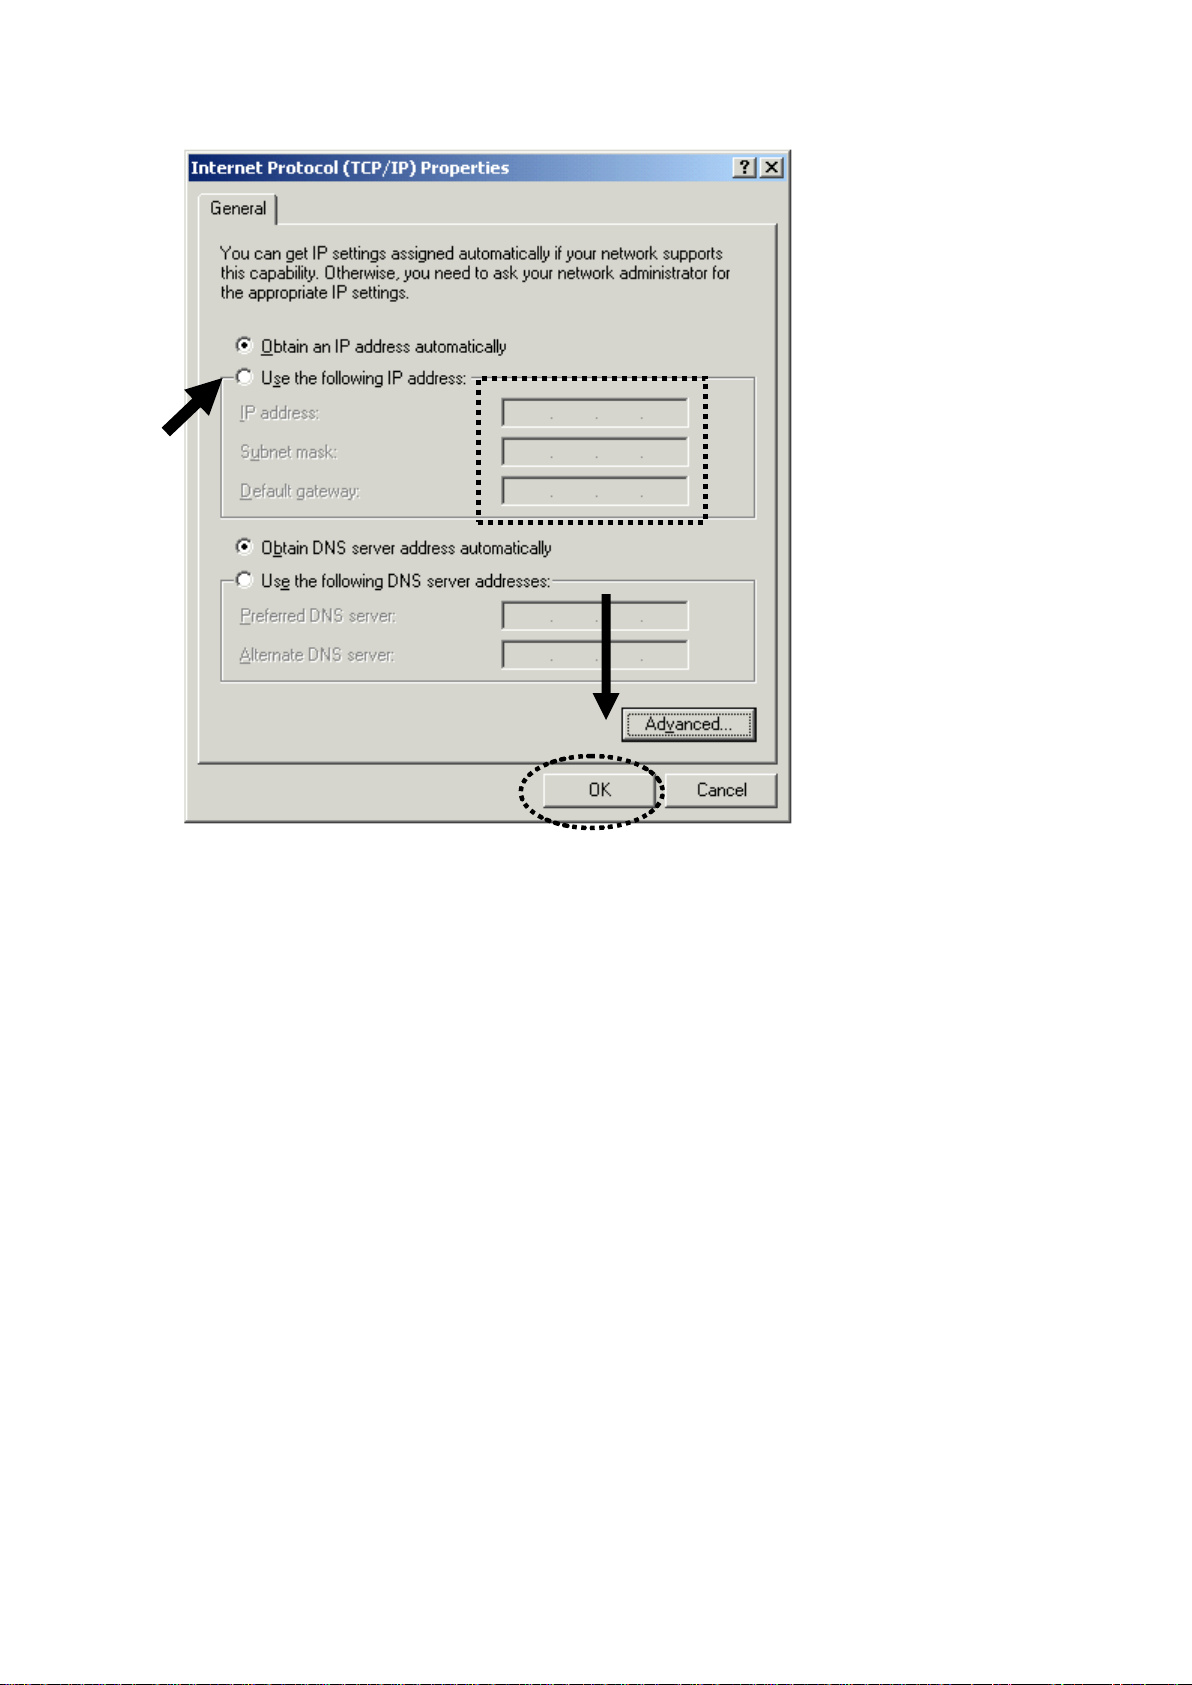
2. Select „Use the following IP address‟, then input the following settings
in respective field:
IP address: 192.168.2.2
Subnet Mask: 255.255.255.0
click „OK‟ when finish.
11
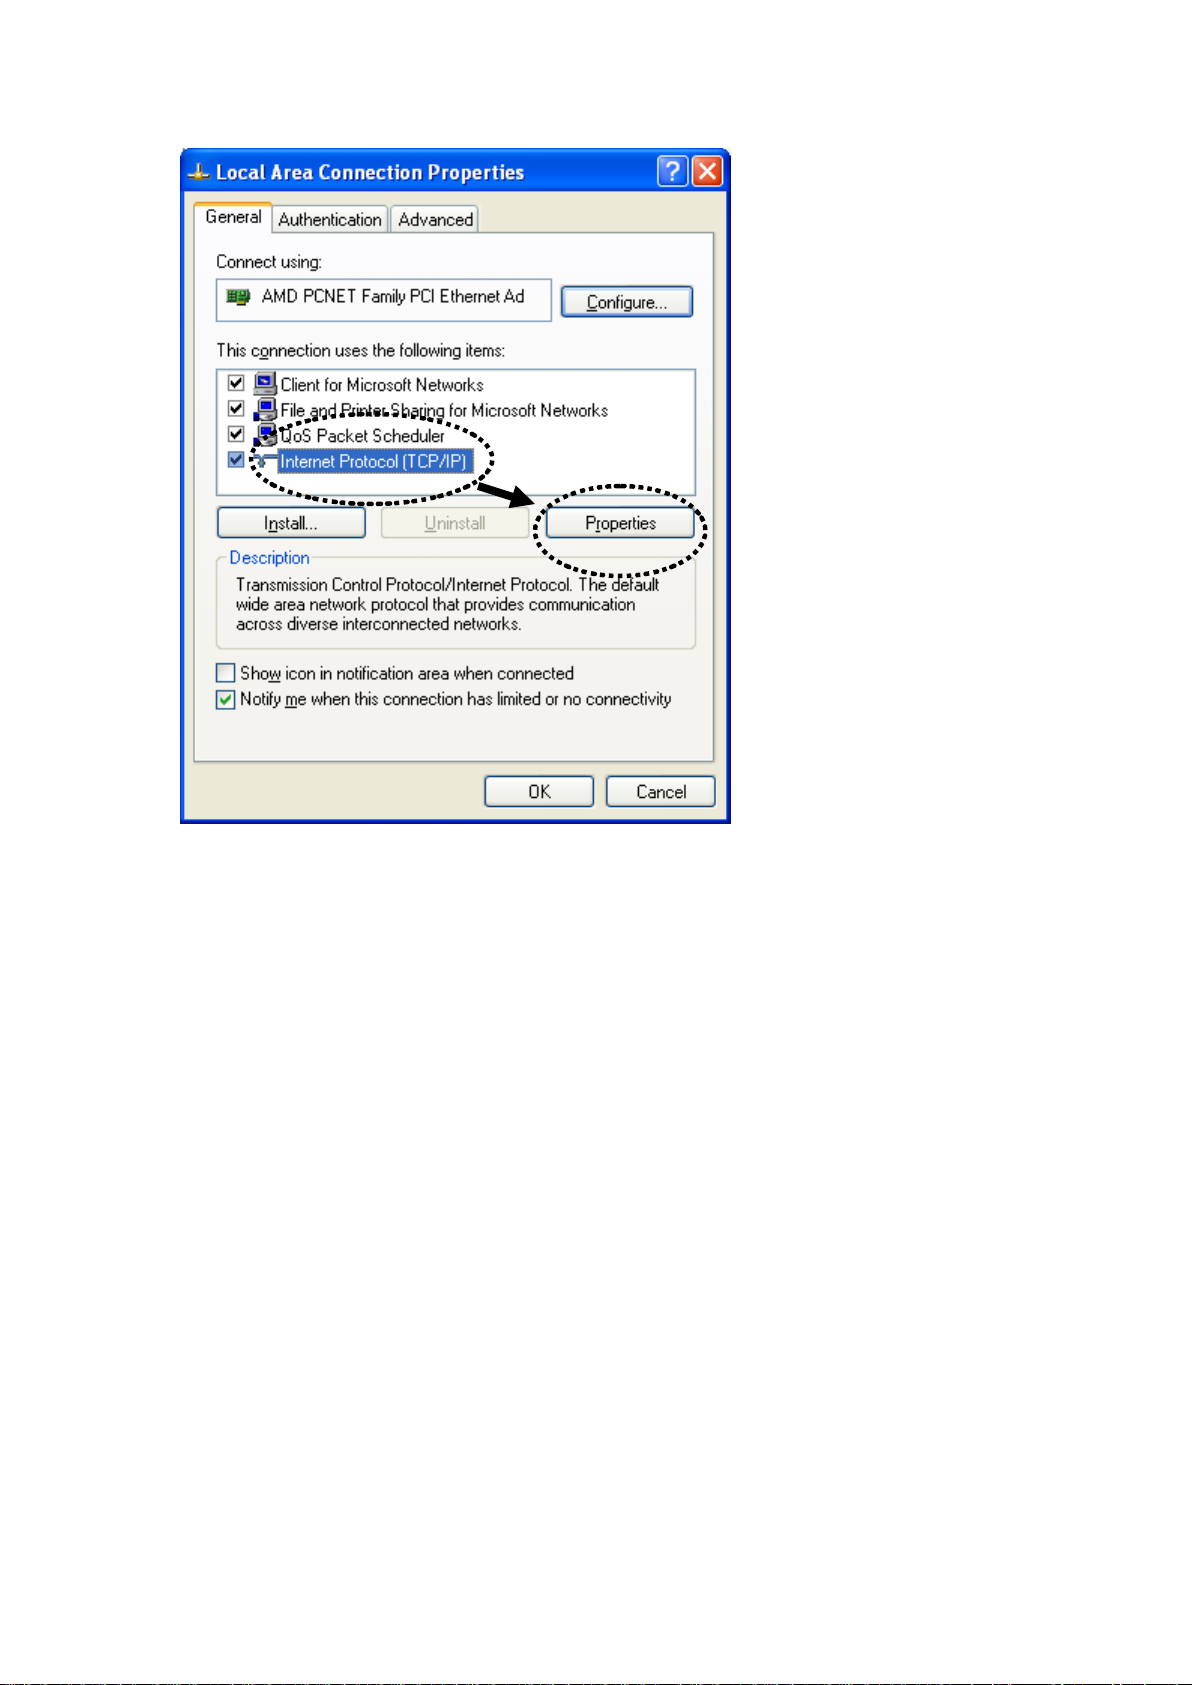
2-2-3 Windows XP IP address setup
1. Click „Start‟ button (it should be located at lower-left corner of your
computer), then click control panel. Double-click Network and Internet
Connections icon, click Network Connections, and then double-click
Local Area Connection, Local Area Connection Status window will
appear, and then click „Properties‟
12
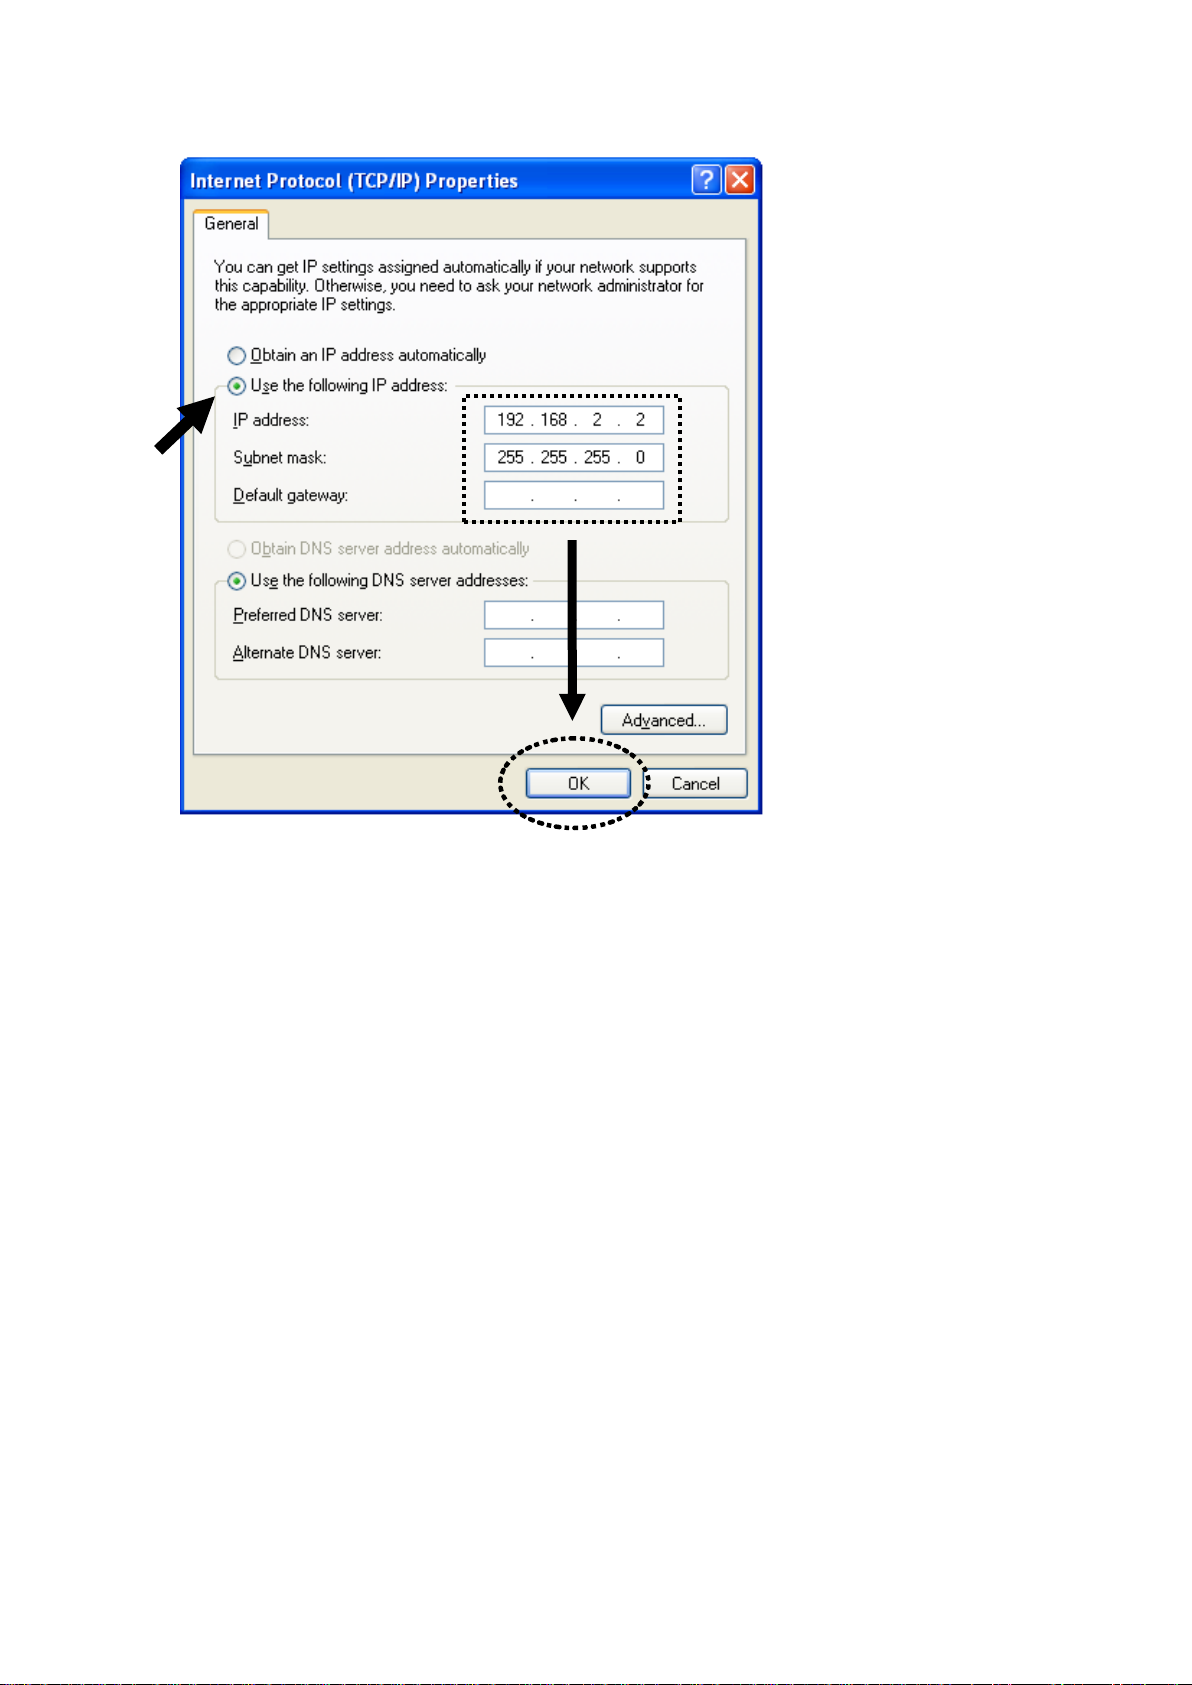
2. Select „Use the following IP address‟, then input the following settings
in respective field:
IP address: 192.168.2.2
Subnet Mask: 255.255.255.0
click „OK‟ when finish.
13
2-2-4 Windows Vista IP address setup
1. Click „Start‟ button (it should be located at lower-left corner of your
computer), then click control panel. Click View Network Status and
Tasks, then click Manage Network Connections..Right-click Local Area
Netwrok, then select ‘Properties’. Local Area Connection Properties
window will appear, select „Internet Protocol Version 4 (TCP / IPv4), and
then click „Properties‟
14

2. Select „Use the following IP address‟, then input the following settings
in respective field:
IP address: 192.168.2.2
Subnet Mask: 255.255.255.0
click „OK‟ when finish.
15

16 17
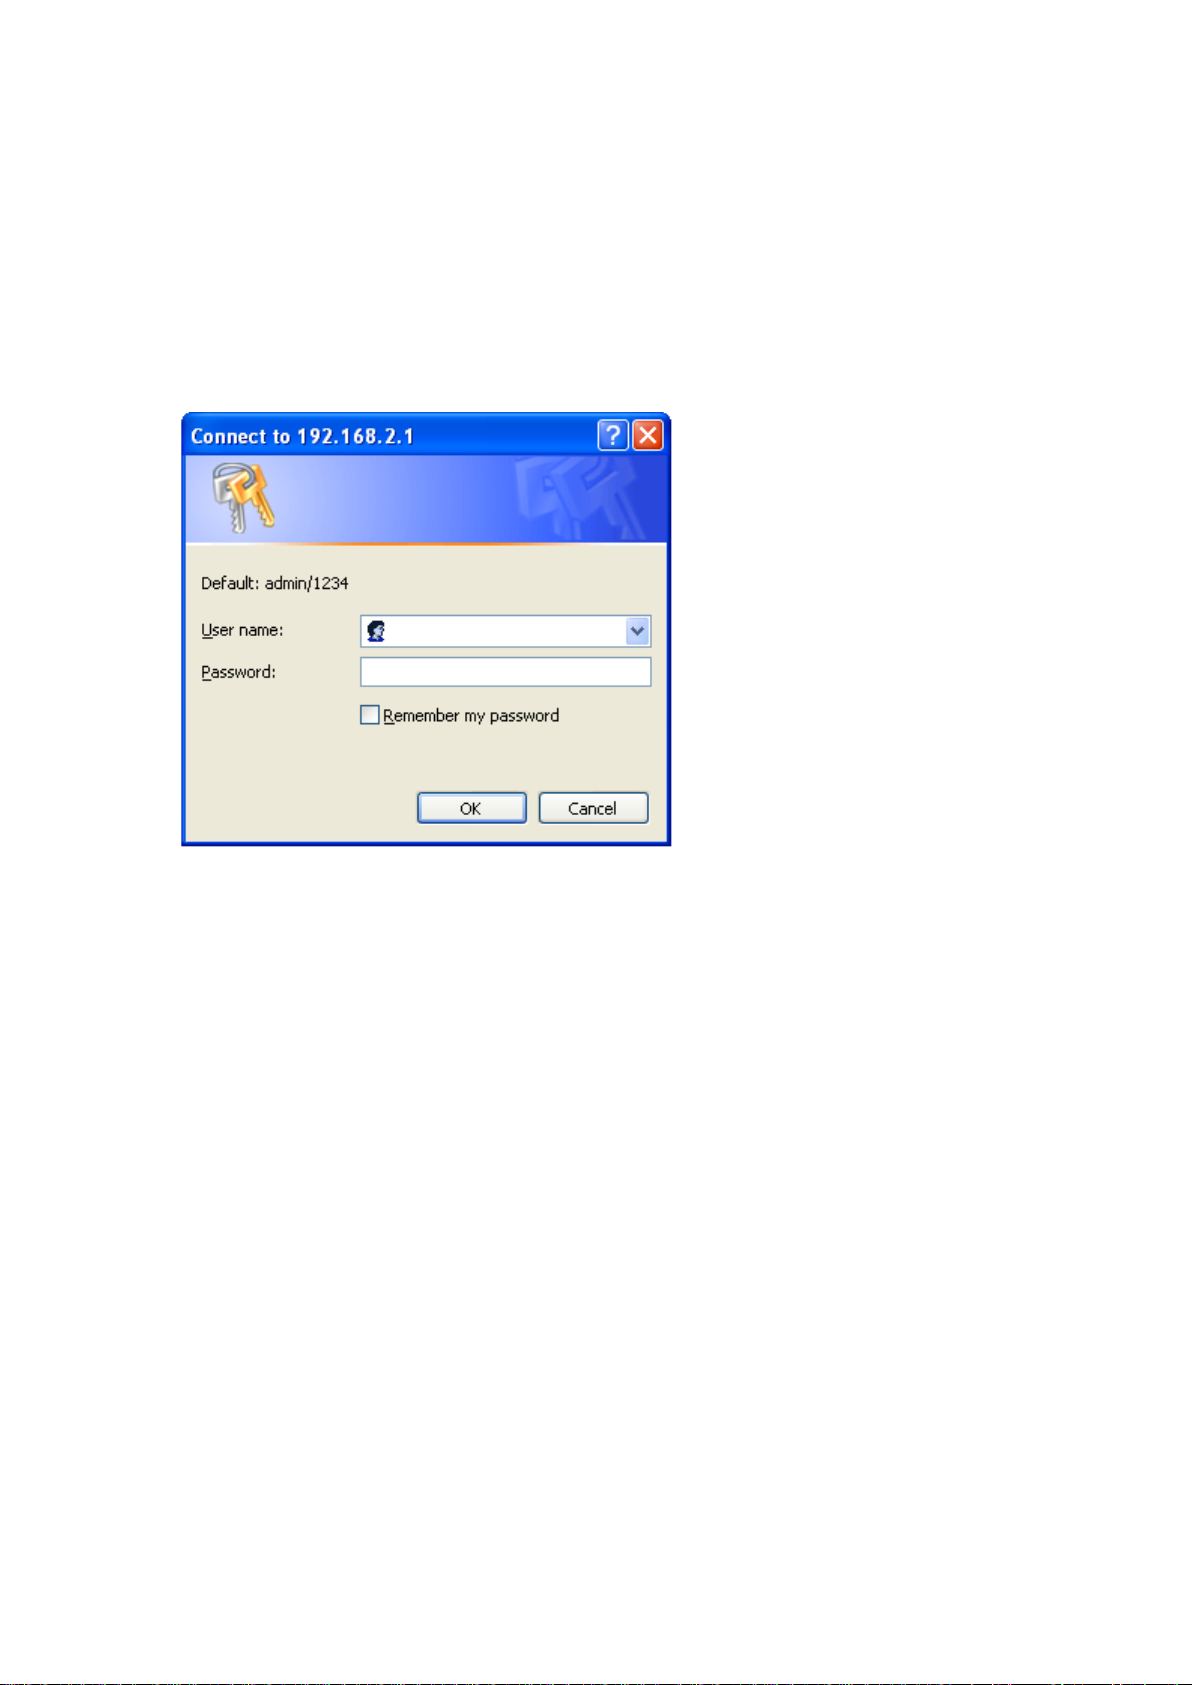
2-2-5 Connecting to Web Management Interface
All functions and settings of this access point must be configured via web
management interface. Please start your web browser, and input
„192.168.2.1‟ in address bar, then press „Enter‟ key. The following
message should be shown:
Please input user name and password in the field respectively, default
user name is „admin‟, and default password is „1234‟, then press „OK‟
button, and you can see the web management interface of this access
point:

NOTE: If you can’t see the web management interface, and you’re
being prompted to input user name and password again, it means you
didn’t input username and password correctly. Please retype user
name and password again. If you’re certain about the user name and
password you type are correct, please go to ‘4-2 Troubleshooting’ to
perform a factory reset, to set the password back to default value.
18
 Loading...