


10330
WARNING: Failure to follow these warnings and instructions
could result in serious injury or death.
• FALL HAZARD—To help prevent falls, do not use this product when the
infant begins to push up on hands and knees or has reached 15 pounds
(6.8 kg), whichever comes first.
•
SUFFOCATION HAZARD—Infants can suffocate:
• In gaps between an extra pad and side of the bassinet.
• On soft bedding.
•
NEVER add a mattress, pillow, comforter or padding. Use ONLY the pad
provided by manufacturer.
• Use
ONLY the bedding provided by the manufacturer.
• Strings can cause strangulation! Do not place items with a string around a
child's neck, such as a hood strings or pacifier cords. Do not suspend
strings over a bassinet or attach strings to toys.
•
NEVER use bassinet without bedding provided with the product.
• CHECK your child frequently, accidents can happen quickly.
• DO NOT place more than one infant in the bassinet.
• DO NOT move or carry the bassinet with the child in it.
• DO NOT use around pets or other children without caster locks on.
• DO NOT allow children to play on or around bassinet.
• DO NOT use bassinet in a motor vehicle.
•
NEVER use near steps or stairs.
• DO NOT USE bassinet if any parts are missing or broken. Contact Consumer
Relations for replacement parts and instructional literature if needed.
•
NEVER use plastic shipping bags or other plastic film as a mattress cover.
They are not sold or intended for that purpose as they can cause
suffocation.
• T
o reduce the risk of SIDS, Pediatricians recommend healthy infants be placed
on their backs to sleep, unless otherwise advised by your physician.
Keep These Instructions
For Future Use
up to
11.3kg
25lbs
Jusqu'à
11,3kg
25lbs
Hasta
11.3kg
25lbs
up to
6.8kg
Jusqu'à
6,8kg
Hasta
6.8kg
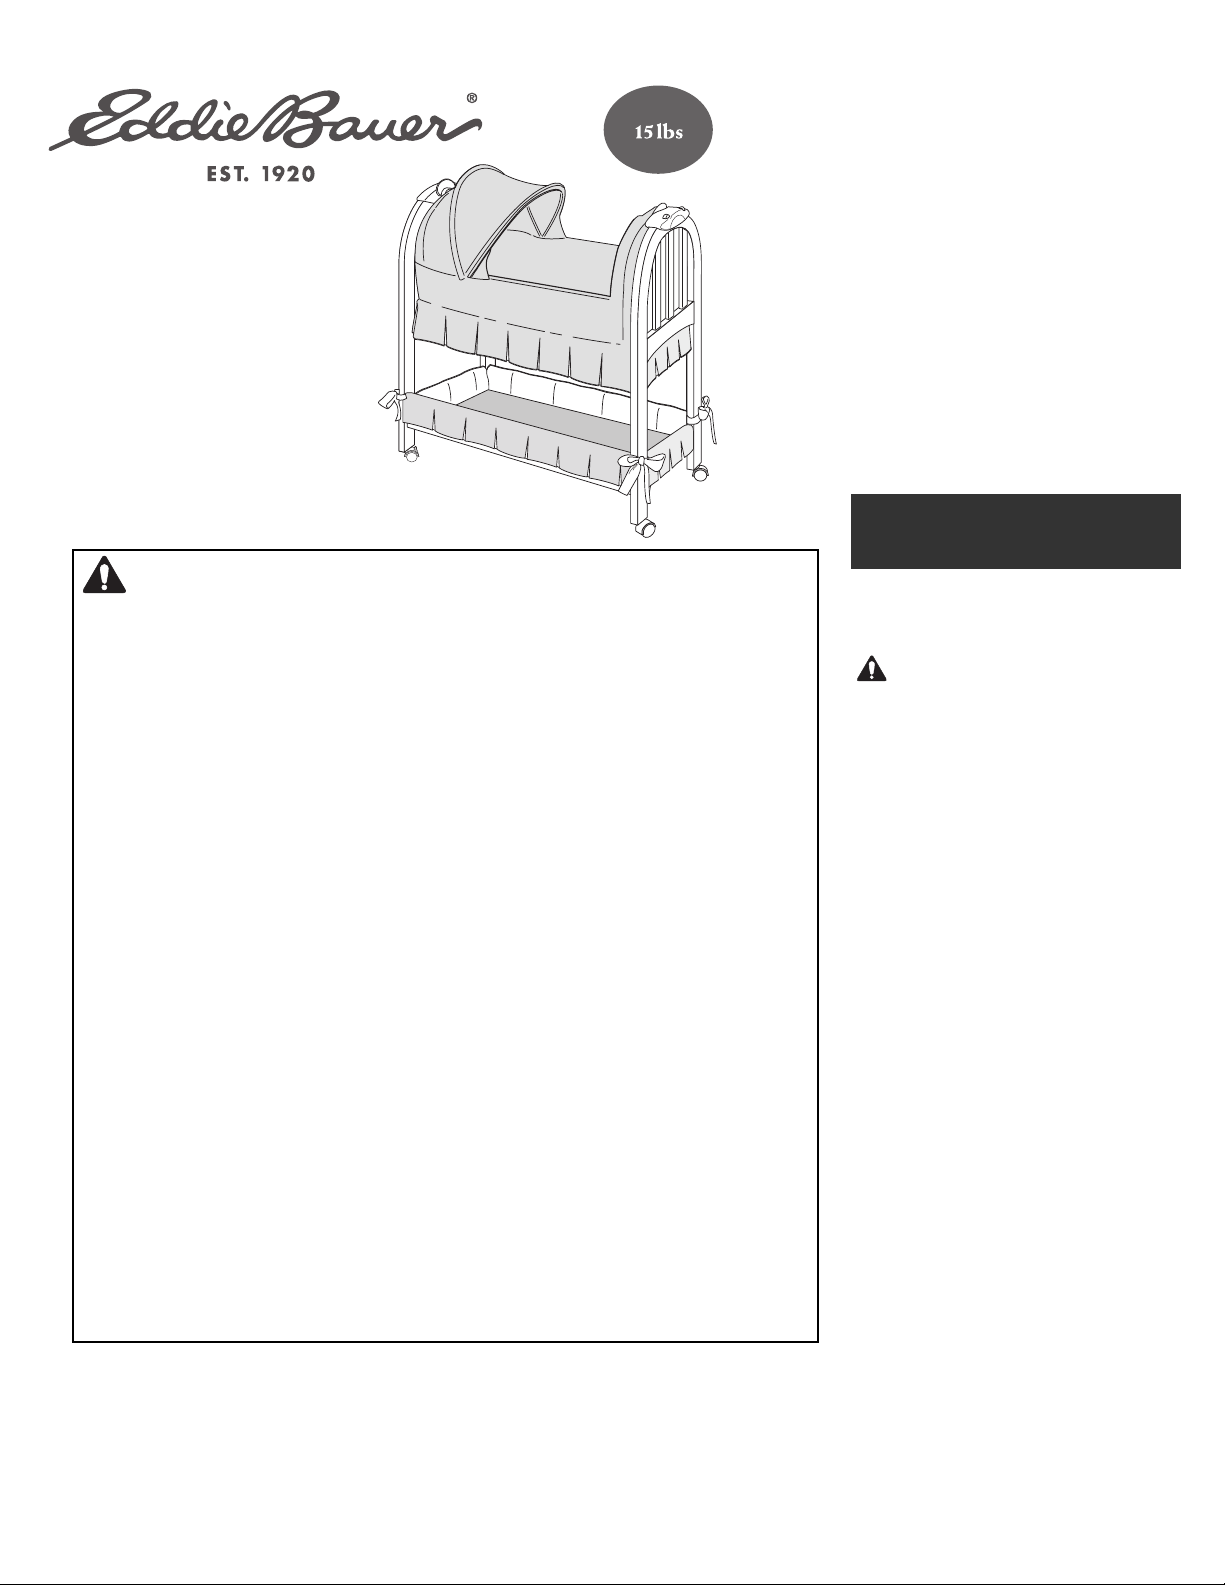
Introduction
Thank you for purchasing the Eddie
Bauer Musical Rocking Bassinet. To
ensure that you benefit from all the
great features your Eddie Bauer
Musical Rocking Bassinet has to offer,
and to make sure that you operate it
properly, we urge you to:
• Adult assembly required.
• Tools needed: Phillips head
screwdriver.
CAUTION:
• Keep small parts away from child
during assembly.
• Remove all contents from packaging
and discard box, and/or poly bags.
• Lay out and identify all parts.
• Read all instructions before assembly
and use of bassinet.
• Do not return this product to the
place of purchase, If any parts are
missing, call Consumer Relations at
(800) 544-1108. Or visit our web site
at www.djgusa.com/eddiebauer.
• Include the model number
(10330, 10332, or 10339) and date
code (manufacture date) located
underneath Basket Board.
• Batteries not included. 3 “AA” sized
alkaline batteries needed. Dispose of
batteries safely.
User Guide
Questions? Comments?
Missing Parts? Contact Us:
www.djgusa.com/eddiebauer
(800) 544-1108
Musical
Rocking
Bassinet
10330, 10332, & 10339
Dorel Juvenile Group, Inc. is an authorized licensee of Eddie Bauer, Inc.
Eddie Bauer® is a registered trademark of Eddie Bauer, Inc.
©2006 Dorel Juvenile Group. All Rights Reserved.
www.djgusa.com (800) 544-1108
www.djgusa.com/eddiebauer.com
Made in CHINA. Hecho en CHINA.
Styles and colors may vary. Los estilos y los colores pueden variar.
Distributed by (distribuido por) Dorel Juvenile Group, Inc.,
2525 State St., Columbus, IN 47201-7494
Dorel Distribution Canada, 873 Hodge, St. Laurent, QC H4N 2B1
09/08/06 4358-3534B

Basket Parts
Wood Frame Parts
Parts List
2
Tools Needed: Phillips head screwdriver
Bedding
Storage Skirt
Pad
Sheet
Metal Side Rails (with foam tops) (2)
Basket Board
Metal Basket Ends (with plastic housing) (2)
Basket Hardware
A
B
C
D
E
F
Hardware
Casters (2 with locks)
Music Module
Slide Locks (2)
Headboard (2)
Storage Board
Bottom Rail Assembly
Rail (2)
NOTE: The
manufacturing
date code is
underneath
Basket Board.
I
J
K
L
M
N
A
C
E
F
H
G
Screw (8)
Screw (4)
I
M
K
N
O
J
P
Bushing
(4)
Shoulder
Bolt (2)
Barrel Nut
(2)
Wood
Dowel (8)
O
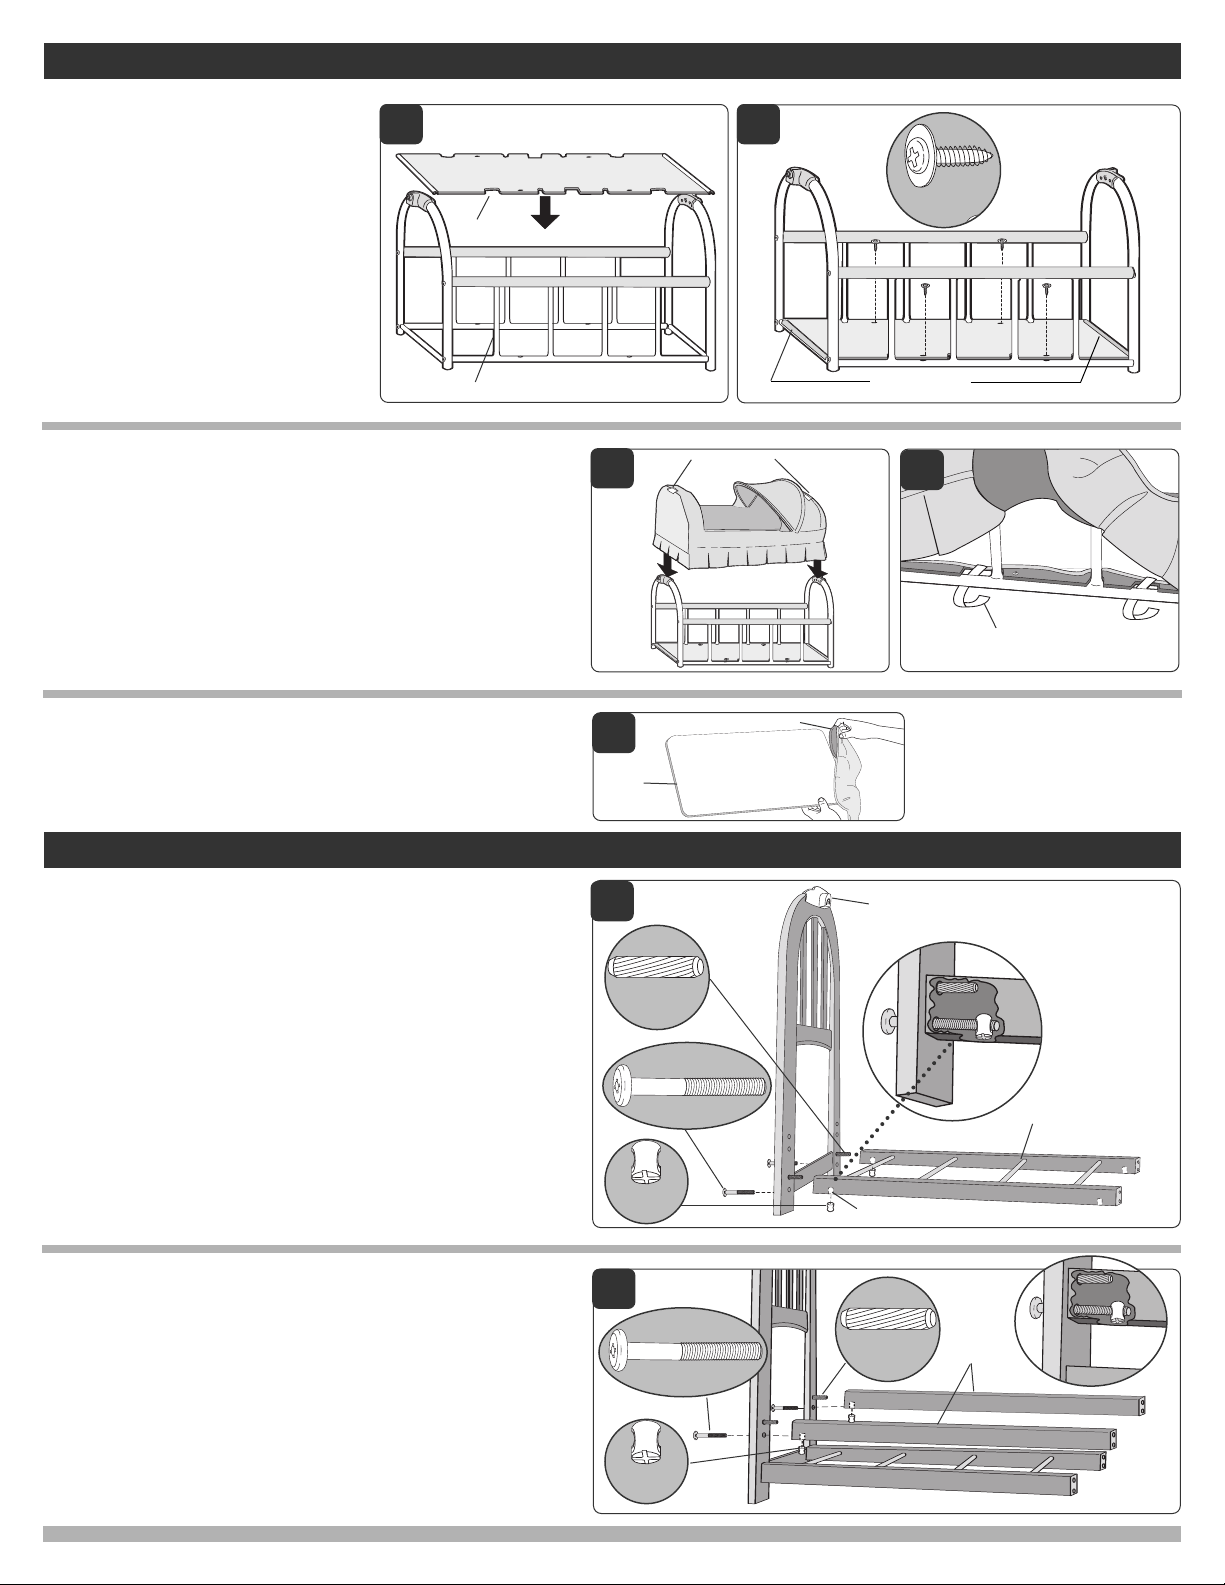
1 Metal Side Rails:
Locate two
Metal Basket Ends.
Position with knobs out
(Figure 1).
Position
two
Metal Side Rails
with foam on top. Secure one
Metal Basket End to Metal Side
Rails using four screws. Repeat
on other Metal Basket End
(Figure 1a).
1a
1
Foam Up
To Assemble Basket
Bolt (8)
Sound Module
Mounting
Screw (2)
Knobs Face Out
Screw (8)
B
D
L
G
H
P
T-Nut (8)
3
To Assemble Basket
(continued)
2 Basket Board:
Locate
Basket Board and position
with ten strips underneath
. Line up
notches to bars and slide
Basket
Board down
(Figure 2).
Press plastic ends firmly onto
metal
(Figure 2a).
Secure
Basket Board
to
Metal Side
Rails
with four screws (Figure 2a).
2a
3 Bedding:
Slip
Bedding over Metal Frame Assembly and pull down
completely (Figure 3). Arrange holes in fabric opening over
plastic knobs and tuck fabric inside frame.
Lift ruffles on Bedding and loop six straps through slots in
basket board. Loop four end straps through slots in plastic
ends. Secure each strap to patch under Basket Board
(Figure 3a).
3
3a
Openings
1 Bottom Rail Assembly:
TIP: Assemble with Headboard placed on its side.
Locate holes in Headboard. Place two wooden dowels in
second holes from the bottom (Figure 1). Dowels should be
placed on same side as knobs.
Locate Bottom Rail Assembly and position (as shown) with
T-nut hole facing down (Figure 1). Slide end of Bottom Rail
Assembly onto wooden dowels.
Position T-nuts with cross facing down and hole facing so as to
receive bolt. Place T-nuts into holes and secure using two bolts
(Figure 1).
NOTE: Do not assemble other Headboard until Step 3.
1
Screw (4)
2
Notch
Bar
Strap
To Assemble Wood Frame
Knob Faces In
Bolt (2)
2 Rail:
Place two wooden dowels in top holes of Headboard
(Figure 2).
Locate Rails and slide hole without metal insert onto dowels
(Figure 2).
Position T-nuts with cross facing down and hole facing so as to
receive bolt. Place T-nuts into holes and secure using two bolts
(Figure 2).
Wood
Dowel (2)
Bolt (2)
2
Plastic Ends
Bottom Rail
Assembly
Rails
4 Pad and Sheet:
Slide Pad into opening of Sheet (Figure 4) and secure
together.
Place covered Pad into Basket.
4
Pad
Sheet
Wood
Dowel (2)
T-Nut
(2)
T-Nut Hole Faces Down
Inside
View
Inside
View
T-Nut
(2)

3 Second Headboard:
Position Headboard with knob facing in. Repeat Steps 1 and 2 for
other Headboard
(Figure 3).
3
4
4 Casters:
Locate two Casters with locks (Figure 4).
Locate four holes at bottom of Headboards. Push two
Casters with locks into the holes diagonally from one
another (Figure 4a).
Push remaining two Casters in the opposite holes. Stand
Wood Frame upright.
4
To Assemble Wood Frame
(continued)
Locks
4a
5 Storage Area:
Locate Storage Skirt and Storage Board. Slide Storage Board
into opening of Skirt (Figure 5).
Place covered Storage Board on Bottom Rail Assembly and
arrange ruffles of Skirt over Rails. Tie a bow around each
corner (Figure 5a).
5
Storage
Board
5a
6 Music Module:
Slide Music Module over plastic mount with battery door
toward outside (Figure 6).
Remove battery door, using a Phillips head screwdriver
(Figure 6a). NOTE: Do not replace battery door yet.
6 6a
Battery Door
8
8 Slide Locks:
Locate Slide Locks and orient with their concave sides facing
in. Tilt Slide Lock and pivot firmly onto the knob
(Figure 8).
Repeat on other side.
Diagonally
7
7 Secure Music Module:
Secure Music Module with two Mounting screws, but do not
over tighten
(Figure 7).
Music Module
Mounting Screw
(2)
Knobs Face In
 Loading...