

Page 1
CD Multi-Source Receiver
CD Multi-Source Receiver
CD Multi-Source Receiver
Page 2
Introduction
For your safety in using the CD3100
Warnings and caution signs, illustrated below, are posted throughout this manual as well as on the
CD3100. They show safe and correct ways to handle the product so as to prevent personal injury to
you, others and to avoid property damage.
Before reading through the manual, take time to read through and learn the important information listed
in this section.
This sign indicates a situation in which incorrect handling or
Warning
Caution
Please read all materials such as manuals and warranties that have come with the product.
Eclipse will not be liability for unsatisfactory product performance due to failure to follow these
instructions.
WARNING
● Do not modify this system for use other than that specified herein. Also, do not deviate
from the installation procedures described herein; Eclipse will not be held liable for
damages including, but not limited to serious injury, death or property damage resulting
from installations that enable unintended operation.
● This main unit requires 12V DC and should only be installed in a vehicle with a 12V negative
ground electrical system. Any other installation may cause a fire or other severe damage
to the main unit and the vehicle.
● Never install this main unit where it will interfere with safe operation of the vehicle. Never
block the drivers' view. Do not install main unit where it may interfere with operation of the
brakes, the steering or any safety main unit, including seat belts and air bags.
● Before drilling holes in a vehicle for installation, you must confirm the locations of pipes,
tanks, electrical wiring, and other vehicle systems and components to ensure that there will
be no interference or contact. In addition, you must also apply rust prevention and leak
prevention measures at the drilling area. Otherwise, fire or electric shock could occur.
● When installing main unit do not remove or alter existing vehicle fasteners, including nuts,
bolts, screws, clips, and fittings. Never detach, move or alter existing vehicle wiring,
including electrical grounds and straps. Alteration of existing vehicle components may
make vehicle unsafe to operate.
● Before installation, remove the negative (-) battery terminal to prevent shocks, electrical
arcing, fires, and damage to vehicle wiring and the main unit you are installing.
● Secure wiring with tape or plastic ties so that wires do not interfere with vehicle operation,
including brake pedal, gear shifter and steering. Position wires so that they will not be
rubbed, abraded, or damaged by moving vehicle components, including power seats.
● To avoid main unit and vehicle damage, including fire, never supply power to installed main
unit in a way which will overload the capacity of an existing vehicle circuit. Never leave a
power supply wire or connection uninsulated. Always install supplied fuses, circuit
breakers, and relays.
disregard of this sign might result in death or serious personal
injury.
This sign indicates a situation in which incorrect handling or
disregard of this sign might result in personal injury or may
result solely in damage to property.
2
Page 3

For your safety in using the CD3100
WARNING
● Air bags are vital safety main unit. Never install main unit in a way which will alter air bag
wiring or interfere with air bag deployment. Air bags must function properly in the event of
an accident.
● When installation is complete, test all vehicle electrical systems for proper operation,
including lights, horn, brake lights, and emergency flashers.
● For your protection, never use a power drill without safety glasses or goggles. Debris or
broken drill bits may cause severe eye injuries, including blindness.
● Use electrical tape to insulate the ends of all wires, even if not used. Proper insulation
prevents arcs, shocks and fires.
● Some main unit uses batteries. Never install main unit where young children can get
access to batteries. If a battery is swallowed, seek medical attention immediately.
● When vehicle is moving, never take your eyes off the road to make adjustments to the main
unit. You must pay attention to the road to avoid accidents, do not let the operation or
adjustment of the main unit distract you from proper vehicle operation.
● The driver should not look at the screen while driving. Accidents may result if you are not
paying attention to the forward direction.
● Do not put foreign objects in the loading slot of disc. Fires or shocks may result.
● Do not disassemble or alter this main unit. Accidents, fires or shocks may result.
● Do not let water or foreign objects enter the internal parts of this main unit. Smoke, fires or
shocks may result.
● Pay attention to where the remote control is left. Traffic accidents or problems with driving
may result if the remote control makes its way under the foot pedals etc. when the vehicle
is stopped or when it goes around a corner.
● Do not use when it is broken (the screen is not lit or no sound comes out). Accidents, fires
or shocks may result.
● Always replace fuses with fuses of identical capacity and characteristics. Never use a high
capacity fuse than the original. Using the wrong type of fuse may cause a fire or severe
damage.
● If foreign objects or water enters the main unit, smoke comes out, or there is a strange
odor, stop using it immediately, and contact your dealer. Accidents, fires, or shocks may
result if you continue to use it in these conditions.
● The driver should not change the CD while driving. As accidents may result if you are not
paying attention to the forward direction, first stop the car at a safe location and then
proceed.
● Plastic bags and wrappings may cause suffocation and death. Keep away from babies and
children. Never put bag over your head or mouth.
I
3
Page 4

Introduction
CAUTION
● Wiring and installing this main unit requires expertise and experience. Professional
installation is recommended. Consult with your dealer or a professional installer. Incorrect
wiring may damage the main unit or interfere with safe vehicle operation.
● Use only the accessory parts as specified. Using other parts may cause damage to the
main unit or cause parts to fall or fly off the main unit.
● Do not install the main unit in places where it may get dew condensation on (around the air
conditioning hose, etc.), come in contact with water, or in condition of high moisture, dust
or oily smoke. If water, moisture, dust or oily smoke enters this main unit, smoke, fires or
malfunctions may result.
● Avoid installing in places where it cannot be fastened securely or where there are strong
vibrations. Also, if you installed the main unit with double-sided tape, first wipe away dirt
and wax from the installation area. Otherwise, the main unit may come loose due to
vibration while driving, causing problems for driving and resulting in traffic accidents or
injuries.
● Do not install in places with direct sunlight or where it will be hit directly by hot air from the
heater. This may increase the temperature of the interior of this main unit, resulting in fires
and malfunctions.
● Do not block the fan, heat sink or vents of this main unit. When fan, heat sink or vent is
blocked, the interior overheats, and fires may result.
● Connect as specified in the installation manual. If not connected normally, fires or
accidents may result.
● When installing in vehicles equipped with air bags, check the manufacturer's cautions
regarding operation before operating. Airbags may not operate properly.
● Carry out the wiring such that cords are not pinched by movable parts such as seat rails,
and screw parts of the vehicle body. Accidents, fires and shocks may result from
disconnection and electrical shorts.
● Carry out the wiring such that the cord does not make contact with metal parts. The cord
maybe be damaged by contact with metal parts, resulting in fire and shocks.
● Avoid hot surfaces when wiring main unit. High temperatures may damage wiring, causing
shorts, arcing and fires.
● When changing the installation location for this main unit, please consult the dealer where
you bought it for safety reasons. Expertise is necessary for removal and installation.
● Keep volume to a reasonable level so that you can hear sounds from outside the vehicle,
including warning sounds, voices, and sirens. Failure to do so may cause an accident.
● Be careful that hands and fingers are not pinched when adjusting the tilting angle or
closing display. Injuries may result.
● Do not put your hands or fingers into the loading slot of disc. Injuries may result.
● Do not touch the heat dissipating part of the amp. Burns may result from the heat of this
part.
● Do not recharge dry batteries. Dry batteries may rupture, resulting in injuries.
● Do not use batteries other than those specified. Also, do not mix old and new batteries.
Injuries or pollution to the surroundings may result from battery ruptures and leakage.
4
Page 5

For your safety in using the CD3100
CAUTION
● When inserting batteries into the main unit, be careful with the polarity (positive/negative),
and insert them as indicated. If the battery polarities are incorrect, injuries and pollution to
the surroundings may result from battery ruptures and leakage.
● Replace used batteries as soon as possible; they may leak and damage main unit. Battery
leakage can burn your skin or your eyes. Wash hands after handling.
● If alkaline solution from alkaline dry batteries makes contact with your skin or clothes,
flush with clean water. If any of the solution gets in your eyes, also flush clean with water
and then seek medical attention.
● When disposing of lithium dry batteries, affix insulating tape to the positive and negative
terminals, and after they are insulated, dispose of them according to the "Local municipal
ordinances". Shorts, fires and ruptures may result from disposal when coming contact with
other electrically conductive objects such as metal parts, etc.
● Do not short, disassemble or heat the batteries, or place them in fire or water. Fire and
injuries may result from battery rupture and leakage.
● Store the remote control in a place away from direct sunlight, high temperatures, and high
moisture levels. The case may change shape, and the batteries may rupture and leak.
● Do not use this main unit except for in-vehicle use. Shocks or injuries may result.
● Be careful of the position of the volume when turning the power source ON. Hearing
damage may result if very loud noise is emitted when the power is turned ON.
● Do not operate under abnormal conditions such as when the sound is broken or distorted.
Fires may result.
● This main unit uses invisible laser light. Do not disassemble or alter this main unit. If
trouble occurs, contact the dealer where you bought the main unit.
Altering this main unit may cause exposure to laser emissions (worsening eyesight), or
result in accidents, fires or shocks.
● If the main unit is dropped or the cosmetics appear broken, turn off the power to the main
unit and contact your dealer. If used in this condition, fires or shocks may result.
I
5
Page 6

6
Page 7

Table of Contents
For your safety in using the CD3100 ........................................... 2
Operating precautions ................................................................ 12
Names of controls and parts .....................................................13
How to operate the CD/MP3/WMA player .................................19
How to operate the tuner ............................................................29
How to use the remote control .................................................. 32
How to operate the Area Shot function (U.S.A./CANADA only)
........ 34
How to operate the AUDIO CONTROL ......................................38
How to operate the Sound Adjustment Mode .......................... 40
Making changes with Display Adjustment Mode ..................... 44
Making changes with Function Mode ....................................... 45
How to operate the main unit with an optional CD changer connected
How to operate the tuner with an optional HD Radio tuner connected (U.S.A. only)
How to operate the tuner with an optional XM satellite radio tuner connected
(U.S.A./CANADA only)
How to operate the tuner with an optional SIRIUS satellite radio tuner connected
(U.S.A./CANADA only)
...........................................................................51
...........................................................................54
........ 48
..... 50
I
II
III
IV
V
VI
VII
VIII
IX
X
XI
XII
XIII
XIV
XV
How to operate the main unit with an optional Interface Adapter for iPod® connected
......... 57
Others ..........................................................................................61
If you have a question: ............................................................... 62
Specifications ..............................................................................66
How to contact customer service .............................................. 67
XVI
XVII
XVIII
XIX
XX
7
Page 8

Table of Contents
For your safety in using the CD3100.................................................... 2
Operating precautions ......................................................................... 12
Notes on operation ....................................................................................................... 12
Names of controls and parts............................................................... 13
Turning the power on and off........................................................................................ 15
Switching Audio Modes ................................................................................................ 15
Adjusting volume .......................................................................................................... 15
Switching Rotary Modes............................................................................................... 16
Switching screen .......................................................................................................... 17
Detaching the front panel ............................................................................................. 18
Using the detachable panel.................................................................................... 18
How to remove the detachable panel..................................................................... 18
How to fit the detachable panel.............................................................................. 18
How to operate the CD/MP3/WMA player........................................... 19
About compact discs .................................................................................................... 19
About brand new CDs ............................................................................................ 19
About CD accessories............................................................................................ 20
About borrowed CDs .............................................................................................. 20
How to remove CDs ............................................................................................... 20
About irregularly-shaped CDs ................................................................................ 20
About cleaning a CD..................................................................................................... 20
About MP3/WMA .......................................................................................................... 21
What is MP3/WMA? ............................................................................................... 21
Playable MP3 file standards................................................................................... 21
Playable WMA file standards ................................................................................. 21
ID3/WMA tag.......................................................................................................... 21
Media ..................................................................................................................... 22
Format of discs....................................................................................................... 22
File names.............................................................................................................. 22
Multi-sessions ........................................................................................................ 23
Playing MP3/WMA ................................................................................................. 23
MP3/WMA playing time display.............................................................................. 23
Display order of MP3/WMA file/folder names ........................................................ 23
Listening to CD ............................................................................................................. 24
TRACK (FILE) UP/DOWN ............................................................................................ 25
FOLDER UP/DOWN..................................................................................................... 25
FAST FORWARD/REWIND ......................................................................................... 25
SCAN/REPEAT/RANDOM ........................................................................................... 26
FOLDER SCAN/REPEAT/RANDOM............................................................................ 26
DISPLAYING TITLE ..................................................................................................... 27
Ejecting the disc ........................................................................................................... 28
8
Page 9

Table of Contents
How to operate the tuner..................................................................... 29
Listening to the tuner .................................................................................................... 29
Tuning to a station ........................................................................................................ 29
Operations during rotary mode ..................................................................................... 29
Storing stations into memory automatically
(The automatic preset mode: ASM).............................................................................. 30
Manually setting stations into memory ......................................................................... 30
Preset station scan ....................................................................................................... 30
Changing the reception sensitivity for automatic scanning........................................... 31
Changing the radio band location................................................................................. 31
How to use the remote control ........................................................... 32
Precautions in use of the remote control ...................................................................... 32
Cleaning the remote control ......................................................................................... 32
Replacing the battery.................................................................................................... 33
How to operate the Area Shot function (U.S.A./CANADA only)....... 34
About the Area Shot ..................................................................................................... 34
To use the Area Shot function................................................................................ 34
Map data ................................................................................................................ 35
User Registration Key display ...................................................................................... 35
Reading Area Shot data ............................................................................................... 36
Activating the Area Shot mode ..................................................................................... 36
AREA SHOT Screen Configuration .............................................................................. 37
How to operate the AUDIO CONTROL ............................................... 38
Switching audio control modes..................................................................................... 38
How to operate the Sound Adjustment Mode ................................... 40
About Sound Adjustment Mode.................................................................................... 40
About parametric EQ.............................................................................................. 40
About crossover ..................................................................................................... 41
Setting preset EQ ......................................................................................................... 42
Switching the Sound Adjustment Mode........................................................................ 42
Parametric equalizer adjustment (PEQ) ....................................................................... 42
Adjusting center frequencies and Q curves.................................................................. 42
Crossover adjustment (X-Over).................................................................................... 43
Non-fader phase (NON-FADER) .................................................................................. 43
Making changes with Display Adjustment Mode .............................. 44
Switching the Display Adjustment Mode ...................................................................... 44
Adjusting the contrast (CONTRAST)............................................................................ 44
Changing scroll pattern (SCROLL)............................................................................... 44
Making changes with Function Mode ................................................ 45
Switching the Function Mode ....................................................................................... 45
Setting guide tone (GUIDE TONE) ............................................................................... 45
9
Page 10

Table of Contents
Setting time (CLOCK ADJUST).................................................................................... 45
Switching demonstration screen display (DEMO) ........................................................ 46
Setting the steering remote function (U.S.A. only) ....................................................... 46
Reading steering remote data (U.S.A. only) .......................................................... 46
How to operate the main unit with an optional
CD changer connected........................................................................ 48
Listening to a CD .......................................................................................................... 48
Advancing to the next track or returning to the beginning of the track being played .... 48
Operations during rotary mode ..................................................................................... 48
Fast Forward/Rewind ................................................................................................... 48
Playing the beginning of tracks (SCAN) ....................................................................... 48
Repeating the same track (REPEAT)........................................................................... 49
Playing tracks in random order (RANDOM) ................................................................. 49
Skipping to the next or previous CD ............................................................................. 49
Specifying a CD to play ................................................................................................ 49
How to operate the tuner with an optional HD Radio
tuner connected (U.S.A. only)............................................................. 50
About HD Radio............................................................................................................ 50
Switching between displays when receiving HD Radio ................................................ 50
HD Radio reception settings......................................................................................... 50
How to operate the tuner with an optional XM satellite radio
tuner connected (U.S.A./CANADA only) ............................................ 51
About XM satellite radio................................................................................................ 51
Selecting the radio mode.............................................................................................. 51
Selecting a channel ...................................................................................................... 51
Operations during rotary mode .............................................................................. 51
Category selection ................................................................................................. 51
Direct channel selection ............................................................................................... 52
Manually setting channels into Memory ....................................................................... 52
Preset channel scan ..................................................................................................... 52
Switching displays when using the XM satellite radio .................................................. 52
Displaying XM ID .......................................................................................................... 53
How to operate the tuner with an optional SIRIUS satellite radio
tuner connected (U.S.A./CANADA only) ............................................ 54
About SIRIUS satellite radio ......................................................................................... 54
Selecting the radio mode.............................................................................................. 54
Selecting a channel ...................................................................................................... 54
Operations during rotary mode .............................................................................. 54
Category selection ................................................................................................. 54
Direct channel selection ............................................................................................... 55
Manually setting channels into memory ....................................................................... 55
Preset channel scan ..................................................................................................... 55
Switching displays when using the SIRIUS satellite radio............................................ 55
Displaying SIRIUS ID ................................................................................................... 56
10
Page 11

Table of Contents
How to operate the main unit with an optional
Interface Adapter for iPod
Listening to iPod music files (If an iPod is not connected) ........................................... 57
Listening to iPod music files (If an iPod is connected) ................................................. 57
Advancing to the next music file or returning to the beginning
of the music file being played ....................................................................................... 58
Fast Forward/Rewind ............................................................................................ 58
Searching for a music file...................................................................................... 58
Repeating the same music file (REPEAT) ............................................................. 59
Playing music files in random order (SHUFFLE) ................................................... 60
Displaying text........................................................................................................ 60
®
connected.............................................. 57
Others.................................................................................................... 61
Connecting portable audio players to the AUX jack ..................................................... 61
Switching the AUX mode on and off ...................................................................... 61
Changing auxiliary input sensitivity ........................................................................ 61
If you have a question: ........................................................................ 62
Displayed information (for troubleshooting) .................................................................. 62
Specifications....................................................................................... 66
How to contact customer service....................................................... 68
* For more information on the operation of E-iSERV (Area Shot, steering remote),
refer to the ECLIPSE Website given below and download the operation manual.
(URL:http://www.e-iserv.jp)
11
Page 12

Introduction
Operating precautions
<Your CD3100 will perform well over a long period of time through correct handling and care.>
Notes on operation
• For your safety, play only at volume levels that allow outside sounds to be heard.
• We recommend using with this player a disc with the logo shown to
the left.
• You can play music CDs (CD-R/CD-RW) on this player. Be sure to
use discs that have been properly processed.
Depending on the editing main unit used, some discs may not play
TEXT
properly.
• Do not insert anything other than a CD into the head unit.
Do not insert any foreign objects, such as coins or credit cards, into
the disc slot. Be especially watchful of children’s mischief in this
regard.
12
• Avoid severe mechanical shock.
When the player is subjected to severe vibration while traveling over a
rough surface, playback may be intermittent. When a situation like
this occurs, resume playback after returning to a smoother road.
• About dew condensation.
In cold or rainy weather, just as the interior glass surface gets fogged,
dew (water condensation) may also settle on the main unit. When this
occurs, disc playback may become intermittent or impossible.
Dehumidify the air in the vehicle for a while before resuming
playback.
• Cleaning the disc slot.
The disc slot tends to get dusty. Clean it occasionally to prevent
accumulated dust from scratching the discs.
Page 13
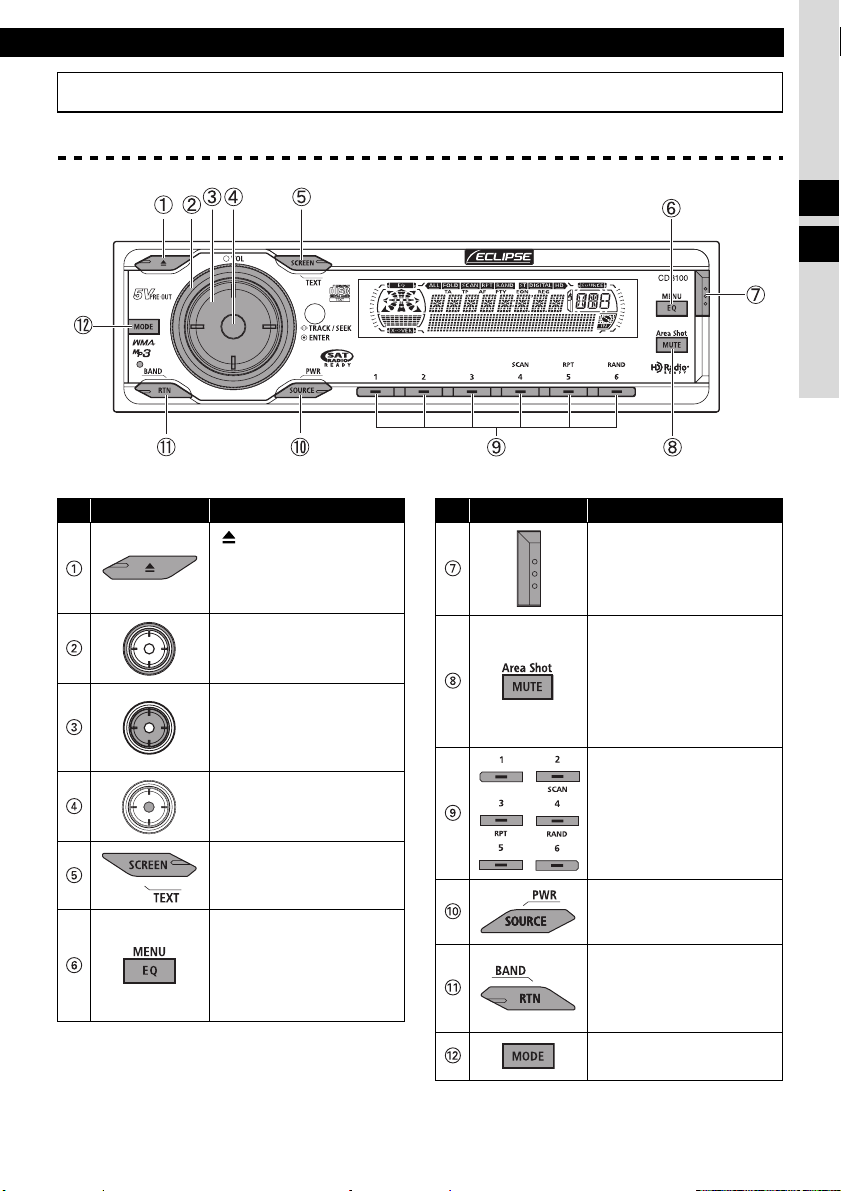
Names of controls and parts
Front view
Names of controls and parts
II
III
No. Button Name/Working
[ (OPEN/EJECT)]
button
Opens/closes front panel
and ejects CD.
[VOL] button
Adjusts volume.
[SELECT] button
Selects radio station and
CD tracks.
Selects setting items.
[ENTER] button
Enters selected item.
[SCREEN/TEXT] button
Switches screen pattern.
Switches title display.
[EQ/MENU] button
Switches preset EQ
mode.
Switches menu selection
mode.
No. Button Name/Working
[Release] button
Detach the right end of
the front panel from the
body of the main unit.
[MUTE/Area Shot]
button
Activates and deactivates
mute.
Switches Area Shot
function.
Buttons [1] to [6]
Selects radio preset
channels and performs
disc mode functions.
[SOURCE/PWR] button
Switches audio mode.
[RTN/BAND] button
Returns to previous
screen.
Switches radio band.
[MODE] button
Switches to rotary mode.
13
Page 14
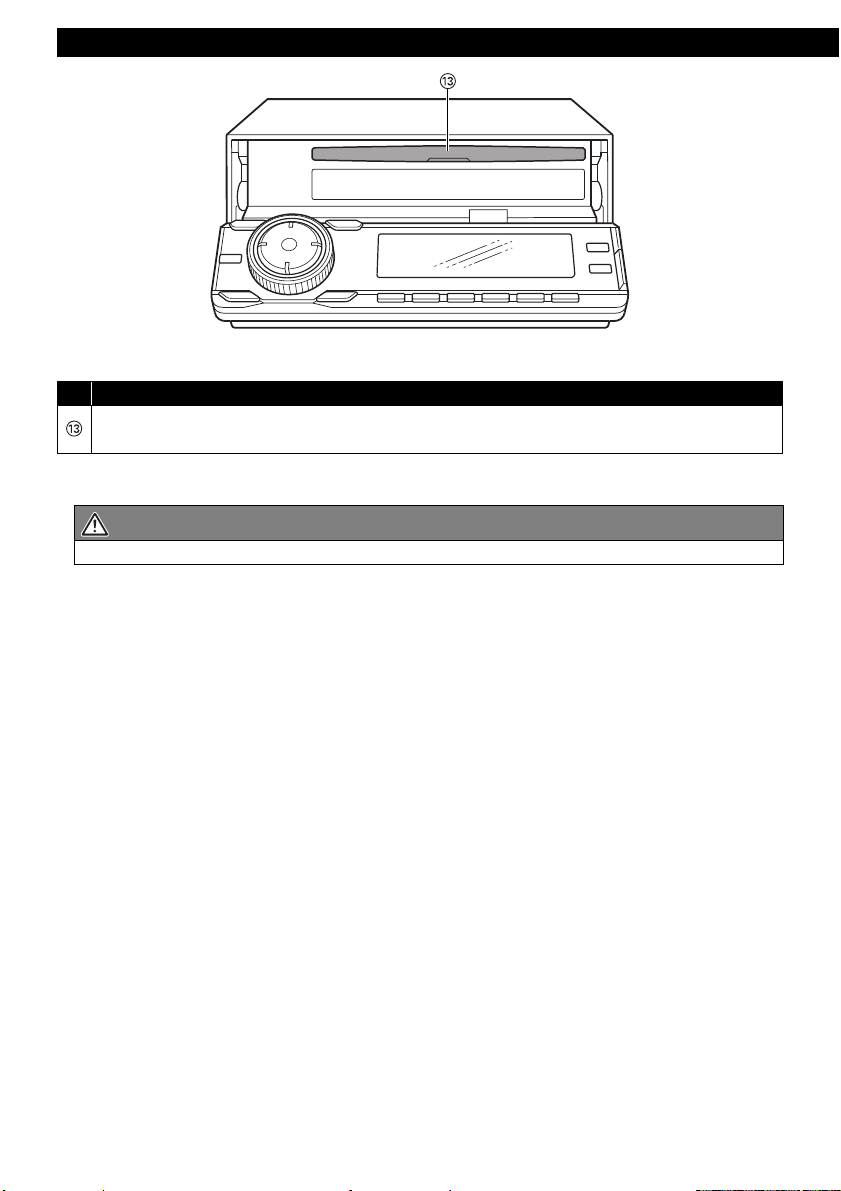
Introduction
No. Name/Working
Disc slot
Inserts compact discs.
CAUTION
Never place an object or rest your hands or the like on the front panel.
14
Page 15
Names of controls and parts
Turning the power on and off
When the power is turned on, the state used
when the power was turned off such as CD and
tuner playback is restored.
When power is OFF, press the
1
[SOURCE/PWR] button.
The power will come ON.
ATTENTION
When the main unit's power is turned on for
the first time or if the battery terminals have
been disconnected because of a reason
such as vehicle maintenance and the power
is then turned back on, the main unit will
start up in FM1 mode. After this, the
broadcast stations will be searched for
automatically and stored in buttons [1] to
[6].
When power is ON, press the
2
[SOURCE/PWR] button until you
hear a beep (for more than one
second).
The power will go OFF and the main
unit will be in Standby.
Switching Audio Modes
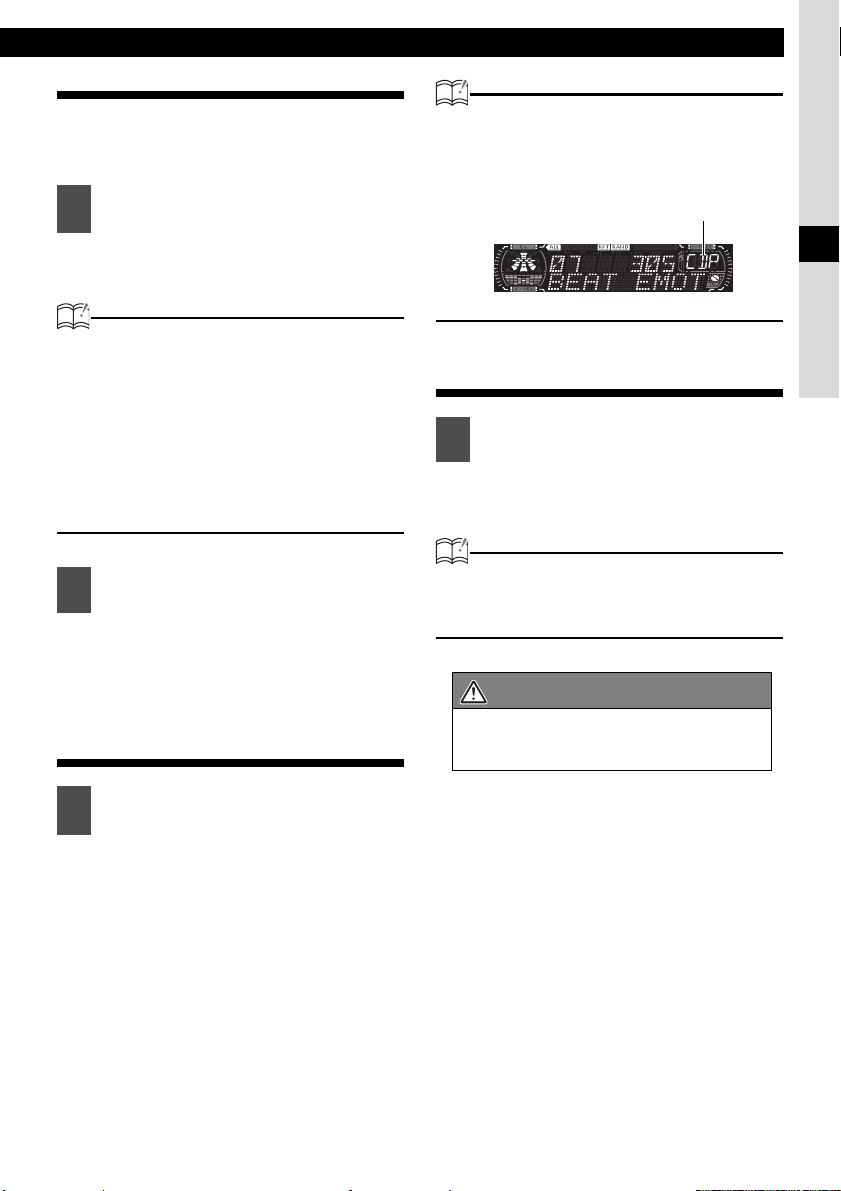
ATTENTION
The currently selected audio mode is
displayed in the upper right corner of the
screen. (When the switching screen is set to
normal - see page 17).
Current audio mode
Adjusting volume
Turn the [VOL] button.
1
Turn to the right: Increases the volume.
Turn to the left: Decreases the volume.
ATTENTION
Press the [MUTE/Area Shot] button for less
than one second to cut the volume or restore it
instantly.
CAUTION
Do not adjust the volume or other controls
while driving the vehicle. Do so only while
parked in a safe location.
III
Press the [SOURCE] button for
1
less than one second.
Press the button to switch mode in the
following sequence:
FM/AM → SIRIUS*1 → XM*1 →
CD (MP3/WMA)
*1
iPod
→ FM/AM → ⋅ ⋅ ⋅ ⋅
*1: Cannot be selected if the corresponding
device is not connected to the main unit.
*2: Not displayed if no disc is inserted.
*3: Cannot be selected if the AUX mode is not set
to ON. For details, refer to "Switching the AUX
mode on and off" on page 61.
*2
→ CDC*1 → AUX*3 →
15
Page 16
Introduction
Switching Rotary Modes
The function of the [VOL] button can be switched.
When rotary mode is set to ON, the [VOL] button
can be switched from normal volume adjustment
to the following functions:
Source Function Page
FM/AM TUNE UP/DOWN 29
XM
SIRIUS
CDP/CDC TRACK UP/DOWN 25
MP3/WMA FILE search 25
iPod Track search 58
For detailed information on the above functions,
see the operation instructions for each related
audio source.
Press the [MODE] button when the
1
main unit is switched to any audio
mode.
Rotary mode will switch ON. When
rotary mode is set to ON, the rotary
indicator will be displayed as follows.
rotary indicator
CHANNEL UP/
DOWN
CHANNEL UP/
DOWN
51
54
If the [MODE] button is pressed again,
or if no operations are performed for
more than 10 seconds, rotary mode
will be canceled.
16
Page 17
Names of controls and parts
Switching screen
The screen's display pattern can be switched.
Press the [SCREEN/TEXT] for less than one second.
1
When the button is pressed, the screen pattern changes display type in the following
order.
TYPE1 → TYPE2 → TYPE3 → TYPE4 → TYPE5 → TYPE1 → ⋅ ⋅ ⋅ ⋅
Display area (upper)
Display area (lower)
Pattern
Mode
Radio
Satellite radio
CD
CD changer
MP3/WMA
iPod
AUX
* : Displays only when an optional HD Radio unit is connected.
**: Displays only when the DISC has CD TEXT.
Display
area
Upper frequency clock clock frequency frequency
Lower information* information* frequency Sound Meter 1 Sound Meter 2
Upper CH No. clock clock CH No. CH No.
Lower information information CH No. Sound Meter 1 Sound Meter 2
Upper
Lower CD TEXT** CD TEXT**
Upper
Lower DISC No. DISC No.
Upper elapsed time clock clock elapsed time elapsed time
Lower information information elapsed time Sound Meter 1 Sound Meter 2
Upper
Lower information information
Upper – clock clock – –
Lower 'INPUT' 'INPUT' – Sound Meter 1 Sound Meter 2
Typ e1
Track No.+
elapsed time
Track No.+
elapsed time
Track No.+
elapsed time
Type2 Type3 Typ e4 Typ e5
clock clock
Track No.+
elapsed time
clock clock
Track No.+
elapsed time
clock clock
Track No.+
elapsed time
Track No.+
elapsed time
Sound Meter 1 Sound Meter 2
Track No.+
elapsed time
Sound Meter 1 Sound Meter 2
Track No.+
elapsed time
Sound Meter 1 Sound Meter 2
Track No.+
elapsed time
Track No.+
elapsed time
Track No.+
elapsed time
III
17
Page 18
Introduction
Detaching the front panel
Using the detachable panel
The front panel of the main unit can be removed.
By removing this panel when you leave the
vehicle, you can prevent the theft of the main
unit.
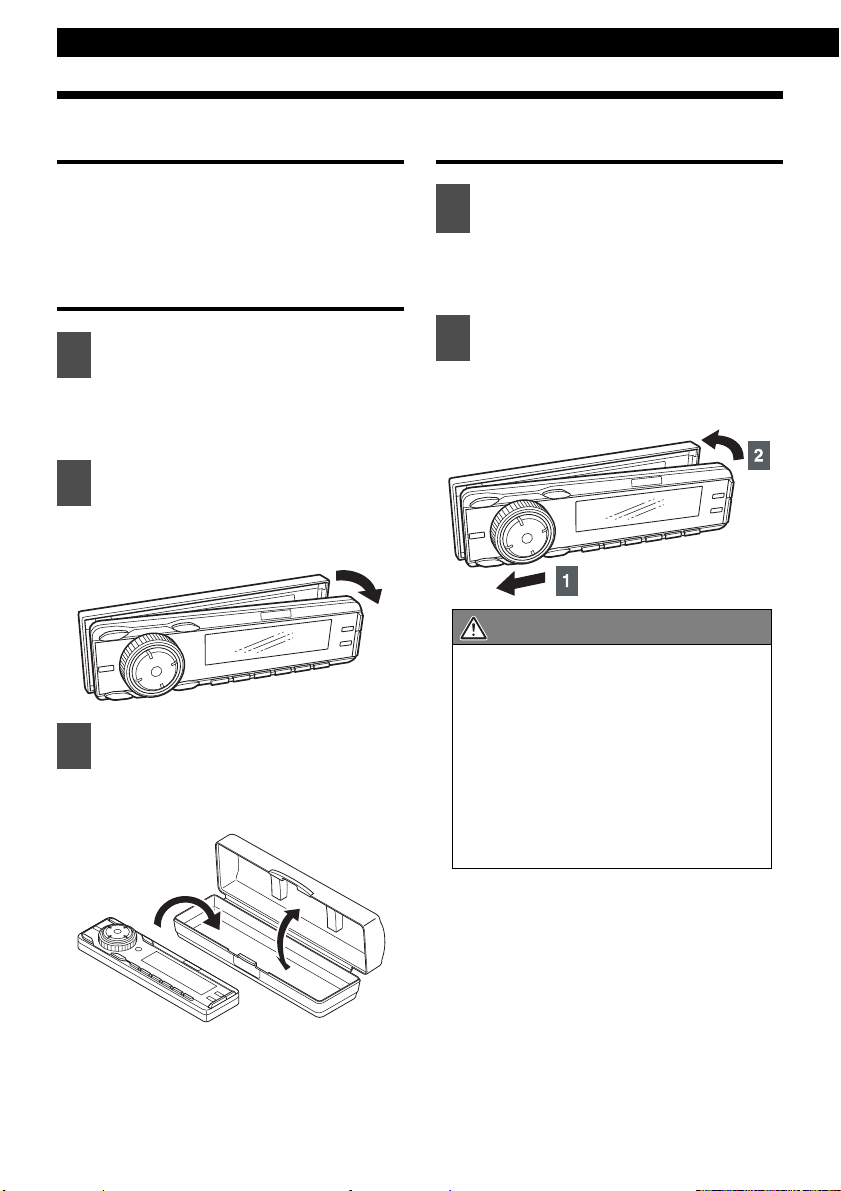
How to remove the detachable panel
Press the [Release] button.
1
The right end of the front panel
detaches from the body of the main
unit.
Remove the front panel.
2
Hold the front panel and pull it toward
you to remove it.
Put the front panel into the case.
3
Push to open the front panel case and
put the front panel in it.
How to fit the detachable panel
Insert the left end of the front panel
1
into the main unit.
Engage the catch at the left end of the
front panel with the lock on the main
unit itself.
Insert the front panel.
2
Press the right end of the front panel
until it clicks into place.
CAUTION
• If you drop the detachable panel or
subject it to impact, it may be
damaged or malfunction.
• Do not detach or fit the detachable
panel while driving since this could
cause an accident.
• Store the panel at a location free from
humidity, dust, and water.
• Do not leave the detachable panel in
locations that are likely to become hot,
like the dashboard and surroundings.
18
Page 19
How to operate the CD/MP3/WMA player
How to operate the CD/MP3/WMA player
About compact discs
• The signal recorded on a compact disc is read by a laser beam, so nothing touches the disc surface.
A scratch on the recorded surface or a badly warped disc may cause deteriorated sound quality or
intermittent playback. Observe the following precautions to ensure high quality sound performance:
III
About brand new CDs
Rough Edges
Ballpoint pen
Rough Edges
Flakes
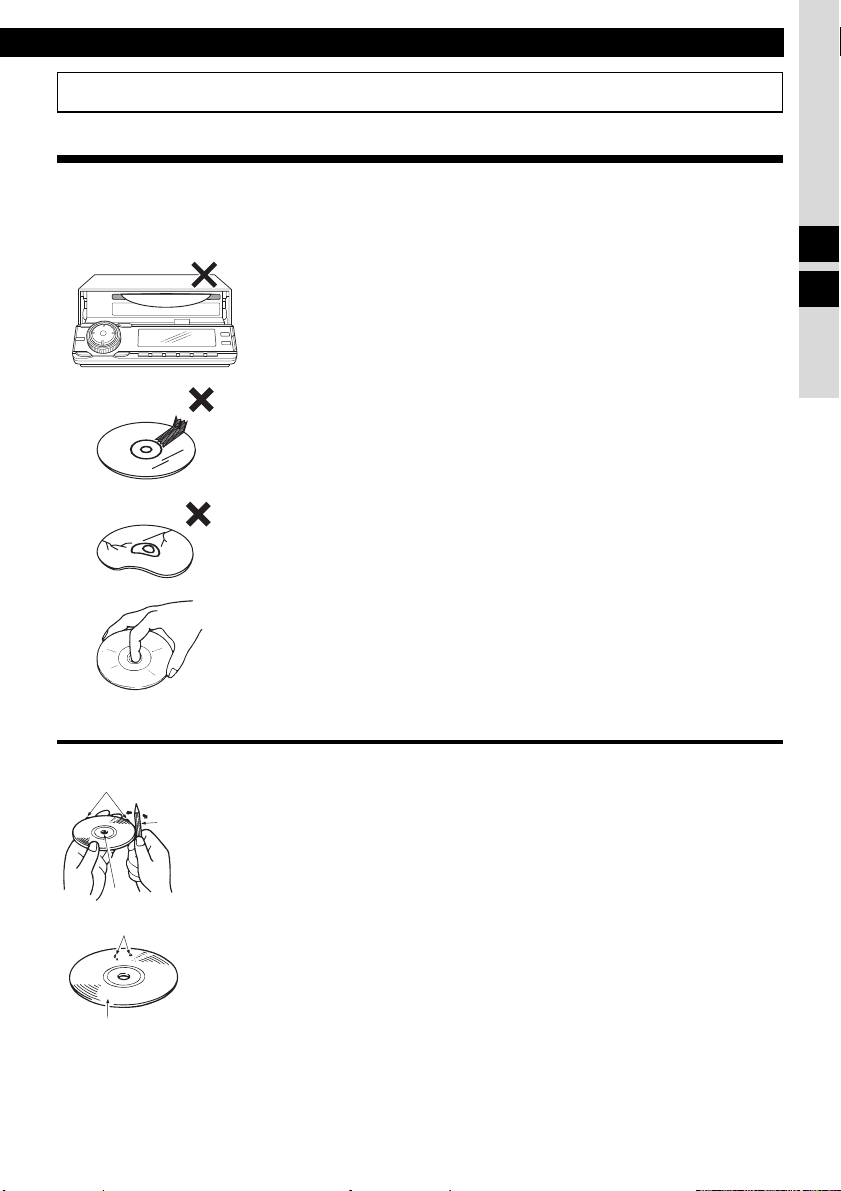
• Do not leave an ejected disc in the disc slot for very long; the disc may
warp. Discs should be stored in their cases and kept away from high
temperature and humidity.
• Do not stick a piece of paper or tape. Do not write on or scratch either
side of a disc.
• Discs spin at a high speed inside the main unit. Keep cracked or
warped discs out of the player to avoid damage it.
• Avoid touching the recorded surface when handling a disc; handle
discs by their edges.
• You may notice that some brand new discs are rough around the
center hole or outside edge. Remove the rough edges with the side of
a ballpoint pen, etc. Rough edges may prevent proper loading in the
main unit. Flakes from the rough edges may also stick to the recorded
surface and interfere with playback.
IV
Recorded surface
19
Page 20
Operation
About CD accessories
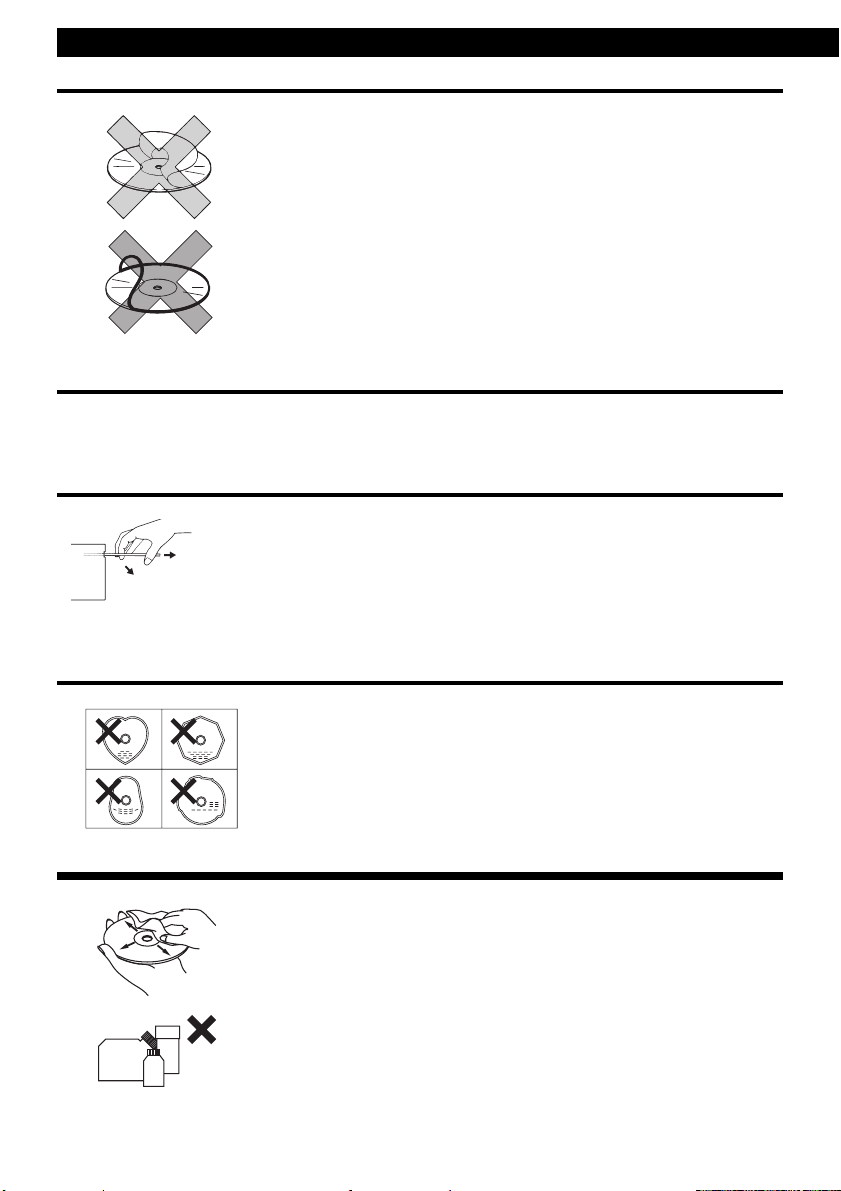
• Do not use accessories (stabilizers, protective seals, laser lens
cleaners, etc.) sold for "improving sound performance" or "protecting
CDs." The changes in CD thickness or outside dimensions made by
these accessories may cause problems in the player.
• Please be sure NOT to attach any ring-shape protector (or other
accessory) to your discs. Those protectors are commercially available
and said to protect disc and to improve sound quality (and antivibration
effect), but they can do more harm than good in regular uses. The most
common problems are disc insertion, disc ejections, and won't play
problems due to the protector ring that came off in the disc mechanism.
About borrowed CDs
• Do not use a CD with glue or remnants of adhesive tape or labels. They may cause the CD to get
stuck inside or damage the main unit.
How to remove CDs
• When removing the ejected disc, pull it straight out along the slot.
OKAY
N
O
G
O
OD
Pressing downward in the process may scratch the recorded surface
of the disc.
About irregularly-shaped CDs
• Specially-shaped CDs, like heart-shaped or octagonal CDs, cannot be
played. Do not attempt to play them, even with an adapter, since they
may damage the player.
•
About cleaning a CD
• Use a commercially available compact disc cleaner to clean a CD,
wiping gently from the center to the edge.
20
XXXX
XXXX
XXXX
• Do not use benzine, thinner, LP record spray or other cleaners on
CDs. They may damage a CD’s finish.
Page 21

How to operate the CD/MP3/WMA player
About MP3/WMA
ATTENTION
The making of MP3/WMA files by recording from sources such as broadcasts, records, recordings, videos and
live performances without permission from the copyright holder for uses other than personal enjoyment is
prohibited.
What is MP3/WMA?
MP3/WMA (MPEG Audio Layer III) is a standard format for audio compression technology. By using
MP3/WMA a file can be compressed to one-tenth the size of the original.
WMA (Windows Media
compressed to a size smaller than MP3 files.
This main unit has limitations on MP3/WMA file standards and recorded media and formats that can
be used.
TM
Audio) is format for audio compression technology. WMA files can be
Playable MP3 file standards
• Supported standards: MPEG-1 Audio Layer III
• Supported sampling frequencies: 44.1, 48 (kHz)
• Supported bit rate: 64, 80, 96, 112, 128, 160, 192, 224, 256, 288, 320 (kbps)
• Supported channel modes: monaural, stereo, joint, dual
* Supports VBR. (64~320kbps)
* Does not support free format.
Playable WMA file standards
• Supported standards: WMA Ver. 7
• Supported sampling frequencies: 32, 44.1, 48 (kHz)
• Supported bit rate: 48, 64, 80, 96, 128, 160, 192, 256, 320 (kbps)
WMA Ver. 8
WMA Ver. 9
*Supports VBR (48~192 kbps).
*Does not support lossless compression.
*Does not support WMA files recorded at a frequency of 48kHz with a bit
rate of 96kbps.
IV
ID3/WMA tag
MP3/WMA files have an "ID3 / WMA Tag" that allows input of information so that data such as song
title and artist can be saved.
This main unit supports ID3v. 1.0, 1.1 and WMA tags.
21
Page 22
Operation
Media
Media capable of playing MP3/WMA includes CD-R and CD-RW discs. Compared to CD-ROM
media commonly used for music discs, CD-R and CD-RW discs are fragile in high temperature/high
humidity environments and one section of the CD-R and CD-RW may become incapable of
playback. Fingerprints or scratches on the disc may prevent playback or cause skipping during
playback. Sections of a CD-R and CD-RW may deteriorate if left inside a vehicle for long periods of
time. It is also recommended that CD-R and CD-RW discs be kept in a light-blocking case because
the discs are vulnerable to ultra-violet light.
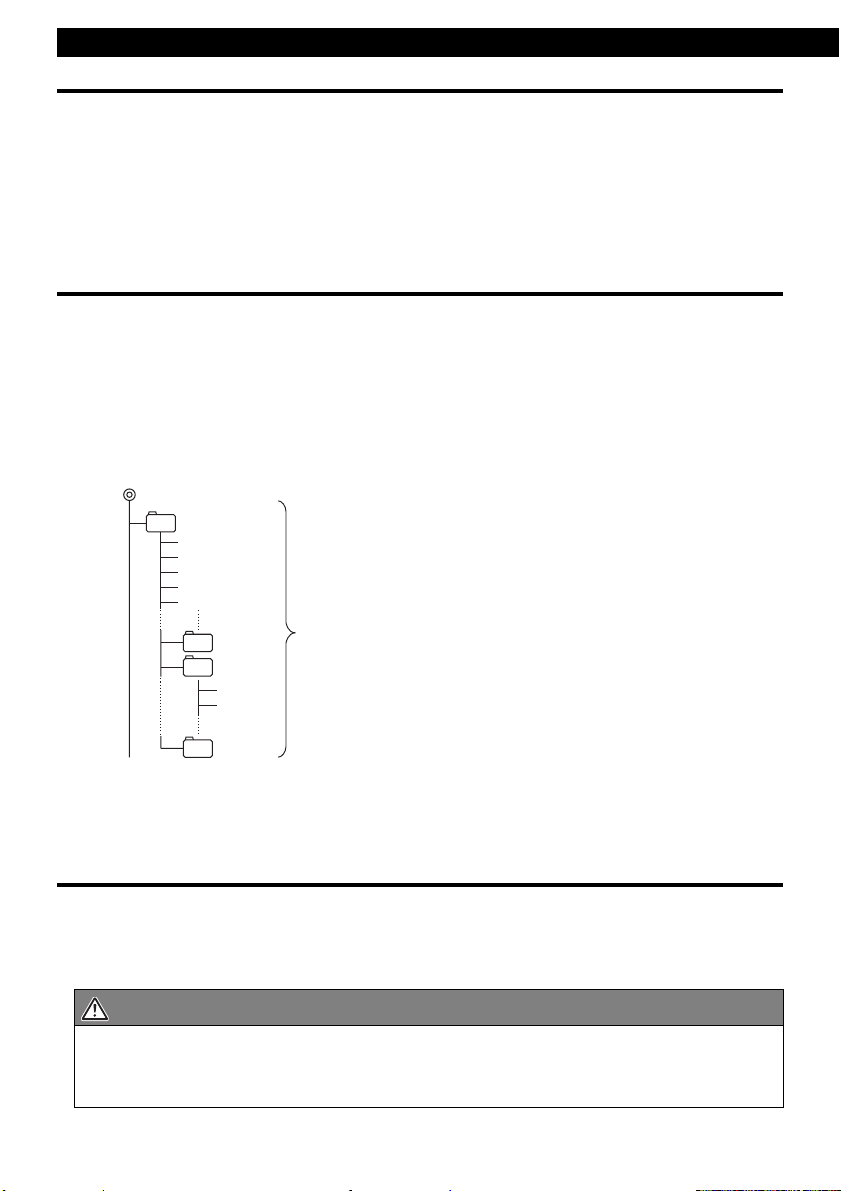
Format of discs
The format of discs to be used must be ISO9660 Level 1 or Level 2.
Control items for this standard are as follows:
• Maximum directory layers: 8 layers
• Maximum characters for folder names/file names: 32 (including "." and 3 letter file extension)
• Allowable characters for folder names/file names: A~Z, 0~9, _ (underscore)
•
Number of files possible on a single disc: 256
[Configuration example for CD supporting MP3/WMA]
Root directory (F1)
F2
Folder 2
001.mp3
002.mp3
003.mp3
004.txt
005.mp3
Number of files possible on a single disc is 256.
F158
F159
Folder 158
Folder 159
001.mp3
002.mp3
Files aside from MP3/WMA files (Example: 004.txt) also count as single files.
Folder 191
F191
• Total number of folders possible on a single disc:191
• Maximum folders this main unit can recognize: 192*
*: A root directory is counted as one folder.
File names
Only files with the MP3/WMA file extension ".mp3", ".wma" can be recognized as MP3/WMA and played.
Be sure to save MP3 files with the ".mp3" file extension. Be sure to WMA files with the ".wma" file
extension. The "MP" letters of the file extension will be recognized whether entered as uppercase letters
or lowercase letters.
CAUTION
If the ".mp3", ".wma" file extension is attached to a file other than an MP3/WMA file, that file will be
mistakenly recognized by the main unit as an MP3/WMA file and played, resulting in loud noise
output that can damage the speakers. Be sure to avoid attaching the ".mp3", ".wma" file extension
to files that are not MP3/WMA files.
22
Page 23

How to operate the CD/MP3/WMA player
Multi-sessions
Multi-sessions are supported, and playing of CD-R and CD-RW discs with annotated MP3/WMA
files is possible. However, when "Track at once" has been written, close the session or process the
warning message. Standardize the format of each session without changing the format.
Playing MP3/WMA
When a disc with recorded MP3/WMA files is inserted, the main unit first checks all the files on the disc. No
sound is output while the main unit is checking the files on the disc. It is recommended that the disc be recorded
without files other than MP3/WMA files and without unnecessary folders in order to speed up the checking of
disc files by the main unit.
MP3/WMA playing time display
It is possible that playing time will not be correct, depending on the writing condition of the MP3/
WMA file.
*It is possible that playing time will not be correct when VBR Fast Up/Down is operated.
Display order of MP3/WMA file/folder names
Names of MP3/WMA folders and files within the same level are displayed in the following order.
1.MP3/WMA folders displayed first, by ascending order of numbers, letters.
2.Files displayed next, by ascending order of numbers, letters.
IV
23
Page 24
Operation
Listening to CD
Press the [ (OPEN/EJECT)]
1
button.
The front panel opens.
If a disc has already been loaded, the
disc is ejected by pressing the [
(OPEN/EJECT)
Insert a CD into the disc slot, label
2
side up.
The front panel automatically closes
and the CD will immediately start
playing.
ATTENTION
• Playback may be intermittent when there is
a scratch on a CD or when the recorded
side is dirty.
• When a CD is already loaded, press the
[SOURCE] button for less than one second
to switch to the CD mode. (For details, refer
to "Switching Audio Modes" on page 15.)
] button.
● Note ●
• When music data recorded in
the normal way (CD-DA) is
present on the same disc with
MP3/WMA music files, the
normally recorded music data
will be played. To listen to the
MP3/WMA music files, press
[MODE] button for more than
one second.
• When a non-MP3/WMA file is
played, "NO SUPPORT" will
appear.
• The optional CD changer
cannot be used to play MP3/
WMA files.
CAUTION
Do not press the [
button while CD is being inserted. This
could cause an injury and damage to the
front panel.
24
(OPEN/EJECT)
]
Page 25
How to operate the CD/MP3/WMA player
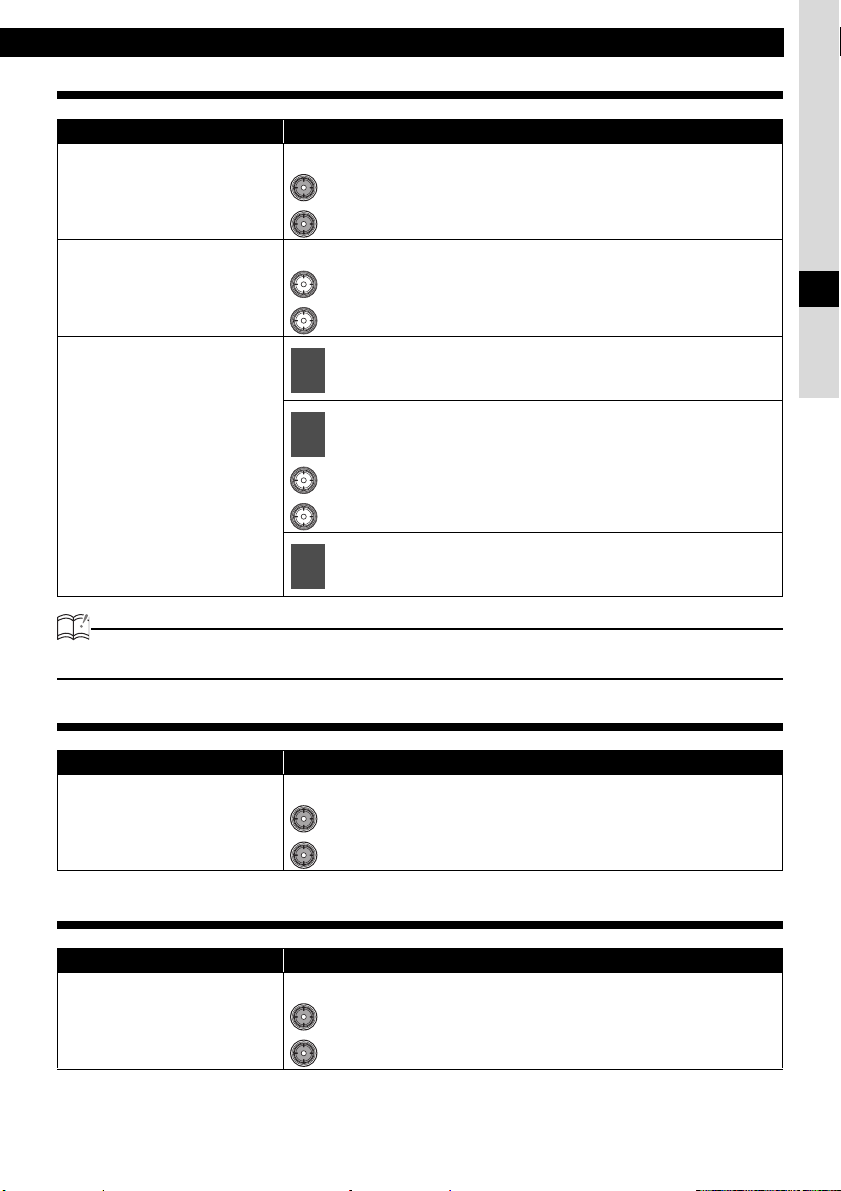
TRACK (FILE) UP/DOWN
Media Operation
Press the button briefly.
CD, MP3/WMA
CD (Rotary mode)
MP3/WMA (Rotary mode)
ATTENTION
For details on how to operate the rotary mode function, see page 16.
(Right): Advances to the next track (file).
(Left): Returns to the beginning of the track (files) being played.
Turn the button.
(Right): Advances to the next track.
(Left): Returns to the beginning of the track being played.
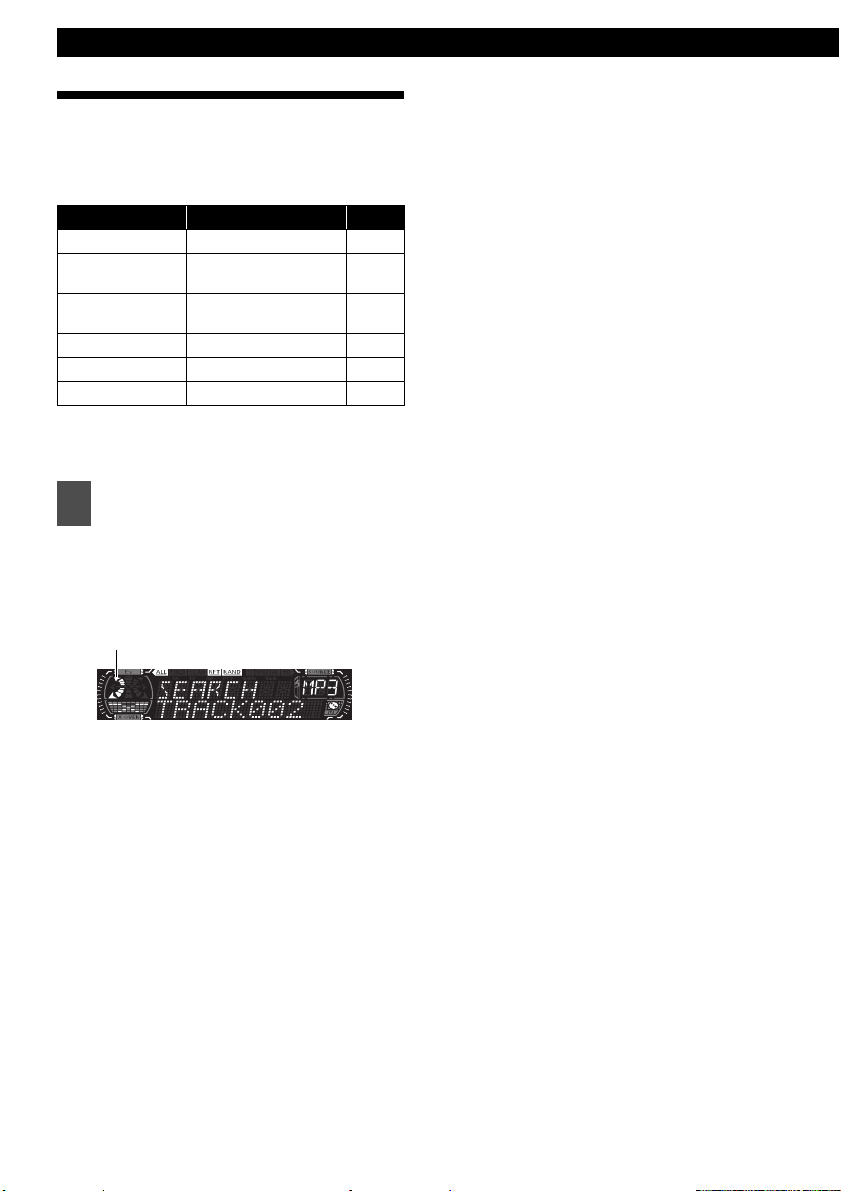
Press the [MODE] button for less than one second
1
to display the file list.
Turn the button to select the file.
2
(Right): Advances to the next file.
(Left): Returns to the beginning of the files being played.
Press the [ENTER] button.
3
IV
FOLDER UP/DOWN
Media Operation
Press the button.
MP3/WMA
FAST FORWARD/REWIND
Media Operation
Press and hold the button.
CD, MP3/WMA
(Upper): Selects the next folder.
(Lower): Selects the previous folder.
(Right): Fast forward.
(Left): Rewind.
25
Page 26
Operation
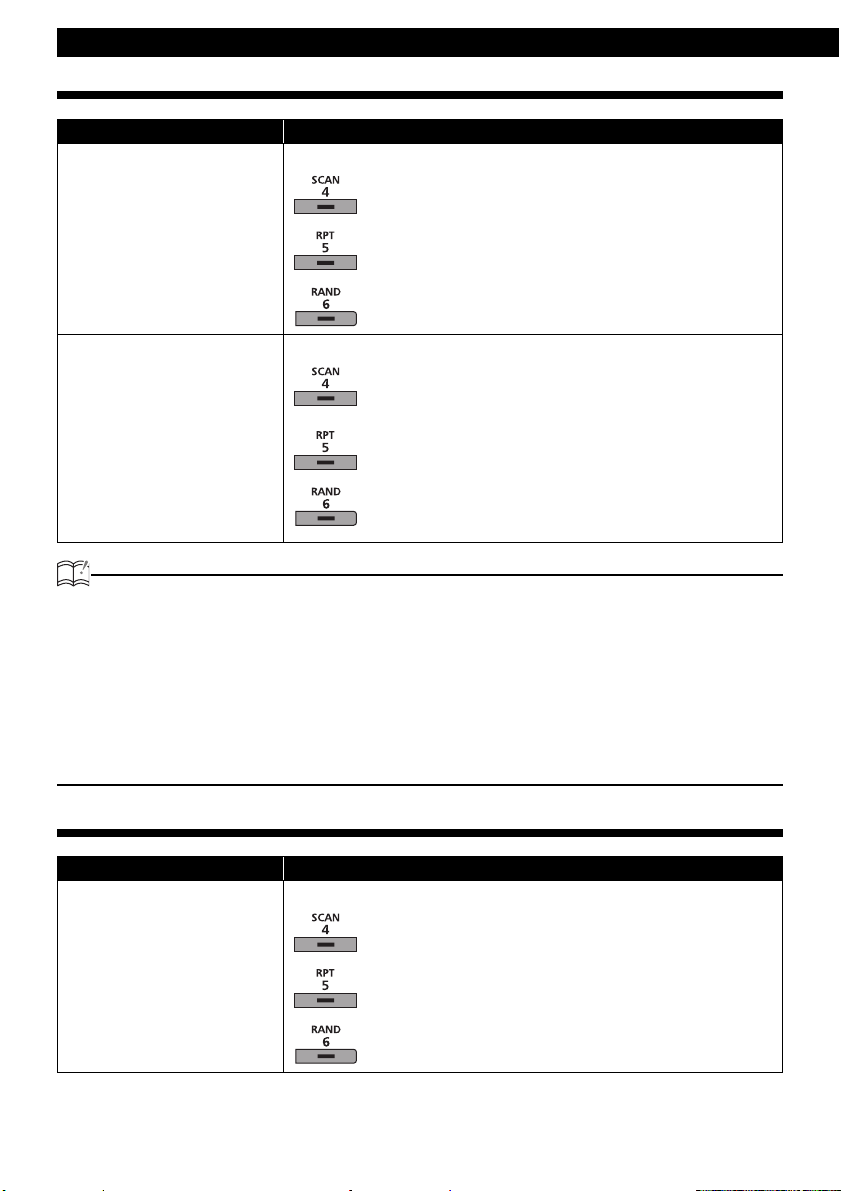
SCAN/REPEAT/RANDOM
Media Operation
Press the button.
: The main unit will play the first 10 seconds of each
track. To cancel, press button again.
CD
Press the button.
MP3/WMA
ATTENTION
• During random playback, press the [5 RPT] button to repeat the track (file) being played. To
cancel repeat play (go back to random play), press the [5 RPT] button again.
During playback of a particular track: The track (file) being played displayed repeatedly.
While searching: The following track (file) is played repeatedly.
• Occasionally the same track happens to be played (selected) two or more times in a row; this
is normal operation and is not a sign of a problem.
• When any of the functions -"Playing the beginning of tracks, "Repeating the same track" and
"Playing tracks in random order" - is selected, a message such as [SCAN], [RPT] or
[RANDOM] appears on the display to verify the current function.
: Repeating the same track. To cancel, press button
again.
: Playing tracks in random order. To cancel, press button
again.
: The main unit will play the first 10 seconds of each file
located within the same layer of the folder currently
being played. To cancel, press button again.
: Repeating the same file. To cancel, press button again.
: Files will be randomly selected from among all files at
the same levels as the folder currently being played.
To cancel, press button again.
FOLDER SCAN/REPEAT/RANDOM
Media Operation
Press the button for more than one second.
: The first 10 seconds of the first song in each folder is
played. To cancel, press button again.
MP3/WMA
26
: All the files in the same layer as the folder being played
are repeated. To cancel, press button again.
: The files in all folders are played randomly. To cancel,
press button again.
Page 27
How to operate the CD/MP3/WMA player
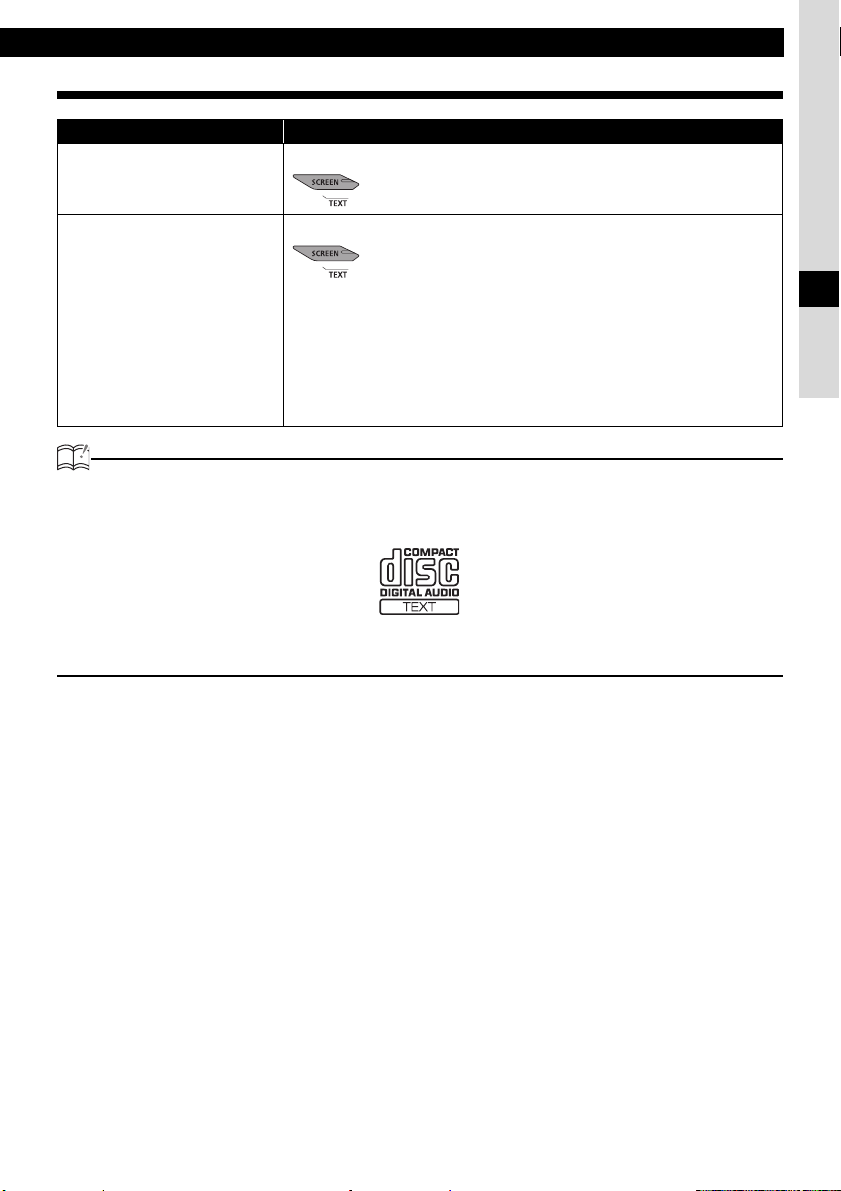
DISPLAYING TITLE
Media Operation
Press the button for more than one second.
CD (CD text)
Press the button for more than one second.
MP3/WMA
ATTENTION
• CD text cannot be displayed with the optional CD changer.
• If the CD came with a logo shown below, it is recorded with a disc title and track titles.
These information will be displayed during playback.
: Text is displayed scrolls the display in the order. DISC
title → TRACK title
: Each time the button is pressed. The following will be
displayed in order.
Folder Name/File Name* → Ta g → Folder NO. + File
NO.
*:The display area shows a maximum of 9 characters
and then scrolls to display the remaining characters.
After the folder name is displayed, the file name will
be displayed by scrolling. After the file name is
scrolled, the display will be fixed.
IV
• CD text, Folder name/file name or tag recorded with characters other than alphanumeric and
symbols cannot be displayed.
27
Page 28
Operation
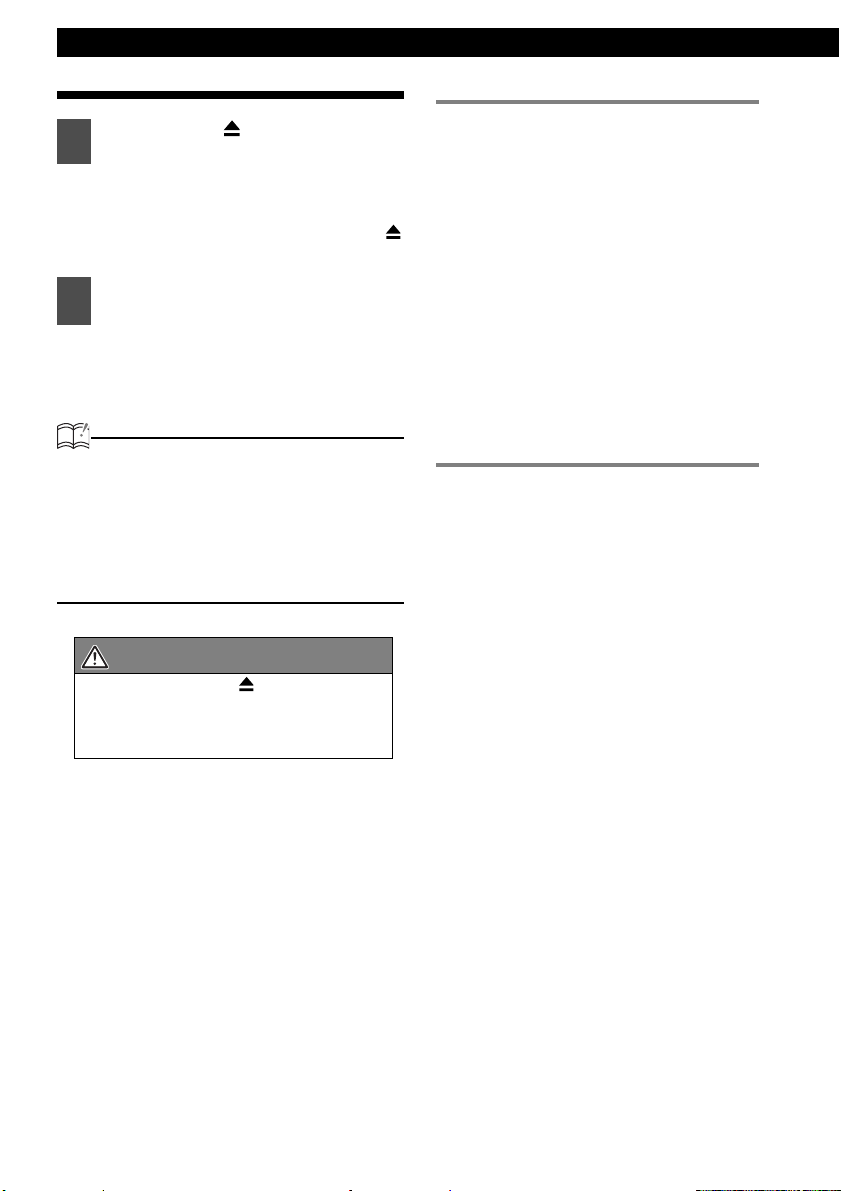
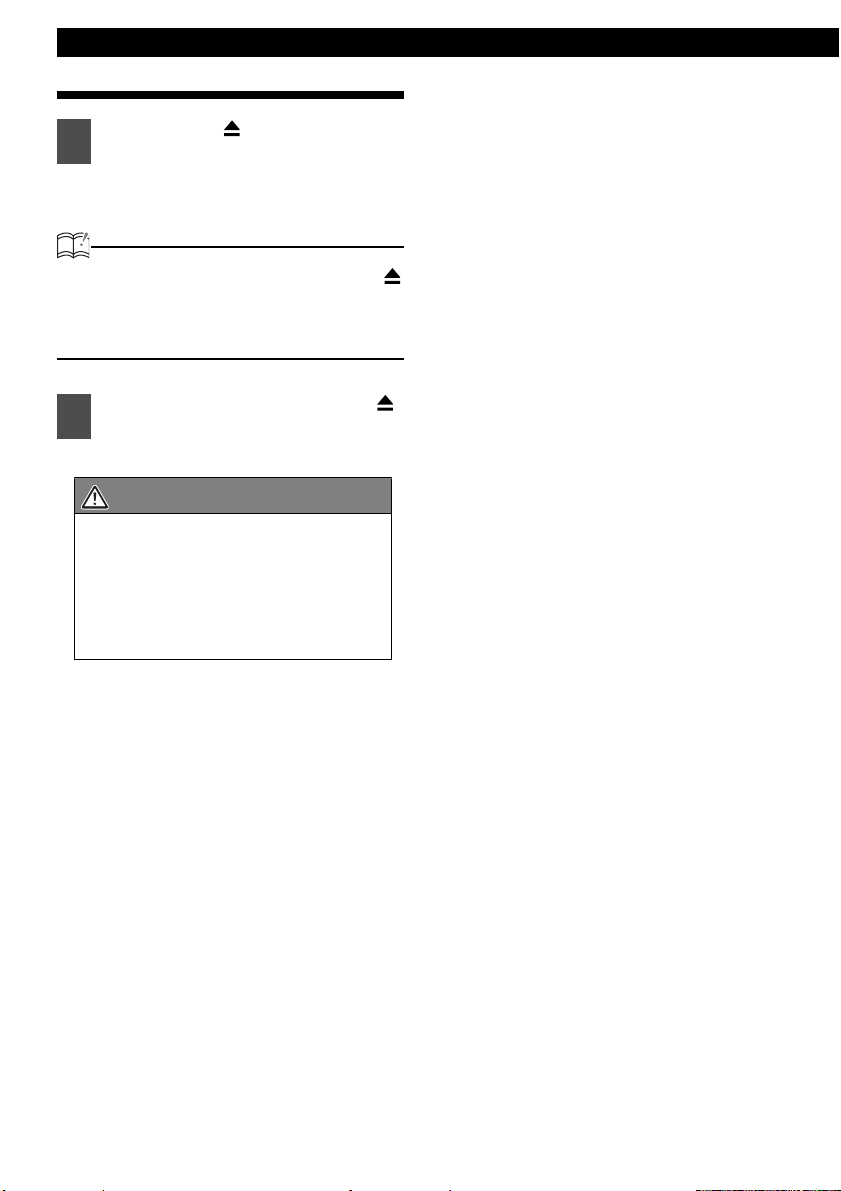
Ejecting the disc
Press the [ (OPEN/EJECT)]
1
button.
The front panel opens and the disc is
ejected.
ATTENTION
If a loaded CD is not ejected, press the [
(OPEN/EJECT)] button for more than five
seconds with the front panel open to eject the
disc.
Remove the disc and press the [
2
(OPEN/EJECT)] button.
The front panel closes.
CAUTION
• Do not drive with the front panel open.
The panel may cause unexpected
personal injury during a panic stop, or
the like.
• Do not attempt to close the front panel
by hand. Doing so may damage the
panel.
28
Page 29
How to operate the tuner
How to operate the tuner
ATTENTION
• If stations have been stored in memory,
pressing a button from [1] to [6] will directly
select a station. (Refer to "Manually setting
stations into memory" on page 30)
Listening to the tuner
Switch to tuner mode.
1
For details, refer to "Switching Audio
Modes" on page 15.
Tuning to a station
There are automatic and manual methods for
setting stations in memory. The main unit will
accept up to 24 stations in memory: 6 in AM 18 in
FM (6 each for FM1, FM2 and FM3.) (Initial
setting)
Press the [RTN/BAND] button for
1
less than one second to switch to
the desired FM, AM bands.
Radio bands will switch from FM1 →
FM2 → FM3 → AM in order each time
the button is pressed.
Press and hold the [SELECT]
3
(Right/Left) button to start the
automatic station search.
:
Right
Starts searching toward higher
frequencies.
Left:
Starts searching toward lower
frequencies.
ATTENTION
At times, it may be difficult to maintain optimum
reception because the antenna affixed to your
vehicle is in motion constantly (relative to the
broadcast antenna), encountering continuous
variation in the received radio signals’ strength.
Other factors affecting reception include
interference from natural obstacles, sign posts,
etc.
When an optional HD Radio tuner unit is
connected, digital broadcasts have reception
priority. (U.S.A. only)
Operations during rotary mode
For the operation method in the Rotary mode,
refer to page 16.
IV
V
Press the [SELECT] (Right/Left)
2
button to tune to a station.
Right:
Tunes to higher frequencies.
Left:
Tunes to lower frequencies.
29
Page 30
Operation
Storing stations into memory automatically (The automatic preset mode: ASM)
Press the [SELECT] (Upper) button
1
for more than two seconds until a
beep is heard.
The automatic preset mode starts.
[ASM ON] will appear on the display,
and stations are automatically entered
in memory under buttons [1] to [6].
These buttons are called preset
buttons.
ATTENTION
• Pressing the preset buttons ([1] to [6])
allows you to make one-touch station
selections. The frequency of the selected
station is indicated on.
• When a new station is set in memory, the
station previously set in memory will be
deleted.
• If there are fewer than six receivable
stations, the stations set in the remaining
buttons will be retained.
Manually setting stations into memory
This section covers the setting of stations in
memory under the numbered buttons.
Press the [SELECT] (Left/Right)
1
button to tune to the station to be
entered in memory.
Select any button, from [1] to [6],
2
and press it for more than two
seconds.
The tuned station is now memorized
and set in the button selected.
Repeat the procedure to set
additional manually tuned stations in
memory, in turn, for buttons [1] to [6].
These buttons are called the preset
buttons.
CAUTION
If the vehicle’s battery is disconnected (for
repairs to the vehicle or for removing the
main unit), all stations in memory will be
lost. In such a case, set stations in memory
again.
Preset station scan
CAUTION
If the vehicle’s battery is disconnected (for
repairs to the vehicle or for removing the
main unit), all stations in memory will be
lost. In such a case, set stations in the
memory again.
30
This function enables reception of all the stations
in the preset buttons for five seconds each.
Press the [SELECT] (Lower) button
1
for more than one second.
[P SCAN] will appear on the display,
and stations stored under preset
buttons [1] through [6] will be played
for five seconds each.
To stop the preset scan mode at a
2
desired station, press the
[SELECT] (Lower) button again.
The main unit will stay tuned to the
desired station.
Page 31

How to operate the tuner
Changing the reception sensitivity for automatic scanning
The main unit lets you select the reception
sensitivity to be used for automatic scanning of
stations. The two sensitivity modes available for
this main unit are AUTO mode and DX mode.
During automatic scanning, the
reception sensitivity switches
automatically to one of two levels.
Initially the reception sensitivity is
AUTO
Mode
DX Mode
When an optional HD Radio tuner unit is
connected, reception sensitivity is set to the
AUTO Mode. The DX Mode is unavailable.
(U.S.A. only)
1
2
set to the low level so that only
stations with strong signals are
received. If no stations could be
received, the reception sensitivity is
increased so that stations with
weaker signals can also be
received.
Because the reception sensitivity for
automatic scanning is set to the high
level from the start, even stations
with weaker signals can be received.
(Signal crossover may result in
some stations being hard to hear.)
ATTENTION
Check that the main unit is in
standby mode.
Press and hold button [1], then the
[EQ/MENU] button, and hold both
for more than three seconds.
The mode switches between AUTO
mode and DX mode each time the
buttons are pressed.
Changing the radio band location
The location for the radio bands used between
the North American region and the Asia/
Australia/Latin region can be switched. The
default setting is USA (North America).
ATTENTION
When an optional HD Radio tuner unit is
connected, radio band location is set to USA.
Other radio band locations are unavailable.
(U.S.A. only)
Check that the main unit is in
1
standby mode.
Press and hold button [3], then the
2
[EQ/MENU] button, and hold both
for more than three seconds.
The radio band switches in the order
shown below each time the buttons
are pressed.
USA →
USA
When the power is turned on, the
broadcast stations will be searched for
automatically and stored in buttons [1]
to [6].
ASIA → AUS → LATIN →
V
31
Page 32

Operation
How to use the remote control
Precautions in use of the remote control
• Be careful when handling the control, especially because it is small and light. Dropping or striking it
hard may damage it, wear out the battery or cause a malfunction.
• Keep the remote control free of moisture, dust and water. Do not subject it to shock.
• Do not place the remote control unit where it will get hot, such as on the dashboard or near a heater
vent. Allowing the remote control unit to overheat may warp its case or cause other problems.
• Do not operate the remote control unit while driving because doing so could cause an accident.
• When using the remote control, point it toward the remote control light receptor.
• The light receptor may not operate correctly if it is exposed to bright light such as direct sunlight.
• Remove the batteries from the remote control unit whenever it is not to be used for a long time.
Cleaning the remote control
• Use a dry cloth to keep the main unit clean. If the remote control unit gets extremely dirty, clean it
with a cloth moistened with diluted liquid detergent. Do not use alcohol or thinner; these compounds
may damage the finish.
• In no event should benzine or thinner be used. These substances will damage the case or finish.
Remote control
32
No. Button Name/Working
[PWR] button
Turns main unit power ON/
OFF.
[TU] button
Switches to tuner mode.
[BAND] button
Switches radio band.
[ ] button
Decreases the volume.
[MUTE] button
Activates and deactivates
mute.
Page 33

How to use the remote control
No. Button Name/Working
[ PRESET CH ] buttons
[ DISC ] buttons
Selects radio preset channels
and performs disc mode
functions.
[MODE] button
Switches radio band and DISC
mode.
[DISC] button
Switches audio source mode.
[AUX] button
Switches to AUX mode.
[ ] button
Increases the volume.
[ TUNE·SEEK ] buttons
[ TRACK ] buttons
Selects radio stations and CD
tracks.
Replacing the battery
WARNING
To prevent accidents, store batteries out of
the reach of children. If a child has
swallowed one, consult a doctor
immediately.
Use two AAA size batteries.
Remove the back cover of the
1
remote control unit by gently
pressing and sliding it in the
direction indicated by the arrow.
Install the two batteries provided
2
into the compartment as
illustrated inside the
compartment.
Return the back cover into place
3
by sliding it in the direction
indicated by the arrow.
CAUTION
• Be extremely careful not to swallow the
battery.
• The battery life is approximately one
year. If the remote control unit does not
operate correctly or if the remote control
does not light button lamp, replace the
batteries.
• Be sure to orient the batteries correctly
so that the positive and negative poles
match the diagram.
• Do not use one new battery and one old
one; use two new batteries.
• Use only two of the same kind of
battery.
• If any liquid is seen leaking from the
batteries, remove both batteries and
dispose of them properly. Thoroughly
clean the battery compartment with a dry
cloth. Then install new batteries.
VI
33
Page 34

Various Settings
How to operate the Area Shot function (U.S.A./CANADA only)
About the Area Shot
Using Area Shot function, maps to destinations and guidance information can be displayed on your
main unit if you have set route on the ECLIPSE web site (E-iSERV).
ATTENTION
• The display in this manual may differ from that of the actual product.
• For details on how to operate the Area Shot function, refer to the ECLIPSE website.
(URL: http://www.e-iserv.jp)
To use the Area Shot function
In order to use Area Shot, driving instructions such as the direction of travel and the street names of turn
intersections must be downloaded from the ECLIPSE website (E-iSERV) and imported into the CD3100.
The process is as follows:
Access The ECLIPSE Website. (URL: http://www.e-iserv.jp)
Register as a user. A User Registration Key is required when
registering. For details about User Registration Key, see page 35.
(To register, follow the instructions provided by the website. Once you
have registered, there is no need to repeat the procedure.)
34
Login.
Set your start point and destination on the Area Shot page.
Address or intersection, city, state/prov. and zip/postal code can be
used to search for start points, routes and destinations. Your home
can be registered as a memory point. (Follow the instructions
provided on the website.)
Download information.
Write the downloaded information to a CD-R.
Import the data written to the CD-R into the CD3100.
(For details, see page 36.)
Area Shot is ready for use.
Page 35

How to operate the Area Shot function (U.S.A./CANADA only)
Map data
The map data used by the main unit was created based on information provided by NAVTEQTM.
When using the map data, be aware of actual road conditions and obey traffic rules.
Copying, publishing or using maps in electronic media without express written consent is forbidden.
WARNING
• Make sure to follow the actual traffic regulations when driving.
• During your vehicle while only following guidance point instructions may lead to traffic violations
and cause accidents.
• Do not modify this system for use other than that specified herein. Also, do not deviate from the
installation procedures described herein, ECLIPSE will not be held liable for damages including,
but not limited to serious injury, death or property damage resulting from installations that enable
unintended operation.
User Registration Key display
User Registration Key is your CD3100's unique ID. In order to use the ECLIPSE web site (E-iSERV), a
16-digit User Registration Key is necessary.
Check that the main unit is in standby mode.
1
Press the [SCREEN] button.
2
The 16 digits of your User Registration Key will be displayed.
Pressing the [SCREEN] button will display the first 8 digits. Pressing the [SCREEN]
button again will display the latter 8 digits.
ATTENTION
Your User Registration Key is a 16-digit ID composed of numbers 0-9 and letters A-F.
VII
35
Page 36

Various Settings
Reading Area Shot data
The Area Shot data that has been downloaded
from E-iSERV (web site) to a CD-R can be
loaded into the main unit and saved there.
Press the [EQ/MENU] button for
1
more than one second.
The Menu Selection mode is activated.
Press the [SELECT] (Upper/ Lower)
2
button to select FUNCTION then
press the [ENTER] button.
The function mode is activated.
Press the [SELECT] (Upper/ Lower)
3
button to select the AREA SHOT.
Press the [ENTER] button.
4
The front panel opens automatically.
Insert the CD-R to be used for read
5
the Area Shot data.
If there are no correct files on the CDR, "NO DATA" is displayed.
Press the [SELECT] (Upper/
6
Lower) button to select the saving
file.
CAUTION
• Do not turn the ignition switch or power
to the main unit ON or OFF (or remove
the front panel of the main unit) while
data reading is in progress. Data
reading will be interrupted and data may
be damaged.
• Only the [
can be operated while the system is
reading data. Ejecting the CD-R stops
reading the data and the data will not be
saved in the main unit.
Activating the Area Shot mode
Press the [MUTE/Area Shot] button
1
for more than one second.
Intersection street names and turning
directions are displayed on the screen.
Pressing and holding the [MUTE/Area
Shot] button (for 1 second or more) a
second time closes the Area Shot
mode.
● Note ●
• Confirm the caution display and
press [ENTER] to turn ON the
Area Shot mode.
(OPEN/EJECT)] button
Press the [ENTER] button.
7
The selected file will be saved.
"READING" is displayed. When
reading has finished, [COMPLETED]
will appear on the display and then it
will return to the display for selecting
the function mode. [FILE ERR]
appears if the system is unable to read
the file.
36
CAUTION
• Modes may not be changed if guidance
data has not been imported properly.
• Do not look at the screen while driving.
Page 37

How to operate the Area Shot function (U.S.A./CANADA only)
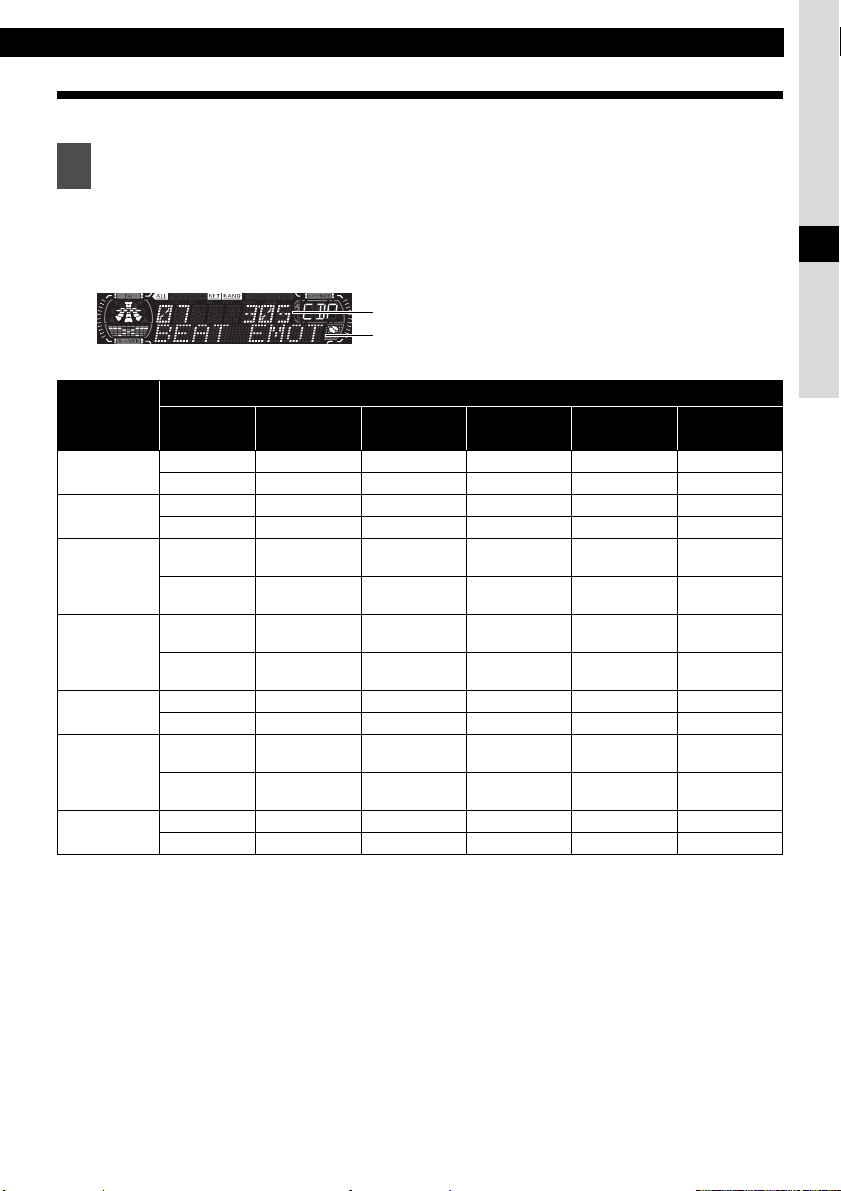
AREA SHOT Screen Configuration
By manually switching between guidance points, both previous and next guidance points can
be confirmed during guidance. Intersection street names and the direction of turns are shown
on the display in text and with arrows.
Guidance point No. display:
㽲
Displays the next (previous) point number, starting point or destination point.
Distance display:
㽳
Displays the distance between guidance points.
㩷㩷㩷
Text information (guidance point map only):
㽴
Information about guidance points (traveling direction, street names) is displayed as text.
Arrows:
㽵
Current traveling direction is indicated by arrow. .
VII
37
Page 38

Various Settings
How to operate the AUDIO CONTROL
Switching audio control modes
Various audio control modes may be fine-tuned using this procedure.
Press the [ENTER] button to select the item to be adjusted.
1
Modes will switch in the order shown below each time the button is pressed.
BASS → MID → TREB → BAL FAD → NON-F*
*1: Setting cannot be made in FM mode.
*2: NON-F (non-fader) Output is not affected by the settings of the BASS, MID and
TREBLE.
WARNING
Do not adjust the volume or other controls while driving the vehicle. Do so only while parked in a
safe location.
2
→ LOUD → SVC*1 → BASS
Mode Function
BASS Adjusts bass level.
MID
(MIDDLE)
TREB
(TREBLE)
SVC
BAL/FAD
(FADER/
BALANCE)
NON-F
(NON-FADER
LEVEL)
LOUDNESS
Adjusts middle level.
Adjusts treble level.
Adjusts different volume levels for
each audio mode. When SVC is set,
the volume level can change as
shown in the example setting (See
next page).
Adjust left/right (BALANCE) and
front/rear (FADER) speaker balance.
Adjusts non-fader level (for
connected sub-woofer).
The loudness control may be turned
on the emphasize low and high
frequencies at low volume levels.
Loudness compensates for the
apparent weakness of low and high
frequencies at low volume by
boosting the bass and treble levels.
Button operation (Press [SELECT] button)
Upper Lower Right Left
Emphasizes
low sounds.
Emphasizes
medium
sounds.
Emphasizes
high sounds.
Increase the
SVC setting
level.
Emphasizes
front
speakers.
Increase the
sub-woofer
level.
Select ON Select OFF
Softens low
sounds.
Softens
medium
sounds.
Softens high
sounds.
Decrease the
SVC setting
level.
Emphasizes
rear
speakers.
Decrease the
sub-woofer
level.
--
--
--
--
Emphasizes
right
speakers.
--
--
Emphasizes
left speakers.
38
Page 39

How to operate the AUDIO CONTROL
SVC Setting examples:
The volume for the initial FM mode (default value: 40) is used as a reference for storing the differences
in volume that have been set for each audio mode.
Audio mode FM AM CD
Default value
(Volume level)
SVC setting
(Volume level)
When volume level in FM
mode is adjusted from 40 to
45
When volume level in CD
mode is adjusted from 35 to 6045 → 70 60 → 80* 60
When volume level in AM
mode is adjusted from 80 to
20
Reference
(40)
Reference
(40)
45 55 → 60 30 → 35
70 → 52060 → 0*
0
(40)
SVC setting
value
+15 (55)
0
(40)
SVC setting
value
-10 (30)
*: The volume levels can be set to a maximum of 80 and a minimum of 0. If you try to go past
the maximum or minimum volume level, the level will not change.
The volume difference can be set within a range of -10 to +20.
ATTENTION
If the battery terminals have been disconnected because of a reason such as vehicle maintenance,
the SVC settings will return to their default values. If this happens, you will need to make the
settings again.
VIII
39
Page 40

Various Settings
How to operate the Sound Adjustment Mode
About Sound Adjustment Mode
The system has several features that allow you to adjust the acoustic characteristics inside the
cabin.
Item Function Page
Parametric EQ Three bands, frequency level, and Q curve can be adjusted. 42
Cross over
Non-fader phase Change phase of the sub-woofer. 43
Allocate specified frequency bands to each speaker for improved sound
integration.
About parametric EQ
A variety of materials are used inside a vehicle to manufacture the seats and windows, and because
these materials absorb and reflect sound in different ways, the parametric equalizer lets you adjust
the peaks and dips of the frequency characteristics inside the vehicle to compensate for this.
43
High
[Sound pressure]
Low
Low [Frequency] High
Peak
Dip
An "equalizer" is a function that corrects these peaks and dips in order to flatten the frequency
characteristics. However with a normal graphic equalizer, the median frequency and the Q
(sharpness and band width) are fixed, so that when neighboring bands are corrected, there is a limit
to the amount by which distortion in the peak and dip characteristics can be corrected. A "parametric
equalizer" lets you adjust the median frequency, Q (sharpness and band width) and gain to variable
levels, so that you can make fine adjustments to spot areas of the frequency band.
[Parametric equalizer characteristics]
1. Median frequency can be varied.
High
[Sound pressure]
Low
Low [Frequency] High
2. Gain can be varied.
High
[Sound pressure]
40
Low
Low [Frequency] High
Page 41

How to operate the Sound Adjustment Mode
3. Q (sharpness/band width) can be varied.
High
[Sound pressure]
Low
Low [Frequency] High
About crossover
The frequency band that is stored by audio media such as CDs is a fairly wide range from 20 Hz to 20
kHz, and it is difficult for a single speaker to be able to play back all frequencies in such a wide range.
Because of this, several speakers can be used, with different frequency bands (such as treble,
medium and bass) allotted to each speaker so that wide frequency ranges can be played back. The
"Crossover" function is used to allot the frequency ranges that are to be played back by each
speaker in accordance to the installed speaker units and the layout of the speakers, in order to
obtain the maximum level of performance from the speakers and to provide the most stable
frequency characteristics.
The crossover function includes a high-pass filter (HPF) for playing back treble sounds, and a lowpass filter (LPF) for playing back bass sounds. In addition, the HPF and LPF are used in
combination in order to play back sounds in the mid range.
-3dB -3dB
Bass range
(woofers)
Medium range
(Front and rear speakers)
IX
20Hz
fc(LPF)
fc(HPF)
20Hz
For example, when adjusting the HPF, frequencies that are lower than the specified frequency are
progressively dampened, rather than simply not being played back at all. The "slope" adjustment
function is the function that is used to adjust these dampening characteristics.
The slope characteristics of a filter are such that with larger slope values (for example 12 dB/oct),
the slope becomes steeper, and so the amount of sound mixing in with neighboring bands becomes
less so that only the target band is played back. However, it also causes the merging of sound
between speakers to become poorer and can result in greater distortion.
• The crossover function is a filter that allocates specified frequency bands.
• A high-pass filter (HPF) is a filter that cuts out frequencies that are lower than the specified
frequency (bass range) and allows higher frequencies (treble range) to pass through.
• A low-pass filter (LPF) is a filter that cuts out frequencies that are higher than the specified
frequency (treble range) and allows lower frequencies (bass range) to pass through.
• The slope is the signal level at which frequencies that are one octave higher or one octave lower
are dampened.
41
Page 42

Various Settings
Setting preset EQ
Press the [EQ/MENU] button to
1
select the preset EQ.
Preset EQ modes are switched in the
order shown below each time the
button is pressed.
Mode Description
DEFEAT FLAT
POWER Low frequencies emphasized
SHARP High frequencies emphasized
VOCAL Mid frequencies emphasized
CUSTOM Equalizer user preset value
ATTENTION
When BASS, MIDDLE and TREBLE values
are adjusted in audio control mode, CUSTOM
EQ will be updated. (Refer to page 38 for
details on audio control operation.)
Switching the Sound Adjustment Mode
Press the [EQ/MENU] button for
1
more than one second.
The Menu Selection mode is activated.
Press the [SELECT] (Upper/Lower)
2
button to select the SOUND.
Press the [ENTER] button.
3
The sound adjustment mode is
activated.
Press the [SELECT] (Upper/Lower)
4
button to select the setting item.
When the button is pressed, the
setting item changes as follows.
PEQ ↔ X-OVER FR ↔ X-OVER NF ↔
NON-FADER ↔ PEQ ↔
Press the [ENTER] button.
5
Switches among the adjustment modes.
ATTENTION
If returning to previous screen, press the [RTN]
button.
Parametric equalizer adjustment (PEQ)
Press the [SELECT] (Upper/Lower)
1
button to select the PEQ.
Press the [ENTER] button.
2
The PEQ setting mode is activated.
Adjusting center frequencies and Q curves
The three bands, Bass, Middle and Treble can be
adjusted and each band has frequency level and
Q curve to be adjusted. Narrow, Normal, MidWide
and Wide can be adjusted for Bass, Normal and
Narrow for Middle, and Normal for Treble.
Press the [ENTER] button to select
1
the band to be adjusted.
Each time the button is pressed, the
band changes in the following order.
BASS → MIDDLE → TREBLE →
Press the [SELECT] (Upper/Lower)
2
button to adjust the Q curve
pattern.
Each time the button is pressed, the Q
curve pattern changes as follows.
When the BASS is selected:
WIDE ↔ MidWIDE ↔ NORMAL ↔
NARROW
When the MIDDLE is selected:
NORMAL ↔ WIDE
When the TREBLE is selected:
NORMAL (FIX)
WIDE MidWIDE NORMAL NARROW
42
Page 43

How to operate the Sound Adjustment Mode
Press the [SELECT] (Right/Left)
3
button to adjust the frequency level.
Each time the button is pressed, the
frequency level changes as follows.
When the BASS is selected:
60Hz ↔ 80Hz ↔ 100Hz ↔ 120Hz
When the MIDDLE is selected:
700Hz (FIX)
When the TREBLE is selected:
7.5kHz ↔ 10kHz ↔ 12.5kHz ↔ 15kHz
Press the [EQ/MENU] or [RTN]
4
button to exit sound adjustment
mode.
ATTENTION
• Center frequencies and Q curves adjusted
here are reflected on BASS, MIDDLE and
TREBLE in the audio control mode. (Refer
to page 38 for details on audio control
operation.)
• When the center frequencies and Q curves
are adjusted, CUSTOM EQ will be updated.
Crossover adjustment (X-Over)
Press the [SELECT] (Upper/Lower)
3
button to set PASS or ON.
When the button is pressed, the
setting item changes as follows.
Upper: PASS
Lower: ON
Slope is 12dB/oct under ON.
Press the [EQ/MENU] or [RTN]
4
button to exit sound adjustment
mode.
ATTENTION
Crossover setting will be reflected in the display.
Non-fader phase (NON-FADER)
The merging of sound between the front and rear
speakers and the woofer can be improved.
Switch the phase to a phase which lets the
speakers combine without any disharmony.
IX
Allocate specified frequency bands to each
speaker for improved sound integration.
• Crossover FR adjustment (X-OVER FR)
Sets the frequency for front and rear
speakers.
• Crossover NF adjustment (X-OVER NF)
Sets the frequency for Non-Fader (subwoofer).
Press the [SELECT] (Upper/Lower)
1
button to select the X-OVER FR or
X-OVER NF.
Press the [ENTER] button.
2
The selected setting mode is
activated.
Press the [SELECT] (Upper/ Lower)
1
button to select the NON-F.
Press the [ENTER] button.
2
The non-fader setting mode is
activated.
Press the [SELECT] (Upper/Lower)
3
button to select NORMAL or
REVERSE.
When the button is pressed, the
setting item changes as follows.
Upper: NORMAL
Lower: REVERSE
Press the [EQ/MENU] or [RTN]
4
button to exit sound adjustment
mode.
43
Page 44

Various Settings
Making changes with Display Adjustment Mode
This mode lets you adjust the display contrast and change the scroll pattern.
Switching the Display Adjustment Mode
Press the [EQ/MENU] button for
1
more than one second.
The Menu Selection mode is activated.
Press the [SELECT] (Upper/Lower)
2
button to select the DISP.
Press the [ENTER] button.
3
The display adjustment mode is
activated.
Press the [SELECT] (Upper/Lower)
4
button to select the setting item.
When the button is pressed, the
setting item changes in the following
order.
CONTRAST ↔ SCROLL
Press the [ENTER] button.
5
Switches among the adjustment
modes.
ATTENTION
If returning to previous screen, press the [RTN]
button.
Adjusting the contrast (CONTRAST)
Adjust the display contrast to the best level.
Press the [SELECT] (Upper/Lower)
1
button to select the CONTRAST.
Press the [ENTER] button.
2
The contrast setting mode is activated.
Press the [SELECT] (Upper/Lower)
3
button to adjust contrast.
Upper: Increases the contrast level.
Lower: Decreases the contrast level.
Press the [ENTER] button.
4
The selected settings will take effect.
Press the [EQ/MENU] or [RTN]
5
button to exit contrast adjustment
mode.
Changing scroll pattern (SCROLL)
The scroll pattern of the text display can be
switched.
Press the [SELECT] (Upper/Lower)
1
button to select the SCROLL.
Press the [ENTER] button.
2
The scroll pattern setting mode is
activated.
Press the [SELECT] (Upper/Lower)
3
button to select scroll pattern.
When the button is pressed, the scroll
pattern changes as follows.
Upper: ONCE
Lower: REPEAT
ONCE: Text will scroll once before
changing to a fixed display.
REPEAT: Text will continue to scroll.
The selected settings will take effect.
Press the [EQ/MENU] or [RTN]
4
button to exit display adjustment
mode.
44
Page 45

Making changes with Function Mode
Making changes with Function Mode
A variety of settings can be changed.
Switching the Function Mode
Press the [EQ/MENU] button for
1
more than one second.
The Menu Selection mode is activated.
Press the [SELECT] (Upper/Lower)
2
button to select the FUNCTION.
The funciton adjustment mode is
activated.
Press the [ENTER] button.
3
The function mode is activated.
Press the [SELECT] (Upper/Lower)
4
button to select the setting item.
When the button is pressed, the
setting item changes in the following
order.
AREA SHOT*1 ↔ GUIDETONE ↔
CLOCK ADJUST ↔ DEMO ↔ HD
*2
RADIO
STEERING SW ↔ SIRIUS ID
ID
*1: Refer to page 36 for details on
*2: This setting can only be chosen
*3: Refer to page 61 for detail on AUX
*4: This setting can only be chosen
↔ AUX*3 ↔ AUX SENSE ↔
*4
*5
Area shot operation.
when an optional HD Radio tuner
unit is connected. (Refer to page
50 for details on HD Radio
operation.)
operation.
when an optional SIRIUS Satellite
radio tuner unit is connected.
(Refer to page 56 for details on
SIRIUS Satellite radio operation.)
↔ XM
*5: This setting can only be chosen
when an optional XM Satellite
radio tuner unit is connected.
(Refer to page 51 for details on XM
Satellite radio operation.)
Setting guide tone (GUIDE TONE)
The main unit is set at the factory to emit a beep
tone in response to button operation. The guide
tone feature may be disabled in the following
procedure:
Press the [SELECT] (Upper/Lower)
1
button to select the GUIDE TONE.
Press the [ENTER] button.
2
The guide tone setting mode is
activated.
Press the [SELECT] (Upper/Lower)
3
button to select the guide tone ON/
OFF.
Press the [EQ/MENU] or [RTN]
4
button to exit function mode.
Setting time (CLOCK ADJUST)
This main unit uses the 12-hour display notation.
Press the [SELECT] (Upper/Lower)
1
button to select the CLOCK ADJUST.
Press the [ENTER] button.
2
The clock setting mode is activated.
Press the [SELECT] (Right/Left)
3
button to display the item to be
selected for adjustment.
Right: Minutes will be switched.
Left: Hours will be switched.
Press the [SELECT] (Upper/Lower)
4
button to adjust the time.
X
XI
45
Page 46

Various Settings
Upper: Turns the time forward.
Lower: Turns the time back.
Press the [ENTER] button.
5
Press the [EQ/MENU] or [RTN]
6
button to exit function mode.
Switching demonstration screen display (DEMO)
Demonstration screen display settings can be
performed.
If the demonstration screen display is set to ON,
demonstration screen is displayed.
If you press a button while the demonstration
screens are being displayed, the demonstration
screens will be canceled and the audio operation
screen will be displayed. If you do not operate
the status display function within 15 seconds, the
display will return automatically to the demo
screen.
Press the [SELECT] (Upper/ Lower)
1
button to select the DEMO.
Press the [ENTER] button.
2
The demo display setting mode is
activated.
Press the [SELECT] (Upper/ Lower)
3
button to select the DEMO ON/OFF.
Press the [EQ/MENU] or [RTN]
4
button to exit function mode.
operation even with the installation of the main
unit. Import this software into your CD3100.
For details, contact the store from which you
purchased your main unit. Depending on your
vehicle’s make and model, material downloaded
from the web site may not be compatible with
your steering remote. Consult the store from
which you purchased your CD3100 about
compatibility and set-up procedures. Software for
the steering remote can be downloaded and
imported into the main unit as follows:
Access The ECLIPSE web site.
(URL: http://www.e-iserv.jp)
Download the steering remote software following
instructions provided on the ECLIPSE web site (EiSERV). (Because material available on the website
may not be compatible with the steering remotes
found on some automobiles, make sure to check
the website for details about compatibility.)
Copy the downloaded software to CD-R.
Import into the main unit.
The steering remote can be operated.
Reading steering remote data (U.S.A. only)
The steering remote data that has been
downloaded from E-iSERV (web site) to a CD-R
can be loaded into the main unit and save there.
ATTENTION
The demonstration screen display is set to ON
as a factory default. It is recommended that
you turn the demonstration screen display
OFF after installing the main unit.
Setting the steering remote function (U.S.A. only)
The vehicle’s factory loaded steering remote
becomes inoperable when the CD3100 is
installed. The ECLIPSE web site (E-iSERV)
provides software that enables steering remote
46
Press the [SELECT] (Upper/Lower)
1
button to select the Steering SW
Data.
Press the [ENTER] button.
2
The steering remote setting mode is
activated.
“INSERT DISC” will be displayed and
the front panel will open automatically.
Insert the CD-R to be used for
3
saving the steering remote data.
Page 47

Making changes with Function Mode
Press the [ (OPEN/EJECT)]
4
button to close the front panel.
Press the [SELECT] (Upper/Lower)
5
button to select files.
Press the [ENTER] button.
6
The CD-R data is read. While it is
reading, [READING] is displayed.
If the data can be read successfully,
[Completed] will appear on the display.
When using CD-R data, the CD-R will
automatically eject when reading is
complete.
Compatibility with various switches
The compatibility of the main unit's various modes and the steering remotes installed on your
vehicle are as follows:
Button
Switch Name
*1
: Switch names change depending on vehicle make and model.
*2
: If a SIRIUS/XM satellite radio tuner (purchased separately) is connected, categories can be switched when in the
*1
TRACK+
TRACK-
VOL+
VOL-
MODE
MUTE
POWER
satellite mode.
operation
Short tap TUNE UP TRACK UP – TRACK UP –
Hold
Short tap
Hold
Short tap Volume UP Volume UP Volume UP Volume UP –
Hold
Short tap
Hold
Short tap Change to
Hold
Short tap
Hold
Short tap
Hold
Tuner Disc mode AUX iPod Power OFF
SEEK UP
TUNE
DOWN
SEEK
DOWN
Gradually
increases
volume
Volume
DOWN
Gradually
decreases
volume
the next
mode
MUTE MUTE MUTE MUTE –
Power OFF Pow er OFF Power OFF Power OFF
ATTENTION
This function is available only for vehicles
equipped with steering remote with an
interface that operates by detecting voltage.
CAUTION
• Do not turn the ignition switch or power
to the main unit ON or OFF (or remove
the front panel of the main unit) while
data reading is in progress. Data
reading will be interrupted and data may
be damaged.
• Only the [VOL] button can be operated
while the system is reading data.
Mode
*2
FAST UP – FAST UP –
*2
TRACK
DOWN
FAST
DOWN
Gradually
increases
volume
Volume
DOWN
Gradually
decreases
volume
Change to
the next
mode
–
–
Gradually
increases
volume
Volume
DOWN
Gradually
decreases
volume
Change to
the next
mode
TRACK
DOWN
FAST
DOWN
Gradually
increases
volume
Volume
DOWN
Gradually
decreases
volume
Change to
the next
mode
–
–
–
–
–
Power ON in
the last
mode
Power ON in
the last
mode
XI
47
Page 48

About optional unit
How to operate the main unit with an optional CD changer connected
This section covers the operation of an optional
CD changer that is connected to the main unit.
Listening to a CD
Switch to CD changer mode.
1
For details, refer to "Switching Audio
Modes" on page 15.
Advancing to the next track or returning to the beginning of the track being played
Press the [SELECT] (Right/Left)
1
button for less than one second.
Right: Advances to the next track.
Left:
Returns to the beginning of the
track being played.
(Repeat pressing for previous
tracks.)
Operations during rotary mode
Turn the [VOL] button.
1
Turn to the right:
Advances to the next track.
Turn to the left:
Return to the beginning of the track
being played.
Repeat turning for previous tracks.
Fast Forward/Rewind
Fast forward or rewind the song currently being
played.
Press and hold the [SELECT]
1
(Right/Left) button.
Right: Fast forward.
Left: Rewind.
Playing the beginning of tracks (SCAN)
Press the [4 SCAN] button.
1
Pressing the button for less than one
second causes the changer to move
up to the next track and play it for 10
seconds, then move up to the next
track and play it for 10 seconds, and
so on, on one CD, until the button is
pressed again.
Press the button for longer than a
second to play the first 10 seconds of
the first track of every CD loaded.
ATTENTION
• To continue playing a desired track, press
the button again to stop scanning.
• After the entire disc is scanned once,
ordinary playback starts from the point
where scanning started.
48
Page 49

How to operate the main unit with an optional CD changer connected
Repeating the same track (REPEAT)
Press the [5 RPT] button.
1
Pressing on the button for less than
one second causes the changer to
repeat the track currently being
played, until the button is pressed
again.
Press the button for longer than a
second to repeat all tracks on the CD
being played.
Playing tracks in random order (RANDOM)
Press the [6 RAND] button.
1
Pressing on the button for less than
one second causes the changer to
play the tracks on the currently playing
CD in random order, until the button is
pressed again.
Press the button for longer than a
second to play tracks from all of CDs
loaded in the currently selected
changer, in random order.
ATTENTION
• During random playback, press the [5 RPT]
button to repeat the track being played. To
cancel repeat play (go back to random
play), press the [5 RPT] button again.
During playback of a particular track: The
track being played is played repeatedly.
While searching: The following track is
played repeatedly.
• Occasionally the same track happens to be
played (selected) two or more times in a
row, but it is not a sign of a problem.
• When any of the functions - "Playing the
beginning of tracks", "Repeating the same
track" and "Playing tracks in random order"
- is selected, a message such as [SCAN],
[ALL SCAN], [REPEAT], [ALL REPEAT],
[RANDOM] or [ALL RANDOM] appears on
the display to verify the current function.
• Random play is not canceled even if a
magazine is ejected.
Skipping to the next or previous CD
Press [SELECT] (Upper/Lower)
1
button.
Upper:
Selects the next higher number
disc.
Lower:
Selects the next lower number disc.
Specifying a CD to play
A CD of your choice is directly selectable out of
the loaded discs.
Press the [MODE] button for more
1
than one second.
Press a button from [1] to [6].
2
Buttons 123456
CD 123456
789101112
To select a CD from nos. 7 to 12, press
the desired button considerably longer.
Press the [MODE] button for more
3
than one second to exit direct
select mode.
XII
49
Page 50

About optional unit
How to operate the tuner with an optional HD Radio tuner connected (U.S.A. only)
About HD Radio
If the optional HD Radio (High Definition Radio)
tuner unit is connected, terrestrial digital
broadcasts can be received. When terrestrial
digital broadcasts are received, FM reception has
the same quality as a CD, and AM reception has
the same quality as conventional FM sound.
Depending on the reception status, HD Radio
can also receive analog broadcasts, which
means reception is still possible in regions with
no digital coverage.
There are automatic and manual methods for
setting stations in memory. The main unit will
accept up to 24 stations in memory: 6 in AM and
18 in FM (6 each for FM1, FM2 and FM3.) (Initial
setting)
See "How to operate the tuner" on page 29 for
information on the following operations:
• Listening to the tuner
• Tuning to a station
• Entering stations into memory automatically
(The automatic preset mode: ASM)
• Manually setting station into memory
• Preset station scan
During digital reception, [HD] is shown on the
display.
Switching between displays when receiving HD Radio
During digital reception, the name of the station
being received and other information can be
displayed.
Press the [SCREEN] button for
1
more than one second.
Each press will switch the display
items in the following sequence:
station name
album* → genre.
*: Depending on the nature of the
broadcast, no information may be shown.
→ title* → artist* →
HD Radio reception settings
The HD Radio reception method can be
selected. When the HD Radio tuner is connected
to this main unit for the first time, it will be set at
[AUTO] (automatic digital/analog selection).
Press the [EQ/MENU] button for
1
more than one second.
The Menu selection mode is activated.
Press the [SELECT] (Upper/Lower)
2
button to select FUNCTION then
press the [ENTER] button.
The function mode is activated.
Press the [SELECT] (Upper/Lower)
3
button to select HD Radio.
Press the [ENTER] button.
4
Displays the reception setting screen.
Press the [SELECT] (Upper/Lower)
5
button to select Auto or OFF.
In the [Auto] setting, the selection is
switched between digital and analog
reception automatically. In areas
where digital reception is not possible,
reception is automatically switched to
analog to avoid loss of reception.
During digital reception, [HD] is shown
on the display. This is cleared during
analog reception.
In the [OFF] setting, reception is
always analog.
Press the [ENTER] button.
6
Press the [EQ/MENU] or [RTN]
7
button to exit function mode.
50
Page 51

How to operate the tuner with an optional XM satellite radio tuner connected (U.S.A./CANADA only)
How to operate the tuner with an optional XM satellite
radio tuner connected (U.S.A./CANADA only)
About XM satellite radio
If the optional XM satellite radio tuner unit is
connected, satellite radio broadcast can be
received.
With XM satellite radio, over 170 channels are
available including music, sports, news, and
entertainment programs.
The channel can be selected from categories
such as ROCK and DANCE, or by selecting
individual channel manually.
Reception of XM satellite radio is fee based; you
have to subscribe to it.
It is possible to subscribe through the XM radio
website.
URL: http://www.xmradio.com
ATTENTION
For information about the operation and set-up
of the XM satellite radio tuner unit, see the XM
satellite radio unit's owner's manual.
The main unit will accept up to 24 stations in
memory.
Selecting the radio mode
Press the [SELECT] (Right/Left)
2
button to tune to a channel.
Right: Selects the higher channel.
Left: Selects the lower channel.
Press the [SELECT] (Right/Left)
3
button for more than one second
to start the automatic channel
search.
Reception is enabled for all channels
within the currently selected category.
(Refer to page 51 for details on
"Category selection".)
Right: Starts searching toward higher
channels.
Left: Starts searching toward lower
channels.
Operations during rotary mode
Turn the [VOL] button.
1
Turn to the right: Tunes to higher
channels.
Turn to the left: Tunes to lower
channels.
XIII
XIV
Switch to XM satellite radio mode.
1
For details, refer to "Switching Audio
Modes" on page 15.
Selecting a channel
Press the [RTN] button for less
1
than one second to switch to the
desired XM bands.
Radio bands will switch from XM1 →
XM2 → XM3 → XM4 in order each time
the button is pressed.
Category selection
The channel can be selected from among
categories such as ROCK and DANCE.
Consult the XM web site for details of categories.
Press the [SELECT] (Upper/Lower)
1
button for less than one second.
Categories will switch in order shown
below each time button is pressed.
Upper: Advance to next category.
Lower: Return to previous category.
51
Page 52

About optional unit
Direct channel selection
The channel can be selected by inputting the
channel directly.
Press the [MODE] button for more
1
than one second.
The mode will change to direct
channel selection mode.
Press the [SELECT] (Right/Left)
2
button to select the channel digit
number.
Right: Advance to next digit.
Left: Return to previous digit.
Press the [SELECT] (Upper/Lower)
3
button to select the channel
number to be input.
When the button is pressed, the media
type changes in the following order.
0 ↔ 1 ↔ 2 ↔ 3 ↔ 4 ↔ 5 ↔ 6 ↔ 7 ↔
8
↔ 9 ↔ 0 ↔
Press the [ENTER] button.
4
Starts reception.
Manually setting channels into Memory
This section covers the setting of channels in
memory under the numbered buttons.
Press the [SELECT] (Right/Left)
1
button to tune to the channel to be
entered in memory.
Select any button, from [1] to [6],
2
and press it for more than two
seconds.
The tuned channel is now memorized
and set in the button selected. Repeat
the procedure to set additional
manually tuned channels in memory,
in turn, for buttons [1] to [6]. These
buttons are called the preset buttons.
ATTENTION
If the vehicle's battery is disconnected (for
repairs to the vehicle or for removing the main
unit), all channels in memory will be lost. In
such a case, set channels in memory again.
Preset channel scan
This function enables reception of all the
channels in the preset buttons for five seconds
each.
Press the [SELECT] (Lower) button
1
for more than one second.
[P SCAN] will appear at the display,
and channels stored under preset
buttons [1] through [6] will be played
for five seconds each.
To stop the preset scan mode at a
2
desired channel, press the
[SELECT] (Lower) button again.
The main unit will stay tuned to the
desired channel.
Switching displays when using the XM satellite radio
Press the [SCREEN] button for
1
more than one second.
Each time the button is pressed the
display item changes in the following
order:
channel name
→ name → channel name →
ATTENTION
If there is no name, NO_ DATA will appear.
→ category name → title
52
Page 53

How to operate the tuner with an optional XM satellite radio tuner connected (U.S.A./CANADA only)
Displaying XM ID
Displays the XM ID. The XM ID is necessary
when subscribing to programs, etc.
Press the [EQ/MENU] button for
1
more than one second.
The Menu Selection mode is activated.
Press the [SELECT] (Upper/ Lower)
2
button to select FUNCTION then
press the [ENTER] button.
Press [SELECT] (Upper/ Lower)
3
button to select the XM ID.
Press [ENTER] button.
4
The XM ID is displayed.
Press the [EQ/MENU] or [RTN]
5
button to exit function mode.
53
XIV
Page 54

About optional unit
How to operate the tuner with an optional SIRIUS satellite radio tuner connected (U.S.A./CANADA only)
About SIRIUS satellite radio
If the optional SIRIUS satellite radio tuner unit is
connected, satellite radio broadcast can be
received.
With SIRIUS satellite radio, over 125 channels
are available including music, sports, news, and
entertainment programs.
The channel can be selected from categories
such as POP and ROCK, or by selecting
individual channel manually.
Reception of SIRIUS satellite radio is fee based;
you have to subscribe to it.
It is possible to subscribe through the SIRIUS
radio website.
URL: http://cdn.sirius.com
ATTENTION
For information about the operation and set-up
of the SIRIUS satellite radio tuner unit, see the
SIRIUS satellite radio unit's owner's manual.
The main unit will accept up to 24 stations in
memory.
Selecting the radio mode
Switch to SIRIUS satellite radio
1
mode.
For details, refer to "Switching Audio
Modes" on page 15.
Selecting a channel
Press the [SELECT] (Right/Left)
2
button to tune to a channel.
Right: Selects the higher channel.
Left: Selects the lower channel.
Press the [SELECT] (Right/Left)
3
button for more than one second
to start the automatic channel
search.
Reception is enabled for all channels
within the currently selected category.
(Refer to page 54 for details on
"Category selection".)
Right: Starts searching toward
higher channels.
Left: Starts searching toward
lower channels.
Operations during rotary mode
Turn the [VOL] button.
1
Turn to the right:
Tunes to higher channels.
Turn to the left:
Tunes to lower channels.
Category selection
The channel can be selected from among
categories such as POP and ROCK.
Consult the SIRIUS web site for details of
categories.
Press the [RTN] button for less
1
than one second to switch to the
desired SR bands.
Radio bands will switch from SR1 →
SR2 → SR3 → SR4 in order each time
the button is pressed.
54
Press the [SELECT] (Upper/Lower)
1
button for less than one second.
Categories will switch in order shown
below each time button is pressed.
Upper: Advance to next category.
Lower: Return to previous
category.
Page 55

How to operate the tuner with an optional SIRIUS satellite radio tuner connected (U.S.A./CANADA only)
Direct channel selection
The channel can be selected by inputting the
channel directly.
Press the [MODE] button for more
1
than one second.
The mode will change to direct
channel selection mode.
Press the [SELECT] (Right/Left)
2
button to select the channel digit
number.
Right: Advance to next digit.
Left: Return to previous digit.
Press the [SELECT] (Upper/Lower)
3
button to select the channel
number to be input.
When the button is pressed, the media
type changes in the following order.
0 ↔ 1 ↔ 2 ↔ 3 ↔ 4 ↔ 5 ↔ 6 ↔ 7 ↔
8
↔ 9 ↔ 0 ↔
Press the [ENTER] button.
4
Starts reception.
Manually setting channels into memory
This section covers the setting of channels in
memory under the numbered buttons.
Press the [SELECT] (Right/Left)
1
button to tune to the channel to be
entered in memory.
Select any button, from [1] to [6],
2
and press it for more than two
seconds.
The tuned channel is now memorized
and set in the button selected. Repeat
the procedure to set additional
manually tuned channels in memory,
in turn, for buttons [1] to [6]. These
buttons are called the preset buttons.
ATTENTION
If the vehicle’s battery is disconnected (for
repairs to the vehicle or for removing the main
unit), all channels in memory will be lost. In
such a case, set channels in memory again.
Preset channel scan
This function enables reception of all the
channels in the preset buttons for five seconds
each.
Press the [SELECT] (Lower) button
1
for more than one second.
[P SCAN] will appear at the display,
and channels stored under preset
buttons [1] through [6] will be played
for five seconds each.
To stop the preset scan mode at a
2
desired channel, press the
[SELECT] (Lower) button again.
The main unit will stay tuned to the
desired channel.
Switching displays when using the SIRIUS satellite radio
Press the [SCREEN] button for
1
more than one second.
Each time the button is pressed the
display item changes in the following
order:
channel name
→ artist → channel name →
ATTENTION
If there is no name, NO_ DATA will appear.
→ category name → title
XV
55
Page 56

About optional unit
Displaying SIRIUS ID
Displays the SIRIUS ID. The SIRIUS ID is
necessary when subscribing to programs, etc.
Press the [EQ/MENU] button for
1
more than one second.
The Menu Selection mode is activated.
Press the [SELECT] (Upper/ Lower)
2
button to select FUNCTION then
press the [ENTER] button.
Press [SELECT] (Upper/ Lower)
3
button to select the SIRIUS ID.
Press [ENTER] button.
4
The SIRIUS ID is displayed.
Press [SELECT] (Right/Left) button
5
to select first 9 digits and last 3
digits of SIRIUS ID.
Right: Last 3 digits
Left: First 9 digits
Press the [EQ/MENU] or [RTN]
6
button to exit function mode.
56
Page 57

How to operate the main unit with an optional Interface Adapter for iPod® connected
How to operate the main unit with an optional
Interface Adapter for iPod® connected
An iPod can be connected to the main unit using an optional Interface Adapter for iPod (iPC-106),
allowing you to listen to iPod music files and operate some iPod functions from the main unit. For
details on connecting the Interface Adapter for iPod, as well as settings and other information, refer to
the Interface Adapter for iPod OWNER'S MANUAL.
iPod is for legal or right holder-authorized copying only. Don't steal music. iPod
Apple Computer, Inc., registered in the U.S. and other countries.
Listening to iPod music files (If an iPod is not connected)
Operation
Connect an iPod using the optional Interface Adapter for iPod.
The iPod will begin playing once it is connected.
ATTENTION
• The iPod will begin playing the music file it was playing before being connected. If the main
unit cannot detect the music file that was playing previously, it will begin playing from the first
music file.
• When the iPod is connected using the optional iPod interface adapter, "ECLIPSE" will be
displayed on the iPod. While "ECLIPSE" is displayed, the iPod cannot be operated directly.
®
is a trademark of
CAUTION
• Disconnect headphones and all other accessories from the iPod before connecting it to the
optional Interface Adapter for iPod. Failure to do so may make it impossible to operate the
iPod from the main unit.
• If the iPod's equalizer has been customized, sound output may be distorted when it is
connected to the optional Interface Adapter for iPod.
Listening to iPod music files (If an iPod is connected)
Operation
Switch to the iPod mode.
For details, refer to "Switching Audio Modes" on page 15.
XV
XVI
57
Page 58

About optional unit
Advancing to the next music file or returning to the beginning of the music file being played
Operation
Press the [SELECT] (Right/Left) button for less than one second.
Right : Advances to the next music file.
Left : Returns to the beginning of the music file being played.
(Repeat pressing for previous music files.)
Fast Forward/Rewind
Operation
Press and hold [SELECT] (Right/Left) button.
Right : Fast forward.
Left : Rewind.
Searching for a music file
The iPod search mode can be operated from the main unit.
Operation
Press the [MODE] button.
1
: The search mode is activated.
Turn the [VOL] button to select the search mode item.
2
: Search mode items are selected in the following order.
Playlists ↔ Albums ↔ Artists ↔ Genres ↔ Songs
↔ Playlists
Press the [ENTER] button.
3
: The following information is displayed according to the selected search
mode item.
Playlists: The playlist selected on the iPod is displayed
Artists: Artist names are displayed
Albums: Album names are displayed
Songs: Music file names are displayed
Genres: Genre names are displayed
58
Page 59

How to operate the main unit with an optional Interface Adapter for iPod® connected
Turn the [VOL] button to select the desired search mode item, then press the
4
[ENTER] button.
: If SONGS is selected, the selected song will be played. If another search
mode item is selected, continue the selection process until you have
selected a song.
All files in the selected list (playlist, artist, album and genres) will be
played back and repeated.
After selecting the desired search mode item (ARTIST, ALBUM or
GENRES), press button [1] to play back all files in that item. No files can
be played back even if button [1] is pressed after selecting PLAY LIST.
ATTENTION
• Each search item mode will display information in the following order before displaying music
file information:
Search mode Display order
Playlists Playlists → Songs
Artists Artists → Albums → Songs
Albums Albums → Songs
Genres
Songs Songs
• The ALL option on iPod is displayed in the Playlists search mode. Select Playlists to play back
all files.
Genres → Artists → Albums →
Songs
Repeating the same music file (REPEAT)
Operation
Press the button [5].
: Pressing on the button causes the iPod to repeat the music file currently
being played, until the button is pressed again.
XVI
59
Page 60

About optional unit
Playing music files in random order (SHUFFLE)
Operation
Press the button [6].
: Pressing on the button for more than one second causes the iPod to play
the music files on the currently playing album in random order, until the
button is pressed again.
: Press the button for less than one second to play music files from all of
iPod in the currently in random order.
ATTENTION
• When any of the functions- REPEAT and RANDOM is selected, a message such as [RPT],
[ALL RAND] or [RAND] appears on the display to verify the current function.
• REPEAT and RANDOM both operate in the same manner as the REPEAT and SHUFFLE
modes on iPod.
Displaying text
The display can be switched to show album name, artist name and song name.
Operation
Press the [SCREEN] button for more than one second.
: Album name, artist name and song name are scrolled and displaying,
information is changed in following order.
Song → Artist → Album → Song
ATTENTION
• Text recorded with characters other than alphanumeric and symbols cannot be displayed.
• Characters that cannot be displayed are displayed as * (asterisks).
• If there is not text stored in music file, [NO DATA] will appear.
60
Page 61

Others
Others
Connecting portable audio players to the AUX jack
Use a commonly available accessory cord with
an optional AUX105 to connect a portable audio
player to the AUX (auxiliary) jack of this system.
A connection terminal for optional LAN cable
(AUX105) is provided on this unit.
Turn on the portable audio player
1
and start its play function.
The AUX mode is activated.
For details, refer to "Switching Audio
Modes" on page 15.
ATTENTION
• While the AUX mode is activated, actions
such as turning off the audio player or
pulling out the connection cord may cause
noise spikes that can damage the system
speakers. Be sure to avoid this possibility
by turning off system power or switching
from AUX mode to another mode before
shutting off or disconnecting the portable
audio player.
• Audio output levels will differ for the various
devices that can be connected by this
method. Carefully adjust volume until the
output level of the connected player is
known.
• Before using a portable audio player in a
vehicle, read the player's operation manual
carefully and confirm problem-free
operation in the vehicle before proceeding.
• When you connect an optional LAN cable
(AUX 105) to the main unit, another optional
equipment using E-LAN cannot be
connected.
Switching the AUX mode on and off
Press the [EQ/MENU] button for
1
more than one second.
The Menu selection mode is activated.
Press the [SELECT] (Upper/Lower)
2
to select FUNCTION then press the
[ENTER] button.
The function mode is activated.
Press the [SELECT] (Upper/Lower)
3
button to select the AUX.
The AUX mode is activated.
Press the [SELECT] (Upper/Lower)
4
button to select ON/OFF.
Each time the button is pressed, the
setting item changes as follows.
Upper: ON
Lower: OFF
The selected settings will take effect.
Press the [EQ/MENU] or [RTN] button
5
to exit sound adjustment mode.
Changing auxiliary input sensitivity
The sensitivity of the auxiliary mode can be changed.
Press the [EQ/MENU] button for
1
more than one second.
The Menu Selection mode is activated.
Press the [SELECT] (Upper/Lower)
2
to select FUNCTION then press the
[ENTER] button.
The function mode is activated.
Press the [SELECT] (Upper/Lower)
3
button to select the AUX SENSE.
The AUX sense mode is activated.
Press the [SELECT] (Upper/Lower)
4
button to select the sensitivity mode.
Pressing the button allows you to
toggle through sensitivity modes as
follows:
Low ↔ Mid ↔ Hi ↔ Low ↔
The selected settings will take effect.
Press the [EQ/MENU] or [RTN]
5
button to exit function mode.
XVI
XVII
61
Page 62

Other information
If you have a question:
[RESET] button
First check the item mentioned below before attempting to troubleshoot problems.
CAUTION
If a problem occurs, for instance when the main unit does not respond to any button presses, or the
display doesn't work correctly, press the [RESET] button using a paper clip or similar item.
Pressing the [RESET] button will delete all the entries from memory. The settings will return to
those made at the factory prior to shipment.
Displayed information (for troubleshooting)
The information listed in the chart below is displayed to show the status of the CD, Area Shot function,
XM Radio, Sirius Radio, iPod and CD changer. Refer to the chart for the appropriate action.
62
Information Contents Explanation and remedial action to take
INFO 1 CD PLAYER SHUTTER IS
INFO 2 NO DISC LOADED IN THE
INFO 3 DISCS ARE DIRTY OR
INFO 5 CD PLAYER AND CD
INFO 6 WHEN THE CD PLAY ER
INFO 7 AN INTERNAL POWER
LOAD
OPEN
MAGAZINE
DAMAGED
CHANGER FAILS
MECHANICALLY
AND CD CHANGER
INTERNAL TEMPERATURE
IS HIGH (TO PROTECT
PICKUP UNIT)
SUPPLY FAILURE IS
OCCURRING
Close the shutter.
There is no disc in the magazine or player. Load a
disc in the magazine. (Load a music disc.)
The loaded disc is dirty or upside down. Check it for
proper orientation and verify it is clean.
• The CD player and CD changer is inoperative for
some reason. Go through the magazine removal
procedure.
• If a magazine fails to eject, have your dealer fix
problem.
• The temperature in the CD player and CD changer
is too high for operation. Wait till it cools down.
• Resume playing after the "High temperature
sensed and CD stopped" display disappears. If the
CD still cannot play, have your dealer repair it.
• Turn the ACC off once before turning it on once
again to resume the operation.
• If this condition persists, please contact your
dealer.
CD changer is in the process of verifying the
presence of CDs after a magazine has been inserted
into the CD changer.
Page 63

If you have a question:
AUTH_ERR
ANTENNA
NO SIGNAL
OFF AIR
CHANNEL---
INVALID
ANTENNA
CALL 888-539SIRIUS
ACQUIRING
NO iPod iPod IS NOT CONNECTED Make sure iPod is connected correctly.
READING... iPod IS SENDING DATA Wait until the message disappears before operating.
NO DATA
ERROR1
ERROR2
AREA SHOT DATA
CANNOT BE IMPORTED
PROPERLY
XM ANTENNA IS
DISCONNECTED
XM Satellite RADIO SIGNAL
RECEIVING FAILS
NO BROADCASTING ON
SELECTED CHANNEL
UNRECEIVABLE CHANNEL
OR NO AVAILABLE
CHANNEL IN SELECTED
CATEGORY
NO RECEIVABLE
CHANNEL
Sirius ANTENNA IS
DISCONNECTED
NO SUBSCRIPTION TO
THE SELECTED CHANNEL
Sirius Satellite RADIO
SIGNAL RECEIVING FAILS
THERE ARE NO MUSIC
FILES STORED IN iPod
iPod STOPPED SENDING
DATA FOR SOME REASON
iPod SOFTWARE NOT
SUPPORTED
Confirm the E-iSERV data.
Connect the XM antenna.
Select another channel.
Select another channel.
Select another channel.
Select another channel.
Connect the Sirius antenna.
Subscribe to Sirius to receive the service by Sirius
Satellite radio.
Select another channel.
Check files in iPod.
Check connection with iPod.
Check iPod software.
63
XVIII
Page 64

Other information
Mode Problem Causes
Is the volume control up sufficiently? Turn up the volume control. 15
Is the muting function in effect (MUTE)?
Common
to all
Dead or weak
sound
Power does not
turn on.
Frequencies or
titles set in
memory are
deleted.
No guide tone
sounds.
The remote
control does not
work.
Is the fader or balance control set far to one
side?
Other probable causes include broken
audio-signal wiring or a faulty speaker.
Are there too electrical items installed,
causing a lack of power?
Other probable causes include a run-down
car battery, broken power or
interconnection wiring.
Has the car battery been disconnected for
repair or checked out?
Are there too electrical items installed and
causing lack of available power?
Other probable causes include run-down
car battery, broken power or
interconnection wiring.
Is the guide tone disabled? Enable the guide tone. 45
Is the battery low? Replace battery. 33
Is the battery installed in reverse polarity?
Is direct sunlight hitting the remote control
light receptor?
Other probable causes include a
malfunctioning remote control.
Remedial action
to take
Cancel the muting (MUTE)
function.
Readjust the fader and
balance controls to more
normal positions.
Have your dealer check the
problem.
Have your dealer check the
problem.
Have your dealer check the
problem.
Reenter them into memory. 30
Have your dealer check the
problem.
Have your dealer check the
problem.
Reinstall the battery in the
correct polarity.
Use the remote control close
to the receptor.
Have your dealer check the
problem.
Refer to
page
15
15
—
—
—
—
—
33
—
—
64
Page 65

If you have a question:
Mode Problem Causes
CD
Tuner
The disc cannot
be inserted.
The disc is
ejected as soon
as it is inserted.
Or, the disc cannot
be ejected.
The disc cannot
be changed.
Sound skips
around.
Sound is
intermittent.
Sound is bad in
quality.
The disc cannot
be ejected.
Receives no
stations, or
receives static
noise.
Is an extra label or seal applied to the disc?
Are there rough edges, deformations or
damaged areas on the disc?
Is the disc damaged?
(scratched, warped, etc.)
Is the disc clean? Clean the disc. 20
Is the player mounted at a proper angle?
Is the player mounted loosely?
Are you driving over a rough surface?
If unknown
Is the antenna retracted? Extend the antenna. —
Is the tuner correctly tuned to a station? Tune to a station. 29
Are you driving outside the service area of
your preset stations?
Are you operating other main unit such as
computer, or a mobile phone, in your
vehicle at the same time as your main unit?
Other problems may include a loose or
disconnected antenna cable, a bad antenna
cable or a bad wiring.
Remedial action
to take
Do not apply labels or seals to
the disc.
Try inserting another disc.
Remove any burrs.
Do not use a deformed or
damaged disc.
Try another disc. Do not play
a damaged disc.
Have your dealer check it out. —
Avoid playback while driving
over rough surfaces.
Press the [ OPEN/EJECT]
button for longer than five
seconds with the front panel
opened.
Tune to a local station.
(Please note, there may be
no local stations servicing the
area where you are currently
driving.)
Avoid operating such main
unit while using the main unit.
Have your authorized
Eclipse retailer check the
problem.
Refer to
page
19
19
19
12
—
29
—
—
65
XVIII
Page 66

Other information
Specifications
<GENERAL>
Power Supply 14.4V DC (11-16V)
Current Drain 3A
Dimensions (W x H x D)
In-Dash Main unit 7" x 2" x 6-1/8" (178 x 50 x 155mm)
Mass (weight) Approx. 1.6kg
Usage temperature range -20°C to +65°C (-4°F to +149°F )
Storage temperature range -40°C to +85°C (-20°F to +185°F )
<FM TUNER>
Frequency Range
Australia: 87.5~108MHz (0.1MHz step)
Latin America: 87.75~107.9MHz (0.1MHz step)
Usable Sensitivity 15dBf
50dB Quieting Sensitivity 24dBf
Frequency Response 30~15,000Hz, ±3dB
Stereo Separation 38dB (1kHz)
<AM TUNER>
Frequency Range
Australia: 522~1,710kHz (9kHz step)
Latin America: 530~1,710kHz (10kHz step)
Usable Sensitivity 22µV
USA: 87.75~107.9MHz (0.2MHz step)
Asia: 87.5~108MHz (0.05MHz step)
USA: 530~1,710kHz (10kHz step)
Asia: 522~1,629kHz (9kHz step)
<CD SECTION>
Frequency Response 20Hz~20kHz, ±3dB
Wow & Flutter Below measurable limits
Stereo Separation 80dB
S/N Ratio (A-weighted) 95dB
Dynamic Range 95dB
Total Harmonic Distortion 0.008%
<AUDIO AMPLIFIER>
Power Output 14W x 4 (20Hz~20kHz, 1% THD, 4Ω,
Output Level/Impedance 5V/55Ω line-out impedance
Loudness +10dB at 100Hz/+6dB at 10kHz
66
Vcc=14.4V)
Max. 50W x 4
Page 67

Specifications
67
XIX
Page 68

Other information
How to contact customer service
Should the product require service, please contact the following Eclipse dealer near your house.
<U.S.A/CANADA>
Fujitsu Ten Corp. of America
19600 South Vermont Avenue, Torrance, CA90502
Phone: 1-800-233-2216 (Information)
<AUSTRALIA>
Fujitsu Ten (Australia) PTY LTD.
89 Cook Street Port Melbourne, Victoria 3207 Australia
Phone: 1800 211 411
Fax: 03 9646 8084
<MALAYSIA>
CSE Automotive Technologies Sdn. Bhd.
Level 5, Axis Plaza, Jalan U1/44, Glenmarie, 40150 Shah Alam,
Selangor D.E., Malaysia
Phone: 03-5569-4200
Fax: 03-5569-4201
<SINGAPORE>
Cobara Singapore Pte Ltd
#07-02 King's Centre 390, Havelock Road Singapore 169662
Phone: 6737 2568
Fax : 6737 9538
<KOREA>
J & TED TRADE
Toy Bldg 2F, 1815 San Kyuk 2 Dong, Buk Gu, Daegu, Korea
Phone: (053) 382-8248
Fax: (053) 381-3037
<TAIWAN>
Sentrek Taiwan, LTD.
1, 9F, Lane 155, Section 3, Peishen RD., Shenkeng, Taipei Hsien, 222
Taiwan, R.O.C.
Phone: 02-2662-8110
Fax: 02-2662-8117
<INDONESIA>
68
PT. Anugrah Valova Electrindo.
Jl.Bukit Gading Raya Blok P 21-22, Kelepa Gading Barat, Jakarta 14240
Phone: (021) 4585-2857
Fax: (021) 4586-5710
Page 69

<THAILAND>
Safe-T-Cut (Thailand) Co., Ltd.
114/9 Soi Suwansawadi, Thungmahamek, Rama 4 Rd., Sathorn,
Bangkok 10120, Thailand.
Phone: 02-671-9610-12
Fax: 02-671-9614
How to contact customer service
69
XX
Page 70

Introduction
Pour votre sécurité lors de l'utilisation de l'appareil CD3100
Les symboles d'avertissement et de mise en garde illustrés ci-dessous sont présentés dans ce manuel, mais
sont également apposés sur l'appareil CD3100. Ils indiquent les méthodes sûres et correctes pour manipuler
le produit de sorte à éviter de vous blesser ou de blesser un tiers et de créer des dégâts matériels.
Avant de lire le manuel, prenez le temps de lire et de noter les informations importantes indiquées dans
cette section.
Avertissement
mort ou des blessures graves en cas de manipulation
incorrecte occasionnée par le non-respect de ce symbole.
Ce symbole indique une situation qui pourrait entraîner des
Ce symbole indique une situation qui pourrait entraîner la
Mise en garde
blessures ou des détériorations matérielles en cas de
manipulation incorrecte occasionnée par le non-respect de ce
symbole.
Veuillez lire tous les supports, tels que les manuels et les garanties, fournis avec le produit.
Eclipse ne pourra pas être tenu pour responsable des performances insatisfaisantes du produit en
raison du non-respect de ces instructions.
AVERTISSEMENT
● Ne modifiez pas ce système pour une utilisation autre que celle spécifiée dans ce
document. Veillez à respecter scrupuleusement les procédures d'installation décrites dans
le présent document. Eclipse ne pourra être tenu pour responsable des dommages, y
compris mais sans s'y limiter les blessures graves, la mort ou les dégâts matériels
survenant suite à une installation incorrecte entraînant un fonctionnement inattendu.
● La tension requise pour l'unité principale est 12 Vcc. Vous devez installer l'unité
uniquement dans un véhicule équipé d'un circuit électrique à masse négative de 12 V.
Toute autre installation risque de provoquer un incendie ou d'autres dégâts importants au
niveau de l'unité principale et du véhicule.
● Vous ne devez jamais installer l'unité principale dans un emplacement qui gênerait la
conduite du véhicule. N'obstruez pas la vue du conducteur. N'installez pas l'unité principale
dans un emplacement qui gênerait le bon fonctionnement des freins, du volant ou de tout
élément de sécurité, notamment les coussins et les ceintures de sécurité.
● Avant de percer des trous dans le véhicule pour installer l'unité principale, vous devez
vérifier l'emplacement des tuyaux, des réservoirs, du câblage électrique et de tout autre
système et composant afin d'éviter tout contact ou interférence. En outre, vous devez
également prendre les mesures nécessaires pour éviter l'apparition de rouille et tout risque
de fuites dans la zone de perçage. Dans le cas contraire, un incendie ou un choc électrique
peut se produire.
● Lors de l'installation de l'unité principale, ne retirez ou ne modifiez aucune fixation du
véhicule, notamment les écrous, les boulons, les vis, les loquets et toutes autres attaches.
Prenez soin de ne jamais détacher, déplacer ou modifier le câblage du véhicule, notamment
la mise électrique à la terre et les bandes de court-circuit. Toute modification des
composants du véhicule risque d'entraîner un fonctionnement dangereux de ce dernier.
● Avant d'installer l'appareil, déconnectez la borne négative (-) de la batterie pour éviter les
chocs électriques, les arcs électriques, les incendies et tout endommagement du câblage
du véhicule et de l'unité principale.
● Fixez le câblage à l'aide d'un ruban adhésif ou d'attaches en plastique afin que les câbles
ne gênent pas le fonctionnement du véhicule, notamment au niveau de la pédale de frein,
du levier de vitesse et du volant. Placez les câbles de manière à ce qu'aucune pièce mobile
du véhicule, notamment celles des sièges à réglage électrique, ne frotte contre ces câbles,
ni ne les écrase ou les endommage.
● Pour éviter tout endommagement de l'unité principale et du véhicule, notamment les
incendies, ne mettez pas l'unité principale sous tension s'il y a des risques de surcharge de
la capacité du circuit du véhicule. Vous devez systématiquement isoler tout câble
d'alimentation ou connexion. Installez les fusibles, disjoncteurs et relais fournis.
70
Page 71

Pour votre sécurité lors de l'utilisation de l'appareil CD3100
AVERTISSEMENT
● Les coussins de sécurité constituent un important dispositif de sécurité. Lors de
l'installation, veillez à ce que l'unité principale n'endommage pas le câblage des coussins
de sécurité ou n'empêche pas leur bon fonctionnement. Les coussins de sécurité doivent
pouvoir fonctionner correctement en cas d'accident.
● Une fois l'installation terminée, vérifiez le bon fonctionnement de tous les systèmes
électriques du véhicule, y compris les phares, l'avertisseur sonore, les feux de freinage et
les feux de détresse.
● Pour garantir votre protection, n'utilisez jamais de perceuse sans lunettes de protection.
Des débris peuvent provoquer d'importantes lésions oculaires, notamment la cécité.
● Utilisez un ruban isolant pour isoler les extrémités des câbles, même si ces derniers ne
sont pas utilisés. En isolant correctement les câbles, vous évitez tout risque de choc
électrique, d'arc électrique et d'incendie.
● Certaines unités principales utilisent des piles. Veillez à installer l'unité principale de
manière à ce que les jeunes enfants ne puissent pas accéder aux piles. En cas d'ingestion
d'une pile, consultez immédiatement un médecin.
● Lorsque vous conduisez, ne quittez jamais la route des yeux pour effectuer des réglages
sur l'unité principale. Vous devez rester vigilant pour éviter tout accident; ne vous laissez
pas distraire par le fonctionnement ou le réglage de l'unité principale.
● Le conducteur ne doit pas regarder l'écran en conduisant. Si vous ne restez pas attentif à la
route, vous risquez de provoquer un accident.
● N'introduisez pas d'objets étrangers dans la fente de chargement du disque ; vous
risqueriez de provoquer un incendie ou de subir un choc électrique.
● Ne désassemblez ni ne modifiez l'unité principale. Vous risquez de provoquer un accident,
un incendie ou un choc électrique.
● Veillez à ce qu'aucun corps étranger ou liquide ne pénètre dans les parties internes de
l'unité principale. De la fumée, un incendie ou un choc électrique risque de se produire.
● Prenez soin de conserver la télécommande dans un endroit sûr. Il y a un risque d'accident
ou d'autres problèmes si la télécommande échoue sous les pédales, par exemple, lors d'un
arrêt du véhicule ou dans un virage.
● N'utilisez pas l'appareil s'il est endommagé (l'écran ne s'allume pas ou aucun son n'est
émis). Vous risquez de provoquer un accident, un incendie ou un choc électrique.
● Remplacez les fusibles par des fusibles dotés des mêmes capacités et caractéristiques.
N'utilisez pas de fusible dont la capacité est supérieure à celle du fusible d'origine. En
utilisant un type de fusible inapproprié, vous risquez de provoquer un incendie ou
d'importants dégâts.
● Si un corps étranger ou un liquide pénètre dans l'unité principale, vous risquez de voir
apparaître de la fumée hors de cette dernière ou de sentir une étrange odeur. N'utilisez plus
l'unité principale et contactez votre revendeur. L'utilisation de l'appareil dans ces
conditions comporte un risque d'accident, d'incendie ou de choc électrique.
● Ne tentez jamais de changer de CD lorsque vous êtes au volant. Afin d'éviter tout accident
suite à un manque d'attention, arrêtez votre véhicule dans un endroit ne gênant pas la
circulation, puis procédez au changement.
● L'utilisation incorrecte de sacs en plastiques et d'emballages comporte des risques
d'étouffement pouvant entraîner la mort. Gardez-les hors de portée des enfants. Ne placez
jamais de sac en plastique sur votre tête ou votre bouche.
I
71
Page 72

Introduction
MISE EN GARDE
● L'installation de cette unité principale et de son câblage requiert des connaissances et de
l'expérience. Il est recommandé de demander à un professionnel de procéder à
l'installation. Adressez-vous à votre revendeur ou à un installateur professionnel. Tout
câblage incorrect comporte des risques d'endommagement de l'unité principale ou
d'interférence avec le bon fonctionnement du véhicule.
● Utilisez les pièces selon les instructions. L'utilisation d'autres pièces risque d'endommager
l'unité principale ou de provoquer le détachement d'autres pièces de l'unité.
N'installez pas l'unité principale dans un endroit soumis à la condensation (autour des conduites
●
d'aération, par exemple), ou qui risque d'être en contact avec l'eau ou exposé à l'humidité, la
poussière ou une fumée huileuse. Si de l'eau, de l'humidité, de la poussière ou de la fumée huileuse
pénètre dans l'unité principale, il y a un risque d'incendie, de fumée ou de dysfonctionnement.
● Évitez d'installer l'unité dans un endroit où vous ne pourrez pas la fixer en toute sécurité ou
soumis à de fortes vibrations. En cas d'installation de l'unité principale à l'aide d'un ruban
double face, nettoyez au préalable la poussière ou la colle de la zone d'installation. Cela
évitera que l'unité se détache suite à des vibrations, gênant ainsi la conduite du véhicule et
risquant de provoquer un accident de la route ou des blessures corporelles.
● N'installez pas l'unité dans un endroit exposé à la lumière direct du soleil ou à la chaleur. La
température intérieure de l'unité principale risque d'augmenter, ce qui peut provoquer un
incendie ou un dysfonctionnement.
● N'obstruez pas le ventilateur, le dissipateur thermique ou les sorties d'air de l'unité
principale. En cas d'obstruction de l'un de ces éléments, l'intérieur de l'unité surchauffe,
risquant de provoquer un incendie.
● Connectez l'unité en suivant les instructions du manuel d'installation. Une erreur de
connexion risque de provoquer un incendie ou un incident.
●
En cas d'installation de l'unité dans un véhicule équipé de coussins de sécurité, vérifiez au préalable
les instructions de sécurité du fabricant concernant le fonctionnement des coussins de sécurité.
Sinon, les coussins de sécurité risquent de ne pas fonctionner correctement.
●
Effectuez le câblage en vérifiant que les câbles ne sont pas pincés par des pièces amovibles, comme
les rails de fixation des sièges et autres éléments de fixation de l'habitacle. Il y a un risque d'accident,
d'incendie et de choc électrique suite à une déconnexion ou à une coupure électrique.
● Effectuez le câblage en vous assurant qu'aucun câble n'est en contact avec des pièces
métalliques. Suite à un contact avec une pièce métallique, les câbles risquent d'être
endommagés; il y a un risque d'incendie ou de choc électrique.
●
Lorsque vous effectuez le câblage, évitez les surfaces chaudes. Les températures élevées risquent
d'endommager le câblage provoquant un court-circuit, des étincelles ou un incendie.
● Si vous souhaitez déplacer l'unité principale, renseignez-vous auprès de votre revendeur
afin de connaître les instructions de sécurité. Le retrait et l'installation de l'unité principale
doivent être effectués par une personne expérimentée.
● Gardez le volume à un niveau faible de manière à pouvoir entendre les bruits extérieurs,
tels qu'un avertissement sonore, des voix ou une sirène. Dans le cas contraire, vous
risquez de provoquer un accident.
● Veillez à ne pas vous pincer les mains ou les doigts lorsque vous ajustez les angles de
l'appareil ou lors de la fermeture du panneau. Vous risquez de vous blesser.
● Ne mettez pas vos mains ou vos doigts dans la fente de chargement du disque. Vous
risqueriez de vous blesser.
●
Ne touchez pas la partie dissipant la chaleur sur l'amplificateur car vous risqueriez de vous brûler.
● Ne rechargez pas de piles sèches. Les piles sèches peuvent présenter des défaillances,
pouvant entraîner des blessures.
● N'utilisez que les piles spécifiées pour l'appareil. N'utilisez pas simultanément des piles
neuves et usées. Toute défaillance ou fuite issue des piles peut entraîner des blessures
corporelles ou être un facteur de pollution.
72
Page 73

Pour votre sécurité lors de l'utilisation de l'appareil CD3100
MISE EN GARDE
● Lors de la mise en place des piles dans l'unité principale, prenez soin de respecter la
polarité (positif/négatif) indiquée. En cas de non-respect de la polarité, des blessures
corporelles ou une pollution de l'environnement risquent de se produire en cas de
défaillance ou de fuite du liquide des piles.
● Changez rapidement les piles usées car un liquide risque de s'écouler de ces dernières et
d'endommager l'unité principale. Le liquide qui s'écoule des piles peut brûler votre peau ou
vos yeux. Nettoyez vos mains après chaque manipulation.
● En cas de contact de la solution alcaline des piles sèches avec votre peau ou vos
vêtements, rincez-les à l'eau. En cas de contact d'un liquide avec les yeux, rincez-les à l'eau
et consultez un médecin.
● Lorsque vous vous débarrassez des piles au lithium, placez un ruban isolant sur les
extrémités positive et négative, puis jetez-les selon les procédures locales établies. En cas
de contact avec d'autres objets conducteurs, comme des pièces métalliques, il y a un
risque d'incendie, de choc électrique ou de défaillance.
● Ne désassemblez ni ne chauffez les piles; ne les faites pas brûler et ne les mettez pas dans
l'eau. En cas de défaillance ou de fuite d'un liquide des piles, un incendie ou des blessures
corporelles peuvent se produire.
● Conservez la télécommande à l'abri de la lumière directe du soleil, des températures
élevées et de l'humidité. Il y a un risque de déformation du boîtier, ainsi que de défaillance
et fuite d'un liquide des piles.
● Utilisez l'unité principale uniquement à l'intérieur d'un véhicule. Dans le cas contraire, il y a
un risque de choc électrique ou de blessures.
● Surveillez le niveau du volume lors de la mise en marche de l'appareil. En cas d'émission
de bruit intense lors de la mise en marche, il y a un risque de dommages auditifs.
● N'utilisez pas l'appareil si les conditions de fonctionnement sont anormales, par exemple si
le son est déformé ou inaudible. Il y a des risques d'incendie.
● Cette unité principale est dotée d'une lumière laser invisible. Ne désassemblez ni ne
modifiez l'unité principale. En cas de problème, contactez le revendeur.
Toute modification de l'unité principale risque d'exposer l'utilisateur à des émissions laser
(causant des dommages visuels) ou de provoquer un accident, un incendie ou un choc
électrique.
● Si l'unité principale tombe par terre ou si les boutons de l'interface sont endommagés,
arrêtez l'unité et contactez le revendeur. Toute utilisation de l'unité dans ces conditions
risque de provoquer un incendie ou un choc électrique.
I
73
Page 74

74
Page 75

Table des matières
Pour votre sécurité lors de l'utilisation de l'appareil CD3100
........... 70
Précautions d'utilisation ............................................................ 80
Noms des commandes et des pièces ....................................... 81
Mode d'emploi du lecteur CD/MP3/WMA ..................................87
Mode d'emploi du tuner ..............................................................97
Mode d'emploi de la télécommande ........................................ 100
Mode d'emploi de la fonction Area Shot (États-Unis et Canada uniquement
Mode d'emploi de la fonction AUDIO CONTROL (Contrôle audio)
) ..... 102
....... 106
Mode d'emploi du mode de réglage du son ...........................108
Effectuer des modifications en mode de réglage de l'affichage
.......... 113
Effectuer des changements en mode fonction ...................... 115
Comment utiliser l'unité principale lorsqu'un changeur de CD
(disponible en option) est connecté
Comment utiliser le tuner lorsqu'un tuner radio HD disponible en option est
connecté (uniquement pour les États-Unis)
Mode d'emploi du tuner avec une radio satellite XM disponible en option
(États-Unis et Canada uniquement)
Mode d'emploi du tuner avec une radio satellite SIRIUS disponible en option
(États-Unis et Canada uniquement)
Comment utiliser l'unité principale lorsqu'un adaptateur d'interface pour iPod®
(disponible en option) est connecté
.........................................................119
................................................121
..........................................................123
..........................................................126
.........................................................129
I
II
III
IV
V
VI
VII
VIII
IX
X
XI
XII
XIII
XIV
XV
XVI
Divers .........................................................................................133
Si vous avez une question: ...................................................... 135
Caractéristiques techniques .................................................... 139
Comment contacter le service clientèle ................................. 140
XVII
XVIII
XIX
XX
75
Page 76

Table des matières
Pour votre sécurité lors de l'utilisation de l'appareil CD3100.......... 70
Précautions d'utilisation ..................................................................... 80
Remarques sur le fonctionnement................................................................................ 80
Noms des commandes et des pièces ................................................ 81
Mise en marche et arrêt de l'appareil ........................................................................... 83
Changement de mode audio ........................................................................................ 83
Réglage du volume....................................................................................................... 83
Changement de mode rotatif ........................................................................................ 84
Changement d'écran .................................................................................................... 85
Retrait du panneau avant ............................................................................................. 86
Utilisation du panneau amovible ............................................................................ 86
Retrait de panneau amovible ................................................................................. 86
Mise en place du panneau amovible...................................................................... 86
Mode d'emploi du lecteur CD/MP3/WMA ........................................... 87
À propos des disques compacts................................................................................... 87
À propos des CD neufs .......................................................................................... 87
À propos des accessoires de CD........................................................................... 88
À propos des CD empruntés.................................................................................. 88
Retrait des CD........................................................................................................ 88
À propos des CD de forme irrégulière.................................................................... 88
À propos du nettoyage des CD .................................................................................... 88
À propos des fichiers MP3/WMA.................................................................................. 89
Qu'est-ce qu'un fichier MP3/WMA? ....................................................................... 89
Normes des fichiers MP3 lus ................................................................................. 89
Standards des fichiers WMA lus ............................................................................ 89
Étiquette ID3/WMA................................................................................................. 89
Supports................................................................................................................. 90
Format de disque ................................................................................................... 90
Noms de fichier ...................................................................................................... 90
Sessions multiples ................................................................................................. 91
Lecture de fichiers MP3/WMA................................................................................ 91
Affichage du temps de lecture des fichiers MP3/WMA .......................................... 91
Ordre d'affichage des noms de fichier/dossier MP3/WMA..................................... 91
Lecture d'un CD............................................................................................................ 92
TRACK (FILE) UP/DOWN ............................................................................................ 93
FOLDER UP/DOWN..................................................................................................... 93
FAST FORWARD/REWIND ......................................................................................... 93
SCAN/REPEAT/RANDOM ........................................................................................... 94
FOLDER SCAN/REPEAT/RANDOM............................................................................ 94
DISPLAYING TITLE ..................................................................................................... 95
76
Page 77

Table des matières
Éjection du disque ........................................................................................................ 96
Mode d'emploi du tuner....................................................................... 97
Écoute sur le tuner ....................................................................................................... 97
Réglage d'une station................................................................................................... 97
Fonctionnement en mode rotatif................................................................................... 97
Enregistrement automatique de stations dans la mémoire (mode de présélection
automatique : ASM)...................................................................................................... 98
Enregistrement manuel des stations en mémoire ........................................................ 98
Balayage des stations préréglées ................................................................................ 98
Modification de la sensibilité de la réception pour la recherche automatique .............. 99
Modification de la zone de la bande radio .................................................................... 99
Mode d'emploi de la télécommande................................................. 100
Précautions d'utilisation de la télécommande............................................................. 100
Nettoyage de la télécommande.................................................................................. 100
Changement des piles................................................................................................ 101
Mode d'emploi de la fonction Area Shot (États-Unis et Canada
uniquement)........................................................................................ 102
À propos de la fonction Area Shot.............................................................................. 102
Pour utiliser la fonction Area Shot........................................................................ 102
Renseignements cartographiques ....................................................................... 103
Affichage du code d'enregistrement de l'utilisateur .................................................... 103
Lecture des données de la fonction Area Shot........................................................... 104
Activation du mode Area Shot .................................................................................... 104
Configuration de l'écran Area Shot............................................................................. 105
Mode d'emploi de la fonction AUDIO CONTROL (Contrôle audio) 106
Choix des modes de contrôle audio ........................................................................... 106
Mode d'emploi du mode de réglage du son .................................... 108
À propos du mode de réglage du son ........................................................................ 108
À propos de l'égaliseur paramétrique................................................................... 108
À propos du crossover ......................................................................................... 109
Setting preset EQ ....................................................................................................... 110
Changement de mode de réglage du son .................................................................. 110
Réglage de l'égaliseur paramétrique (PEQ) ............................................................... 110
Réglage des fréquences centrales et des courbes Q................................................. 110
Réglage de la fonction crossover (X-Over) ................................................................ 111
Phase non équilibrée (NON-FADER) ......................................................................... 112
Effectuer des modifications en mode de réglage de l'affichage ... 113
Passage en mode de réglage de l'affichage............................................................... 113
Réglage du contraste (CONTRAST) .......................................................................... 113
Modification du mode de défilement (SCROLL) ......................................................... 114
77
Page 78

Table des matières
Effectuer des changements en mode fonction ............................... 115
Passage en mode fonction ......................................................................................... 115
Régler la tonalité de référence (GUIDE TONE).......................................................... 115
Réglage de l'heure (CLOCK ADJUST)....................................................................... 115
Réglage de l'affichage de l'écran de démonstration (DEMO)..................................... 116
Réglage de la fonction Télécommande au volant (Etats-Unis uniquement)............... 116
Lecture des données de la télécommande au volant (Etats-Unis uniquement)... 116
Comment utiliser l'unité principale lorsqu'un changeur de CD
(disponible en option) est connecté................................................. 119
Écoute d'un CD........................................................................................................... 119
Passage à la piste suivante ou retour au début de la piste en cours de lecture ........ 119
Utilisation de la molette de commande....................................................................... 119
Avance rapide/rembobinage....................................................................................... 119
Lecture du début des pistes (SCAN) .......................................................................... 119
Répétition d'une piste (REPEAT) ............................................................................... 120
Lecture des pistes en ordre aléatoire (RANDOM)...................................................... 120
Passage au CD suivant ou précédent ........................................................................ 120
Sélection d'un CD....................................................................................................... 120
Comment utiliser le tuner lorsqu'un tuner radio HD disponible en
option est connecté (uniquement pour les États-Unis).................. 121
À propos de la radio HD ............................................................................................. 121
Passage d'un affichage à un autre lors de la réception de la radio HD...................... 121
Réglages de la réception radio HD............................................................................. 122
Mode d'emploi du tuner avec une radio satellite XM disponible en
option (États-Unis et Canada uniquement) ..................................... 123
À propos de la radio satellite XM................................................................................ 123
Sélection du mode radio............................................................................................. 123
Sélection d'un canal.................................................................................................... 123
Utilisation en mode rotatif..................................................................................... 123
Sélection des catégories ...................................................................................... 123
Sélection directe de canaux ....................................................................................... 124
Mémorisation manuelle des canaux ........................................................................... 124
Balayage des canaux préréglés ................................................................................. 124
Passage d'un affichage à un autre à l'aide de la radio satellite XM ........................... 124
Affichage du numéro d'identification XM .................................................................... 125
Mode d'emploi du tuner avec une radio satellite SIRIUS disponible en
option (États-Unis et Canada uniquement) ..................................... 126
À propos de la radio satellite SIRIUS ......................................................................... 126
Sélection du mode radio............................................................................................. 126
Sélection d'un canal.................................................................................................... 126
Utilisation en mode rotatif..................................................................................... 126
Sélection des catégories ...................................................................................... 126
Sélection directe de canaux ....................................................................................... 127
Mémorisation manuelle des canaux ........................................................................... 127
Balayage des canaux préréglés ................................................................................. 127
78
Page 79

Table des matières
Passage d'un affichage à un autre à l'aide de la radio satellite SIRIUS..................... 127
Affichage du numéro d'identification SIRIUS.............................................................. 128
Comment utiliser l'unité principale lorsqu'un adaptateur d'interface
pour iPod
Écoute de fichiers audio iPod (Si aucun iPod n'est connecté) ................................... 129
Écoute de fichiers audio iPod (Si un iPod est connecté)............................................ 129
Passage au fichier audio suivant ou retour au début du fichier audio en cours. ........ 130
®
(disponible en option) est connecté............................. 129
Avance/Retour rapides......................................................................................... 130
Recherche d'un fichier audio................................................................................ 130
Répétition d'un fichier audio (REPEAT) ............................................................... 131
Lecture des fichiers audio en ordre aléatoire (SHUFFLE) ................................... 132
Affichage de texte ................................................................................................ 132
Divers .................................................................................................. 133
Raccordement de lecteurs audio portables à la prise AUX ........................................ 133
Activation et désactivation du mode AUX ............................................................ 133
Modification de la sensibilité de l'entrée auxiliaire................................................ 134
Si vous avez une question:............................................................... 135
Informations affichées (pour le dépannage) ............................................................... 135
Caractéristiques techniques............................................................. 139
Comment contacter le service clientèle........................................... 140
* Pour en savoir plus sur le fonctionnement d'E-iSERV (Area Shot, télécommande au
volant), consultez le site Internet d'ECLIPSE indiqué ci-dessous et téléchargez le
manuel d’utilisation. (URL : http://www.e-iserv.jp)
79
Page 80

Introduction
Précautions d'utilisation
<Prenez soin d'utiliser et de manipuler correctement votre appareil CD3100 afin de prolonger sa durée
de vie.>
Remarques sur le fonctionnement
• Pour votre sécurité, gardez le volume à un faible niveau de manière à pouvoir entendre les bruits
extérieurs pendant la conduite.
• Nous vous conseillons d'utiliser dans ce lecteur des CD portant le
logo affiché à gauche.
• Vous pouvez lire des CD de musique (CD-R/CD-RW) dans ce lecteur.
Veillez à utiliser des CD qui ont correctement été gravés.
Selon l'unité de gravage qui a été utilisée, vous pouvez rencontrer
TEXT
des problèmes de lecture avec certains disques.
• Vous ne devez pas insérer de supports autres qu'un CD dans l'unité
principale.
N'insérez pas de corps étrangers, tels qu'une pièce ou une carte de
crédit, dans la fente du CD. Surveillez particulièrement les enfants car
ils sont susceptibles d'effectuer ce type de dégât.
80
• Évitez tout choc mécanique important.
Si le lecteur est soumis à d'importantes vibrations, lorsque vous
roulez sur une route en mauvais état par exemple, la lecture risque
d'être interrompue par intermittence. Dans ce cas, reprenez la lecture
du CD lorsque vous aurez retrouvé des conditions de conduite
satisfaisantes.
• À propos de la condensation.
En cas de pluie ou de basses températures, de la condensation se
dépose sur l'intérieur des vitres de la voiture, mais peut également se
déposer sur l'unité principale. Dans ce cas, la lecture du CD peut être
interrompue par intermittence, voire complètement. Éliminez la
condensation de la voiture, puis reprenez la lecture du CD.
• Nettoyage de la fente du disque.
La fente du disque devient facilement poussiéreuse. Nettoyez-la de
temps en temps pour éviter que la poussière qui s'accumule ne raye
les disques.
Page 81

Noms des commandes et des pièces
Noms des commandes et des pièces
Vue avant
II
III
N° Bouton Nom/Fonction
Bouton [ (OPEN/
EJECT)]
Ouvre/ferme le panneau
avant et éjecte le CD.
Bouton [VOL]
Permet de régler le
volume.
Bouton [SELECT]
Permet de sélectionner
les stations radio et les
pistes d'un CD.
Permet de sélectionner
les réglages choisis.
Bouton [ENTER]
Permet d'entrer l'élément
sélectionné.
Bouton [SCREEN/TEXT]
Permet de changer de
motif d'écran.
Permet de changer
d'affichage de titres.
Bouton [EQ/MENU]
Permet de modifier le
mode égaliseur
présélectionné.
Permet de changer de
mode de sélection des
menus.
N° Bouton Nom/Fonction
Bouton [Release]
Permet de détacher la
partie droite du panneau
avant de l'unité principale.
Bouton [MUTE/Area
Shot]
Permet d'activer et de
désactiver la fonction
Silence.
Permet de passer à la
fonction Area Shot.
Boutons [1] à [6]
Permet de sélectionner
les canaux de préréglage
de station radio et
d'exécuter les fonctions
du mode disque.
Bouton [SOURCE/PWR]
Permet de changer de
mode audio.
Bouton [RTN/BAND]
Permet de revenir à
l'écran précédent.
Permet de changer de
bande radio.
Bouton [MODE]
Permet d'activer/de
désactiver le mode rotatif.
81
Page 82

Introduction
N° Nom/Fonction
Fente du disque
Permet d'insérer les disques compacts.
MISE EN GARDE
Ne placez jamais d'objet, ni ne posez votre main sur le panneau avant.
82
Page 83

Mise en marche et arrêt de l'appareil
Lorsque vous mettez l'appareil en marche, l'état
actif lors du dernier arrêt de l'appareil, par
exemple CD ou tuner, est rétabli.
Lorsque l'appareil s'arrête,
1
appuyez sur le bouton [SOURCE/
PWR].
L'appareil se met en marche.
ATTENTION
Lors de la première mise en marche de l'unité
principale ou lors de la mise en marche après
une déconnexion des bornes de la batterie,
par exemple suite à l'entretien du véhicule,
l'unité principale démarre en mode FM1.
Ensuite, l'appareil recherche automatiquement
les stations radio, puis les enregistre dans les
boutons [1] à [6].
Lorsque l'appareil est en marche,
2
appuyez sur le bouton [SOURCE/
PWR] jusqu'à ce que vous
entendiez un bip sonore (pendant
plus d'une seconde).
L'appareil est arrêté et passe en mode
veille.
Noms des commandes et des pièces
*3: Ne peut pas être sélectionné lorsque le mode
AUX est désactivé. Pour plus d'informations,
reportez-vous au chapitre 'Activation et
désactivation du mode AUX' en page 133.
ATTENTION
Le mode Audio actuellement sélectionné
s'affiche en haut à droite de l'écran (lorsque
l'écran en cours d'affichage est réglé sur
normal – reportez-vous à la page 85).
Mode audio actuellement sélectionné
Réglage du volume
Tournez le bouton [VOL].
1
Tournez à droite: pour augmenter le
volume.
Tournez à gauche: pour baisser le
volume.
ATTENTION
Appuyez sur le bouton [MUTE/Area Shot] pendant
moins d'une seconde pour arrêter le volume ou le
rétablir.
III
Changement de mode audio
Appuyez sur le bouton [SOURCE]
1
pendant moins d'une seconde.
Appuyez plusieurs fois sur le bouton
pour faire défiler les modes dans
l'ordre suivant:
FM/AM → SIRIUS*1 → XM*1 →
CD (MP3/WMA)
→ FM/AM → ⋅ ⋅ ⋅ ⋅
*1: Vous ne pouvez pas sélectionner ce mode si
le périphérique correspondant n'est pas
connecté à l'unité principale.
*2: Ce mode apparaît uniquement si un CD est
inséré dans le lecteur.
*2
→ CDC*1 → AUX*3 → iPod
MISE EN GARDE
Vous ne devez pas régler le volume ni d'autres
contrôles pendant que vous conduisez.
N'effectuez ces opérations que lorsque vous
avez arrêté votre véhicule dans un endroit sûr.
*1
83
Page 84

Introduction
Changement de mode rotatif
La fonction du bouton [VOL] peut être modifiée.
Lorsque le mode rotatif est activé (ON), le bouton
[VOL] peut passer de la fonction de réglage du
volume à l'une des fonctions suivantes:
Source Fonction Page
FM/AM TUNE UP/DOWN 97
XM
SIRIUS
CD/Changeur
de CD
MP3/WMA FILE search 93
iPod
Pour obtenir plus d'informations sur les fonctions
mentionnées ci-avant, reportez-vous aux
instructions de fonctionnement de la source
audio correspondante.
Appuyez sur le bouton [MODE]
1
lorsque l'un des modes audio est
activé sur l'unité principale.
Le mode Rotation va être activé.
Lorsque le mode Rotation est activé,
l'indicateur de rotation s'affiche comme
suit.
Voyant de rotation
CHANNEL UP/
DOWN
CHANNEL UP/
DOWN
TRACK UP/DOWN 93
Recherche des
pistes
123
126
130
Si vous appuyez de nouveau sur le
bouton [MODE] ou si vous n'effectuez
aucune opération pendant plus de 10
secondes, le mode rotatif est annulé.
84
Page 85

Noms des commandes et des pièces
Changement d'écran
Vous pouvez choisir parmi plusieurs motifs d'affichage pour l'écran.
Appuyez sur le bouton [SCREEN/TEXT] pendant moins d'une seconde.
1
Lorsque vous appuyez sur ce bouton, les motifs d'affichage changent dans l'ordre
suivant:
TYPE1 → TYPE2 → TYPE3 → TYPE4 → TYPE5 → TYPE1 → ⋅ ⋅ ⋅ ⋅
Zone d'affichage (haut)
Zone d'affichage (bas)
Modèle
Mode
Radio
Satellite radio
CD
CD changer
MP3/WMA
iPod
AUX
* : s'affiche uniquement lorsqu'une radio HD optionnelle est connectée.
**: Affichage uniquement lorsque DISC dispose de la fonction CD TEXT.
Zone
d'affichage
haut Fréquence Horloge Horloge Fréquence Fréquence
bas Informations* Informations* Fréquence
haut N° CAN. Horloge Horloge N° CAN. N° CAN.
bas Informations Informations N° CAN.
haut
bas CD-TEXTE ** CD-TEXTE **
haut
bas N° de disque N° de disque
haut Temps écoulé Horloge Horloge Temps écoulé Temps écoulé
bas Informations Informations Temps écoulé
haut
bas Informations Informations
haut – Horloge Horloge – –
bas 'ENTREE' ENTREE' –
Type1
N° plage +
temps écoulé
N° plage +
temps écoulé
N° plage +
temps écoulé
Type2 Type3 Type4 Type5
Indicateur du
Horloge Horloge
N° plage +
temps écoulé
Horloge Horloge
N° plage +
temps écoulé
Horloge Horloge
N° plage +
temps écoulé
niveau sonore 1
Indicateur du
niveau sonore 1
N° plage +
temps écoulé
Indicateur du
niveau sonore 1
N° plage +
temps écoulé
Indicateur du
niveau sonore 1
Indicateur du
niveau sonore 1
N° plage +
temps écoulé
Indicateur du
niveau sonore 1
Indicateur du
niveau sonore 1
niveau sonore 2
niveau sonore 2
niveau sonore 2
niveau sonore 2
niveau sonore 2
niveau sonore 2
niveau sonore 2
Indicateur du
Indicateur du
N° plage +
temps écoulé
Indicateur du
N° plage +
temps écoulé
Indicateur du
Indicateur du
N° plage +
temps écoulé
Indicateur du
Indicateur du
III
85
Page 86

Introduction
Retrait du panneau avant
Utilisation du panneau amovible
Vous pouvez retirer le panneau avant de l'unité
principale.
Il est conseillé d'enlever ce panneau lorsque
vous quittez votre véhicule afin d'éviter tout
risque de vol de l'unité principale.
Retrait de panneau amovible
Appuyez sur le bouton [Release].
1
La partie droite du panneau avant se
détache de l'unité principale.
Retirez le panneau avant.
2
Tenez le panneau avant et tirez-le vers
vous afin de le détacher.
Rangez la façade dans son boîtier.
3
Appuyez sur le boîtier pour l'ouvrir puis
rangez-y la façade.
Mise en place du panneau amovible
Insérez la partie gauche du
1
panneau avant dans l'unité
principale.
Placez le loquet à l'extrémité gauche
du panneau avant dans la cavité qui
se trouve sur l'unité principale.
Insérez le panneau avant
2
Appuyez sur l'extrémité droite du
panneau avant pour le mettre en place
jusqu'à ce que vous entendiez un clic.
MISE EN GARDE
• Prenez soin de ne pas laisser tomber
le panneau amovible et de le
manipuler avec précaution, sinon il
risque d'être endommagé ou de ne
plus fonctionner correctement.
• Ne détachez ni ne mettez en place le
panneau amovible pendant que vous
conduisez car vous risquez de
provoquer un accident.
• Conservez le panneau à l'abri de
l'humidité, de la poussière et de l'eau.
• Ne laissez pas le panneau amovible
dans un endroit qui risque de chauffer,
tel que le tableau de bord.
86
Page 87

Mode d'emploi du lecteur CD/MP3/WMA
Mode d'emploi du lecteur CD/MP3/WMA
À propos des disques compacts
• Le signal enregistré sur le disque compact étant lu par un rayon laser, aucun élément ne touche la
surface du disque. Si la surface enregistrée est rayée ou si le disque est voilé, la qualité du son
risque d'être altérée ou la lecture risque d'être interrompue par intermittence. Pour garantir une
qualité de son optimale, respectez les précautions suivantes:
III
À propos des CD neufs
Bords inégaux
Stylo à bille
Bords inégaux
Copeaux
• Ne laissez pas un CD qui a été éjecté dans la fente du lecteur
pendant une trop longue période; le CD risque de se voiler.
Conservez les CD dans leur boîtier et à l'abri des températures
élevées et de l'humidité.
• Ne collez pas de morceaux de papier ou de ruban adhésif sur le CD.
N'écrivez pas sur le CD et ne rayez aucune face.
• La vitesse de lecture des disques dans l'unité principale est élevée.
N'insérez pas de disques voilés ou fendus dans le lecteur afin d'éviter
d'endommager ce dernier.
• Évitez de toucher la surface enregistrée lorsque vous manipulez le
disque; tenez-le par les bords.
• Vous avez peut-être remarqué que certains disques neufs ont un
centre et des bords inégaux. Retirez les irrégularités ou résidus à
l'aide d'un manche de stylo à bille, etc. Les bords inégaux peuvent
empêcher le chargement correct du disque dans l'unité principale.
Les copeaux des bords inégaux peuvent aussi coller à la surface
enregistrée et interférer avec la lecture.
IV
Face enregistrée
87
Page 88

Fonction
À propos des accessoires de CD
• N'utilisez pas d'accessoires, tels que des stabilisateurs, joints de
protection ou nettoyant pour lentille laser, vendus pour "améliorer les
performances sonores" ou "protéger les CD". Les modifications
d'épaisseur ou de dimensions extérieures du CD créées par ces
accessoires peuvent provoquer des problèmes dans le lecteur.
• Veillez à ne PAS poser de protection en forme d'anneau (ou autre
accessoire) sur vos disques. Ces protections, disponibles dans le
commerce, sont supposées protéger les disques et améliorer la
qualité sonore (et l'effet anti-vibration), mais elles risquent
d'endommager le CD en utilisation normale. Les problèmes les plus
fréquents concernent l'insertion et l'éjection des disques et l'absence
de lecture dus au détachement de l'anneau de protection dans le
mécanisme du disque.
À propos des CD empruntés
• N'utilisez pas de CD sur lequel se trouve de la colle ou des résidus de ruban adhésif ou
d'étiquette. Le CD risque de se coincer dans l'unité principale ou d'endommager cette dernière.
Retrait des CD
• Lorsque vous éjectez un disque du lecteur, retirez-le en le maintenant
droit. Si vous appuyez sur le disque lors de son retrait, vous risquez
de rayer la surface enregistrée.
ERR
EU
OK
R
À propos des CD de forme irrégulière
• Les CD ayant une forme spéciale, par exemple en forme de cœur ou
octogonale, ne seront pas lus. Ne tentez pas de les lire, même avec
un adaptateur, car ils endommagent le lecteur.
•
À propos du nettoyage des CD
• Utilisez un produit nettoyant pour disques compacts disponibles dans
le commerce pour nettoyer les CD, en les essuyant doucement du
centre vers le bord.
88
XXXX
XXXX
XXXX
• N'utilisez pas de benzine, de diluant, de pulvérisateur pour disques
vinyles ou d'autres produits d'entretien pour nettoyer les CD. Ils
risquent d'abîmer la finition du CD.
Page 89

Mode d'emploi du lecteur CD/MP3/WMA
À propos des fichiers MP3/WMA
ATTENTION
À l'exception d'un usage personnel, l'utilisation de fichiers MP3/WMA créés à partir de sources,
telles que des diffusions, des enregistrements, des vidéos et des interprétations en direct, sans
l'autorisation du détenteur des droits d'auteur est interdite.
Qu'est-ce qu'un fichier MP3/WMA?
MP3/WMA (MPEG Audio Layer III) est le format standard de compression audio. Grâce au format
MP3/WMA, un fichier peut être compressé à un dixième de sa taille d'origine.
WMA (Windows Media
des fichiers WMA est supérieur à celui des fichiers MP3.
Cette unité principale est limitée en termes de normes de fichiers MP3/WMA, de supports
enregistrés et de formats utilisables.
TM
Audio) est un format de compression audio. Le niveau de compression
Normes des fichiers MP3 lus
• Normes prises en charge: MPEG-1 Audio Layer III
• Fréquences d'échantillonnage prises en charge: 44,1, 48 (kHz)
• Taux de transfert pris en charge: 64, 80, 96, 112, 128, 160, 192, 224, 256, 288, 320 (kbps)
• Modes de canal pris en charge: monaural, stéréo, joint, mixte
* Compatible VBR. (64~320 kbps)
* Incompatible format libre.
Standards des fichiers WMA lus
• Standards supportés: WMA Ver. 7
• Fréquences d'échantillonnage prises en charge: 32, 44,1 et 48 (kHz)
• Taux de transfert pris en charge: 48, 64, 80, 96, 128, 160, 192, 256 et 320 (kbps)
Version WMA 8
Version WMA 9
* Compatible VBR (48~192 kbps).
* Ne prend pas en charge la compression sans perte.
* Ne prend pas en charge les fichiers WMA enregistrés à une
fréquence de 96 kHz et un débit de 48kbps.
IV
Étiquette ID3/WMA
Les fichiers MP3/WMA sont dotés d'une "étiquette ID3/WMA" qui permet d'ajouter des informations
afin de pouvoir enregistrer certaines données, notamment les titres de piste et les noms d'artiste.
Cette unité principale prend en charge les tag ID3 version 1.0 et 1.1 et étiquettes WMA.
89
Page 90

Fonction
Supports
Les supports compatibles avec les fichiers MP3/WMA sont les disques CD-R et CD-RW. Par rapport
au support CD-ROM généralement utilisé pour les disques musicaux, les disques CD-R et CD-RW
sont sensibles aux environnements à température et humidité élevée, et des parties du CD-R et du
CD-RW peuvent devenir illisibles. Les marques de doigts ou les rayures sur le disque peuvent
empêcher la lecture ou provoquer des interruptions de lecture. Des parties d'un CD-R ou CD-RW
laissé dans un véhicule pendant des périodes prolongées peuvent être endommagées. Il est
également conseillé de ranger les disques CD-R et CD-RW dans une boîte opaque, car ils sont
sensibles aux rayons ultraviolets.
Format de disque
Le format de disque à utiliser doit être ISO9660 Level 1 ou Level 2.
Les informations permettant de contrôler cette norme sont les suivantes:
• Nombre maximal de couches dans le répertoire: 8 niveaux
• Nombre maximal de caractères pour les noms de fichier/dossier: 32 (y compris le point (".") et les 3 lettres
• Caractères autorisés pour les noms de dossier et de fichier: A~Z, 0~9 et _ (trait de soulignement)
é
• Nombre maximum de fichiers autoris
s sur un disque : 256
[Configuration example for CD supporting MP3/WMA] (Exemple de configuration d'un CD prenant en
charge les fichiers MP3/WMA)
Root directory (F1)
Folder 2
F2
001.mp3
002.mp3
003.mp3
004.txt
005.mp3
Le nombre maximum de fichiers pouvant être enregistrés sur un disque est
de 256.
Les fichiers qui ne sont ni des MP3 ni des WMA (par exemple: 004.txt) sont
F158
F159
Folder 158
Folder 159
001.mp3
002.mp3
également comptés comme des fichiers uniques.
indiquant l'extension du fichier)
F191
Folder 191
• Nombre de dossiers pouvant être stockés sur un disque: 191
• Nombre maximal de dossiers que l'unité principale peut reconnaître:192*
*: Le répertoire racine est compté comme un seul dossier.
Noms de fichier
Seuls les fichiers comportant l'extension ".mp3" et ".wma" seront reconnus comme étant des fichiers
MP3/WMA et seront lus. Veillez à bien enregistrer les fichiers MP3 avec l'extension ".mp3". Veillez à
bien enregistrer les fichiers WMA avec l'extension ".wma". Les lettres "MP" dans l'extension de
fichiers seront reconnues, que vous les ayez saisies en minuscules ou en majuscules.
MISE EN GARDE
Si l'extension de fichier ".MP3/WMA" est apposée à un fichier autre qu'un fichier MP3/WMA, l'unité
principale le reconnaît à tort comme un fichier MP3/WMA et le lit, émettant un bruit fort qui peut
endommager les haut-parleurs. Veillez à ne pas utiliser l'extension ".mp3" ou ".wma" pour des
fichiers qui ne sont ni MP3 ni WMA.
90
Page 91

Mode d'emploi du lecteur CD/MP3/WMA
Sessions multiples
La lecture de sessions multiples est prise en charge, tout comme la lecture de disques CD-R et CDRW contenant des fichiers MP3/WMA annotés. Si vous gravez le CD en mode "Track at once"
(Piste par piste), fermez la session ou traitez le message d'erreur. Normalisez le format de chaque
session sans en changer le format.
Lecture de fichiers MP3/WMA
Lorsqu'un disque sur lequel sont enregistrés des fichiers MP3/WMA est inséré dans le lecteur,
l'unité principale commence par vérifier tous les fichiers du disque. Lors de cette vérification, aucun
son n'est émis. Il est recommandé d'utiliser un disque ne contenant que des fichiers MP3/WMA et
aucun dossier inutile afin de ne pas ralentir le processus de vérification des fichiers.
Affichage du temps de lecture des fichiers MP3/WMA
Il est possible que la durée de lecture soit incorrecte, en fonction des conditions d'écriture du fichier
MP3/WMA.
* La durée de lecture peut être incorrecte lorsque la fonction VBR Fast Haut/Bas est utilisée.
Ordre d'affichage des noms de fichier/dossier MP3/WMA
Les noms de dossiers et de fichiers MP3/WMA appartenant à un même niveau sont affichés dans
l'ordre suivant.
1.Dossiers MP3/WMA affichés en premier, dans l'ordre croissant des numéros, puis des lettres.
2.Fichiers affichés ensuite, dans l'ordre croissant des numéros, puis des lettres.
IV
91
Page 92

Fonction
Lecture d'un CD
Appuyez sur le bouton [ (OPEN/
1
EJECT)].
Le panneau avant s'ouvre.
Si un disque a déjà été chargé, il peut
être éjecté en appuyant sur le bouton
(OPEN/EJECT)].
[
Insérez un CD dans la fente avec la
2
face imprimée vers le haut.
Le panneau avant se ferme
automatiquement et la lecture du CD
démarre immédiatement.
ATTENTION
• La lecture risque d'être interrompue par
intermittence si le CD est rayé ou si la face
enregistrée est poussiéreuse.
• Si un CD est déjà chargé dans le lecteur,
appuyez sur le bouton [SOURCE] pendant
moins d'une seconde pour passer en mode
CD. (Pour plus de détails, reportez-vous à
la section "Changement de mode audio", à
la page 83.)
● Remarque ●
• Lorsqu'un disque contient des
fichiers MP3/WMA et des données
musicales enregistrées dans des
conditions standard (CD-DA), ces
dernières sont lues. Pour lire les
fichiers MP3/WMA, appuyez sur le
bouton [MODE] pendant plus d'une
seconde.
• Lorsqu'un fichier autre qu'un fichier
MP3/WMA est lu, le message "NO
SUPPORT" apparaît.
• Vous ne pouvez pas utiliser le
changeur de CD en option pour
lire les fichiers MP3/WMA.
MISE EN GARDE
N'appuyez pas sur le bouton [
EJECT)
] pendant l'insertion du CD. Vous
risqueriez de vous blesser et
d'endommager le panneau avant.
92
(OPEN/
Page 93

TRACK (FILE) UP/DOWN
Supports Fonction
Appuyez brièvement sur le bouton.
CD, MP3/WMA
Tournez le bouton.
CD (mode rotatif)
1
2
Mode d'emploi du lecteur CD/MP3/WMA
(Droite): Passe à la piste (le fichier) suivant(e).
(Gauche): Permet de revenir au début de la plage (des fichiers)
en cours de lecture.
(Droite): Permet de passer à la plage suivante.
(Gauche): Permet de revenir au début de la plage en cours de
lecture.
Appuyez sur le bouton [MODE] pendant moins
d'une seconde pour afficher la liste des fichiers.
Tournez le bouton pour sélectionner le fichier.
IV
MP3/WMA (mode rotatif)
(Droite): Permet de passer au fichier suivant.
(Gauche): Permet de revenir au début des fichiers en cours de
lecture.
Appuyez sur le bouton [ENTER].
3
ATTENTION
Pour en savoir plus sur le fonctionnement du mode Rotation, consultez la page 84.
FOLDER UP/DOWN
Supports Fonction
Appuyez sur le bouton.
MP3/WMA
(Haut): Sélectionne le dossier suivant.
(Bas): Sélectionne le dossier précédent.
FAST FORWARD/REWIND
Supports Fonction
Appuyez sur le bouton et maintenez-le enfoncé.
CD, MP3/WMA
(Droite): Avance rapide.
(Gauche): Rembobinage.
93
Page 94

Fonction
SCAN/REPEAT/RANDOM
Supports Fonction
Appuyez sur le bouton.
: L'unité principale lit les 10 premières secondes de
chaque piste. Pour annuler cette fonction, appuyez de
nouveau sur le bouton.
CD
Appuyez sur le bouton.
MP3/WMA
ATTENTION
• Pendant la lecture aléatoire, appuyez sur le bouton [5 RPT] pour relire la piste (le fichier) en
cours de lecture. Pour annuler la répétition de lecture (et revenir en mode lecture aléatoire),
appuyez de nouveau sur le bouton [5 RPT].
Pendant la lecture d'une piste: la lecture de la piste (du fichier) en cours est répétée.
Pendant une recherche: la lecture de la piste (du fichier) suivant(e) est répétée.
• Il arrive qu'une piste soit lue (sélectionnée) plusieurs fois de suite. Ce fonctionnement est
normal et ne signale pas la présence d'un problème.
• Si la fonction "Playing the beginning of tracks", "Repeating the same track" ou "Playing tracks
in random order" est sélectionnée, un message tel que [SCAN], [RPT] ou [RANDOM] apparaît
à l'écran dans le but de vérifier la fonction actuelle.
: Répétition de la lecture d'une piste. Pour annuler cette
fonction, appuyez de nouveau sur le bouton.
: Lecture des pistes en ordre aléatoire. Pour annuler
cette fonction, appuyez de nouveau sur le bouton.
: L'unité principale lit les 10 premières secondes de
chaque fichier se trouvant au même niveau que le
dossier en cours de lecture. Pour annuler cette
fonction, appuyez de nouveau sur le bouton.
: Répétition de la lecture d'un fichier. Pour annuler cette
fonction, appuyez de nouveau sur le bouton.
: Les fichiers sont sélectionnés de façon aléatoire parmi
tous les fichiers se trouvant au même niveau que le
dossier en cours de lecture. Pour annuler cette
fonction, appuyez de nouveau sur le bouton.
FOLDER SCAN/REPEAT/RANDOM
Supports Fonction
Appuyez sur le bouton pendant plus d'une seconde.
: L'unité lit les 10 premières secondes de chaque
chanson de chaque dossier. Pour annuler cette
fonction, appuyez de nouveau sur le bouton.
MP3/WMA
94
: La lecture de tous les fichiers se trouvant au même
niveau que le dossier en cours de lecture est répétée.
Pour annuler cette fonction, appuyez de nouveau sur le
bouton.
: Les fichiers de tous les dossiers sont lus de manière
aléatoire. Pour annuler cette fonction, appuyez de
nouveau sur le bouton.
Page 95

Mode d'emploi du lecteur CD/MP3/WMA
DISPLAYING TITLE
Supports Fonction
Appuyez sur le bouton pendant plus d'une seconde.
CD (texte CD)
Appuyez sur le bouton pendant plus d'une seconde.
MP3/WMA
ATTENTION
• Le texte du CD ne peut pas être affiché lorsque le chargeur de CD en option est connecté.
• Si l'étiquette du CD porte le logo ci-dessous, cela indique que le titre du CD et les titres de
pistes ont été enregistrés.
Ces informations sont affichées pendant la lecture.
: Le texte affiché défile dans l'ordre suivant
: Titre du DISQUE à Titre de la PISTE
: À chaque fois que vous appuyez sur le bouton, les
éléments suivants apparaissent dans l'ordre indiqué.
Nom du dossier/Nom du fichier * → Tag
→ N° de dossier + N° de fichier
*:L'écran affiche 9 caractères maximum, puis fait
défiler les autres caractères. Une fois le nom du
dossier affiché, le nom du fichier défile. Après le
défilement du nom du fichier, l'affichage reste fixe.
IV
• Le texte du CD, le nom du dossier/nom du fichier ou l'étiquette contenant des caractères qui
ne sont ni alphanumériques ni des symboles ne s'affiche pas.
95
Page 96

Fonction
Éjection du disque
Appuyez sur le bouton [ (OPEN/
1
EJECT)].
Le panneau avant s'ouvre et le disque
est éjecté.
ATTENTION
S'il s'avère impossible d'éjecter un CD,
appuyez sur le bouton [ (OPEN/EJECT)]
pendant plus de cinq secondes en maintenant
la façade ouverte.
Retirez le disque et appuyez sur le
2
bouton [ (OPEN/EJECT)].
Le panneau avant se ferme.
MISE EN GARDE
• Ne laissez pas le panneau avant ouvert
lorsque vous conduisez. Vous pouvez
vous blesser en cas d'arrêt d'urgence,
par exemple.
• N'essayez pas de fermer le panneau
avant à la main. Cette manœuvre
risquerait de l'endommager.
96
Page 97

Mode d'emploi du tuner
Mode d'emploi du tuner
ATTENTION
• Si vous avez enregistré des stations radio
en mémoire, appuyez sur l'un des boutons
(de [1] à [6]) pour rappeler directement la
station voulue. (Reportez-vous à la section
"Enregistrement manuel des stations en
mémoire", à la page 98)
Écoute sur le tuner
Passez en mode Tuner.
1
Pour plus de détails, reportez-vous à
la section "Changement de mode
audio", à la page 83.
Réglage d'une station
Pour mémoriser les stations, vous disposez
d'une méthode automatique et d'une méthode
manuelle. L'unité principale peut stocker en
mémoire jusqu'à 24 stations: 6 en AM, 18 en FM
(6 en FM1, 6 en FM2 et 6 en FM3.) (Réglage
initial)
Appuyez sur le bouton [RTN/
1
BAND] pendant moins d'une
seconde pour accéder à la bande
FM ou AM voulue.
À chaque fois que vous appuyez sur le
bouton, les bandes radio changent
dans l'ordre suivant: FM1
FM3 → AM.
→ FM2 →
Appuyez sur le bouton [SELECT]
3
(Droite/Gauche) et maintenez-le
enfoncé pour lancer la recherche
automatique de stations.
Droite
:
Démarre la recherche des fréquences
plus élevées.
Gauche
:
Démarre la recherche des fréquences
moins élevées.
ATTENTION
Il est parfois difficile de conserver une réception
optimale car l'antenne fixé sur le véhicule est en
mouvement permanent (par rapport à l'antenne
de diffusion), ce qui entraîne une variation de la
puissance du signal de réception radio. Parmi les
autres facteurs ayant une incidence sur la
réception figurent les interférence provenant
d'obstacles naturels et des poteaux de
signalisation.
Lorsqu'une unité de tuner radio HD disponible
en option est connectée, la réception de
radiodiffusion numérique est prioritaire. (Aux
États-Unis uniquement)
Fonctionnement en mode rotatif
Pour connaître la méthode de fonctionnement en
mode Rotation, reportez-vous à la page 84.
IV
V
V
Appuyez sur le bouton [SELECT]
2
(Droite/Gauche) pour régler une
station.
Droite:
Règle sur des fréquences plus
élevées.
Gauche:
Règle sur des fréquences moins
élevées.
97
Page 98

Fonction
Enregistrement automatique de stations dans la mémoire (mode de présélection automatique : ASM)
Appuyez sur le bouton [SELECT]
1
(Haut) pendant plus de deux
secondes jusqu'à ce que vous
entendiez un bip sonore.
Le mode de présélection automatique
démarre.
Le message [ASM ON] s'affiche à
l'écran et les stations sont
automatiquement enregistrées en
mémoire sous les boutons [1] à [6].
Ces boutons sont appelés boutons de
préréglage.
ATTENTION
• Ces boutons (de [1] à [6]) permettent de
sélectionner une station en une seule
opération. La fréquence de la station
sélectionnée apparaît.
• Lors de l'enregistrement en mémoire d'une
nouvelle station, la précédente station
mémorisée est supprimée.
• Si le nombre de stations trouvées est
inférieur à six, les stations enregistrées
sous les boutons restants sont conservées.
MISE EN GARDE
Si la batterie du véhicule est débranchée
(lors de réparations effectuées sur le
véhicule ou du retrait de l'unité principale),
aucune des stations mémorisées ne sera
conservée. Dans ce cas, enregistrez à
nouveau les stations en mémoire.
Enregistrement manuel des stations en mémoire
Cette section traite de l'enregistrement des stations
en mémoire sous les boutons numérotés.
Appuyez sur le bouton [SELECT]
1
(Droite/Gauche) pour régler la
station à mémoriser.
Appuyez sur l'un des boutons de
2
préréglage (de [1] à [6]) pendant
plus de deux secondes.
La station réglée est enregistrée en
mémoire sous le bouton sélectionné.
Répétez ces étapes pour enregistrer
manuellement en mémoire chaque
station sous les boutons [1] à [6].
Ces boutons sont appelées boutons
de préréglage.
MISE EN GARDE
Si la batterie du véhicule est débranchée
(lors de réparations effectuées sur le
véhicule ou du retrait de l'unité principale),
aucune des stations mémorisées ne sera
conservée. Dans ce cas, enregistrez à
nouveau les stations en mémoire.
Balayage des stations préréglées
Cette fonction permet d'activer pendant cinq
secondes toutes les stations enregistrées sous
les boutons de préréglage.
Appuyez sur le bouton [SELECT]
1
(Bas) pendant plus d'une seconde.
[P SCAN] apparaît sur l'affichage et
les stations mémorisées sous les
boutons de présélection [1] à [6] sont
activées chacune pendant cinq
secondes.
Pour arrêter le mode de balayage
2
des stations préréglées sur la
station voulue, appuyez à nouveau
sur le bouton [SELECT] (Bas).
L'unité principale reste réglée sur la
station choisie.
98
Page 99

Mode d'emploi du tuner
Modification de la sensibilité de la réception pour la recherche automatique
L'unité principale vous permet de sélectionner la
sensibilité de la réception pour la recherche
automatique de stations. Les deux modes de
sensibilité disponibles sont AUTO et DX.
Pendant la recherche automatique,
la sensibilité de la réception passe
automatiquement sur l'un des deux
niveaux. Au départ, la sensibilité de
Mode
AUTO
Mode DX
Lorsqu'une unité de tuner radio HD (disponible
en option) est connectée, la sensibilité de la
réception est paramétrée sur le mode AUTO.
Le mode DX n'est pas disponible. (Aux ÉtatsUnis uniquement)
1
2
la réception est paramétrée sur le
niveau le plus bas afin de permettre
la réception des stations ayant un
signal fort. En cas d'échec de
réception de stations, la sensibilité
de la réception est alors augmentée
afin de permettre la réception des
stations ayant un signal plus faible.
Étant donné que la sensibilité de la
réception est paramétrée à l'origine
sur le niveau le plus élevé, la
réception des stations avec de
faibles signaux est possible. (Vous
pouvez ne pas bien entendre
certaines stations en raison du
croisement des signaux.)
ATTENTION
Vérifiez que l'unité principale est
en mode veille.
Appuyez sur le bouton [1] et
maintenez-le enfoncé, puis
appuyez sur le bouton [EQ/MENU]
et maintenez les deux boutons
enfoncés pendant plus de trois
secondes.
Le mode bascule entre AUTO et DX
à chaque fois que vous appuyez sur
les boutons.
Modification de la zone de la bande radio
La zone des bandes radio utilisées dans la
région nord-américaine et les régions latine/
asiatique/australienne peut être permutée. Le
paramétrage par défaut est USA (Amérique du
nord).
ATTENTION
Lorsqu'une unité de tuner radio HD (disponible
en option) est connectée, la zone de bande
radio est paramétrée sur USA. Les autres
zones de bande radio ne sont pas disponibles.
(Aux États-Unis uniquement)
Vérifiez que l'unité principale est
1
en mode veille.
Appuyez sur le bouton [3] et
2
maintenez-le enfoncé, puis
appuyez sur le bouton [EQ/MENU]
et maintenez les deux boutons
enfoncés pendant plus de trois
secondes.
À chaque fois que vous appuyez sur
les boutons, les bandes radio défilent
dans l'ordre suivant:
USA →
USA
Lorsque vous mettez l'appareil en
marche, celui-ci recherche
automatiquement les stations
d'émission, puis les enregistre sous
les boutons [1] à [6].
ASIA → AUS → LATIN →
V
99
Page 100

Fonction
Mode d'emploi de la télécommande
Précautions d'utilisation de la télécommande
• Manipulez la télécommande avec précaution car elle est petite et légère. Prenez soin de ne pas
laisser tomber votre télécommande et de la manipuler avec précaution, sinon vous risquez de
l'endommager, d'user les piles ou de provoquer un dysfonctionnement.
• Gardez la télécommande à l'abri de l'humidité, de la poussière et de l'eau. Ne la soumettez pas à
d'importants chocs.
• Veillez à ne pas placer la télécommande près d'un endroit où elle risque de chauffer, tel que le
tableau de bord ou le ventilateur de chauffage. En cas de surchauffe de la télécommande, son
boîtier risque de se déformer ou d'autres problèmes peuvent se produire.
• N'utilisez pas la télécommande lorsque vous conduisez car vous risquez de provoquer un accident.
• Lorsque vous souhaitez utiliser la télécommande, dirigez-la vers le récepteur lumineux.
• Le photorécepteur peut ne pas fonctionner correctement s'il est exposé à une lumière vive, comme
la lumière directe du soleil.
• Retirez les piles de la télécommande lorsque vous ne l'utilisez pas pendant une période prolongée.
Nettoyage de la télécommande
• Utilisez un tissu sec pour nettoyer la télécommande. Si cette dernière est très sale, nettoyez-la avec
un tissu que vous aurez mouillé avec un détergent dilué. N'utilisez ni alcool, ni diluant, car ils
risqueraient d'endommager le revêtement de la télécommande.
• N'utilisez en aucun cas de benzine ou de diluant. Ces produits endommageraient le boîtier ou le
revêtement.
Télécommande
100
N° Bouton Nom/Fonction
Bouton [PWR]
Permet de mettre en marche/
d'arrêter l'unité principale.
Bouton [TU]
Permet de passer en mode
tuner.
Bouton [BAND]
Permet de changer de bande
radio.
Bouton [ ]
Permet de baisser le volume.
Bouton [MUTE/Area Shot]
Permet d'activer et de
désactiver la fonction silence.
 Loading...