

Eclipse 55090 Owner's Manual
R
by FUJITSU TEN
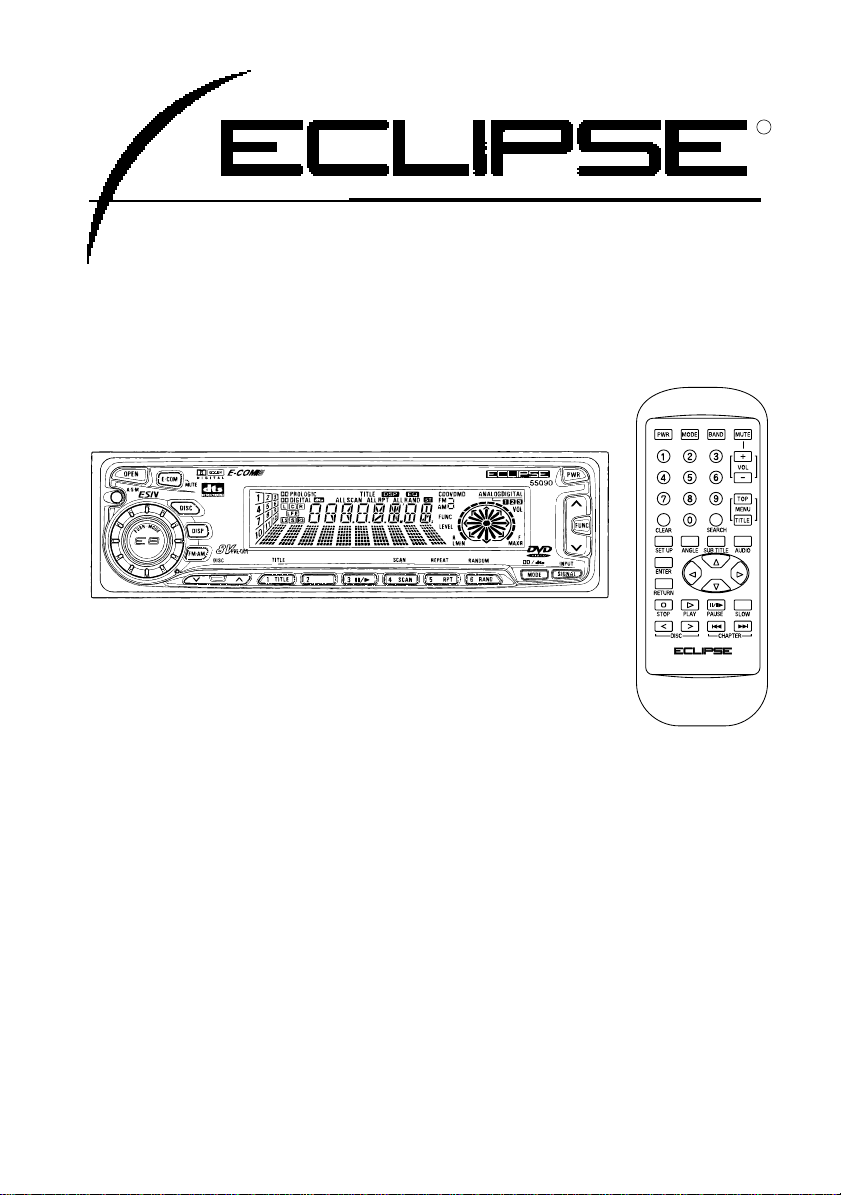
MODEL 55090
ESN E8 DVD TUNER WITH CDC/E-COM/DSP
CONTROL AND REMOTE
OWNER'S MANUAL
We appreciate your purchase of this tuner.
Please read through this manual for correct operation.
We suggest that after reading it you keep this manual
in a safe place for future reference.

For your safety in using the
Warning
Caution
Warning
55090
Warnings and caution signs, illustrated below, are posted
throughout this manual as well as on the 55090. They show safe
and correct ways to handle the product so as to prevent personal
injury to you and others and avoid damage to property.
Before reading through the manual, take time to read through
and learn the important information listed in this section.
This sign indicates a situation in which
incorrect handling through disregard of a sign
might result in death or serious personal
injury.
This sign indicates a situation in which
incorrect handling through disregard of a sign
might result in personal injury or may result
solely in damage to property.
Do not modify this system for use other than that specified
•
herein. Also, do not deviate from the installation procedures
described herein; Eclipse will not be held liable for damages
including, but not limited to serious injury, death or property
damage resulting from installations that enable unintended
operation.
This unit is intended for operation in DC 12-volt, negative-
•
grounded vehicles only. Never use it in 24-volt vehicles such
as heavy trucks or diesel cars with cold-region specifications.
Do not change CDs while driving. Doing so may result in an
•
accident.
2

Do not place the vinyl storage bag over a person. It may
Warning
•
cause a serious accident or death by suffocation.
Do not adjust the controls while driving the car. To adjust the
•
controls, stop the car in a safe location.
To prevent accidents, store batteries for the remote control
•
out of the reach of small children. In case a child swallows a
battery, consult a physician immediately.
Do not disassemble or rebuild this product. Doing so may
•
cause an accident, fire or electrical shock.
When it is necessary to replace the fuse, always use a fuse of
•
the correct rating (number of amperes). Use of fuses with
higher amperage ratings may cause a fire.
Do not operate the product in a malfunctioning condition, for
•
instance, when the audio does not play. Doing so may result
in an accident, fire or electrical shock.
If an abnormal situation occurs, such as foreign matter
•
entering or liquid splashing on the product, or smoke or a
strange odor emitting from the unit, shut off the product
immediately and consult the dealer from whom you purchased
it. Continued operation may cause an accident, fire or
electrical shock.
Do not install this product in locations where it may interfere
•
with the operation of the steering wheel, shift lever, brake
pedal, etc. Otherwise, an accident or injury may result.
To prevent damaging the vehicle, confirm the locations of
•
hoses, electrical wiring, and the fuel tank prior to drilling holes
to install this product. Also, take care so that the product dose
not interfere, nor come in contact with them. Otherwise, a fire
may result.
3
When installing this product, never use the existing nuts or
Caution
Warning
•
bolts that secure parts of the fuel tank, or the steering or
braking system. Otherwise, improper steering or braking or a
fire may result.
To prevent a short circuit from occuring, disconnect the
•
battery's negative terminal before installing this product.
Otherwise, an electric shock or injury may result
When using an existing nut and/or bolt from the vehicle to
•
ground this product, do not use any that secure parts of the
steering or braking systems. Otherwise, an accident may
results.
Bundle cables and harnesses with electrical tape or wire ties
•
to prevent them from interfering with moving parts. If they
should entangle the steering wheel, shift lever or brake pedal,
an accident may result.
Never supply power to another electrical appliance by splicing
•
or tapping into this product's power lead(wire). Otherwise, the
current capacity of the wire will be exceeded, resulting in a fire
or electric shock.
Never attempt to disassemble or modify the product.
•
Otherwise, an accident, fire or electric shock may result.
Play the audio at a moderate volume level that permits you to
•
hear sounds from outside the car. Driving without being able
to hear outside sounds may result in an accident.
Keep foreign objects out of the disc slot. They may cause fire
•
or electrical shock. Another possibility is that discs may be
damaged or become stuck.
4

Do not stick your fingers or hands into the disc slot. Doing so
Caution
•
may cause personal injury.
This product must be operated only as on-board equipment,
•
or it may cause electrical shock or injury.
Do not play distorted sounds for long periods of time;
•
the speakers may overheat and cause a fire.
This product uses an invisible laser light. In case a problem
•
develops, be sure to consult the dealer from whom you
purchased the product. Do not disassemble or rebuild the
unit; rebuilding it may expose you and others to a dangerous
laser emission (which would damage eyesight) or cause an
accident.
Never use batteries other than those specified. Do not mix
•
new and old cells. Doing so may cause a fire or personal injury
due to a battery explosion or chemical leaks.
Pay attention to the (+) and (-) polarity of the battery when
•
installing them in the product. Incorrect installation may cause
personal injury or product damage spoilage due to a battery
explosion or chemical leakage.
For best results, this product should be installed by a
•
professional installer. Contact the dealer whom you purchased
the product for an appointment.
When installing this product, be sure to use the supplied
•
mounting hardware. If parts other than those supplied are
used, the unit may be damaged internally, or may not be held
in place securely and become dislodged.
Avoid installing this product in places where it may get wet,
•
such as near windows, or in places that are moist or dusty.
Presence of liquid, moisture or dust inside this product can
cause short circuiting, resulting in smoke or fire.
5

Do not install this product in locations where it cannot be
Caution
•
fastened securely, such as places subject to frequent
vibration. Otherwise, it may become dislodged and cause an
accident or injury.
If this product is not connected properly, a short circuit, fire or
•
accident may occur.
When routing cables, use care so that they do not contact
•
sharp metal parts such as brackets or screw tips. Otherwise,
a short circuit, electric shock, fire or accident may result.
6

Table of Contents
Operating precautions .............................................. 10
Notes on operation ...................................................................... 10
About CDs and DVDs .................................................................. 12
About cleaning a disc .................................................................. 14
Names of controls and parts .................................... 15
ESN (Key CD) security operating procedure ........... 16
How to program the Key CD ....................................................... 16
How to cancel the Key CD .......................................................... 17
How to change the Key CD ......................................................... 18
How to resume normal operation (ESN security lock out) ............ 19
What happens if an incorrect CD is inserted? .............................. 20
How to turn the security indicator on/off ...................................... 21
How to read the Electronic Serial Number ................................... 22
Basic operation ......................................................... 23
Turning the power on and off ...................................................... 23
Playing back discs ....................................................................... 23
Listening to the tuner ................................................................... 24
Adjusting audio volume ............................................................... 25
Adjusting the angle of the front panel ........................................... 25
Displaying the clock ..................................................................... 26
Others ......................................................................................... 26
How to operate the DVD player ................................ 31
Inserting a DVD ........................................................................... 32
Changing to DVD mode .............................................................. 32
Fast-forwarding and rewinding pictures ....................................... 33
Searching for pictures ................................................................. 34
Repeat play back (REPEAT) ........................................................ 34
Pausing the picture / Frame-by-frame playback .......................... 35
Stopping playback ...................................................................... 35
Displaying DVD menus ................................................................ 36
Displaying title menus .................................................................. 37
Selecting different multiplex audio channels ................................. 38
Selecting different subtitle languages ........................................... 38
Selecting different multiplex angles .............................................. 39
7

Initial DVD settings ....................................................................... 40
Discs which are compatible with this player ................................. 44
Notes on DVD ............................................................................. 45
Symbols used on DVD video discs .............................................. 46
About copyright ........................................................................... 47
Explanation of DVD video terms .................................................. 48
Table of language codes ............................................................. 51
How to operate the CD player .................................. 53
Listening to CDs .......................................................................... 53
Advancing to the next track or returning to
the beginning of the track being played ....................................... 54
Playing the beginning of tracks (SCAN) ........................................ 54
Repeating the same track (REPEAT) ............................................ 55
Playing tracks in random order (RANDOM) .................................. 55
Switching the display ................................................................... 55
Switching a CD to pause / play ................................................... 56
Ejecting the disc .......................................................................... 56
Creating a title for a CD ............................................................... 57
Changing a previously set title ..................................................... 59
Deleting a previously created title ................................................. 60
Displaying CD text ....................................................................... 60
How to operate the tuner .......................................... 61
Tuning to a station ....................................................................... 61
Entering stations into memory automatically
(The automatic preset mode: ASM) ............................................. 62
Manually setting stations into memory ......................................... 63
Preset station scan ...................................................................... 64
Switching the display ................................................................... 64
FM reception characteristics ........................................................ 65
How to use the special remote control .................... 68
Precautions in use of the remote control....................................... 68
Cleaning the remote control ......................................................... 68
Turning the power on/off ............................................................. 69
Adjusting the audio volume .......................................................... 69
Switching playback modes .......................................................... 70
How to play the tuner .................................................................. 70
How to play CDs ......................................................................... 71
Replacing the battery .................................................................. 72
8

How to use an optional NOB remote control ........... 75
Turning the power on/off ............................................................. 75
Adjusting the audio volume .......................................................... 75
Switching playback modes .......................................................... 76
How to play the tuner .................................................................. 76
How to play CDs ......................................................................... 77
Illuminating the NOB remote control ............................................ 78
Enabling the optional E-COM feature ........................................... 78
Replacing the battery .................................................................. 79
How to operate the receiver with an optional CD
changer connected ................................................... 80
Basic operation ........................................................................... 80
How to operate the receiver with an optional
DIGITAL SOUND PROCESSOR DORBY DIGITAL
& DORBY PRO-LOGIC / DTS DECODER ................. 83
How to operate the DSP functions .............................................. 83
How to operate the EQ functions ................................................ 85
Speaker settings ......................................................................... 88
Switching the position selector .................................................... 91
Switching the dynamic range ....................................................... 92
Switching the input channel ......................................................... 93
Switching the surround playback mode ....................................... 94
If you have a question: .............................................. 95
Displayed information (for troubleshooting) .................................. 96
Specifications .......................................................... 101
Before installation ................................................... 103
Components.............................................................................. 103
Mounting instruction ............................................... 104
Mounting the main unit .............................................................. 104
Names of lead wires and destinations ....................................... 106
System ...................................................................................... 107
9
Operating precautions
u
Operating precautions
<Your 55090 will perform well over a long period of time through correct
handling and care.>
Notes on operation
• For your safety, play only at volume levels that allow outside sounds to
be heard.
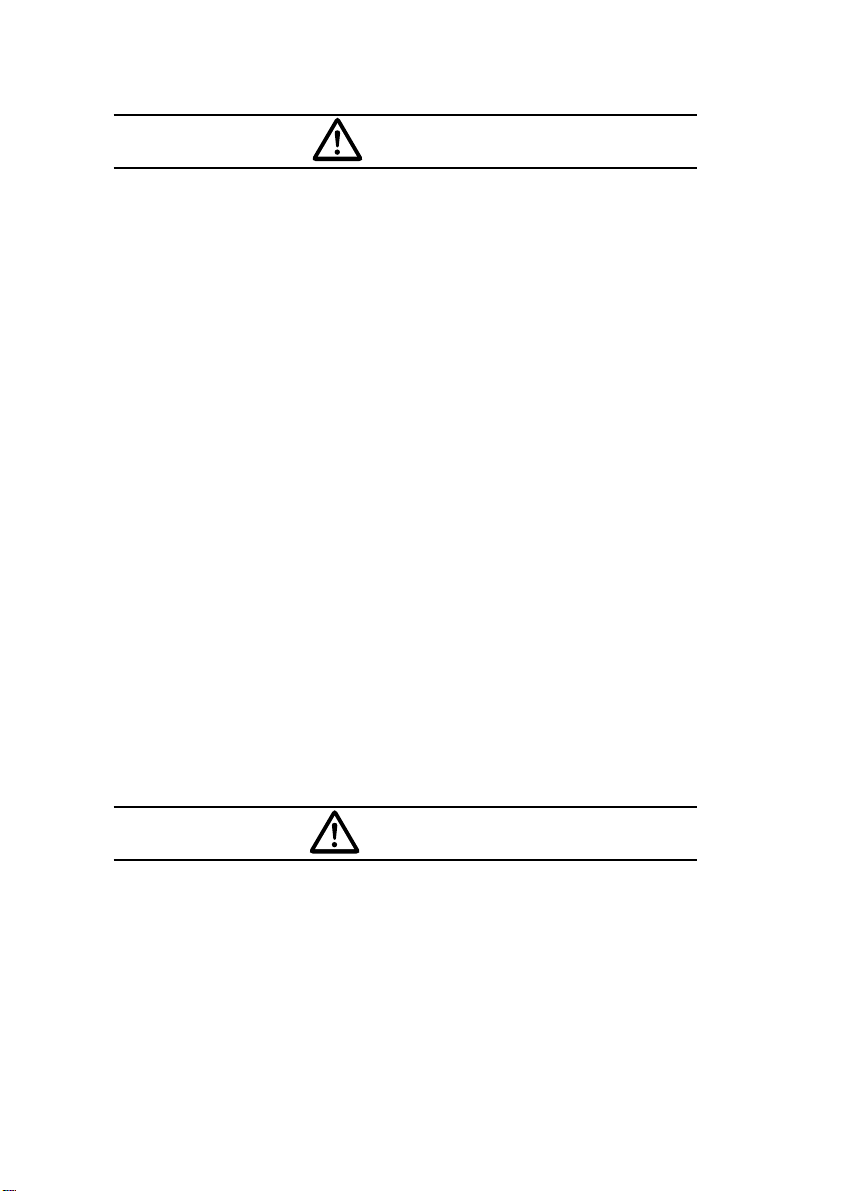
• This player can only play CDs and DVDs
bearing the logo shown at the left.
• It may not be possible to play back some
tracks on CD-Rs.
• It may not be possible to play back CD-Rs
with certain characteristics, or CD-Rs which
are scratched, dirty, or which have been left
inside a vehicle for long periods.
• CDs cannot be played back until all
sessions recorded on the CD-R have been
closed.
• CD-RW discs cannot be played back.
10
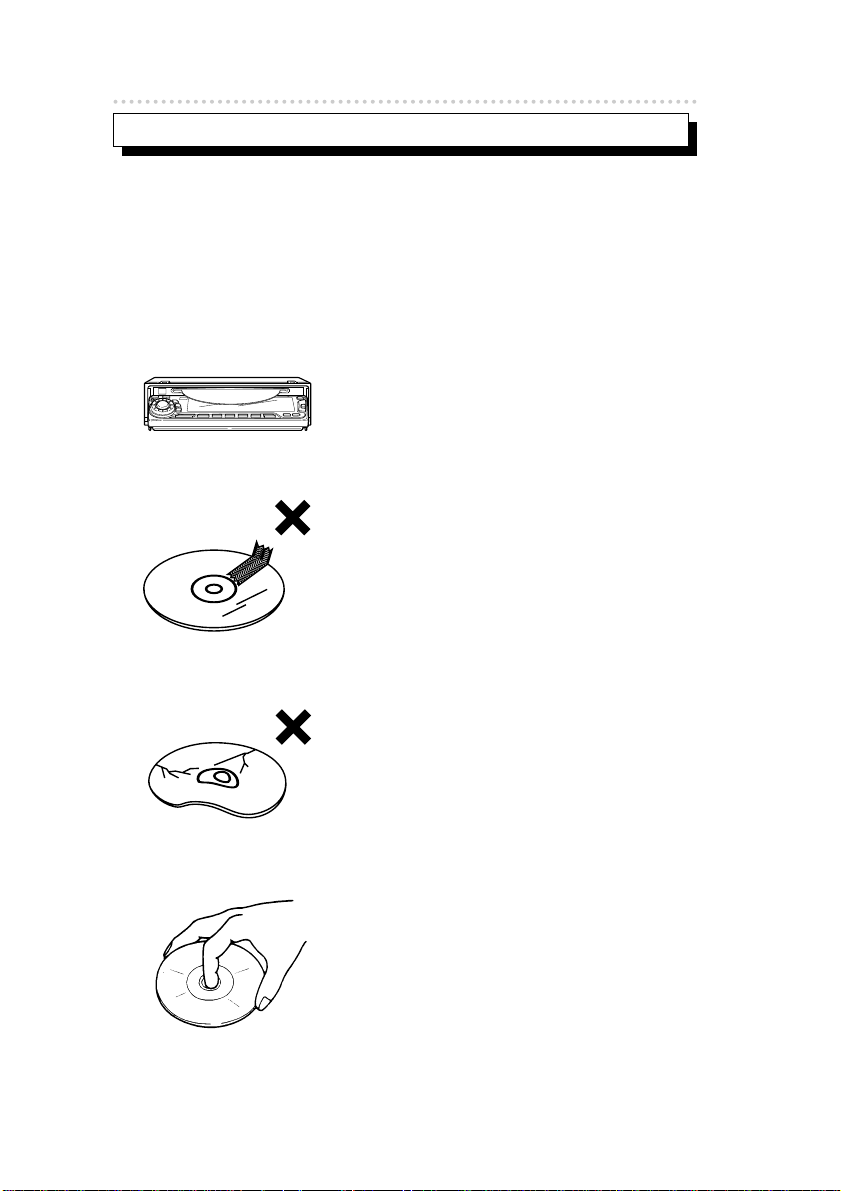
• This player can only play CDs and DVDs
bearing the logo shown at the left.
• Never insert anything other than a CD or
DVD into the disc slot.
Do not insert any foreign objects, such as
coins or credit cards, into the disc slot. Be
especially watchful of children’s mischief in
this regard.
• Avoid severe mechanical shock.
When the player is subjected to severe
vibration while traveling over a rough
surface, playback may be intermittent.
When a situation like this occurs, resume
playback after returning to a smoother
road.
Operating precautions
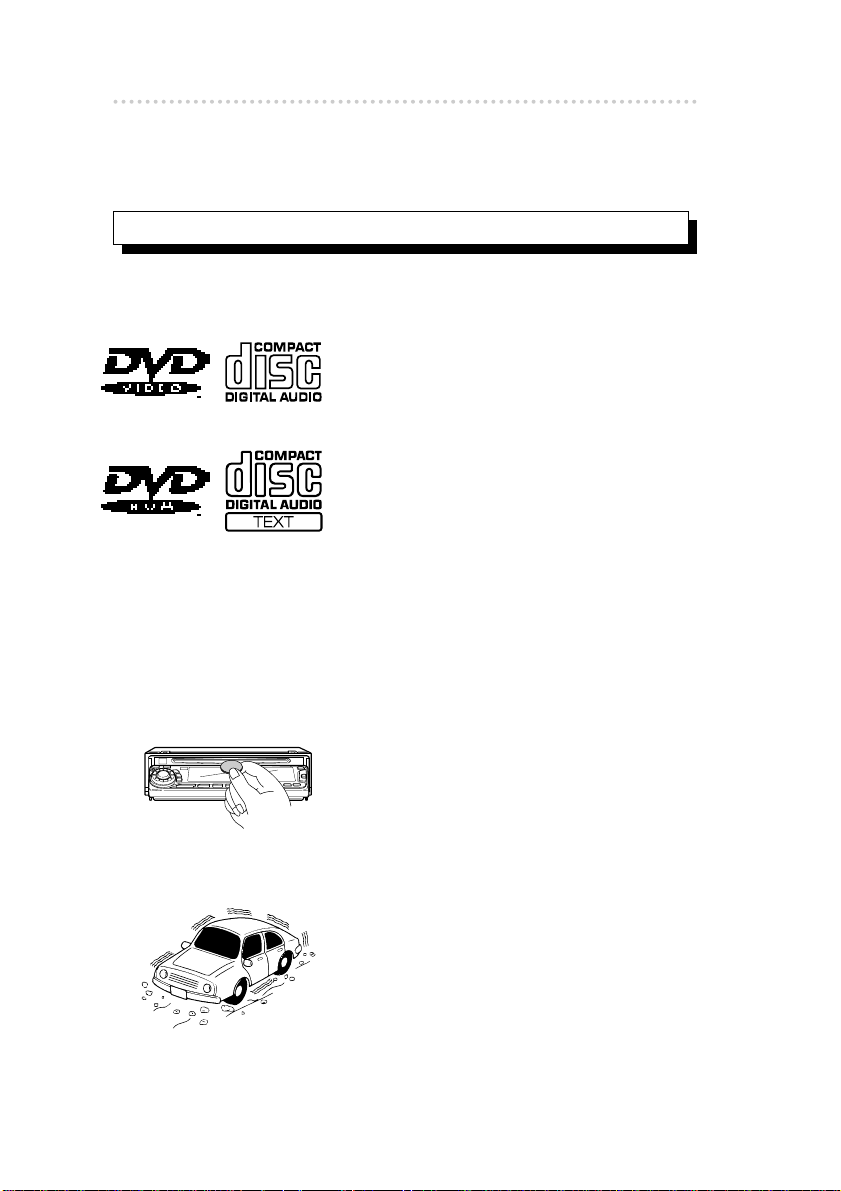
• About dew condensation.
In cold or rainy weather, just as the interior
glass surface gets fogged, dew (water
condensation) may also settle on the deck.
When this occurs, disc playback may
become intermittent or impossible.
Dehumidify the air in the vehicle for a while
before resuming playback.
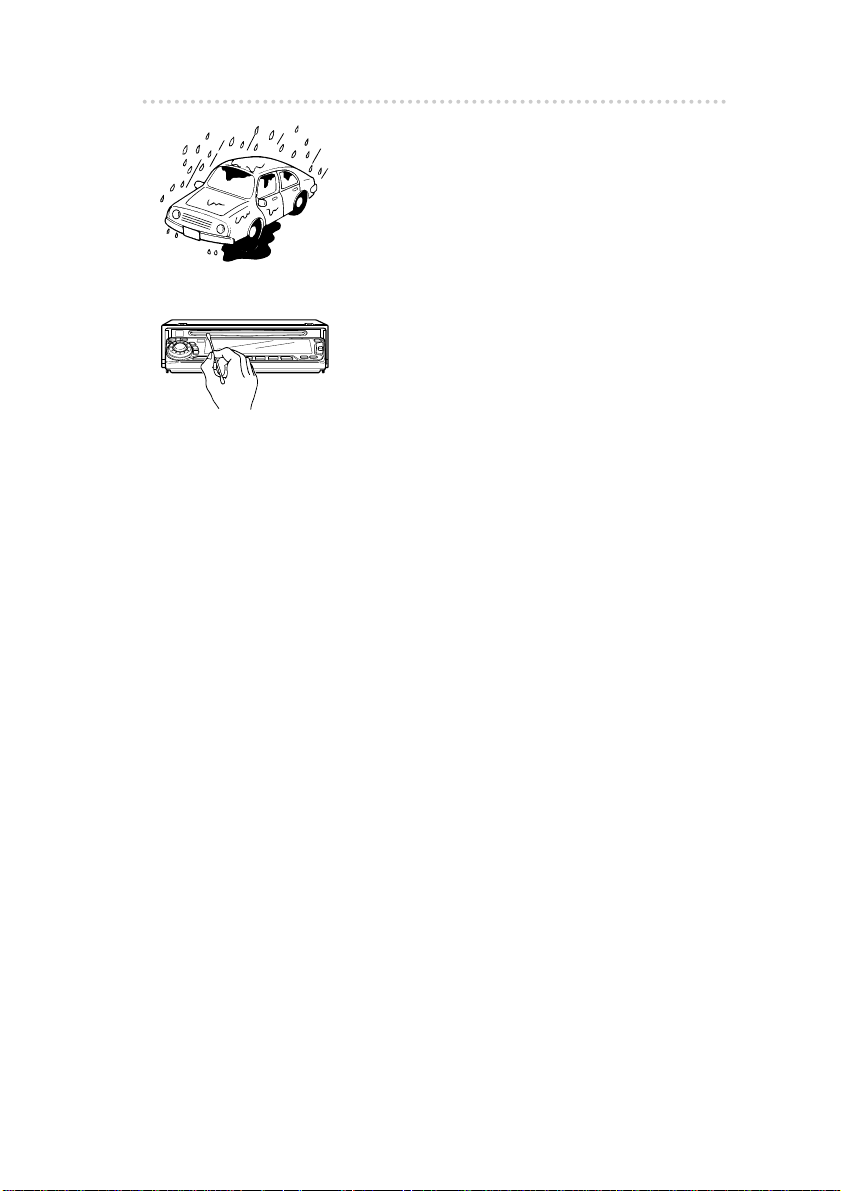
• Cleaning the disc slot.
The disc slot tends to get dusty. Clean it
occasionally to prevent accumulated dust
from scratching the discs.
11
Operating precautions
About CDs and DVDs
• The signal recorded on a disc is read by a laser beam, so nothing
touches the disc surface. A scratch on the recorded surface or a badly
warped disc may cause deteriorated sound quality or intermittent
playback. Observe the following precautions to ensure high quality
sound performance:
• Do not leave an ejected disc in the disc
slot for very long; the disc may warp.
Discs should be stored in their cases and
kept away from high temperature and
humidity.
• Do not stick a piece of paper or tape on,
nor write on or scratch either side of a
disc.
12
• Discs spin at a high speed inside the
deck. Keep cracked or warped discs out
of the player to avoid damaging it.
• Avoid touching the recorded surface when
handling a disc; handle discs by their
edges.
Operating precautions
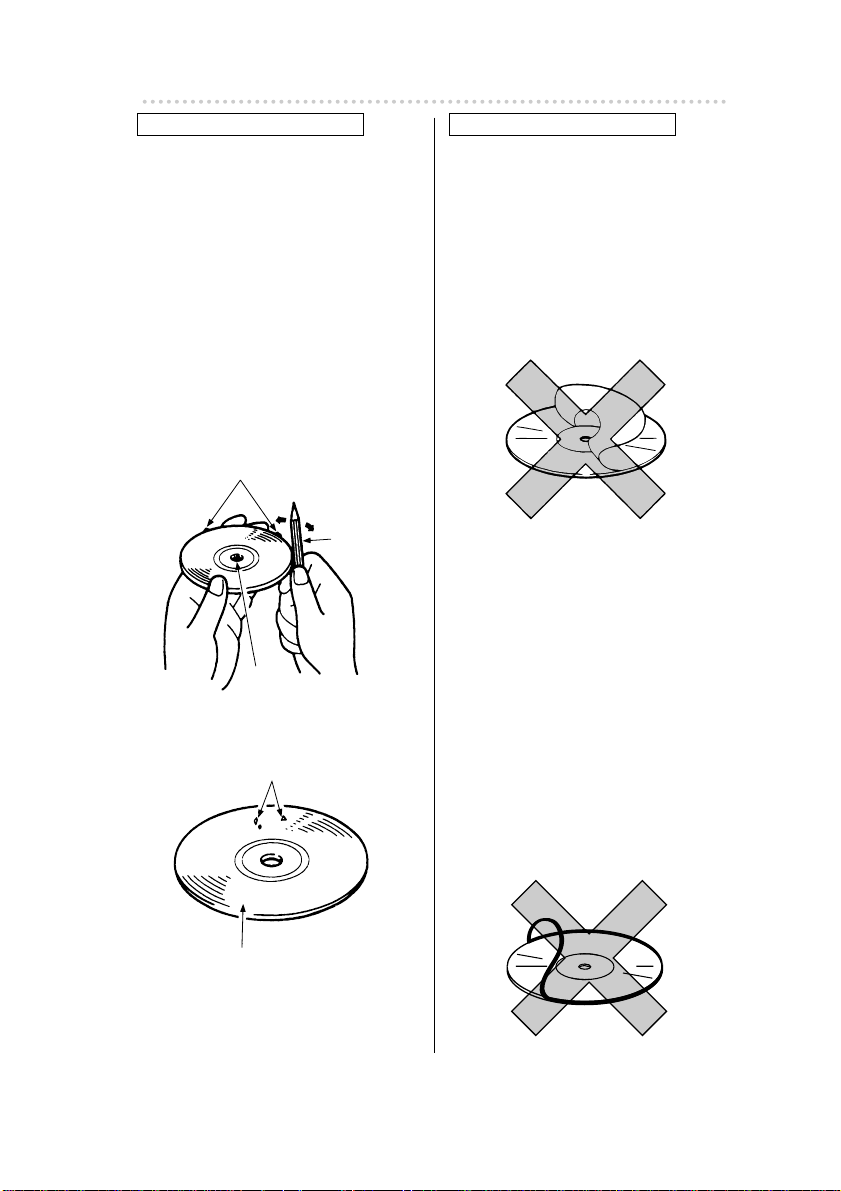
Rough Edges
Ballpoint
pen
Flakes
Recorded surface
Rough
Edges
About brand new discs
• You may notice that some brand
new discs are rough around the
center hole or outside edge.
Remove the rough edges with
the side of a ballpoint pen, etc.
Rough edges may prevent
proper loading in the deck.
Flakes from the rough edges
may also stick to the recorded
surface and interfere with
playback.
About disc accessories
• Do not use accessories
(stabilizers, protective seals, laser
lens cleaners, etc.) sold for
“improving sound performance”
or “protecting discs.” The
changes in disc thickness or
outside dimensions made by
these accessories may cause
problems in the player.
• Please be sure NOT to attach
any ring-shape protector(or
other accessory) to your discs.
Those protectors are commercially available and said to
protect disc and to improve
sound quatily(and antivibration
effect), but they can do more
harm than good in regular uses.
The most common problems are
Insert /Eject related problems
and "No playback" problems
due to the protectorring that
came off in the disc machanism.
13
Operating precautions
XXXX
XXXX
XXXX
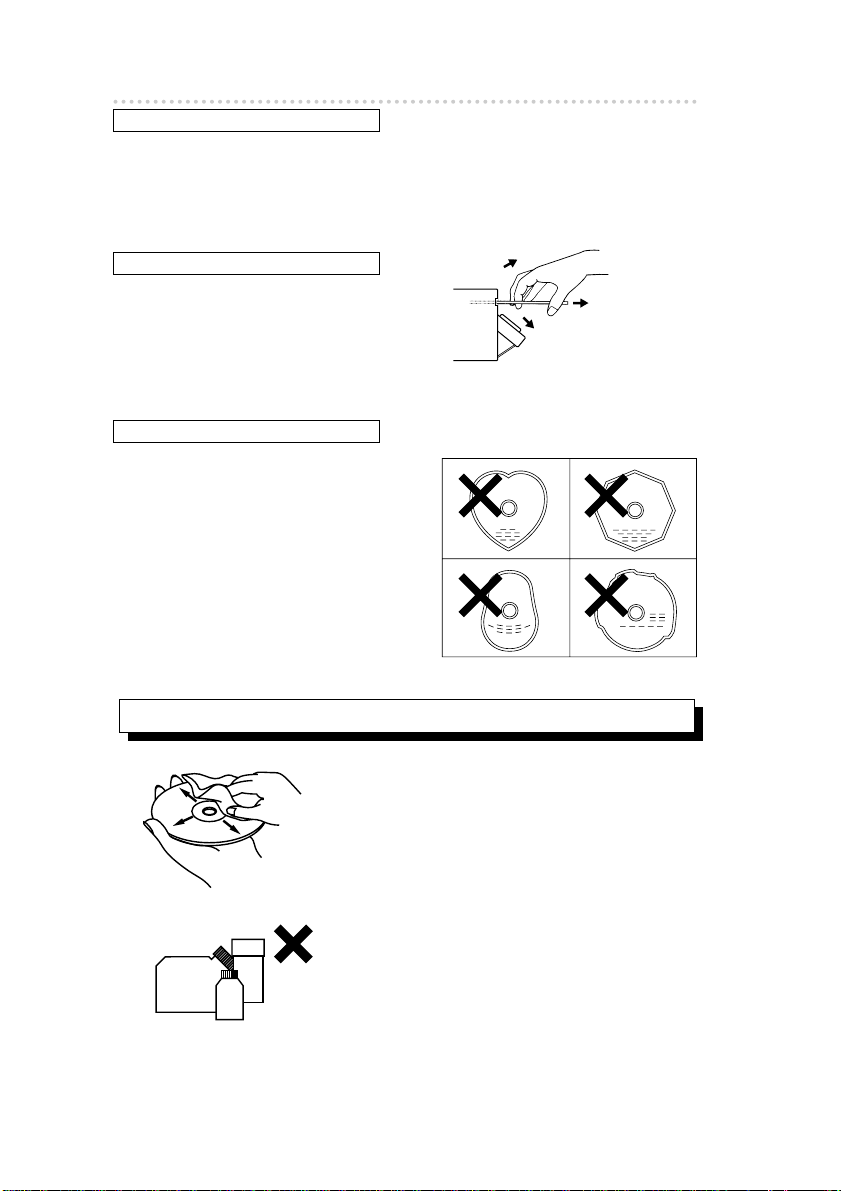
About borrowed discs
• Do not use a disc with glue or
remnants of adhesive tape or labels.
They may cause the disc to get
stuck inside or damage the deck.
How to remove discs
• When removing the ejected disc,
pull it straight out along the slot.
Pressing downward in the process
may scratch the recorded surface of
the disc.
About irregularly-shaped discs
• Specially-shaped discs, like heartshaped or octagonal discs, cannot
be played. Do not attempt to play
them, even with an adapter, since
they may damage the player.
About cleaning a disc
• Use a commercially available compact disc
cleaner to clean a disc, wiping lightly from
the center to the edge.
NO GOOD
OKAY
NO GOOD
14
• Do not use benzine, thinner, LP record
spray or other cleaners on discs. They may
damage a discs finish.
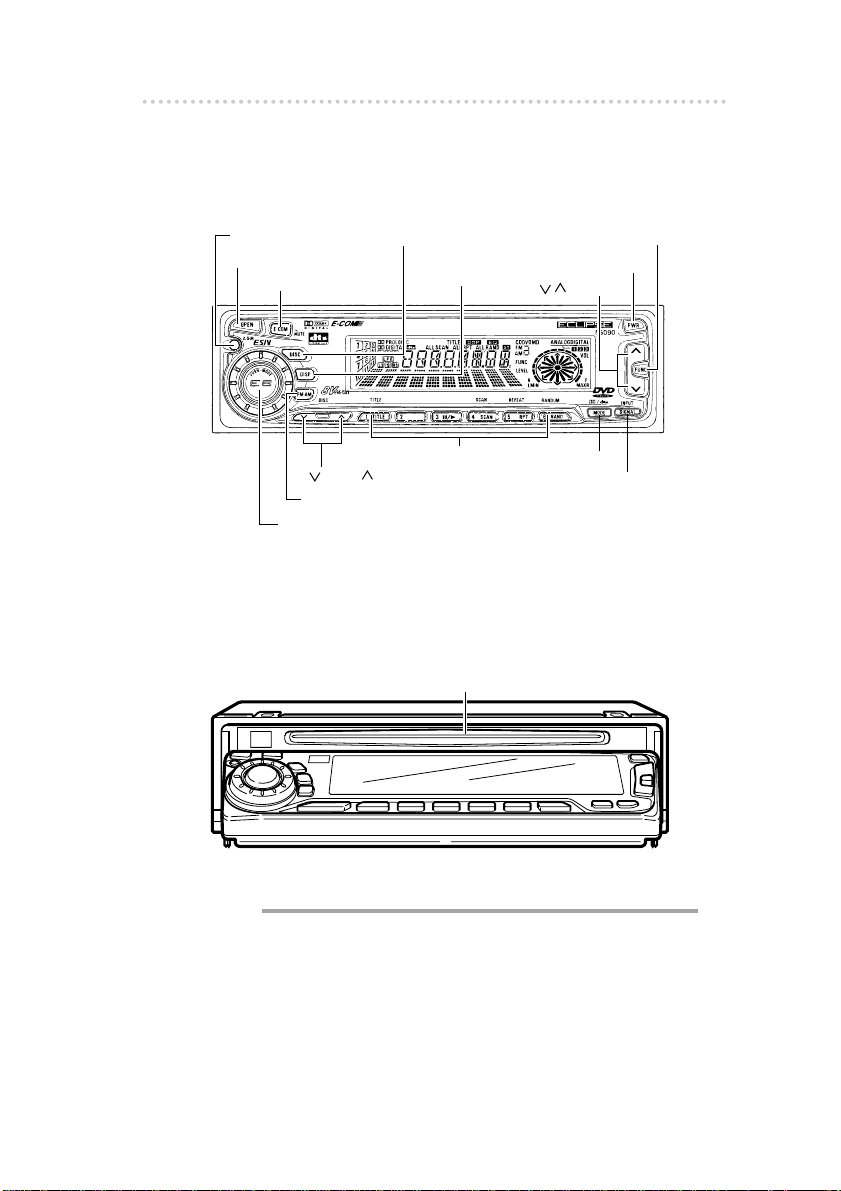
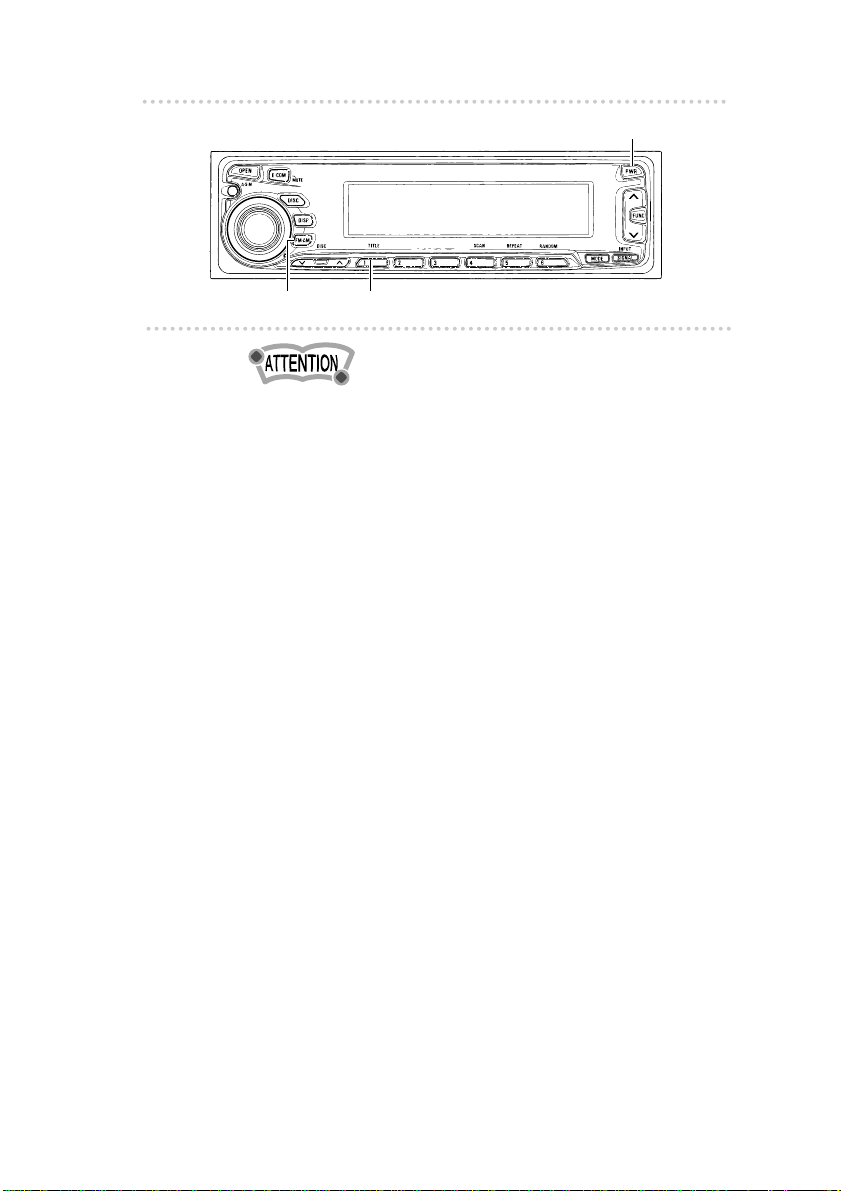
Names of controls and parts
[ASM] button
[DISC] button
[PWR] button
[MODE] button
[FM・AM] button
[AUDIO CONTROL] button
buttons [1] to [6]
[SIGNAL] button
[FUNC] button
[DISP] button
[OPEN] button
[E-COM] button
[ ] buttons
[ DISC ] buttons
※
u
Names of controls and parts
Front view
※NOTE:Double function button → "E-COM" & "MUTE" functions
With the front open
Disc slot
l
Caution
• Never place an object or rest your hands or the like on
the front panel.
• When inserting or removing CDs and DVDs, be
careful not to cause interference with the display or
other parts.
l
15

ESN (Key CD) security operating procedure
[PWR] button
[FM・AM] button
u
ESN (Key CD) security operating
Button [1]
procedure
n How to program the Key CD
1 .
Turn the vehicle’s ignition on. Press the [PWR]
button or [FM•AM] button to activate the tuner
mode.
The tuner is now turned on.
2 .
Press and hold button [1], then the [FM•AM]
button, and hold both for more than one
second.
A [SEC] message appears, then in two seconds it will
change to [DISC].
The front panel opens; the 55090 is now ready to
accept your Key CD in the CD slot.
3 .
Insert the CD into the slot.
The front panel closes.
A [SEC] message appears, the front panel opens, the
Key CD is ejected, then the tuner mode is activated.
16
ESN (Key CD) security operating procedure
[PWR] button
[FM・AM] button
Button [1]
• If there is a problem with the inserted CD, an [ERR]
message will appear for two seconds and the CD will be
ejected. Reinsert the ejected CD.
• If a CD causes the [ERR] message to appear twice in a
row, a [CHANGE] message will appear for two seconds.
Try another CD.
• The Security indicator will flash whenever the vehicle’s
ignition is switched off.
n How to cancel the Key CD
1 .
Turn the vehicle’s ignition on. Press the [PWR]
button or [FM•AM] button to activate the tuner
mode.
The tuner is now turned on.
2 .
Press and hold button [1], then the [
button, and hold both for more than one
second.
A [SEC] message appears, then in two seconds it will
change to [DISC].
The front panel opens; the 55090 is now ready to
accept your Key CD in the CD slot.
3 .
Insert your Key CD into the slot.
The front panel closes.
A [CANCEL] message appears, the front panel opens,
the Key CD is ejected, then the tuner mode is
activated.
The Key CD is cancelled.
FM•AM
]
17

ESN (Key CD) security operating procedure
•
This process cancels the protection for the ESN
deck.
• If power to the ESN deck is disconnected, then
reconnected, a Key CD will not need to be inserted in
order to return the unit to normal operation.
• Inserting a CD other than the Key CD will not cancel the
protection. Instead, the display will show [ERR] for two
seconds, then the normal CD playback mode will activate.
n How to change the Key CD
1 .
First, cancel the existing Key CD.
Refer to “How to cancel the Key CD.”
2 .
Next, program a new Key CD.
Refer to “How to program the Key CD.”
18
 Loading...