

Page 1

User Guide
EchoStar Personal Video Recorder
with User Interface
Page 2

Preface
DISCLAIMER
RECEIVER
EchoStar International Corporation has to the best of its abilities, done
everything to supply you with a receiver built to the most up-to-date
software and hardware. EchoStar International Corporation makes no
warranties with respect to the reception of the channels provided by the
broadcast service providers and specifically disclaims any implied
warranties of merchantability or fitness for any particular purpose.
EchoStar International Corporation reserves the right, for whatever
reason, to revise, change or modify the hard- and software of the receiver
without the obligation to notify or warrant any person or organization of
such change.
DOCUMENTATION
EchoStar International Corporation has to the best of its abilities, done
everything to supply you with the most up-to-date information. EchoStar
International Corporation makes no warranties with respect to the
information provided by this User guide and specifically disclaims any
implied warranties of merchantability or fitness for any particular purpose.
The information provided is meant as a guideline for the use and
maintenance of the receiver.
EchoStar International Corporation reserves the right to revise, change or
translate this User guide without the obligation to notify any person or
organization of such change. Therefore, please visit our web site, on a
regular basis, for the latest information available.
Issue: echolite_pvr_b_100a_us
We encourage you to express your thoughts on this user manual.
Please send your comments to:
EchoStar International Corporation
Technical Publications Department
Schuilenburglaan 5a
7604 BJ Almelo
The Netherlands
LIMITED WARRANTY
If your receiver has conditional access capabilities:
For pay-services, please only use Common Interface (CI) modules and
the related Smartcard which are approved by the service provider of the
encrypted program you want to receive. Only this will enable the receiver
to work properly.
Anomalies can occur when an unapproved CI-module and/or Smartcard
is used. EchoStar can not and will not accept any responsibility for the
performance of such CI-modules and/or smartcards. If you use an
unapproved CI-module and/or Smartcard, EchoStar is no longer able to
provide any assistance or support. Use of an unapproved CI-module and/
or Smartcard will void any warranty claim. If you have any doubt which CImodules are approved, please ask your service provider for assistance.
COPYRIGHT AND TRADEMARKS
© 2004 EchoStar International Corporation. All rights reserved worldwide.
This User guide has been provided pursuant to an agreement containing
restrictions on its use. This User guide is also covered by Federal
Copyright Law.
No part of this User guide may be copied, distributed, transmitted, stored
in a retrieval system or translated into any human or computer language,
in any form or by any other means, electronically, mechanically,
magnetically, manually or otherwise or disclosure to third parties without
the express written permission of EchoStar International Corporation.
EchoStar International Corporation is possibly in the possession of
patents, requests for patent approval, trademarks, copyrights and other
intellectual property with respect to the contents within this user manual.
The submission of this User guide does not imply you have got any
license or other legal right for the use of the here above mentioned
without the express written permission of EchoStar International
Corporation.
■ EchoStar, EchoLITE and Quality has a Name
are registered trademarks of EchoStar International Corporation;
■ All other trademarks are the property of their respective owners or
companies.
© 2004 EchoStar International Corporation
All rights reserved
Page II EchoStar International Corporation
Page 3
SAFETY GUIDELINES
1. INTENDED USE
This documentation set is intended for anyone
who uses an EchoStar receiver. It can be used
by both first-time and experienced users of
receivers who want to install, use and maintain
their receiver.
This User guide is applicable for the
EchoLITE PVR receivers and is divided into
separate sections and chapters. For easy
access to the information, a clear table of
content is provided.
Note that this manual is applicable for all
models, therefore the most comprehensive
description and operation is given. For detailed
information, please refer to your dealer.
2. NOTATIONAL CONVENTIONS
Throughout this user guide, there may be
blocks of text indicated by symbols and printed
in a different way then the surrounding text.
These blocks of text ask the attention of the
All rights reserved
reader to avoid hazardous situations. The
hazard levels are indicated as:
© 2004 EchoStar International Corporation
THIS WARNING INDICATES A HAZARDOUS
SITUATION WHICH, IF NOT AVOIDED, COULD
RESULT IN (SERIOUS) INJURY.
This caution indicates a situation which, if
not avoided, could damage the equipment
or other properties.
This note indicates additional information to
make you aware of possible problems and
information of any import an ce to he l p th e
you to understand, to use and to maintain
the installation.
Safety Guidelines
3. GENERAL SAFETY
Read this user guide carefully and make sure you understand the instructions given. For your
safety, know what the reaction upon each action will be. Do not perform any actions which are not
described in this user guide, failing to do so might result in an uncontrolled behavior of the receiver
or even in a hazardous situation for persons and/or equipment.
Disconnect the receiver from the mains before you start any maintenance or installation
procedures. Do not use alcohol or ammonia based liquids to clean the receiver. If required, clean
with a soft lint-free cloth slightly made damp with a mild soap solution.
Consult an authorized service technician if the receiver does not operate normally when the
instructions in this user guide are strictly followed. Do not to attempt to open the receiver, as you
will be exposed to a shock hazard.
To avoid the risk of electrical shock and fire, do not put any objects on top of the receiver which:
■ contain liquids, such as vases, glasses, bottles, etc.;
■ contain an open heat source or open fire, such as candles, cigarettes, ash trays, etc.;
■ could fall through the ventilation slots or which could cover them and prevent proper cooling of
the components inside.
Make sure that nothing rests on the receivers cables and that the cables are not located where they
can cause injury to persons and pets (e.g to stumble over, eat the cable).
Do not install the receiver:
■ in the open air;
■ in a closed or poorly ventilated cabinet;
■ directly on top of or under another equipment;
■ on a surface which will obstruct the ventilation slots.
Do not expose the receiver and it’s accessories:
■ to rain or excessive moisture to avoid the risk of shock or permanent damage to your receiver;
■ to direct sunlight, heaters, stoves or any other heat generating equipment;
■ to any magnetic objects, such as speakers, electric motors, transformers, etc.;
■ to excessive vibration.
To help avoid possible damage to the receiver’s electronics, wait 5 seconds after you switched off
the receiver before you move the receiver or disconnect any equipment.
For receivers with conditional access capabilities:
■ do not put any foreign objects into the Common Interface (CI) slots or smartcard reader;
■ do not touch the components or pins on the CI-module/smartcard;
■ hold the CI-module and the smartcard by its edges.
www.echostar-int.com Page III
Page 4
Safety Guidelines
4. ELECTRICAL SAFETY
When you use or connect electrical equipment,
always obey the safety regulations as
applicable in your country, to reduce the risk of
fire, electrical shock and personal injury.
Read and comply at least with the given safety
instructions.
■ Always make sure that the electrical power
supply corresponds with the voltage on the
electrical identification plate on the
equipment next to the electrical connection.
■ Your equipment is double insulated in
compliance with the standards as stated in
the EC Declaration of Conformity; therefore
no additional earth wire is required, though
the use of an earth leak switch and/or over
voltage protection switch is recommended.
■ Only use an approved extension
(convenience) lead suitable for the electrical
power consumption of the installed
equipment.
5. ENVIRONMENTAL SAFETY
Most of the packaging materials and batteries
can be recycled. Please discard these materials
in an environmental safe manner.
ENVIRONMENTAL REMARK
Dispose the packaging in an environmental
safe manner. Please inform yourself on local
regulations with respect to the disposal of
reusable materials.
ENVIRONMENTAL REMARK
Dispose used batteries in an environmental
safe manner. Please inform yourself on local
regulations with respect to the disposal of
batteries.
6. LOGOS
The receiver is following the provisions of
Council Directive 89/336/EEC on the
approximation of the laws of the Member
States relating to the electromagnetic
compatibility and the provisions of Council
Directive 73/23/EEC and 93/68/EEC on
the approximation of the laws of the
Member States relating to low voltage and
electrical safety.
The receiver is electrically safe within the
normal use of the receiver as st ated in the
safety chapter.
Warning! You have to read the manual for
detailed instructions on handling the
receiver.
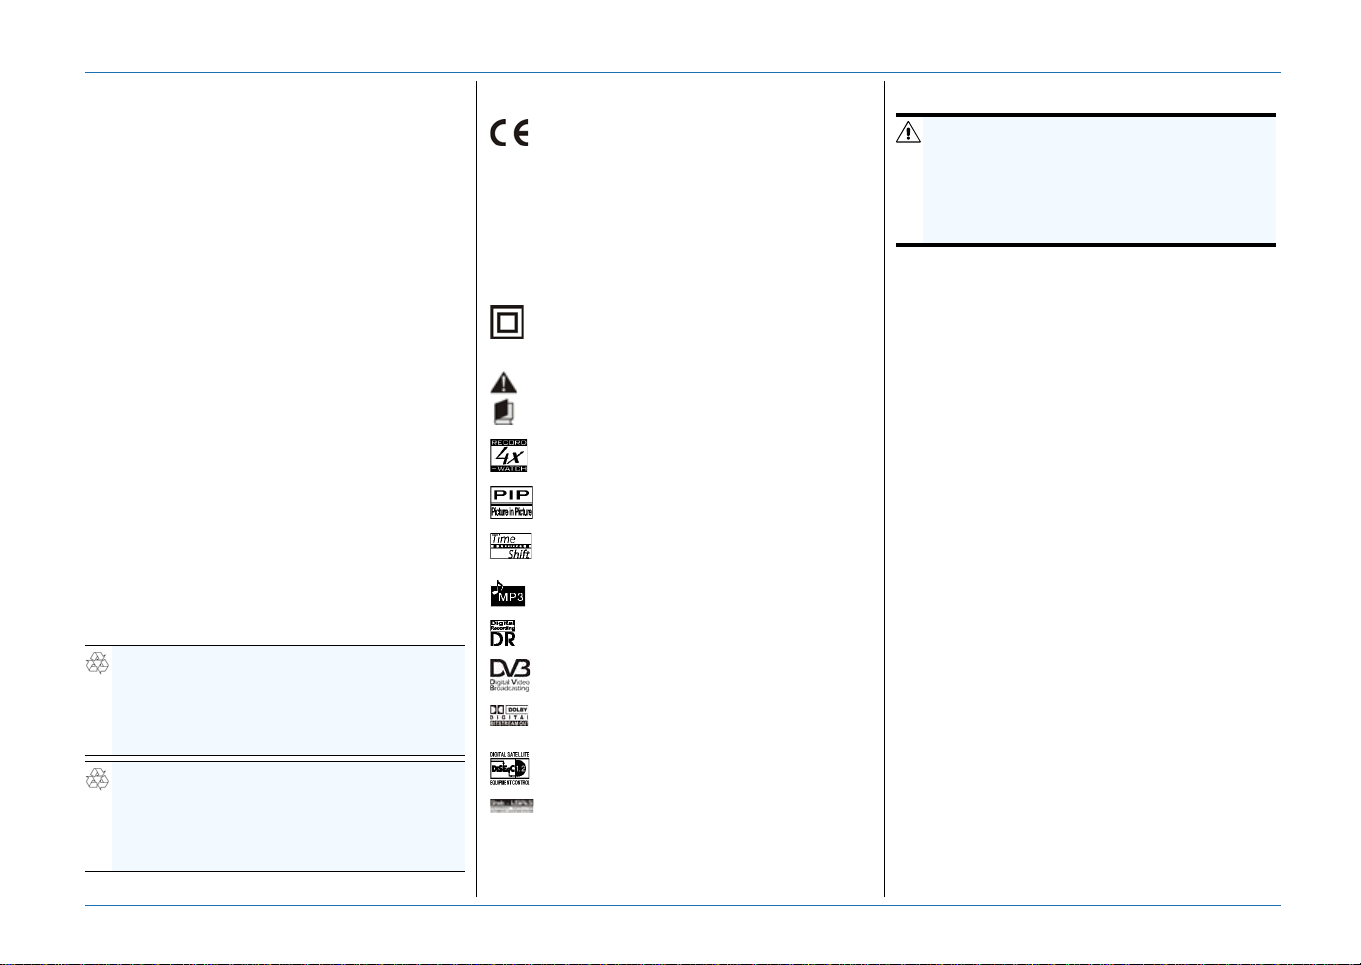
Dual Tuner for Watching and Recording
(4x Record, 2x Watch)
Picture-In-Picture for simultaneously
watching 2 channels.
Time-shift function to pause live video as
with recordings.
Embedded MP3-player.
Designed for Digital Recording
The receiver is compliant with the DVB
standards as registered.
The receiver is compliant with the Dolby
Digital standard.
The receiver is compliant with the
DiSEqC1.2 standard.
The receiver is compliant with the USALS
standard.
7. CLEANING
WARNING
R
ISK OF ELECTRICAL SHOCK.
REMOVE THE MAINS PLUG FROM THE POWER
SUPPLY SOCKET BEFORE YOU CLEAN THE
RECEIVER. MAKE SURE, IF USED, CLEANING
AGENTS CANNOT GET IN THE RECEIVER.
1. Switch the receiver to OFF.
2. Wait at least 5 seconds, to help avoid
possible damage to the receiver’s
electronics.
3. First use a dry, soft and clean lint-free
cleaning cloth to clean the outside of the
receiver.
4. If dry cleaning fails, you may use a mild
soap solution. Proceed as follows:
a. Make a dry, soft and clean lint-free
cleaning cloth a little damp.
b. Carefully wipe the surface and make sure
that no moisture gets into the receiver or
its openings.
c. Let the receiver dry on the air.
8. END OF LIFE DISPOSAL
Your receiver and related accessories contain
materials which can be recycled and reused.
Specialized companies can recycle your
equipment to increase the amount of reusable
materials and to minimize the amount of
materials to be disposed of.
Please inform yourself on local regulations on
disposal of your equipment.
© 2004 EchoStar International Corporation
All rights reserved
Page IV EchoStar International Corporation
Page 5

TABLE OF CONTENTS
SAFETY GUIDELINES
1 INTENDED USE III
2 NOTATIONAL CONVENTIONS III
3 GENERAL SAFETY III
4 ELECTRICAL SAFETY IV
5 ENVIRONMENTAL SAFETY IV
6 LOGOS IV
7 CLEANING IV
8 END OF LIFE DISPOSAL IV
TABLE OF CONTENTS
TECHNICAL SPECIFICATIONS
QUICK REFERENCE GUIDE
1 REMOTE CONTROL UNIT 1
2 FRONT PANEL CONTROLS 2
3 REAR PANEL CONNECTIONS 2
4LIVE VIDEO 3
5PVR 3
6MP3 3
7 PICTURE-IN-PICTURE (PIP) 3
8 INFOBANNER - TV/RADIO 4
9 INFOBANNER - PVR 4
All rights reserved
10 INFOBANNER - MP3 PLAYER 4
GETTING STARTED
© 2004 EchoStar International Corporation
1 FIRST TIME INSTALLATION 1-1
2 UNPACKING 1-4
3 INSTALL YOUR RECEIVER 1-4
4 MENU STRUCTURE 1-8
Table Of Contents
DESCRIPTION AND OPERATION
1LISTS 2-1
2 EPG MENU - PROGRAM INFORMATION 2-3
3 TELETEXT 2-4
4TIMERS 2-5
5 ORGANIZE THE LISTS 2-6
6 CREATE A FAVORITE LIST OR A FOLDER (PVR/MP3) 2-7
7 ADD/EDIT DATA, ADD A SATELLITE 2-8
8 ADD/EDIT DATA, ADD/EDIT A TRANSPONDER OR CHANNEL 2-9
9 SOFTWARE UPGRADE - FACTORY RESET 2-10
10 PVR - PLAYBACK AND TRICK MODES 2-11
11 PVR - RECORDING, TIME SHIFT AND INSTANTREPLAY 2-12
12 PVR - EDIT AND DESCRAMBLE A RECORDING 2-13
13 MP3 - PLAYBACK AND TRICK MODES 2-14
14 MENU STRUCTURE 2-15
TROUBLESHOOTING
1 GENERAL 3-1
2 REMOTE CONTROL UNIT (RCU) RELATED 3-1
3 LIST RELATED 3-1
4 EPG RELATED 3-2
5 TIMER RELATED 3-2
6 TV AND RADIO RELATED 3-2
7 INSTALLATION RELATED 3-3
8 SMARTCARD RELATED 3-4
9 MOTORIZED INSTALLATION RELATED 3-4
10 PVR RELATED 3-5
11 MP3 RELATED 3-5
12 SPECIAL PVR FUNCTIONS 3-5
GLOSSARY
1 ABBREVIATIONS 4-1
2 TERMINOLOGY 4-1
3 SEARCH MODES 4-3
INDEX
www.echostar-int.com Page V
Page 6

Specifications
TECHNICAL SPECIFICATIONS
FEATURES GENERAL
■ Full functional Digital Video Recorder (ATA-UDMA66 HDD)
■ Play, FF, Rewind, Slow Motion, Pause and Index
■ InstantReplay, Time-shift and Multi-Lingual Recording
■ Fast 200 MIPS Processor with 64 Mb Memory
■ Dual Tuner (Dual Recording, Watching, PIP)
■ Powerful Editing Tools for Recordings (Cut/Paste)
■ Multi-lingual Advanced User Interface
■ Games
■ 7 Day Electronic Program Guide (EPG)
■ 7,500 Channels, 64 Satellites, 1,600 Transponders
■ Multiple Favorite Lists per mode (TV, Radio, DVR, MP3)
■ 8 Timers
■ Smart Timers (Sleep, Wake-up)
■ Multiple Editing T ools (Video, Move, Rename, Delete)
■ Multiple Search Modes
■ Parental Control with Installation and Receiver Lock
■ Teletext (Embedded Decoder, VBI Re-insertion)
■ Subtitling (DVB, Teletext supported)
■ UHF Modulator (CH21-69, PAL, NTSC)
■ S/PDIF Home Cinema Support (Dolby Digital Compatible)
■ DiSEqC
■ DiSEqC
■ Hi-Speed USB2.0 Link (For USB compliant PC)
■ Software Update via Satellite/Internet (OTA/RS-232)
■ MPEG-2/DVB Compliant (MP@ML, PIP)
■ Compact size 370 x 290 x 65 mm (WxDxH)
TM
Motor Control (DiSEqCTM 1.2, USALS)
TM
LNB Control (DiSEqC 1.0, 1.1)
CONDITIONAL ACCESS
■ Common Interface 2
■ Housing PCMCIA (Type 1 and 2)
TUNER/DEMODULATOR (FOR EACH TUNER)
■ Receiving Frequency 950-2,150MHz
■ Input Signal Level between -65dB and -25dB
■ Input Impedance 75 Ohm
■
LNB Control 13/18V, 0/12V, 0/22kHz, DiSEqC1.0, DiSEqC1.1
■
LNB Power 500mA (max)
■ Demodulator QPSK, C/Ku-Band
■ Symbol Rate 2-45Msym/s (SCPC/MCPC)
■ Video System PAL B/G, I, D/K, NTSC
■ Transport Stream MPEG1-2 Layer3 Compliant
■ Sampling Rate 8,12,
11.025
,16, 24,
22.05
,32,
44.1
,48
POWER SUPPLY
■ Mains input 100-240Vac, 50-60Hz, 50W (max)
■ Standby 7W (max)
CONNECTIONS
■ IF Connector LNB1 IN, LNB1 OUT (Loop-through)
LNB2 IN, LNB2 OUT
■ SCART Connector TV, VCR
■ RCA Connector AUDIO L/R, VIDEO, 0/12V
■ IEC Connector TV OUT, ANT IN (Modulator)
■ DIN Connector SVHS
■ TOSLINK Connector S/PDIF (AC-3)
■ RS-232 Connector RS-232 (Baud Rate 115,200)
■ USB-B Connector USB (Version 2.0)
■ RGB Video Out TV (SCART)
■ RGB Loop-through VCR (SCART)
■ CVBS Video Out TV, VCR (SCART), VIDEO (RCA)
■ S-Video Out SVHS (DIN)
■ Dolby Digital Out Optical S/PDIF (TOSLINK)
■ MP3 Audio Out AUDIO L/R (RCA), TV, VCR (SCART)
© 2004 EchoStar International Corporation
All rights reserved
Page VI EchoStar International Corporation
Page 7
Quick Reference Guide
QUICK REFERENCE GUIDE
1. REMOTE CONTROL UNIT
1.1. THE BATTERIES
The remote control unit (RCU) requires two
AAA (LR03, UM4) alkaline batteries to operate.
CAUTION
Insert the batteries correctly, make sure the
polarity matches the instruction in the
battery compartment.
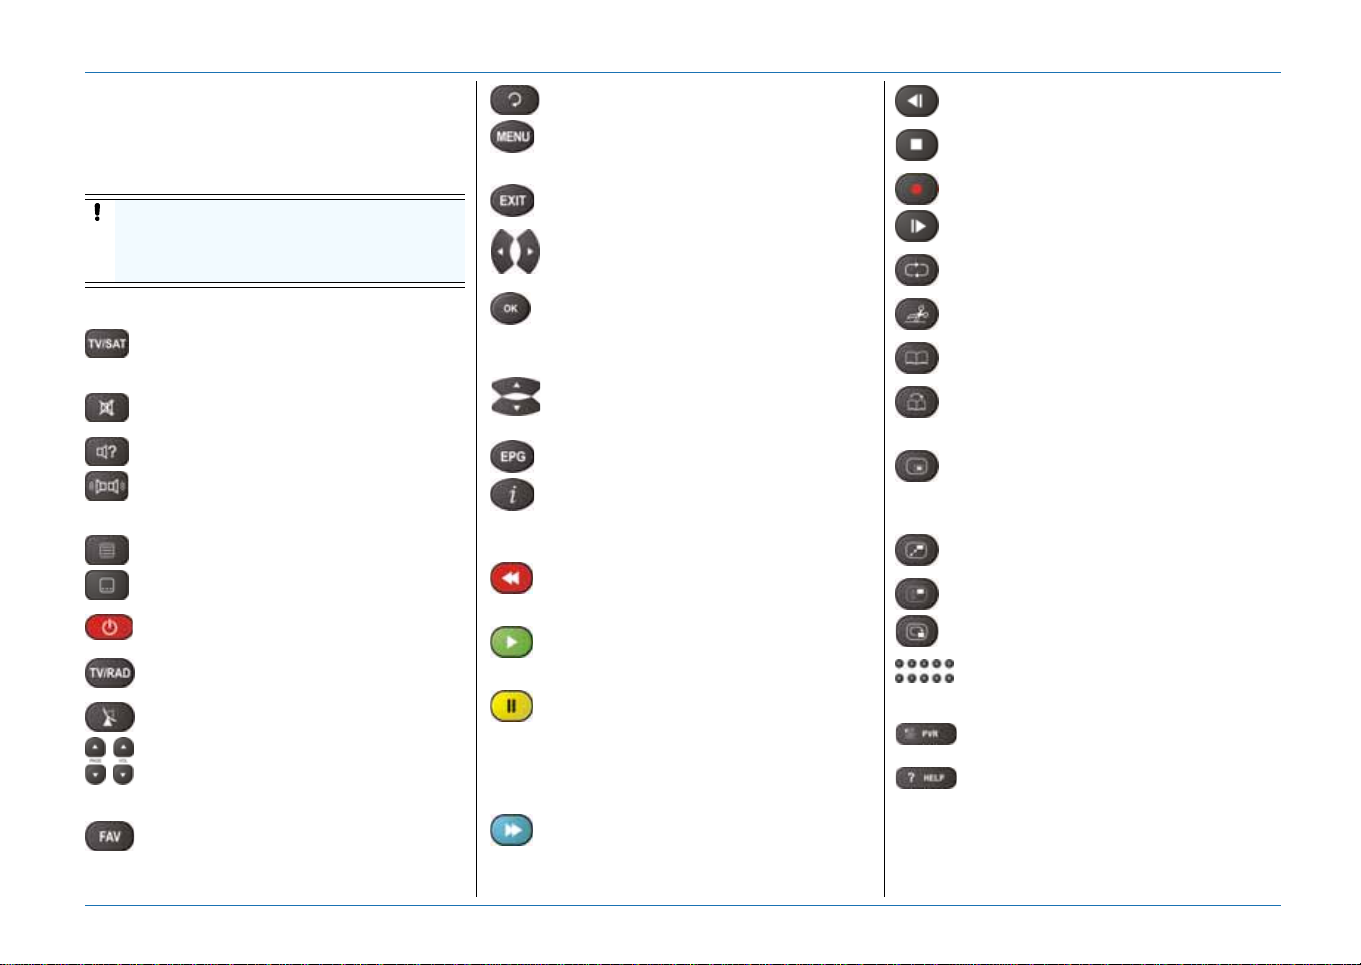
1.2. THE KEYS
TV/SAT, to switch the receiver signal to
the TV on or off (SCART connection
only).
Mute, to temporary, shut down the
audio.
Audio, to choose a language.
Stereo/Mono, to select Mono on the
left/right speaker or Stereo. Does not
All rights reserved
© 2004 EchoStar International Corporation
work for Dolby Digital (S/PDIF).
Teletext, to choose teletext.
Subtitle, to choose another subtitle
language.
ON/STANDBY, to switch to standby or
on.
TV/RAD, to switch to TV or Radio
mode.
SAT list, to select another satellite.
PAGE , to go up one page.
PAGE , to go down one page.
VOL, to decrease the volume.
VOL, to increase the volume.
FAV,
to go to the channel or favorite list of the
actual mode;
Recall, to go to the previous channel.
MENU,
to go to the main menu;
to go back one menu.
EXIT, to leave a menu or fe ature.
Zoom, to zoom in on live video.
VOL, to decrease the volume.
VOL, to increase the volume.
, to move the cursor left or right.
OK,
to go to the (favorites) lists;
to make a menu selection;
to confirm a selection.
CH, to go one channel up.
CH, to go one channel down.
, to move the cursor up or down.
EPG,to view the EPG.
i,
to view the InfoBanner;
to access extended (EPG) information;
to access the mosaic view (recording).
Red, to go to an option as indicated in
the active on-screen menu.
REWIND, to go back fast.
Green, to go to an option as indicated in
the active on-screen menu.
PLAY, to playback a recorded event.
Yellow, to go to an option as indicated
in the active on-screen menu.
PAUSE,
to pause the playback of an event;
to pause a live program;
to freeze live video.
Blue, to go to an option as indicated in
the active on-screen menu.
Fast Forward, to go forward vastly
Slow-motion, to playback a recording
in reversed slow-motion.
STOP, to stop the recording or playback
of an event
RECORD, to start or stop a recording.
Slow-motion, to playback a recording
in forward slow-motion.
Continuous, to playback a scene or
recording continuously.
Edit recording, to edit a recording with
use of cut and paste tools.
Set bookmark, to mark a scene for
quick access.
Goto bookmark, to playback a scene
from the next or last played bookmark
onwards.
PIP,
to show or hide the Picture-In-Picture
(PIP) screen;
to preview a recording.
PIP Swap, to swap between PIP and
main screen.
PIP List, to show the PIP channel list.
PIP Move, to change the position of the
PIP screen.
NUMBER KEYS,
to enter alpha/numerical settings;
to type in a channel number.
PVR, to show the PVR lists:
Recordings and MP3.
HELP, to access the on-screen colored
key functions and navigation help.
www.echostar-int.com Page 1
Page 8
Quick Reference Guide
2. FRONT PANEL CONTROLS
WARNING
ALL EQUIPMENT INVOLVED IN THE INSTALLATION TASK MUST BE INSTALLED
CORRECTLY AND SWITCHED OFF. MAKE SURE THAT IT IS SAFE TO PROCEED
WITH THE INSTALLATION TASK.
U
NSAFE CIRCUITS AND INSTALLATIONS CAN CAUSE (SERIOUS) INJURY OR
DAMAGE TO EQUIPMENT.
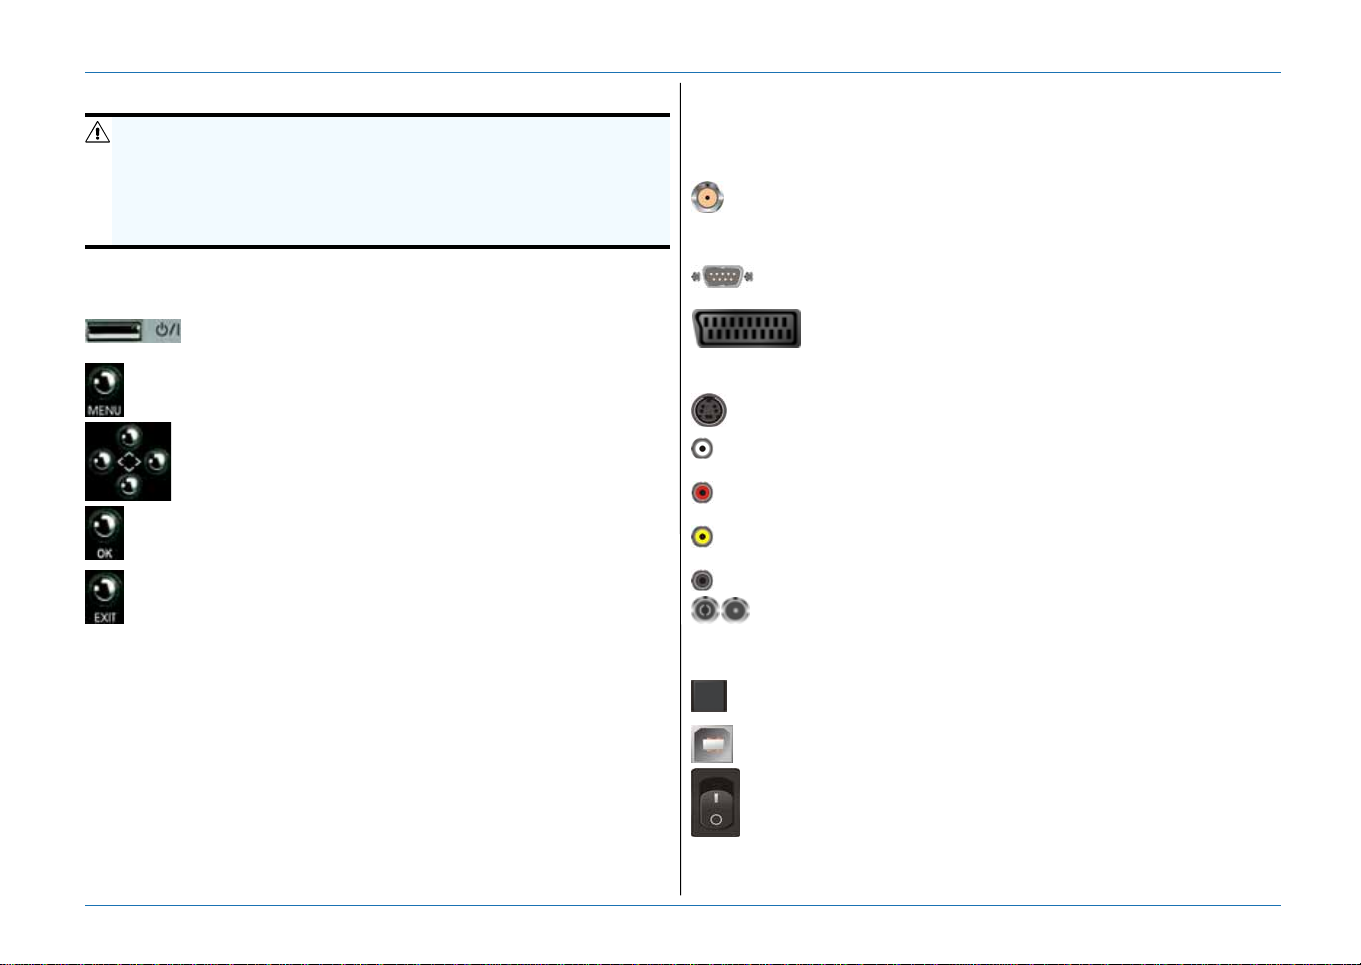
For the location and availability of the basic front panel controls, please
refer to the front panel as shown on the packaging. If available, the basic
front panel controls are:
To switch to standby or on.
Note that the ON/OFF switch is located on the rear panel.
to go to the main menu;
to go back one menu
to move the cursor ;
to go one channel up or down.
to go to the (favorites) lists;
to make a menu selection;
to confirm a selection.
to leave a menu or feature;
to zoom in on live video.
Indicators The green indicator shows that there is sufficient signal
Access door to access the different slots for the CI-modules and
received
The red indicator shows that the receiver is in standby
The orange indicator shows that a RCU command is
received.
smartcards.
3. REAR PANEL CONNECTIONS
For the location and availability of the connectors, please refer to the rear
panel as shown on the packaging. If available, the connectors on the rear
panel are:
For each tuner (LNB1, LNB2)
LNB IN (F-type), to connect a dish installation;
IF OUT (F-type), for a loop th rough connection to another
receiver/tuner.
RS-232 (sub-D), to connect to the serial communication
port of a PC.
TV (SCART), to connect to a TV with a fully-featured
SCART cable;
VCR (SCART), to connect to a VCR with a fully-featured
SCART cable to enable RGB loop-though for DVD players.
SVHS (DIN), to connect to a S-Video input of SVHS
compatible equipment.
(White) AUDIO L (RCA), to connect to the left audio input of a
stereo set.
(Red) AUDIO R (RCA), to connect to the right audio input of a
stereo set.
(Yellow) VIDEO (RCA), to connect to the composite video input of
the TV (monitor).
(Black) 0/12V (RCA), to connect a remote 0/12V switch.
ANT IN (IEC), to connect to a VHF/UHF terrestrial
TVantenna;
TV OUT (IEC), to connect to the UHF connector of a TV or
a VCR.
S/PDIF (TOSLINK), to connect to a Dolby Digital (AC-3)
compatible audio equipment.
USB (USB-B), to connect to an USB compatible PC.
ON/OFF switch, to switch the receiver ON or OFF.
© 2004 EchoStar International Corporation
All rights reserved
Page 2 EchoStar International Corporation
Page 9
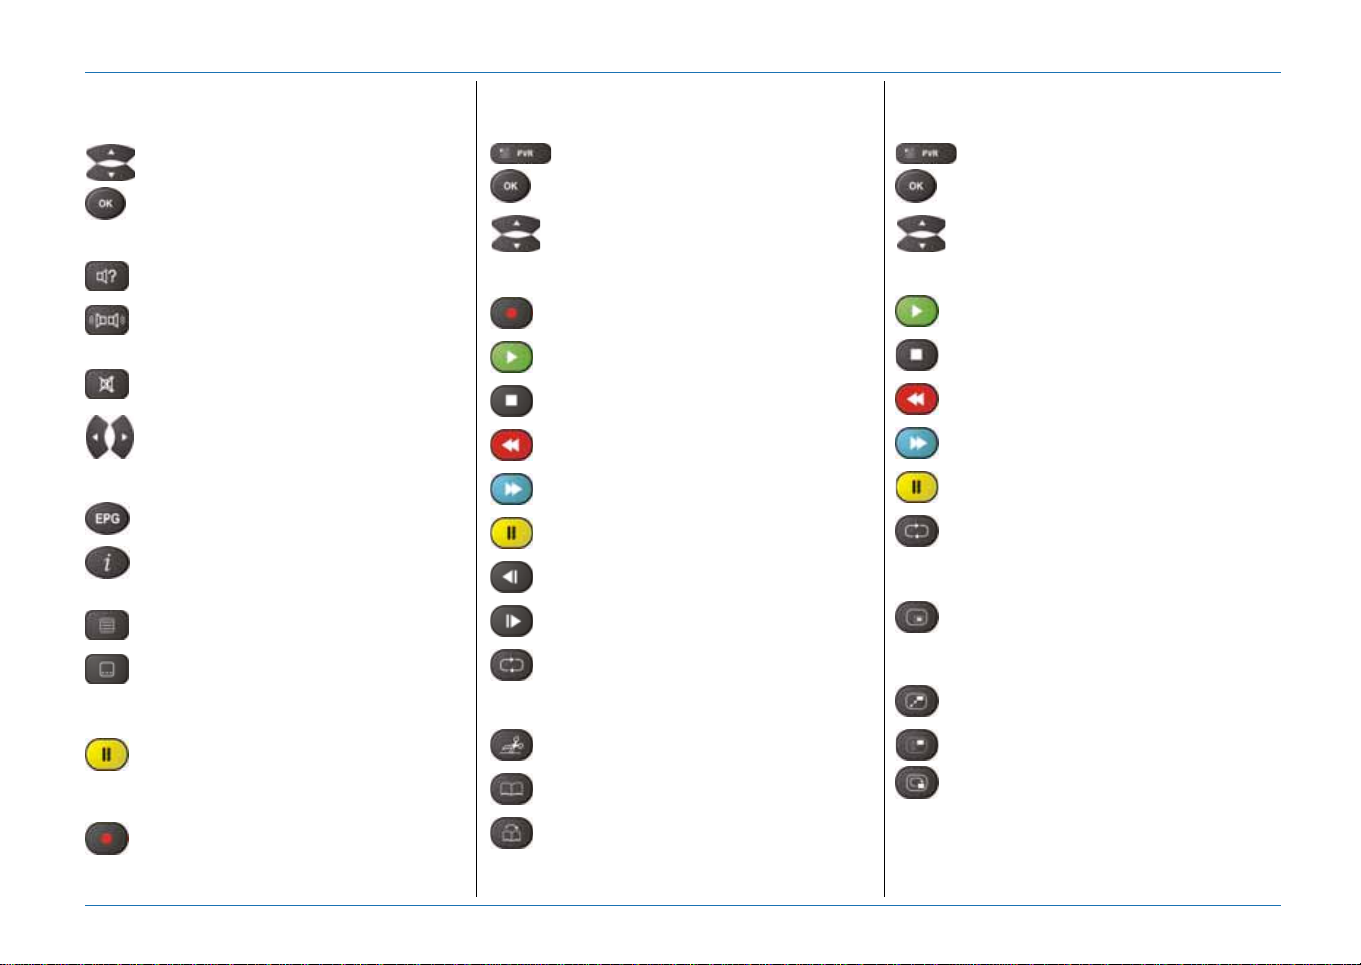
Quick Reference Guide
4. LIVE VIDEO
TO ZAP
CH, to go one channel up.
CH, to go one channel down.
OK, to go to the (favorites) lists;
AUDIO
Audio, to choose a language or radio
station (Canalsat radio)
Stereo/Mono, to select Mono on the
left/right speaker or Stereo. Does not
work for Dolby Digital (S/PDIF).
Mute, to temporary, shut down the
audio.
VOL, to decrease the volume.
VOL, to increase the volume.
PROGRAM INFORMATION
EPG, to view the EPG.
All rights reserved
i, to view the InfoBanner;
to access extended (EPG) information;
© 2004 EchoStar International Corporation
to access technical channel information.
Teletext, to choose teletext.
Subtitle, to choose another subtitle
language.
TIME SHIFT
PAUSE, to pause a live program.
(InstantReplay must be set to On).
RECORD
RECORD, to start or stop a recording.
5. PVR
TO ZAP
PVR, to show the PVR and MP3 lists.
OK, to start the playback of the selected
recording.
CH, to go one recording up.
CH, to go one recording down.
OPERATION
RECORD, to start or stop a recording.
PLAY, to continue the playback of a
recording.
STOP, to stop the recording or playback
of an event
REWIND, to go back quickly.
Fast Forward, to go forward quickly.
PAUSE, to pause the playback.
Slow-motion, to playback a recording
in reversed slow-motion.
Slow-motion, to playback a recording
in forward slow-motion.
Continuous, to playback a scene or
recording continuously.
SPECIAL FUNCTIONS
Edit recording, to edit a recording with
use of cut and paste tools.
Set bookmark, to mark a scene for
quick access.
Goto bookmark, to playback a scene
from the next or last played bookmark
onwards.
6. MP3
TO ZAP
PVR, to show the PVR and MP3 lists.
OK, to start the playback of the selected
song or playlist.
CH, to go one song up.
CH, to go one song down.
OPERATION
PLAY, to continue the playback of a
song.
STOP, to stop the song.
REWIND, to go back fast.
Fast Forward, to go forward vastly
PAUSE, to pause the song.
Continuous, to playback a song
continuously.
7. PICTURE-IN-PICTURE (PIP)
PIP,
to show or hide the Picture-In-Picture
(PIP) screen;
to preview a recording.
PIP Swap, to swap between PIP and
main screen.
PIP List, to show the PIP channel list.
PIP Move, to change the position of the
PIP screen.
www.echostar-int.com Page 3
Page 10
Quick Reference Guide
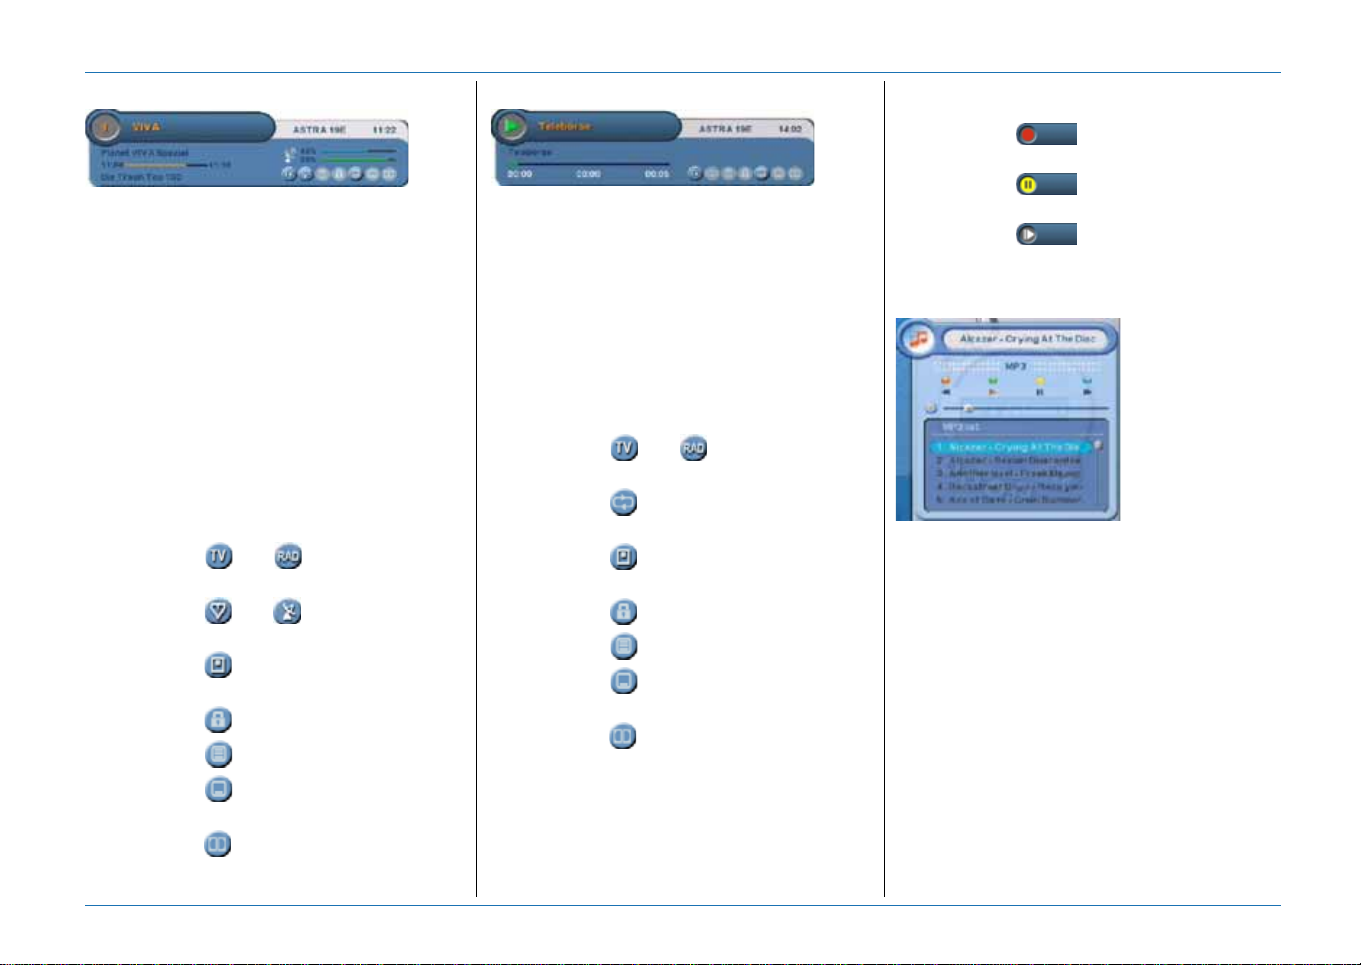
8. INFOBANNER - TV/RADIO
The InfoBanner has:
■ The channel information bar, to show the
channel number and name;
■ The satellite information bar, to show the
name of the selected satellite;
■ The digital clock, to show the current local
time;
■ The program information bar, to show the
program name, start time and duration.
■ The next program information bar, to show
the information for the next program;
■ The signal indicator, to show the signal
strength (top) and signal quality (bottom);
■ The service information bar, to show that
additional services are available. These
icons show only if the service is available:
- the icon and show the active
mode, TV or Radio;
- the icon and show the active list,
FAV or SAT;
- the icon means channel is
scrambled;
- the icon means channel is locked;
- the icon means teletext is available;
- the icon means more Subtitle
languages are available;
9. INFOBANNER - PVR
The InfoBanner has:
■ The information bar, to show the name of
the recording;
■ The satellite information bar, to show the
name of the selected satellite;
■ The digital clock, to show the time at the
moment of recording;
■ The progress bar, to show the duration.
■ The service information bar, to show that
additional services are available. These
icons show only if the service is available:
- the icon and show the active
mode, TV or Radio;
- the icon means repeat recording
continuously;
- the icon means recording is
scrambled;
- the icon means recording is locked;
- the icon means teletext is available;
- the icon means more Subtitle
languages are available;
- the icon means Dolby Digital audio is
available.
Additional the InfoBanner has some PVR
indicators. These are:
- the icon shows that you are
4x
recording from a channel;
- the icon shows the PVR status
such as play and pause;
- the icon shows the trick play
8x
status such as rewind, fast forward and
slow motion.
10. INFOBANNER - MP3 PLAYER
The InfoBanner has:
■ The information bar, to show the name of
the song;
■ The control bar, to show the available
playback controls;
- Rewind;
-Play;
- Pause;
- Fast forward.
■ The progress bar, to show the duration.
■ The playlist, to show the name of the
available songs.
© 2004 EchoStar International Corporation
All rights reserved
- the icon means Dolby Digital audio is
available.
Page 4 EchoStar International Corporation
Page 11

Getting Started
GETTING STARTED
1. FIRST TIME INSTALLATION
Installation of this receiver is not difficult but each installation has its advantages and disadvantages. Normally a generic dual tuner PVR receiver lets
you watch and record two different programs at the same time. In principle it is the same as with an ordinary TV-VCR installation. The TV uses its own
tuner to let you watch a program while the VCR uses its own tuner for recording a program.
In this receiver, EchoStar has added some intelligence to the usage of the two built in tuners. This receiver can record up to four programmes at the
same time while you watch another with the possibility to view the sixth programme in a picture-in-picture view. Due to technical reasons, you will find
that there are some limitations is selecting the programs. These limitations depend on the installation type and program choice
In the next paragraphs you will learn about the basics of satellite broadcasts, installation configurations and their impact on your daily use.
SATELLITE BROADCASTS
The digital signal that is transmitted from the satellite, is for more economy (more channels at the same time ) divided by using different transmission
techniques. In satellite jargon, the digital signal is divided in High/Low band, frequencies, horizon tal/vertica l polarization and symbol rates. For
maximum efficiency the digital signals are spread over so called transponders (TP). But what about the band? All transponders with a frequency under
11700 Mhz are in the low band where transponders with a frequency over 11700 Mhz are in the high band. Thus the transponder (12188/H) in our
example belongs to the high band as its frequency (12188) is over 11700 MHz.
INSTALLATION CONFIGURATIONS
If this receiver replaces your current satellite receiver, there is no need to replace your dish installation or LNB. In this case follow the instructions on
how to install a Loop-through configuration.
You can connect the receiver in different ways, each with its own advantages and disadvantages.
Y ou can use the Loop-through configuration where you connect a single dish to the first tuner and the output of tuner 1 to the input of tuner 2. Now each
All rights reserved
tuner has access to the same satellite and transponders. While recording, the band and polarity of the recorded program will limit the channel list
temporarily for the second tuner because only one tuner can control the LNB for band and polarity.
You can use the Twin configuration, where you connect a single dish with a twin LNB (two LNBs in one house), connection 1 to the first tuner and
© 2004 EchoStar International Corporation
connection 2 to the second tuner. Now each tuner has access to the same satellite and transponders. While recording, the band and polarity of the
recorded program will not influence the channel list for the second tuner as they operate as two independent receiver-LNB installations.
Y ou can use the T1-T2 configuration where you connect a single dish (aimed at satellite 1) to the first tuner and where you connect another single dish
(aimed at satellite 2) to the second tuner. Now each tuner has access to its own satellite and transponders. While recording, the band and polarity of
the recorded program will not influence the channel list for the second tuner as they operate as two independent receivers aimed at different satellites.
For connection diagrams and explanation of more advanced installation types, please refer to the appendix of this user guide.
DAILY USE
The explanation above sounds difficult but you have to know a bit about it to understand why sometimes your channel list seems to loose channels.
This is not the case, they are temporarily not selectable and therefor they are not shown. So at every moment you will access a channel list that has the
channels that are available for watching and recording.
Note that the channels lists in the next examples are fiction and do not necessarily reflect your current situation.
www.echostar-int.com Page 1 - 1
Page 12
Getting Started
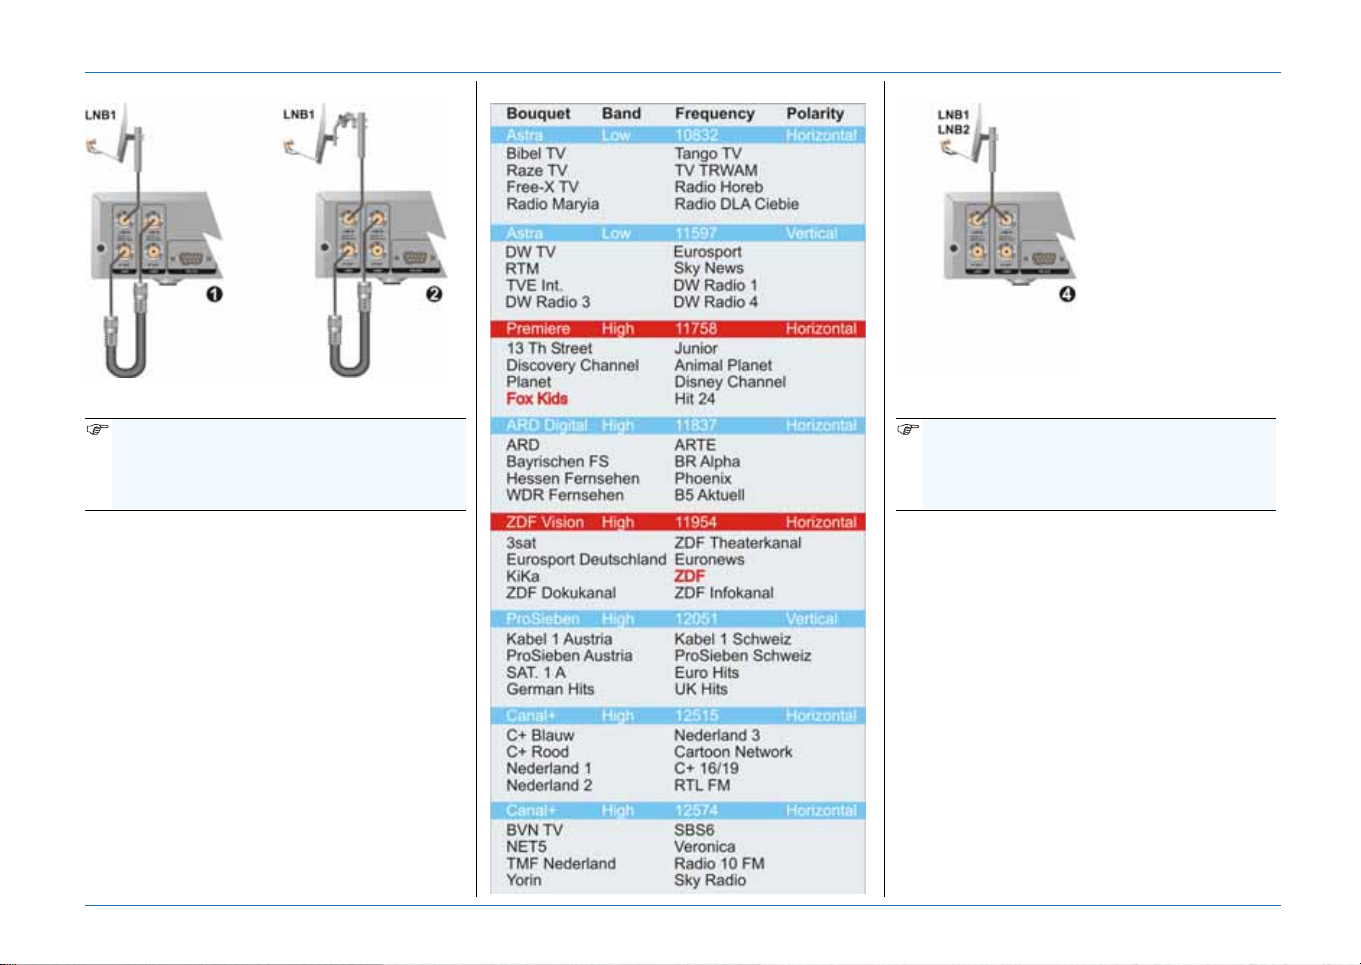
LOOP-THROUGH CONFIGURATION
1) Fixed dish; 2) DiSEqC motorized
NOTE
The amount of channels presented in the
channel list can vary depending on the
current recording(s) and installation type.
EXAMPLE:
Normally you have access to all the channels
that you have searched for. In our example we
make use of channel list as shown.
Record a program from ZDF (11954/H).
This means that your channel list will be
decreased to all the channels that belong to the
High band and Horizontal polarity.
Record another program from Fox Kids
(11758/H).
This means that your channel list will again be
decreased to only the channels that belong to
the frequencies (TP) 11758/H and 11954/H.
Within these frequencies you can record two
more channels and watch another.
PART OF A CHANNEL LIST (1, 2) TWIN CONFIGURATION
4) Single dish - Twin LNB
NOTE
The amount of channels presented in the
channel list can vary depending on the
current recording(s) and installation type.
EXAMPLE:
Normally you have access to all the channels
that you have searched for. In our example we
make use of channel list as shown.
Record a program from ARD (11837/H).
This means that one tuner is limited to all the
channels that belong to this frequency. Note
that the complete channel list is still present.
Record another program from SAT.1A
(12051/V).
This means that your channel list will be
decreased to only the channels that belong to
the frequencies (TP) 11837/H and 12051/V.
Within these frequencies you can record two
more channels and watch another.
© 2004 EchoStar International Corporation
All rights reserved
Page 1 - 2 EchoStar International Corporation
Page 13
Getting Started
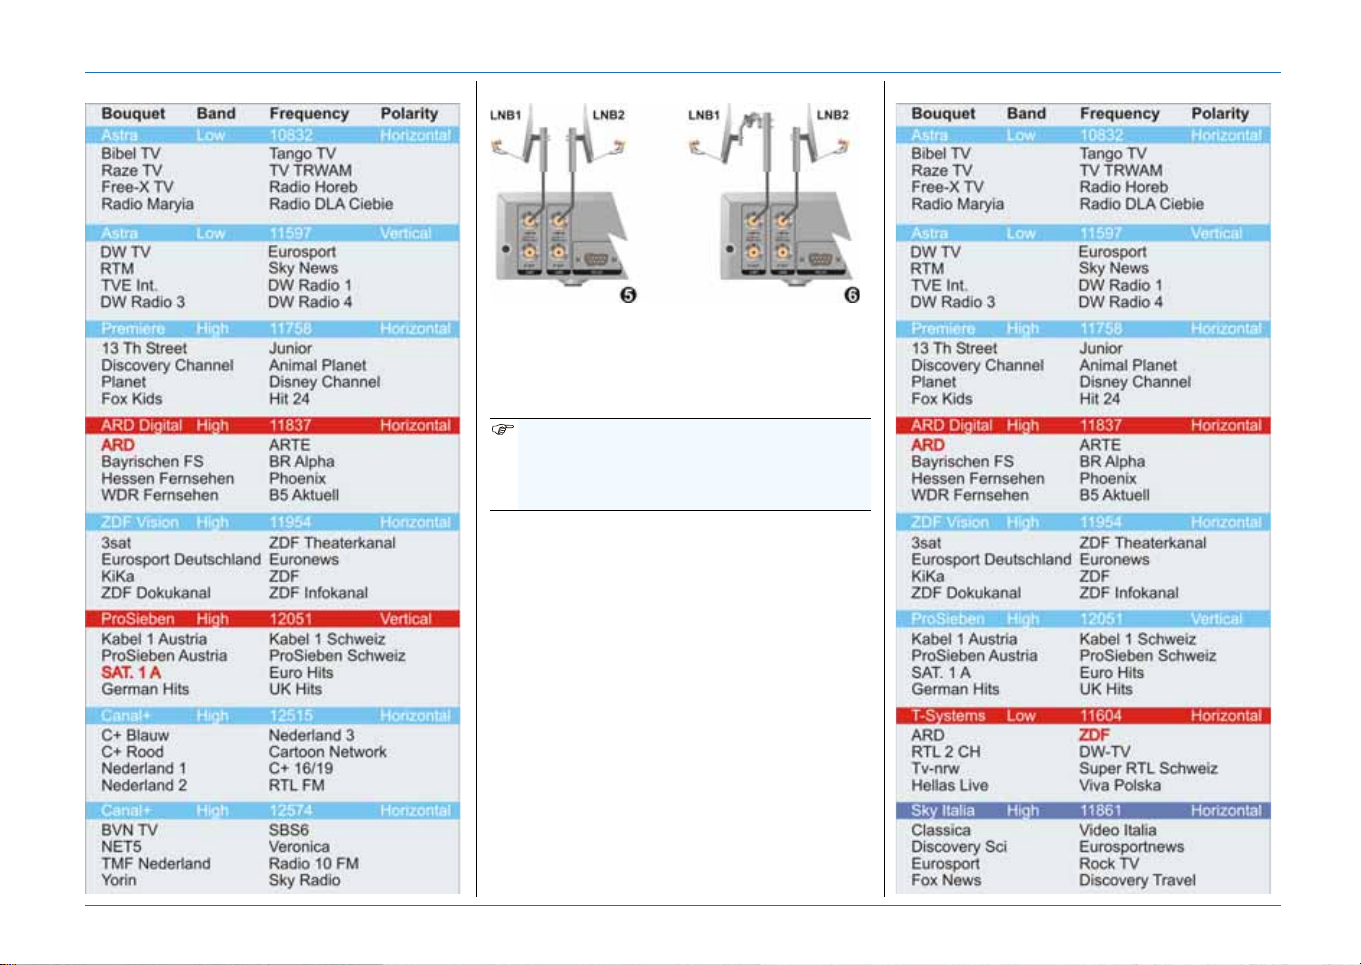
PART OF A CHANNEL LIST (4) T1-T2 CONFIGURATION
5) Fixed, 2 dishes; 6) Fixed/DiSEqC motorized
NOTE
The amount of channels/satellites presented
in the channel list can vary depending on the
current recording(s) and installation type.
All rights reserved
© 2004 EchoStar International Corporation
EXAMPLE:
Normally you have access to all the channels/
satellites that you have searched for. In our
example we make use of channel list as shown.
Record a program from Astra1-ARD (11837/H).
This means that one tuner is used for Astra and
only the channels that belong to this frequency
(11837/H) are shown. Note that the complete
channel list for Hotbird is still present.
Record another program from Hotbird-ZDF
(11604/H).
This means that the other tuner is used for
Hotbird and only the channels that belong to
this frequency (11604/H) are shown.
Within these frequencies (11837/H), 11604/H)
you can record two more channels and watch
another.
PART OF A CHANNEL LIST (5, 6)
www.echostar-int.com Page 1 - 3
Page 14
Getting Started
2. UNPACKING
CAUTION
It is recommended to keep the packaging
materials for a period of time. In case of
warranty claims, we can request to return
the receiver in the original packaging to
protect the electronics. Failing to do so
might void the warranty.
2.1. TO UNPACK YOUR RECEIVER:
WARNING
K
EEP AWAY THE PLASTIC PACKAGING FROM
CHILDREN. THE PLASTIC PACKAGING MAY CLING
TO NOSE AND MOUTH AND PREVENT
BREATHING.
When you unpack the contents of the box,
confirm that all the parts are included.
Unpack the contents of the box carefully.
Electronic equipment as receivers are easily
damaged when you handle it roughly. Examine
all parts for damage that may have occurred
during shipment. If you find any damage, stop to
unpack the box and call the shop where you
bought the receiver.
To help avoid possible damage to the receiver’s
electronics, allow the receiver to adapt to the
ambient temperature and humidity level. This to
avoid condensation.
2.2. THE CONTENTS OF THE BOX
The box contains:
■ A receiver;
■ A loop-through cable;
■ A remote control unit (RCU);
■ A pair of batteries (for the RCU);
■ A set of documentation.
3. INSTALL YOUR RECEIVER
WARNING
ALL EQUIPMENT INVOLVED IN THE INSTALLATION
TASK MUST BE INSTALLED CORRECTLY AND
SWITCHED OFF. MAKE SURE THAT IT IS SAFE TO
PROCEED WITH THE INSTALLATION TASK.
NSAFE CIRCUITS AND INSTALLATIONS CAN
U
CAUSE (SERIOUS) INJURY OR DAMAGE TO
EQUIPMENT.
CAUTION
Tighten the F-connectors only by hand. Do
not use any tools. You will damage the
connector pins if you overtighten the
connector. This will result in loss of signal
quality, or even total loss of recep ti on .
3.1. GUIDED INSTALLATION
NOTE
The loop-through configuration is preprogrammed for a fixed dish installation with
a universal LNBF.
If you have another dish installation,
additional settings are required.
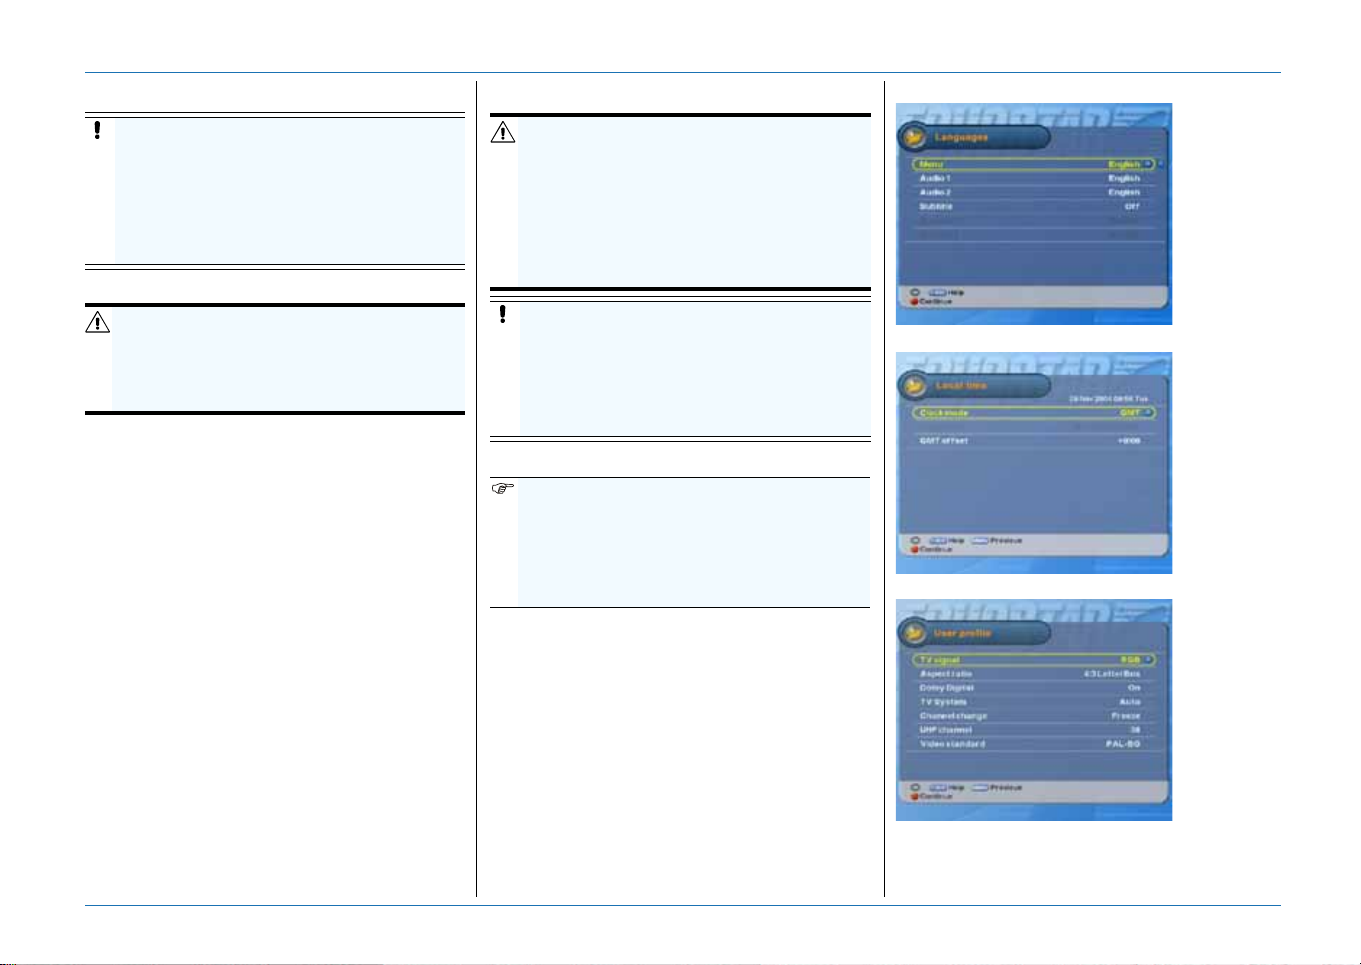
1. Switch the receiver to ON and wait for the
Languages menu to appear.
2. Make the required Language selections.
3. Make sure, the pre-programmed language
settings are convenient for you.
4. Press the Red key to advance.
5. Make the required Local time selections.
Note that GMT time is transmitted by the
satellite, EchoStar has no influence on this.
6. Press the Red key to advance.
7. Make the required User profile selections.
8. Press the Red key to advance.
QUICK REFERENCE GUIDE
Make the required Language selections.
© 2004 EchoStar International Corporation
All rights reserved
Make the required Local time selections.
Make the required User profile selections.
Page 1 - 4 EchoStar International Corporation
Page 15
Getting Started
SINGLE LNB - LOOP-THROUGH
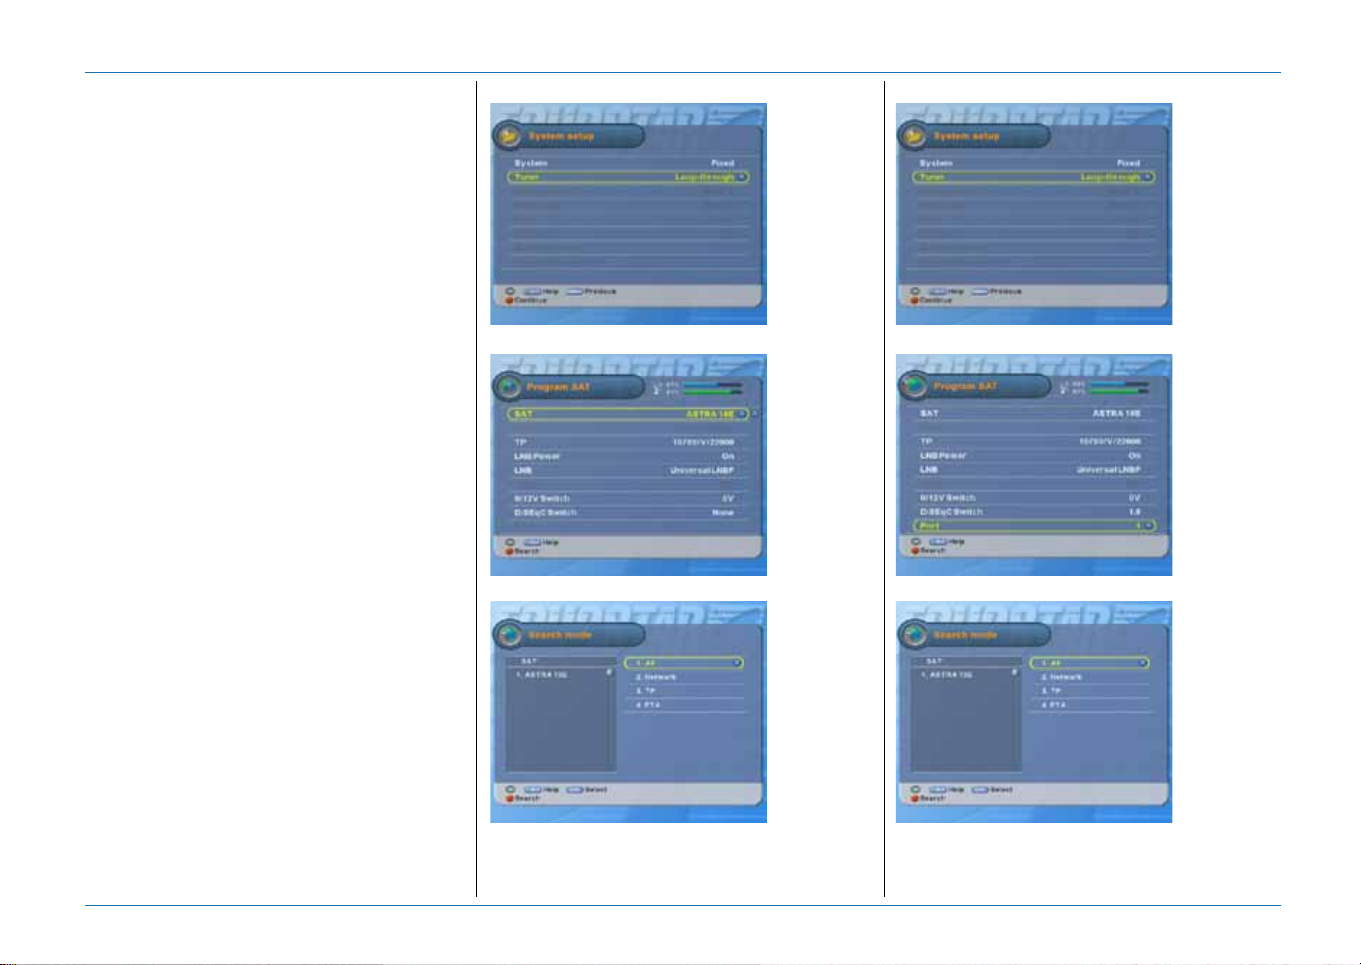
9. In the System setup menu, select:
- System: Fixed;
- Tuner: Loop-through.
10.Press the Red key to advance.
11.In the Program SAT menu, select your
satellite and make sure, the signal indicator
shows a reading.
12.Press the Red key to advance.
13.In the Search mode menu, select: All.
14.Press the Red key to advance.
15.Wait for the search channels to complete.
MULTIPLE LNBS - LOOP-THROUGH
9. In the System setup menu, select:
System: Fixed
Tuner: Loop-through.
10.Press the Red key to advance.
11.In the Program SAT menu, select:
All rights reserved
© 2004 EchoStar International Corporation
- SAT: your applicable satellite;
- DiSEqC switch: 1.0 (max. 4 satellites), or
DiSEqC switch: 1.1 (max. 16 satellites);
- Port: select the applicable port.
12.Press the Red key to advance.
13.In the Search mode menu, select: All.
14.Press the Red key to advance.
15.Wait for the search channels to complete.
16.Select the next satellite.
17.Repeat steps 11. - 15. for each switch port.
SINGLE LNB
Select System: Fixed, Tuner; Loop-through.
Select your satellite.
MULTIPLE LNBS
Select System: Fixed, Tuner; Loop-through.
Select your satellite, switch and port.
Select Search mode: All, press the Red key.
Wait for the search channels to complete.
Select Search mode: All, press the Red key.
Wait for the search channels to complete.
www.echostar-int.com Page 1 - 5
Page 16
Getting Started
DISEQC 1.2 - LOOP-THROUGH
CAUTION
On the motorized dish, set the physical limit
switches first. Failing to do so might cause
damage to your dish or other properties.
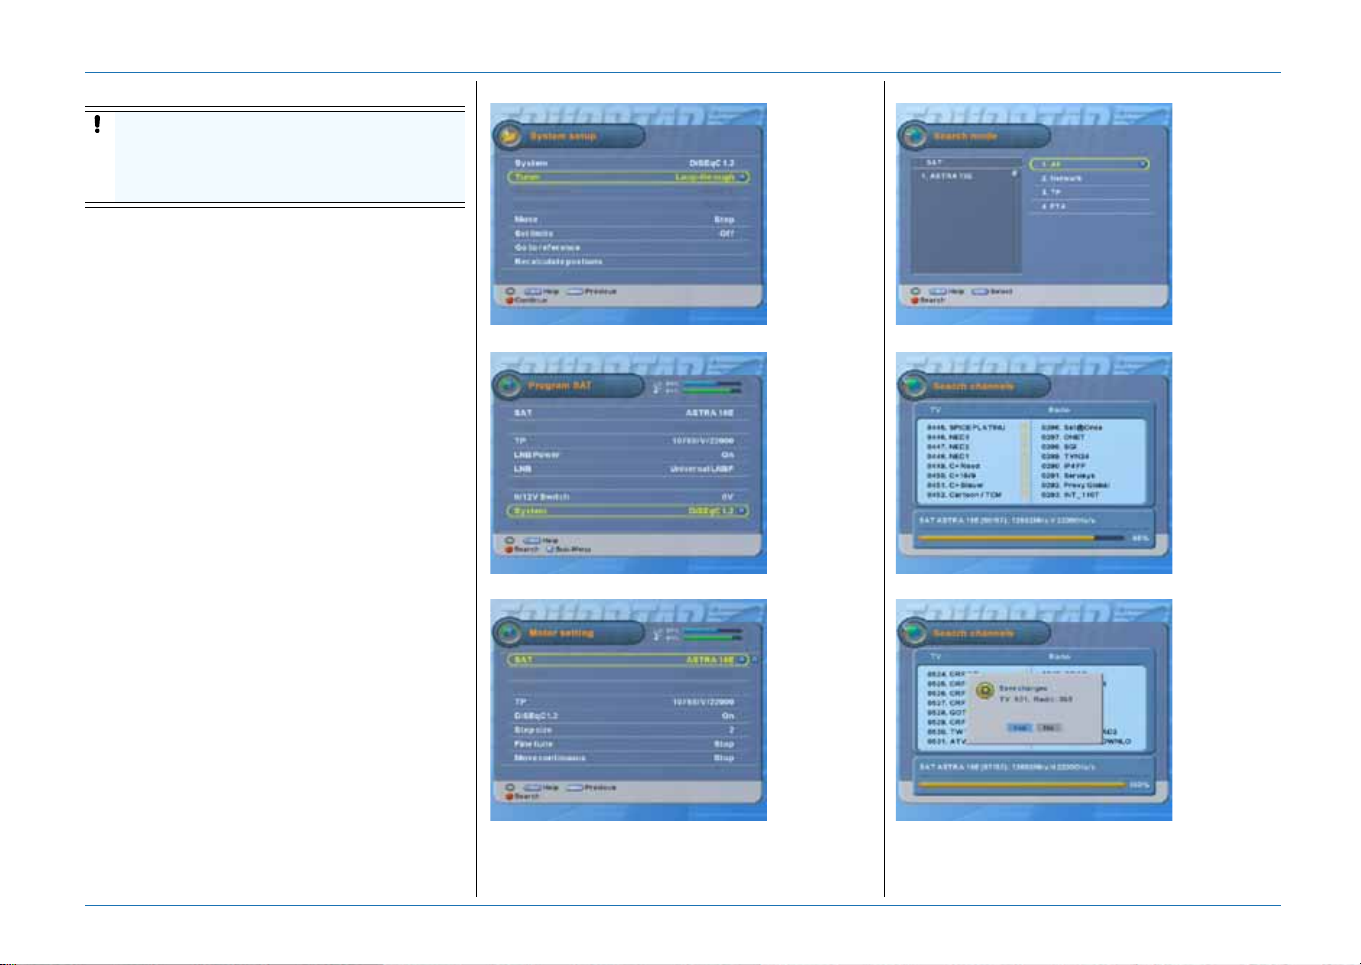
9. In the System setup menu, select:
System: DiSEqC1.2;
Tuner: Loop-through.
10.Select Move: press thekey to move the
dish to the West limit.
11.Select Set limits: press thekey, select
West limit and press the OK key.
12.Select Move and press the key to move
the dish to the East limit.
13.Select Set limits: press the key, select
East limit and press the OK key.
14.Select Set limits: On.
15.Press the Red key to advance.
16.In the Program SAT menu, select your
satellite and make sure, the signal indicator
shows a reading.
17.Select the System option and press the blue
key to advance.
18.Select Move continuous and move the dish
to find the satellite.
19.Select Fine tune and move the dish to find
the best signal.
20.Press the Red key to advance.
21.In the Search mode menu, select: All.
22.Press the Red key to advance.
23.Wait for the Search channels to complete.
24.Select the next satellite.
25.Repeat steps 16. - 23. for each satellite.
DISEQC 1.2
Select System: DiSEqC, Tuner; Loop-through.
Select your satellite.
Move the dish to find the best signal.
DISEQC 1.2
Select Search mode: All, press the Red key.
© 2004 EchoStar International Corporation
All rights reserved
Wait for the search channels to complete.
Press the OK key to confirm.
Page 1 - 6 EchoStar International Corporation
Page 17
Getting Started
USALS - LOOP-THROUGH
CAUTION
On the motorized dish, set the physical limit
switches first. Failing to do so might cause
damage to your dish or other properties.
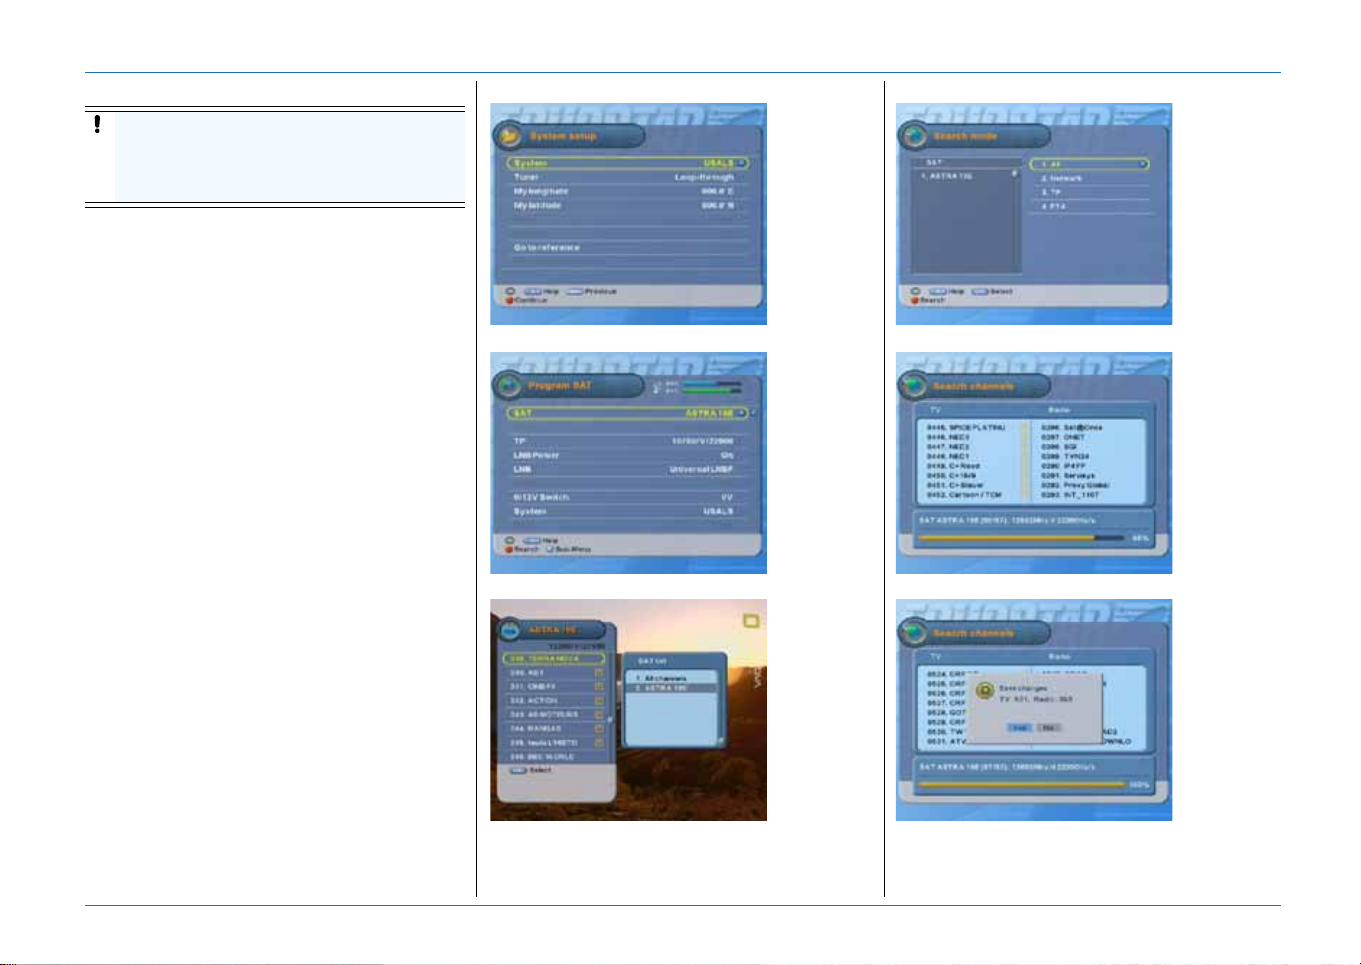
9. In the System setup menu, select:
System: USALS
Tuner: Loop-through.
10.Refer to the installation instructions as given
in the USALS installation guide.
11.Select My longitude.
12.Use the number keys to set the longitude of
the installation site (dish).
13.Select My latitude.
14.Use the number keys to set the latitude of
the installation site (dish).
15.Press the Red key to advance.
16.In the Program SAT menu, select your
All rights reserved
© 2004 EchoStar International Corporation
satellite and make sure, the signal indicator
shows a reading.
17.Select the System option and press the blue
key to advance.
18.Allow the dish some time to move towards
the selected satellite.
19.When the signal shows, press the Red key
to advance.
20.In the Search mode menu, select: All.
21.Press the Red key to advance.
22.Wait for the search channels to complete.
USALS
Select System: DiSEqC, Tuner; Loop-through.
Select your satellite.
DISEQC 1.2
Select Search mode: All, press the Red key.
Wait for the search channels to complete.
Move the dish to find the best signal
Press the OK key to confirm.
www.echostar-int.com Page 1 - 7
Page 18

Getting Started
4. MENU STRUCTURE
MAIN MENU
1. Search channels Program SAT To define the settings as used for the selected satellite.
Auto To search for the channels, on the selected satellite, automatically (fixed installations only).
Manual To search for the channels, on the selected satellite, by the user defined transponder.
Advanced To search for the channels, on the selected satellite, by the user defined PIDs.
System setup To define the settings that belong to the dish installation itself.
2. Add/Edit Edit channel To Lock, to Delete, to Move or to Rename a channel.
Edit favorite To edit or to add channels to a favorite list.
Add/Edit data To add or edit a satellite or transponder which is not listed in the internal database.
Delete SAT To delete a satellite with all its TV and Radio channels.
3. User preferences Languages To set the language you want to use for Menu, Audio and Subtitle.
OSD setup To set the menu appearance.
User profile To set the personal preferences for the on-screen menus.
Local time To set the local time as used by the EPG and timers.
Timer list To set, modify or delete a timer.
Parental control To set the locks to avoid unauthorized use of the receiver or the installation/edit menus.
4. Extras About EchoStar To review the receiver and manufacturer information.
Factory reset To delete all personal settings and return to the factory defaults.
Receiver copy To copy the software and/or channel lists from one receiver to another (same model only).
Software upgrade To download the latest software version as available from the satellite (OTA).
Accessories To access the accessories such as a calendar and calculator.
Games To access the games.
5. Conditional access 1 To review the common interface and smartcard information (Slot 1, only for 2Ci models).
2 To review the common interface and smartcard information (Slot 2, only for 2Ci models).
6. HDD Information To review the manufacturer information and status of the HDD.
Format To do a ‘factory reset’ of the HDD.
Recording To access the recording menu for manual recordings.
InstantReplay To activate/de-activate the InstantReplay function.
Descrambling To access the menu that let you descramble the scrambled recordings for future watching.
© 2004 EchoStar International Corporation
All rights reserved
Page 1 - 8 EchoStar International Corporation
Page 19
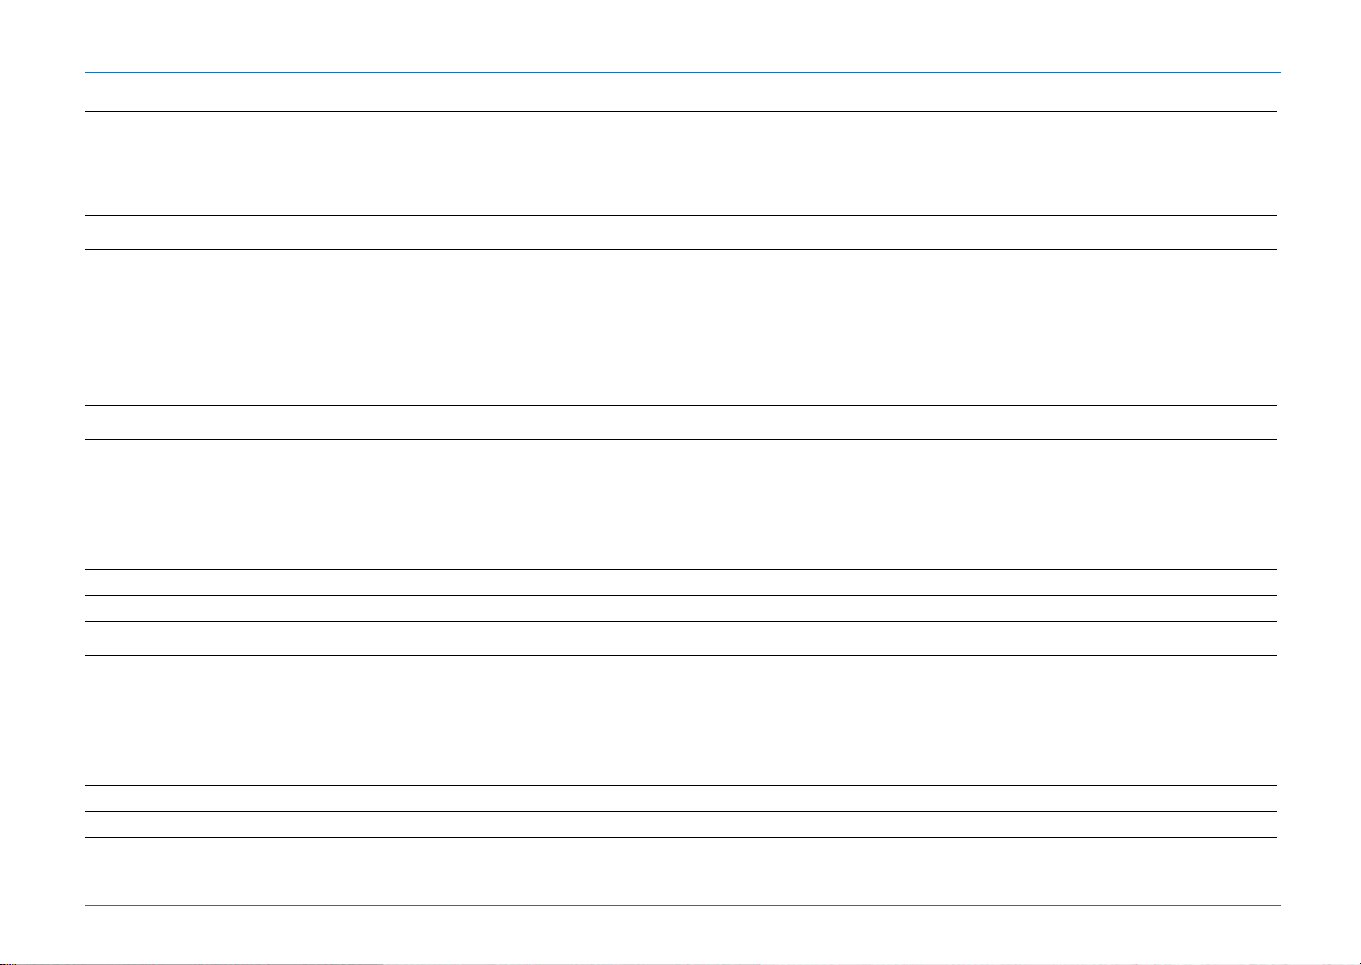
CHANNEL LIST (USE THE OK AND COLOR KEYS FOR DIRECT ACCESS TO THE OPTIONS)
OK Red To group the channel list by None, FTA/CAS or Tuner.
Green To sort the channel list by A to Z
Yellow To view up to 16 channels in a mosaic screen.
SAT To view the SAT list
EPG MENU (USE THE EPG AND COLOR KEYS FOR DIRECT ACCESS TO THE OPTIONS)
EPG Red To show the EPG in daily forma t.
Green To show the EPG in weekly format.
Yellow To show to the next page of program information.
Blue To select another zoom factor for the program balloons.
Record To access the EPG bases timer.
i To retrieve detailed program information for the selected program.
PVR MENU (USE THE PVR AND COLOR KEYS FOR DIRECT ACCESS TO THE OPTIONS)
PVR Red To lock a recording for unauthorized viewing.
Green To delete a recordin g.
Yellow To rename a recording or folder.
All rights reserved
Blue To access the PVR edit menu for sorting, descrambling and file management.
i To preview the recording in 16 scenes (pictures) from where you can start viewing.
PIP To preview the recording in a live video screen.
© 2004 EchoStar International Corporation
To toggle between the PVR and MP3 list
MP3 MENU (USE THE PVR AND COLOR KEYS FOR DIRECT ACCESS TO THE OPTIONS)
MP3 Red To add a MP3 song to the playlist.
Green To delete a recordin g.
Yellow To rename a recording or folder.
Blue To access the PVR edit menu for sorting, descrambling and file management.
i To add all songs to the playlist.
OK To add one song to the playlist.
To toggle between the PVR and MP3 list
Getting Started
www.echostar-int.com Page 1 - 9
Page 20

Getting Started
© 2004 EchoStar International Corporation
All rights reserved
Page 1 - 10 EchoStar International Corporation
Page 21
DESCRIPTION AND OPERATION
1. LISTS
The OK key gives access to the channel lists and the different list and zap functions.
NOTE
Sometimes a list seems to be empty because you are recording from another transponder as
available from your (favorite) list.
1.1. GENERAL
For the general navigation, you can use in all lists the same navigation keys.
Once in a list, these keys are:
Description and Operation
■ The (Page Up/Down) key lets you scroll page by page through the list.
■ The (Up/Down) key lets you scroll channel by channel (recording, song) through the list.
■ The (OK) key lets you select a channel (recording, song) for viewing or listening.
■ The (EXIT) key lets you leave the list without changes.
1.2. THE CHANNEL LIST
All rights reserved
For easier navigation, so called direct access keys are made available.
Once in the channel list, these keys are:
© 2004 EchoStar International Corporation
■ The (Red) key lets you group the list: None (default), FTA/CAS (Free-To-Air/Scrambled) or
Tuner.
■ The (Green) key lets you sort the complete list in None (default) or from A-Z.
■ The (Yellow) key lets you show the channel list in a mosaic view.
■ The (SAT list) key lets you show the channel list per satellite (Current SAT) or All
channels.
■ The (Favorite list) key, gives direct access to the favorite lists (only if they are created).
Press the FAV key again to go to the next favorite list or return to the last selected channel list.
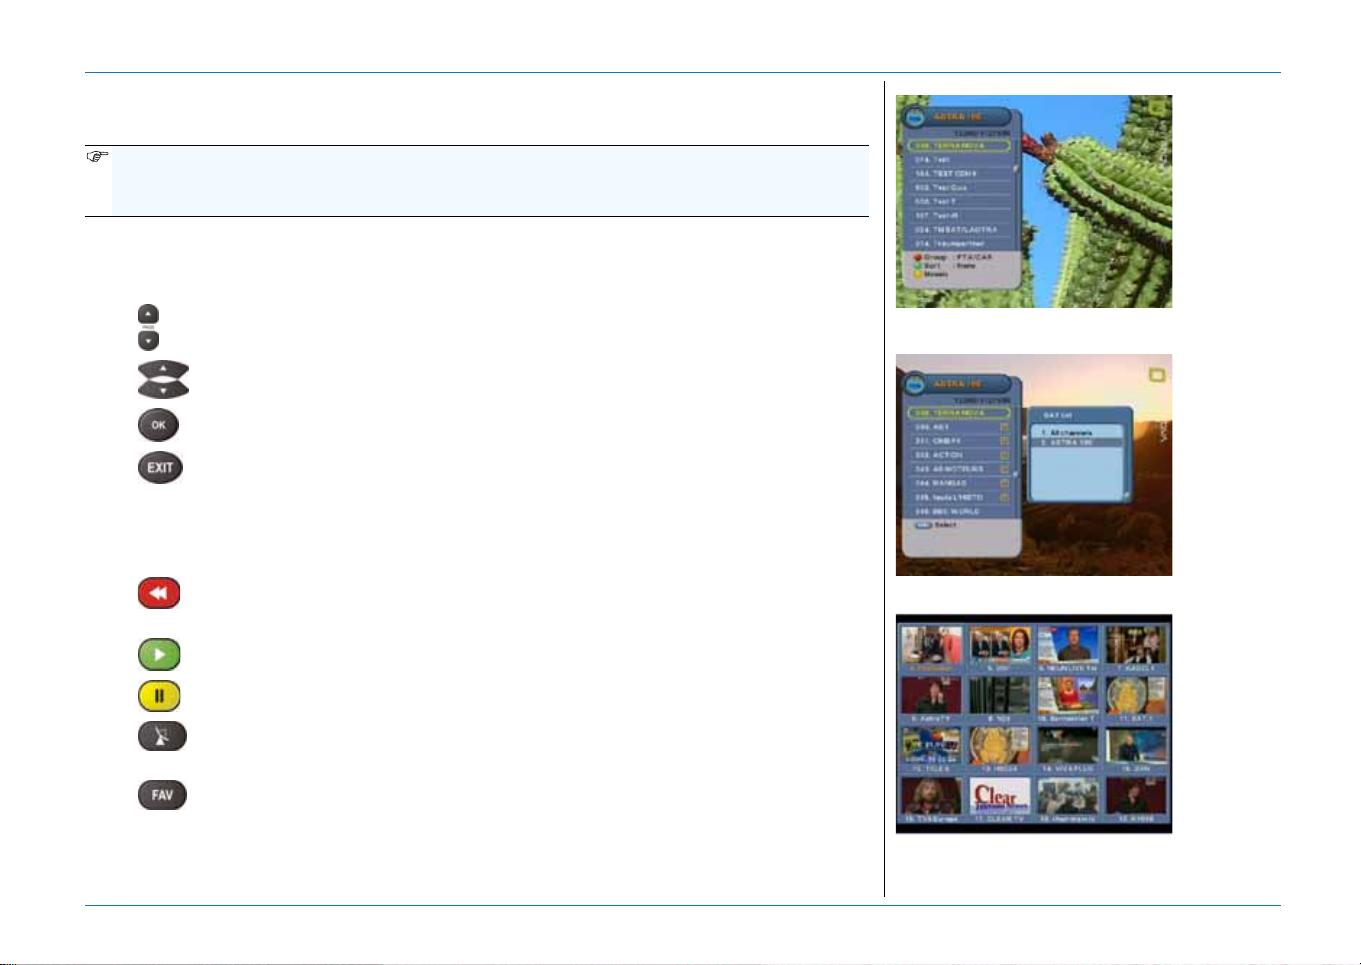
OK key - to access the channel list.
SA T-key - to access the channel list per SAT.
Yellow key - to access the mosaic view.
www.echostar-int.com Page 2 - 1
Page 22
Description and Operation
PVR key - to view the list.
1.3. THE PVR LIST
The key gives access to the PVR list, where the OK key lets you select a recording for
viewing. For easier navigation, so called direct access keys are made available.
Once in the PVR list, these keys are:
■ The (Red) key lets you lock a recording for unauthorized viewing.
■ The (Green) key lets you delete a recording from the list.
■ The (Yellow) key lets you rename a recording.
■ The (Blue) key lets you edit, (sort by time, sort A-Z, descramble, move to folder) a
recording The Blue key lets you also create folders (favorite lists) for further organization of the
list.
© 2004 EchoStar International Corporation
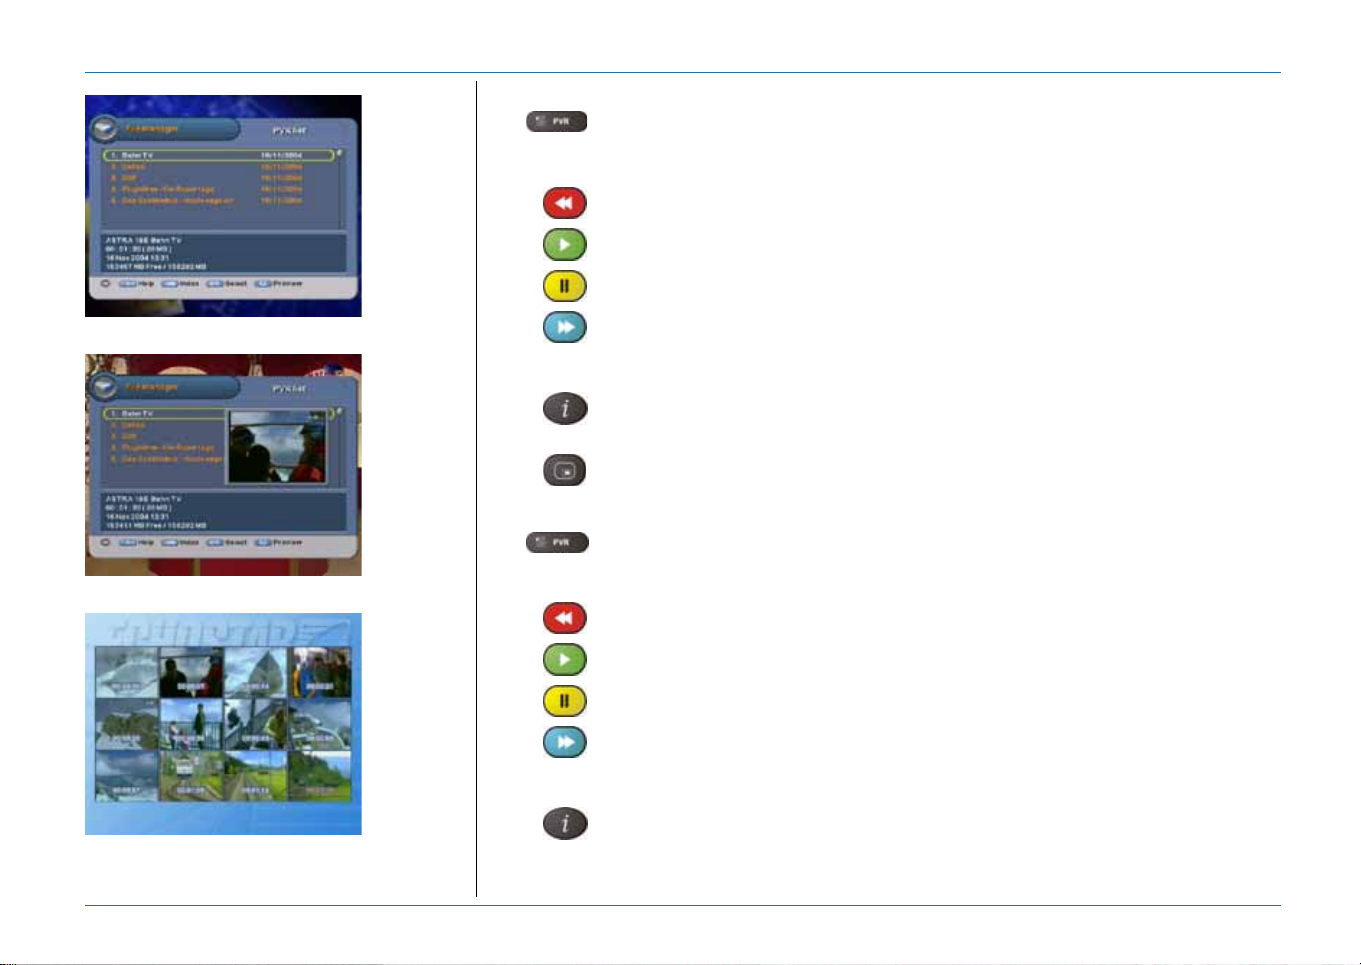
■ The (i) key divides the recording in equal parts and lets you preview the first scene of such
a part. You can select a scene from where you want to start viewing.
■ The (PIP) key lets you preview the recording in a so-called preview screen.
1.4. THE MP3 LIST
The key gives access to the PVR list where the key gives access to the MP3 list. The
OK key lets you select a song for listening. For easier navigation, so called direct access keys are
PIP-key - to preview the recording.
i-key - to preview a selection of scenes.
Page 2 - 2 EchoStar International Corporation
made available. Once in the MP3 list, these keys are:
■ The (Red) key lets you add a song to, or remove a song from the playlist.
■ The (Green) key lets you delete a song from the list.
■ The (Yellow) key lets you rename a song.
■ The (Blue) key lets you edit, (sort by time, sort A-Z, descramble, move to folder) a
recording The Blue key lets you also create folders (favorite lists) for further organization of the
list.
■ The (i) key lets you add all available songs from a folder to the playlist.
All rights reserved
Page 23
2. EPG MENU - PROGRAM INFORMATION
The key gives access to the EPG menu, where you control the timers an d view the
information in the Electronic Program Guide.
NOTE
Most digital channels broadcast program data as an EPG. Digit al channels that broadcast EPG
offer you program information in advance for a certain period of time. The EPG information is
not always available. Sometimes the service provider supplies only the program name, the now/
next information or sometimes nothing at all. EchoStar has no influence on this matter.
When the EPG menu shows, with the colored keys, you can access the timers and the powerful
tools for further organization of the EPG menu.
■ The (Red) key gives, once in the Weekly EPG menu, access to the Daily EPG menu.
■ The (Green) key, once in the Daily EPG menu, access to the Weekly EPG menu.
■ The (Record) key gives access to the timer list. In the timer list you can select a PVR, a
Sleep or a Reminder (VCR) timer.
CAUTION
All rights reserved
© 2004 EchoStar International Corporation
The Reminder timer does not start or program your video recorder (VCR). You have to set the
timer of your VCR also to the same time as on the receiver. Please refer to the user’s guide of
your VCR how to record from a satellite receiver.
■ The (i) key gives, if available from the service provider, access to the detailed program
information of the current selected program.
■ The keys, once in the Daily EPG menu, lets you toggle between the Now and Next program
information.
Description and Operation
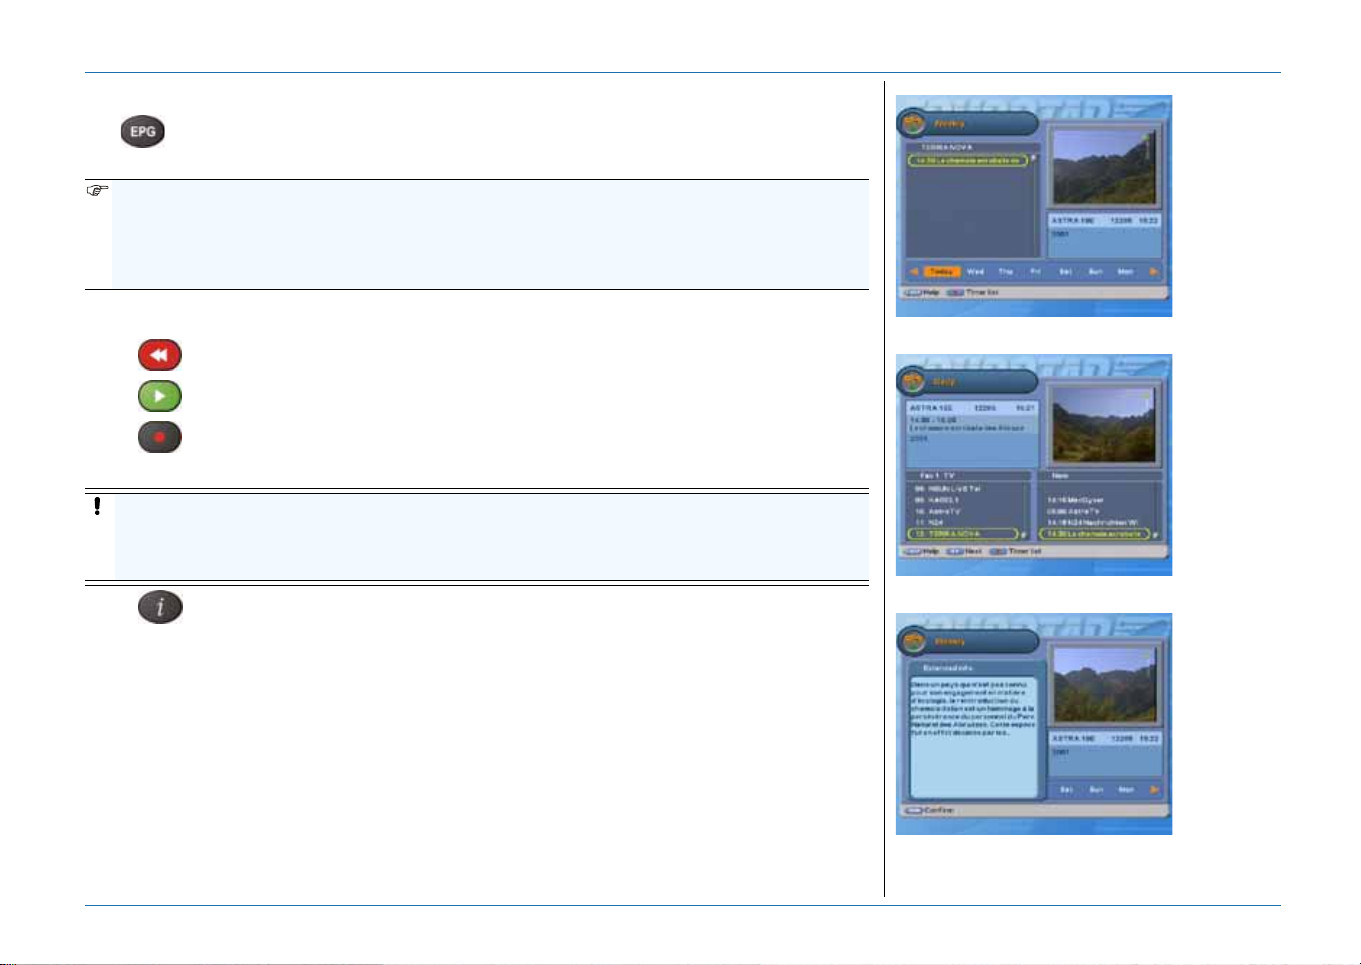
EPG key - to access the weekly EPG.
Red key - to access the daily EPG.
i-key - to access the detailed program
information.
www.echostar-int.com Page 2 - 3
Page 24
Description and Operation
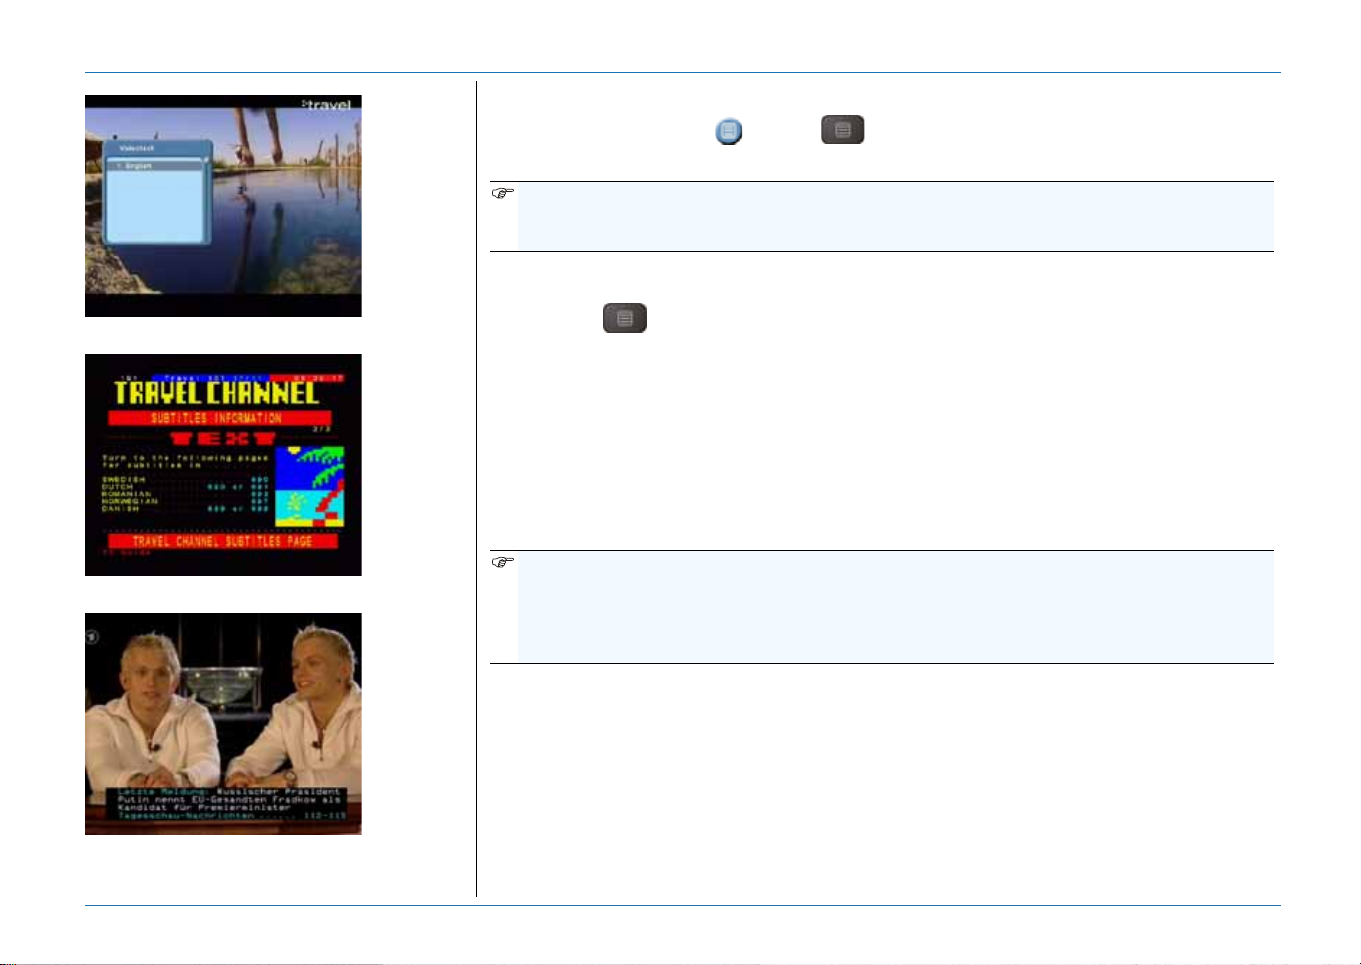
Teletext key - to select teletext/language.
keys - to choose a page number.
3. TELETEXT
If the InfoBanner shows the icon, the key gives access to the embedded Teletext
decoder.
NOTE
Sometimes the service provider does not offer T eletext support. Then the Teletext option will not
show. Please note that EchoStar has no influence on this matter.
IF YOU WANT TO ACCESS
TELETEXT:
1. Press the key.
2. In the T eletext pop-up, select
your language.
3. Press the OK key.
4. Allow the receiver to collect
the Teletext data.
F YOU WANT TO EXIT TELETEXT:
I
1. At any page, press the EXIT
key.
NOTE
Some Teletext pages are meant to be on top of live video, such as so called latest new s flashes.
When you access such a page, allow the receiver to collect the information. When the
information is collected, the receiver returns automatically to live video with the news flash on
top.
ELECT A TELETEXT PAGE:
S
1. Press the numerical keys to
choose a page number, or:
2. Press the key to go to
the next/previous page, or:
3. Press one of color keys to
go to the indicated page.
4. Sub-pages (1/2, 2/2) are
automatically advanced.
SE THE TELETEXT SUPPORTED
U
SUBTITLES FOR THE HEARING
IMPAIRED:
1. If the subtitles are
transmitted, select the
applicable Teletext page.
2. Allow the receiver to collect
the subtitles.
3. Note that the subtitles are
show on top of the video.
4. At any time, press the EXIT
key to return to the normal
operation.
© 2004 EchoStar International Corporation
All rights reserved
If available - latest news flashes/subtitles.
Page 2 - 4 EchoStar International Corporation
Page 25
4. TIMERS
CAUTION
The Reminder timer does not start or program your video recorder (VCR). You have to set the
timer of your VCR also to the same time as on the receiver. Please refer to the user’s guide of
your VCR how to record from a satellite receiver.
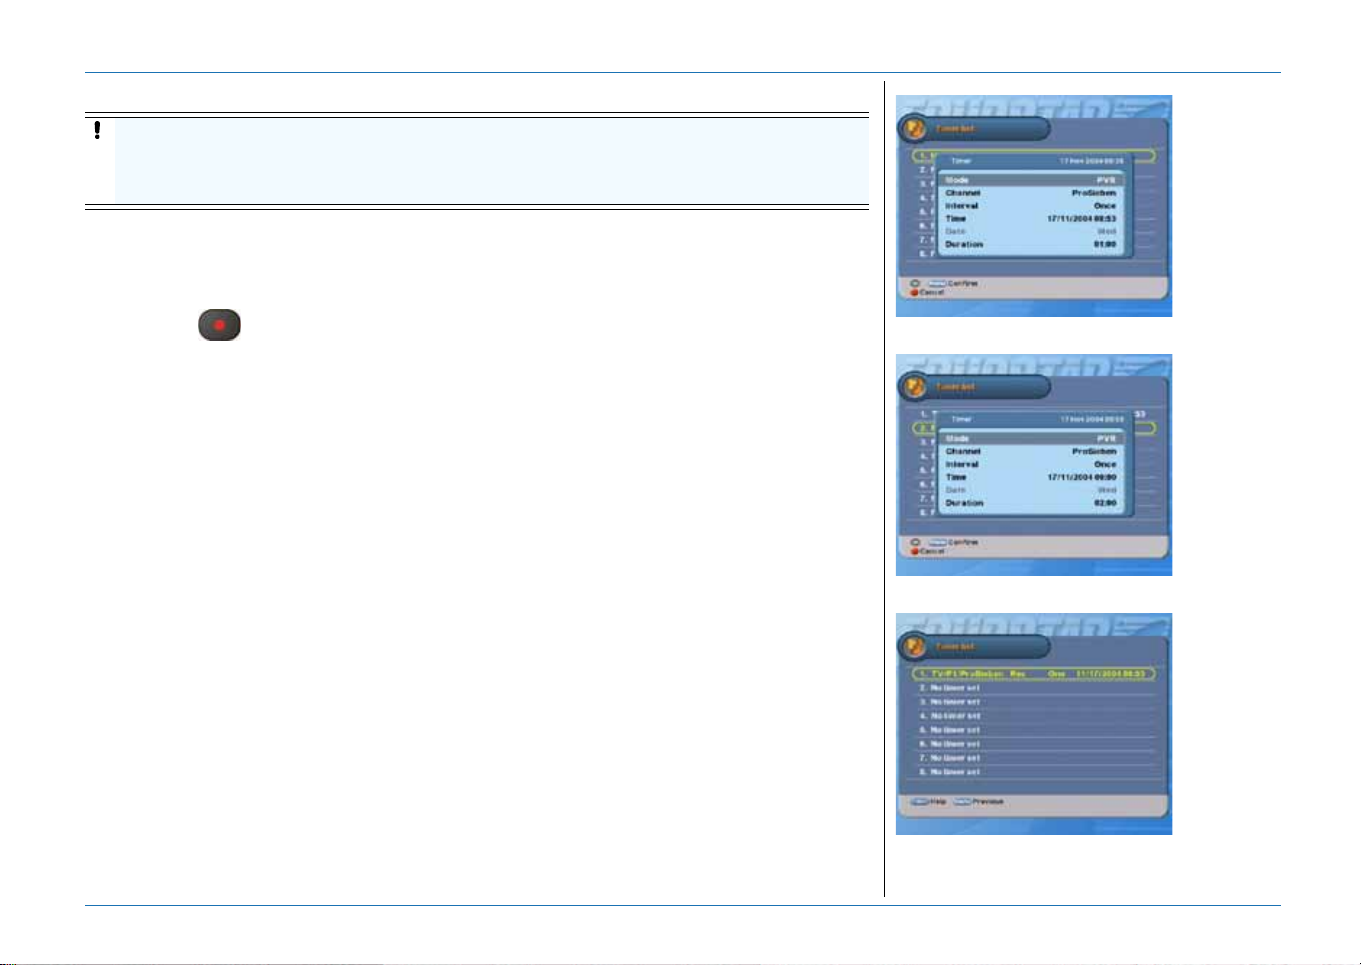
I
F YOU WANT TO SET A TIMER
ONTO AN EPG EVENT:
1. Press the EPG key .
2. Select the EPG event.
3. Press the (Record)
key.
4. Select a free timer (No timer
set) and press the OK key.
5. If you want to record on the
hard disk, select the PVR
timer.
6. If you want to record on a
All rights reserved
© 2004 EchoStar International Corporation
VCR, select the Reminder
timer.
7. Review the timer settings as
retrieved from the EPG
event.
8. If required, change the EPG
based settings.
9. Press the MENU key.
10.Note that the timer shows in
the timer list.
11. Press the EXIT key.
F YOU WANT TO SET A TIMER
I
WHEN THERE IS NO EPG:
1. Press the MENU key.
2. Select main menu 3.
3. Select Timer list.
4. Press the OK key .
5. Select a free timer (No timer
set) and press the OK key.
6. If you want to record on the
hard disk, select the PVR
timer.
7. If you want to record on a
VCR, select the Reminder
timer.
8. Make the required settings.
For the PVR timer, note that
the standard duration is set
to 2 hours.
9. Press the MENU key.
10.Note that the timer shows in
the timer list.
1 1.Press the EXIT key.
F YOU WANT TO LOOK UP,
I
DELETE OR CHANGE A TIMER:
1. Press the MENU key.
2. Select main menu 3.
3. Select Timer list.
4. Press the OK key.
5. Press the keys to select
the timer.
6. If you want to delete the
timer:
a. Press the Green key.
b. Note that the timer is
deleted from the list.
7. If you want to change the
timer:
a. Press the OK key.
b. Make the required
changes.
c. Press the EXIT key.
Description and Operation
EPG / Record key - Set EPG based timer.
Make the required timer settings.
Green key - delete the selected timer.
www.echostar-int.com Page 2 - 5
Page 26
Description and Operation
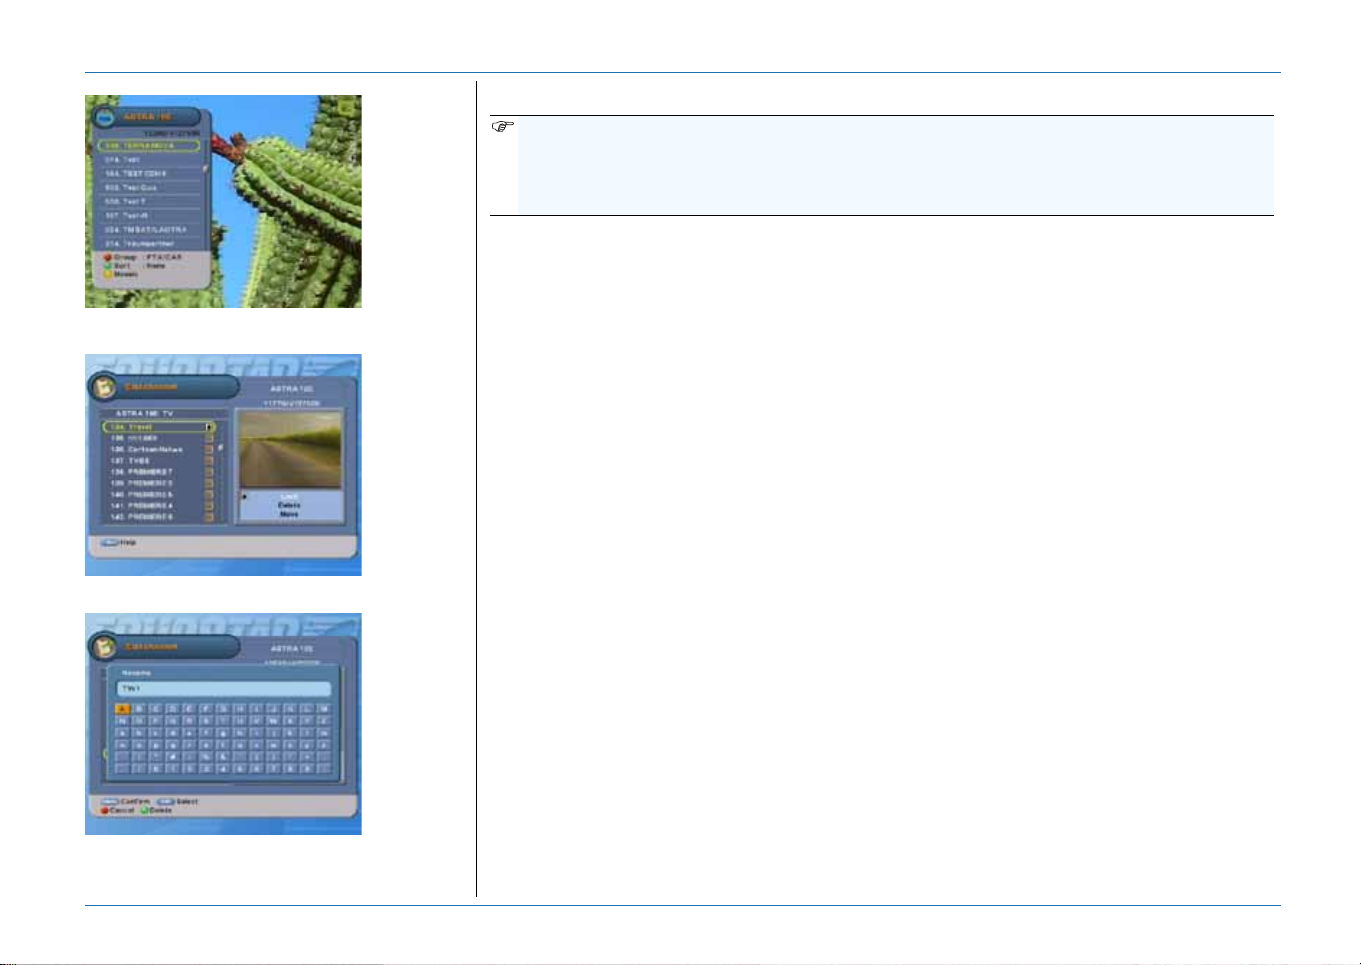
Group and Sort the list.
Red - Lock, Green - Delete, Yellow - Move.
Arrow/OK keys - Rename a selection.
5. ORGANIZE THE LISTS
NOTE
1. Sometimes a list seems to be empty because you are recording from another transponder
as available from your (favorite) list.
2. The Group and Sort settings are reset to None once you leave the list.
F YOU WANT TO GROUP A LIST:
I
1. Press the Red key.
2. Make your selection.
- None; numerical order;
- FTA/CAS - Free-To-Air/
Conditional Access
System;
- Tuner; Tuner 1/Tuner2.
F YOU WANT TO SORT A LIST:
I
1. Press the Green key.
2. Make your selection.
- None; numerical order;
- A-Z; alphabetical order.
F YOU WANT TO LOCK A
I
SELECTION:
1. Press the MENU key.
2. Select main menu 2.
3. Select Edit channel.
4. Press the OK key.
5. Make the required selection.
6. Press the Red key.
7. Enter your PIN-code.
8. Press the OK key.
9. Note that the Lock symbol
shows.
F YOU WANT TO DELETE A
I
CHANNEL:
1. Press the MENU key.
2. Select main menu 2.
3. Select Edit channel.
4. Press the OK key.
5. Make the required selection.
6. Press the Green key.
7. Note that the Delete symbol
shows behind the selection.
F YOU WANT TO MOVE A
I
SELECTION:
1. Press the MENU key.
2. Select main menu 2.
3. Select Edit channel.
4. Press the OK key.
5. Make the required selection.
6. Press the Yellow key.
7. Note that the Move symbol
shows behind the selection.
8. Move the channel, either
with the keys, Page +/keys or the numerical keys.
9. Press the OK key.
10.Note that the Move symbol
disappears.
F YOU WANT TO RENAME A
I
SELECTION:
1. Press the MENU key.
2. Select main menu 2.
3. Select Edit channel.
4. Press the OK key.
5. Make the required selection.
6. Press the Blue key . Note that
the keyboard shows.
7. Rename the selection.
- ; select
character;
- OK; enter character;
- Red; cancel rename;
- Green; backspace.
8. Press the MENU key.
© 2004 EchoStar International Corporation
All rights reserved
Page 2 - 6 EchoStar International Corporation
Page 27
6. CREATE A FAVORITE LIST OR A FOLDER (PVR/MP3)
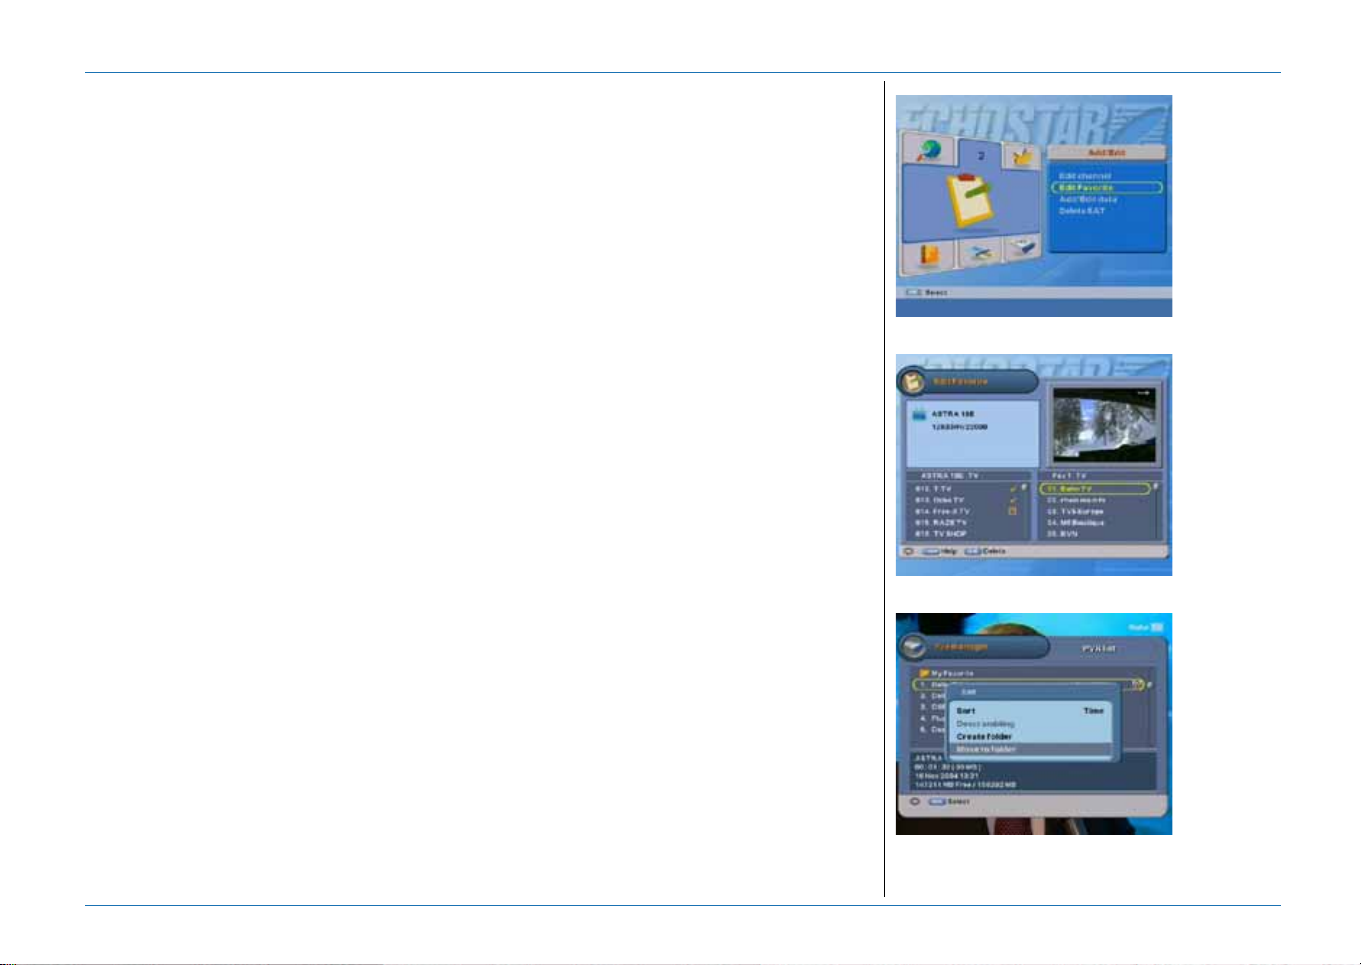
IF YOU WANT TO SELECT A
FAVORITE LIST:
1. Press the MENU key.
2. Select main menu 2.
3. Select Edit favorite.
4. Press the OK key .
5. Press the FAV key to select
the applicable favorite list.
F YOU WANT TO ADD A CHANNEL
I
TO THE FAVORITE LIST
1. Select the favorite list.
2. In the left list, select the
channel.
3. Press the OK key .
4. Note that the Add symbol
shows behind the selection
and that the channel
All rights reserved
appears in the current
selected favorite list.
5. Use the and OK key to
© 2004 EchoStar International Corporation
make the next selection.
6. Press the EXIT key.
F YOU WANT TO DELETE A
I
FAVORITE SELECTION:
1. Select the favorite list.
2. Press the key.
3. In the right list, select the
channel.
4. Press the OK key.
5. Note that the channel is
removed from the current
selected favorite list.
6. Use the and OK key to
make the next selection.
7. Press the MENU key.
8. Press the EXIT key.
F YOU WANT TO RENAME A
I
FAVORITE LIST:
1. Select the favorite list.
2. Press the Blue key. Note that
the keyboard shows.
3. Rename the selection.
- ; select
character;
- OK; enter character;
- Red; cancel rename;
- Green; backspace.
4. Press the EXIT key.
IF YOU WANT TO CREATE A
FOLDER (PVR-MP3 ONLY):
1. Press the PVR key.
2. If you want the MP3 list,
press the key.
3. Press the Blue key.
4. Select: Create folder.
5. Press the OK key. Note that
the keyboard shows.
6. Enter the folder name.
- ; select
character;
- OK; enter character;
- Red; cancel rename;
- Green; backspace.
7. Press the MENU key. Note
that the folder shows.
F YOU WANT TO ADD A
I
SELECTION TO A FOLDER
1. Press the PVR key.
2. If you want the MP3 list,
press the key.
3. Make your selection.
4. Press the Blue key.
5. Select: Move to folder.
6. Press the OK key.
7. In the folder popup, press
the OK key again.
8. Press the Blue key.
9. Select the folder and note
that the selection is added.
Description and Operation
MENU key - Select Edit favorite.
Red - Lock, Green - Rename, Yellow - Move.
PVR/Blue key - Add selection to folder.
www.echostar-int.com Page 2 - 7
Page 28
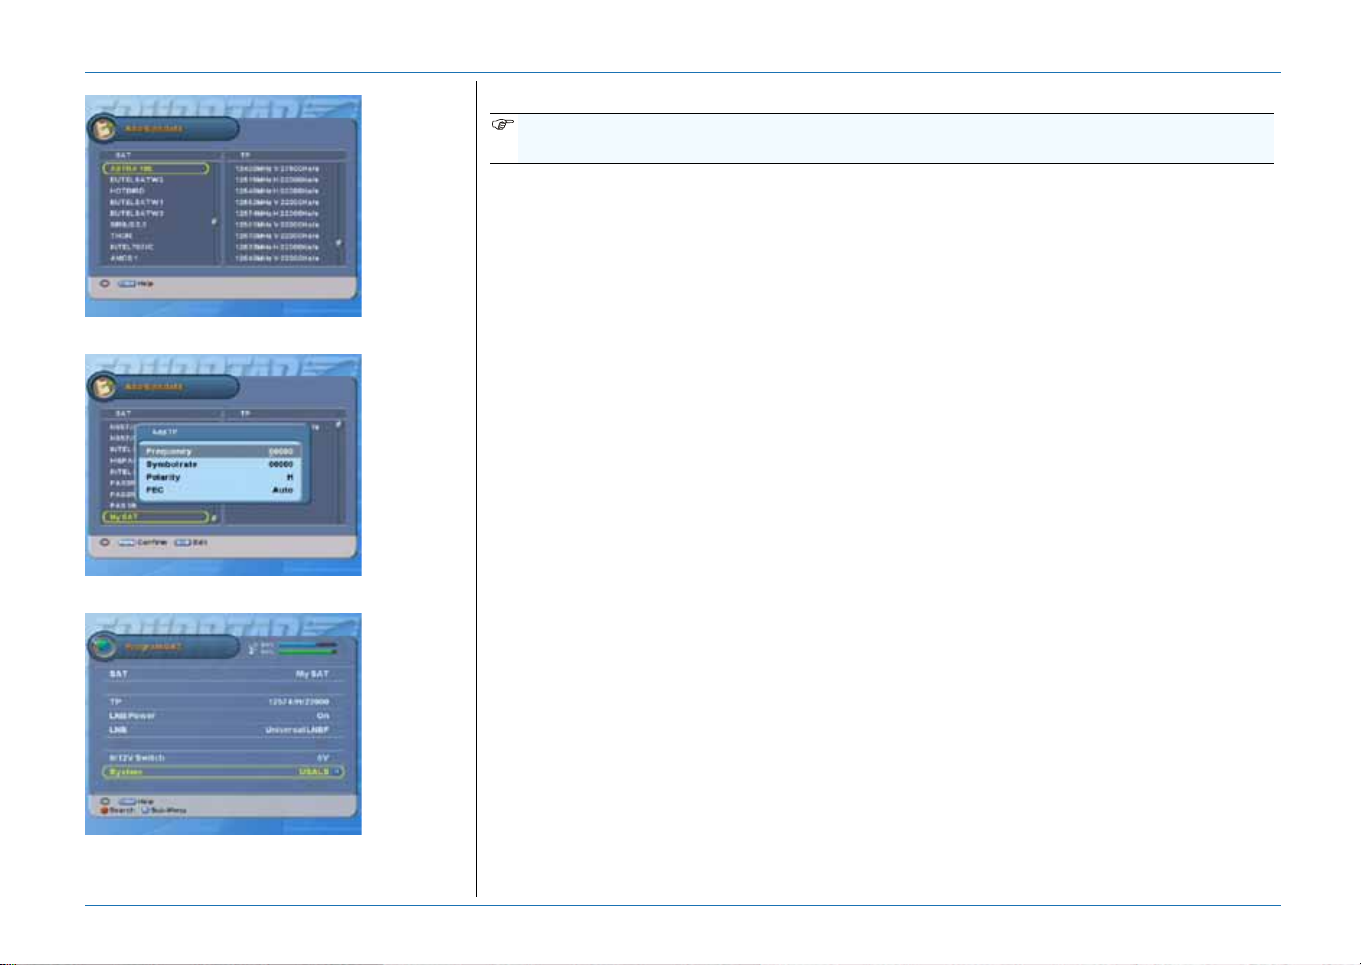
Description and Operation
MENU - Add/Edit data; Green - Add SAT.
Red - Add TP; Green - Edit TP.
Select System: USALS - Press Blue key.
7. ADD/EDIT DATA, ADD A SATELLITE
NOTE
When you add a satellite, you have to identify at least one transponder.
I
F YOU WANT TO ADD A SAT
(FIXED):
1. Press the MENU key.
2. Select main menu 2.
3. Select Add/Edit data.
4. Press the OK key.
5. Press the Green key.
Note that the keyboard
shows.
6. Enter the SAT name.
- ; select
character;
- OK; enter character;
- Red; cancel rename;
- Green; backspace.
7. Press the MENU key.
8. Enter the data of a TP
that belongs to the SAT.
9. Press the MENU key
(2x).
10.Select main menu 1.
11. Select Program SAT.
12.Press the Red key.
13.Select the required
Search mode (Network).
14.Press the OK key.
15.Press the Red key.
16.Wait for the Search
channels to complete.
F YOU WANT TO ADD A SAT
I
(DISEQC 1.2):
1. Press the MENU key.
2. Select main menu 2.
3. Select Add/Edit data.
4. Press the OK key.
5. Press the Green key. Note
that the keyboard shows.
6. Enter the SAT name.
- ; select character;
- OK; enter character;
- Red; cancel rename;
- Green; backspace.
7. Press the MENU key.
8. Enter the data of a TP that
belongs to the SAT.
9. Press the MENU key (2x).
10.Select main menu 1.
11. Select Program SAT.
12.Select System: DiSEqC1.2.
13.Press the Blue key.
14.Move the dish to find the
satellite.
15.Press the Red key.
16.Select the required Search
mode (Network).
17.Press the OK key.
18.Press the Red key.
19.Wait for the Search channels
to complete.
F YOU WANT TO ADD A SAT
I
(USALS):
1. Press the MENU key.
2. Select main menu 2.
3. Select Add/Edit data.
4. Press the OK key.
5. Press the Green key. Note that
6. Enter the SAT name.
7. Press the MENU key.
8. Enter the data of a TP that
9. Press the MENU key (2x).
10.Select main menu 1.
11.Select Program SAT.
12.Select System: USALS.
13.Press the Blue key.
14.Select Position and enter the
15.Press the Red key.
16.Select the required Search
17.Press the OK key.
18.Press the Red key.
19.Wait for the Search channels to
the keyboard shows.
- ; select character;
- OK; enter character;
- Red; cancel rename;
- Green; backspace.
belongs to the SAT.
orbital position of the SAT.
mode (Network).
complete.
© 2004 EchoStar International Corporation
All rights reserved
Page 2 - 8 EchoStar International Corporation
Page 29
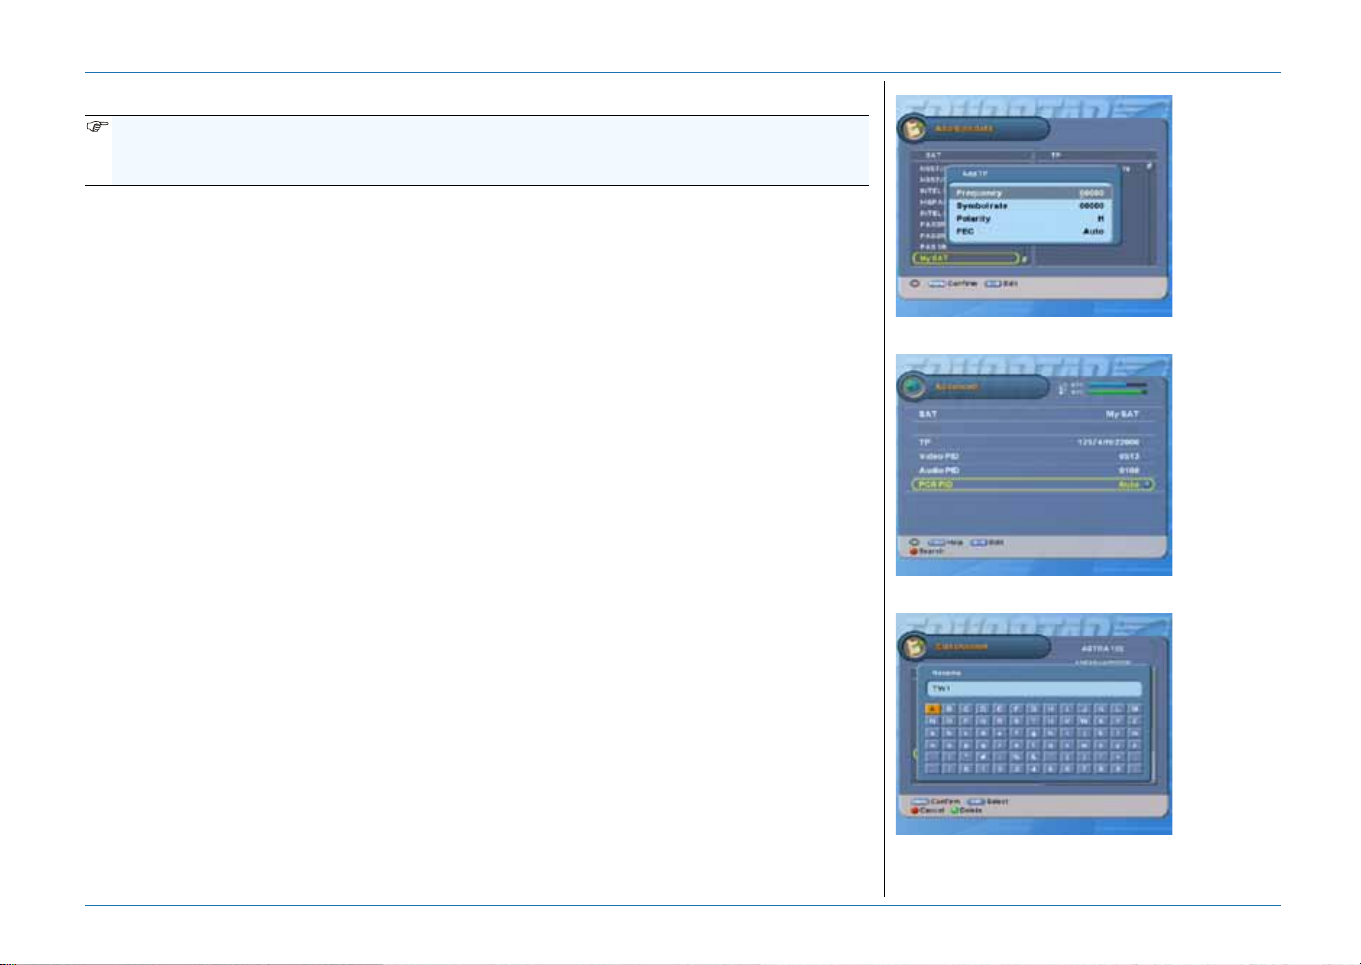
8. ADD/EDIT DATA, ADD/EDIT A TRANSPONDER OR CHANNEL
NOTE
You only need to add a transponder and/or channel if it is not available from the internal
database.
IF YOU WANT TO ADD A
TRANSPONDER:
1. Press the MENU key.
2. Select main menu 2.
3. Select Add/Edit data.
4. Press the OK key .
5. Press the key.
6. Press the Green key.
7. Add the new transponder:
a. Enter the Frequency.
b. Enter the Symbol rate.
c. Enter the Polarity.
d. Enter the FEC (If known).
8. Press the MENU key twice.
All rights reserved
9. Select main menu 1.
10.Select Program SAT.
© 2004 EchoStar International Corporation
11. Make sure, the signal
indicator shows a reading.
12.Press the Red key.
13.Select the required Search
mode (TP).
14.Press the OK key.
15.Press the Red key.
16.Wait for the Search channels
to complete.
F YOU WANT TO EDIT A
I
TRANSPONDER:
1. Press the MENU key.
2. Select main menu 2.
3. Select Add/Edit data.
4. Press the OK key.
5. Press the key.
6. Press the Red key.
7. Select the required
transponder:
a. Enter the Frequency.
b. Enter the Symbol rate.
c. Enter the Polarity.
d. Enter the FEC (If known).
8. Press the MENU key twice.
9. Select main menu 1.
10.Select Program SAT.
11.Make sure, the signal
indicator shows a reading.
12.Press the Red key.
13.Select the required Search
mode (TP).
14.Press the OK key.
15.Press the Red key.
16.Wait for the Search channels
to complete.
F YOU WANT TO ADD/EDIT A
I
CHANNEL:
1. Press the MENU key.
2. Select main menu 1.
3. Select Advanced.
4. Press the OK key.
5. Select the required
transponder:
6. Set the new PIDs
(Enter also the leading 0):
a. Set the Video PID.
b. Set the Audio PID.
c. Set the PCR PID (If
7. Press the Red key.
8. Note that the Channel added
popup shows momentarily.
9. Press the MENU key twice.
10.Select main menu 2.
11.Select Edit channel.
12.Press the Blue key.
13.Rename the channel.
- ; select
- OK; enter character;
- Red; cancel rename;
- Green; backspace.
14.Press the MENU key.
Description and Operation
Red - Edit TP; Green - Add TP.
known).
Set the Audio PID and Video PID.
character;
Rename the channel.
www.echostar-int.com Page 2 - 9
Page 30
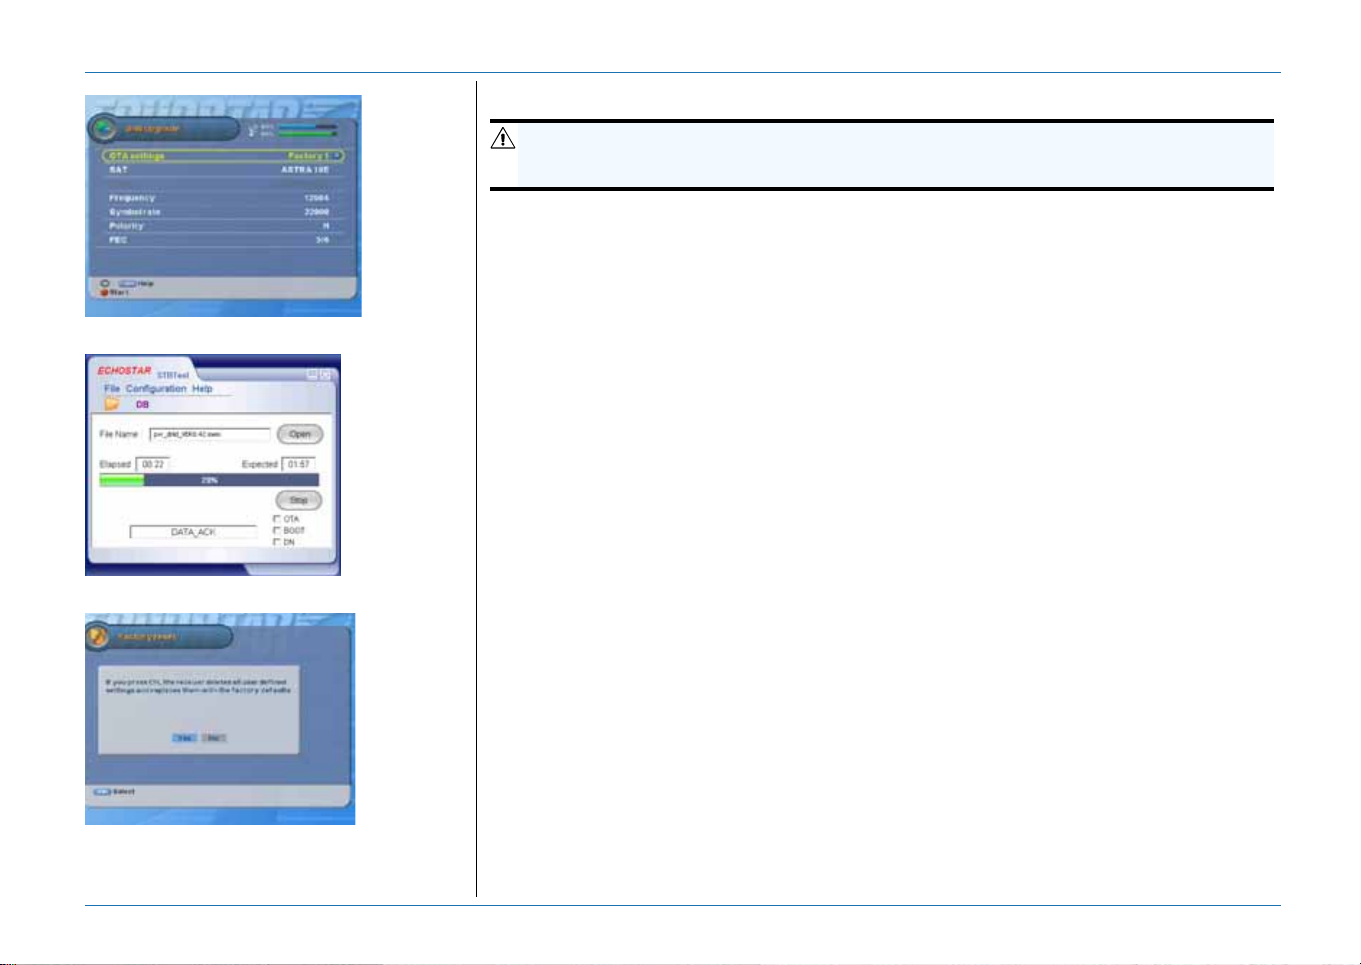
Description and Operation
MENU key - Software upgrade by OTA.
RS-232 cable - Software upgrade by PC.
MENU key - Factory reset.
9. SOFTWARE UPGRADE - FACTORY RESET
WARNING
D
O NOT PRESS ANY KEYS DURING THE SESSION, THIS CAN INTERRUPT THE SOFTWARE UPGRADE
SEQUENCE WHICH CAN DAMAGE THE RECEIVER PERMANENTLY.
I
F YOU WANT TO DO A SOFTWARE
UPGRADE BY OTA:
1. Press the MENU key.
2. Select main menu 4.
3. Select S/W upgrade.
4. Press the OK key.
5. Select the applicable
OTA setting.
6. Make sure the signal
indicator shows a signal.
7. Press the Red key to start
the procedure:
a. the TV screen shows a
progress menu
b. If the there is no new
S/W version, nothi ng
happens.
c. If a new S/W version is
found on the satellite, the
receiver starts to
download the new
S/W version. This
process can take up to
approximately
30 minutes.
8. The Software upgrade is
completed when the TV
shows live video.
F YOU WANT TO DO A SOFTWARE
I
UPGRADE BY PC:
1. Press the MENU key.
2. Select main menu 4.
3. Select About EchoStar.
4. Press the OK key.
5. Look up the current:
a. S/W version.
b. Internet site.
6. On your PC with Internet
access, visit our Internet
site.
7. Go to the Product support
area and find the software
for your receiver.
8. Download the latest software
as applicable for your
receiver.
9. Find the utilities link and
download the software
loader.
10.Follow the instructions as
given in the zip-file.
11. Note that on our Internet
site, a new manual update is
available to cover the latest
features.
F YOU WANT TO DO A FACTORY
I
RESET
(required if you want to change
the system type, recommended
after you cannot resolve any
problem):
1. Write down the most
important settings before
you Confirm the Factory
reset (e.g. Switch and Port
settings, LNBs, User
preferences, etc.).
2. Press the MENU key.
3. Select main menu 4.
4. Select Factory reset.
5. Press the OK key.
6. Note that selection Yes is
active.
7. Press the OK key.
8. Enter your PIN-code to start
the procedure.
9. Wait for the Factory reset to
complete.
10.Continue with the initial
installation to install your
receiver.
© 2004 EchoStar International Corporation
All rights reserved
Page 2 - 10 EchoStar International Corporation
Page 31
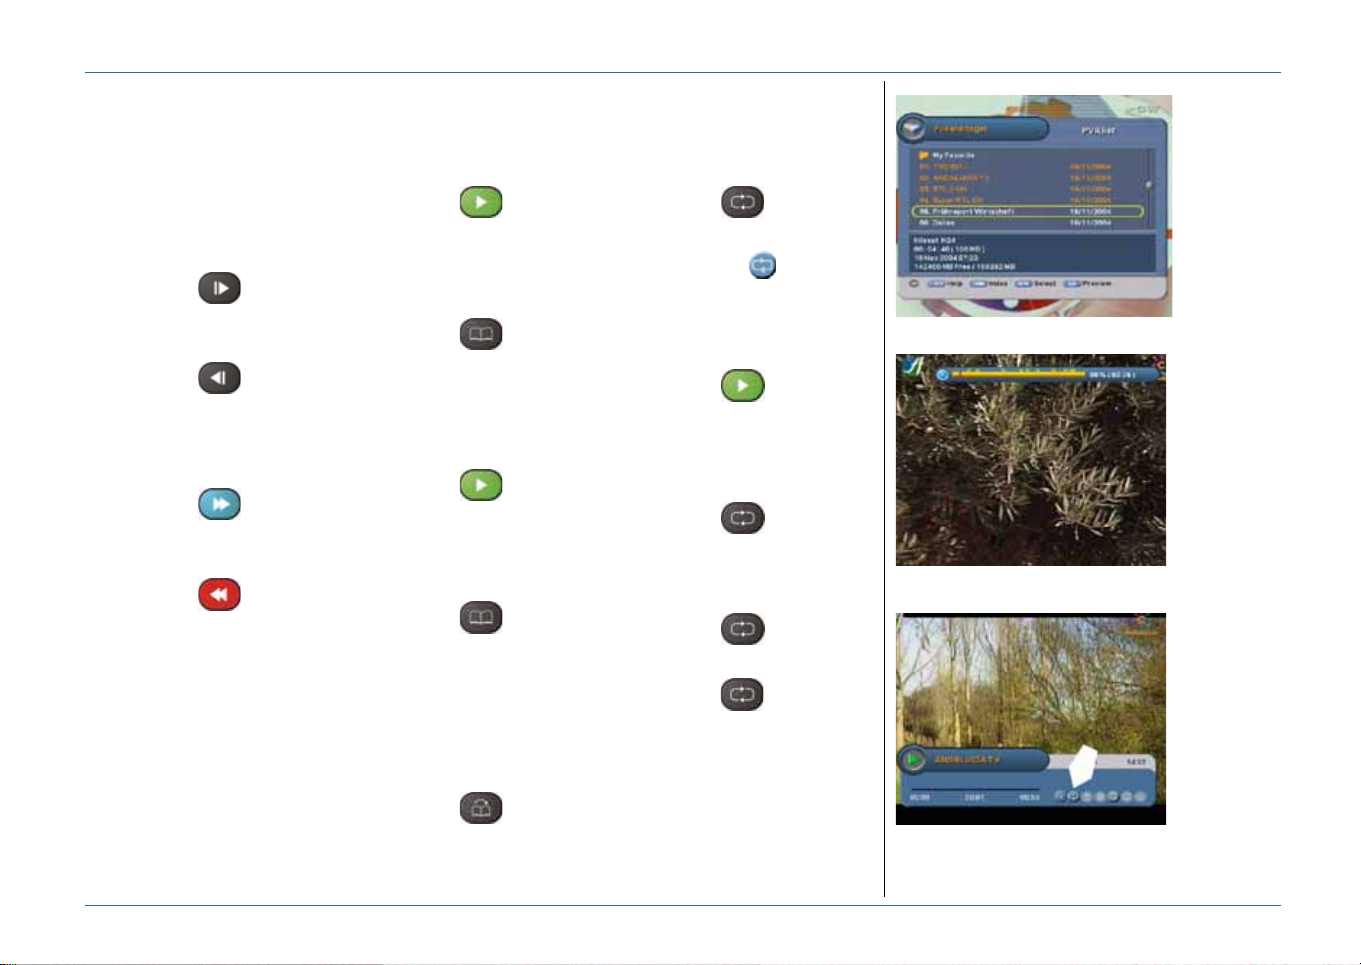
10. PVR - PLAYBACK AND TRICK MODES
IF YOU WANT TO PLAYBACK A
RECORDING:
1. Press the PVR key.
2. Select the recording.
3. Press the OK key .
LOW MOTION (PLAYBACK ONLY):
S
1. Press the key for slow
motion forward at 1/2x.
2. Press again for 1/4 and 1/8x.
3. Press the key for
reverse slow motion at 1/2 x.
4. Press again for 1/4 and 1/8x.
AST FORWARD/REWIND:
F
1. Press the key for fast
All rights reserved
forward at 2x.
2. Press again for 4, 8 and 16x.
© 2004 EchoStar International Corporation
3. Press the key for
rewind at 1x
4. Press again for 2, 4 and 8x.
F YOU WANT TO SET A
I
BOOKMARK:
1. Playback a recording.
2. Press the key. Note
that the action bar shows.
3. Use the keys to go to
the scene where you want to
set the bookmark.
4. Press the key. Note
that the bookmark shows.
5. Press the exit key.
F YOU WANT TO DELETE A
I
BOOKMARK:
1. Playback a recording.
2. Press the key. Note
that the action bar shows.
3. Use the keys to go to
the bookmark that you want
to delete.
4. Press the key. Note
that the bookmark
disappears.
5. Press the exit key.
F YOU WANT TO GO TO A
I
BOOKMARK:
1. Playback a recording.
F YOU WANT TO REPEAT THE
I
RECORDING CONTINUOUSLY:
1. Playback a recording.
2. Press the key. Note
that the InfoBanner shows.
3. Note that the shows.
F YOU WANT TO REPEAT A SCENE
I
CONTINUOUSLY:
1. Playback a recording.
2. Press the key. Note
that the action bar shows.
3. Use the keys to go to
the scene that you want to
repeat.
4. Press the key. Note
that a marker shows.
5. Use the key to set the
length of the scene.
6. Press the key to
activate the repeat scene.
7. Press the key again to
remove the repeat scene.
Description and Operation
PVR key - PVR list.
Play/bookmark key - Set or remove bookmark.
2. Press the key. Note
that the action bar shows
Repeat key - Repeat the recording or scene.
3. Press the exit key.
www.echostar-int.com Page 2 - 11
Page 32
Description and Operation
Stop key - stop a recording.
MENU key - Set a timed recording.
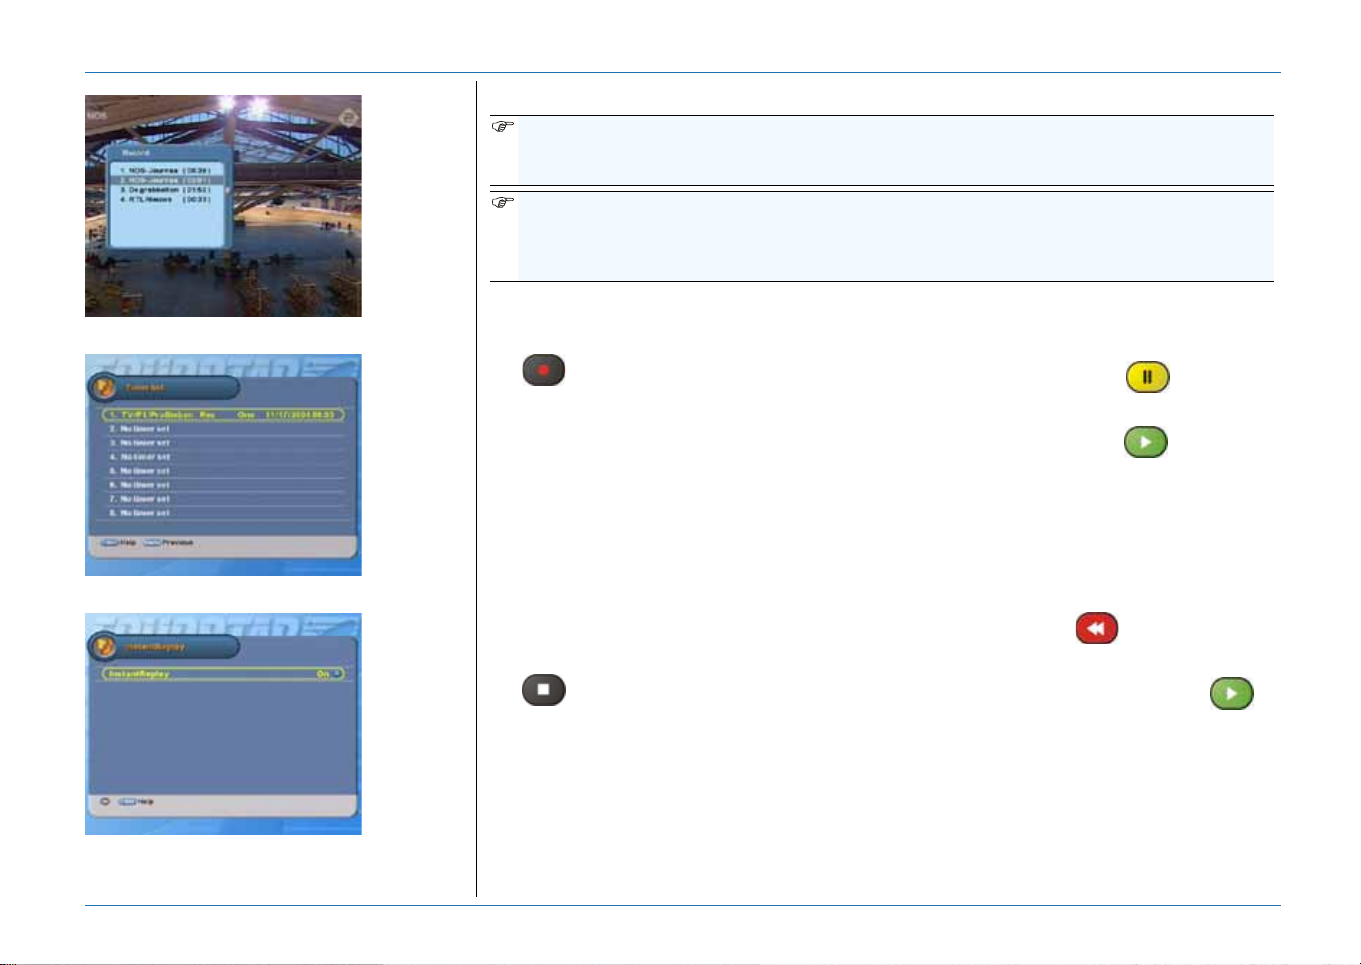
11. PVR - RECORDING, TIME SHIFT AND INSTANTREPLAY
NOTE
The default recording time for manual recordings is set to a maximum of two hours. If you want
to make a longer recording, set the recording time accordingly.
NOTE
During recording, sometimes your channel list seems to loose channels. This is not the case,
they are temporarily not selectable and therefor they are not shown. For detailed informatio n,
please refer to the section Getting started.
F YOU WANT TO RECORD
I
MANUALLY:
1. When in live video, press the
(record) key, note that
the on-screen recorder
indicator shows.
2. Press the record key again.
Note that the recording
menu shows.
3. Make the required settings.
Note that the standard
duration is set to 2 hours.
4. Press the exit key.
F YOU WANT TO STOP A MANUAL
I
RECORDING:
1. When in live video, press the
F YOU WANT TO MAKE A TIMED
I
RECORDING:
1. Press the MENU key.
2. Select main menu 3.
3. Select Timer list.
4. Press the OK key.
5. Select a free timer (No timer
set) and press the OK key.
6. Make the required settings.
For the PVR timer, note that
the standard duration is set
to 2 hours.
7. Press the MENU key.
8. Note that the timer shows in
the timer list.
9. Press the EXIT key.
F YOU WANT TO USE TIME SHIFT:
I
1. Make sure the InstantReplay
option is set to On.
2. Press the key, note
that live video freezes.
3. press the key, note
that live video continues.
F YOU WANT TO USE
I
INSTANTREPLAY:
1. Make sure the InstantReplay
option is set to On.
2. For an InstantReplay, press
the key.
3. If you want to view the
© 2004 EchoStar International Corporation
All rights reserved
MENU key - InstantReplay to On.
Rewind/Play - Use InstantReplay.
(stop) key, note that
the record menu shows.
2. Select the recording that you
want to stop.
3. Press the stop key, note that
the stop indicator appears
behind the selection.
4. Press the exit key.
flashback, press the
key.
4. The receiver will continue
automatically with (time
shifted) live video after the
flashback has played.
Page 2 - 12 EchoStar International Corporation
Page 33
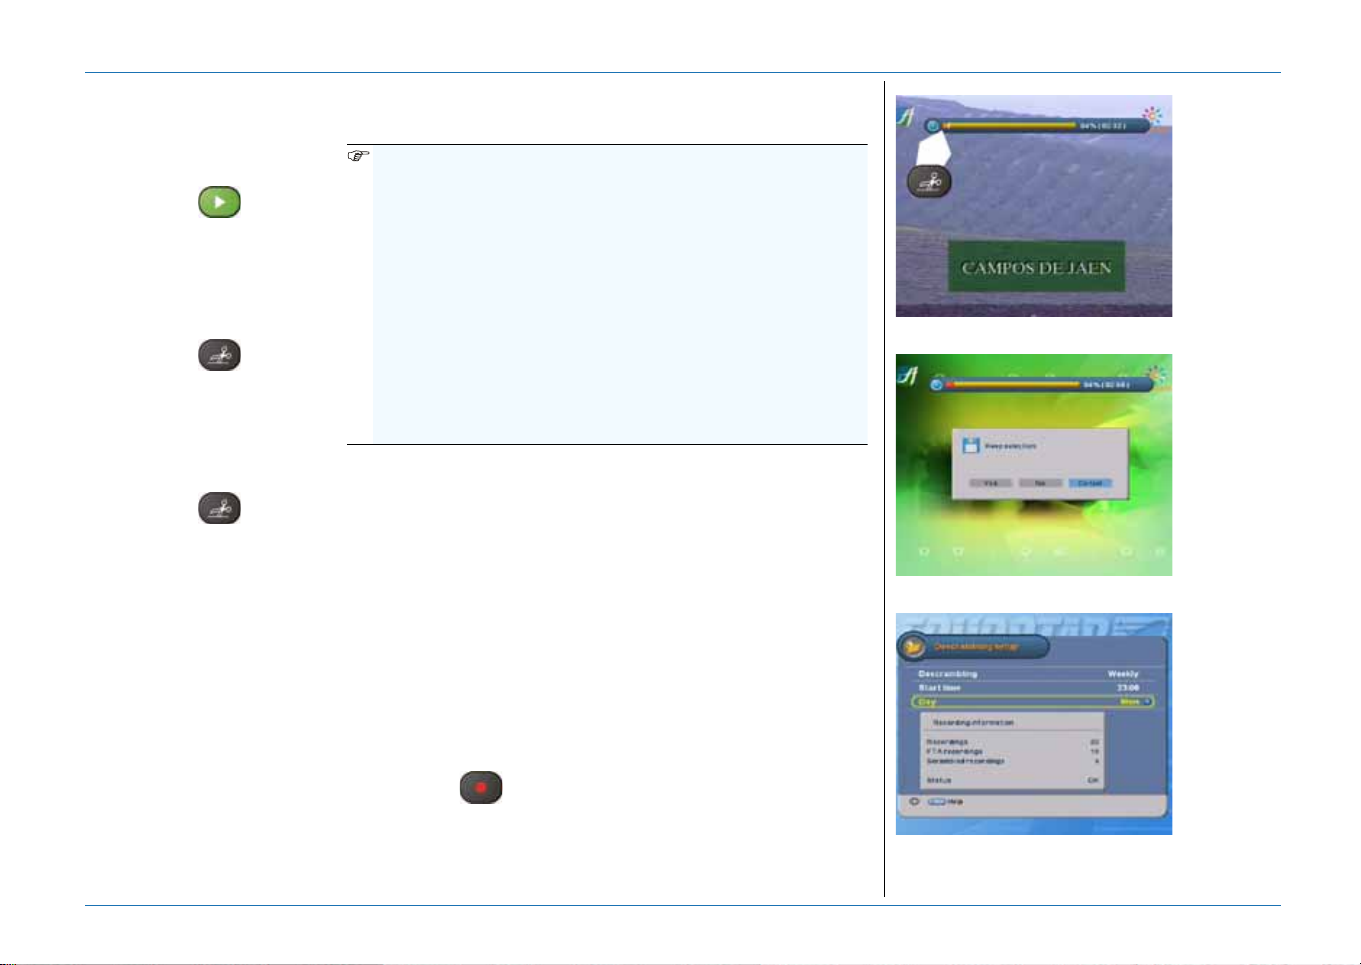
12. PVR - EDIT AND DESCRAMBLE A RECORDING
IF YOU WANT TO EDIT A
RECORDING:
1. Playback a recording.
2. Press the key. Note
that the action bar shows.
3. Use the keys to go to
the beginning of the scene
that you want to cut from the
recording.
4. Press the key. Note
that the edit mark shows.
5. Use the keys to go to
the end of the scene that you
want to cut from the
recording.
6. Press the key. Note
All rights reserved
that the edit mark shows.
7. If you want to delete the
© 2004 EchoStar International Corporation
scene, select No and press
the OK key.
8. If you want to keep the
selected scene as a new
recording, select Yes and
press the OK key.
9. In the PVR list, note that the
extracted scene is called:
<recording name>_cut.
10.Rename the scene as
applicable.
11. If you sele ct cancel, the
current recording is not
changed.
F YOU WANT TO DESCRAMBLE THE RECORDINGS REGULARLY:
I
■ Do not press any keys during the session, this can interrupt
the descrambling sequence which can damage the
recording permanently.
■ For scrambled channels: Y ou only can record one program
at the time unscrambled, the other recordi n gs are
scrambled. Therefore you need to descramble them
afterwards.
■ The descramble keys of your smartcard are valid for a
certain period and get automatically updated by the service
provider. Therefore we recommend to descramble the
recordings as soon as possible as you cannot descramble
with invalid keys.
■ The receiver makes a descrambled copy of the recording,
so free disk space must be available before you start.
1. Make sure the smartcard is not used for descrambling a
program.
2. Press the MENU key and select main menu 6.
3. Select Descramble and press the OK key.
4. Select Now, Daily or Weekly and make the required
selections.
5. Press the EXIT key to start the descrambling of all scrambled
recordings immediately (Now) or delayed (Daily, Weekly).
F YOU WANT TO DESCRAMBLE A RECORDING IMMEDIATELY:
I
1. Make sure the smartcard is not used for descrambling a
program.
2. Select a scrambled recording (note red scrambled symbol
behind the recording).
3. Press the (record) key.
4. The playback/descrambling of the recording starts
Description and Operation
Cut/Paste key - Remove the unwanted scene.
OK key - Keep/delete selected scene.
MENU key - Descramble recordings.
www.echostar-int.com Page 2 - 13
Page 34
Description and Operation
PC - Transfer MP3s to the receiver.
PVR/key - Access MP3 list.
13. MP3 - PLAYBACK AND TRICK MODES
NOTE
It is not possible to record MP3 songs. You have to use the USB-PVR Loader to transfer the
MP3 songs from a PC onto the hard disk of the receiver.
IF YOU WANT TO TRANSFER MP3S
ONTO THE RECEIVER:
1. On your PC with Internet
access, visit our Internet
site.
2. Go to the Product support
area and find the software
for your receiver.
3. Find the utilities link and
download the
USB-PVR loader.
4. Install the USB-PVR loader
onto your PC.
5. Connect the PC and receiver
with a USB-cable.
6. Start the USB-PVR loader
and transfer the MP3s onto
the HDD of the receiver.
7. Refer to the detailed
instructions that came with
the USB-PVR load er.
F YOU WANT TO PLAYBACK A
I
SONG:
1. Press the PVR key.
2. Use the keys to go to the
MP3 list.
3. Select the song.
4. Press the OK key.
O CREATE A PLAYLIST:
T
1. Press the PVR key.
2. Use the keys to go to the
MP3 list.
3. Select the song.
4. Press the Red key to add or
remove a song from the
playlist.
5. Note that a selected symbol
shows behind the selection.
6. At the last song, press the
OK key to start the playback.
AST FORWARD/REWIND/PAUSE:
F
1. Playback a recording.
2. Press the key for fast
forward.
3. Press the key for
rewind.
4. Press the key for
pause.
© 2004 EchoStar International Corporation
All rights reserved
OK key - Playback a MP3 song.
Page 2 - 14 EchoStar International Corporation
Page 35
14. MENU STRUCTURE
NOTE
Some menus have a signal indicator which you can use to find the best signal for the selected satellite. The top banner shows the Signal quality
and the bottom banner shows the Signal strength
MAIN MENU
1. Search channels Program SAT
All rights reserved
© 2004 EchoStar International Corporation
Edit LNB
LO low To select the Low Band Local oscillator Frequency.
LO high To select the High Band Local oscillator Frequency.
Description and Operation
SAT To define the satellite you want to search channels on. For motorized systems, allow the dish
some time to move to the selected SAT until the signal indicator shows a reading.
Red: Direct access to the search mode menu.
Tuner
(T1-T2 only)
TP Shows a transponder, from the internal database, of the defined SAT. If the signal indicator
LNB Power To switch the LNB power to On (for dishes) or Off (for distribution networks).
LNB To define the LNB that you use in your system.
22kHz To switch the 0/22kHz control signal to On for port 1 or Off for port 2.
0/12V switch To select the port for the selected satellite, 0V for port 1 or 12V for port 2.
DiSEqC switch
(Fixed only)
To define the tuner for the selected SAT.
shows low levels, select another TP that gives a better signal.
Red: Direct access to the search mode menu
Blue: Direct access to the Add/Edit data menu; to add/edit a SAT or TP that is not listed
(for detailed information refer to the explanation of the Add/Edit data menu.
Red: Direct access to the search mode menu.
Red: Direct access to the search mode menu
Blue: Direct access to the Edit LNB menu; to add a LNB that is not pre-programmed.
(only selectable when you select a LNB that is not a Universal LNB).
Red: Direct access to the search mode menu.
Red: Direct access to the search mode menu.
T o select the DiSEqC switch that you use in your installation. Select DiSEqC 1.0 for committed
switches and DiSEqC 1.1 for uncommitted switches.
Red: Direct access to the search mode menu.
www.echostar-int.com Page 2 - 15
Page 36

Description and Operation
System
(DiSEqC1.2 only)
To select the system (dish) for the selected satellite. If you use a motorized dish together with
a fixed dish, make sure that the motorized dish is always connected to LNB 1 (switch port1).
Blue: Direct access to the Motor setting menu; to aim the dish to the selected satellite.
Red: Direct access to the search mode menu.
Motor setting
SAT To define the satellite you want to search channels on. For motorized systems, allow the dish
some time to move to the selected SAT until the signal indicator shows a reading.
Red: Direct access to the search mode menu.
Position Shows the orbital position of the selected satellite.
Red: Direct access to the search mode menu.
Tuner
To define the tuner for the selected SAT.
(T1-T2 only)
TP Shows a transponder, from the internal database, of the defined SAT. If the signal indicator
shows low levels, select another TP that gives a better signal.
Red: Direct access to the search mode menu
Blue: Direct access to the Add/Edit data menu; to add/edit a SAT or TP that is not listed
(for detailed information refer to the explanation of the Add/Edit data menu.
DiSEqC1.2 To set the DiSEqC motor control to On or Off for the selected satellite.
Red: Direct access to the search mode menu.
Step size To set the step size for the fine tune commands.
Red: Direct access to the search mode menu.
Fine tune To move the dish for best signal level and quality. The signal indicator helps you to check the
signal quality (top) and strength (bottom) for the defined SAT.
Red: Direct access to the search mode menu.
Move continuous To move the dish rapidly and find the defined SAT.
Red: Direct access to the search mode menu.
System
(USALS only)
To select the system (dish) for the selected satellite. If you use a motorized dish together with
a fixed dish, make sure that the motorized dish is always connected to LNB 1 (switch port1).
Blue: Direct access to the USALS menu; to review/edit the satellite data.
USALS
SAT To define the satellite you want to search channels on. For motorized systems, allow the dish
some time to move to the selected SAT until the signal indicator shows a reading.
Red: Direct access to the search mode menu.
© 2004 EchoStar International Corporation
All rights reserved
Page 2 - 16 EchoStar International Corporation
Page 37

Description and Operation
All rights reserved
© 2004 EchoStar International Corporation
1. Search channels
Tuner
(T1-T2 only)
To define the tuner for the selected SAT.
Red: Direct access to the search mode menu
TP Shows a transponder, from the internal database, of the defined SAT. If the signal indicator
shows low levels, select another TP that gives a better signal.
Red: Direct access to the search mode menu
Blue: Direct access to the Add/Edit data menu; to add/edit a SAT or TP that is not listed
(for detailed information refer to the explanation of the Add/Edit data menu.
USALS To set the USALS motor control to On or Off for the selected satellite.
Red: Direct access to the search mode menu.
Position To set the orbital position of the defined SAT.
Red: Direct access to the search mode menu.
Port
(DiSEqC only)
To select the port for the selected satellite,
Red: Direct access to the search mode menu.
Search mode
All To search for all available channels, scrambled and Free-To-Air, on the selected satellite.
Red: To start the Search channels.
Network To search for all channels that are available within the Network.
Red: To start the Search channels.
TP To search for all available channels on the selected transponder (TP).
Red: To start the Search channels.
FTA To search only for Free-To-Air channels on the selected satellite.
Red: To start the Search channels.
Search channels Search channels does a channel search on the defined SAT.
Auto (Fixed dish installations only)
SAT To select the satellite you want to search channels on.
Red: To start the Search channels.
All To search for all availab le channels, scrambled and Free-To-Air, on the selected satellite.
Red: To start the Search channels.
FTA To search only for Free-To-Air channels on the selected satellite.
Red: To start the Search channels.
www.echostar-int.com Page 2 - 17
Page 38
Description and Operation
1. Search channels
1. Search channels
Tuner
Tuner 1/Tuner 2
To select the tu ner configuration that you want to use.
To search channel s, only for the selected tuner.
Green: To select the tuner for which you want to search channels for (T1-T2 only).
Loop-through
Twin
To search channels for both tuners at the same time.
To search channels for both tuners at the same time (Twin LNB).
Search channels Search channels does a channel search on the defined SAT.
Manual
SAT To define the satellite you want to search channels on.
Red: To start the Search channels.
Tuner
(T1-T2 only)
To define the tuner for the selected SAT.
Red: To start the Search channels.
Frequency To define the Frequency of the transponder.
Red: To start the Search channels.
Blue: Direct access to the Add/Edit data menu; to add/edit a SAT or TP that is not listed
(for detailed information refer to the explanation of the Add/Edit data menu.
Symbol rate To define the Symbol rate of the transponder.
Red: To start the Search channels.
Polarity To define the Polarity of the transponder (Horizontal, Vertical).
Red: To start the Search channels.
FEC To define the FEC of the transponder, if this is not known, select Auto.
Red: To start the Search channels.
Network To search for all channels that are available within the Network.
Note that the Network is automatically set by the values that you have entered for the
Frequency, Symbol rate and Polarity.
No: search for all channels that are available.
Yes: search only for channels that are part of this Network.
Red: To start the Search channels.
FTA To search only for Free-To-Air channels on the selected satellite.
No: search for all channels that are available.
Yes: search only for Free-To-Air channels.
Red: To start the Search channels.
Search channels Search channels does a channel search on the defined SAT.
Advanced
© 2004 EchoStar International Corporation
All rights reserved
Page 2 - 18 EchoStar International Corporation
Page 39
1. Search channels
All rights reserved
© 2004 EchoStar International Corporation
1. Search channels
Description and Operation
SAT To define the satellite you want to search channels on.
Red: To save the data as entered in the database.
Tuner
(T1-T2 only)
To define the tuner for the selected SAT.
Red: To save the data as entered in the database.
TP To define the transponder where you want to find the channel on.
Red: To save the data as entered in the database.
Blue: Direct access to the Add/Edit data menu; to add/edit a SAT or TP that is not listed
(for detailed information refer to the explanation of the Add/Edit data menu.
NOTE
You only need to change PIDs when your service provider changes or adds a channel.
A digital signal is basically broken up in Video and Audio information (PID) which are synchronized with the PCR PID.
Video PID To define the Video PID of the selected channel.
Red: To save the data as entered in the database.
Audio PID To define the Audio PID of the selected channel.
Red: To save the data as entered in the database.
PCR PID To define the PCR PID of the selected channel, if this is not known, select Auto.
Red: To save the data as entered in the database.
System setup - Fixed
System To select the system (dish) that you have installed.
Tuner
Tuner 1/Tuner 2
Loop-through
Twin
System setup - DiSEqC1.2
System To select the system (dish) that you have installed.
Tuner
Tuner 1/Tuner 2
Loop-through
Twin
To select the tu ner configuration that you want to use.
To search channel s, only for the selected tuner.
To search channels for both tuners at the same time.
To search channels for both tuners at the same time (Twin LNB).
To select the tu ner configuration that you want to use.
To search channel s, only for the selected tuner.
To search channels for both tuners at the same time.
To search channels for both tuners at the same time (Twin LNB).
CAUTION
On a motorized dish, set the physical East and West limit switches first. Failing to do so might cause damage to your
motorized dish installation or other properties.
Rotate To rotate the dish towards the East and West limit.
www.echostar-int.com Page 2 - 19
Page 40
Description and Operation
Set limits To confirm, activate or de-activate the East and West limits as set in the Move option.
Go to reference If the dish is out of position, you can re-calibrate the position of the dish with this command.
Recalculate positions If the dish is out of position, you can restore all satellite positions after you have re-adjusted
1. Search channels
System setup - USALS
System To select the system (dish) that you have installed.
Tuner
Tuner 1/Tuner 2
Loop-through
Twin
Allow the dish some time to re-calibrate and return to the SAT.
the dish for one satellite manually.
To select the tu ner configuration that you want to use.
To search channel s, only for the selected tuner.
To search channels for both tuners at the same time.
To search channels for both tuners at the same time (Twin LNB).
CAUTION
On a motorized dish, set the physical East and West limit switches first. Failing to do so might cause damage to your
motorized dish installation or other properties.
My longitude Set the longitude for the installation site of the dish, you can obtain your longitude from Stab
My latitude Set the longitude for the installation site of the dish, you can obtain your latitude from Stab at:
Go to reference If the dish is out of position, you can re-calibrate the position of the dish with this command.
2. Add/Edit Edit channel (functions are available from direct access keys)
Change channel list TV/RAD: To toggle between the TV and Radio lists.
Lock Red: To lock a channel (Parental control).
Delete Green: To mark a channel that you want to delete.
Move Yellow: To mark a channel that you want to move.
Rename Blue: To rename a channel.
2. Add/Edit
Edit favorite (functions are available from direct access keys)
Page 2 - 20 EchoStar International Corporation
at: www.usals. info.
www.usals.info.
Allow the dish some time to re-calibrate and return to the SAT.
OK: To confirm the action.
When the keyboard shows:
Red: To cancel the operation and return to the original name.
Green: To delete the last entered character (backspace).
© 2004 EchoStar International Corporation
All rights reserved
Page 41
2. Add/Edit
All rights reserved
© 2004 EchoStar International Corporation
2. Add/Edit
3. User preferences
Description and Operation
Change Favorite list FAV: To advance to the next favorite list.
TV/RAD: To toggle between the TV and Radio lists.
When in the left list OK: To add a channel to the favorite list.
SAT: To toggle between the Current SAT and All channels list.
When in the right list: OK: To remove a channel to the favorite list.
Red: To lock a channel (Parental control).
Green: To rename a channel.
Yellow: To mark a channel that you want to move.
Blue: T o rename a favorite list.
Menu: To confirm or reject the action.
Add/Edit data (functions are available from direct access keys)
When in the SAT list
(Add/Rename)
When in the TP list
Red (Edit TP)
Frequency
Symbol rate
Polarity
FEC
Green (Add TP)
Frequency
Symbol rate
Polarity
FEC
Yellow (Delete TP) To delete a transponder.
Delete SAT
Red (Delete SAT) To mark a satellite (and all its TV and Radio channels) that you want to delete.
Languages
Menu To set the language you want to use in the menus.
Green: To add a satellite.
Red: To rename a satellite.
When the keyboard shows:
Red: To cancel the operation and return to the original name.
Green: To delete the last entered character (backspace).
To edit a transpo nder:
To edit the Frequency of the transponder.
To edit the Symbol rate of the transponder.
To edit the Polarity of the transponder (Horizontal, Vertical).
To edit the FEC of the transponder, if this is not known, select Auto.
To add a transponder.:
To add the Frequency of the transponder.
To add the Symbol rate of the transponder.
To add the Polarity of the transponder (Horizontal, Vertical).
To add the FEC of the transponder, if this is not known, select Auto.
www.echostar-int.com Page 2 - 21
Page 42
Description and Operation
Audio 1
Audio 2
Subtitle To set subtitles to On (show) or Off (Hide).
Subtitle 1 To set the language for programs with multi-lingual subtitles. For multi-lingual programs, if
Subtitle 2
3. User preferences
OSD setup
InfoBanner time-out When you change to another channel, the InfoBanner shows momentarily. With this option
Transparency To set the transparency level of the On-Screen-Display (OSD) menu.
3. User preferences User profile
TV Signal To select the video output for the TV and VCR output (SCART).
Aspect ratio To set the image size for the TV.
Dolby Digital To tell the receiver that it is connected to a Dolby Digital amplifier or not. When you have
TV System To set the video standard supported by your TV (UHF modulator only)
Channel change T o set the channel transition effect.
UHF channel Factory default: UHF channel 38 (607.25MHz).
Video standard To set the video standard as supported by your TV.
3. User preferences
Local time
Clock To select the internal (Local time) or satellite (GMT) clock.
Local time* To set the current date and time.
To set the language for programs with multi-lingual audio. For multi-lingual programs, if
available, you can choose your own language. The receiver will first look for the 1st selected
language, if not available, for the 2nd. If the two selected languages are not transmitted, audio
is given in the native language of that channel.
available, you can choose your own language. The receiver will first look for the 1st selected
language, if not available, for the 2nd. If the two selected languages are not transmitted, no
subtitle is shown. If you do not want to have any subtitles, select Off.
you can set the view time for the InfoBanner.
© 2004 EchoStar International Corporation
All rights reserved
If you have a TV with a 4:3 screen size and the transmission is in 16:9 format, you can select
either 4:3, 4:3 Letterbox or 16:9. 4:3 shows the full screen completely where some of the
image sides is cut off, 16:9 will show the full image with black top and bottom banners.
selected On, note that analog audio is not given to the TV, so no audio is heard. If you want to
listen through the TV audio, select Off.
T o set the TV channel to which the receiver is connected. If the channel number on the TV and
receiver are not the same, you will have a distorted or no image at all. For more information,
please refer to the user manual of the TV.
Generally select for the European main land; PAL B/G and for the UK; PAL I.
Page 2 - 22 EchoStar International Corporation
Page 43
3. User preferences
3. User preferences
All rights reserved
© 2004 EchoStar International Corporation
4. Extras
Description and Operation
NOTE
The time shown in the Local time field offers you a possibility to check for the correct time. EPG and timers will not operate
correctly if the Local time not set correctly.
GMT offset* To define the time-offset as a result of the time zone were you are located.
* Availability depends on the selection as made for the Clock.
Timer List
1-8 To select the timer that you want to program.
OK: .To add or revise a timer.
Mode To select a PVR, a Sleep or a Reminder (VCR) timer.
Channel To select the chan nel that you want to record from.
Interval To set the timer, once or repeat for every occurrence.
Time To set the start date and time for the timer.
Date Shows the start date for the timer.
Duration To set the length for the timer.
Parental control
Installation lock To lock the In stallation related menus for unauthorized users. Note that the Installation lock
comes on automatically after you have set a channel lock.
Edit lock To lock the Edit related menus for unauthorized users. Note that the Edit lock comes on
automatically after you have set a channel lock.
Receiver lock To lock the receiver completely for unauthorized users. If you select On, you only can gain
access with the PIN-code after you have set the receiver to standby.
Current PIN-code To type in the factory default (0000) or your personal PIN-code.
New PIN-code To type in your new personal PIN-code.
Verify PIN-code To type in your new personal PIN-code for verification.
About EchoStar
Company Shows the Company name.
Address Shows the visit address of EchoStar.
Internet site Shows the EchoStar Internet site.
Boot version Shows the current Boot version.
EPLD version Shows the current Altera version.
www.echostar-int.com Page 2 - 23
Page 44
Description and Operation
S/W version Shows the current software version.
DB version Shows the current database version.
4. Extras
4. Extras
4. Extras Software upgrade
Factory reset
Yes It is advised to write down the most important settings before you confirm the Factory reset
No If you select No, the receiver returns to the previous menu.
Receiver copy
Files
S/W
DB
S/W+DB
NOTE
EchoStar offers on a regular basis software updates via the satellite and the EchoStar Internet. If you have trouble to get a
download with the latest software version, please ask your retail seller or dealer for assistance.
If you are not able to receive the satellite/transponder, you always can upgrade the software through the RS-232 connector
at the rear of the receiver with software from our Internet site: www.echostar-int.com.
OTA settings Factory1 takes a Software upgrade from Astra1.
SAT To select the user defined SAT to take a Software upgrade from.
Frequency Shows the Frequency. For OTA setting: User, to select a Frequency.
Polarity Shows the Polarity. For OTA setting: User, to select a Polarity.
(e.g. Switch and Port settings, LNBs, User data, etc.).
If you select Y es, the receiver deletes all user defined settings, channels, timers and (favorite)
lists and replaces them with the factory defaults. If a Factory reset is done after a Software
upgrade, the latest satellite and transponder database is activated.
When the Factory reset is completed, the receiver shows the initial installation procedure as if
the receiver came out of the box.
To select the data that you want copy from another receiver of the same type.
To copy the software only.
To copy the personal data only.
To copy all data from one receiver to another.
Factory2 takes a Software upgrade from Hotbird.
User takes a Software upgrade from a user defined SAT
The signal indicator helps you to check the signal quality (top) and strength (bottom) for the
defined SAT.
Red: To start the software upgrade from the satellite.
Red: To start the software upgrade from the satellite.
Red: To start the software upgrade from the satellite.
Red: To start the software upgrade from the satellite.
© 2004 EchoStar International Corporation
All rights reserved
Page 2 - 24 EchoStar International Corporation
Page 45
© 2004 EchoStar International Corporation
All rights reserved
4. Extras
4. Extras
Description and Operation
Symbol rate Shows the Symbol rate. For OTA setting: User, to select a Symbol rate.
Red: To start the software upgrade from the satellite.
FEC Shows the FEC. For OTA setting: User, to select a FEC.
Red: To start the software upgrade from the satellite.
Red (Start) Starts the Software upgrade. When the TV screen turns black, the receiver first compares the
current S/W version with the version on the satellite. If the S/W version is the same, the
Software upgrade is aborted and the TV returns to live video.
If a new S/W version is found on the satellite, the receiver starts to download the new S/W
version in temporary memory. When the download is complete, the new S/W version is written
to the receiver memory where it deletes the previous version. This process can take up to
approximately 30 minutes.
The Software upgrade is completed when the TV shows live video.
Accessories
Calendar Shows the built in Calendar.
Red: To select the previous month.
Green: To select the next month.
Yellow: To select the previous year.
Blue: To select the next year.
Calculator Shows the built in Calculator.
Games
Tetris Starts the game called: Tetris
OK: Rotate
Down: Drag
Recall: Restart
Exit: Quit game
Block out Starts the game called: Block out
<>: Move
Yellow: Stop ball
Recall: Restart
Exit: Quit game
Sokoban Starts the game called: Sokoban
Red: Undo
Green: < Stage (Previous stage)
Yellow: Stage > (Next stage)
Recall: Restart
Exit: Quit game
www.echostar-int.com Page 2 - 25
Page 46
Description and Operation
5. Conditional access
(receivers with conditional access capabilities only)
NOTE
The information pages can show differently for the modules and smartcards that you use. EchoStar has no control over the
information as provided by the service pr ovi der, therefore no spe ci f i c in fo rma ti o n is given.
1 To access the Module 1 information pages to set and view the options for the inserted Module
2 To access the Module 2 information pages to set and view the options for the inserted Module
6. HDD Information
Model Shows the model number of the HDD.
Serial number Shows the serial number of the HDD.
S/W version Shows the current S/W version of the HDD.
Used Shows the amount of space (capacity) that you have already used.
Free Shows the amount of space (capacity) that you can use.
Total Shows the total capacity of the HDD.
6. HDD Format
Yes If you select Yes, the receiver deletes all content that is present on the HDD and restores the
No If you select No, the receiver returns to the previous menu.
6. HDD Recording
Recording To program a recording manually. You can select up to 4 recordings simultaneously. For
Channel To select the channel that you want to record the program from.
Mode T o select a recording b ased on the EPG time (aut omatically set) or Normal time (man ually set)
Duration T o set the length for the timer.
and Smartcard.
and Smartcard.
© 2004 EchoStar International Corporation
All rights reserved
condition as came out of the box.
detailed information, please refer to the section Getting started.
Red: To start or stop the recording.
Blue: Direct access to the Timer list.
settings.
Please note that EPG information is not necessarily correct. Please note, EchoStar has no
control over the EPG data as it is provid ed by th e se rvi c e provider,
Page 2 - 26 EchoStar International Corporation
Page 47
6. HDD InstantReplay
6. HDD Descrambling
All rights reserved
© 2004 EchoStar International Corporation
Description and Operation
Title To set the name for the program.
When the keyboard shows:
Red: To cancel the operation and return to the original name.
Green: To delete all text in the window of the keyboard.
NOTE
Time shift is only available when the InstantReplay option is active.
InstantReplay On: To set the InstantReplay and Time shift option to On.
This option lets you repeat live video at the moment you press the Red key (Rewind).
This option lets you pause live video at the moment you press the Yellow key (Pause).
Off: To set the InstantReplay and the Time shift option to Off.
NOTE
This receiver lets you record either descrambled or scrambled recordings. Once the smartcard is used for descrambling one
program, the other programs will be recorded scrambled.
Before you start to descramble the recordings, you have to make sure that the smartcard is not used for descrambling
another recording or live video.
Descrambling
Manual
Now
Daily
Weekly
Start To set the start time for descrambling the scrambled recordings.
Day To set the day for descrambling the scrambled recordings.
To set the descrambling method for the scrambled recordings.
To start the descrambling of all the selected scrambled recording.
To start the descrambling of all the scrambled recordings at this moment.
To start and repeat the descrambling every day at the selected ti me.
To start and repeat the descrambling once a week on the selected day and time.
www.echostar-int.com Page 2 - 27
Page 48

Description and Operation
© 2004 EchoStar International Corporation
All rights reserved
Page 2 - 28 EchoStar International Corporation
Page 49
TROUBLESHOOTING
1. GENERAL
Troubleshooting
3. LIST RELATED
Problem Possible cause What to do?
1. Nothing appears on
the receiver front
panel.
■ Main pow er cable is
damaged or not
connected.
■ The On/Off switch on
■ Check the main
■ Set the On/Off switch
the rear panel is set
to Off.
■ General domestic
■ Check the domestic
power failure.
2. You have forgotten
■ - ■ Contact your dealer.
the PIN-code.
2. REMOTE CONTROL UNIT (RCU) RELATED
Problem Possible cause What to do?
1. Receiver does not
All rights reserved
respond to the
RCU.
2. Receiver does
© 2004 EchoStar International Corporation
sometimes not
respond to the
RCU.
■ Batteries are empty . ■ Insert new batteries.
■ Direct sun light from
■ Close the sun blinds
behind the receiver.
■ You do not aim
■ Aim at the receiver
sufficiently at the
receiver.
■ Batteries are almost
■ Install a RCU
■ Insert new batteries.
empty.
power cord and
insert it in the (wall
socket).
in the On position.
power supply and
insert a new fuse.
or get closer to the
receiver.
display.
extender.
Problem Possible cause What to do?
1. The list is empty. ■ You have selected an
empty list.
■ You are recording a
program.
■ Press the OK key.
■ Press the FAV key.
■ When recording, the
channel list is limited.
Stop the recording or
wait for the recording
to complete.
■ You have deleted all
channels.
■ Press the MENU key.
■ Select main menu 1.
■ Select AUTO and do
a search channels.
2. I cannot find the
channel while I
know it must be
there.
■ You are recording a
program.
■ When recording, the
channel list is limited.
Stop the recording or
wait for the recording
to complete.
3. I cannot find the
PVR list.
4. I cannot find the
MP3 list.
5. I cannot find the
channel list for the
PIP-screen.
■ You are in the wrong
list.
■ - ■ Press the PVR key.
■ HDD fai lure. ■ Contact your dealer.
■ - ■ Press the PVR key.
■ HDD fai lure. ■ Contact your dealer.
■ - ■ When the PIP screen
■ Press the OK key.
■ Press the FAV key.
■ Press the SAT key.
■ Press the key.
shows, press the
PiP list key.
www.echostar-int.com Page 3 - 1
Page 50
Troubleshooting
4. EPG RELATED
Problem Possible cause What to do?
1. The EPG is empty. ■ The selected
program supports no
EPG.
■ There is no solution
for this, the data is
supplied by the
service provider and
beyond our control.
■ The local time is not
correct.
■ In the Local time
menu, set the correct
time.
■ The daylight saving
time is not correct.
■ In the Local time
menu, set the correct
time.
2. There is no weekly
EPG.
■ The selected
program supports no
weekly EPG.
■ There is no solution
for this, the data is
supplied by the
service provider and
beyond our control.
5. TIMER RELATED
Problem Possible cause What to do?
1. I cannot set a timer
because I have no
EPG.
2. I cannot find the
programmed
timers.
■ The selected
program supports no
EPG.
■ In the EPG menu,
press the record key
and set the timer
manually.
■ The EPG settings
are not correct.
■ Read the solutions in
to solve an EPG
related problem.
■ - ■ Press the EPG key.
■ Press the record key.
■ Select applicable
timer.
Problem Possible cause What to do?
3. My VCR did not
record the program.
■ You did not set the
VCR itself.
■ Set your VCR itself
also.
■ The Reminder timer
does not start your
VCR, it only switches
on the receiver so
that you can record
the program.
6. TV AND RADIO RELATED
Problem Possible cause What to do?
1. No picture or sound
in the TV or Radio
mode.
2. Bad picture or noisy
sound in the TV or
Radio mode.
■ Receiver is in
standby.
■ Cable rela ted
problems.
■ Dish/LNB related
problems.
■ Teletext shows the
subtitle page without
titles.
■ Bad reception of the
signal.
■ Signal interference
with UHF-installation.
■ Switch the receiver
on.
■ Check the cable
connections.
■ Make sure the dish
and LNB are
correctly adjusted.
■ Press the EXIT key
to leave Teletext.
■ Make sure the dish
and LNB are clean
and correctly
adjusted.
■ Check the UHF
settings. Make sure
you use the correct
channel. Please refer
to the TV/Radio user
guide.
© 2004 EchoStar International Corporation
All rights reserved
Page 3 - 2 EchoStar International Corporation
Page 51
Troubleshooting
Problem Possible cause What to do?
3. The TV shows a
No Signal
■ Bad reception of the
signal.
message.
4. The TV shows a
■ Smartcard problems ■ Read the solutions in
“Scrambled signal”
message.
5. There is no Dolby
Digital (AC-3)
sound to my other
equipment.
All rights reserved
■ The equipment is
connected to the
receiver with a RCA
or SCART cable only .
■ The Dolby Digital
option is not set to
© 2004 EchoStar International Corporation
6. There is no audio
while I watch a
Dolby Digital
program.
On.
■ The Dolby Digital
amplifier is set to Off.
■ The receiver is not
connected to a Dolby
Digital amplifier.
■ Make sure the
channel selected
transmits.
■ Make sure the
correct dish or LNB is
selected.
■ Make sure the dish
and LNB are clean
and correctly
adjusted.
to solve smartcard
related problem.
■ Connect the
S/PDIF connector of
the receiver to the
Dolby Digital input of
the Dolby Digital
amplifier.
■ Press the MENU key.
■ Select main menu 3.
■ Select User profile.
■ Set the Dolby Digital
option to On.
■ Set the Dolby Digital
amplifier to On.
■ Press the MENU key.
■ Select main menu 3.
■ Select User profile.
■ Set the Dolby Digital
option to Off.
7. INSTALLATION RELATED
Problem Possible cause What to do?
1. During (initial) setup
of the receiver, no
channels are found.
2. My television does
not receive any
signal from the
receiver (UHF only)
■ You did not select the
correct LNB(F).
Universal LNB
05150 - C-band
09750 - FSS
10000 - FSS
10050 10060 - DBS
10750 - DBS
11200 - AUSAT
11475 - Telecom
■ When installed, you
have selected the
incorrect switch type
or port.
■ You have selected
the incorrect satellite
to search channels
on.
■ You have selected
the incorrect search
method.
■ You did not select the
correct Audio/Video
channel on your TV.
■ On the receiver, in
the Program SAT
menu select the
correct LNB(F).
■ Press the Blue key to
edit the LNB.
■ On the receiver, in
the installation setup
menu make the
correct selections.
■ On the receiver, in
the installation setup
menu select the
correct satellite.
■ At an initial setup,
always choose the
option All.
■ Refer t o the user
guide of the TV for
instructions.
■ On the receiver, In
the TV system menu
select the correct
UHF channel and
PAL setting.
■ Use another method
to connect the
receiver.
www.echostar-int.com Page 3 - 3
Page 52
Troubleshooting
Problem Possible cause What to do?
3. My television does
not receive any
signal from the
receiver
■ You did not select the
correct A/V channel
on your TV.
■ You did not use a
correct SCART
cable.
■ Select the correct
A/V channel on your
TV.
■ Use only a full
featured SCART
cable that is correctly
shielded.
4. My television shows
black areas on the
left and right of the
screen.
■ You did not select the
correct Aspect ratio
for your TV.
■ On the receiver, in
the User profile
menu select the
correct Aspect ratio.
8. SMARTCARD RELATED
Problem Possible cause What to do?
1. I cannot view or
listen to a
scrambled channel.
■ The CI-module/
smartcard is not valid
for the service.
■ The CI-module/
smartcard is not
correctly inserted.
■ The descrambling
keys are not valid
anymore.
■ Insert a valid
CI-module/smartcard
correctly.
■ Contact your service
provider.
■ Insert a valid
CI-module/smartcard
correctly.
■ The descrambli ng
keys are regularly
updated by the
service provider.
9. MOTORIZED INSTALLATION RELATED
Problem Possible cause What to do?
1. I cannot select a
specific satellite.
2. The motor reacts
unpredictable which
results in incorrect
positioning of the
dish.
3. The motor runs at
different speeds.
4. The motor cannot
find the satellite
anymore.
■ The required satellite
is located outside the
selected East or
West limit.
■ If physically possible,
mind dish damage,
revise the limit
setting.
■ Select another
satellite.
■ The cables used are
worn, damaged or
corroded.
■ Inspect the cable for
possible damage and
install new cable as
required.
■ The cable is
incorrectly finished or
not sufficiently
shielded.
■ The speed depends
on the receiver
output voltage.
■ Use sufficiently
shielded and
correctly finished
cables.
■ Select a transponder
that has horizontal
polarity (18V).
13V runs slow,
18V runs faster.
■ Motor problems. ■ In the System setup
menu, select Go to
reference to reset the
motor.
■ For DiSEqC1.2
If supported by your
model, select
Recalculate
positions.
■ Dish problems. ■ Make sure the dish is
correctly installed.
■ Cold weather. ■ Make sure the motor
is not frozen.
© 2004 EchoStar International Corporation
All rights reserved
Page 3 - 4 EchoStar International Corporation
Page 53
Troubleshooting
10. PVR RELATED
Problem Possible cause What to do?
1. The programmed
channel is not
recorded
completely.
2. Live pause seems
not to work
3. I cannot watch a
All rights reserved
© 2004 EchoStar International Corporation
recording.
4. My recording stops
after two hours.
5. How can I get the
recordings onto my
PC?
■ Local time setting is
not correctly set.
■ The EPG data does
not reflect the actual
start or stop time.
■ You have pressed
the wrong key.
■ You have not
activated the
InstantReplay option.
■ Smartcard related
problems.
■■
■ You did not specify
the stop time. The
factory default is set
to two hours.
■ - ■ Visit the EchoStar
■ In the Local time
menu, set the correct
time.
■ This data is supplied
by the service
provider and beyond
control. You can set
the timer 5 minutes
earlier/later than
shown.
■ Press the pause key
once
■ Press the MENU key.
■ Select main menu 6.
■ Set InstantReplay to
On.
■ Read the solutions in
to solve a smartcard
related problem.
■ During ma nual
recording press the
record key.
■ Set the stop time.
internet site and
download the
USB-PVR Loader.
11. MP3 RELATED
Problem Possible cause What to do?
1. I cannot record
MP3s.
■ - ■ You have to use a
PC and the USBPVR Loader to
transfer the MP3s to
the receiver.
2. I cannot find my
MP3s.
■ - ■ Press the PVR key.
■ Press the key.
12. SPECIAL PVR FUNCTIONS
Problem Possible cause What to do?
1. I cannot record use
InstantReplay.
2. I cannot use Time
shift
■ You disabled the
function.
■ You disabled the
InstantReplay
function.
■ Press the MENU key.
■ Select menu 6.
■ Select InstantReplay.
■ Set InstantReplay to
ON.
■ Set the
InstantReplay option
to On.
www.echostar-int.com Page 3 - 5
Page 54

Troubleshooting
© 2004 EchoStar International Corporation
All rights reserved
Page 3 - 6 EchoStar International Corporation
Page 55

GLOSSARY
1. ABBREVIATIONS
AC Alternating Current (ac voltage)
CA Conditional Access (smartcard)
C-band A Frequency range (3.70-4.20 GHz)
CI Common Interface (slot)
DB DataBase
DC Direct Current (dc voltage)
DiSEqC Digital Satellite Equipment Control
EPG Electronic Program Guide
FEC Forward Error Correction
Freq Frequency
FTA Free-To-Air
GB Giga Byte
GMT Greenwich Mean Time (Universal Time Code)
H Horizontal polarization
HDD Hard Disk Drive
IDE Intelligent Drive Equipment
kHz KiloHertz
All rights reserved
Ku-band A Frequency range (10.70-18.00 GHz)
LNB Low Noise Block down converter
MHz MegaHertz
© 2004 EchoStar International Corporation
OSD On-Screen Display
OTA Over-The-Air
PCMCIA Personal Computer Memory Card Industry Association
PID Packet Identification
PIP Picture-In-Picture
PVR Personal Video Recorder
SAT Satellite
S/W Software
TP Transponder
USALS Universal Satellites And Location System
V Vertical polarization
Glossary
2. TERMINOLOGY
Aspect ratio We refer to aspect ratios as 4:3 or 16:9. These
numbers describe the screen format in width and
height of the picture
CI-module/CAM Both names are used for these modules. These
modules are PCMCIA cards with a slot in which
you can insert a smartcard.
Common Interface A DVB standard which defines the software and
hardware requirements for condition access
systems.
Conditional access A system which is used by service providers to
control the subscriber’s access to certain
services, programs and events like Pay TV.
CVBS Composite video is a combination of the three
basic elements of a video picture (color,
brightness, and synchronization) into a single
cable with two wires in it as used in SCART and
RCA (Video) connections.
Descrambling Descrambling means decoding the satellite
signal or recording to allow you to watch the
service to which you have subscribed.
DiSEqC A standard through which it is possible to let a
DiSEqC compatible receiver send a signal over
the RF cable to a switching device to switch
between different LNBs or dishes. DiSEqC uses
the 0/22kHz signal to control the switching
device.
DiSEqC 1.0 A standard used for switching devices to switch
between LNBs or dishes. With this type of switch
(also committed DiSEqC switch) you are li mi te d
to the use of 4 LNBs or dishes.
DiSEqC 1.1 A standard used for switching devices to switch
between LNBs or dishes. With this type of switch
(also uncommitted DiSEqC switch) you are
limited to the use of 16 LNBs or dishes.
www.echostar-int.com Page 4 - 1
Page 56

Glossary
DiSEqC1.2 A standard used for motorized dishes. In this
kind of installations you only need to connect the
motor/LNB with a suitable coaxial cable. So the
motor control signals and the RF signals run
through one cable.
EPG A ele ctronic program guid e that comes with a
broadcast. Note that every station fills the EPG
differently or not, so differences in the EPG are
not necessarily receiver errors.
FEC Is an invisible part of a broadcast that can correct
possible errors in the reception of the digital
terrestrial signal.
Fixed A dish antenna that is pointed at one particular
satellite.
Frequency band A range of frequencies which are dedicate to a
certain usage. In the satellite area, known bands
are the C/Ku-band.
FTA An unscrambled broadcast which you can view
without additional payments to a service
provider.
Horizontal In the satellite industry, horizontal is used to
indicate the direction in which the received signal
is polarized. Normally abbreviated as H.
Letterbox This is probably the best way to watch a movie
as it keeps the original screen size. This format
shows the full picture, in the center of your TV
screen. Depending on your TV and program you
will see black bars above and below, left and
right of the picture, or just full screen if the
program matches your screen size.
LNB A device behind the feedhorn which processes
the signal into a format which is understood by
the receiver for further processing.
Loop-though Loop-through means that you connect a signal
output (LNB, VCR, UHF Antenna) of the first unit
to the signal input (LNB, DVD, analog TV) of the
other without any processing.
NVOD Near Video On Demand - Multi channel system
broadcasting many copies of a film with
staggered start times so a complete film is
always available to a viewer with a short waiting
period.
Network With respect to the receiver, a network (also
known as a bouquet) is a set of programs that is
offered by a single service provider.
NTSC USA video standard with image format 4:3,
625 lines, 60Hz and 4MHz bandwidth with a total
of 6MHz video channel width.
PAL European video standard with image format 4:3,
625 lines, 50Hz and 4MHz bandwidth with a total
of 8MHz video channel width.
Parental control A feature which is introduced to give you the
possibility to ‘Lock’ several functions of the
receiver to prevent unauthorized persons
(children) to view broadcasts that are not suitable
for them.
PID
(Video, Audio, PCR)
A digital signal is divided into so called packages
(as suit cases on a transport belt). Each packet
holds certain information for Video, Audio, timing
and completeness of the packet stream so that
the receiver can compose a distortion free signal
for your TV or Radio.
Polarity Broadcasts are done in a particular Frequency
band. To make maximum use of a Frequency
band and bring you the maximum number of
programs, the broadcasts are polarized in
different ways to fit as much as possible
programs into one Frequency band.
RGB RGB (Red. Green, Blue) is used to transfer a TV
signal in DVD quality. The quality is superior to
SVHS and CVBS.
RS-232 connection A RS-232 connection allows you to connect
equipment to the receiver which supports the
RS-232 protocol.
© 2004 EchoStar International Corporation
All rights reserved
Page 4 - 2 EchoStar International Corporation
Page 57

Glossary
SCART cable A SCART cable is also known as ‘Peritel’ cable
and is commonly used in Europe to connect the
audio and video equipment. A fully furnished
SCART cable has 21 wires which is at both sides
finished with a 21-pin connector.
SVHS SVHS means Super-VHS and is superior to a
CVBS signal but less then a RGB signal.
Normally it is a single cable consisting of four
wires because the black/white (luminance) is
separated from the color (chrominance).
Symbol rate Invisible information which tells the receiver at
which speed (rate) the transponder sends the
digital information (symbols). The receiver must
be able to handle the Symbol rate to process the
signal correctly into a correct image.
Transponder Equipment inside a satellite responsible for
receiving a single uplinked channel and
rebroadcasting it back to Earth.
Vertical In the sa tellite industry, Vertical is used to
indicate the direction in which the received signal
All rights reserved
Widescreen Widescreen refers to the 16:9 aspect ratio. When
is polarized. Normally abbreviated as V.
you view 16:9 programmes the complete screen
© 2004 EchoStar International Corporation
is filled without distortion or loss of video. If you
view 4:3 programs, you will have black banne rs
left and right of the picture.
3. SEARCH MODES
All The built-in database is used to select the
available transponders. The digital channels that
belong to these transponders are searched for
and added to the end of the channel list.
Network The built-in database or information from the
received stream is used to search for the
transponders that are included with the currently
received network. The digital channels that
belong to this network are searched for and
added to the end of the channel list.
TP The built-in database or information from the
received stream is used to search for or scan in
the selected transponder. The digital channels
that belong to this transponder only are searched
for or scanned in and added to the end of the
channel list.
FTA The built-in database is used to only search for
the available Free-To-Air chann els which are
then added the end of the channel list.
In the real world it seems that the service
providers do not always accurately code their
channels with a scrambled or FTA code. For this
reason you may find that some searched
channels are Scrambled. Also there is a
possibility that FTA channels are coded as
Scrambled These channels will then be missed
out because of the erroneous code.
www.echostar-int.com Page 4 - 3
Page 58

Glossary
© 2004 EchoStar International Corporation
All rights reserved
Page 4 - 4 EchoStar International Corporation
Page 59

INDEX
A
add
channel .........................................................2-9
channel (pid)
favorite channel
pid
................................................................2-9
satellite
transponder
................................................2-9
............................................2-7
.........................................................2-8
..........................................2-8, 2-9
audio
ac-3 ............................................................2-22
B
batteries ............................................................1
bookmark
go to ...................................................... 1, 2-11
set
.........................................................1, 2-11
C
channel
add to list ......................................................2-7
All rights reserved
© 2004 EchoStar International Corporation
color keys
delete
delete from list
edit pid
list
lock
move
rename
clock
daylight saving time ............................2-22, 3-2
color key
green ............................................................2-1
red
yellow
.....................................................1-9
...........................................................2-6
..............................................2-7
..................................................2-8, 2-9
.................................................................2-1
...............................................................2-6
............................................................2-6
.........................................................2-6
........................................................2-1, 2-3
...........................................................2-1
conditional access
card details .........................................1-8, 2-26
safety
..............................................................III
D
daylight saving time ..........................2-22, 3-2
delete
channel (fav) ................................................ 2-7
descramble
descrambling menu ................................... 2-27
manually
recording
use timer
.................................................... 2-13
................................................... 2-13
.................................................... 2-13
diseqc
committed switch ......................................... 4-1
diseqc 1.0
diseqc 1.1
explanation
uncommitted switch
.................................................... 4-1
.................................................... 4-1
.................................................. 4-1
..................................... 4-1
disposal ........................................................... IV
dolby digital ................................................ 2-22
E
edit
channel ........................................................ 2-9
favorite
......................................................... 2-7
pid
................................................................ 2-9
satellite
........................................................ 2-8
transponder
epg
access ......................................................... 2-3
color keys
troubleshooting
..........................................2-8, 2-9
.................................................... 1-9
............................................ 3-2
Index
F
factory reset ............................................... 2-10
favorite list
add channel ................................................. 2-7
add mp3
add recording
create folder
delete channel
direct access
rename
....................................................... 2-7
............................................... 2-7
................................................. 2-7
............................................. 2-7
................................................... 1
........................................................ 2-7
G
games .......................................................... 2-25
group
list ................................................................ 2-6
I
installation
configurations .............................................. 1-1
diseqc 1.2
examples
guided set-up
lnb loop-through
multiple lnbs
safety
single lnb
t1-t2
twin lnb
usals
ventilation
instantreplay ..............................2-12, 2-27, 3-5
.................................................... 1-6
..................................................... 1-2
............................................... 1-4
........................................... 1-1
................................................. 1-5
............................................................. III
..................................................... 1-5
............................................................. 1-1
........................................................ 1-1
............................................................ 1-7
...................................................... III
www.echostar-int.com Page 5 - 1
Page 60

Index
L
letterbox .........................................................4-2
list
channel .........................................................2-1
general info
mp3
pip
................................................................0-3
pvr
................................................................2-2
..................................................2-1
..............................................................2-2
live pause ......................................................3-5
logo
ce .................................................................. IV
dolby digital
dvb
................................................................ IV
................................................... IV
M
menu
add/edit ..............................................1-8, 2-20
conditional access
edit lnb
........................................................2-15
epg
...............................................................1-9
extras
.................................................1-8, 2-23
factory reset
hdd
.....................................................1-8, 2-26
motor setting
mp3
..............................................................1-9
pvr
................................................................1-9
receiver copy
search channels
search mode
usals
...........................................................2-16
user preferences
move
channel .........................................................2-6
..............................1-8, 2-26
...............................................2-24
..............................................2-16
..............................................2-24
.................................1-8, 2-15
..............................................2-17
................................1-8, 2-21
mp3
create playlist ............................................ 2-14
fast forward
list
................................................................ 2-2
playback
record
rewind
tranfer
................................................ 2-14
.................................................... 2-14
........................................................ 2-14
........................................................ 2-14
........................................................ 2-14
O
ota
astra1 ........................................................ 2-10
P
parental control
explanation .................................................. 4-2
pid
edit ............................................................... 2-9
pip
keys .................................................................3
list
....................................................................3
pvr
color keys .................................................... 1-9
list
................................................................ 2-2
set timer
start playback
start recording
......................................2-3, 2-5, 2-12
............................................ 2-11
............................................. 2-3
R
recording
bookmarks ................................................. 2-11
descramble
edit
............................................................. 2-13
fast forward
playback
remove scene
repeat
rewind
slow motion
start manual
start timer
................................................ 2-13
................................................ 2-11
.................................................... 2-11
............................................ 2-13
........................................................ 2-11
........................................................ 2-11
................................................ 2-11
............................................... 2-12
................................................... 2-12
recordings
to pc ............................................................. 3-5
rename
channel ........................................................ 2-7
favorite list
................................................... 2-7
S
safety ............................................................... III
satellite
add ............................................................... 2-8
edit
............................................................... 2-8
search modes .............................................. 4-3
signal
indicator .......................................................... 4
software upgrade
by ota ......................................................... 2-10
by pc
.......................................................... 2-10
factory reset
sort
list .........................................................2-6, 2-7
............................................... 2-10
© 2004 EchoStar International Corporation
All rights reserved
Page 5 - 2 EchoStar International Corporation
Page 61

subtitle
hearing impaired ..........................................2-4
select
..................................................... 1, 2-22
teletext supported
.........................................2-4
summertime ..................................................3-2
symbols
infobanner .......................................................4
T
teletext
access ..........................................................2-4
latest news flash
subtitles
........................................................2-4
...........................................2-4
tetris ..............................................................2-25
the contents of the box ..............................1-4
time shift ..............................................2-12, 3-5
timer
change .........................................................2-5
delete
All rights reserved
© 2004 EchoStar International Corporation
...........................................................2-5
look up
..........................................................2-5
set
................................................................2-5
sleep
.............................................................2-3
vcr
........................................................2-3, 2-5
transponder
add ...............................................................2-8
edit
...............................................................2-8
U
uhf
troubleshooting .............................................3-3
V
vcr timer .................................................2-3, 2-5
ventilation ........................................................III
Index
www.echostar-int.com Page 5 - 3
Page 62

Index
© 2004 EchoStar International Corporation
All rights reserved
Page 5 - 4 EchoStar International Corporation
Page 63

Notes
All rights reserved
© 2004 EchoStar International Corporation
www.echostar-int.com
Page 64

Notes
© 2004 EchoStar International Corporation
All rights reserved
EchoStar International Corporation
 Loading...