

Page 1
Mini EVK PL-20 Quick Start Guide
Insert the Mini EVK CD into your CD-ROM drive.
1 3
1. The Mini EVK installer starts automatically.
2. Follow the on-screen instructions to install the software.
3. When you have finished, eject the CD.
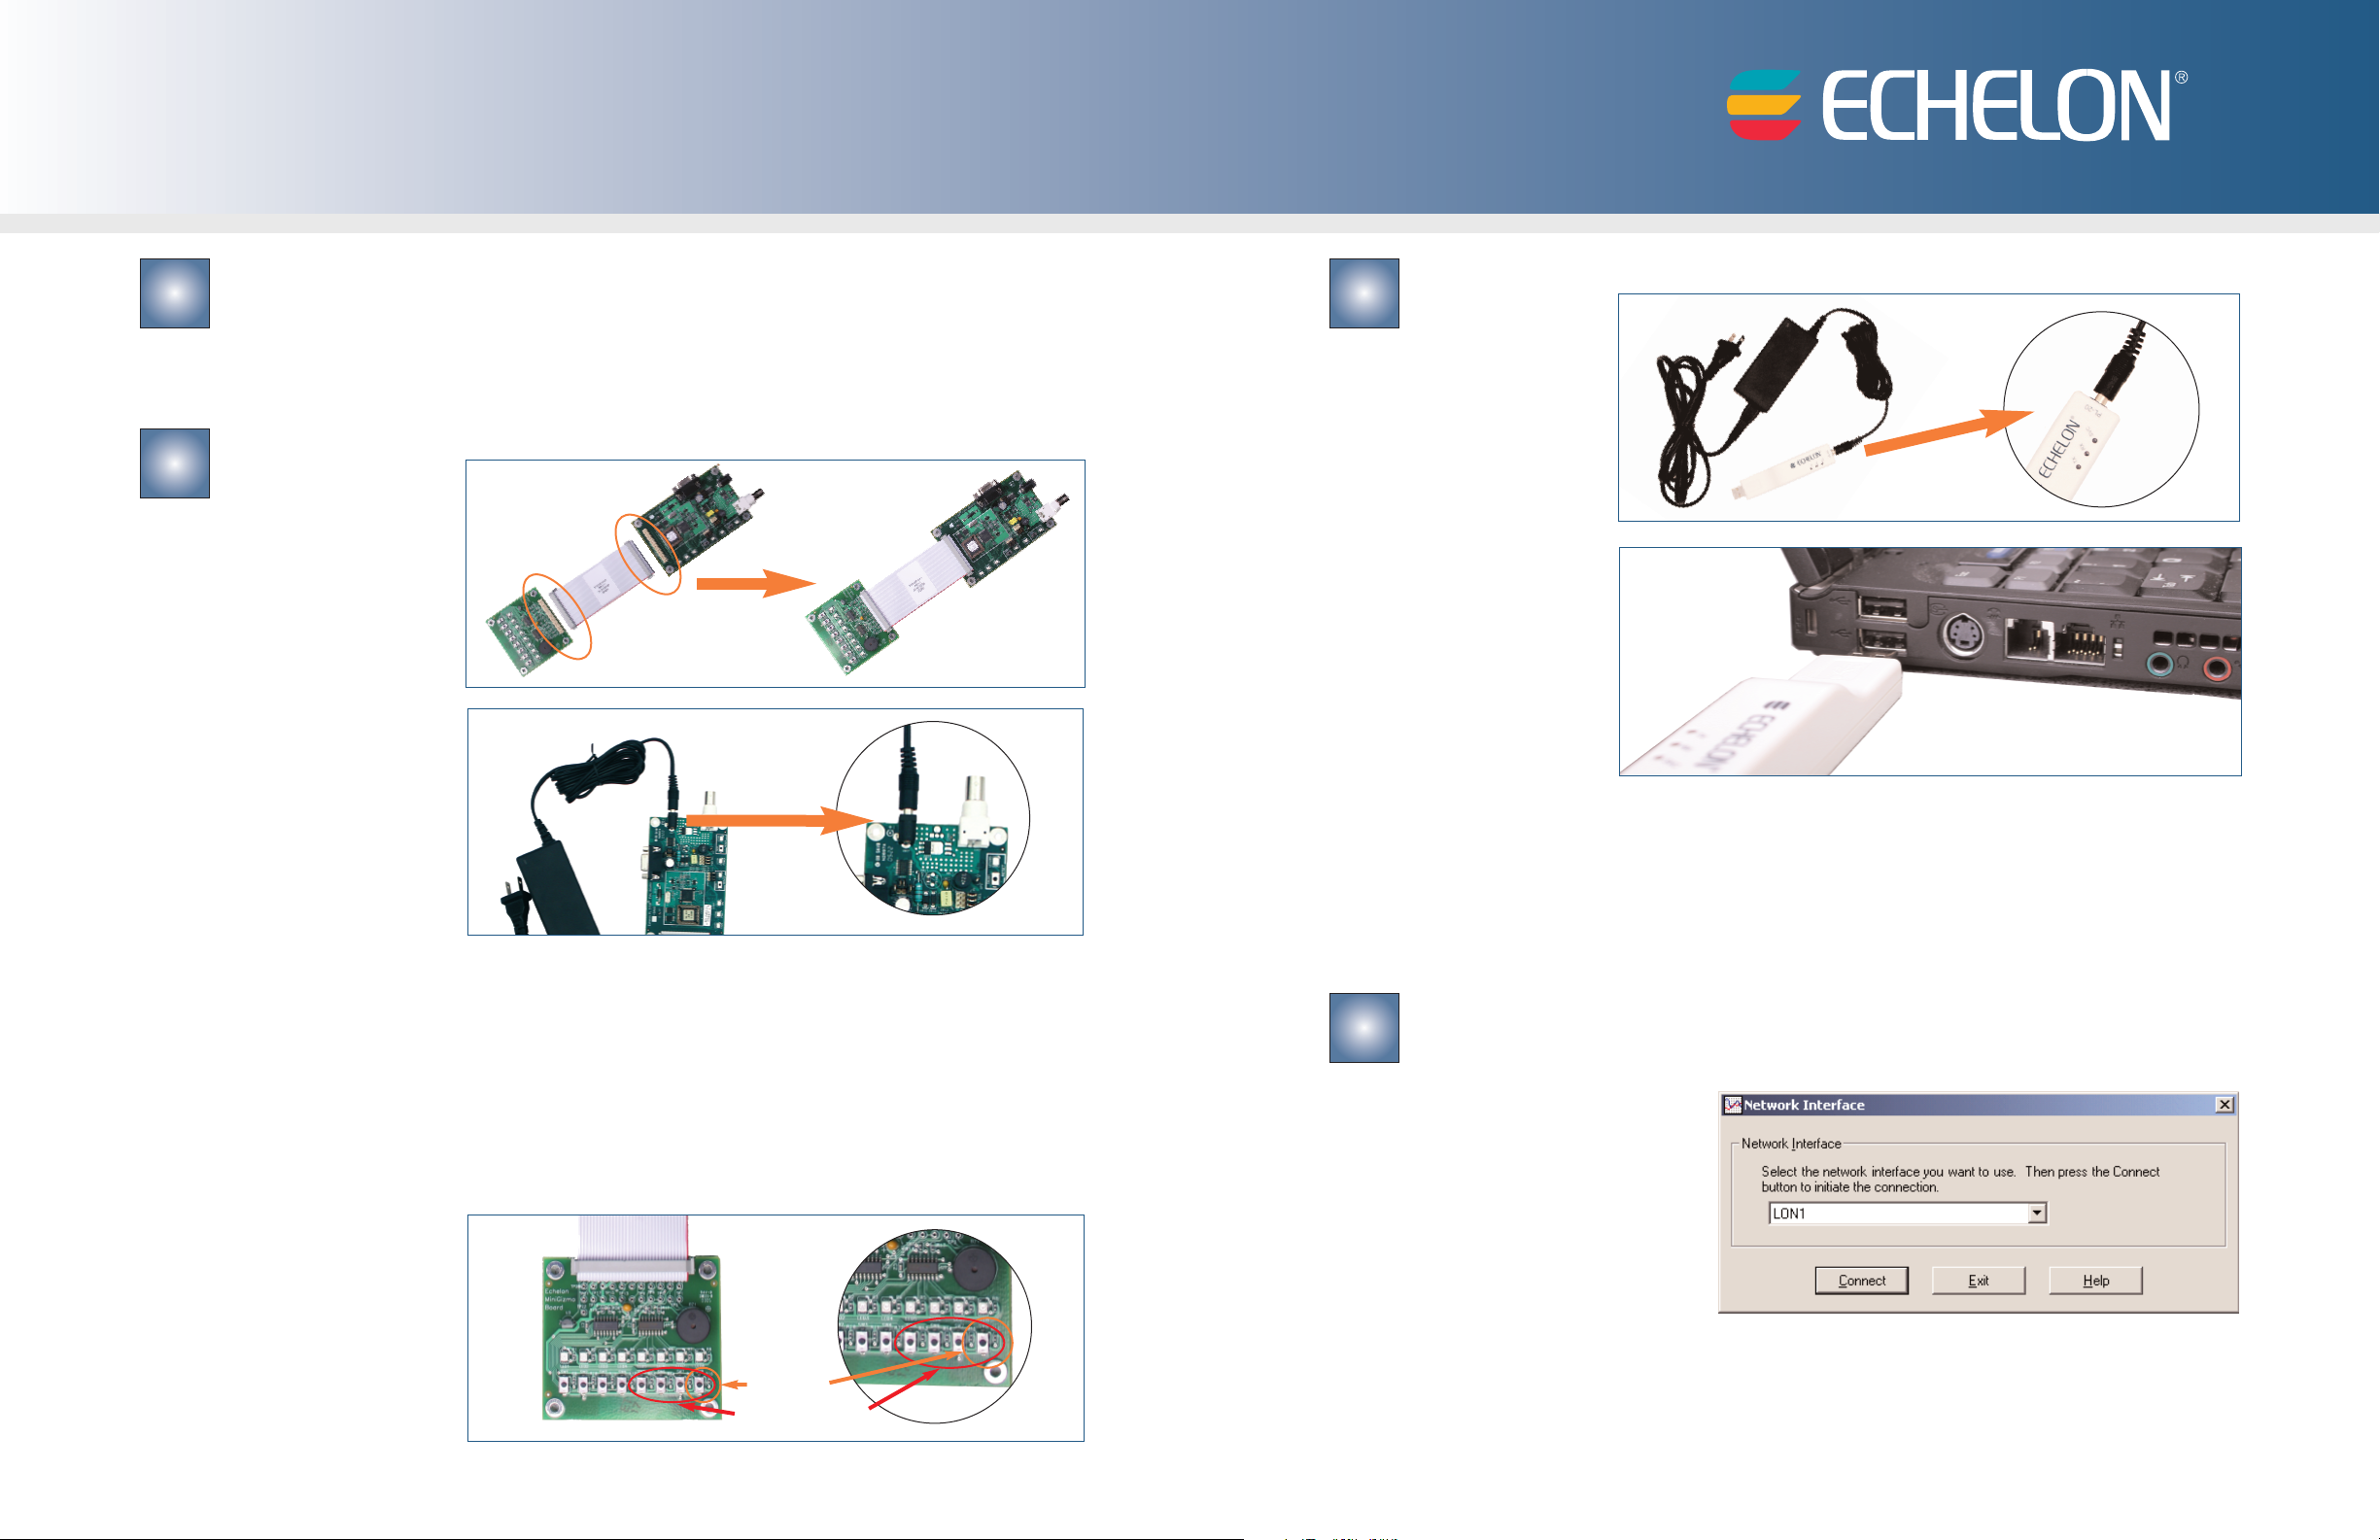
Assemble the Evaluation Boards and run the demo applications.
2
1. Connect each
MiniGizmo to an
Evaluation Board.
2. Connect a Mini EVK
Power Line Power
Supply to each
Evaluation Board, and
then plug in the power
supplies
.
Attach your computer to the power line channel.
1. Connect a Mini
EVK Power Line
Power Supply to
the U20 USB
Network Interface,
and then plug in
the power supply.
2. Plug in the U20
USB Network
Interface into a
USB port on your
computer.
3. On Windows XP and Windows Server 2003, choose any of the three Windows Update options,
at your preference. Click
Next to continue.
3. After you plug in the power supplies, LED1 will begin flashing, indicating that the Evaluation Board
has entered CENELEC configuration mode. If LED8 is on, then the CENELEC access protocol is
enabled. If LED8 is off, CENELEC is disabled. You can press the SW8 button to enable or disable
CENELEC. When you have made a selection, press the SW1 button to confirm your selection and exit
ou will not be able to perform any network operations with the
Y
CENELEC configuration mode
aluation Board until you have made a selection and exited CENELEC configuration mode
Ev
Mini EVK User's Guide for more information on the CENELEC access protocol.
4. Connect push buttons on the PL 3120
by pushing the Connect button (SW5 – SW8 on the 3150 Evaluation Board or SW8 on the 3120
Evaluation Board) on
either board, then the
Connect button on
the other board, and
then pressing Connect
button on the first
board again.
.
See the
.
®
Evaluation Board to LEDs on the PL 3150®Evaluation Board
SW8 (3120)
SW5 – SW8 (3150)
4
4. Select
5.
Install the Software Automatically (Recommended). Click Next to continue.
Click
A completion dialog appears
.
Finish.
Run the Monitoring & Control Example Application.
1. Click the Windows Start button, point to All Programs, point to Echelon Mini EVK, and
then click
Control Example
Application.
Select
2.
interface, and then click
Connect.
Monitoring &
LON1 as the network
Page 2
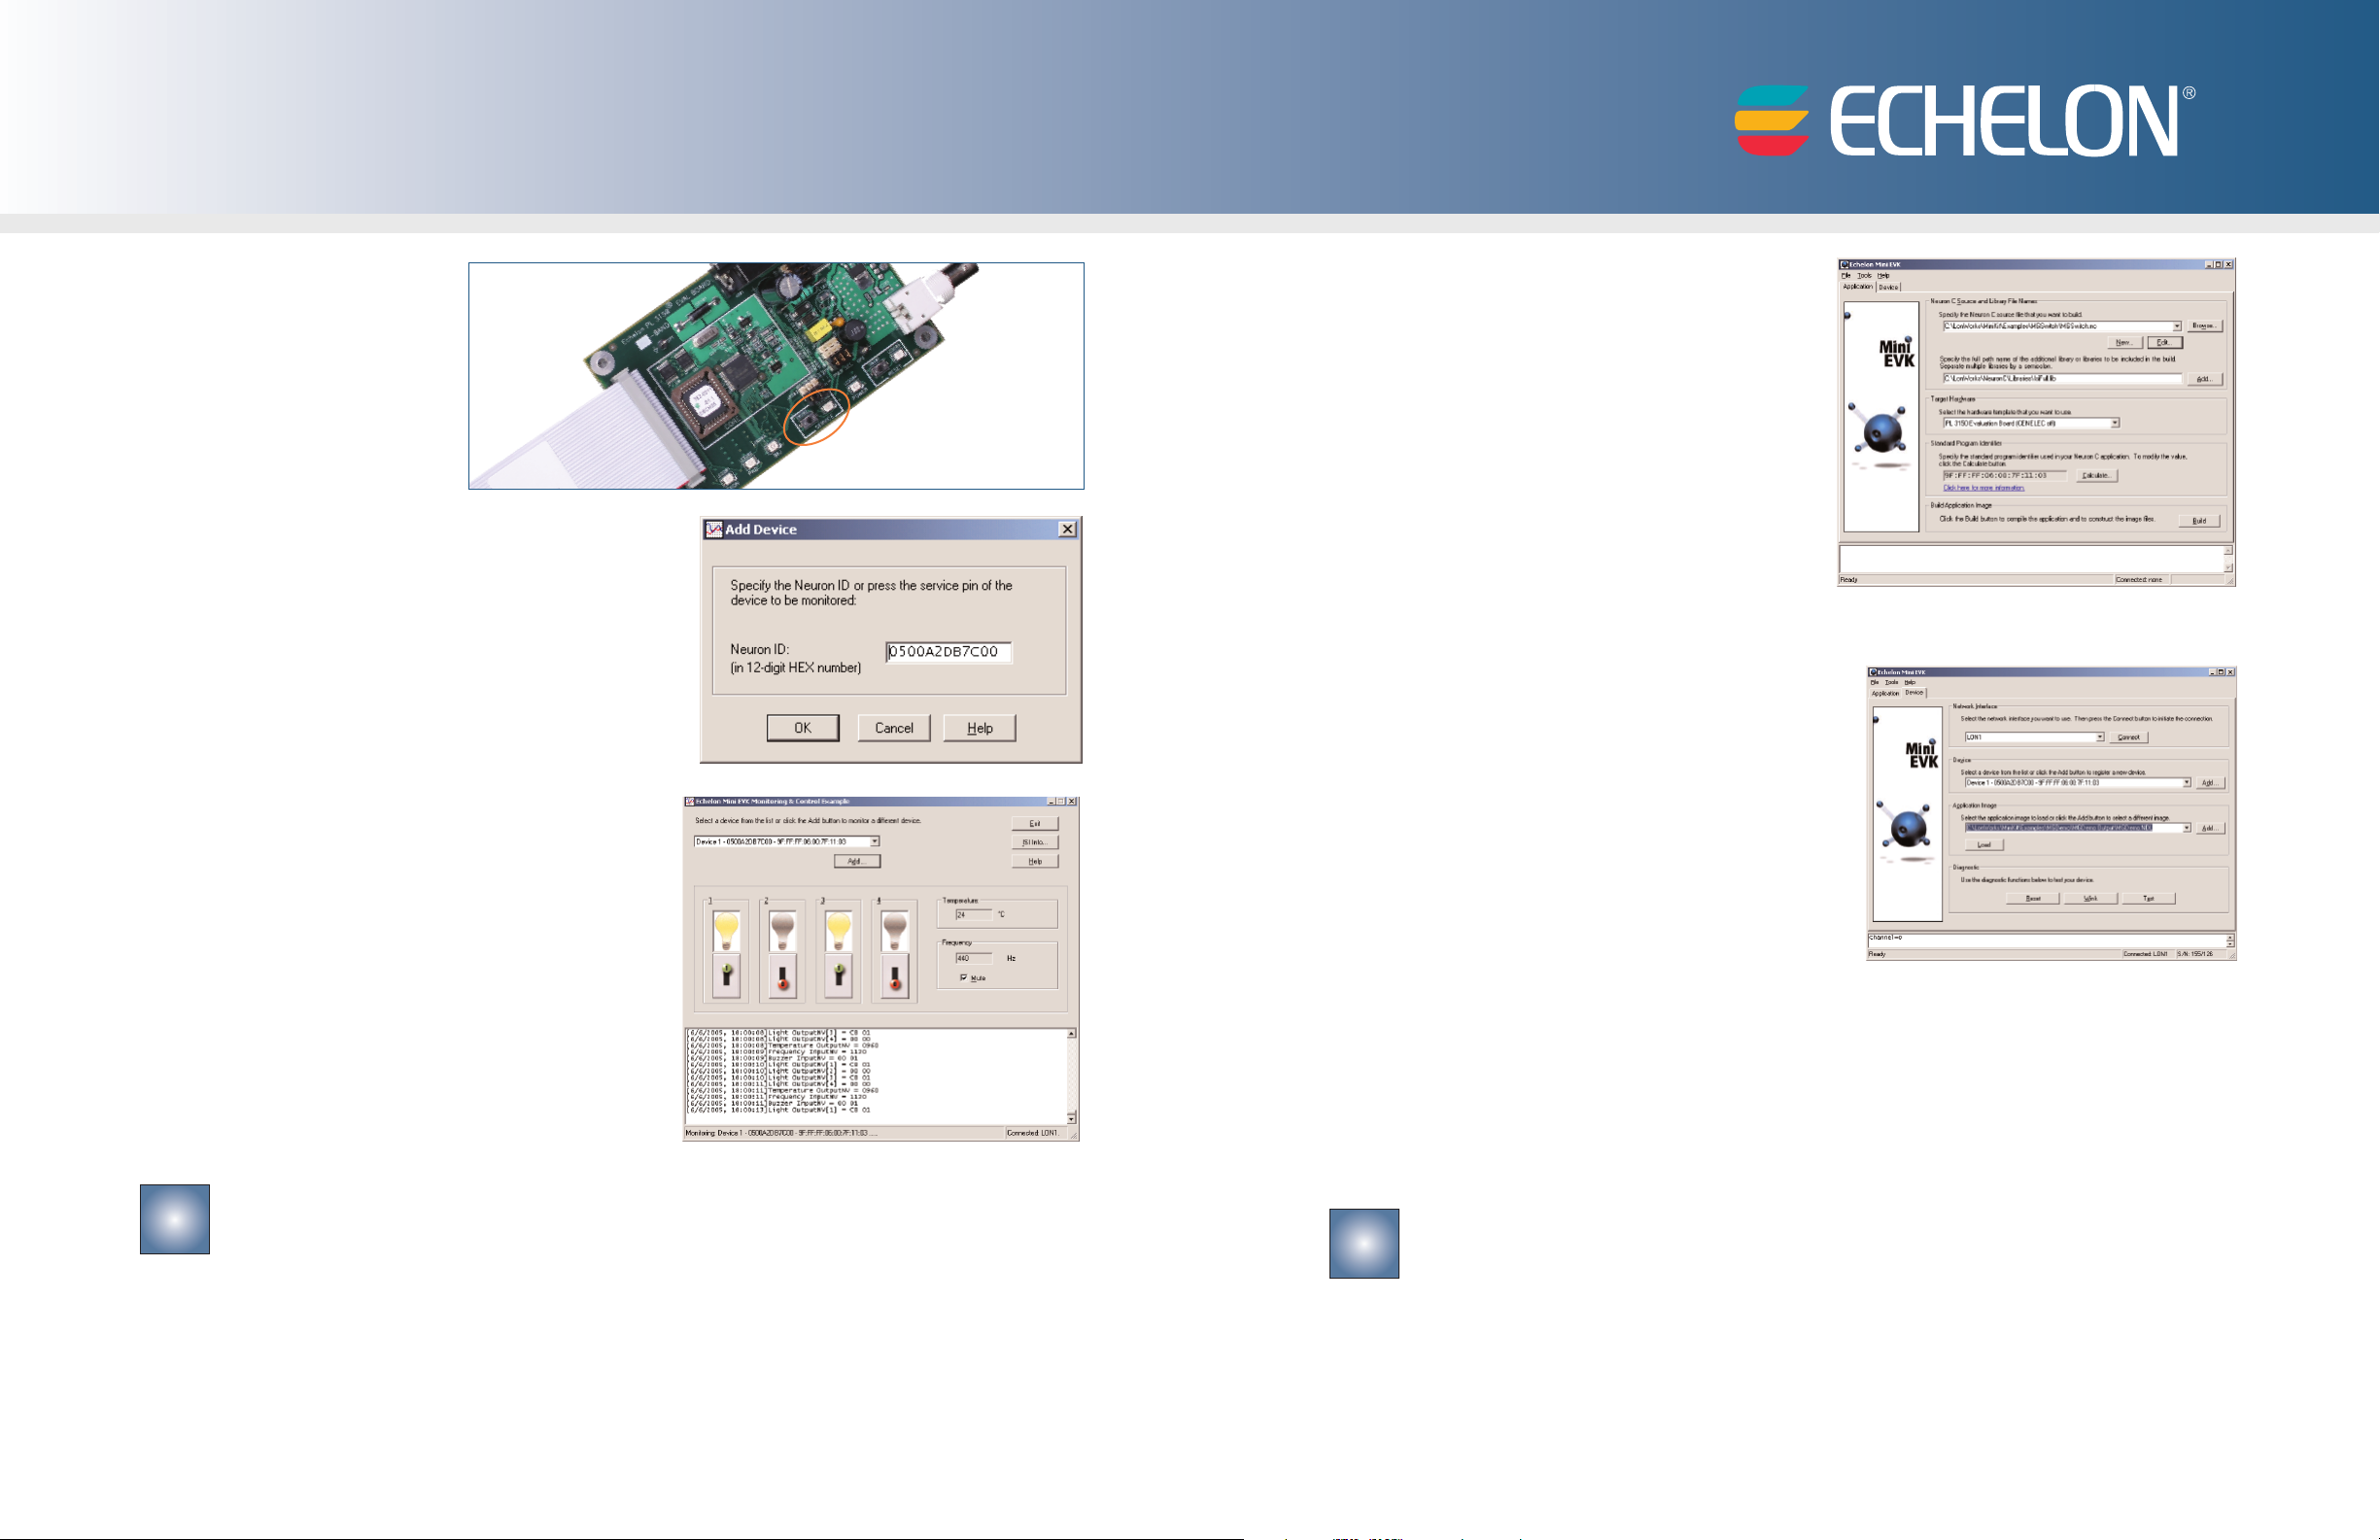
3. Click Add to open the
Add Device dialog,
and then press the PL
3150 Evaluation
Board’s
button. The board’s
Neuron ID appears
on the
Service
Add Device dialog.
2. To create an application, write Neuron®C
code using a text editor of your choice
such as Windows Notepad, and then use
the
Application tab to select your source
file, select your target hardware, and then
build an application image.Alternatively,
you can select one of the example applications.
5
4. Click
5. Control the MiniGizmo LEDs by clicking the light
OK to connect the board to the Monitoring
& Control Example Application.
switch icons, and monitor the MiniGizmo temperature sensor.
Use the Mini EVK Application to load other example applications and to create
your own applications.
Click the Windows
1.
click
Mini EVK Application.
Start button,
point to
ograms,point to
All Pr
Copyright © 2005-2006, Echelon Corporation. Echelon, LONWORKS, Neuron, 3120,3150, and the Echelon logo are registered trademarks of Echelon Corporation. Other marks belong to their respective holders. P/N 078-0301-01C
Echelon Mini EVK,
and then
6
Click the
3.
work interface, and then click
4. Press the Service button on your device, and
then click OK to select the device
5. Select an application image to load, and then
click Load to load the application image into
the device.
6. After you load an application that has support for the CENELEC Configuration Library enabled,
LED1 will begin flashing, indicating that the Evaluation Board has entered CENELEC configuration mode. If LED8 is on, then CENELEC is enabled. If LED8 is off, CENELEC is disabled.You can
press the SW8 button to enable or disable CENELEC.
SW1 button to confirm your selection and exit CENELEC configuration mode.You will not be able
to load another application into the Evaluation Board, or perform any network operations with
the Evaluation Board, until you have made a selection and exited CENELEC configuration mode.
Device tab
, select
LON1 as the net
Connect.
.
-
When you have made a selection,
press the
For more information, see the following documentation included in your Echelon
Mini EVK program folder:
• Mini EVK User’s Guide—for more information on the examples and how to develop applica-
tions with the Mini
•
Mini EVK Hardware Guide—for more information on the Evaluation Boards and MiniGizmo.
• Introduction to the LONWORKS
Application.
®
System—for more information on the LONWORKS platform.
 Loading...