


i.LON® SmartServer 2.0 Power Line Repeating Guide
 ®
®
078-0348-01E
Echelon, i.LON, LON, LONWORKS, LonTalk, Neuron, LONMARK, 3120, 3150, LNS, LonMaker, and the Echelon logo are trademarks of Echelon Corporation registered in the United States and other countries. LonPoint and LonSupport are trademarks of Echelon Corporation.
Other brand and product names are trademarks or registered trademarks of their respective holders.
Neuron Chips, LonPoint Modules, and other OEM Products were not designed for use in equipment or systems which involve danger to human health or safety or a risk of property damage and Echelon assumes no responsibility or liability for use of the Neuron Chips or LonPoint Modules in such applications.
Parts manufactured by vendors other than Echelon and referenced in this document have been described for illustrative purposes only, and may not have been tested by Echelon. It is the responsibility of the customer to determine the suitability of these parts for each application.
ECHELONMAKES NO REPRESENTATION, WARRANTY, OR CONDITION OF ANY KIND, EXPRESS, IMPLIED, STATUTORY, OR OTHERWISE OR IN ANY COMMUNICATION WITH YOU, INCLUDING, BUT NOT LIMITED TO, ANY IMPLIED WARRANTIES OF MERCHANTABILITY, SATISFACTORY QUALITY, FITNESS FOR ANY PARTICULAR PURPOSE, NONINFRINGEMENT, AND THEIR EQUIVALENTS.
No part of this publication may be reproduced, stored in a retrieval system, or transmitted, in any form or by any means, electronic, mechanical, photocopying, recording, or otherwise, without the prior written permission of Echelon Corporation.
Printed in the United States of America.
Copyright ©1997–2008 by Echelon Corporation.
Echelon Corporation
www.echelon.com
ii |
Preface |

Table of Contents |
|
Preface .................................................................................................... |
vi |
Welcome......................................................................................................... |
vii |
Purpose .......................................................................................................... |
vii |
Audience......................................................................................................... |
vii |
Models ............................................................................................................ |
vii |
Network Installation Equipment...................................................................... |
vii |
Device Requirements.............................................................................. |
viii |
Hardware Requirements ......................................................................... |
viii |
Software Requirements .......................................................................... |
viii |
Network Installation Process ......................................................................... |
viii |
i.LON SmartServer 2.0 Documentation........................................................... |
x |
Related Reading.............................................................................................. |
x |
Content ............................................................................................................ |
x |
For More Information and Technical Support................................................. |
xi |
Using the SmartServer Help Files............................................................ |
xi |
Viewing the SmartServer 2.0 ReadMe..................................................... |
xii |
Using Technical Support.......................................................................... |
xii |
1 Preparing a Power Line Repeating Network for Installation ......... |
1 |
Preparation Overview ...................................................................................... |
2 |
Loading Street Lighting Helper to the Pocket PC ..................................... |
2 |
Copying Files to the SmartServer............................................................. |
5 |
Copying Application Image Files ........................................................ |
6 |
Copying External Interface Files ........................................................ |
6 |
Copying Resource Files ..................................................................... |
6 |
Setting the SmartServer to Standalone Mode .......................................... |
7 |
Placing a Network in Standalone Mode ............................................. |
7 |
Network Limitations in Standalone Mode........................................... |
8 |
Configuring the LONWORKS Channel for Power Line Repeating .............. |
8 |
2 Installing a Power Line Repeating Network.................................. |
11 |
Installation Overview ..................................................................................... |
12 |
Commissioning a Power Line Repeating Network in the Correct |
|
Order ....................................................................................................... |
13 |
Installing a Three-Phase Power Line Repeating Network ...................... |
14 |
Attaching an External GSM Modem to the SmartServer ........................ |
14 |
Installing a Power Line Repeating Network with a Pocket PC ................................ |
14 |
Using Street Lighting Helper ................................................................... |
14 |
Acquiring Device Locations and Neuron IDs.................................... |
15 |
Configuring Street Lighting Helper Connections .............................. |
16 |
Configuring Street Lighting Helper Settings ..................................... |
17 |
Connecting the PC Pocket to the SmartServer ...................................... |
19 |
Using a Serial Connection................................................................ |
19 |
Using a LAN Connection .................................................................. |
19 |
Using iLonProxyPocket........................................................................... |
20 |
Starting and Configuring iLonProxyPocket on a Serial |
|
Connection ....................................................................................... |
20 |
Starting and Configuring iLonProxyPocket on a LAN |
|
Connection ....................................................................................... |
21 |
Sending Device Data to the SmartServer............................................... |
22 |
Installing a Power Line Repeating Network with SmartServer Web |
|
Pages............................................................................................................. |
24 |
Creating Devices..................................................................................... |
24 |
i.LON SmartServer 2.0 Power Line Repeating Network Management Guide |
iii |
Entering Device Locations and Neuron IDs............................................ |
26 |
Automatically Acquiring the Neuron ID............................................. |
26 |
Automatically Acquiring the Neuron ID with |
|
Overview - Devices Web Page .................................................. |
26 |
Automatically Acquiring the Neuron ID with |
|
LON Device Driver Web Page ................................................... |
29 |
Manually Acquiring the Neuron ID.................................................... |
30 |
Selecting Devices.................................................................................... |
32 |
Installing Devices with Smart Network Management.............................. |
32 |
Enabling Smart Network Management............................................. |
32 |
Installing Devices.............................................................................. |
33 |
Checking Device Installation Status ................................................. |
33 |
Troubleshooting Power Line Repeating Network Installation ................. |
35 |
3 Maintaining a Power Line Repeating Network.............................. |
37 |
Maintenance Overview .................................................................................. |
38 |
Analyzing a Power Line Repeating Network........................................... |
38 |
Adding Devices ....................................................................................... |
47 |
Upgrading Devices.................................................................................. |
47 |
Replacing Devices .................................................................................. |
51 |
Replacing Devices with the Pocket PC ............................................ |
51 |
Replacing Devices with the SmartServer......................................... |
51 |
Automatically Replacing Devices............................................... |
51 |
Manually Replacing Devices...................................................... |
54 |
Decommissioning Devices...................................................................... |
55 |
Setting Devices Offline............................................................................ |
56 |
Testing Devices....................................................................................... |
57 |
Querying Devices ............................................................................. |
57 |
Winking Devices ............................................................................... |
59 |
Deleting Devices ..................................................................................... |
60 |
Switching to LNS Mode and Synchronizing to an LNS Database .......... |
60 |
4 Controlling a Street Lighting Network with the Scheduler |
|
Application....................................................................................... |
67 |
Scheduling Overview..................................................................................... |
68 |
Configuring the Real-Time Clock ............................................................ |
68 |
Setting the SmartServer Time .......................................................... |
69 |
Adding an SNTP Time Server.................................................... |
69 |
Manually Configuring the Time .................................................. |
71 |
Entering the Location of the SmartServer ........................................ |
72 |
Creating Event Schedulers ..................................................................... |
74 |
Selecting Data Points.............................................................................. |
77 |
Creating Daily Schedules........................................................................ |
80 |
Defining Daily Schedules.................................................................. |
80 |
Creating Daily Schedule Events....................................................... |
82 |
Creating Exception Schedules................................................................ |
84 |
Creating One-Time Exceptions ........................................................ |
84 |
Creating Exceptions ......................................................................... |
87 |
Defining Exception Dates and Recursions ................................ |
87 |
Creating Exception Events......................................................... |
91 |
Demonstrating a Street Lighting Schedule.................................................... |
95 |
Creating the Weekday Schedule ............................................................ |
95 |
Creating the Weekday Daily Schedule............................................. |
96 |
Creating the Weekday Exception Schedule..................................... |
97 |
Creating the Weekend and Holiday Exception Schedules ................... |
102 |
Copying Event Schedulers to other SmartServers...................................... |
108 |
iv |
Preface |
5 Connecting Devices on a Power Line Repeating Network........ |
109 |
Connecting Devices Overview..................................................................... |
110 |
Using Type Translators to Connect Devices within a Network............. |
110 |
Creating a Type Translator............................................................. |
110 |
Selecting Input and Output Points.................................................. |
113 |
Selecting or Creating a Type Translation ....................................... |
114 |
Creating a Custom Scalar-Based Translation ......................... |
115 |
Creating a Custom Rule-Based Translation ............................ |
117 |
Example Type Translator for Street Lighting Network ................... |
119 |
Creating Web Connections ................................................................... |
120 |
Connecting Repeating Devices on the Same Network .................. |
121 |
Connecting Repeating Devices to Other Networks........................ |
122 |
Testing Web Connections .............................................................. |
125 |
Appendix A Glossary......................................................................... |
127 |
i.LON SmartServer 2.0 Power Line Repeating Network Management Guide |
v |
Preface
The i.LON® SmartServer can automatically install and manage a LONWORKS network running over a PL-20 power line channel. The SmartServer features a standalone network management mode in which it can install and maintain a LONWORKS network without LNS network management services. Specifically for PL-20 power line channels, the SmartServer uses a repeating function called the Enhanced LonTalk® Proxy Protocol to transmit messages to the devices attached to the power line, overcoming impediments posed by power line channels such as excessive noise and long distances between devices. The standalone network management mode and repeating function make the SmartServer the ideal tool for managing, controlling, and monitoring street lighting and other power line networks where long distances separate devices and the use of LNS network management services is not practicable.
vi |
Preface |

Welcome
When running on a noisy PL-20 power line channel, the SmartServer can use a repeating function to transmit network messages to the devices closest to it, which in turn relay the messages to the devices located further down the power line, and so on until the message reaches the target device. The repeating function enables the network management commands sent by the SmartServer to reach the target devices, overcoming impediments posed by power line channels such as excessive noise and long distances between devices.
Purpose
This document describes how to manage, control, and monitor a power line repeating network using the SmartServer.
Audience
This guide is intended for system designers and integrators with an understanding of control networks.
Models
The power line repeating guide is intended for models of the SmartServer that operate on PL-20 power line channels (models 72103R-430, 72103R-439, and 72103R-445). PL-20 models of the SmartServer may include programming and IP-852 routing features (you can license IP-852 routing for units that do not have this feature enabled). There is also a PL-20 model of the SmartServer (model 72103R-450) that includes an external coupling option, which enables the SmartServer to communicate over virtually any AC or DC power mains, including three-phase systems. The inputs and outputs of each model are slightly different, as noted in the i.LON SmartServer 2.0 Hardware Guide.
You cannot use earlier versions of the i.LON hardware (v1.0, e2, or e3) to install or manage a power line repeating network.
Note: The IP-852 routing feature is disabled when managing a PL-20 repeating channel. This is because IP-852 routing is not supported when the SmartServer is operating in standalone mode, and standalone mode is required for the SmartServer to manage a PL-20 repeating channel.
Network Installation Equipment
The installation of a power line repeating network entails attaching LONWORKS repeating devices (Neuron-hosted devices or host-based ShortStack devices) to the power line and sending their Neuron IDs, and optionally their locations, to the SmartServer using a Pocket PC, the SmartServer Web pages, or a custom C# application. Upon receiving the device data, the SmartServer discovers the repeating path for each device, and if you are using a Pocket PC, it commissions the devices, and then loads, recommissions, and places the devices online. The process of commissioning, loading, re-commissioning, and placing the devices online is optional if you are using the SmartServer Web pages or a custom C# application
The recommended installation method for a power line repeating network entails using a bar code scanner and a Windows-based Pocket PC with built-in GPS receiver (or a Pocket PC and separate GPS receiver with Bluetooth connections) to acquire the Neuron IDs and geographic locations (coordinates) of the devices. After acquiring the Neuron IDs and locations, they are sent from the Pocket PC to the SmartServer. Once the SmartServer receives the device data, it automatically installs the devices.
Note that you can manually enter the Neuron IDs and locations of the devices using the SmartServer Web interface; however it may not practicable or efficient to do so. This is especially true if the installers are not trained on using the SmartServer Web interface, or if the installation is for an outdoor system such as street lighting, where access to an Ethernet, GPRS, or dial-out connection may not be readily available or is cost-prohibitive.
i.LON SmartServer 2.0 Power Line Repeating Network Management Guide |
vii |

Device Requirements
The Neuron-hosted devices and host-based ShortStack devices to be installed on a power line repeating network must be enabled for repeating. This is because the devices may need to be used to relay network messages from the SmartServer to devices located further down the power line. To enable repeating on a device, your device manufacturer must update your devices so that they support the repeating function. For more information on installing application device repeating on your Neuron-hosted devices and host-based ShortStack devices, contact your Echelon sales representative.
Hardware Requirements
The hardware and accessories required for the recommended power line repeating network installation method is as follows:
•Windows-based Pocket PC with internal GPS receiver, and RS-232 serial connection or built-in Wi-Fi connection.
•GPS receiver with Bluetooth connection (if Pocket PC does not include integrated GPS).
•Wireless bar code scanner with a compatible connection to the Pocket PC.
•Serial sync cable. This cable physically connects the Pocket PC to a RS-232 null modem cable. This accessory is required to connect the Pocket PC to the SmartServer via an RS-232 serial connection.
•RS-232 null modem cable. This cable physically connects the serial sync cable attached to the Pocket PC to the SmartServer console port.
•SmartServer hardware (PL-20 model) loaded with the SmartServer embedded software.
Software Requirements
The Pocket PC requires the following software for collecting device Neuron IDs and coordinates and transmitting the device data to the SmartServer: Street Lighting Helper, iLONProxyPocket, and iLONProxy. These files are provided on the i.LON SmartServer 2.0 DVD, and they are downloaded to the LonWorks\iLon100\LonWorks\iLon100\unsupported\StreetLightingHelper\Bin folder on your computer when you install the i.LON SmartServer 2.0 software. Each of these programs is described as follows:
• Street Lighting Helper. This application collects the Neuron IDs acquired with the bar code scanner, lists the Neuron IDs and corresponding coordinates (if acquired with GPS receiver), and saves them to XML and CSV (comma separated value) files.
Note: Street Lighting Helper is an unsupported sample application. You can use Street Lighting Helper as a starting point for creating your own custom application that you can be used to collect device locations and Neuron IDs. The sample code for Street Lighting Helper is provided on the i.LON SmartServer 2.0 DVD, and it is downloaded to the LonWorks\iLon100\unsupported\StreetLightingHelper\Src folder on your computer when you install the i.LON SmartServer 2.0 software.
•iLONProxyPocket. This application is used to transmit the device file created with the Street Lighting Helper program to the SmartServer via an RS-232 serial connection.
•iLONProxy. This application serves as proxy for SOAP/HTTP requests between the SmartServer and the Street Lighting Helper program on the Pocket PC. This program can be used over a TCP/IP connection (providing debug information) or a serial connection.
Network Installation Process
The following section lists the basic steps required to install a power line repeating network that are detailed in this guide. These steps assume that a Pocket PC is being used as an installation tool.
viii |
Preface |
1.Install the applications on the Pocket PC to be used for collecting device coordinates and Neuron IDs and transmitting them to the SmartServer that is attached to the power line repeating network.
2.Copy the application image files (.apb extension) and external interface files (.xml or .xif extensions) provided by the device manufacturer to the lonworks/import folder on the SmartServer flash disk.
Note: If you are installing devices pre-loaded with the current application image files and external interface files, skip this step. This ensures that the SmartServer does not overwrite the files currently on the devices.
3.Switch the SmartServer to standalone mode. To do this, follow these steps:
a.Open the SmartServer Web interface, click Driver, and then click the Net network. The
Setup – LON Network Driver page opens.
b.In the Network Management Service property, click Standalone, and the click Submit. Note that it may take a few minutes for the SmartServer to switch to standalone mode.
4.Configure the LONWORKS channel attached to the SmartServer for power line repeating. To do this, follow these steps:
a.Click Driver, expand the network icon, and then click the LON channel. The Setup – LON Channel Driver Web page opens.
b.In the Channel Type property, select the PL-20C channel, select the Repeating check box, and then click Submit.
5.Open the application on the Pocket PC that is used to collect device coordinates and Neuron IDs and transmit them to the SmartServer.
6.Acquire the coordinates of a device with the built-in GPS receiver on the Pocket PC, or a standalone GPS receiver with Bluetooth connection to the Pocket PC.
7.Acquire the Neuron ID of the device using the bar code scanner.
8.Add the Neuron ID and location of the device to the list of devices to be installed.
9.Repeat steps 6–8 for each device to be installed.
10.If sending device data over a serial connection, connect the Pocket PC to the SmartServer console port using an RS-232 serial sync and an RS-232 null modem cable.
11.Transmit the Neuron IDs and coordinates of the devices from the Pocket PC to the SmartServer over the RS-232 console port (via serial sync and RS-232 null modem cables). Alternatively, you can send the device data over a wireless LAN using the built-in Wi-Fi connection on the Pocket PC.
12.The SmartServer commissions, loads, re-commissions, and places the devices online upon receiving the device data.
13.If you have access to the SmartServer Web interface, verify that the devices transmitted to the SmartServer have been added to the SmartServer tree. To do this, expand the network icon, expand the LON channel, and then verify that the devices appear below the LON channel.
14.If you have access to the SmartServer Web interface, check device installation status. To do this, right-click the SmartServer icon, point to Setup, and then click LON Command Queue on the shortcut menu. Alternatively, you can click Setup and then click LON Command Queue.
See Chapter 1, Preparing a Power Line Repeating Network for Installation, and Chapter 2, Installing a Power Line Repeating Network, for more information on these steps.
i.LON SmartServer 2.0 Power Line Repeating Network Management Guide |
ix |

i.LON SmartServer 2.0 Documentation
The documentation for the SmartServer is provided as Adobe Acrobat PDF files and online help files. The PDF file for this document is installed in the Echelon i.LON SmartServer 2.0 Software program folder when you install the i.LON SmartServer 2.0 software. You can also download the latest SmartServer documentation, including the latest version of this guide, from Echelon’s Website at www.echelon.com/support/documentation/manuals/cis.
This user’s guide, the online help files, and the following documents comprise the SmartServer documentation suite:
•i.LON SmartServer 2.0 User’s Guide. Describes how to configure the SmartServer and use its applications to manage control networks.
•Echelon Enterprise Services 2.0 User’s Guide. Describes how to use the i.LON AdminServer to rapidly and automatically deploy and install LONWORKS networks and how to use the LNS Proxy Web service to manage LNS networks.
•i.LON Vision 2.0 User’s Guide. Describes how to create custom Web pages for monitoring and controlling LONWORKS networks and other control networks.
•i.LON SmartServer 2.0 Programmer’s Reference. Describes how to configure the SmartServer using XML files and SOAP calls. This allows you to create your own applications that you can use to configure the i.LON.
•i.LON SmartServer 2.0 Programming Tools User’s Guide. Describes how to write custom built-in applications called Freely Programmable Modules (FPMs) and deploy them on the SmartServer. FPMs let you implement custom functionality and tailor the SmartServer to meet your needs.
•i.LON SmartServer 2.0 Hardware Guide. Describes how to assemble, mount, and wire the SmartServer hardware.
•i.LON SmartServer 2.0 Quick Start Guide. Contains all the information you will need to connect the SmartServer hardware, install the i.LON SmartServer 2.0 software, and configure the SmartServer using the SmartServer configuration Web pages.
•IP-852 Channel User’s Guide. Describes how to configure an IP-852 channel with the Echelon LONWORKS®/IP Configuration Server. You will need this information if you plan to use the i.LON as an IP-852 router.
Related Reading
The following additional documents may be useful if you are using certain features of the SmartServer. You can download these documents from Echelon’s Web site at www.echelon.com/docs.
•NodeBuilder User’s Guide. Describes how to use the NodeBuilder tool to develop and test applications for Neuron-hosted devices.
Content
This guide includes the following content:
•Preparing a Power Line Repeating Network for Installation. Describes the tasks required for preparing a PL-20 power line repeating network for installation. Describes how to install the Street Lighting Helper sample application used to store and transmit device locations and Neuron IDs to a Pocket PC that is being used as an installation tool. Describes how to upload application image files (.apb extension), external interface files (XIFs), and resource files to the SmartServer. Describes how to place the SmartServer in standalone mode, configure the LONWORKS channel attached to the SmartServer as a PL-20 channel, and enable repeating on the PL-20 channel.
x |
Preface |
•Installing a Power Line Repeating Network. Describes how to acquire the geographic locations (coordinates) and Neuron IDs of the devices to be attached to the PL-20 channel, including how to use a bar code scanner and Pocket PC to acquire the device data. Describes how to transmit the device data to the SmartServer and install the devices, including how to link a Pocket PC to the SmartServer and use the Pocket PC to upload the device data to the SmartServer and install the devices. Explains how to troubleshoot the installation of a power line repeating network.
•Maintaining a Power Line Repeating Network. Describes how to analyze and debug the power line repeating channel using the Power Line Repeating Analysis Web page on the SmartServer. Explains how to replace, upgrade, test, add, and delete devices with the SmartServer. Describes how to switch the network to LNS management mode and synchronize the network to an LNS database so that it can be managed with an LNS application such as the LonMaker tool.
•Controlling a Street Lighting Network with the Scheduler Application. Describes how to use the Scheduler application on the SmartServer to control the devices on a street lighting network. Explains how to create exception schedules and how to add events to the schedules so that devices such as luminaries can be turned on and off based on calculated sunrise and sundown times. Describes how to duplicate a Scheduler application so that you can create additional pre-configured Event Schedulers to the SmartServer.
•Connecting Devices on a Power Line Repeating Network. Describes how to use type translators and Web connections to connect devices on a power line repeating network together and to devices on other networks.
•Appendix A – Glossary. Provides definitions for key terms associated with a power line repeating network.
For More Information and Technical Support
If you need help using the SmartServer, you can use the online help files, view the i.LON SmartServer 2.0 ReadMe, or read the i.LON SmartServer 2.0 documentation. If none of these sources, answer your questions, you can contact technical support if you have purchased support services from Echelon or an Echelon support partner.
Using the SmartServer Help Files
If you need more information on how to use a particular SmartServer Web page, you can click Help to open a new window with context-sensitive help for that Web page.
If you need more information on how to use a particular SmartServer Web pages, you can click Help to open a new window with context-sensitive help for that Web page.
i.LON SmartServer 2.0 Power Line Repeating Network Management Guide |
xi |

If you need help with a particular dialog in the SmartServer Web interface, you can click the “?” icon in the upper-right hand corner of the dialog to open a new window with context-sensitive help for that dialog.
Viewing the SmartServer 2.0 ReadMe
The SmartServer 2.0 ReadMe provides descriptions of known problems, if any, and their workarounds. To view the SmartServer 2.0 ReadMe, click Start, point to Programs, point to Echelon i.LON SmartServer 2.0 Software, and then select i.LON SmartServer 2.0 ReadMe First. You can also find additional information about the i.LON SmartServer 2.0 online at www.echelon.com/ilon.
Using Technical Support
If you have technical questions that are not answered by this document, the SmartServer 2.0 online help, or the SmartServer 2.0 ReadMe document, you can contact technical support. Free e-mail support is available or you can purchase phone support from Echelon or an Echelon support partner. See www.echelon.com/support for more information on Echelon support and training services.
xii |
Preface |
You can also view free online training or enroll in training classes at Echelon or an Echelon training center to learn more about developing devices. You can find additional information about device development training at www.echelon.com/training.
You can obtain technical support via phone, fax, or e-mail from your closest Echelon support center. The contact information is as follows (check www.echelon.com/support for updates to this information):
Region |
Languages Supported |
Contact Information |
|
|
|
The Americas |
English |
Echelon Corporation |
|
Japanese |
Attn. Customer Support |
|
|
550 Meridian Avenue |
|
|
San Jose, CA 95126 |
|
|
Phone (toll-free): |
|
|
1.800-258-4LON (258-4566) |
|
|
Phone: +1.408-938-5200 |
|
|
Fax: +1.408-790-3801 |
|
|
lonsupport@echelon.com |
|
|
|
Europe |
English |
Echelon Europe Ltd. |
|
German |
Suite 12 |
|
French |
Building 6 |
|
Italian |
Croxley Green Business Park |
|
|
Hatters Lane |
|
|
Watford |
|
|
Hertfordshire WD18 8YH |
|
|
United Kingdom |
|
|
Phone: +44 (0)1923 430200 |
|
|
Fax: +44 (0)1923 430300 |
|
|
lonsupport@echelon.co.uk |
|
|
|
Japan |
Japanese |
Echelon Japan |
|
|
Holland Hills Mori Tower, 18F |
|
|
5-11.2 Toranomon, Minato-ku |
|
|
Tokyo 105-0001 |
|
|
Japan |
|
|
Phone: +81.3-5733-3320 |
|
|
Fax: +81.3-5733-3321 |
|
|
lonsupport@echelon.co.jp |
|
|
|
China |
Chinese |
Echelon Greater China |
|
English |
Rm. 1007-1008, IBM Tower |
|
|
Pacific Century Place |
|
|
2A Gong Ti Bei Lu |
|
|
Chaoyang District |
|
|
Beijing 100027, China |
|
|
Phone: +86-10-6539-3750 |
|
|
Fax: +86-10-6539-3754 |
|
|
lonsupport@echelon.com.cn |
|
|
|
Other Regions |
English |
Phone: +1.408-938-5200 |
|
Japanese |
Fax: +1.408-328-3801 |
|
|
lonsupport@echelon.com |
|
|
|
i.LON SmartServer 2.0 Power Line Repeating Network Management Guide |
xiii |
xiv |
Preface |
1
Preparing a Power Line Repeating
Network for Installation
This chapter describes the tasks required for preparing a PL-20 power line repeating network for installation. It describes how to download the Street Lighting Helper sample application used to store and transmit device locations and Neuron IDs to a Pocket PC that is being used as an installation tool. It describes how to upload application image files, external interface files (XIFs), and resource files to the SmartServer. It explains how to place the SmartServer in standalone mode, configure the LonWorks channel attached to the SmartServer as a PL-20C channel, and enable repeating on the PL-20C channel.
i.LON SmartServer 2.0 Power Line Repeating Network Management Guide |
1 |

Preparation Overview
Before a PL-20 power line repeating network can be installed, you need to perform a few tasks to prepare your Pocket PC (if you are using one to install the power line repeating network) and the SmartServer to be attached to the network for the installation.
If you are using a Pocket PC as an installation tool, you need to install the Street Lighting Helper application (or your own custom Street Lighting Helper application) and the iLONPocketProxy application to your Pocket PC.
You need to upload to the SmartServer flash disk the application image files (.apb extensions) of the devices to be attached to the network, the external interface files (XIFs) of the devices, and resource files.
Using the SmartServer Web pages, you need to place the SmartServer in standalone mode and configure the LONWORKS channel attached to the SmartServer for power line repeating. In standalone mode, the SmartServer serves as a network manager that can directly load, commission, set online/offline, wink, test, and reset the devices attached to its channel without sending any network management commands through LNS. The SmartServer needs to be in standalone mode in order to establish and maintain the appropriate repeating chain on the PL-20 channel.
This chapter details the following tasks required for preparing a power line repeating network for installation:
1.Loading StreetLighting applications on your Pocket PC (if you are using a Pocket PC as an installation tool).
2.Copying device application image files, XIFs, and resource files to the SmartServer.
3.Setting the SmartServer in standalone mode.
4.Configuring the LONWORKS channel attached to the SmartServer for power line repeating.
Loading Street Lighting Helper to the Pocket PC
If you are using a Pocket PC as an installation tool for collecting device Neuron IDs and coordinates and transmitting this data to the SmartServer, you need to install the Street Lighting Helper file on the Pocket PC. The Street Lighting Helper file contains the following two applications:
•Street Lighting Helper. This application collects the Neuron IDs acquired with the bar code scanner, lists the Neuron IDs and corresponding coordinates (if acquired with GPS receiver), and saves them to XML and CSV (comma separated value) files.
•iLONProxyPocket. This application is used to transmit the device file created with the Street Lighting Helper program to the SmartServer via an RS-232 or Bluetooth serial connection.
To install the Street Lighting Helper on the Pocket PC, follow these steps:
1.Install the i.LON SmartServer 2.0 software from the i.LON SmartServer 2.0 DVD following the steps described in Chapter 2 of the i.LON SmartServer 2.0 User’s Guide.
2.Download the .NET Compact Framework 2 Service Pack 2 to your Pocket PC. This service pack is required to run the Street Lighting Helper program. To download the service pack, go to www.microsoft.com/downloads/details.aspx?familyid=AEA55F2F-07B5-4A8C-8A44- B4E1B196D5C0&displaylang=en.
3.Download Microsoft ActiveSync to your computer. You can use this program to copy the Street Lighting Helper file from your computer to your Pocket PC. To download the latest version of ActiveSync, go to www.microsoft.com/windowsmobile/activesync/default.mspx.
4.Start Microsoft ActiveSync. To do this, click Start on the taskbar, point to Programs, and click
Microsoft ActiveSync.
2 |
Preparing a Power Line Repeating Network for Installation |

5.Connect the Pocket PC to your computer via a USB or serial connection.
6.Set up a sync partnership between your computer and the Pocket PC. Your computer is now connected to the Pocket PC and you can begin copying files.
7.Download or copy the Street Lighting Helper file to your Pocket PC. To copy the file, skip to step 8. To download the file, follow these steps:
a.On your computer, browse to the C:\LonWorks\iLon100\unsupported\iLonProxy\Install folder and then double-click the setup.exe file. The Echelon Street Lighting Helper wizard opens.
b.Click Next. The Select Installation Folder window appears.
c.The Street Lighting Helper application will be installed in the C:\Program Files\Echelon\ Echelon Street Lighting Helper folder by default. You can click Browse to select a different destination folder. Click Next. The Confirm Installation window opens.
i.LON SmartServer 2.0 Power Line Repeating Network Management Guide |
3 |

d.Click Next to start the Street Lighting Helper installation.
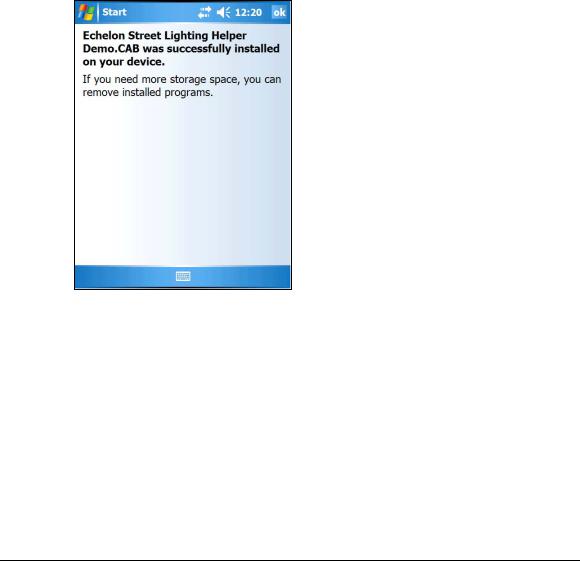
e.After Street Lighting Helper has been installed, a window appears stating that the installation has been completed successfully. Click Close. If the Application Already Installed dialog opens, click Yes. The Street Lighting Helper application is downloaded to the Pocket PC.
f.When the Street Lighting Helper download is complete, the Application Downloading Complete dialog opens.
g.Click OK. On your Pocket PC the following dialog opens, confirming that the Street Lighting Helper has been downloaded to the Pocket PC
4 |
Preparing a Power Line Repeating Network for Installation |
h.On the Pocket PC, tap OK.
8.To copy the Street Lighting Helper files from your computer to the Pocket PC, follow these steps:
a.On your computer, browse to the LonWorks\iLon100\unsupported\iLonProxy\bin folder on your computer and then copy the StreetLightingHelper.exe, iLonProxyPocket.exe, and iLonProxy.exe files.
b.In Microsoft ActiveSync, click Explore, browse to the Mobile Device\Program Files folder on your Pocket PC, and then paste the files.
c.Optionally, you can create a new folder called “iLON Tools” or some other descriptive name in the Program Files folder on the Pocket PC and then paste the files to that new folder.
Note: Uninstalling the Street Lighting Helper application also uninstalls the iLONProxyPocket application. If you want to use the iLONProxyPocket application with your custom Pocket PC solution, you can copy the iLONProxyPocket.exe file located in the LonWorks\iLon100\LonWorks\iLon100\unsupported\StreetLightingHelper\Bin folder on your computer to your Pocket PC.
Copying Files to the SmartServer
You can use the SmartServer to download the latest application image files (.apb extension) to the devices on a power line repeating network when installing the network. To do this, you upload the application image files provided by the device manufacturer to the root/LonWorks/import folder on the SmartServer flash disk. If the device interface has changed, you can also upload the updated external interface files that should be provided by the device manufacturer to the root/LonWorks/import folder.
When the SmartServer receives the Neuron ID of a device being installed, it fetches the program ID from the device. The SmartServer then locates the application image file and XIF on its flash disk that have program IDs matching that of the device, and it downloads the application image file to the device and loads the XIF.
Note: If you are installing devices that are pre-loaded with the current application image files, and you are using the sample Street Lighting Helper application to install the devices, the SmartServer will overwrite the current application image file stored on the devices when they are added. This is because the SmartServer will automatically download the application image files in the root/LonWorks/import folder that have program IDs matching those of the pre-loaded devices.
This section details how to copy the following types of files to the SmartServer flash disk:
i.LON SmartServer 2.0 Power Line Repeating Network Management Guide |
5 |
•Application image files (.apb extension). The application that determines how a device functions.
•External interface files. The logical interface to a device. It can either be a device interface file (.xif extension) or a device template (.xml extension).
•Resource files. Defines the components of the device interface, including network variable types, configuration property types, format types, and functional profiles implemented by the device application.
Copying Application Image Files
The application image is a file provided by the device manufacturer that determines how a device functions. It consists of the object code generated by the Neuron C compiler and includes other application-specific parameters such as self-identification data and program ID string.
To copy an application image to the SmartServer, follow these steps:
1.Verify that you have the correct user name and password to access the SmartServer via FTP and that FTP access is enabled on your SmartServer. To do this, follow these steps:
a.Right-click the SmartServer icon, point to Setup, and then click Security on the shortcut menu. Alternatively, you can click Setup and then click Security. The Setup – Security Web page opens.
b.In the General property, check the FTP/Telnet User Name and FTP/Telnet Password properties.
c.In the Service property, verify that the Enable FTP check box is selected.
2.In the browser of an FTP client such as Microsoft Internet Explorer 7, enter the FTP URL of your SmartServer (ftp://192.168.1.1, for example).
3.Enter the FTP/Telnet user name and password for accessing your SmartServer via FTP.
4.Use FTP to access the root/lonworks/import directory on the SmartServer flash disk.
5.Upload the application image (.apb extension) from the location where it is saved, which could be
ashared network drive with read/write permissions, to the root/lonworks/import folder on the SmartServer flash disk. Note that you cannot copy a file from one SmartServer and directly paste it into another.
Copying External Interface Files
The external interface file (XIF) is a file provided by the device manufacturer that defines the logical interface for a device. The file can be a device interface file (.xif extension) or a device template file (.xml extension). The XIF specifies the number and types of functional blocks, and the number, types, directions, and connection attributes of data points. The program ID field is used as the key to identify each external interface. Each program ID uniquely defines the static portion of the interface.
•To copy a device interface file (.xif extension) to the SmartServer, follow the steps outlined in the previous section, Copying Application Image Files.
•To copy a device template file (.xml extension) to the SmartServer, follow the steps outlined in the previous section, Copying Application Image Files, except that in step 4, access the root/config/template directory on the SmartServer flash disk, and then in step 5, copy the device template to that directory.
Note: If you upload any XIFs to the SmartServer, you should also upload any used user-defined types.
Copying Resource Files
A resource file defines the components of the device interface, including network variable types, configuration property types, format types, and functional profiles implemented by the device application. Resource files allow for the correct formatting of the data generated or configured by the
6 |
Preparing a Power Line Repeating Network for Installation |
device. Note that standard, echelon, bas_controller, and mbus_integrator catalogs are pre-loaded in the root/lonWorks/types/folder of the SmartServer flash disk.
To copy a resource file to the SmartServer, follow these steps:
1.Follow steps 1–3 in Copying Application Image Files.
2.Access the root/lonworks/types folder on the SmartServer flash disk.
3.Copy the resource file from the location where it saved to the root/lonWorks/types folder on the SmartServer flash disk.
Setting the SmartServer to Standalone Mode
For a power line repeating network, you must operate the SmartServer in standalone mode. This is because the SmartServer needs to operate as the exclusive network manager of the system in order to establish and maintain the appropriate repeating chains. A repeating chain is the path a message must travel on the PL-20 channel from the SmartServer to one or more repeating devices before reaching the target device.
In standalone mode, the SmartServer controls the network management commands sent to the devices attached to its channel (on a network operating in LNS mode, LNS handles these commands). In standalone mode, the SmartServer can directly download the application image file to the devices and commission, set the application state (online/offline), wink, test, and reset the devices attached to its channel.
Placing a Network in Standalone Mode
To set a network to standalone mode using the SmartServer Web pages, follow these steps:
1.Open the SmartServer Web pages following Chapter 3 of the i.LON SmartServer 2.0 User’s Guide.
2.Click Driver at the top of the tree in the left frame.
3.Click the Net network. The Setup – LON Network Driver Web page opens in the right frame.
4.In the Network Management Service property, click Standalone.
5.Click Submit. A dialog appears informing you that the SmartServer is being switched to standalone mode.
i.LON SmartServer 2.0 Power Line Repeating Network Management Guide |
7 |

It may take up to a few minutes for the SmartServer to switch to standalone mode. When the SmartServer has switched to standalone mode, the dialog closes and you can continue preparing your SmartServer for the network installation.
Network Limitations in Standalone Mode
Managing a power line repeating network in standalone mode has the following restrictions:
•Network is limited to a maximum of approximately 200 devices.
•Network is limited to a single channel.
•Network cannot have a router attached to the channel.
•Network does not use LNS management.
•Devices cannot be configured with LNS Plug-ins
•Network cannot be connected to any other network management tool through the network interface or remote network interface.
•LONWORKS connections are not supported. A network in standalone mode functions strictly as a master-slave system. This differs from the standard LNS mode in which the devices attached to the SmartServer’s channel can communicate with each other and the SmartServer in a peer-to-peer manner.
Configuring the LONWORKS Channel for Power Line Repeating
For a power line repeating network, the LON channel attached to the SmartServer must be configured as a PL-20C channel and repeating must be enabled on the channel. To do this, follow these steps:
1.Click Driver.
2.Expand the network icon, and then click the LON channel. The Setup – LON Channel Driver Web page opens.
3.In the Channel Type property, select the PL-20C channel.
4.Select the Repeating check box to enable repeating on the PL-20C channel.
8 |
Preparing a Power Line Repeating Network for Installation |

5.If a network message fails, a data point and its device are marked offline. You can select the Use Minimal Offline Time check box so that all the data points on the offline device with pending network messages (read/write requests, polls, or heartbeats) are marked offline and network messages are not sent to them. This ensures that network performance is not impacted by an offline device.
You can also set the minimum period of time (in seconds) that the SmartServer waits before transmitting network messages to offline data points. During this period, an offline device transmits an OFFLINE status in response to data point requests. Once the Minimal Offline Time elapses, the SmartServer sends a read/write request to one offline data point. If the read/write request succeeds, the data point and its device are marked online, and all cached read/write requests for the offline data points on the device are executed. If you do not configure this property on a power line repeating channel, it is set to 60 seconds.
6.Optionally, you can set the Use Offline Delay property to specify the period of time (in seconds) that the SmartServer waits before marking a data point and its parent device offline (red) in the SmartServer tree after the LON driver detects that the data point is offline.
For example, if you poll a data point every 5 minutes and you set Use Offline Delay to 1 hour, it takes 12 polls for the data point and its parent device to be marked offline—even though the LON driver detected that it could not communicate with the data point after the first poll.
7.Optionally, you can click Advanced to set the retry timer and retry counts that determine the frequency in which network messages are re-sent to a device after no confirmation of delivery is received. Although you can change these properties, it is recommended that you use the default transmit timer (512 ms) and the default retry count (3).
Use Transmit |
You can change the interval (in milliseconds) the final repeating device in |
|
Timer |
the repeating chain (the proxy agent) waits for confirmation before |
|
|
resending network messages to the target device. The default value is 512 |
|
|
ms. Note that the SmartServer may use a longer interval than the one you |
|
|
specify if it determines that a longer interval is needed. |
|
|
Note that the retry interval used by the devices on the repeating chain prior |
|
|
to the proxy agent is calculated based on the total transaction time |
|
i.LON SmartServer 2.0 Power Line Repeating Network Management Guide |
9 |
|

between the proxy agent and the target device.
If you clear this check box, a default interval is calculated based on the network topology for all hops in the repeating chain.
Use Retry Count You can change the number of times a network message is re-sent when no confirmation is received. The default value is 3 attempts.
This means that the proxy agent will attempt to re-send a network message to the target device three times. If confirmation is still not received, the SmartServer will re-send the message through the repeating chain to the proxy agent, which again attempts three times to deliver the message to the target device. If confirmation is still not received, the process of the SmartServer sending the message to the repeating agents and the proxy agent making three attempts to deliver the message is repeated one more time. After that the SmartServer switches to the secondary frequency and repeats this process up to three times. Ultimately, a total of 18 attempts will be made to deliver a network message to a target device.
If a device cannot be reached, it will be marked offline (red) in the tree view and in the Power Line Repeating Analysis Web page. Network messages will not be propagated to an offline device until the Minimal Offline Time expires (this property is fixed at 1 minute on a power line repeating channel). In addition, the data points on the device will be marked offline in the SmartServer applications with the unplugged icon (  ). All subsequent data point requests will also mark the data point offline.
Once the Minimal Offline Time (1 minute) elapses, a single data point request is sent to the device. If the device executes the request, the device and the data point are marked online and the device executes all failed data point requests.
Note that if you specify a retry count that is greater than the default three and you set the transmit timer to a long interval, the SmartServer may reduce the specified retry count. In addition, the retry count may be reduced for the devices on the repeating chain prior to the proxy agent based on the total transaction time between the proxy agent and the target device relative to the non-group receive timer.
If this check box is cleared, a default value, which can range from 0 to 15 attempts, is calculated based on network topology. Typically, the default retry count on a power line repeating channel is 3.
8.Click Submit.
10 |
Preparing a Power Line Repeating Network for Installation |
2
Installing a Power Line Repeating
Network
This chapter describes how to acquire the coordinates and Neuron IDs of the devices to be attached to a power line repeating network, including how to use a bar code scanner and Pocket PC to acquire the device data. It describes how to transmit the device data to the SmartServer and install the devices, including how to link a Pocket PC to the SmartServer and use the Pocket PC to upload the device data to the SmartServer and install the devices. It explains how to troubleshoot the installation of a power line repeating network.
i.LON SmartServer 2.0 Power Line Repeating Network Management Guide |
11 |

Installation Overview
You can use the SmartServer to install a power line repeating network. The installation process entails acquiring the coordinates of the devices to be installed (or descriptive strings uniquely identifying their locations) and the Neuron IDs of the devices. After collecting the device data, you transfer it to the SmartServer, which installs the network upon receiving the device data.
If you are using a Pocket PC, which is recommended, the installation process is simple and accurate. You start the Street Lighting Helper application on the Pocket PC; acquire the coordinates of the devices with a GPS receiver (built-in to the Pocket PC or external) or enter a description of the device location such as a light pole number; scan the Neuron IDs of the devices with a bar code scanner or manually enter them; and then send the device data to the SmartServer (via the console port using an RS-232 serial connection). Upon receiving the device data from the Pocket PC, the SmartServer automatically discovers the repeating chain for each device, commissions the devices, loads the devices (if necessary), and then re-commissions and sets the devices online.
If you are using the SmartServer Web pages, you create the devices and then manually enter the locations and Neuron IDs of the devices to be installed. The SmartServer then discovers the repeating chain for each device and then commissions the devices. After the devices have been commissioned, you select the devices being installed and then enable smart network management for the selected devices on the Web client. Once smart network management is enabled on the Web client, the SmartServer (connected to the Web client via Ethernet or an external GSM/GPRS modem) completes the installation of the devices. It loads (if necessary), re-commissions, and then starts the devices.
Notes:
•You can only install one SmartServer per power line repeating channel. You cannot install multiple SmartServers on the same power line repeating channel because the SmartServers may conflict with each other.
•You should allot a sufficient amount of time for the network installation to be completed before it needs to be operational. In some cases, the network installation may continue overnight and into the next day before it is completed.
12 |
Installing a Power Line Repeating Network |

Commissioning a Power Line Repeating Network in the Correct
Order
You must either commission the power line repeating network all at one time, or commission it incrementally starting from the devices closest to the SmartServer. This is because the SmartServer must commission the repeating devices closest to it so that they can be used to reach and commission the devices located further down the power line.
If you commission the network all at one time, the SmartServer can automatically discover and commission the devices in order. In this case, the SmartServer first discovers the repeating and target devices with which it has direct communication and commissions them. The SmartServer then uses the commissioned repeating devices to reach and commission the devices located further down the power line, and it continues this process until it has installed the entire network.
If you commission the network incrementally, you must add the devices to the SmartServer in topological order. This means that you must first add the repeating devices closest to the SmartServer. You then add the repeating devices closest to the previously installed set of devices, and repeat this process until the entire network has been installed.
If you are installing the network incrementally and you try to install a device at an intermediate location (a place where the device cannot directly communicate with the SmartServer or reach it though a repeating device), the commissioning process for that device will fail. Furthermore, that repeating device cannot be utilized as a repeating agent to reach the devices further down the power line. After the network has been installed, the SmartServer will attempt to commission the device again, and the commissioning will succeed provided that the SmartServer can communicate with the device.
i.LON SmartServer 2.0 Power Line Repeating Network Management Guide |
13 |

Installing a Three-Phase Power Line Repeating Network
You can install the SmartServer (PL model with external coupling option) on a three-phase system using a passive three-phase coupler. For a three-phase power line repeating network, the cabinet in which the SmartServer is mounted must be placed in a location where the SmartServer is within 100m of a repeating device on each of the three phases.
Attaching an External GSM Modem to the SmartServer
If you are using an external GSM modem with a separate antenna to connect the Web client to the SmartServer, you should install the antenna at least 1m away from the SmartServer and its associated wiring. In addition, you should install the antennas of high-powered modems (1 Watt or greater) outside the housing of any enclosure. For more information on connecting an external GSM modem to the SmartServer, see the i.LON SmartServer 2.0 Hardware Guide for more information.
Installing a Power Line Repeating Network with a Pocket PC
You can install a power line repeating network using a Pocket PC as an installation tool. With the Pocket PC, the network installation entails the following steps, which are each described in the subsequent sections:
1.Start and use the Street Lighting Helper application. In this application, you do the following:
a.Acquire the coordinates of the devices with a GPS receiver or enter a descriptive location.
b.Scan the Neuron IDs of the devices with a bar code scanner or manually enter them.
c.Optionally, create a list of devices and export them to an XML or CSV file or import a device list.
2.Connect the PC Pocket to the SmartServer console port via Bluetooth or a RS-232 serial connection.
3.Start the iLonProxyPocket application on the Pocket PC. This application is used to transmit the device file created with the Street Lighting Helper program to the SmartServer via an RS-232 or Bluetooth serial connection.
4.In the Street Lighting Helper application, send the list of devices to the SmartServer. Upon receiving the list of devices from the Pocket PC, the SmartServer automatically loads, commissions, and sets the devices online.
Using Street Lighting Helper
You can use the Street Lighting Helper application on the Pocket PC to acquire or enter the locations and Neuron IDs of the devices being installed and then send the device data to the SmartServer. If you want to save a set of devices and send them to the SmartServer at a later time, you can save and export a list of devices.
You can also use the Street Lighting Helper application to configure the COM ports used for the barcode scanner and GPS receiver and set the port used by the Street Lighting Helper application for sending SOAP requests to the SmartServer. You can also enable and set options for resolving location and Neuron ID conflicts and set the default names for the devices when they are added to the SmartServer.
Note: You can create your own application for collecting device locations and Neuron IDs and install it on the Pocket PC. See the i.LON SmartServer 2.0 Programmer’s Reference for more information on creating a custom application for the Pocket PC.
14 |
Installing a Power Line Repeating Network |

Acquiring Device Locations and Neuron IDs
You can use the Street Lighting Helper application on the Pocket PC to acquire or enter the locations and Neuron IDs of the devices being installed.
You can use an internal GPS receiver on the Pocket PC or connect an external Bluetooth GPS receiver to the Pocket PC and acquire the geographic locations (coordinates) of the devices. The coordinates of a device enable it to be associated with a specific location. Alternatively, you can enter a description of the device location, such as a light pole number, that can be associated with a device. After you acquire or enter the location of a device, you can scan the Neuron ID of the device with a bar code scanner or manually enter it. You continue to acquire the locations and Neuron IDs of the devices attached to the network one-at-a-time until you want to send the device data to the SmartServer and begin the network installation process.
To acquire the locations and Neuron IDs of the devices being installed, follow these steps:
1.Verify that the GPS receiver (if you are acquiring device coordinates) and barcode scanner are using the correct COM ports on the Pocket PC.
2.If you are acquiring the device coordinates, start the GPS navigation program on the internal GPS of the Pocket PC or on the external GPS connected to the Pocket PC.
3.Start the Street Lighting Helper application. To do this, tap Start, tap Programs, and then tap Street Lighting Helper. The Street Lighting Helper application opens.
4.Acquire or enter the device location.
•If you are acquiring the device coordinates, position the Pocket PC or external GPS receiver at the device location.
•If you are entering the location, tap anywhere in the Location box, tap the keyboard, and then enter a description of the device location, such as light pole number, that can be associated with the device.
5.Acquire or enter the Neuron ID of the device.
•If you are using a bar code scanner, scan the Neuron ID bar code label on the device.
•If you are entering the Neuron ID, tap anywhere in the Neuron ID box, tap the keyboard icon, and then enter the 12-digit hex string on the device.
i.LON SmartServer 2.0 Power Line Repeating Network Management Guide |
15 |

6.If you are entering the Neuron ID, click Add. The device specified in the Neuron ID box is added to the device list.
a.If the device being added has the same location or Neuron ID as an existing device, the Conflict dialog appears. This dialog prompts you to select whether to replace the existing device, add the new device, or cancel the add operation.
b.Tap Replace Existing to add the new device to the list and remove the existing device; tap Duplicate Entry to add the new device to the list and keep the existing device there; or tap Don’t Replace (Cancel) to cancel the add operation and not add the new device to the list.
c.Optionally, you can select the Remember My Decision check box to enable the selected option to be used automatically for future Neuron ID conflicts.
7.Repeat steps 4–6 for each device to be installed.
8.Optionally, you can save the current list of devices to an XML or CSV file and then send the list to the SmartServer at a later time. To do this, tap Program, tap Export, enter the file name in the Name box, select the file type (XML or CSV) from the Type list and then tap Save. The device list is saved.
9.After you have entered all the devices to be installed, connect the Pocket PC to the SmartServer, start the iLonProxyPocket application, activate the Street Lighting Helper application, and then click Send. See the respective sections later in this chapter for more information on completing these steps.
Configuring Street Lighting Helper Connections
You can use the Street Lighting Helper application to configure the COM ports used for the barcode scanner and GPS receiver that are connected to the Pocket PC. In addition, you can set the port used by the Street Lighting Helper application for sending SOAP requests to the SmartServer via iLonProxyPocket application.
To configure the Street Lighting Helper connections, follow these steps:
1.Tap Program and then tap Connections. The Connections dialog opens.
16 |
Installing a Power Line Repeating Network |
 Loading...