

Page 1
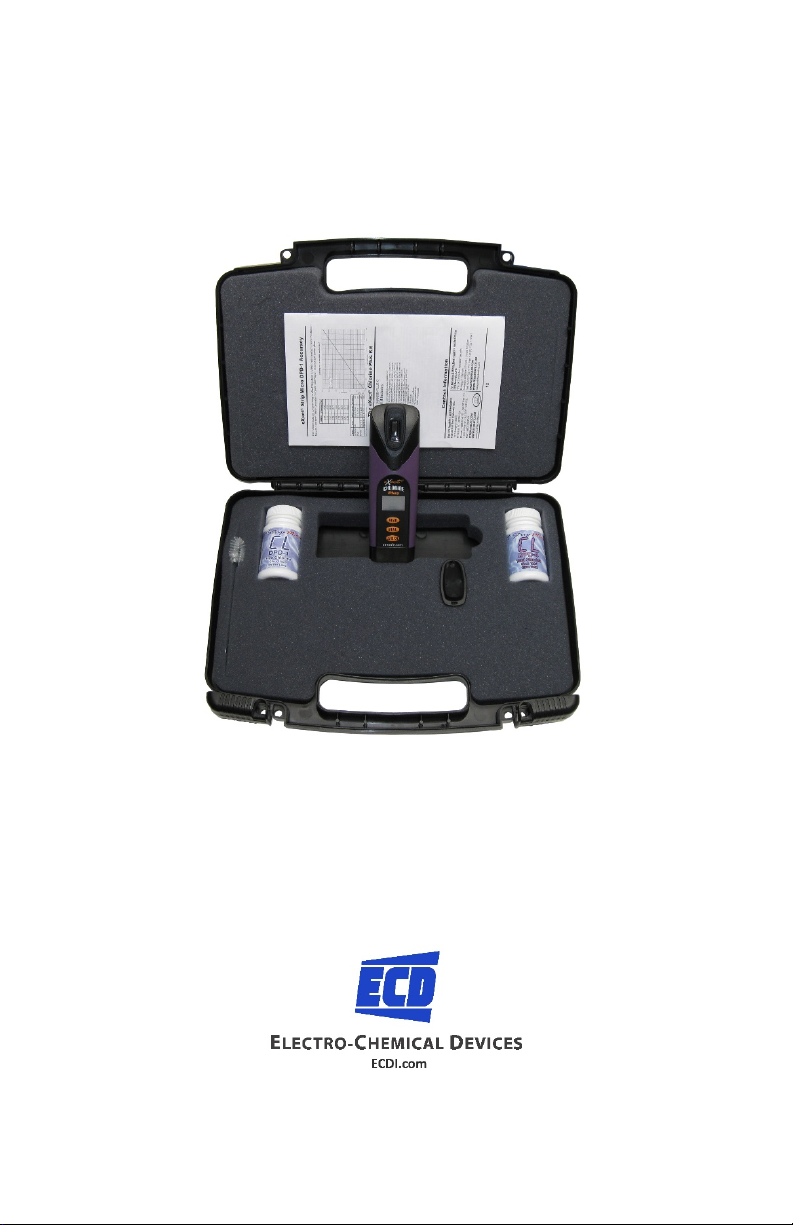
HCA1 Chlorine Plus Photometer System
Instruction Manual
Ideal for the measurement of Free and Total Chlorine in Drinking Water,
Waste Water, Environmental or other clear water samples
Page 2
Parts Order/Reorder Information
Part#
Description
1000040-1
Meter, case and 2 bottles test strips, Free chlorine and total
Chlorine
1000040-2
Meter, case and 2 bottles of test strips, Free chlorine
1000040-3
Meter, case and 2 bottles of test strips, Total chlorine
1000040-4
Meter, case and 2 bottles of test strips, Chlorine Dioxide
1000040-5
Meter, case and 2 bottles of test strips, High Range chlorine
1000040-6
Meter, case and 2 bottles of test strips, Ozone
1000040-7
Meter, case and 2 bottles of test strips, Peracetic Acid
9250500
Plastic case
1000570
HCA1 meter only
9260100
100 Test Strips Free Chlorine, 0.01-11.0 ppm
9260101
100 Test Strips Total Chlorine, 0.01-11.0 ppm
9260102
100 Test Strips Chlorine Dioxide, 0.01-12.0 ppm and 100 Glycine
Sample Conditioning Strips
9260103
100 Test Strips High Range Chlorine, 1-300 ppm
9260104
100 Test Strips Ozone, 0.01-11.0 ppm
9260105
100 Test Strips Peracetic Acid, 0.01-9.0 ppm
Contact Information:
Electro-Chemical Devices
1681 Kettering
Irvine, CA 92614
+1-800-729-1333
www.ECDanalytical.com
support@ecdanalytical.com
2
Page 3

Contents
HCA1 Chlorine Plus Specifications ........................................................ 4
HCA1 Range and Accuracy .................................................................... 4
HCA1 General Information .................................................................... 5
Accuracy and Calibration ...................................................................... 5
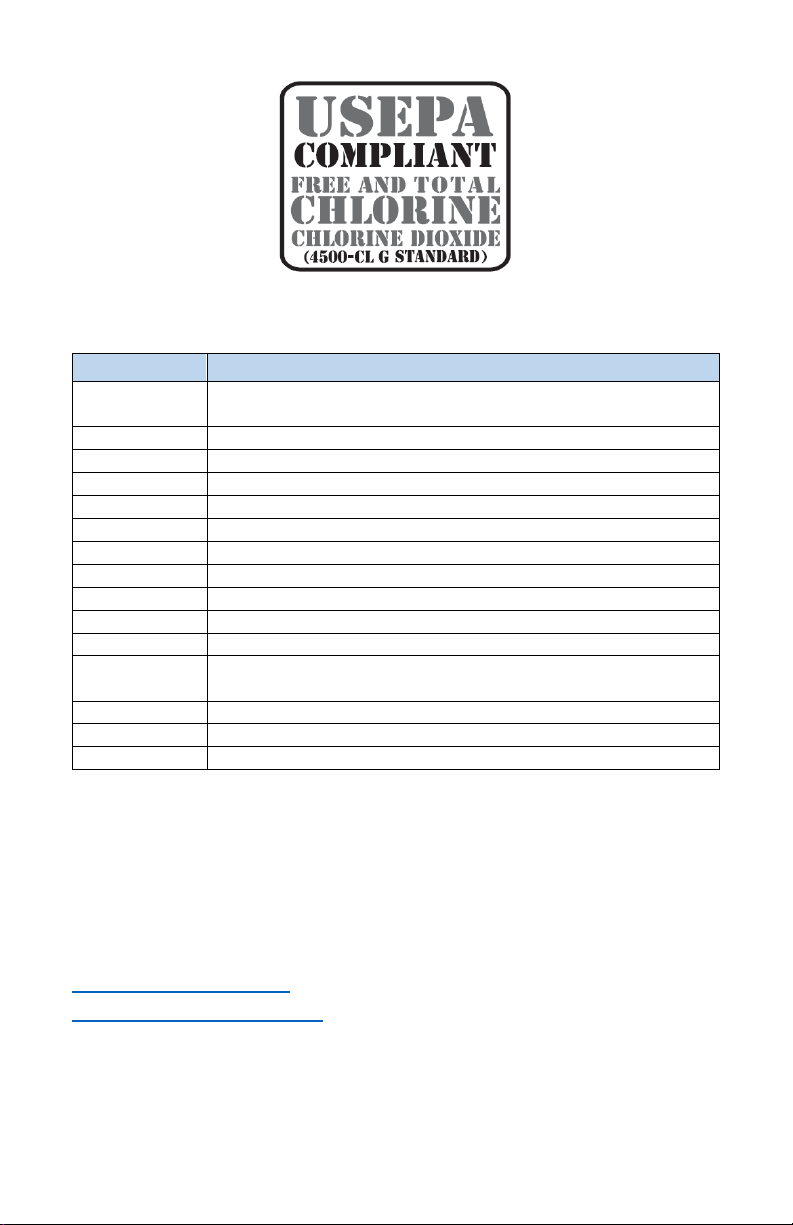
Compliance Verification for Free and Total Chlorine Testing ............... 6
About the Photometric Cell .................................................................. 6
Installing the Batteries .......................................................................... 6
MENU CL1 DPD-1 Free Chlorine Test Procedure .................................. 7
MENU CL1 DPD-4 Total Chlorine Test Procedure ................................. 8
MENU O3 Ozone Test Procedure .......................................................... 8
MENU Cd4 Chlorine Dioxide Test Procedure ........................................ 9
MENU PA5 Peracetic Acid Test Procedure ............................................ 9
MENU HR8 High Range Chlorine Test Procedure ............................... 10
HCA1 Micro CL (DPD-1, -4) Strip Interferences ................................... 11
HCA1 Chlorine Plus Tips for Best Accuracy ......................................... 11
HCA1 Chlorine Plus Meter Messages .................................................. 12
3
Page 4
HCA1 Chlorine Plus Specifications
Menu
Test
Range
Resolution
Accuracy
0.01-3.00 ppm
0.01
3 %
3.01-5.99 ppm
0.01
7%
6.00-11.00 ppm
0.1
14%
0.01-5.99 ppm
0.01
8%
6.0-9.0 ppm
0.1
16%
0.01-5.00 ppm
0.01
8%
5.0-12.0 ppm
0.1
8%
0.01-5.00 ppm
0.01
8%
5.0-9.0 ppm
0.1
9%
Measurement method: Photometric
Light source: Light Emitting Diode (LED)
Wavelength: 525 nm
Transmission Range: 0.0 – 100%
Photometric precision: ± 0.1/0.01 %T
Display: 3 digit LCD with annunciators
Cell path length: 20 mm
Cell Chamber: Molded PET plastic, non-removable
Sample requirement: 4 ml
Temperature range: 0 - 50°C
Power Supply: (4) AAA alkaline batteries, not included
Battery Life: >2000 tests with alkaline batteries
Electromagnetic Compliance: Emitted Interference, EN 61326
Immunity to Interference, EN61326
Waterproof rating: Exceeds IP67
Weight: Instrument, 140 g (5 oz)
Dimensions: W x D x H, 5 x 3.5 x 16.5 cm
2 x 1.4 x 6.375 in
HCA1 Range and Accuracy
CL1
O3 Ozone
Cd4 Chlorine dioxide
PA5 Peracetic Acid
Free Chlorine, DPD-1
Total Chlorine, DPD3
4
Page 5

HCA1 General Information
In order to save power, the meter is designed to turn off after 3 minutes (timed from
the last button pressed).
Should the meter turn off in the middle of a test, the last stored zero in the meter will
remain valid when the meter is turned on again. Also, the test result is stored in
memory for easy retrieval.
The HCA1 Chlorine Plus meter is controlled by three buttons:
1.
ZERO/ON: When first pressed, this button turns the meter on. When the meter is on
and this button is pressed, it zeroes the sample in the cell. Once the meter is zeroed,
this zero value applies to all parameters and is stored and retained even when meter
turns off. However, it is recommended that each new water sample analyzed is zeroed
before testing, to maximize sensitivity and accuracy.
2.
MENU: With each press, the MENU button advances through the tests in the following
sequence: CL1, bR2, O3, Cd4, PA5, HP6, PH7, HR8. Each test menu can store up to 20
results. To retrieve the stored results, go to the desired test using the MENU key.
When the desired test is displayed, press and hold down the MENU key. Continue
holding down the MENU key to scroll the stored results for that test, starting with the
most recent result. The meter will display, from memory, the last 20 readings in
sequence beginning with -20, which is the latest result, followed by -19, which is the
2nd latest result, etc.; and finally -01, which is the oldest result retained. Only the last
20 readings are stored in each menu. This meter is able to store 160 results in memory
(20 in each menu).
3.
READ: When pressed once, this button starts the timer for the parameter being
tested. When pressed a second time the meter exits the timer and immediately
prepares to colorimetrically measure the sample, and simultaneously stores the
measurement in memory.
If the parameter being measured is below or above the detection range, the display
will show LO (Under Range) or HI (Over Range). This feature is menu specific and does
not apply to all parameters.
Accuracy and Calibration
All tests have been calibrated using certified reference standards and standard
analytical spectrophotometric methods. The algorithm in the software of the HCA1
Chlorine Plus System mirrors the AWWA, US EPA, DIN, and ISO reference test methods
for chlorine. Studies show that the HCA1 Chlorine Plus System, with the HCA1 Strip
Micro CL (DPD-1), repeatedly agrees with an EPA Compliant reference method greater
than 99% (R2= 0.9989, 0 - 6.0 ppm - see page 12). The HCA1 Chlorine Plus Advanced
Photometric System has been factory calibrated for your convenience. You can expect
the fixed calibrations in the meter to be valid for the life of the meter because of the
quality, Long-Life LED, the photo cell, and the software as written into the meter. This
is why the meter comes with a 2-Year Warranty. For verification of photometer
5
Page 6

calibration, the Ready Snap® 3 Calibration Verification Standard part #490903) is
Components (Free Chlorine)
AWWA 4500-CI G
HCA1 DPD-1
Anhydrous DPD sulfate
1.5%
1.5%
Anhydrous Na2HPO4
33.4%
33.4%
Anhydrous KH2PO4
64.0%
64.0%
EDTA
1.1%
1.1%
available for purchase.
Compliance Verification for Free and Total Chlorine Testing
This DPD test system is accepted by most health departments because this test is USEPA
(DIN Standard 38 408 G4, ISO 7393/2) accepted for testing requirements for Free and
Total Chlorine. The Chlorine Plus meter uses a wavelength of 525nm; and the
compliance requirement is that the colorimeter wavelength is between 490 and 530nm.
The HCA1 Strip Micro CL (DPD-1) uses the same reagents and proportions, and the
resulting solution pH is maintained between 6.2 and 6.5 as specified by AWWA
(American Water Works Association) method 4500-Cl G. It should be understood that
the USEPA does not "approve" commercial DPD delivery systems such as reagent
powder pillows, tablets, dispensers, or HCA1 Strip DPD delivery devices. The HCA1 Strip
Micro CL (DPD-1) for Free Chlorine, and the HCA1 Strip Micro CL (DPD-3) or the HCA1
Strip Micro CL (DPD-4) for Total Chlorine meet your reportable testing requirements
because the HCA1 Strip Micro CL delivers the same chemicals in identical proportions
(see table below); therefore, the system is compliant. Likewise, AWWA proportions are
followed as required for Total Chlorine measurements using Potassium Iodide.
About the Photometric Cell
The built-in CELL is transparent plastic and, when filled to the top, contains 4ml. The
sturdy CELL design will last for over 20,000 readings. Scratches on the CELL will not
interfere or compromise the accuracy of the readings because of its fixed position. For
best accuracy, rinse cell with clean water immediately after a test is completed. Do not
use solvents, such as acetone, to clean the cell. When the CELL becomes stained or
cloudy from repeated testing, or when the meter does not blank when you press the
ZERO/ON button, the cell needs to be cleaned.
Clean as follows: Fill cell with clean water and move the Cell cleaning brush up-and-
down and back-and-forth along the walls of the cell. Afterwards, rinse the cell and the
meter is ready for use again. Cleaning the cell regularly is especially recommended after
you run a test that is using turbidity or precipitation chemistry for analysis.
Installing the Batteries
1. Unscrew the O-ring sealed battery cover counter-clockwise. Use proper sized
pliers if necessary. Do not disturb the sealing O-ring. Batteries are not
included.
6
Page 7

2. Remove the used batteries and install 4 new AAA batteries following the
diagram for correct polarity (see diagram). We recommend high quality AAA
alkaline batteries be used.
3. Replace the battery cover. Be sure to tighten the cover securely. Do not over
tighten. This is necessary for meter to be waterproof.
4. Dispose of the used batteries in accordance with your local regulations.
5. Press ZERO/ON button to confirm the meter turns on. The meter is now ready
for operation.
6. Meter will not work if battery orientation is incorrect.
7.
MENU CL1 DPD-1 Free Chlorine Test Procedure
1. Remove (1) Micro CL (DPD-1) Strip from the bottle before beginning the test.
Place it in a dry convenient place and recap the test strip bottle.
2. Press the ZERO/ON button to power the meter on; the display will show all
annunciators, then the current MENU selection, followed by the last reading.
3. Press and re-press the MENU button until the display shows the parameter
CL1.
4. Rinse the CELL at least 3 times with the water sample you will be testing -
rinsing minimizes the potential for cross contamination from a previous test.
Finally, fill cell to capacity (4mL) with the water sample.
5. Press the ZERO/ON button. The cursor will move across the display followed
by 0.00 PPM. Sample is ready for testing.
6. Dip the HCA1 Strip Micro CL (DPD-1) into the CELL and immediately press
READ. This starts the 20 SECOND countdown timer. During this time move the
strip in a gentle back and forth motion (approx. 2 strokes/Sec). Remove and
discard the strip after “1” on the display disappears. When testing outdoors
(in sunlight), for best accuracy, use the Mixing Cap/Cell Cover when Zeroing
and Reading the sample.
7. The cursor will move across the display while the meter prepares to measure
the sample. Record result displayed (this result is automatically stored in CL1
Menu).
NOTE: N,N-diethyl-p-phenylenediamine (DPD) also reacts to form a magenta color with
Ozone, Total Chlorine, Permanganate, Iodine, and other oxidizers.
7
Page 8

MENU CL1 DPD-4 Total Chlorine Test Procedure
1. Remove (1) Micro CL (DPD-4) Strip from the bottle before beginning the test.
Place it in a dry convenient place and recap the test strip bottle.
2. Press the ZERO/ON button to power the meter on; the display will show all
annunciators, then the current MENU selection, followed by the last reading.
3. Press and re-press the MENU button until the display shows the parameter
CL1.
4. Rinse the CELL at least 3 times with the water sample you will be testing -
rinsing minimizes the potential for cross contamination from a previous test.
Finally, fill cell to capacity (4mL) with the water sample.
5. Press the ZERO/ON button. The cursor will move across the display followed
by 0.00 PPM. Sample is ready for testing.
6. Dip the HCA1 Strip Micro CL (DPD-4) into the CELL and immediately press
READ. This starts the 20 SECOND countdown timer. During this time move the
strip in a gentle back and forth motion (approx. 2 strokes/Sec). Remove and
discard the strip after “1” on the display disappears. When testing outdoors
(in sunlight), for best accuracy, use the Mixing Cap/Cell Cover when Zeroing
and Reading the sample.
7. The cursor will move across the display while the meter prepares to measure
the sample. Record result displayed (this result is automatically stored in CL1
Menu).
8. Press READ again and the meter will count down and display the next Total
Chlorine result. If this reading matches the previous result, then record this as
Total Chlorine value (this result is stored in CL1). After testing is completed,
rinse cell immediately. Record the Total Chlorine as the highest value the
meter displayed.
MENU O3 Ozone Test Procedure
1. Remove (1) Micro O3 (DPD-4) Strip from the bottle before beginning the test.
Place it in a dry convenient place and recap the test strip bottle.
2. Press the ZERO/ON button to power the meter on; the display will show all
annunciators, then the current MENU selection, followed by the last reading.
3. Press and re-press the MENU button until the display shows the parameter
O3.
4. Rinse the CELL at least 3 times with the water sample you will be testing -
rinsing minimizes the potential for cross contamination from a previous test.
Finally, fill cell to capacity (4mL) with the water sample.
5. Press the ZERO/ON button. The cursor will move across the display followed
by 0.00 PPM. Sample is ready for testing.
6. Dip the HCA1 Micro Strip O3 (DPD-4) into the CELL and immediately press
READ. This starts the 20 SECOND countdown timer. During this time move the
strip in a gentle back and forth motion (approx. 2 strokes/Sec). Remove and
discard the strip after “1” on the display disappears. When testing outdoors
8
Page 9

(in sunlight), for best accuracy, use the Mixing Cap/Cell Cover when Zeroing
and Reading the sample.
7. The cursor will move across the display while the meter prepares to measure
the sample. Record result displayed (this result is automatically stored in O3
After testing is completed, rinse cell immediately.
Menu).
MENU Cd4 Chlorine Dioxide Test Procedure
1. Remove (1) Micro Strip Cd (DPD-1) and (1) Micro Glycine Strip from the
bottles before beginning the test. Place them in a dry convenient place and
recap the test strip bottles.
2. Press the ZERO/ON button to power the meter on; the display will show all
annunciators, then the current MENU selection, followed by the last reading.
3. Press and re-press the MENU button until the display shows the parameter
Cd4.
4. Rinse the CELL at least 3 times with the water sample you will be testing -
rinsing minimizes the potential for cross contamination from a previous test.
Finally, fill cell to capacity (4mL) with the water sample.
5. Dip the Micro Glycine Strip into the CELL and immediately press READ. This
starts the 20 SECOND countdown timer. During this time move the strip in a
gentle back and forth motion (approx. 2 strokes/Sec). Remove and discard the
strip after “1” on the display disappears. The cursor will move across the
display while the meter prepares to measure the sample. Ignore the result.
6. Press the ZERO/ON button. The cursor will move across the display followed
by 0.00 PPM. Sample is ready for testing.
7. Dip the HCA1 Micro Strip Cd (DPD-1) into the CELL and immediately press
READ. This starts the 20 SECOND countdown timer. During this time move the
strip in a gentle back and forth motion (approx. 2 strokes/Sec). Remove and
discard the strip after “1” on the display disappears. When testing outdoors
(in sunlight), for best accuracy, use the Mixing Cap/Cell Cover when Zeroing
and Reading the sample.
8. The cursor will move across the display while the meter prepares to measure
the sample. Record result displayed (this result is automatically stored in Cd4
After testing is completed, rinse cell immediately.
Menu).
MENU PA5 Peracetic Acid Test Procedure
1. Remove (1) Micro PA (DPD-4) Strip from the bottle before beginning the test.
Place it in a dry convenient place and recap the test strip bottle.
2. Press the ZERO/ON button to power the meter on; the display will show all
annunciators, then the current MENU selection, followed by the last reading.
3. Press and re-press the MENU button until the display shows the parameter
PA5.
9
Page 10

4. Rinse the CELL at least 3 times with the water sample you will be testing -
rinsing minimizes the potential for cross contamination from a previous test.
Finally, fill cell to capacity (4mL) with the water sample.
5. Press the ZERO/ON button. The cursor will move across the display followed
by 0.00 PPM. Sample is ready for testing.
6. Dip the HCA1 Micro Strip PA (DPD-4) into the CELL and immediately press
READ. This starts the 20 SECOND countdown timer. During this time move the
strip in a gentle back and forth motion (approx. 2 strokes/Sec). Remove and
discard the strip after “1” on the display disappears. When testing outdoors
(in sunlight), for best accuracy, use the Mixing Cap/Cell Cover when Zeroing
and Reading the sample.
7. The cursor will move across the display while the meter prepares to measure
the sample. Record result displayed (this result is automatically stored in PA5
After testing is completed, rinse cell immediately.
Menu).
MENU HR8 High Range Chlorine Test Procedure
1. Remove (1) Micro HR Strip from the bottle before beginning the test. Place it
in a dry convenient place and recap the test strip bottle.
2. Press the ZERO/ON button to power the meter on; the display will show all
annunciators, then the current MENU selection, followed by the last reading.
3. Press and re-press the MENU button until the display shows the parameter
HR8.
4. Rinse the CELL at least 3 times with the water sample you will be testing -
rinsing minimizes the potential for cross contamination from a previous test.
Finally, fill cell to capacity (4mL) with the water sample.
5. Press the ZERO/ON button. The cursor will move across the display followed
by 0.00 PPM. Sample is ready for testing.
6. Dip the HCA1 Micro Strip HR into the CELL and immediately press READ. This
starts the 20 SECOND countdown timer. During this time move the strip in a
gentle back and forth motion (approx. 2 strokes/Sec). Remove and discard the
strip after “1” on the display disappears. When testing outdoors (in sunlight),
for best accuracy, use the Mixing Cap/Cell Cover when Zeroing and Reading
the sample.
7. The meter will begin counting up for 120 seconds, at the end of which the
cursor will move across the display while the meter prepares to measure the
sample. Record result displayed (this result is automatically stored in HR8
After testing is completed, rinse cell immediately.
Menu).
10
Page 11

HCA1 Micro CL (DPD-1, -4) Strip Interferences
Interfering Substance
Interference Level and treatment
Acidity
If sample has acidity above 150mg/L CaCO3
pH 6.0 to 7.0 with 0.5N sodium hydroxide.
Alkalinity
If sample has alkalinity above 200mg/L CaCO3
pH 6.0 to 7.0 with 0.5N sulfuric acid.
Bromine & Bromamines, Br2
Color similar to free chlorine reaction at all
levels.
Chlorine Dioxide, ClO2
Color similar to free chlorine reaction at all
levels.
Copper, Cu+2
Color development is reduced above 10 ppm
(mg/L).
Iodine, I2
Color similar to free chlorine reaction at all
levels.
Manganese, oxidized (Mn+4, Mn+7)
or Chromium, oxidized (Cr+6)
See AWWA procedure 4500-CL F, 1(d) for
removal of interferences.
Monochloramine (NH2Cl)
Monochloramine interferences are known to
Monochloramine concentration.
Ozone, O3
Color similar to free chlorine reaction at all
levels.
Peroxides
Interference is possible.
pH
Typical pH samples of potable water with a
hydroxide).
test may not develop full color. Neutralize to
test may not develop full color. Neutralize to
(applies to DPD-1 only)
HCA1 Chlorine Plus Tips for Best Accuracy
1. Become familiar with the meter and the different tests by reading the
instructions carefully.
2. The Free Chlorine and Total Chlorine reagents are compliant for meeting
USEPA (4500-Cl G); ISO 7393/2; and German DIN 38408 G4-2 requirements.
3. Observe the dip time (as required for the test) for accurate results.
4. Test immediately after filling the CELL when testing for oxidizers.
5. Be sure the CELL is filled to capacity (4ml).
6. Rinse the CELL with clean water immediately after completing the test. (DPD
will stain the CELL wall if allowed to remain in the CELL)
7. Just before testing, rinse the sample CELL with the sample water several times
to get a representative sample. Store the meter and all test materials out of
direct sunlight and away from chemical storage areas.
occur in free chlorine
DPD methods. This interference is dependent
on temperature and
pH of 6.0 to 9.0 are OK. If outside this range
adjust to pH 6.0 to 7.0 using acid (0.5N
Sulfuric acid) or base (0.5N Sodium
11
Page 12

8. Minimize exposure of meter and test reagents to heat above 32°C (90°F).
Message
Description
Corrective Action
In READ mode: test sample
measurement range (test specific).
Dilute and retest. Dilution Kit
In READ mode: test sample
measurement range (test specific).
Sample value is below
In ZERO mode: sample absorbance
the meter will read “LO”.
Dilute sample, filter sample, or
Excessive stray light detected.
when testing in sunlight.
Place the LIGHT BLOCKING CAP
reading result.
Low battery indication.
Replace the batteries.
9. Dry the outside of the meter when testing is complete or before storage of the
meter.
10. When running a DPD-1 Free Chlorine test AFTER a Total Chlorine DPD-4, or a
HR Free Chlorine test, rinsing is very important to remove residual KI, which
may interfere.
11. Each HCA1 Strip Micro is valid for ONLY one test. Discard strip after single use
in regular refuse that is inaccessible to children and pets.
12. Each bottle of HCA1 Strip Micro contains, at minimum, the quantity of strips
notated on the bottle. Due to the strip slitting process, you may find one or
two extra strips that are noticeably smaller or larger in width than the normal
strips in the bottle. These should be discarded. Using these strips may give
incorrect results.
13. The HCA1 Chlorine Plus Meter is not compatible for use with DPD-1, DPD-3,
and DPD-4 powder pillows, tablets, or liquids available from other
manufacturers. Accurate results can only be guaranteed by using genuine
HCA1 Micro strips or reagents (reorder information below).
14. Lab testing with the Chlorine Plus meter has shown that zeroing and
measuring of the sample normally does not require any cell cover for accurate
results, except in sunlight. To obtain optimal accuracy when testing with the
meter outdoors (sunlight), use the Mixing Cap/Cell Cover when zeroing and
reading the sample.
15. Remove batteries when meter is not used for more than a month (Warranty
Requirement).
HCA1 Chlorine Plus Meter Messages
Hi
Lo
Lo
ER
concentration is above the
concentration is below the
(due to a cloudy or colored sample
or a dirty cell) is too high to zero,
Normally this does not occur, even
available
measurement range.
clean cell. One of these options
should remedy the problem.
over the CELL for zeroing and for
12
 Loading...