


EasyStart R
+
Operating instructions.
Comfort radio remote control
with integrated timer
for parking heaters and more.
22 1000 32 80 06
03.2009
Contents
Introduction
• Please read first...................................................................................................... 3
• Purpose ................................................................................................................. 3
• Safety information ..................................................................................................3
• Statutory regulations ..............................................................................................3
• General information ................................................................................................4
Overview
• Mobile unit of the radio remote control ...................................................................5
• Displays .................................................................................................................6
Operation and Adjustment
• Basic operation and adjustment rules ..................................................................... 7
• Activate mobile unit ................................................................................................ 8
Set weekday, time and operating time ............................................................... 9
Switch on heater .............................................................................................. 10
Switch off heater .............................................................................................. 11
Switch on ventilation ........................................................................................ 12
Switch off ventilation / General information on ”ventilate“ mode ........................ 13
Switch on add-on unit ...................................................................................... 14
Switch off add-on unit / General information on the add-on unit ....................... 15
General information on programming the preset time ....................................... 16
Program preset times .............................................................................. 17 – 18
Delete preset times .......................................................................................... 19
Heizstufe einstellen – bei Wasserheizgeräten ....................................................20
Heizstufe einstellen – bei Wasserheizgeräten ....................................................21
Maintenance
• Battery charge status ........................................................................................... 22
• Replace battery .................................................................................................... 22
What to do if …?
• Displays ....................................................................................................... 23 – 25
Service
• Hotline ................................................................................................................. 26
2
Introduction
Please read rst
Before you start to set and use the
radio remote control, please ensure you
carefully read through these operating
instructions.
These operating instructions contain
important information, which you require
to set and use the radio remote control.
Please store these operating instructions
in a safe place so you can refer to it at a
later date.
Safety information
Important! Danger!
– Only the battery cover of the mobile unit
may be opened.
– The battery and battery cover must be
kept out of reach of children – swallowed small parts.
– Before washing clothing, remove the
mobile unit from pocket.
– Protect the mobile unit from adverse
effects (impacts, extreme temperatures,
moisture, rain, liquids).
– The mobile unit and heater must be
switched off when refuelling.
– Dispose of the battery and mobile part
according to the statutory regulations.
– Improper use and use outside the
specified area of use cancels all liability
and warranty.
– Only use the recommended battery and
original spare parts.
– All information and notes, in particular
the safety information in the heater‘s
technical description must be observed
at all times!
Statutory regulations
Return / disposal of electrical
and electronic equipment in accordance with Art 4 Paragraph 1
Alt Fz-VO (End-of-Life Vehicles
Regulations)
As a part of the vehicle, when the vehicle
is handed into a recognised waste collection body, a recognised returns body or
a recognised dismantling firm, the radio
remote control must be placed in the
vehicle for return in accordance with Art 4
Paragraph 1 Alt Fz-VO.
Purpose
The bidirectional radio remote control
EasyStart R+ (mobile unit in conjunction
with stationary unit) is used for remote
controlled switching on / off and presetting the switching on time, operating time
and mode of the heater and/or add-on
unit installed in the vehicle.
Please note!
Improper use and use outside the specified area of use cancels all liability and
warranty.
3
Introduction
General information
The mobile unit of the radio remote control has a simple control structure.
With only 4 keys, it is possible to set all
functions, change them if necessary and
program the preset times.
The switching pulses of the mobile unit
have an outdoor range (direct visual
contact) of up to 1000 metres. External
interference, local conditions and dense
building development in the surrounding
area shorten the range.
displays can appear which are described
in the chapter “What to do if …?” from
page 23.
If you and the mobile unit are outside the
range you do not have to do without the
heater.
The preset mode is then available as an
alternative.
If a vehicle was disconnected from the
power supply (battery disconnected) and
the power supply is reinstated, the time
appears when the mobile unit is activated.
This must then be adjusted. See description on page 9 “Set weekday, time and
operating time”.
Operation of the mobile unit is described
in detail from page 7.
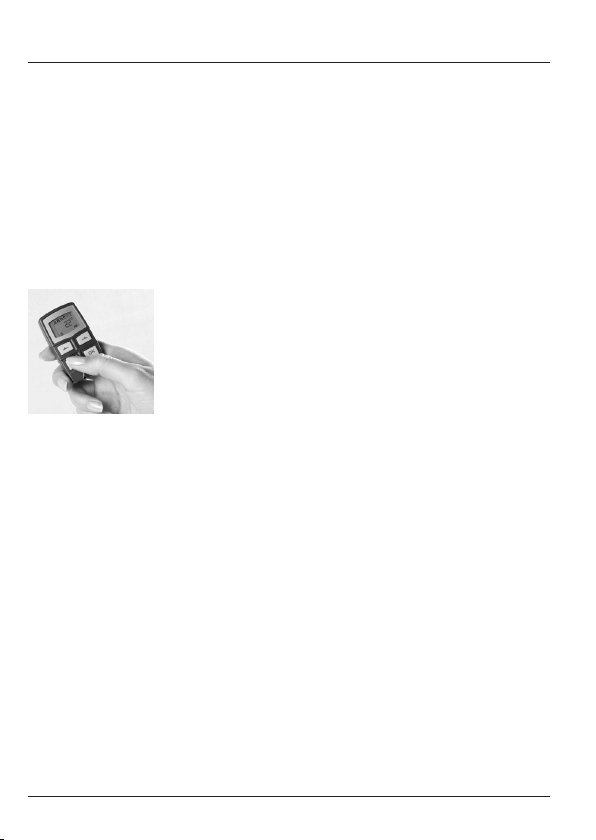
The mobile unit
should always be
pointed towards
the vehicle when
activated or for
data transmission.
Depending on
use and ambient
effects however,
4

Overview
Mobile unit of the radio remote
control
The mobile unit of the radio remote con-
trol can be used to make the necessary
adjustments for operation of the heater
and various units can be switched on
and off.
Please note!
The number of symbols and displays differs depending on the installed heater and
feature options.
Menu bar
Program bar
Display of the active
program memory and cor-
responding weekday
Back control key
Select a function in the
menu bar and adjust
values
Activation key
• Mobile unit – ON / OFF
• Switch over in the
display bar between
– Temperature
– Time
– Operating time
– Temperature setpoint value
• Switch back to the
menu bar
Display bar
Status display
Next control key
Select a function in the
menu bar and adjust
values
OK key
Select the flashing symbol
or confirm inputs
Key fob
5
Overview
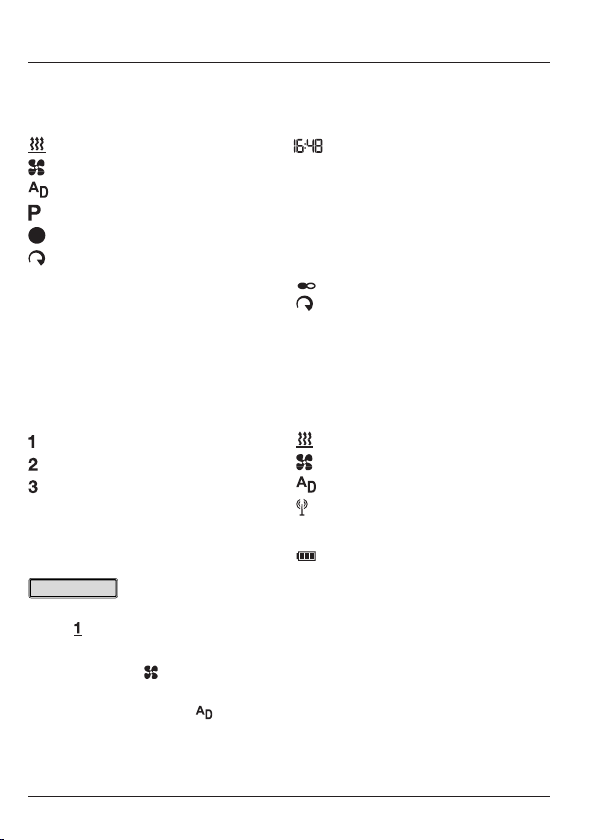
Displays
Menu bar
Display bar
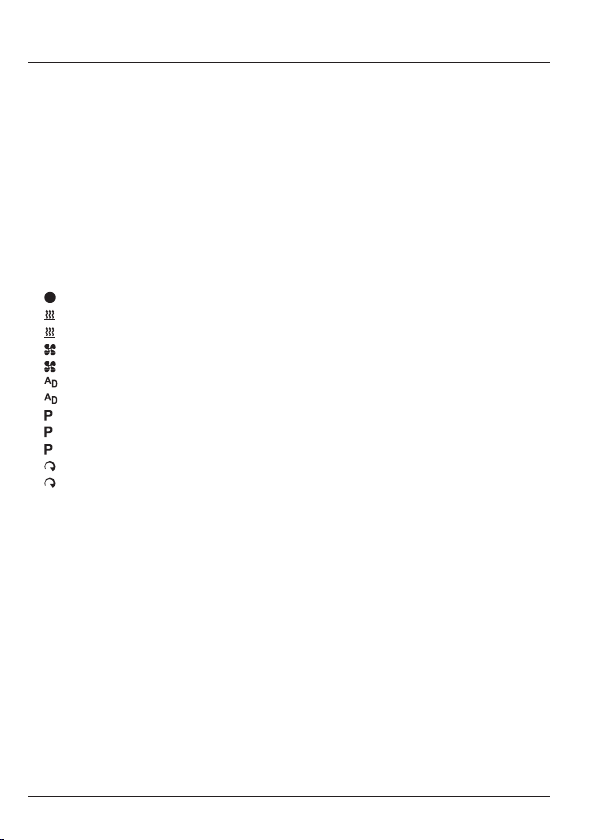
Heater ON / OFF
Ventilation ON / OFF
Add-on unit ON / OFF
Program preset time
Set the time / operating time
Set heating level
Program bar
Preset memory 1
Preset memory 2
Preset memory 3
Mo – So Weekdays
Mo – Su English weekdays
Please note!
• If the program number is underlined,
e. g. this program will be executed
next.
• “Ventilate” mode is not possible in all
heater models.
• The add-on unit function is not
possible with all heater models and
must be activated by the installation
workshop.
Numerical and text displays
AM Time in the morning (English)
PM Time in the afternoon (English)
°C Temperature in degrees Celsius
°F Temperature
in degrees Fahrenheit
Unlimited operating time
Heating level is set
Status display
Heating mode active
Ventilation mode active
Add-on unit active
Communication between
mobile unit and stationary unit
Battery charge status
6
Operation and Adjustment
Basic operation and adjustment rules
Activate mobile unit
Before each operation or setting, a con-
nection must be established between the
mobile unit and the stationary unit.
To do this, press until the menu bar
appears in the display, then release the
key and continue with the operation or
adjustment (see also page 8).
Switch off mobile unit / protect mobile unit against involuntary actuation
If is pressed for a long time the
display disappears, i.e. the mobile unit
is switched off and is therefore also pro-
tected against involuntary actuation.
Flashing symbols
Each flashing symbol
in the menu, program
and display bar can be
changed with or
and confirmed with .
Confirm input
The settings and changes must always
be confirmed with , otherwise they are
lost (exception: operating time).
Terminate/quit settings
You can use to terminate or quit
entering settings in a menu.
Display disappears
If a setting/adjustment or confirmation is
not made within 10 seconds the display
disappears, i.e. the mobile unit returns to
its normal condition.
For renewed input you must press
again.
Set operating time
(one-off or permanent)
The operating time can be individually set
with or .
In preset mode from 10 – 120 minutes.
In immediate operation from 10 – 120
minutes or continuous operation .
See pages 9, 10, 12 and 14 for a descrip-
tion.
Display during data transmission
During data transmission
(display SENd) the LED
display lighting switches
off.
After the data transmission has finished
the LED lighting is switched back on.
7
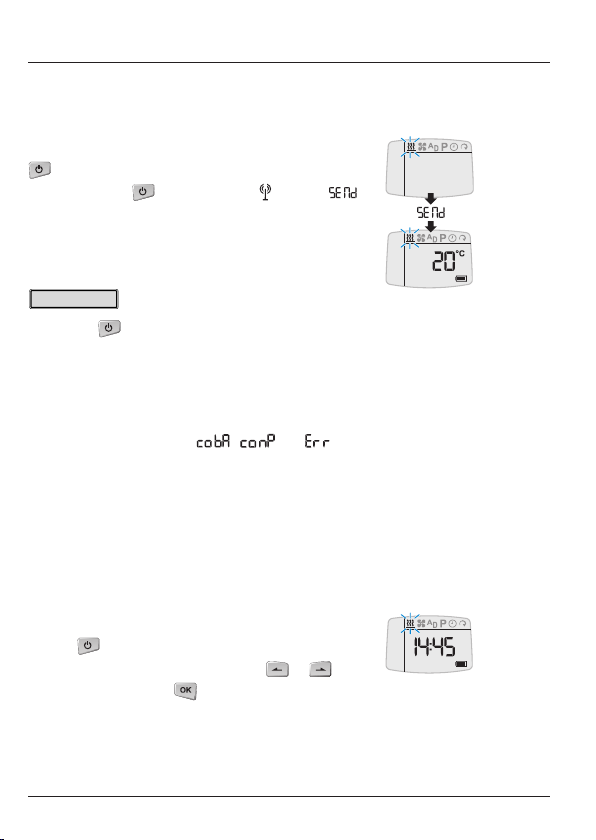
Operation and Adjustment
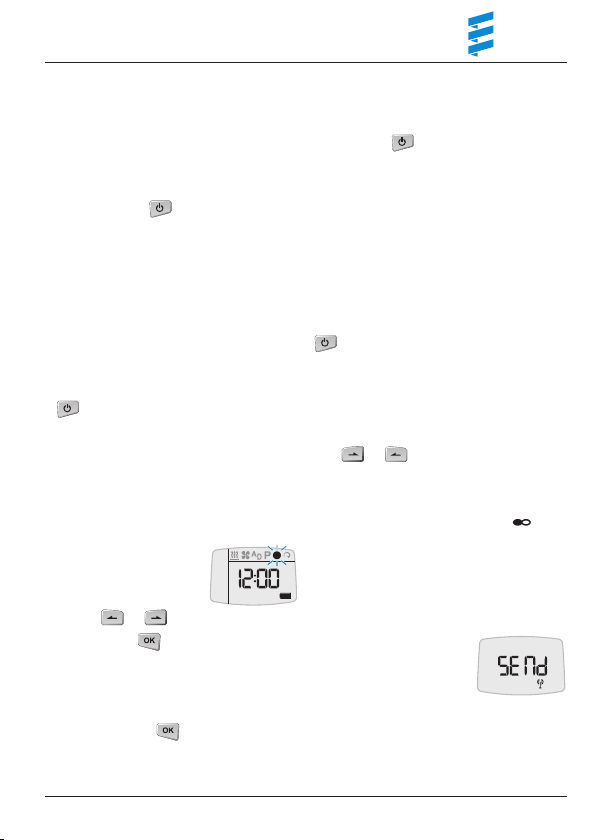
Activate mobile unit
Use the mobile unit to establish the connection with the
stationary unit.
press until the menu bar appears in the display. The
release the key. The symbol and text
appear briefly, then the temperature is displayed.
The radio remote control is activated.
Please note!
• If the key is not released after the menu bar ap-
pears the mobile unit switches itself off.
• During data transmission (display SENd) the display
lighting switches off. After the data transmission has
finished the display lighting is switched back on.
• Possible displays such as , and are de-
scribed in the chapter “What to do if …?” from page 23.
The following actions are possible:
• Switch over from temperature display to time and
back, press.
• Select functions in the menu bar with or ,
confirm selection with .
The further procedure is described in the relevant sec-
tion for the selected function.
Display
8
Operation and Adjustment
Set weekday, time and operating time
Activate mobile unit with (see page 8).
Select symbol with or .
Confirm selection with .
Select weekday with or .
Confirm selection with .
Set hours with or .
Confirm setting with .
Set minutes with or .
Confirm setting with .
Permanently set operating time for immediate operation
with or .
Confirm setting with .
The set, current time is displayed.
The adjustment is completed.
Display
The following action is possible:
• Select functions in the menu bar with or ,
confirm selection with .
The further procedure is described in the relevant sec-
tion for the selected function.
9

Operation and Adjustment
Switch on heater
Activate mobile unit with (see page 8).
Select symbol with or .
Confirm selection with .
Heater is switched on.
The following actions are possible for the operating
time:
• The operating time can be accepted with .
• The operating time can be changed as a one-off
with or and then confirmed with .
Please note!
The operating time last displayed is adopted without
confirmation.
• press to display the temperature, the last saved
operating time remains valid.
The following actions are possible:
• Call up display.
press, the current heating level is displayed
(in air heaters only).
press to display the time.
Display
press to display the operating time.
See above for adjustment.
• Select functions in the menu bar with or ,
confirm selection with .
The further procedure is described in the relevant sec-
tion for the selected function.
10

Operation and Adjustment
Switch off heater
Activate mobile unit with (see page 8).
Select symbol with or .
Confirm selection with .
Heater is switched off.
The following actions are possible:
• Switch over from temperature display to time and
back, press.
• Select functions in the menu bar with or ,
confirm selection with .
The further procedure is described in the relevant sec-
tion for the selected function.
Display
11

Operation and Adjustment
Switch on ventilation – only possible if the symbol is displayed in the
menu bar (See page 13 for general information).
Activate mobile unit with (see page 8).
Display
Select symbol with or .
Confirm selection with .
Ventilation is switched on.
The following actions are possible for the operating
time:
• The operating time can be accepted with .
• The operating time can be changed as a one-off
with or and then confirmed with .
Please note!
The operating time last displayed is adopted without
confirmation.
• press to display the temperature, the last saved
operating time remains valid.
The following actions are possible:
• Call up display.
press to display the time.
press to display the operating time.
See above for adjustment.
• Select functions in the menu bar with or ,
confirm selection with .
The further procedure is described in the relevant sec-
tion for the selected function.
12

Operation and Adjustment
Switch off ventilation – only possible if the symbol is displayed in the
menu bar (See page 13 for general information).
Activate mobile unit with (see page 8).
Display
Select symbol with or .
Confirm selection with .
Ventilation is switched off.
The following actions are possible:
• Switch over from temperature display to time and
back, press.
• Select functions in the menu bar with or ,
confirm selection with .
The further procedure is described in the relevant sec-
tion for the selected function.
General information on the ”ventilate“ mode
If the symbol is not displayed in the
menu bar, “ventilate” mode is not possible
for the heater models used.
In “ventilate” mode of HYDRONIC water
heaters the vehicle blower is directly
controlled by by-passing heating mode
and in AIRTRONIC air heaters the heater’s
blower is directly controlled by by-passing
heating mode.
Please note!
• “Ventilate” mode is not provided for
upgraded independent heaters.
• If you have any further questions regarding “ventilate” mode please contact your
installation workshop or call the service
phone number (see page 26).
13

Operation and Adjustment
Switch on add-on unit – only possible if the symbol is
displayed in the menu bar (See page 15 for general information).
Activate mobile unit with (see page 8).
Display
Select symbol with or .
Confirm selection with .
Add-on unit is switched on.
The following actions are possible for the operating
time:
• The operating time can be accepted with .
• The operating time can be changed as a one-off
with or and then confirmed with .
Please note!
The operating time last displayed is adopted without
confirmation.
• press to display the temperature, the last saved
operating time remains valid.
The following actions are possible:
• Call up display.
press to display the time.
press to display the operating time.
See above for adjustment.
• Select functions in the menu bar with or ,
confirm selection with .
The further procedure is described in the relevant sec-
tion for the selected function.
14

Operation and Adjustment
Switch off add-on unit – only possible if the symbol is
displayed in the menu bar.
Activate mobile unit with (see page 8).
Display
Select symbol with or .
Confirm selection with .
Add-on unit is switched off.
The following actions are possible:
• Switch over from temperature display to time and
back, press.
• Select functions in the menu bar with or ,
confirm selection with .
The further procedure is described in the relevant sec-
tion for the selected function.
General information on the add-on unit
An add-on unit can be e. g. a second
heater or parking air conditioning.
It is also possible to combine a heater
with a blower. The blower is used to
circulate air within the inside of the
vehicle.
The heaters or blower can be operated
simultaneously or independently of each
other.
The “add-on unit” function must be activated by the workshop.
15

Operation and Adjustment
General information on programming the preset time
The mobile unit of the radio remote
control can be used to program 3 preset
times.
The 3 preset times can either all be
spread over one weekday or be spread
between different weekdays.
In water heaters and a temperature sensor connected to the stationary unit the
heater start is automatically calculated
depending on the measured ambient
temperature and the selected heating
level (ECO or HIGH).
The operating time can be between 5 and
60 minutes before the programmed departure time, whereby operation is always
stopped 5 minutes after the programmed
departure time. Therefore the minimum
possible operating time is 10 minutes and
the max possible operating time is 65
minutes.
The operating time set in the “set time”
menu (page 8) is ineffective in this case.
In all other configurations the start takes
place according to the preset operating
time.
Please note!
• The preset times are always departure
times, even if runtime calculation is
deactivated.
• You cannot program more than 3 preset
times.
• The maximum operating time of 65 minutes for automatic runtime calculation is
a factory setting. If necessary, this can
be reduced by the installation workshop
to a minimum of 15 minutes.
Identical preset times
If several identical preset times are
programmed for a specific weekday in
programs 1, 2 or 3 the last entered preset
time is valid. When the mobile unit of
the radio remote control is activated the
saved identical preset times are deleted.
If identical preset times are programmed
for different weekdays there is not conflict.
Overlapping of preset times
Example:
You have set “heat” mode for your
departure time on a weekday to 13 hrs.
At the same time “ventilate” mode has
been programmed for 12.45 hrs on the
same day and with an operating time of
15 minutes. What happens?
The radio remote control calculates
the heater start for “heat” mode which,
depending on the ambient temperature
measured, can lie between 5 and 60
minutes before the programmed departure time. If the calculated heater start is
after 12.45 hrs, the vehicle is ventilated
between 12.30 hrs and 12.45 hrs and is
then heated.
If the calculated heater start is before
12.45 hrs, the vehicle is heated until
12.30 hrs, then the heater is stopped and
the heater switches to “ventilate” mode.
After the set operating time for “ventilate”
mode has expired the heater switches off.
16

Operation and Adjustment
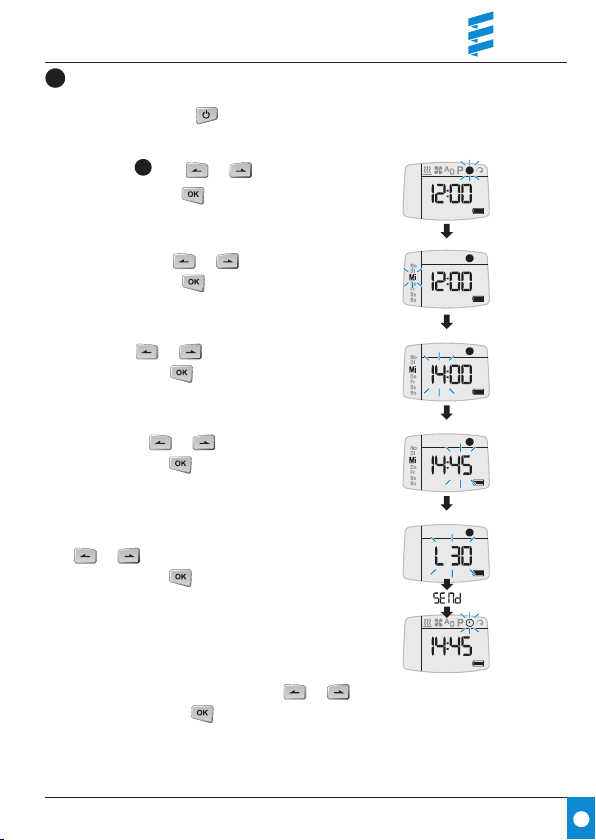
Program preset times
Activate mobile unit with (see page 8).
Select symbol with or .
Confirm selection with .
Select preset memory 1, 2 or 3 with or and
confirm with .
Select weekday Mo – Su with or and confirm
with .
Set hours with or and confirm with .
Set minutes with or and confirm with .
Select the required function , or with or
and confirm with .
Display
Continued on page 18
17

Operation and Adjustment
Program preset times
When selecting (heater with deactivated runtime
calculation), or the operating time is displayed and
can be adopted with or with or adjusted
and confirmed with .
The adjustment is completed.
Please note!
The assigned preset memory locations
appear in the display. The preset memory
activated as next is underlined in the
display and the corresponding weekday is
also displayed.
The following actions are possible:
• Switch over from temperature display to time and
back, press.
• Select functions in the menu bar with or ,
confirm selection with .
The further procedure is described in the relevant sec-
tion for the selected function.
The same procedure is required to program preset times in the preset memory
2 and 3.
Display
18

Operation and Adjustment
Delete preset times
To display the preset times, the steps are the same as
for adjusting/setting the preset time, until the current
function flashes in the status bar.
or press until appears in the display.
Confirm with .
The preset time is deleted.
The following actions are possible:
• Switch over from temperature display to time and
back, press.
• Select functions in the menu bar with or ,
confirm selection with .
The further procedure is described in the relevant sec-
tion for the selected function.
Display
19

Operation and Adjustment
Set heating level – of water heaters
In water heaters you can choose between
the ECO heating level (normal heating)
and HIGH (comfort heating).
The selected heating level is required
to calculate the ”heat“ operating time
depending on the measured ambient
temperature.
Please note!
The heating levels ECO and HIGH are
only effective in conjunction with a programmed preset time.
Activate mobile unit with (see page 8).
Select symbol with or .
Confirm selection with .
Select ECO or HIGH heating level with or and
confirm with .
The selected heating level (e.g. HIGH) is set.
20
Display

Operation and Adjustment
Set heating level – of air heaters
Air heaters can be individually set to a heating level of 8
to 36 in immediate and preset mode.
Please note!
Heating levels 8 to 36 only approximately correspond to
a temperature reading and therefore may differ from the
actual temperature in the vehicle.
Activate mobile unit with (see page 8).
Display
Select symbol with or .
Confirm selection with .
Change the heating level with or and confirm
with .
The new heating level is set.
Function pushbutton
The following activities can be executed with the button installed in the
vehicle:
• Start heater mode, heating duration 30 minutes (LED on)
• Switch off all active units (LED off)
21

Maintenance
Charged status of the
mobile unit‘s battery
(display in mobile unit)
Battery ok
Battery adequate
Battery weak
(replace soon)
Emergency mode,
change battery immediately
If the status display of the mobile unit
indicates a weak battery, purchase a
CR 2430 type round cell battery made by
Varta, Sony or Renata, as recommended
by JE-Eberspächer.
Replace battery
• Use a 1 Euro coin to turn
the bayonet fastening of the
battery cover in the direction
of the arrow.
• Remove the battery cover.
• Check the cover seal for damage.
• Remove dead battery.
• Insert new battery. The battery has been
correctly inserted if the plus pole symbol
and the type designation of the battery
can be read.
• Put on the battery cover. The dripshaped marking must point
to the web between the
recesses.
• Use a coin to turn the
bayonet fastening of the
battery cover in a clockwise direction
until the slit reaches the vertical position.
• Activate mobile unit (see page 8).
22

What to do if …?
Displays
Description
Poor communication between the mobile unit and stationary unit.
Data is received. However, it is faulty.
Possible causes Remedy
Distance between mobile unit and vehicle
at the edge of the range .
Dense buildings between mobile unit and
vehicle?
Several Easy Start radio remote controls
are operated simultaneously.
Description
Communication between the mobile unit and stationary unit is not possible.
Possible causes Remedy
Distance between mobile unit and vehicle
too large.
Several Easy Start radio remote controls
are operated simultaneously.
Mobile unit has not been taught. Teach mobile unit as described in the
Change position relative to vehicle e. g.
hold the mobile unit higher or move it to
the side. Reduce distance from vehicle.
Reduce distance. If possible, reinstate
visual contact with the vehicle.
Reactivate mobile unit after a pause .
Reduce distance.
Reactivate mobile unit after a pause .
installation instruction.
Please note!
If the messages and are displayed, no control / operation possible.
A running heater can only be switched off using the button in the vehicle.
23

What to do if …?
Displays
Description Remedy
A fault occurs in the heater during operation (e. g. fuel shortage or interruption in
the diagnostics cable).
Description Remedy
Stationary unit is in learn mode. Teach mobile unit as described in the
Description Remedy
The mobile unit‘s battery is very weak.
Data transmission is not possible.
See heater‘s installation instructions for
troubleshooting advice.
installation instruction.
Replace battery (see page 22).
Description
The “Set timer” display appears after the mobile unit is activated.
Possible cause Remedy
Stationary part has been disconnected from the vehicle‘s battery. All
programmed preset times have been
deleted.
24
Set time (see page 9).

What to do if …?
Displays
The mobile unit cannot be activated
Possible causes Remedy
Battery dead. Replace battery (see page 22).
No battery inserted. Insert battery (see page 22).
Battery inserted wrong way around. Insert battery correctly (see page 22).
LED display button flashing
Description Remedy
Stationary unit is in learn mode. The display switches itself off after 30
Please note!
If you are unable to remedy the fault
or error, please contact an authorised
JE workshop or call the service phone
number given on the next page.
seconds or the teach the mobile unit as
described in the installation instruction.
25

Service
Hotline
If you have any technical questions, a
problem with your radio remote control
or the heater, dial the following service
phone number:
Telephone hotline
00 49 (0)800 / 12 34 300
Fax hotline
00 49 (0)1805 / 26 26 24
Outside of Germany, please contact the
respective national Eberspächer service
agent.
26


www.eberspaecher.com
J. Eberspächer
GmbH & Co. KG
Eberspächerstraße 24
D-73730 Esslingen
Telefon 0711 939-00
Telefax 0711 939-0643
info@eberspaecher.com
We reserve the right to make changes Printed in Germany © J. Eberspächer GmbH & Co. KG
 Loading...