

Page 1
User Manual
Setup and
Adjustment
www.easyrig.com
Page 2
2
Made in Sweden
Page 3

3
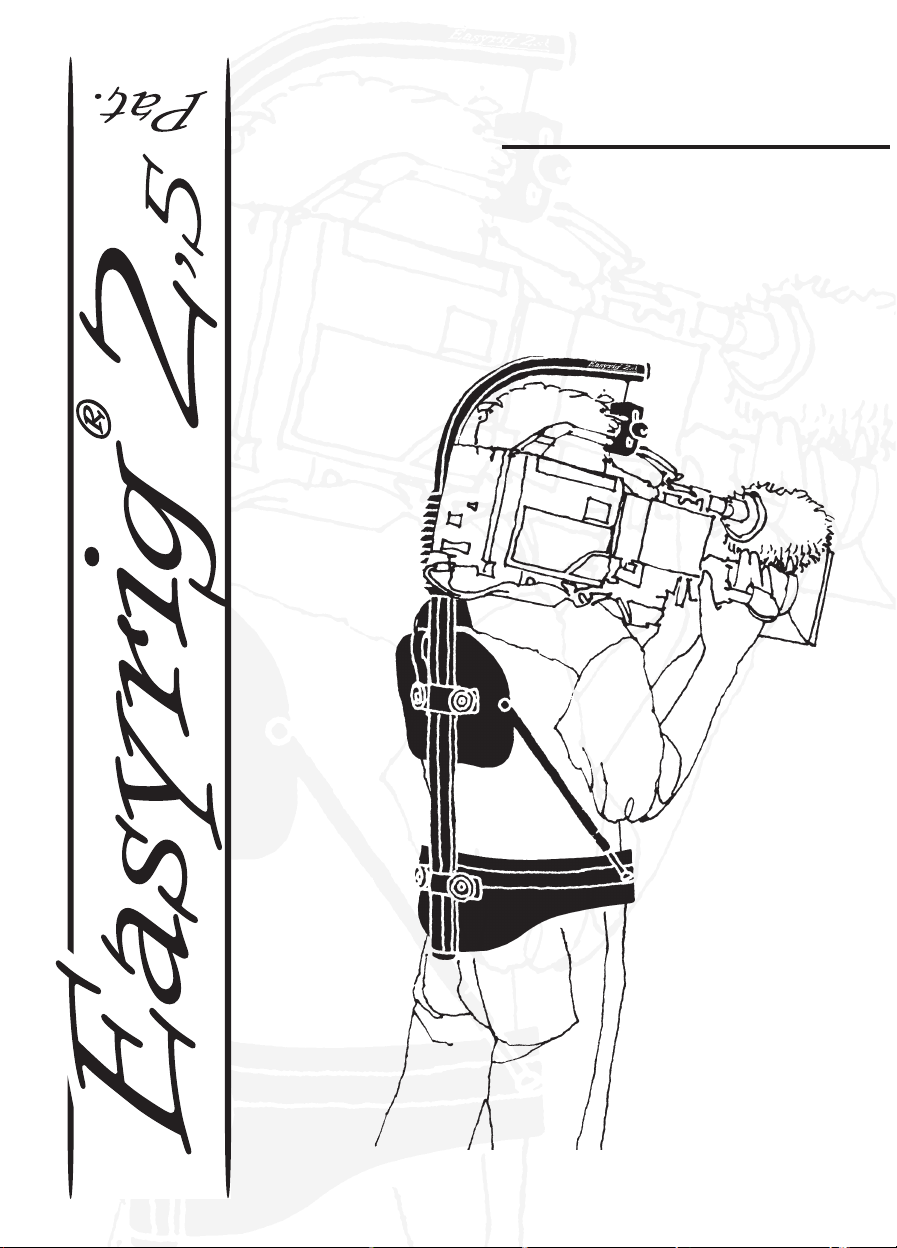
Congratulations on your new Easyrig!
Easyrig is patented and specially designed by a photographer
for professional photographers. It can be used with both
video and lm cameras. EASYRIG is manufactured in Sweden
and has been ergonomically tested with optimal results.
EASYRIG gives you the advantages of both a handheld camera
and tripod mounted camera; i.e. with the speed and mobility
of the handheld camera you can still achieve steady pictures.
EASYRIG relieves your back and shoulders. The load is redis-
tributed to the hips so that you can concentrate on the actual
lming. You won’t suffer from a strained back or shoulders as
you would from normal handheld shooting and you will be able
to work for longer periods of time.
After you are nished with your Easyrig, just fold it and put
it in the specially designed Petrol bag that your Easyrig is
delivered in.
Easyrig will be your best tool when you do sport events, documentaries, news, yes, any occasion where handheld camera is
required.
To get most out of your Easyrig, please read the user manual
carefully.
Have fun!
Johan Hellsten
Page 4

4
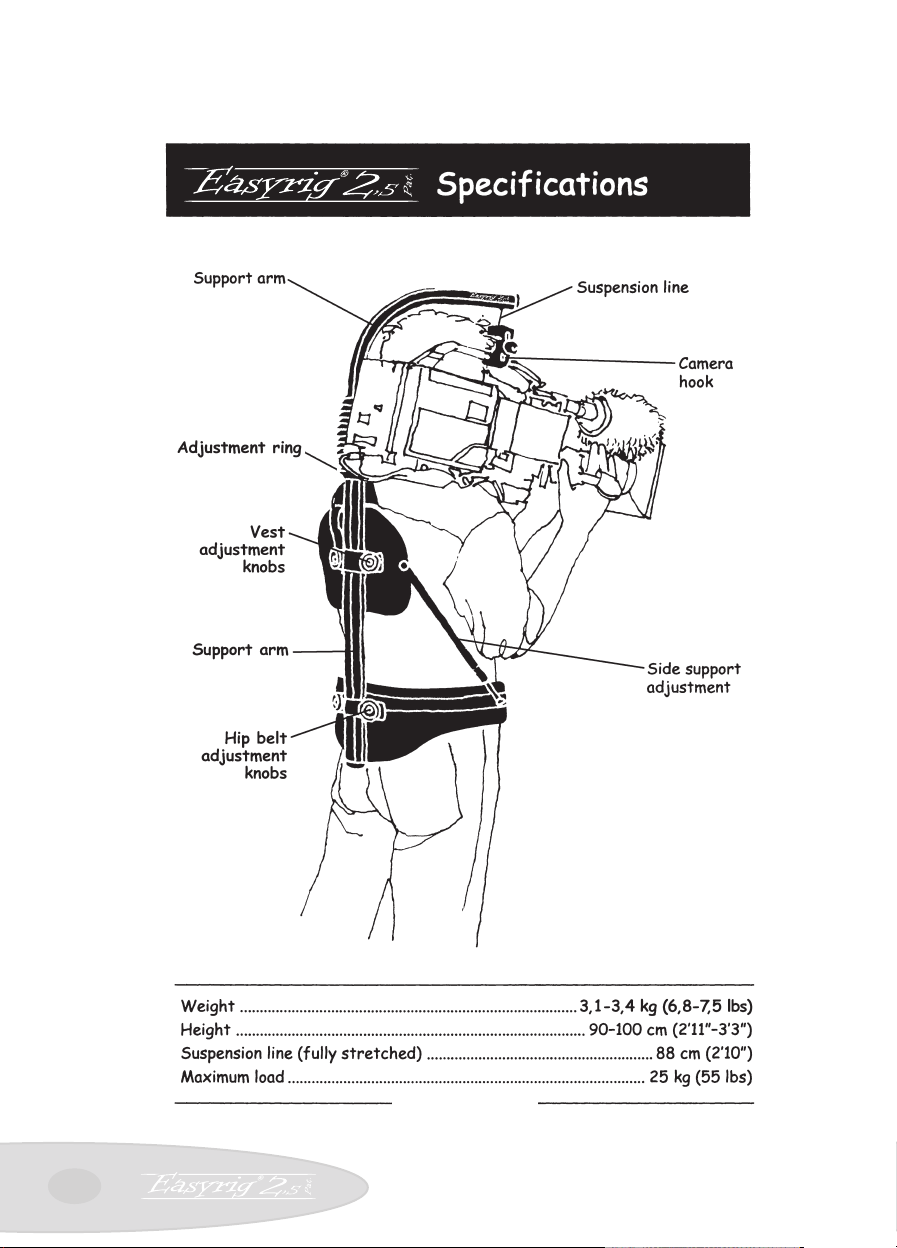
Using the Easyrig
It is as simple to put the Easyrig on as it is with a backpack.
Just don’t forget to adjust it so it feels comfortable.
The weight of the camera should primarily be on your hips. It
is important that the support bar is vertical – if it is lopsided,
the load will be unevenly distributed on the hips and the camera might hit the bar.
The hip belt should be tightened so that the rig doesn’t slide
down or around the hips. The shoulder strap is mainly for balancing the Easyrig, and prevent it from tilting.
If the support arm is too high or too low, rst try adjusting
the support bar in relation to the hip belt/vest, or change position of your hips. It is also possile to adjust the tube inside
the support bar, but that might require adjusting the tightness of the suspension line. Note that there must not be more
than 10 cm (4 in) between the lower end of the tube and the
adjustment ring.
When attaching the hook onto the camera, you might nd it
easier to put the camera on a table or a bench rst. Try and
nd the right balance before you secure the hook.
Don’t forget to fasten the safety line.
Hip shots
Easyrig gives you the freedom to shoot from various levels.
You simply move the camera down from your shoulder as you
would in an ordinary handheld situation – only now you don’t
feel more than a fraction of the camera’s weight.
When shooting at hip level, lean backwards when pushing the
camera forward, thus minimising the load on your back.
The length of the suspension line makes it possible to move
the camera as far as your arms reach.
Page 5

5
Fig. 1
Undo the buckle and unfold
the support arm.
Fig. 2
Let the tube slide into the
back support bar and pull
over the bellows.
Fig. 2
Put on your Easyrig.
Adjust the hip belt until you
nd the rig comfortable.
Pull the belt tightly.
Page 6

6
Fig. 4
Attach your camera to the
Easyrig. Use your middle
nger to open the hook.
Secure the hook by turning
the knob clockwise.
Fasten the safety line.
Fig. 5
Leave a gap of approx. 2 cm (1 inch)
between the camera and the
support arm.
Fig. 6
If adjustment is needed, loosen the
knobs and move the hipbelt and/or
the vest to nd the right position.
Page 7

7
Fig. 7
By adjusting the side supports
you will move the weight on
your hips.
Fig. 8
Adjust the chest strap
if necessary, but don’t pull
it too tight.
Your Easyrig is now ready
to be used.
Different powered shock absorbers
Page 8

8
Safety precautions
Always hold the camera when working with the Easyrig. There
is a safety strap which you attach to the camera and hook
onto the vest.
Never undo the hip belt buckle when the camera is attached
to the Easyrig! The weight of the camera will pull the top of
the Easyrig down, and you might loose control of the camera.
If you fall into water when wearing the Easyrig, it’s important
to get the equipment off quickly. Just release the hip belt
and shoulder strap buckles and slide the shoulder strap over
your arm.
Be especially careful when lming in rough terrain. Make sure
you wear comfortable shoes and clothing.
If you work with the Easyrig under special conditions, i.e. in
a car, boat, plane or helicopter, make sure to use a safety belt
or harness.
Page 9

9
Some practical advice
Try to keep the camera as close to your body as possible, to
avoid unnecessary strain on your back.
When lming upwards, you might nd it easier if you have the
camera tucked under your arm.
When lming at hip or knee level, you can remove the eye
piece in order to see better. You could also attach an LCD
screen, to get better control of the shot.
When shooting at hip level during longer periods of time, rest
the camera on the hip belt to increase stability.
Avoid getting your clothing creased under the hip belt since it
may cause discomfort.
Use the Easyrig for transporting your camera to and from the
lming site.
When folding your Easyrig, always make sure to put the
upper part of the support arm inside the hip belt and fasten
the buckle at the back of the hip belt. This will prevent the
suspension line from wearing.
When lming with a cable, fasten it to the Easyrig in order to
maintain stability.
If you don’t use your Easyrig for more than a couple of
months, make sure to store it standing up. Otherwise the
shock absorber gasket might dry out.
”Easyrig is an effective ergonomic relief aid for back and shoulders,
intended for TV cameramen working with hand held cameras.
A considerable load relief has been ascertained. The aid provides a
good basis for improvement of back health. The results show that this
aid can give longterm benets in the form of improved back health,
work effectiveness and picture quality.”
Elisabeth Schell, Authorised ergonomist and registered physio
therapist, Swedish Television.
Page 10

10
Australia
Lemac
Sydney:
1416 Punch Street
Artarmon NSW 2064
Phone: +61 2 9438 4488
Fax: +61 2 9438 3399
email : lemac@lemac.com.au
web: www.lemac.com.au
Melbourne:
2 Grifths Street
Richmond VIC 3121
Phone: +61 3 9429 8588
Easyrig agents
Fax: +61 3 9428 3336
Brisbane:
5 Exhibition Street
Bowen Hills QLD 4006
Phone: +61 7 3252 9777
Fax: +61 7 3252 9877
Austria
Avisys Electronics GmbH
Felbigergasse 38, 1140 Wien
Phone: +43 1 41 960 10
Fax.: +43 1 41 960 07
email: ofce@avisys.co.at
web: www.avisys.co.at
Bangladesh
Film Trust
81 North South Road, 1st. Floor
Bijoynagar
Dhaka 1000
Tel: +880 2 831 6514,
935 1939
Fax: +880 2 831 9388
Email: lmtrust@agni.com
Belgium
ES Video Facilities
Technologielaan 3
3001 Heverlee
Phone: +32 16 40 40 20
Fax: +32 16 40 51 60
email: info@esvideo.be
web: www.esvideo.be
Canada
Precision Camera Inc.
181 Carlaw Avenue
Toronto, Ontario, M4M 2SI
Phone: +1 416 461 3411
Fax: +1 416 461 4869
web: www.pcicanada.com
Support Communication Inc.
4949 E. Metropolitain
Montreal Quebec, H1R 1Z6
Phone/fax: +91 514 498 3335
Pierre Pelletier
email: SupportCommunication
@videotron.ca
China
Videotech Consultants
Company
13B, Fuk Shing Mansion
89 Ma Tau Wai Road
Hung Hom, Kln, Hong Kong
Phone: +852 2764 9763
Fax: +852 2362 5996
Denmark
Zimmermann Film & Videoteknik
H.C. Ørstedsvej 11 B
1879 Frederiksberg C
Phone: +45 33 25 85 25
Fax: +45 33 25 85 23
email: mail@zimmermann.dk
web: www.zimmermann.dk
Dubai
United Broadcast & Media
Showroom #1,
Rashid Al Majid Building,
Airport Road, Dubai, U.A.E.
Phone: +971 4 2827171
Fax: +971 4 2827373
email: sales@ubms.biz
web: www.ubms.biz
Egypt
Egypt Plus
12 Soliman Abaza street
Mohandseen, Giza 12311
Phone: +20 2 761 3484,
337 3914, 338 0529
Fax: +20 2 337 3914
email: mseif@egyptplus.net
Finland
Qualitron Oy Ab
Vitikka 4, 02630 Espoo
Phone: +358 (0)9 2510 1622
Fax: +358 (0)9 2510 1690
Mobile: +358 (0)50 4653 561
email: pekko.larjo@qualitron.
web: www.qualitron.
Pro Av Saarikko Oy
Otakuja 2, 02150 Espoo
Phone: +358 9 5259 2113
Fax: +358 9 5259 2123
email: ilkka@proav.
web: www.proav.
France
Emit
2, Bd de la Libération
Urbaparc 1 Bat A3
93284 Saint Denis
Phone :+33 1 48 13 90 10
Fax :+33 1 48 13 90 13
email: emit@wanadoo.fr
Germany
Filmtechnik
A. Chrosziel GmbH
Klausnerring 6
85551 Heimstetten
Phone: +49 89 901 09 10
Fax: +49 89 447 08 61
email: info@chrosziel.de
web: www.chrosziel.com
Great Britain
Production Gear Ltd.
Millennium Studios
Elstree Way,
Borehamwood
Herts WD6 1SF
Phone: +44 (0)20 8236 1212
Fax: +44 (0)20 8236 1414
info@productiongear.co.uk
web: www.productiongear.co.uk
Greece
M C Manios
Arahneou 14
115 22 Athens
Phone: +30 210 645 29 95
Fax: +30 210 645 29 97
email: info@mcmanios.gr
web: www.mcmanios.gr
Holland
Vocas Sales & Services
Larensweg 121
1221 CL Hilversum
Phone +31 356233 707
Fax: +31 356233 997
email: j.verlinden@vocas.nl
web: www.vocas.nl
Foc b.v.
Kruyderlaan 35
3431 BM Nieuwegein
Phone: +31 30 6044422
Fax: +31 30 6047944
email: joop.verlinden@foc.nl
web: www.foc.nl
Israel
Band Pro Film Video Inc.
3 Hasolelim street
TelAviv 678970
Phone: +972 3 562 1631
Fax: +972 3 562 1632
email: bandpro@netvision.net.il
web: www.petrolbags.com
Italy
Cartoni S.p.A.
Via Giuseppe Mirri 13
00159 Rome
Phone: +39 06 438 2002
Fax: +39 06 435 88293
email: edp@cartoni.com
web: www.cartoni.com
Japan
Suzuki Enterprises Inc.
Daiichi Nishiya bld 2f
173 Hatagaya, ShibuyaKu
Tokyo 1510072
Phone: +81 3 5350 8235
Fax: +81 3 5350 8237
email: sei@sei8404.com
web: www.sei8404.com
Korea
Human Network Broadcast
RM501 SungWooNetVill
919 Mok dong YangcheonGu
Seoul, Korea 158051
Phone: +82 2 2168 2040
Fax: +82 2 2062 2014
email: hnb@ihnb.co.kr
web: www.ihnb.co.kr
Digital Sunwoo Co. ltd
10F, KCE B/D, #1660,
Hangangro 3Ka, YongsanKu, Seoul
Phone: +82 2 705 1245
Fax: +82 2 705 1244
sunwoo@digitalsunwoo.co.kr
web: www.digitalsunwoo.co.kr
Norway
Bright AS
Brenneriveien 11, 0182 Oslo
Phone: +47 22 98 22 22
Fax: +47 22 98 22 23
email: post@brighttech.no
web: www.brighttech.no
Palestina
Star 2000
P.O. Box 2130, Ramallah
Phone: +970 52 88 65 18
Fax: +970 52 98 40 37
email: star2000@pol.com
Poland
Studiotech Poland Sp. z.o.o.
ul.Taneczna 18 A
Pl 02829 Warszawa
Phone: +48 22 644 1025
Fax: +48 22 648 0171
asekrecka@studiotech.com.pl
web: www.studiotech.com.pl
Russian Federation
Sintex
Kasatkina st. 11, build 3, Moscow
Phone: +7 495 258 5979
Fax: +7 495 258 5979
email: mail@sintex.ru
web: www.sintex.ru
CineLine
65 bld.5 Leningradskoe shosse
124445, Moscow
Phone/fax: +7 095 4584381
email: cineline@inbox.ru
Slovenia
MOPS d.o.o.
Papirnica 26, 4220 Skofja Loka
Phone/Fax: +386 4 512 18 39
Mobile: +386 (0)41 70 63 10
email: mops@siol.net
Spain
Ceproma, S.A.
Arturo Soria, 106, Chalet 3
28027 Madrid
Phone: +34 91 408 60 12
Fax: +34 91 408 28 54
email: ceproma@teleline.es
Taiwan
View Point Image Assemblings
6f No. 153 ShueiYuan Rd.
Taipei
Phone: +886 2 2303 7899
Fax: +886 2 2301 2028
email: yltgrove@tp.silkera.net
Turkey
Sigma
Guniz Sokak 23 / 8
Kavaklidere 06700, Ankara
Phone: +90 312 4662169
Fax : +90 312 4662175
email : sigmases@sigmases.com
web: www.sigmases.com
USA
16x9inc.
P.O. Box 10142
Burbank, CA 91505
Phone: +1 818 972 2839
Fax: +1 818 972 2832
Toll Free: 1 866 800 1699
email: jamesl16x9inc.com
web: www.16x9inc.com
Abel Cine Tech Inc.
609 Greenwich St. 5th Floor
New York, NY 10014
Phone: +1 888 223 1599
Phone: +1 212 462 0100
Fax: +1 212 462 0199
email: info@abelcine.com
web: www.abelcine.com
If there is no agent in your
country, please contact our
head ofce directly:
EASYRIG AB
Anumark 231
S905 95 Umeå
Sweden
Phone/fax: +46 90 77 60 01
email: info@easyrig.se
web: www.easyrig.se
Up to date agent information
found on website
Page 11

11
Easyrig limited Warranty
Manufacturer’s products are warranted to be free from defects
caused by faulty materials or workmanship for a period of two years
from the date of purchase. The liability of the Manufacturer under
this warranty is limited to repairing, replacing, or at its option issuing
credit for any of its products which are returned by purchaser dur-
ing such period provided, however, that:
A. Warranty card is properly lled out and returned to Manufacturer
within 30 days of purchase.
B. Defective merchandise is returned to Manufacturer accompanied
by a report of ndings indicating the basis of/for rejection and with
transportation charges paid by the purchaser.
C. That such defects exist and have not been caused by abuse, misuse, neglect, improper installation or assembly, repair, alteration or
accident.
In no event shall Manufacturer be liable for collateral or consequential damages of any nature. This warranty is in lieu of all other
warranties expressed or implied.
Easyrig Warranty Information card
Please mail within 30 days of purchase.
Name_____________________________ Title___________________
Company______________________ Type of business_______________
Address__________________________________________________
City__________________________ Postal code__________________
Country_______________________
Phone:________________________ Fax:________________________
email:________________________
Easyrig serial No:________________
Purchase location/company:_____________________ Date: __________
Please send to:
S905 95 Umeå
Sweden Thank you!
Easyrig AB
Anumark 231 or fax to: +46 90 77 60 01
Page 12

Layout/printing: Original, Umeå 2007 (1702)
 Loading...