

Page 1
1
User Manual
Page 2
2
Functions & Features
The digital camcorder has various features and functions:
! Digital Video
! Digital camera (5 million pixels)
! 2.7″ resistive touch screen
! Mass Storage (Removable disk)
! PC Digital video (Camera)
! 8 times digital zoom
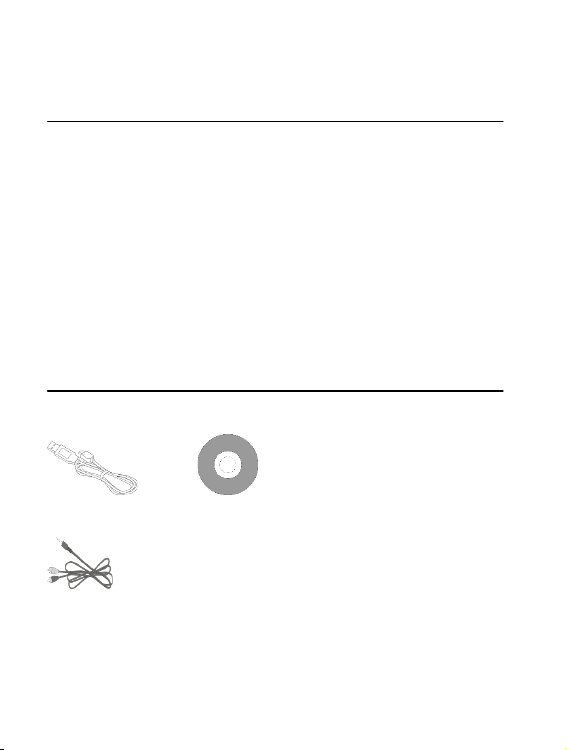
Accessories
You will find the following main accessories after opening the package:
USB connector Installation CD
TV cable
Page 3
3
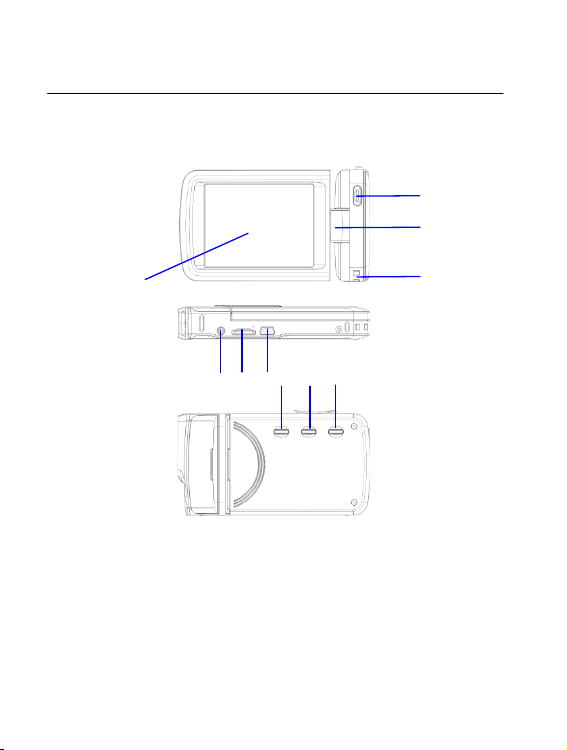
Brief Introduction on Appearance
1 2 3 4 5
7
6 8 9
10
Page 4
4
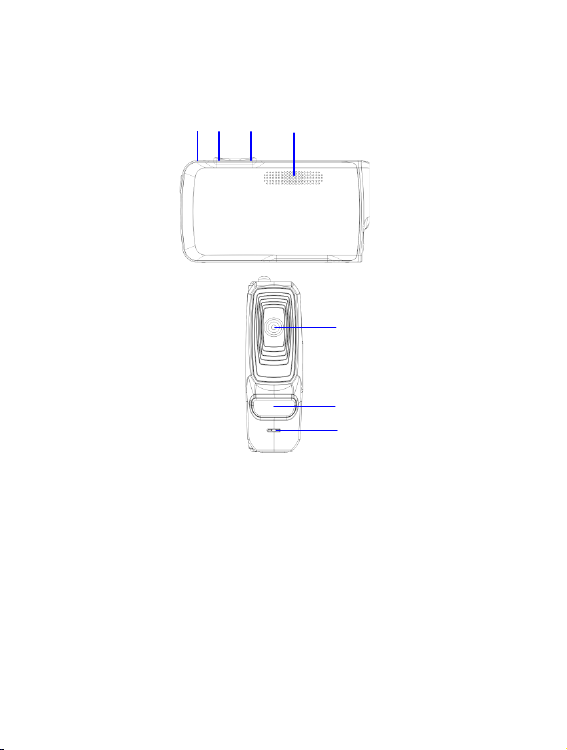
(1) Shutter key (2)Shaft (3) Hang rope buckle (4) Display screen (5) AV port
(6) TF card slot (7) USB port (8) Power key (9) Mode switch key (10) Menu
key (11) Charger light (12)W key (13) T key(14) Loudspeaker (15) Lens (16)
LED fill light (17) Microphone
14
15
16
17
12
13
11
Page 5
5
Camera key press functions and indicators
Press/Indicator
Functions
Power key
Turn the digital camcorder on/off
Shutter key
Video mode, record video/stop recording, shooting
mode, act as a shutter
T key
Digital enlargement and digital zoom, select document by pressing
left (playing back mode). Press up to select menu. After opening
menu, the volume will be turned up (when display video);
W key
Digital lessen and digital zoom, select document by pressing right
(playing back mode). Press down to select menu. After opening
menu, the volume will be turned down (when display video);
Menu key
Open/exit menu. Stop playing (when playing back)
Mode
switch key
Switch among 3 modes—video recording, shooting
and playing back, such 3 modes. Press this key to
enter pc cam mode after connecting computers
Working indicator
If DV is power off, charging it by USB, the light will bright
Start Using
Battery
The digital camcorder is built-in rechargeable 3.7V lithium batteries.
Charge your DV with the USB cable
Insert Memory Card
Insert a TF memory card in the memory card slot with the metal pins towards
inside in light of the prompts next to the card slot.
To remove the memory card, press the TF memory card downwards, and
then remove it.
Page 6

6
───────────────────────────────────────────────
Note:!Turn the power off before replacing the memory card.
!Insert cards in correct direction. Do not insert cards with large force
to avoid damaging cards or any part of the digital video. If failed,
check whether the direction is correct.
! Format any new memory card or the one used in other digital
camcorders before using it in your digital video.
───────────────────────────────────────────────
Open Screen
Open the LCD to let it face towards yourself.
Turn Digital Camcorder on
Press Power key to turn the digital camcorder on.
Switch Mode
In video recording mode, press Mode key to switch from the current mode to
the shooting mode, and then press this key again to switch to playing back
mode, in which press this key again to return to the video recording mode.
In the video recording mode, tap icon on the touch screen to enter the
shooting mode, in which tap icon to enter the playing back mode, in
which tap icon to return to the video recording mode.
Record Video
In video recording mode, press Record key to start recording; press it again
to stop.
Page 7
7
Tap the center of the touch screen once to start recording; press it again to
stop.
Shoot
In the shooting mode, press Shoot key to take photos.
Tap the center of the touch screen once to start shooting.
Self-timer mode: start countdown after pressing the Shoot key. Take one
photo after delaying 2s or 10s.
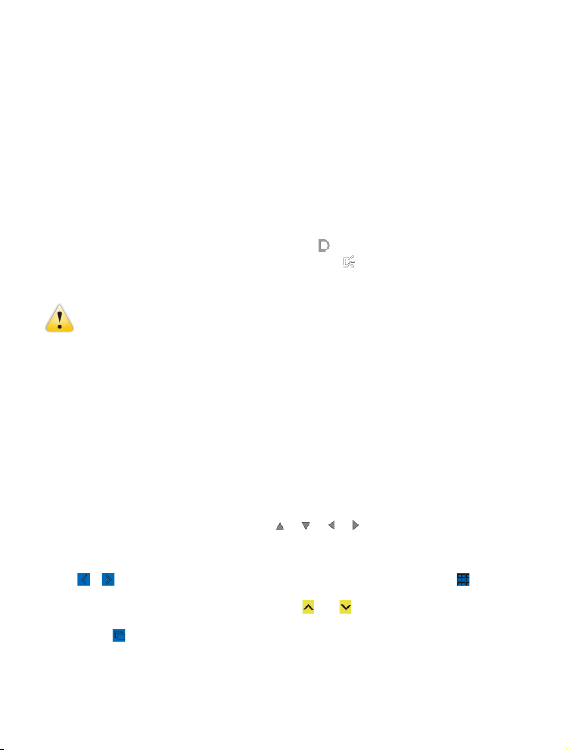
Use the LED fill light: Please press the icon ‘ ’on the screen to turn on the
LED fill light, then screen will show another icon‘ ’(LED fill light couldn't be
used when playing back)"
────────────────────────────────────
NOTE:!Keep the digital camcorder stable while shooting. It is better to
put it on a supporter, such as a tripod, in order to take clear photos.
────────────────────────────────────
Playback
Press Mode key to enter the playing back mode, in which it is able to view
photos/videos, play videos recorded by the digital camcorder.
View photos: use Left key or Right key to select photos/videos. Use Zoom In
key to enlarge photos, and then tap ‘ ’‘ ’‘ ’‘ ’ on the touch screen to
move photos. Use Zoom Out key to enter the thumbnail mode.
Tap or icons on the touch screen to select photos/videos; tap icon
to enter the thumbnail mode, and then tap or keys to turn pages up or
down; tap icon to play slides of photos.
Play video: use Left/right keys to select targeted videos, and then press
Page 8

8
Shutter key to play. Press this key again to stop playing. During playing,
press OK key to suspend, and then press such key again to continue
playing.
After selecting videos, tap icon to play it. Tap key to suspend playing;
tap icon to continue playing. Tap icon or icon to skip backwards
or forwards respectively. Tap icon to stop playing.
In the playing back mode, press DISP key once to playback the
vehicle-mounted loop video recording (vehicle travel records).
TV Output
To input pictures and voice recorded by the digital camcorder to a TV, insert
the common port of the TV cable into the TV port of the digital camcorder.
Connect the yellow port with the video input port of the video equipment, as
well as red/white port with audio input port. Note: stop recording video/audio
or playing before connecting TV or pulling TV cable out.
Turn off
In the power on status, press and hold Power key to turn the digital
camcorder off.
In the idle mode, and beyond the time preset for auto power-off
(1m/3m/5m/OFF), the digital camcorder will turn off automatically to save
power.
Page 9
9
────────────────────────────────────
NOTE:!If setting auto power off on "OFF", the camera will not power off
automatically until the power is low.
────────────────────────────────────
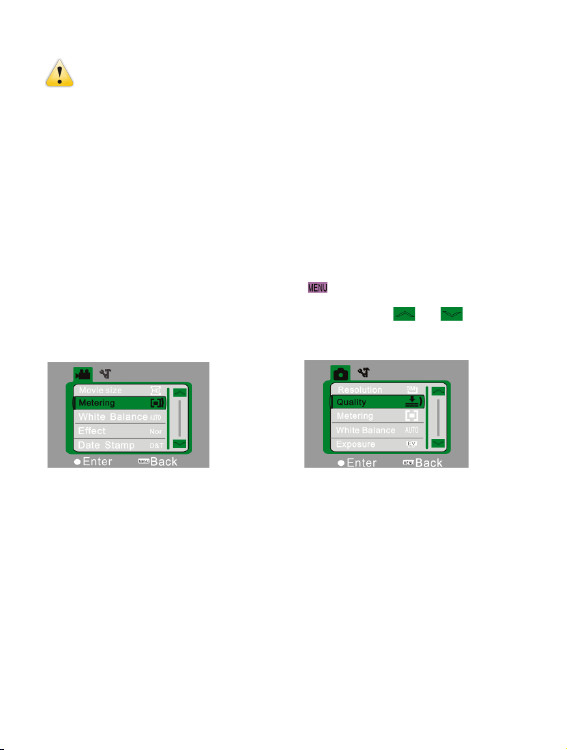
Menu Settings
In the shooting/video recording/playing back modes, press Menu key to
open the menu, and then press Up/Down/Left/Right key to select menus,
then press OK key to enter sub-menu. When selecting menus, the
background color of selected menu will display.
Note: it is able to open menus by tapping icon on the touch screen in
the shooting/video recording/playing back modes. Tap or icons
on the menu interface to switch to the next page.
▲Record Video Menu ▲Shoot Menu
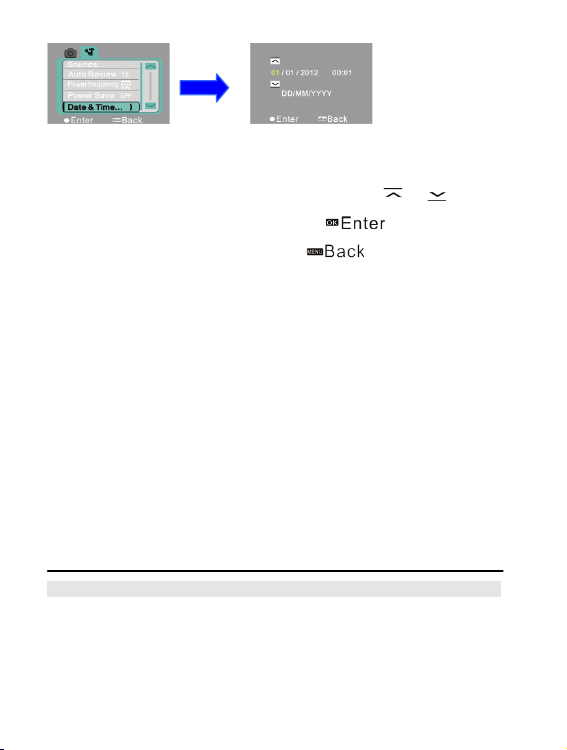
Date & Time Settings
Press Menu key to open the menu, and then press Left/Right keys to enter
Setting menu. Press Down key to select the option of Date & Time, and then
press OK key to enter the setting interface.
Page 10
10
In the setting interface, press Left/Right keys to select items to be adjusted
(date or time). The button icon will be shown on the up/down edges of
selected items. Press Up/Down keys to adjust (or tap or icons to
adjust). After adjustment, press OK key or tap icon on the screen
to confirm. Finally, press Menu key (or tap icon on the screen) to
exit from the setting mode.
Connect Computers
Before connecting with computers, install the digital camcorder driver by
installation CDs. Turn the digital camcorder on, and then use USB cable to
connect the digital video with an available USB port on the computer. The
USB mode is as removable hard disk or camera. The digital camcorder will
enter the removable disk mode automatically. Press Modes Switch key to
enter the camera mode.
Advanced Operation
Video Recording Mode
After being turned on, the digital camcorder will enter the video recording
mode automatically.
Page 11

11
Press Shutter key to start recording, and press such key again to stop
recording.
Tap the icon ‘ ’on the touch screen to open/close the LED fill light (the fill
light is unavailable in the playing back mode).
The information will be shown on the screen in the video recording modes.
No.
Icon Name
Description
1
Video mode
It indicates that it is able to recording video
by pressing Shutter key in the video
recording mode.
2
White
balance
It indicates the current settings for white
balance.
3
Metering mode
It indicates current metering mode.
4
Video format
It indicates current video resolution.
1
2
3
4
5
6 7 8
9
10
11
Page 12
12
5
Recording time
The free time indicates the remaining
available recording time; the recording
time indicates the recorded time.
6
TF card
The icon indicates to insert the
memory card.
7
The power
on/off for LED
fill light
Tap it on the touch screen to turn on/off
LED fill light.
8
Menu key on
The touch
screen
Tap it to open the menu.
9
Power
It indicates current power status. In red
color, it means the power is depleted, and
the camera will turn off automatically.
10
The progress
of Zoom
It indicates the current progress for digital
zoom.
11
Zoom
instruction
It indicates the current times for digital
zoom.
Page 13

13
Menu Settings for video recording
Press Menu key to open Video recording. Press T/W key to select menus,
and then press shutter key to enter sub-menus. Press Menu key or OK key
to return to the main menu. Press T/W key to select, and the press
SHUTTER key to confirm. After returning to the main menu, press Menu key
to exit.
It is possible to operate the settings for menus directly via the touch screen.
Options of Video Recording Menu:
Main Menu
Sub Menu
Description
Video mode
1920x1080
High resolution scheme
1280x720
Medium resolution scheme
640X480
Low resolution scheme
Metering mode
Central metering
It subjects to the central
area when metering.
Multi-spot
metering
It subjects to multi spots
when metering
Spot metering
It subjects to one spot
when metering
Page 14

14
White balance
Auto
It is fit for many conditions.
Day light
It is fit for day light
circumstance.
Cloudy day
It is fit for cloudy
circumstance.
Fluorescent lamp
It is fit for fluorescent lamp
circumstance.
Tungsten lamp
It is fit for tungsten lamp
circumstance.
Special effects
Normal
Normal effect
Black & White
Black & White effect
Return to the
ancients
Return to the ancients
effect
Negative film
Negative film effect
Red
Partial red effect
Green
Partial green effect
Blue
Partial blue effect
Date stamp
Disable
Disable the function of
printing date/time on files.
Page 15

15
Date
When shooting/video
recording, the date will be
print on the lower right
corner of files.
Date & Time
When shooting/video
recording, the date and
time will be print on the
lower right corner of files
Shooting Mode
After being turned on, the digital camcorder will enter the video recording
mode automatically, please press Mode Switch key to enter the shooting
mode.
In the shooting mode, press Shutter key to take photos.
In the video recording /shooting mode, press T/ W key to conduct the digital
zoom.
Tap the icon ‘ ’on the touch screen to open/close the LED fill light (the fill
light is unavailable in the playing back mode).
The information will be shown on the screen in the shooting/ video
recording modes.
Page 16

16
No.
Icon Name
Description
1
Shooting
mode
It indicates that it is able to take
photos by pressing Shutter key in
the shooting mode.
2
Countdown
for self-timer
It instructs the countdown for
self-timer.
3
White
balance
It indicates the current settings for
white balance.
4
Metering
mode
It indicates current metering mode.
5
Exposure
It indicates current exposure value.
6
Picture size
It indicates current resolution of
photos
1 2 3 4 5
6 7 8
9
13
11
12
10
14
15
Page 17

17
7
Picture
quality
It indicates current selected picture
quality.
8
Available
numbers of
photos
It indicates the remaining numbers
of photos available to be taken.
9
ISO
It indicates current ISO setting.
10
The power
on/off for
LED fill light
Tap it on the touch screen to turn
on/off LED fill light.
11
Menu key on
the touch
screen
Tap it to open the menu.
12
Power
It indicates current power status. In
red color, it means the power is
depleted, and the digital camcorder
will turn off automatically.
13
TF card
The icon indicates to insert the
memory card.
14
The
progress of
Zoom
It indicates the current progress for
digital zoom.
15
Zoom
It indicates the current times for
Page 18

18
Menu setting for shooting mode
Press Menu key to open Shooting menu. Press T/W key to select menus,
and then press shutter key to enter sub-menus. Press Menu key or OK key
to return to the main menu. Press T/W key to select, and the press
SHUTTER key to confirm. After returning to the main menu, press Menu key
to exit.
It is possible to operate the settings for menus directly via the touch screen.
Options of Video Recording Menu:
Options of shotting menu:
Main Menu
Sub Menu
Description
Picture size
4000 x 3000
12 million pixels resolution
3264 x2448
8 million pixels resolution
2592x1944
5 million pixels resolution
2048X1536
3 million pixels resolution
1280x1024
1 million pixels resolution
Picture quality
Excellent
Excellent picture quality
Good
Good picture quality
instruction
digital zoom.
Page 19

19
Normal
Normal picture quality
Metering mode
Central metering
It subjects to the central
area when metering
Multi-spot
metering
It subjects to multi spots
when metering
Spot metering
It subjects to one spot
when metering
White balance
Auto
It is fit for many conditions.
Day light
It is fit for day light
circumstance.
Cloudy day
It is fit for cloudy
circumstance
Fluorescent lamp
It is fit for fluorescent lamp
circumstance
Tungsten lamp
It is fit for tungsten lamp
circumstance.
Exposure
/
Use Left/Right key to adjust
the compensation for
exposure.
Shooting mode
off
Use the normal single
photo shooting mode
Page 20

20
2s
Use the 2s delayed
self-timer mode.
10s
Use the 10s delayed
self-timer mode.
Continuous
shooting
Continuous shooting
Special effects
Normal
Normal effect
Black & White
Black & White effect
Return to the
ancients
Return to the ancients
effect
Negative film
Negative film effect
Red
Partial red effect
Green
Partial green effect
Blue
Partial blue effect
Date stamp
Disable
Disable the function of
printing date/time on files
Date
When shooting/video
recording, the date will be
print on the lower right
corner of files.
Page 21

21
Date & Time
When shooting/video
recording, the date and
time will be print on the
lower right corner of files.
ISO
AUTO
Set ISO value as Auto
ISO 100
Set ISO value as 100
ISO 200
Set ISO value as 200
ISO 400
Set ISO value as 400
Playing Back Mode
After being turned on, the digital camcorder will enter the video recording
mode automatically. Press Mode key to enter shooting mode. Under
photograph mode, press Mode key again to enter playing back mode.
Under playing back mode, press T or W to scan photo or video left or right.
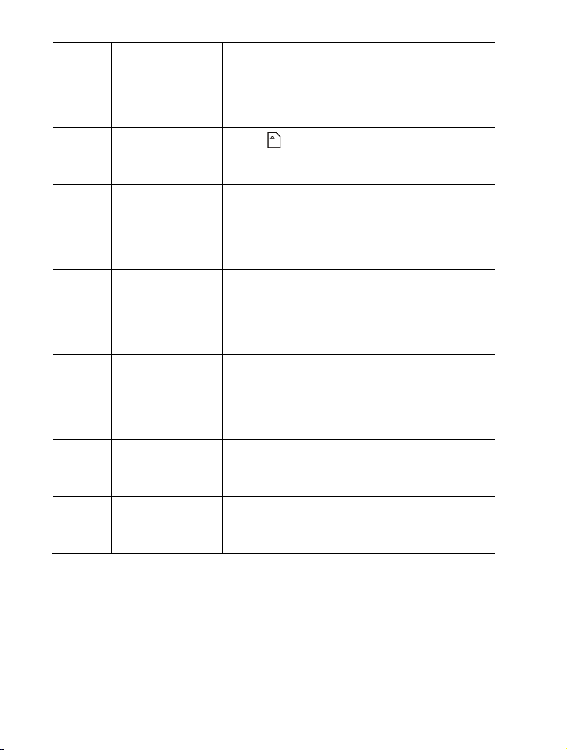
◆ Display information on playing back mode screen
No.
Icon name
Description
1
Playing back
mode
Indicates in playing back mode
1
2
3
4 5 6
7
8 9 10
11
12
13
14
15
Page 22

22
2
Document
protection
Indicates current document has been
locked to protect.
3
Voice memo
Indicates current document has added
voice memo
4
Translational
icon
After enlarging photo, click four icons
including up, down, left and right on
screen to realize translational scan photo.
5
Menu
Click the icon on screen to open menu
6
Video icon
Indicates current document is video
document.
7
Left icon
Click this icon to select document to left.
8
9 grid icon
Click this icon to enter 9: picture scan.
9
Display icon
When current document is photo, click
this icon to enter photo enlargement
state; when current document is video,
click this icon to display video.
10
Slide
Click this icon to display slide
automatically.
11
Right icon
Click this icon to select document to
right.
12
Enlargement
times
Indicates enlargement times in enlarging
photo.
13
Next page
When in 9: picture scan, click this icon to
view next page.
14
Previous page
When in 9: picture scan, click this icon to
view previous page.
15
Document
quantity
Indicates there are currently 31
documents, you are scanning 19th
document.
Page 23
23
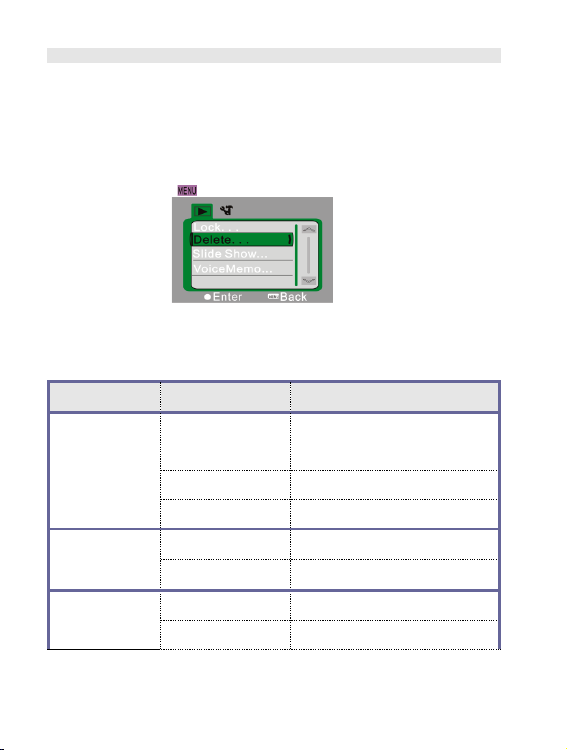
Menu Settings for Playing Back Mode
Press Menu key to open the main menu, and then press Up/Down keys to
select. Press OK key to enter the sub-menus. Press Menu key or OK key to
return to the main menu. Press Up/Down keys to select, and then press OK
key to confirm. After returning to the main menu, press Menu key to exit.
Note: it is able to tap icon on the touch screen to open and set menus.
▲Playback Menu
Options of Playback Menu:
Main Menu
Sub Menu
Description
Lock files
Lock/unlock this
file
Lock/unlock current files
Lock all files
Lock all files
Unlock all files
Unlock all files
Delete files
Delete this file
Delete current file
Delete all files
Delete all files
Play slides
Start
Start to play slides
Interval
1s~10s
Page 24
24
Loop
Yes/No
Voice memo
Add
Add voice memo to photos
Delete
Delete voice from photos
Note: It is able to add voice memo up to 30s to every photo. In the playing
back mode, photos with voice memo will have icon. Press OK key to start
to play voice memo, during which press Up key to suspend playing or press
Menu key to stop playing.
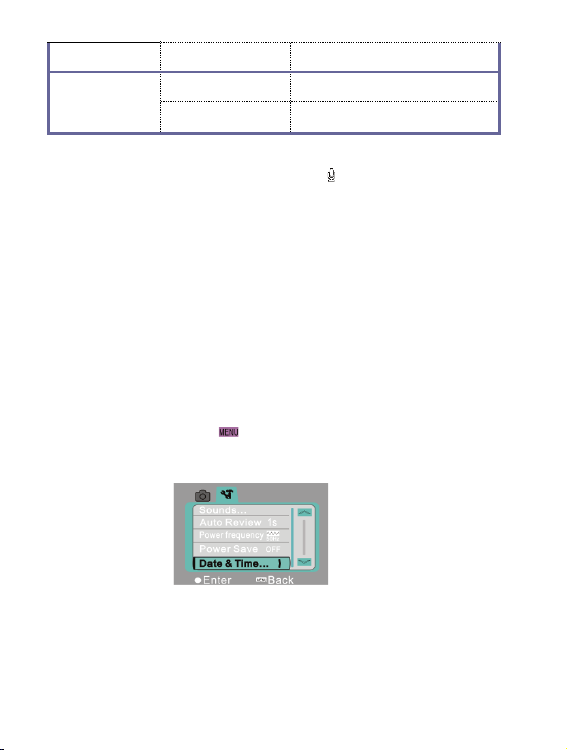
Setting menu
Under any mode (video, photograph or playing back), press Menu key to open menu, and
then press Mode key to enter setting menu. Under setting menu, press T or W to select
menu up or down, press Shutter key to confirm to enter submenu. Under submenu, press
T or W to set, press Shutter to confirm to save setting and then back to main menu or
directly back to main menu by pressing Menu key to cancel setting. After backing to
main menu, press Menu key to exit menu.
Note: you can also click the icon on touch screen to open menu. Menu setting can
be operated on touch screen directly.
▲ Setting menu
Page 25

25
Main Menu
Sub Menu
Description
Sound
Shutter
On/off
Starting up
tone
No/1/2/3
Key tone
On/off
Volume
0/1/2/3
Auto playback
Off
No playback after shooting
1s
Playback 1s after shooting
3s
Playback 3s after shooting
Power
frequency
50Hz
Set light source frequency as
50HZ
60Hz
Set light source frequency as
60HZ
Auto power off
1 min
Auto power off after being in idle
status for 1 min.
3 min
Auto power off after being in idle
status for 3 min.
5 min
Auto power off after being in idle
status for 5 min.
OFF
Disable the function of auto power
off.
Page 26

26
Date & Time
/
Set date & time, together with the
date format
Language
English
Set the menu language as English
Français
Set the menu language as French.
Español
Set the menu language as
Spanish.
Italiano
Set the menu language as Italian.
Português
Set the menu language as
Portuguese.
Deutsch
Set the menu language as
German.
TV
NTSC
Set television system as NTSC
PAL
Set television system as PAL
Format
Yes/No
Format the memory card.
Restore factory
settings
Yes/No
Restore the factory settings
Connect Computers to Download Photos/Videos
After connecting the digital camcorder with a computer and entering the
removable disk mode, there will be a new removable disk in My Computer
interface. Any shot photos or recorded video will be stored under the
Page 27

27
directory “DCIM\100MEDIA” in the removable disk. It is able to enter such
directory to copy files to your computer hard disk.
───────────────────────────────────────────────
Note: do not disconnect USB connection during files download. Do not insert
or remove memory cards during USB connection to avoid data loss.
───────────────────────────────────────────────
Use Camera
After connecting the digital camcorder with a computer, press Mode Switch
key to enter the Camera mode. Before using the camera, it is necessary to
ensure that the digital camcorder driver has already been installed on the
computer. After installation, there will be a new “SPCA1628 PC Driver”
menu under “Start → All Programs” menu. Under this new menu, there is a
shortcut icon . After connecting the digital video with a computer
and entering the camera mode, press icon to open the AMCAP
interface, in which the video captured by the lens will be displayed. Without
the AMCAP software, it is able to send videos via networks by the camera.
Page 28
28
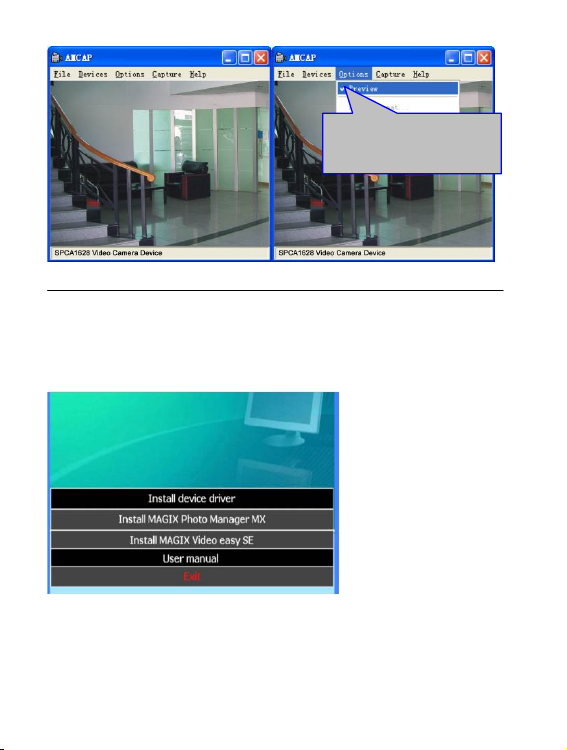
Installing driver and software
The accessory CD contains the camera driver and provided software MAGIX Video easy
SE / MAGIX Photo Manager MX (for photo and video processing).
Installation interface
Please insert the CD into the CD-ROM, the system will automatically run the installer in
the CD, and the screen shows the installation wizard window as below.
(The installer may take several seconds to start, depending on the PC performance. If the
installation window doesn’t appear, please run “Windows Explorer”, and select
“autorun.exe” in the CD.)
Please ensure that
selecting the Preview the
menu of Option
Page 29

29
Installing driver
In the installation wizard window, click the “Install Driver” button and follow the wizard
to install step by step.
Please restart the PC after installing the driver.
Run the software MAGIX Video easy SE / MAGIX Photo Manager MX, click
the button in the wizard window and follow the prompt to install step by step.
For usage, please click the “User Manual” button in the installation wizard
window.
Specification
Image sensor
5 million pixels CMOS image sensor
Photo
resolution
12M (4000 x 3000), 8M (3264 x 2448), 5M (2592 x 1944), 3M
(2048 x 1536),1M(1280x1024)
Memory Card
External TF card(4GB to 32GB)
Page 30
30
File format
JPEG, AVI
Video resolution
FHD1920x1080,HD 1280X720,VGA 640×480
Self-timer delay
2 s / 10s
Digital Zoom
8 times
White balance
Auto / Sunny day / Cloudy day / Fluorescent lamp / Tungsten
lamp
Exposure compensation
-2.0 ~ +2.0
USB port
USB2.0
TV output
NTSC / PAL
Display screen
2.7″resistive touch screen
Power
One 3.7V rechargeable lithium battery
Language
English/ Simplified Chinese/ French/ Spanish/ Italian/
Portuguese/ German
Focus distance
f=5.8mm
Aperture
F2.8
Auto power off
1 min / 3 min /5 min/OFF
Operating system
requirements
Microsoft Windows 7, 2000,XP,VISTA
Size
110.5 mm × 55.7 mm × 21 mm
Page 31

31
Note: the design specification of the product was formulated according to the latest information
when compiling this instruction. There is no prior notice for any modification. Please refer to the
actual digital video.
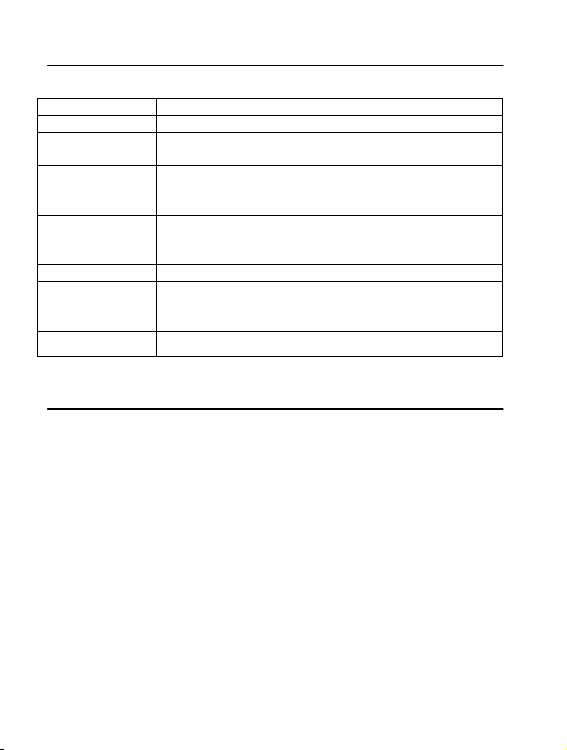
FAQ
The camera fails to
start up after installing
batteries
There is not enough power, please replace batteries.
Do not remove the battery package
Install batteries in wrong direction. Please check whether the
battery has been installed correctly.
Fail to take photos or
record videos after
pressing the Shutter
key
The internal memory is full. Please store shot files in other
storages.
The photo is vague.
Hands shake when shooting. Please use hands, as well as a
tripod or other device, to keep the digital video stable. Do not
shake the digital camcorder when shooting.
The photo or video is
dim.
There is not sufficient light when shooting. So please shoot in
circumstance with full light or use lamps to increase the
brightness of light.
The camera turns off
automatically.
There is not enough power, please replace batteries。
To save power, the digital camcorder will turn off automatically
after being in idle mode for more than 1min (3min or 5min,
according to various settings).
Fail to delete files in
the digital video
The function of file protection is enabled. Please disable such
function in Camera menu.
Page 32

32
DECLARATION OF CONFORMITY
easypix herebly declares that the product DCV2712 is in conformity to all the essential
requirements of Directive 1999/5/EC. The declaration of conformity can be downloaded here:
http://www.easypix.info/download/pdf/doc_dvc2712.pdf
For technical help please visit our support area on www.easypix.eu.
Only EU
 Loading...