

Page 1
0
Page 2

Contents
Introduction………………………………………..2
System Requirements……………………………2
Package Contents………………………………..3
PC Camera Introduction…………………………3
Set up PC Camera………………………………4-5
Software Installation
Arcsoft VideoImpression 2.0………………….6-7
Snapshot by VideoImpression 2.0……………...8-9
Live Video Playing……………..…………………10
Camera Specifications……………………………12
1
Page 3

Introduction
Welcome to the world of digital imaging. The following
information will help you to use your camera to its full
capabilities.
For viewing pictures or video, camera must be connected
to your personal computer .
This camera is support Microsoft Video Class and
plug & play directly without driver.
System Requirements
z Pentium
®
P4 1.2G CPU
z Free USB2.0 port
z 256MB RAM internal memory minimum
z 500MB free hard disk space
z Internet connection
z CD-ROM drive
z Windows compatible sound card and speakers
®
z Windows
XP Service Pack II
z Windows Vista™
Note: If your system is Windows XP Service Pack I,
please go to www.microsoft.com
. It’s free to update
your system to Windows XP Service Pack II.
2
Page 4
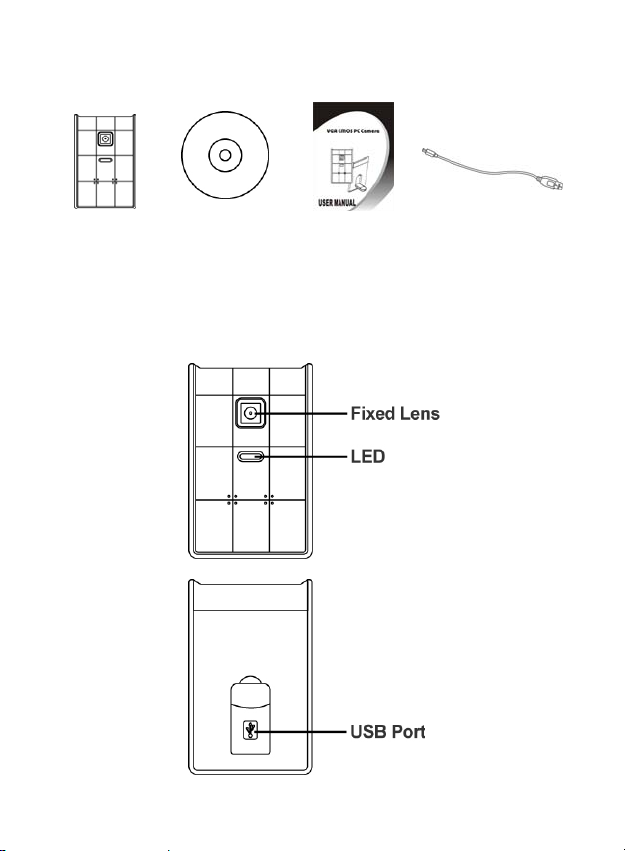
Package Contents
PC camera CD-disc QOG USB Cable
PC Camera Introduction
3
Page 5
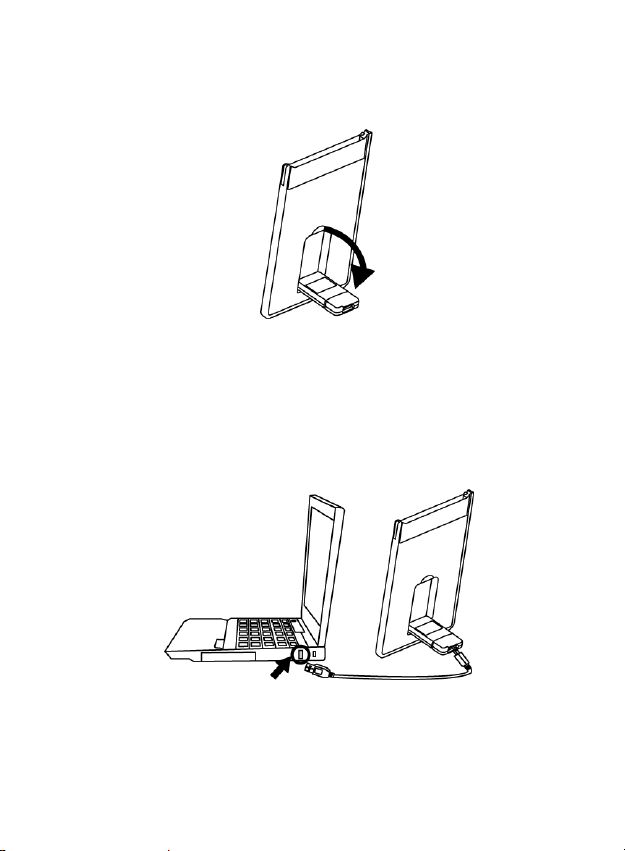
Set up PC camera
1. Please p ut down the USB port on the back of webcam
first.
2. Connect the camera’s USB cable to an available US B
2.0 port of your notebook.
4
Page 6
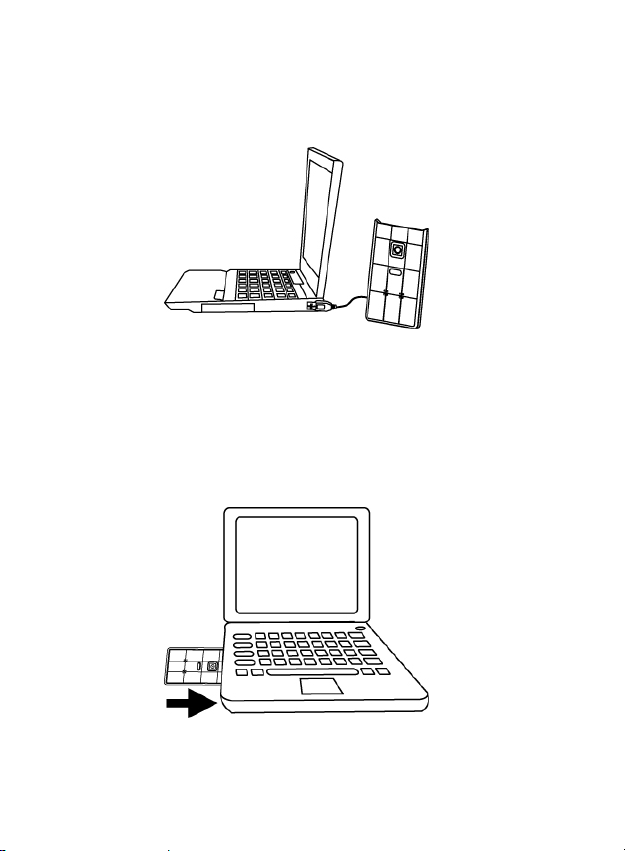
3. Make sure the camera is placed on a level surface.
The best focus range is from 30cm to 90cm.
4. You can storage this ultra slim webcam into the
PCMCIA slot of noteboo k.
5
Page 7

Software Installation
ArcSoft VideoImpression 2.0
1. Turn on the computer and
insert CD installation Disc
into your CD-ROM drive.
Select and click
“ArcSoft
VideoImpression2.0”
2. Choose Setup Language
3. Click “Next”
4. Click “Yes”
6
Page 8

5. Click “Next”
6. Click “Next”
7. Click “Finish”
7
Page 9

Snapshot by AcrSoft VideoImpression2.0
1. Click on the “VideoImpression
2.0” icon on the desktop.
2. Click “Create a New Slide Show”
3. Click “Scan Image”
4. Select source
“WIA-USB Video Device”
8
Page 10
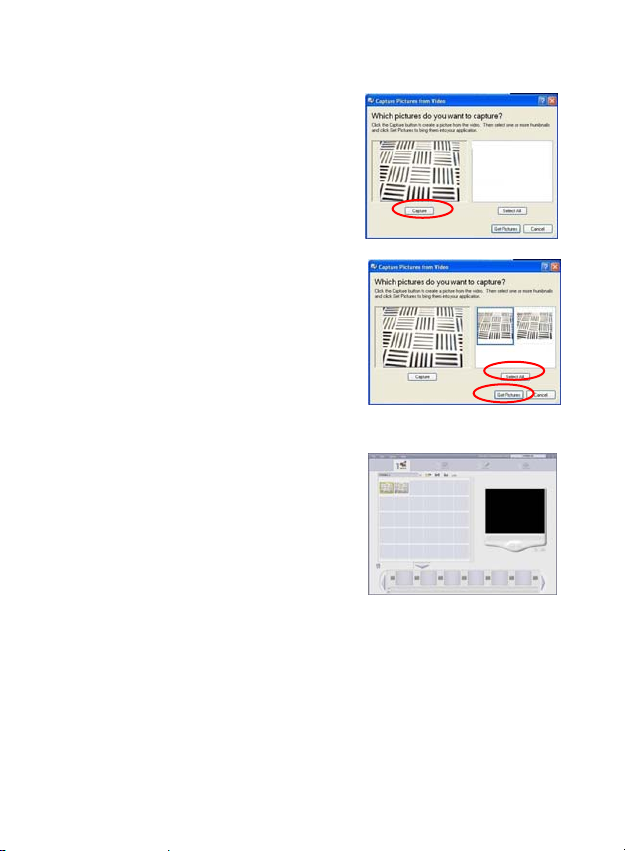
5. Click “Capture” for snapshot.
6. Click “Select All” and then
click “Get Picture”.
7. The pictures are saved.
9
Page 11

Live Video Playing
AcrSoft VideoImpression 2.0
1. Click on the “VideoImpression
2.0” icon on the desktop.
2. Click “Create a New Video”
3. Click “Capture From Device”
10
Page 12
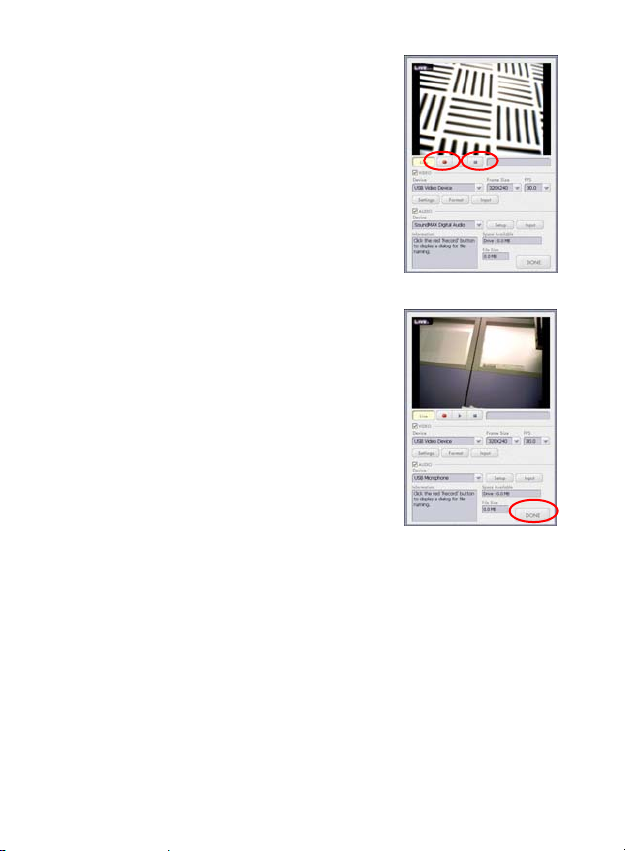
4. Click “Record”, save video name
and then click “Stop”.
5. Click “Done” to finish. Now you
can play the video.
11
Page 13

Camera Specification
Image Sensor
Lens Specification
White Balance
Exposure
Frame Rate
Focus Range
Depth of Field
PC Interface
Video Format
Audio
Video Capture Res.
System Requirements
Snapshot
Still Capture Res.
Power
Bundled Software
640 x 480 pixels, CMOS
F2.8, f=2.43mm
Auto
Auto
640x480 pixels @ 25~30fps
320x240 pixels @ 30fps
Fixed focus, 30~90cm
45cm to infinity
USB2.0
AVI
None
640x480/ 320x240
Support Microsoft Video Class
Win XP Service Pack II/ Vista
Without driver
Software
Up to 640x480 pixels
From USB port
ArcSoft VideoImpression 2.0
Specifications are subject to change without prior notice.
12
Page 14

This symbol on the product or in the instructions
means that your electrical and electronic equipment
should be disposed at the end of its life separately
from your household waste. There are separate
collection systems for recycling in the EU.
For more information, please contact the local authority
or your retailer where you purchased the product.
13
 Loading...