

Page 1
USER MANUAL
Page 2

1
CONTENTS
COMPNENTS & ACCESSORIES…….……….... 2
ORIENTATION…………………………………….. 3
CHARGING……………….……………….………. 4
VIDEO RECORD…………………………………. 5
DOWNLOAD………………..……………..……… 6
SPECIFICATION……………………..…………… 8
Page 3
2
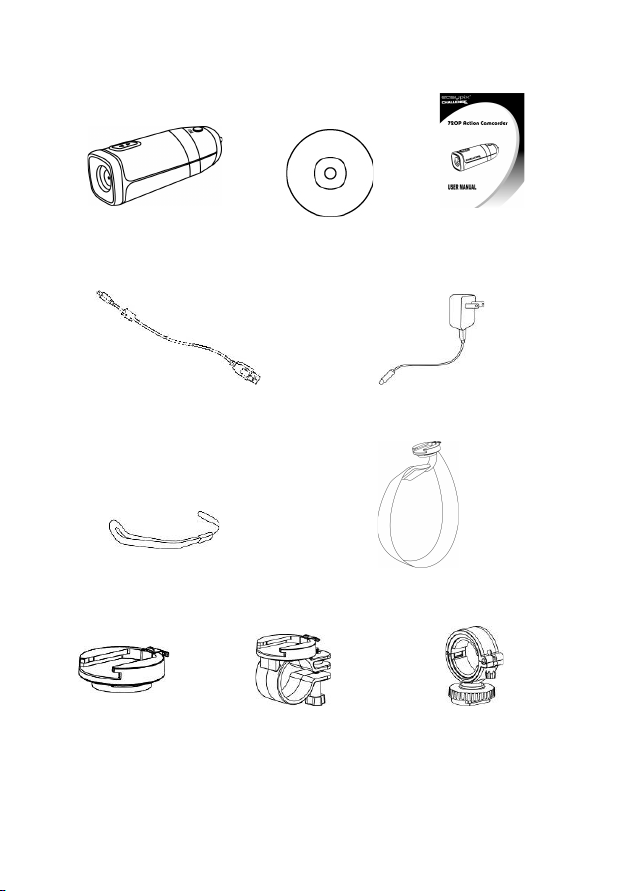
COMPNENTS & ACCESSORIES
Action Camcorder CD User Manual
USB Cable AC Adaptor
Hand Strap Universal Mount
Base Mount Bike Mount Camera Holder
Page 4

3
ORIENTATION
Page 5

4
CHARGING
1. Remove rear protective cap and connect the
supplied mini USB cable into the Action Camcorder.
2. Plug the USB cable into the AC Wall Adaptor or PC /
Mac USB 2.0 port.
3. The green charging status LED at the rear of the
Action Camcorder will illuminate to tell you it’s
charging. When the green LED turns off, the battery
is full and charging is complete.
Page 6

5
VIDEO RECORD
1. Hold down the power button for 2 seconds and
release. The Action Camcorder will vibrate 3 times,
illuminate the blue power LED.
2. Slide the Frame Rate switch to the right side for 60
frames per second or to the left side for 30 fps.
3. Hold down the record button and release, the Action
Camcorder will vibrate 3 times, illuminate the RED
LED and automatically start recording.
4. Hold down the rear button and release, the Action
Camcorder will vibrate 1 time to notify you that it is
saving the file. Then automatically start recording
again.
5. Hold down the record button for 1 second and
release. The Action Camcorder will vibrate 1 time to
notify you that it is saving the file and stop record.
6. Hold down the power button for 2 seconds and
release. The Action Camcorder will vibrate 1 times
and power off.
Note: 1. Your Action Camcorder will exhibit sustained vibration
during the start-up & shut-down sequence, this is normal
operation.
2. The charge LED will illuminate when there is no memory
card inserted properly in the Action Camcorder.
Page 7

6
DOWNLOAD
1. Remove rear protective cap and use (A) or (B).
2. (A): Take the microSDHC out of the Action
Camcorder and use a SDHC compatible card
reader to transfer your files to your computer.
3. (B): Connect the supplied micro USB cable into the
mini USB port of the Action Camcorder.
4. Plug the USB cable into a PC/Mac USB 2.0 port.
Page 8

7
5. Press the Record button and hold. Press the On
button for the Action Camcorder. The red and blue
status LEDs will illuminate. Release the Record
button until the red LED off to tell you it’s
communication with your computer.
6. On a PC/Mac your Action Camcorder will mount to
your computer as a mass storage device. You may
download your video files from the DCIM folder
created on the microSDHC card. (Always eject
device from PC/Mac)
Note: (A) May be exhibit slow transfer speeds.
(B) When connect to PC/Mac, the mass storage device is
‘read-only’. You only can read and copy video file but
can’t delete or move it.
Page 9

8
SPECIFICATION
Sensor
5.15M (2616x1968) CMOS 1/4”
Lens
F3.0, f2.3mm, Optical 116.0°
Resolution
HD : 1280x720 @ 30 / 60 fps
White Balance
Auto
Exposure
Auto
Video Encoder
H.264
Audio Encoder
AAC mono, sample rate 48K
File Format
MOV
Audio Input
Built-in Microphone
Built-in Battery
Internal Li-Ion Rechargeable Battery
3.7V / 650mA
Storage
microSDHC up to 32GB
Connector
USB 2.0, mini USB
Dimensions
89.4 (L) x 32.0 (H) x 32.0 (W) mm
Specifications are subject to change without prior notice.
Page 10

9
This symbol on the product or in the instructions
means that your electrical and electronic equipment
should be disposed at the end of its life separately
from your household waste. There are separate
collection systems for recycling in the EU.
For more information, please contact the local
authority or your retailer where you purchased the
product.
 Loading...