

EarthWay SPRAY-PRO S15 Assembly And Operating Instructions Manual
S15
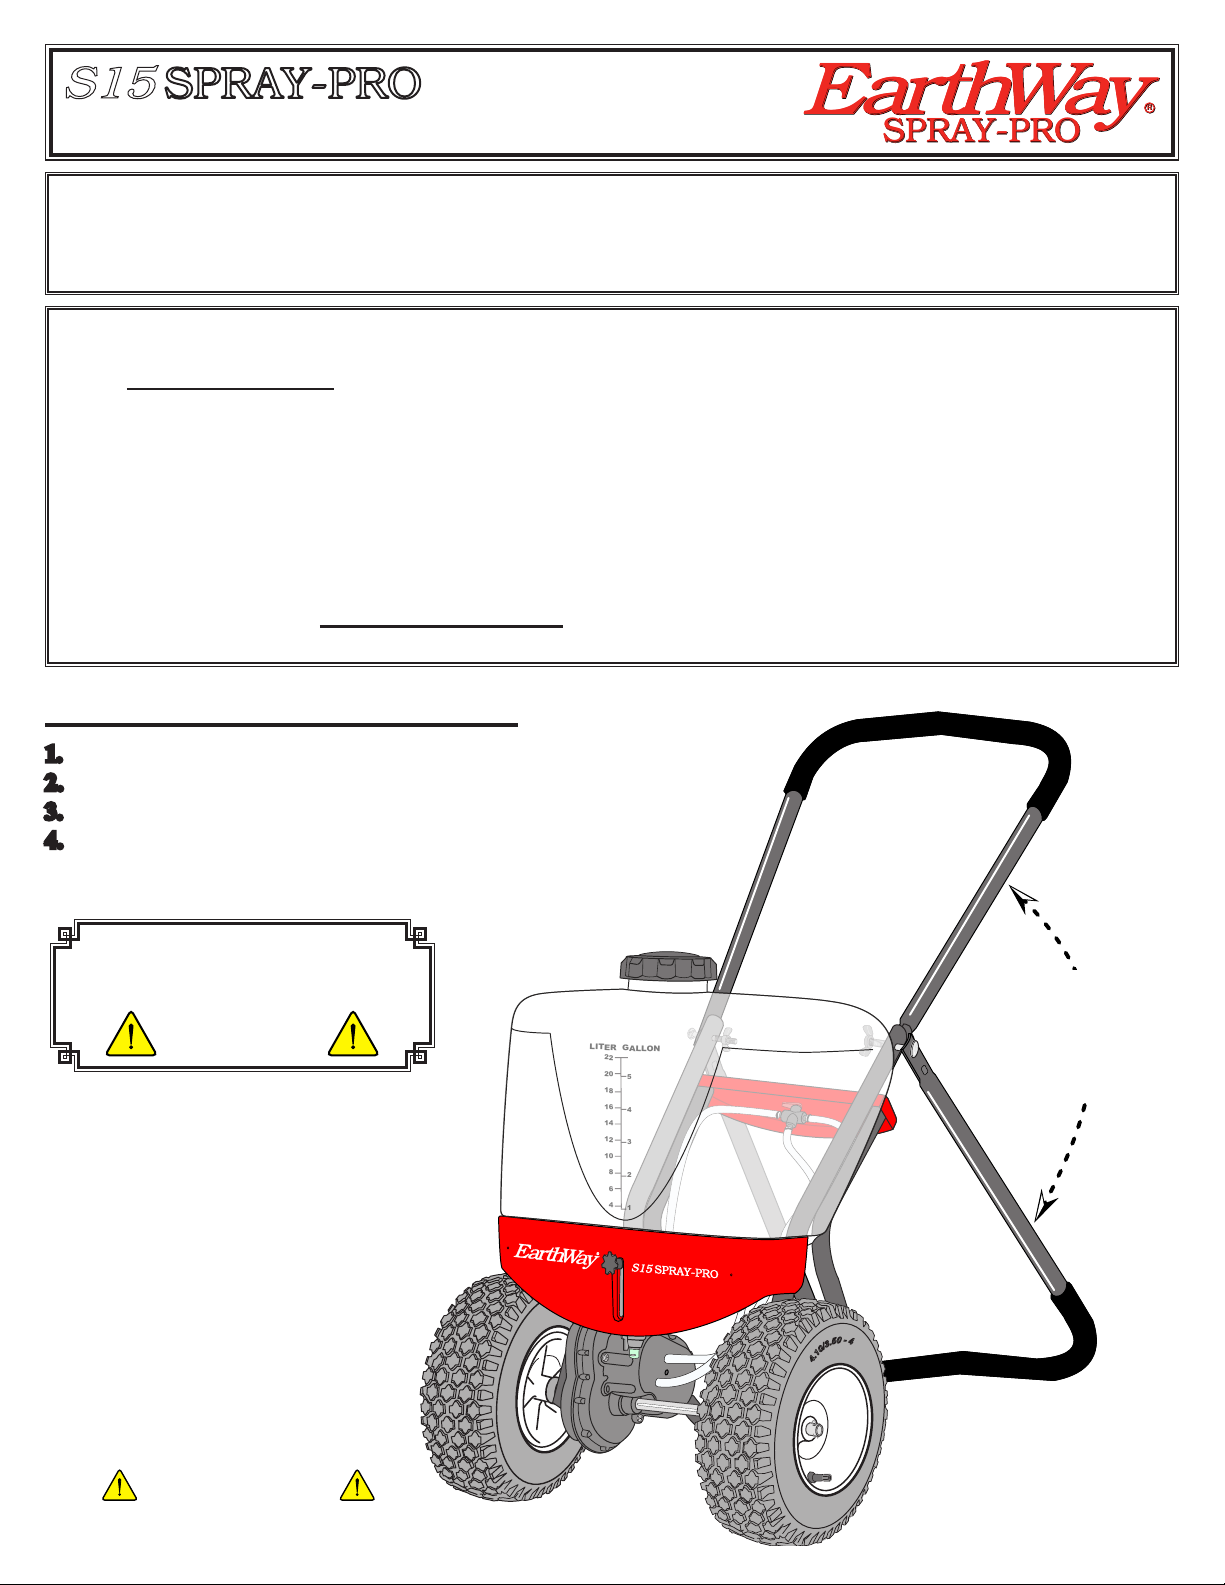
LITER GALLON
22
20
18
16
14
12
10
8
6
4
5
4
3
2
1
SPRAY-PRO
SPRAY-PRO
EarthWay
R
EarthWay
R
SPRAY-PRO PUSH SPRAYER
ASSEMBLY and OPERATING INSTRUCTIONS
Congratulations on the purchase of this new sprayer from Earthway Products, Inc. Please call us if you have any difculty
with assembly or operation of this sprayer. We can be reached via the telephone at 800-294-0671 or 574-848-7491,
Monday—Friday 9:00am ~ 4:00pm or visit us online at www.earthway.com This sprayer comes with lifetime technical
support, email us at techsupport@earthway.com.
HELPFUL HINTS: READ THE DIRECTIONS BEFORE ASSEMBLY
THIS SPRAYER COMES FULLY ASSEMBLED, REQUIRING YOU TO FLIP UP THE HANDLE AND TIGHTEN TWO WING
NUTS - NO TOOLS REQUIRED.
Your sprayer is designed to be pushed at two to three miles per hour, which is a brisk walking speed. Slower or faster
speeds will change the spray patterns and output volumes.
5 Clean your sprayer tank thoroughly after each use. Wash with clean water and push sprayer a several feet to evacuate
any residual materials until you see clean water in a safe area as described in the chemical suppliers directions.
5 Gears are permanently lubricated at the factory. Do not open the gearbox or dirt may enter.
5 Check all hose connections regularly to ensure they remain tight.
5 If unit fails to spray on initial use see Initial Start-Up Procedures on page 3.
5 To help prevent corrosion, coat all metal surfaces (inside & out) with WD-40 or a light oil.
5 When the tank is empty, pull the sprayer backward to the designated cleaning or storage area to prevent damage that
can occur with a dry pump.
ASSEMBLY INSTRUCTIONS
1. Open carton and remove the S15 from carton.
2. Place the S15 onto its wheels.
3. Loosen the two wing nuts that secure the handle slightly.
4. Lift the handle into place and tighten the two wing nuts.
Now you are ready to go!
DO NOT PUSH
FORWARD WITH TANK
EMPTY
For best results keep enough
of the liquid in the tank to
keep the pump supply line
lled. Hills and rough ground
can create a “wave effect” in
the tank that will cause the
pump to have an inconsistent
spray or to lose prime. If
this occurs, turn the control
lever to TRANSPORT and
push a few feet to re-establish
the prime and continue from
where you stopped.
Lift the handle
and tighten the
wing nuts to lock the
handle in place.
-
0
4
5
.
3
/
0
1
.
4
3-2012 Pt.# 52238 PAGE 1

5-YEAR LIMITED WARRANTY
Earthway Products, Inc. warrants this product free of defects in original workmanship and materials for a period of 5-years to the
end user with the original purchase receipt for at home use. If used for business, the warranty is 90-days. If a manufacturing nonconformance is found, Earthway Products, Inc. at its discretion will repair or replace the part(s) or product at no charge provided the
failure is not the result of incorrect installation, mishandling, misuse, tampering, or normal wear and tear as determined by Earthway.
Earthway at its discretion may require that the part(s) or product be returned along with the original purchase receipt at owners expense
for examination and compliance with the terms of this warranty. Do not return any product without rst receiving authorization from
Earthway Products, Inc. To seek remedy under this warranty, contact Earthway Products, Inc. at 574-848-7491, techsupport@earthway.
com or write to Earthway Products, Inc. P.O. Box 547 Bristol, Indiana 46507 and describe the nature of the manufacturing defect.
SPECIFIC LIMITATIONS: This warranty covers only the part(s) or product; any labor charges associated with repair or replacement
of non-conformances are specically excluded. Due to the corrosive nature of most fertilizers and ice melt products, Earthway Products,
Inc. makes no warranty against and specically excludes part(s) or product degradation or failure due to corrosion or its effects. Clean
and dry your sprayer thoroughly after each use, as a preventative measure, coat all metal parts (inside and outside of the steel tubes) with
a light oil or silicon spray.
For Support for your S15, please contact:
North AmericA europe
Earthway Products, Inc.
P.O. Box 547
1009 Maple Street
Bristol, IN 46507
T: 574-848-7491
T: 800-294-0671
E: techsupport@earthway.com
W: www.earthway.com
EarthWay
R
S15
SPRAY-PRO
DMMP Limited
T: 0845 643 9776
E: info@dmmp.co.uk
W: www.earthway.co.uk
Muggioli Giardinaggio
T: 0422 96 9990
E: info@muggioligiardinaggio.com
W: www.muggioligiardinaggio.com
EuroAmerica
T: +31 (035) 5315696
E: product-management@euroamerica.nl
W: www.euroamerica.nl
PAGE 2
RUBBER
WASHER
NOZZLE
with
FLAT SIDES
align with
CAP Tabs
CAP Tabs
4
3
2
1
DCV Locking Tabs
CAP in LOCKED
position
CAP in ready to
install position
Nozzle Installation
5 To remove turn Cap from right to left
5 Push Nozzle out of the Cap and remove rubber washer.
5 Install Nozzle aligning the at sides with the Cap tabs and
reinstall rubber washer.
5 To install the assembly, align the Cap slot with DCV locking
tabs and push onto DCV and turn left to right to lock.
 Loading...