

Page 1
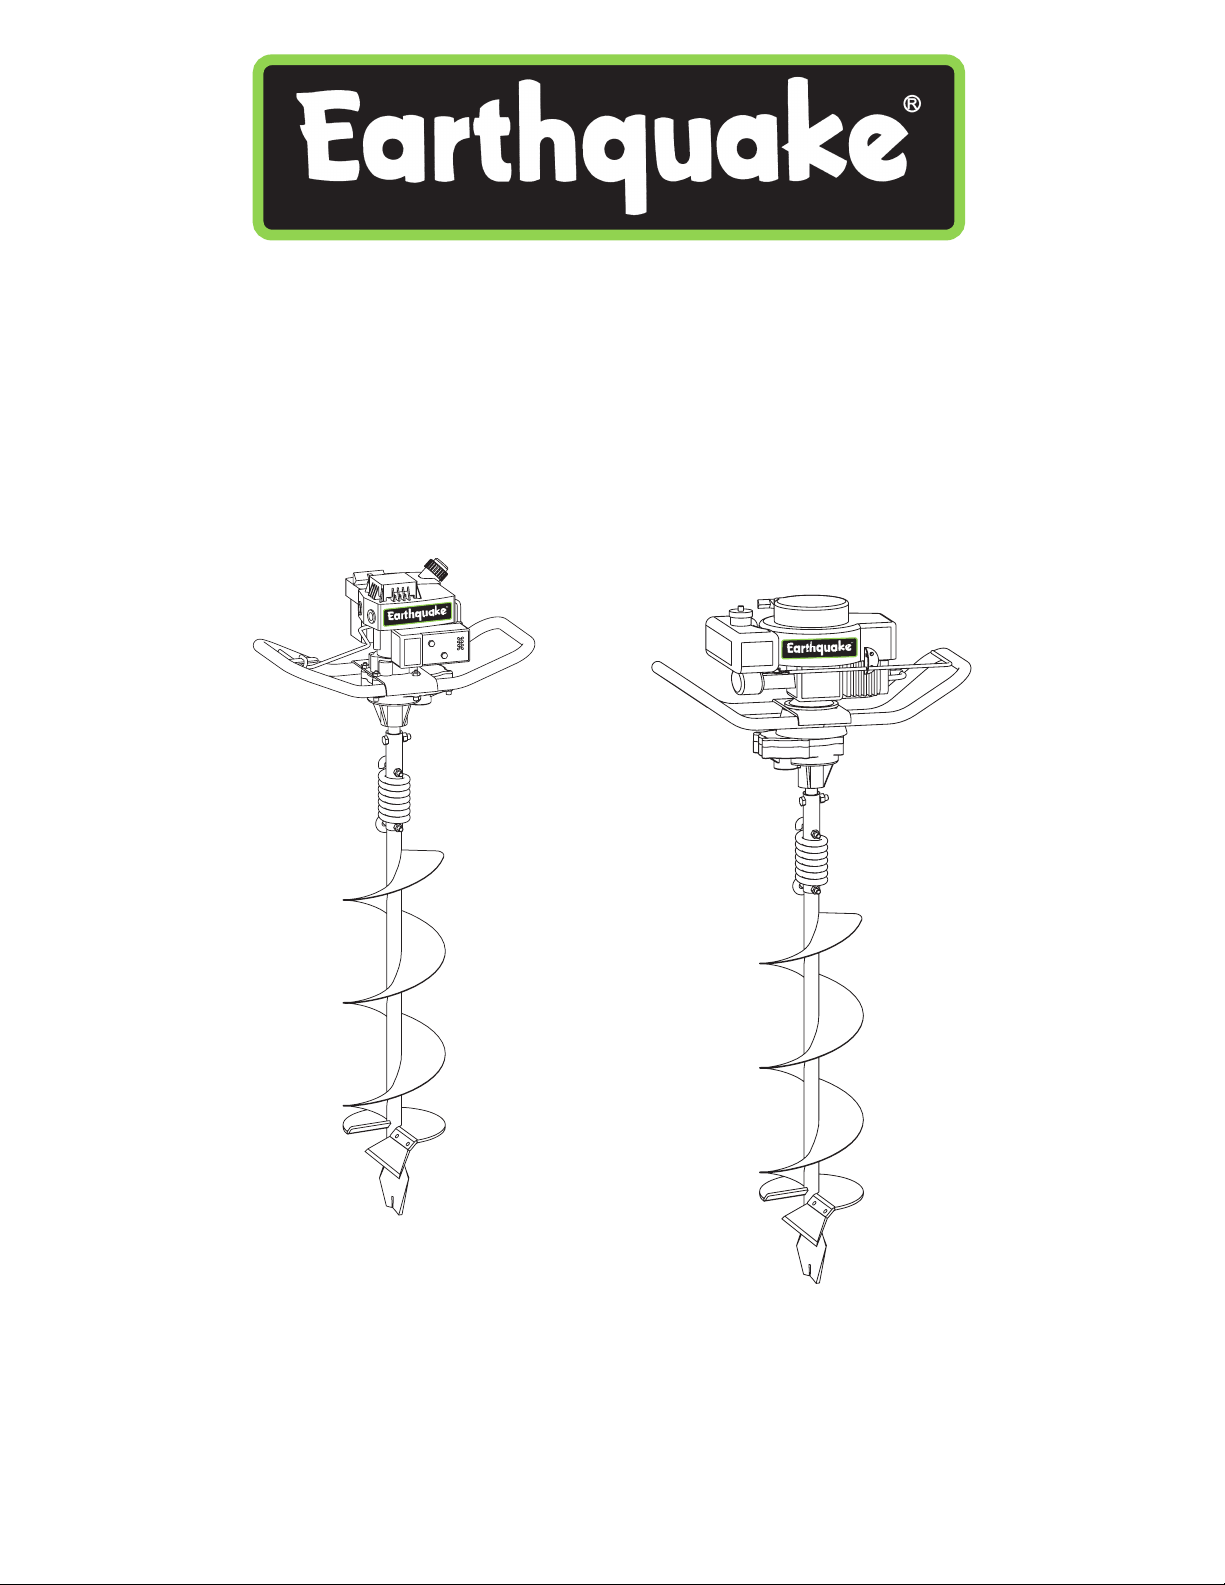
OPERATOR'S MANUAL
POWER EARTH AUGER
Model 8900E
Model 9000E
OM89
Rev. 6/9/05
© Copyright 2004 Ardisam, Inc.
All Rights Reserved. Printed in USA.
Page 2
ARDISAM
REGISTRAREGISTRA
REGISTRA
REGISTRAREGISTRA
THANK YOU . . .THANK YOU . . .
THANK YOU . . .
THANK YOU . . .THANK YOU . . .
for purchasing an Earthquake Earth Auger from
Ardisam, Inc. We guarantee that this auger
conforms to applicable North American safety
standards, and have worked to ensure that it
meets high standards for usability and durability.
With proper care, your auger will provide many
years of service. Please take the time to read
this manual carefully to learn how to correctly
operate and maintain your auger.
Congratulations on your investment in quality.
CONTENTSCONTENTS
CONTENTS
CONTENTSCONTENTS
Registration/Warranty ....................................... 2
TION AND WTION AND W
TION AND W
TION AND WTION AND W
ARRANTYARRANTY
ARRANTY
ARRANTYARRANTY
One Year
Limited Warranty
The Ardisam, Inc., Manufacturing Company warrants
this Earthquake Model 8900E or 9000E Earth Auger to
be free from defects in material or workmanship.
Conditions of this warranty include:
What is covered under warranty:
Ardisam, Inc. will repair or replace any part defective in
workmanship or material within one year after delivery
of the auger to the original purchaser.
What is not covered under warranty:
This warranty applies only to products which have not
been repaired or altered outside our factory. It covers
only defects resulting from normal use, and does not
cover defects arising from misuse, alteration,
negligence, commercial use, or accident. This warranty
applies only to the original purchaser, and is not
transferrable.
Safety ............................................................... 3
Operation ......................................................... 4
Maintenance & Storage .................................... 5
Service, Troubleshooting, and Repair........... 6-11
REGISTRATIONREGISTRATION
REGISTRATION
REGISTRATIONREGISTRATION
Your auger’s serial number is located on the
powerhead decal under the Earthquake name.
Engine serial number is located directly above
spark plug. Write these numbers and the model
number in the space provided. You will need
these numbers if you order parts.
Model Number_________________________
Serial Number _________________________
Engine Serial Number ___________________
Date of Purchase ______________________
Place of Purchase ______________________
How to obtain service:
Return the product to us at the address below with
transportation charges prepaid.
This warranty supersedes all other warranties
either expressed or implied and all other
obligations or liabilities on our part. Ardisam,
Inc., does not assume, and does not authorize
any other person to assume for us, any liability
in connection with the sale of our products. This
guarantee is void unless warranty card is
properly filled out and returned to Ardisam, Inc.,
Cumberland, Wisconsin, at time of purchase.
ARDISAM
CALIFORNIA PROPOSITION 65 WARNING
Engine exhaust from this product contains
chemicals known to the State of California to
cause cancer, birth defects, or other reproductive
harm.
1690 Elm Street, Cumberland, WI 54829
Phone (715) 822-2415 Main Fax (715) 822-2223
Ardisam, Inc.
1-800-345-6007
Email info@ardisam.com
www.ardisam.com
Page 2
Page 3
SAFETYSAFETY
SAFETY
SAFETYSAFETY
ARDISAM
OWNER'S RESPONSIBILITYOWNER'S RESPONSIBILITY
OWNER'S RESPONSIBILITY
OWNER'S RESPONSIBILITYOWNER'S RESPONSIBILITY
Accurate assembly and safe and effective use of the auger
is the owner's responsibility.
1. Read and follow all safety instructions.
2. Carefully follow all assembly instructions.
3. Maintain the auger according to directions and schedule
included.
4. Ensure that anyone who uses the auger is familiar with
all controls and safety precautions.
CAUTIONS AND IMPORTCAUTIONS AND IMPORT
CAUTIONS AND IMPORT
CAUTIONS AND IMPORTCAUTIONS AND IMPORT
Two symbols which draw attention to information of
special interest appear throughout this manual. These
comments range in importance from helpful hints to
warnings about risk of personal injury. Please take the time
to read and understand them.
ANT NOANT NO
ANT NO
ANT NOANT NO
TESTES
TES
TESTES
CAUTION
Indicates a situation which may cause personal injury
or damage to the auger or property.
IMPORTIMPORT
IMPORT
IMPORTIMPORT
Please read this section carefully. Operate the auger
according to the safety instructions and recommendations
outlined here and inserted throughout the text. Make sure
anyone who uses the auger has read the instructions and is
familiar with the controls.
1. Do not carry the auger powerhead between holes with
the engine running.
2. The auger should not rotate when the engine is idling.
If it does rotate when engine is idling, contact
Ardisam, Inc. for instructions.
3. Always keep hands, feet, hair and loose clothing away
from any moving parts on engine and auger.
4. Do not allow children to operate this power auger. Do
not allow adults to operate the auger without proper
instruction.
5. Do not operate any power equipment under the
influence of alcohol or drugs.
ANT SAFETY PRECAUTIONSANT SAFETY PRECAUTIONS
ANT SAFETY PRECAUTIONS
ANT SAFETY PRECAUTIONSANT SAFETY PRECAUTIONS
This symbol points out important safety
instructions which if not followed could
endanger your personal safety. Read and
follow all instructions in this manual and
any others provided with this equipment.
Provides helpful information for proper assembly,
operation, or maintenance of your auger.
6. Keep all screws, nuts and bolts tight.
7. Engine should be shut off before any repairs are
attempted.
8. Temperature of muffler and nearby areas may exceed
150° F (65° C). Avoid these areas.
9. Never run engine indoors or in enclosed, poorly
ventilated areas. Engine exhaust contains carbon
monoxide, an odorless and deadly gas.
Page 4
Page 4
ARDISAM
OPERAOPERA
OPERA
OPERAOPERA
REGISTRATION FORMREGISTRATION FORM
REGISTRATION FORM
REGISTRATION FORMREGISTRATION FORM
Complete and return. Your auger’s serial number is
located on the powerhead decal under the Barracuda name.
Record this number and the model number in the space
provided on page 2 of this manual. You will need these
numbers if you order parts. Fill out and mail the
registration card located in your parts packet. Warranty is
valid only if your completed registration card is
received by Ardisam, Inc., at time of purchase.
SPSP
ARK PLARK PL
SP
ARK PL
SPSP
ARK PLARK PL
If your powerhead does not have the spark plug already
installed for you. You will have to install it following the
instructions given below.
1. Locate the spark plug in the parts packet.
2. With powerhead laying on its side, place spark plug in
hole on right side of engine.
3. Turn by hand until snug.
4. Use a 3/4” wrench or socket to tighten up.
UG INSTUG INST
UG INST
UG INSTUG INST
TIONTION
TION
TIONTION
ALLAALLA
ALLA
ALLAALLA
TIONTION
TION
TIONTION
FUEL MIXTUREFUEL MIXTURE
FUEL MIXTURE
FUEL MIXTUREFUEL MIXTURE
CAUTION
Never fill fuel tank indoors. Never add gas when engine is
running or hot from operation. Do not smoke when filling
fuel tank.
This engine uses a gas/oil mixture. DO NOT RUN ENGINE
ON STRAIGHT GAS ONLY. ENGINE DAMAGE WILL
RESULT!
1. Mix clean, fresh, lead-free gasoline (minimum of 77
octane) with a high quality 2 cycle engine oil at the ratio
of 5 oz. oil to 1 gallon gasoline. (Refer to your engine
manual for further information on fuel.)
2. Mix fuel in a 1 or 2 gallon container approved for
gasoline.
3. Loosen fuel cap slowly. Rest the cap on a clean surface.
4. Carefully pour fuel into the tank. Avoid spillage.
OPERATIONOPERATION
OPERATION
OPERATIONOPERATION
CAUTION
Please do not start your auger until you have read the
Engine Manual that came with your engine, and the section
in this manual titled Safety. If you have read these, follow
the steps below to start your auger. Always perform this
pre-start checklist before starting the engine.
1. Read engine operating manual and follow instructions
for fuel type, starting, etc. BE SURE TO USE
PROPER GAS/OIL MIXTURE.
2. The clutch will transfer maximum power after about
two hours of normal operation. During this break-in
period clutch slippage may occur. The clutch should be
kept free of oil or other moisture for efficient operation.
3. Dig holes without placing excessive body weight on the
unit. The auger operates most efficiently with a shaving
action caused by the weight of the unit itself.
4. Never run engine indoors. Exhaust fumes are deadly.
5. Do not use an ice auger in earth.
6. The ice auger blade protector should be attached to the
auger head when not in use. This will protect the cutting
edge of the ice auger blade.
5. Immediately replace fuel cap and hand tighten. Wipe up
any fuel spillage.
STST
ARTING AND STARTING AND ST
ST
ARTING AND ST
STST
ARTING AND STARTING AND ST
OPPINGOPPING
OPPING
OPPINGOPPING
CAUTION
Do not hold throttle lever wide open while starting. Loss of
control of auger could result.
1. Open gas cap vent if your engine is so equipped (silver
steel cap).
2. Flip the toggle switch to the on position.
3. Move red choke lever to full choke position if engine is
cold.
4. Pull recoil starter until engine fires.
5. Move choke lever to half choke position (midway
between off and full).
6. Pull recoil starter until engine runs.
7. Run engine 30 to 45 seconds at full throttle on half
choke position until engine warms up.
8. Move choke lever to off position.
TO STOP: Flip the toggle switch to the off position.
Page 4
Page 5

ARDISAM
MAINTENANCE AND STMAINTENANCE AND ST
MAINTENANCE AND ST
MAINTENANCE AND STMAINTENANCE AND ST
ORAGEORAGE
ORAGE
ORAGEORAGE
CAUTION
To prevent accidental starting:
Engine must be turned off and cool, and spark plug wire
must be removed from spark plug before checking and
adjusting engine or equipment.
CAUTION
Temperature of muffler and nearby areas may exceed
150° F (65° C). Avoid these areas.
CAUTION
Check auger often for loose nuts and bolts. Keep these
items tightened.
MAINTENANCE AND STMAINTENANCE AND ST
MAINTENANCE AND ST
MAINTENANCE AND STMAINTENANCE AND ST
1. Always allow muffler to cool before filling fuel tank.
2. When storing for over 1 month, use gas stabilizer in
fuel.
ORAGE SAFETYORAGE SAFETY
ORAGE SAFETY
ORAGE SAFETYORAGE SAFETY
ENGINE MAINTENANCEENGINE MAINTENANCE
ENGINE MAINTENANCE
ENGINE MAINTENANCEENGINE MAINTENANCE
CAUTION
Do not operate auger before reading the engine manual
provided in the parts packet.
Engine can overheat and become damaged if debris blocks
the cooling fins or recoil housing.
Refer to the engine manual included in your parts packet
for information on engine maintenance. Your engine
manual provides detailed information and a maintenance
schedule for performing the following tasks:
1. Check air cleaner. See engine manual for instructions.
2. Keep engine and parts clean. See engine manual for
instructions on cleaning recoil housing area, linkage,
springs and controls, muffler area, cooling fins, and
spark plug.
3. Keep all screws, nuts, and bolts tight.
4. Close fuel shut-off valve located between gas tank and
carburetor.
5. Do not fill gas tank indoors or when engine is running
or is hot.
6. The gear case has 4 oz. of grease installed at the
factory. It is recommended that once a year the gear
case be split and the grease level checked. Add grease
only if level of grease is below top of the gears. DO
NOT OVERFILL.
7. For cold weather operation, store the unit in a cool
environment. Transferring the unit from a warm to a
cold place can cause the build up of harmful
condensation.
STST
ORAGEORAGE
ST
ORAGE
STST
ORAGEORAGE
CAUTION
Do not store auger in an unventilated area where fuel
fumes may reach an open flame, spark or pilot light.
CAUTION
Drain fuel outdoors, away from any ignition sources. Use
only approved fuel containers. Be sure engine is cool. Do
not smoke.
Follow the steps below to prepare your auger for storage.
Read your engine manual for detailed instructions on
preparing the engine for storage.
1. Run with gas stabilizer in fuel. Screen in carburetor will
glaze shut if gas stabilizer is not used before storage.
2. Drain the fuel tank. Run the engine until it stops.
3. Remove spark plug, pour one-half ounce of clean
engine oil into cylinder. Pull starter handle slowly
several times to distribute oil. Replace spark plug.
4. Clean entire auger.
5. Store your auger in a clean, dry building that is
inaccessible to children.
Page 5
Page 6

ARDISAM
SERVICESERVICE
SERVICE
SERVICESERVICE
SERVICE INFORMATIONSERVICE INFORMATION
SERVICE INFORMATION
SERVICE INFORMATIONSERVICE INFORMATION
IN CASE OF A SERVICE PROBLEM, DO NOT SEND
UNIT BACK TO RETAILER. CONTACT ARDISAM, INC.
AT 1-800-345-6007.
At Ardisam, we build quality and durability into the design
of our products; but no amount of careful design by us,
and careful maintenance by you, can guarantee a repair-
free life for your auger. Most repairs will be minor, and
easily fixed by following the suggestions in the
troubleshooting guide in this section. The guide will help
you pinpoint the causes of common problems and identify
remedies.
For more complicated repairs, you may want to rely on
your retailer or an authorized mechanic (contact your
retailer for a list of authorized mechanics in your area). A
parts catalog is included in this section.
, TROUBLESHOO, TROUBLESHOO
, TROUBLESHOO
, TROUBLESHOO, TROUBLESHOO
TING AND REPTING AND REP
TING AND REP
TING AND REPTING AND REP
AIRAIR
AIR
AIRAIR
ORDERING REPORDERING REP
ORDERING REP
ORDERING REPORDERING REP
Parts can be obtained from the store where your auger was
purchased or direct from the factory. To order from the
factory, call or write to:
1690 Elm Street, Cumberland, WI 54829
Phone (715) 822-2415 Main Fax (715) 822-2223
Please include the following information with your order:
1. Part numbers
2. Part description
3. Quantity
4. Model number and serial number
AIR PARTSAIR PARTS
AIR PARTS
AIR PARTSAIR PARTS
Ardisam, Inc.
1-800-345-6007
Email info@ardisam.com
www.ardisam.com
We will always be glad to answer any questions you have,
or help you find suitable assistance. To order parts or
inquire about warranty, call or write us at the address
found in the next column under the section ordering repair
parts or check out our website -
www.ardisam.com
Page 6
Page 7

ARDISAM
SERVICESERVICE
SERVICE
SERVICESERVICE
TROUBLESHOOTROUBLESHOO
TROUBLESHOO
TROUBLESHOOTROUBLESHOO
, TROUBLESHOO, TROUBLESHOO
, TROUBLESHOO
, TROUBLESHOO, TROUBLESHOO
TINGTING
TING
TINGTING
TING AND REPTING AND REP
TING AND REP
TING AND REPTING AND REP
CAUTION
Practice safety at all times. Engine must
be turned off and allowed to cool, and
spark plug wire must be disconnected
before attempting any maintenance or
repair.
AIRAIR
AIR
AIRAIR
Problem Possible cause Remedy/Action
Engine will not start
Engine runs rough, floods during operation
Engine is hard to start
1. Power switch off
2. Spark plug wire disconnected
1. Dirty air cleaner
2. Choke partially engaged
3. Carburetor out of adjustment
1. Stale fuel
2. Spark plug wire loose
3. Dirty carburetor
1. Flip switch to on position
2. Connect spark plug wire to spark plug
1. Clean or replace air cleaner
2. Turn off choke
3. Call factory
1. Drain old fuel and replace with fresh. Use
gas stabilizer at end of season
2. Make sure spark wire is securely attached
to spark plug
3. Clean carburetor, use gas stabilizer, new
gas can
Engine misses or lacks power
Auger turns at idle
Auger turns, but has no power
Auger jumps on ice
Auger cuts slowly
Engine runs, then quits
1. Clogged fuel tank
2. Clogged air cleaner
3. Improper carburetor adjustment
4. Spark plug dirty, improper gap, or wrong
type
1. Idle speed too high
2. Broken clutch spring
1. Choke on
2. Carburetor out of adjustment
3. Broken transmission
4. Worn clutch shoes
5. Worn engine lower seal
1. Blades damaged or sharpened incorrectly
1. Dull blades
2. Damaged point
1. Gas cap not venting
2. Screen in carburetor plugged
1. Remove and clean
2. Clean or replace
3. Call factory
4. Replace spark plug and adjust gap
1. Adjust idle speed lower
2. Replace both springs
1. Turn off choke after engine is running
2. Call factory
3. Call factory
4. Replace clutch shoes and springs
5. Call factory
1. Buy new blades, or have blades sharpened
at factory
1. Buy new blades, or have blades sharpened
at factory
2. File point
1. Check self venting gas cap
2. Clean screen, use gas stabilizer, clean gas
can
Page 7
Page 8

ARDISAM
EARTHQUAKE MODEL 8900E PEARTHQUAKE MODEL 8900E P
EARTHQUAKE MODEL 8900E P
EARTHQUAKE MODEL 8900E PEARTHQUAKE MODEL 8900E P
ARTS LISTARTS LIST
ARTS LIST
ARTS LISTARTS LIST
Page 8
Page 9

ARDISAM
EARTHQUAKE MODEL 8900E PEARTHQUAKE MODEL 8900E P
EARTHQUAKE MODEL 8900E P
EARTHQUAKE MODEL 8900E PEARTHQUAKE MODEL 8900E P
ARTS LISTARTS LIST
ARTS LIST
ARTS LISTARTS LIST
MINIMUM ORDER ........................................................................... $10.00
POWERHEAD PARTS
Part # Description Qty.
60G70 Toggle Switch 1
89TRAN2R Transmission Complete 1
8905I Throttle Control Rod 1
8906 Throttle Control, Engine 1
8910T2R Handlebar, w/throttle mounting tab 1
8912 Gear 44T 1
8913 Output Shaft, 7/8" 1
8915 Dowel Pin, 1/4” x 1/2”, hardened steel 1
8916 Clutch Drum & 7T Pinion Gear 1
8918 Washer, Clutch-Hardened Steel 1
8919 Gasket 1
8920 Rotor- Centrifugal 1
8922 Ball Bearing 3
8923 Ball Bearing 2
8924 Snap Ring 3
8929 Bolt-SHCS, 1/4-20 x 1-1/2" 2
(gear case bottom to gear case top)
8931F Bolt-SHCS, 1/4-20 x 2" 4
(gear case to ring)
8932 Nut-Hex, 1/4"-20 Keps 4
8939 Gear Case Bottom 1
9214 48T & 10T Pinion Gear Cluster, left hand thread 1
89382R Gear Case Top 1
GCA1 Gas Cap 1
GT49B Gas Tank 1
S1011 Bolt-SHCS, 1/4-20 x 3/4” 4
(handlebar plate to engine)
TC30004 Gas Engine 1
EARTH AUGER PARTS
Part # Description Qty.
60G56 Nut-Hex 2-way reversible locknut, 5/16-18 2
1423 Bolt-HHCS, 5/16-18 x 2”, Grade 5 2
(auger shock spring)
1433 Bolt-HHCS, 3/8-16 x 1-1/2” 2
(auger to powerhead)
2104 Nut-Hex Locking, 3/8-16 2
8958HD Fishtail Point 1
(used on 4” or larger earth auger)
8970 Fishtail Point 1
(used on 2” & 3” earth auger)
8980 Shock Spring 1
EA2F Earth Auger, 2” w/fishtail point 1
EA3F Earth Auger, 3” w/fishtail point 1
EA4F Earth Auger, 4” w/fishtail point 1
EA6F Earth Auger, 6” w/fishtail point 1
EA8F Earth Auger, 8” w/fishtail point 1
EA10F Earth Auger, 10” w/fishtail point 1
EB4 Earth Blade, 4” 1
(includes EBOLT & ENUT)
EB6 Earth Blade, 6” 1
(includes EBOLT & ENUT)
EB6HD Heavy Duty Earth Blade, 6” 1
(includes EBOLT & ENUT)
EB8 Earth Blade, 8” 1
(includes EBOLT & ENUT)
EB8HD Heavy Duty Earth Blade, 8” 1
(includes EBOLT & ENUT)
EB10 Earth Blade, 10” 1
(includes EBOLT & ENUT)
EB10HD Heavy Duty Earth Blade, 10” 1
(includes EBOLT & ENUT)
EBOLT Bolt-Hex, 1/4-28 x 5/8”, Grade 5 2
(earth blade to auger)
ENUT Nut-Nyloc, 1/4-28 2
SM Shock Mechanism 1
(used on 6” or larger earth auger)
WF516 Washer-Flat, 5/16” 2
ACCESSORIES
EXT6 Depth Extension, 6"
EXT12 Depth Extension, 12"
EXT18 Depth Extension, 18"
Page 9
Page 10

ARDISAM
EARTHQUAKE MODEL 9000E PEARTHQUAKE MODEL 9000E P
EARTHQUAKE MODEL 9000E P
EARTHQUAKE MODEL 9000E PEARTHQUAKE MODEL 9000E P
ARTS LISTARTS LIST
ARTS LIST
ARTS LISTARTS LIST
Page 10
Page 11

ARDISAM
EARTHQUAKE MODEL 9000E PEARTHQUAKE MODEL 9000E P
EARTHQUAKE MODEL 9000E P
EARTHQUAKE MODEL 9000E PEARTHQUAKE MODEL 9000E P
ARTS LISTARTS LIST
ARTS LIST
ARTS LISTARTS LIST
MINIMUM ORDER ........................................................................... $10.00
POWERHEAD PARTS
Part # Description Qty.
60G70 Toggle Switch 1
90TRAN Complete Transmission 1
1402 Bolt-SHCS, 5/16-18 x 1-1/4” 4
(mount ring to engine)
8912 44T Gear 2
8913 Output Shaft, 7/8" 1
8915 Dowel Pin, 1/4” x 1/2”, hardened steel 2
8919 Gasket 1
8922 Ball Bearing 3
8923 Ball Bearing 2
8924 Snap Ring 4
8929 Bolt-SHCS, 1/4-20 x 1-1/2" 2
(gear case bottom to gear case top)
8934 Bolt-SHCS, 1/4-20 x 2-1/4" 4
(gear case to ring)
8939 Gear Case Bottom 1
9005 Throttle Control Rod 1
9005A Twist-Throttle Control Rod 1
9010 Handlebar-Foamed 1
9016 Clutch Drum, 3” Threaded 1
9017 12T Pinion Gear, Threaded 1
9025 Centrifugal Clutch Rotor 1
9037 Mount Ring 1
(handlebar to gear case top)
9038 Gear Case Top 1
9214A 10T Pinion Gear 1
AV520 Gas Engine 1
GCA1 Gas Cap 1
GT3HP Gas Tank 1
EARTH AUGER PARTS
Part # Description Qty.
60G56 Nut-Hex 2-way reversible locknut, 5/16-18 2
1423 Bolt-HHCS, 5/16-18 x 2”, Grade 5 2
(auger shock spring)
1433 Bolt-HHCS, 3/8-16 x 1-1/2” 2
(auger to powerhead)
2104 Nut-Hex Locking, 3/8-16 2
8958HD Fishtail Point 1
(used on 4” or larger earth auger)
8970 Fishtail Point 1
(used on 2” & 3” earth auger)
8980 Shock Spring 1
EA2F Earth Auger, 2” w/fishtail point 1
EA3F Earth Auger, 3” w/fishtail point 1
EA4F Earth Auger, 4” w/fishtail point 1
EA6F Earth Auger, 6” w/fishtail point 1
EA8F Earth Auger, 8” w/fishtail point 1
EA10F Earth Auger, 10” w/fishtail point 1
EB4 Earth Blade, 4” 1
(includes EBOLT & ENUT)
EB6 Earth Blade, 6” 1
(includes EBOLT & ENUT)
EB6HD Heavy Duty Earth Blade, 6” 1
(includes EBOLT & ENUT)
EB8 Earth Blade, 8” 1
(includes EBOLT & ENUT)
EB8HD Heavy Duty Earth Blade, 8” 1
(includes EBOLT & ENUT)
EB10 Earth Blade, 10” 1
(includes EBOLT & ENUT)
EB10HD Heavy Duty Earth Blade, 10” 1
(includes EBOLT & ENUT)
EBOLT Bolt-Hex, 1/4-28 x 5/8”, Grade 5 2
(earth blade to auger)
ENUT Nut-Nyloc, 1/4-28 2
SM Shock Mechanism 1
(used on 6” or larger earth auger)
WF516 Washer-Flat, 5/16” 2
ACCESSORIES
EXT6 Depth Extension, 6"
EXT12 Depth Extension, 12"
EXT18 Depth Extension, 18"
Page 11
Page 12

Ardisam, Inc.
1690 Elm Street, Cumberland, Wisconsin 54829
(715)822-2415 • Fax (715)822-4180
1-800-345-6007
www.ardisam.com
 Loading...