

Eagle Steril-Eze Installation Manual
PART #A223879
Steril-Eze
®
Open Wire
Surgical Case Carts
ASSEMBLY INSTRUCTIONS
CAUTION
INSPECT CONTENTS IMMEDIATELY AND FILE CLAIM WITH DELIVERING CARRIER FOR ANY DAMAGE.
SAVE YOUR BOX AND ALL PACKING MATERIALS.
YOU ARE RESPONSIBLE FOR DAMAGE TO YOUR UNIT IF RETURNED IMPROPERLY PACKED.
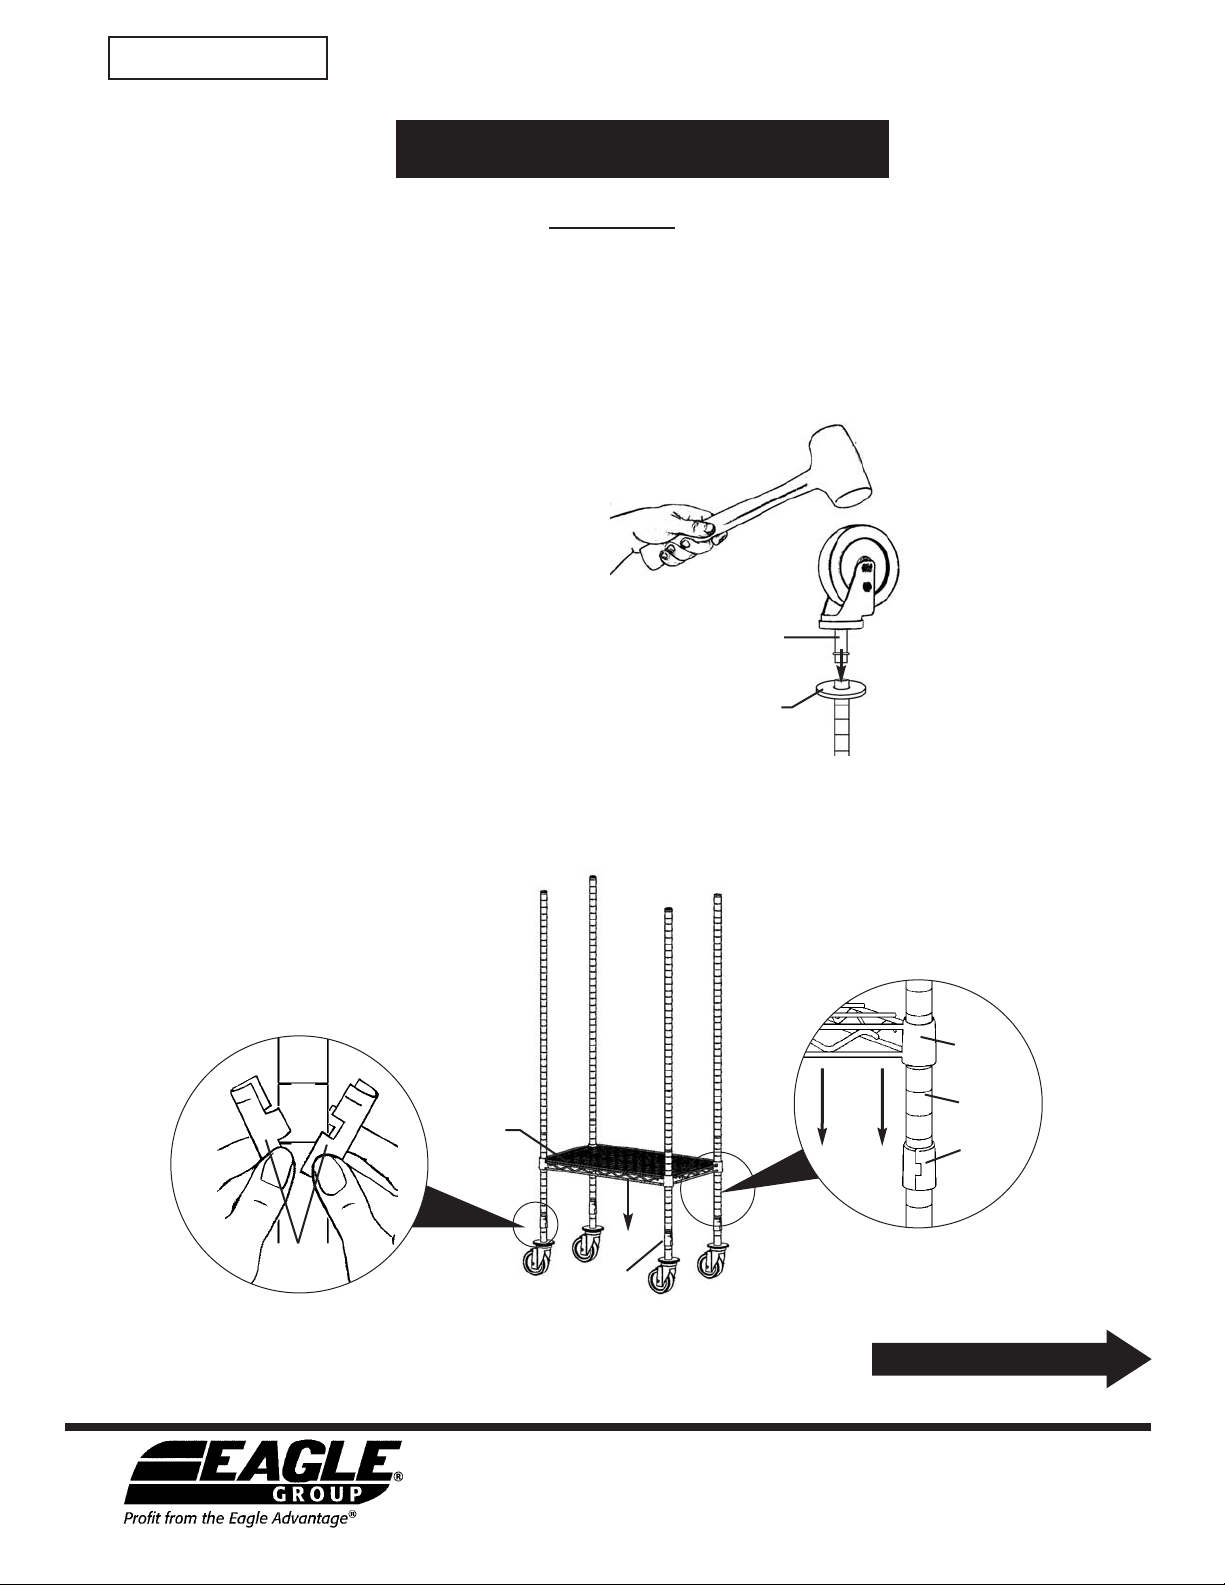
Step 1 - Secure casters to posts.
• Place donut bumpers onto bottom
ends of posts.
• Place caster stems into bottom
and drive caster using a hammer
or mallet (several solid blows are
usually required).
caster
stem
Step 2 - Attach split sleeves (at 3˝ mark
for bottom shelf) to posts.
• The wider part of the taper goes toward
the bottom.
• Make sure rib on split sleeve is seated into
a groove on the post.
Note: The number covered by the split sleeve
indicates approximate height of shelf.
4
3
split
sleeves
bottom
shelf
donut
bumper
Step 3 - Mount shelf.
corner
collar
post
split
sleeve
split
sleeve
(continued on back page)
EG10016 Revised 02/09
• 100 Industrial Boulevard, Clayton, Delaware 19938-8903 U.S.A. • www.eaglegrp.com
• Phone: 302/653-3000 • (Foodservice) 800/441-8440 • (MHC/Retail) 800/637-5100
• Fax: 302/653-2065
Eagle Foodservice Equipment, Eagle MHC, SpecFAB®, and Retail Display are divisions of Eagle Group. ©2009 by the Eagle Group
Steril-Eze
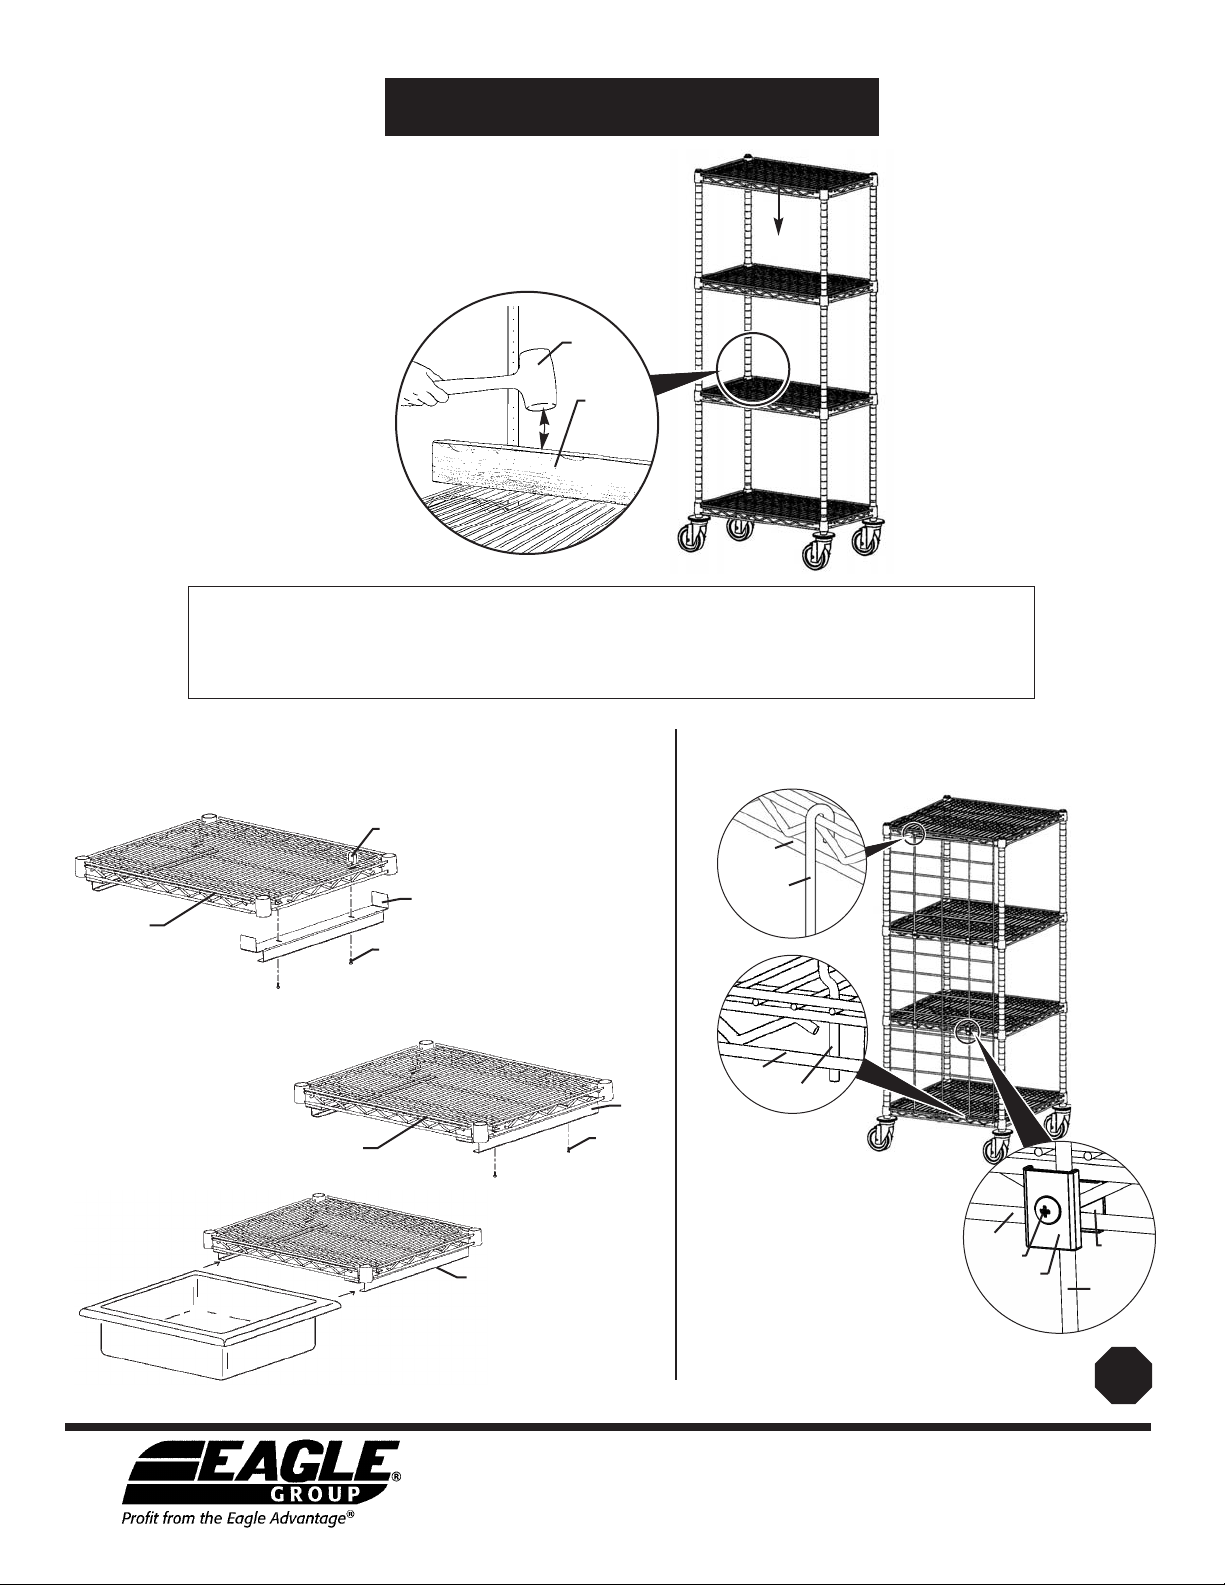
Step 4: Mount additional shelves at
desired heights.
Repeat Steps 2 & 3, working from bottom to top.
Step 5: Securely seat
all shelves.
Note: Do NOT hammer
directly on wire
or corner.
Before installing slides, determine where the clips will be located on the shelf:
• Hold slides together with adjoining tote box and place under wire shelf.
• Note locations of holes on slides. These holes will be the location of the clips.
• Set aside tote box and slides.
®
Open Wire Surgical Case Carts
ASSEMBLY INSTRUCTIONS
Tap with
rubber mallet.
Place board
across shelf
corners.
Step 6 - Attach clips to desired shelf
(two clips per slide).
Hang clips on wires running left-to-right (not front-to-back).
clip
slide
shelf
screw
Step 7 - Attach slides to shelf.
Hold slides under shelf and fasten
to clip with slotted screws.
shelf
Step 8 - Slide tote box
into slides.
slide
screw
slide
Step 9 - Install enclosure panels on both
sides and rear of unit.
top shelf
enclosure
panel hook
bottom
shelf
enclosure panel
bottom hook
Step 10 - Secure enclosure
panel with retaining
clamp assemblies
NOTE: Four retaining clamp
assemblies required per
enclosure panel.
shelf
screw
non-threaded
component
(vertical)
threaded
component
(horizontal)
enclosure
panel
Assembly is complete.
• 100 Industrial Boulevard, Clayton, Delaware 19938-8903 U.S.A. • www.eaglegrp.com
• Phone: 302/653-3000 • (Foodservice) 800/441-8440 • (MHC/Retail) 800/637-5100
• Fax: 302/653-2065
Eagle Foodservice Equipment, Eagle MHC, SpecFAB®, and Retail Display are divisions of Eagle Group. ©2009 by the Eagle Group
(End)
 Loading...