


Boost
Auto Med
Boost
Boost
Eco
Auto Med
100%
English English
selected
4:50 Auto
Low
run time
Exit
Off
On
Boost
Eco
Auto Med
User manual
Bedienungsanleitung
Manual de instrucciones
Manuel d’utilisation
Manuale d’uso
Gebruikershandleiding
Instrukcja obsługi
Руководство по эксплуатации
Priročnik za uporabo
Assembling your machine
Zusammensetzen Ihres Geräts
Montaje del dispositivo
clik
Quick start
Kurzanleitung
Inicio rápido
English
Espanol
Setting up your language
Before u sing your machin e, you will need to s et up your
preferred language option.
You can continu e to use your mach ine without se tting up the
languag e but you will be pro mpted each ti me you release
the trigger.
To set up your lan guage, tap the S election b utton to act ivate
the screen.
Tap the but ton to scroll throu gh the languag e list to your
prefer red language. P ress and hold th e button unt il the
countdo wn ends to set you r language.
A green tic k will appear on th e screen to show y our
language selection is complete.
To cancel your s election, re lease the but ton during
the countdown.
You can acces s a full list of avai lable languag es by select ing
'More+' from t he language lis t.
Einrichten Ihrer Sprache
Bevor Si e Ihr Gerät ver wenden, müss en Sie Ihre bevo rzugte
Sprache einrichten.
Sie könne n Ihr Gerät weit erhin verwe nden, ohne die
Sprach e einzurichte n, aber Sie werde n jedes Mal er neut
dazu aufgefordert, wenn Sie den Ein-/Ausschalter loslassen.
Um Ihre Sp rache einzuri chten, tippen S ie auf die
Auswahl taste, um den B ildschirm zu aktivieren.
Drücken Sie die Auswahltaste, um durch die Sprachen
zu blät tern. Durch ein k urzes Drück en (zwische n 2 und
4 Sekund en) auf die Ausw ahltaste wähl en Sie eine
Sprache aus.
Auf dem Bi ldschirm wird ei n grünes Häkch en
angezeig t, um anzuzeigen, d ass Ihre Spra chauswahl
abgeschlossen wurd e.
Um Ihre Aus wahl abzubrec hen, lassen S ie die Taste
während de s Countdown s los.
Sie könne n auf eine vollst ändige Liste d er verfügb aren
Sprach en zugreifen, in dem Sie in der S prachliste „ Mehr+“
auswählen.
Config uración de su idio ma
Antes de u sar su máquina, d eberá config urar la opción de
idioma preferido.
Puede se guir utilizand o la máquina sin co nfigurar el
idioma, pe ro se le pedirá que l o haga cada vez qu e suelte
el activador.
Para confi gurar el idioma, to que el botón de s elección par a
activa r la pantalla.
Toque el botó n para desplaz arse por la list a de idiomas
hasta el i dioma que pref iera. Pulse sin s oltar el botón h asta
que termi ne la cuenta reg resiva para es tablecer su idioma.
Aparec erá una marca ver de en la pantalla p ara mostrar
que la sele cción de idiom a se ha completado.
Para cance lar la selecci ón, suelte el bot ón durante la
cuenta regresiva.
Si dese a acceder a una li sta complet a de idiomas
disponib les, selecci one “Más+” en la lista de idiom as.
Configuration de votre langue
Avant d'u tiliser votre ap pareil, vous deve z configurer vo tre
option de langue préférée.
Vous pouvez c ontinuer à uti liser votre appa reil sans
configu rer la langue, ma is vous serez invi té à le faire chaqu e
fois que vou s relâcherez la gâchette.
Pour confi gurer votre lang ue, appuyez sur l e bouton
Sélection pour activer l'écran.
Appuyez sur le bouton de sélection pour faire défiler les
langues . Appuyez un co urt instan t (entre 2 et 4 secon des)
sur le bouton de sélection pour sélectionner une langue.
Une coch e verte appar aît à l'écran po ur indiquer qu e votre
sélec tion de langue e st terminée.
Pour annule r votre sélec tion, relâchez l e bouton pend ant le
compte à rebours.
Vous pouvez a ccéder à une lis te complète d es langues
disponib les en sélec tionnant «Plus+» à pa rtir de la list e
de langues .
English
selected
Montage de votre appareil
Assemblaggio dell’apparecchio
Uw apparaat monteren
clik clik
Démarrage rapide
Guida rapida
Snelle start
Configurazione della lingua
Prima di ut ilizzare la mac china, è neces sario impost are
l’opzione di ling ua scelta.
È possibile continuare a utilizzare l’apparecchio senza
impost are la lingua, ma ver rà richiesta o gni volta che si
rilascia i l grilletto.
Per confi gurare la lingua, p remere il pulsa nte di selezion e
per att ivare lo schermo.
Premere il t asto di selez ione per scorr ere tra le lingue.
Tenendo pre muto da 2 a 4 secon di il tasto di sel ezione, si
seleziona una lingua.
Appari rà un segno di spun ta verde sullo sc hermo per
indicare c he la selezione d ella lingua è st ata completata.
Per annulla re la selezione, r ilasciare il pul sante durante il
conto alla rovesci a.
È possibile accedere a un elenco completo delle lingue
disponibili selezionando “More+” (Altro) dall’elenco
delle lingue.
Uw taal configureren
Voorafga and aan het gebr uik van uw appara at, moert u uw
gewenste taaloptie configureren.
U kunt uw app araat blijven g ebruiken zond er het
configu reren van de taal, m aar u wordt hierom g evraagd bij
elke keer dat u de activering loslaat.
Voor het con figureren van u w taal, tikt u op de s electiek nop
om het sch erm te activeren.
Druk op de selectieknop om door de talen te scrollen. Door
de selec tieknop kor t (tussen 2 en 4 se conden) inge drukt te
houden, wo rdt een taal geselecteerd.
Een groen v inkje wordt wee rgegeven op he t scherm om aan
te geven da t uw taalsele ctie geree d is.
Om uw sele ctie te annul eren, laat u de kno p tijdens het
aftellen los.
U hebt toe gang tot een voll edige lijst me t beschikbar e talen
door het s electeren v an 'Meer+' in de lijst m et talen.
Ustawienie Twojego języka
Przed uż yciem urzą dzeniem nale ży skonfigu rować
preferowany języ k.
Można da lej korzys tać z urządze nia bez skonfi gurowania
języka, a le przy każd ym zwolnieni u spustu będ zie
wyśw ietlany moni t o jego ustawienie.
Aby skonf igurować jęz yk, należy s tuknąć pr zycisk wy boru,
aktyw ując ekran.
Przewi jać listę jęz yków, naciskając p rzycisk w yboru. Aby
wybra ć język, nac isnąć i krótko pr zytr zymać prz ycisk
wybo ru (od 2 do 4sekund).
Wybrany język zostanie oznaczony na ekranie zielonym
symbolem potwierdzenia.
Aby anulow ać wybór, nale ży zwolnić pr zycisk w
trakcie odliczania.
Dostę p do pełnej li sty języ ków można uzys kać, stukają c
pozycję „Więcej+”.
Настройка языка
Перед использованием устройства потребуется
настроить предпочитаемый язык.
Можно и спользо вать уст ройст во без нас тройки я зыка,
однак о после ка ждого от пускани я кнопки- курка бу дет
появляться за прос.
Чтобы настроить язык, нажмите кнопку выбора для
активации экр ана.
Нажи майте кно пку выб ора для пр окрутк и языков.
Нажмите и кратковременно удерживайте кнопку
выбор а (от 2 до 4 сек унд), что бы выбрат ь язык.
На экране появится зеленая галочка, показывающая,
что выб ор языка завершен.
Чтобы отменить выбор, отпустите кнопку во время
обратного отсче та.
Чтобы открыть полный список доступных языков,
выбе рите в спис ке языков пу нкт «Mo re+» (Больше).
Nastavitev jezika
Pred upor abo naprave mo rate nastav iti želeno
jezikovno možnost.
Napravo l ahko še naprej up orabljate, ne da b i nastavili
jezik, ven dar bo prikazan p oziv vsakič, ko s prostite sprožilec.
Če želite n astaviti je zik, tapnite gum b Selectio n (Izbor), da
aktivirate zas lon.
Pritiska jte gumb za izbira nje za pomikanje me d jeziki. Če za
kratek č as (od 2 do 4 sekunde) p ridržite gu mb za izbiranje,
boste izbrali jezik.
Na zaslon u se prikaže zele na kljukica, ki ka že, da je izbira
jezika končana.
Če želite p reklicati izb iro, spustite gu mb med odštevanjem.
Do celotnega seznama razpoložljivih jezikov lahko
dostop ate tako, da na sezna mu jezikov izbere te »More+
(Ve č +)« .
Montaż urządzenia
Сборка устройства
Montaža
Szybkie uruchomienie
Краткое руководство
Hitri začetek
100%
Fully cha rge before fir st use
It's im portant to f ully charge you r new machine be fore using
it for the f irst time, and af ter ever y use.
Vor dem ersten Gebrauch vollständig aufladen
Es ist wic htig, dass Sie I hre Maschine vo r dem ersten un d
nach jedem weiteren Gebrauch vollständig aufladen.
Eco
Power modes
Your machine h as three power m odes for dif ferent tasks .
Change cleaning modes quickly using a single button.
Eco: Maxim um run time, for lo nger cleans.
Med: The o ptimum balanc e to clean all floo rs.
Boost : Intensive cle aning for groun d-in dirt.
Leistungsstufen
Ihr Gerä t verfügt üb er drei Leist ungsstuf en für
untersc hiedliche Au fgaben. Übe r eine einzige Tast e
wechse ln Sie rasch zw ischen den Reinigungsmodi.
Eco: Maxim ale Betrieb sdauer für ei ne längere Reinigung.
Auto/Med: Das optimale Gleichgewicht für alle Böden.
Boost: Intensive Reinigung von tiefsitzendem Staub
und Schmutz.
Modos de alimentación
El aparat o tiene tres mod os de potencia p ara distinta s
tareas. C ambie de modo de li mpieza de form a rápida
pulsando un solo botón.
Eco: Tiemp o de funcionam iento máximo p ara limpiezas
más largas.
Auto/Me dio: El equilibrio p erfect o para limpiar to do tipo
de suelos.
Boost : Limpieza en prof undidad para l a suciedad
más difícil.
Modes de puissance
Votre appare il possède tr ois modes de pui ssance pour
effectuer différentes tâches. Changez de mode de
nettoy age rapideme nt à l’aide d’un seul bouton.
Éco: durée d e fonctionne ment maxima le, pour des
nettoyages plus longs.
Auto/In ter: le parfa it équilibre po ur nettoyer to us les sols.
Boost : pour les net toyages inten sifs et la
poussière incrus tée.
Modalità di aspirazione
L’apparecchio ha tre modalità di accensione per funzioni
diverse . Tramite un unico tas to è possibile c ambiare
rapidamente la modalità di pulizia.
Eco: durata m assima, per pul ire più a lungo.
Auto/Med: adatta in modo intelligente potenza
e autonomia.
Boost : pulizia intens a per sporco ostinato.
Vermogensmodi
Uw apparaat heeft drie vermogensmodi voor verschillende
taken. Wij zig snel de reinig ingsmodus me t gebruik van
een enkele knop.
Eco: Maximale looptijd, voor langere reinigingen.
Auto/Me d: De optimale ba lans voor het rei nigen van alle
typen vloeren.
Boost : intensieve rei niging voor ex tra vuile plekk en.
Cárguel o por completo an tes del prime r uso
Es impor tante cargar c ompletamen te el disposit ivo antes de
usarlo po r primera vez y de spués de cada us o.
Charger complètement avant la première utilisation
Il est imp ortant de ch arger complèt ement votre ap pareil
avant la pre mière utilisa tion et après ch aque utilisation.
Caricar e completame nte prima del pr imo utilizzo
È impor tante caricar e completame nte la macchina p rima di
utilizz arla per la prim a volta e dopo ogni u tilizzo.
Volledig opladen voorafgaand aan eerste gebruik
Het is bel angrijk om uw app araat volledi g op te laden
voordat u h et voor de eers te keer gebru ikt en na elk gebruik.
Całkowicie naładować przed pierwszym użyciem
Urząd zenie należy c ałkowicie na ładować pr zed pierw szym
użycie m oraz po każdym u życiu.
Полная зарядка перед первым использованием
Пере д кажды м использ ованием и п осле не го важно
полностью зарядить устройство.
Pred prvo uporabo popolnoma napolnite
Pomembno j e, da popolnom a napolnite vaš s troj pred pr vo
uporabo i n po vsaki upora bi.
Med
Try by moc y
Urząd zenie ma trzy t ryby moc y dostosowan e do różnych
zadań. Try b czyszc zenia można zmie nić szybko za p omocą
jednego przycisku.
Eco: Maks ymalny czas pr acy, do dłużs zego sprzątania.
Auto/Me d: Optymalny b alans do czy szczenia ws zystkic h
rodzajów podłóg.
Boost: Intensywne czyszczenie uporczywego bru du.
Режимы р аботы
Устройс тво може т работа ть в трех реж имах в
завис имости о т выполня емой зад ачи. Режим ы быстро
переключаются одной кнопкой.
Эко: макс имально е время р аботы, дол ьше чист ка.
Авто/средний: оптимальный баланс для уборки
всех покрытий.
Турбо: интенсивная очистка сложных загрязнений.
Načini p orabe energi je
Naprava i ma tri načine p orabe energij e za različna
opravil a. Način čišč enja lahko hitro sp remenite s sam o
enim gumbom.
Eko: Najdalj ši čas delovanj a, primeren za dal jša čiščenj a.
Auto/Sr ed: Optimalno ra vnovesje za či ščenje vseh
talnih površin.
Boost: Intenzivno čiščenje za trdovratno umazanijo.
Boost
SV17

Thank you for choosing to buy a Dyson
cord-free vacuum.
To read your manual in English go to page 3.
Vielen Dank, dass Sie sich für einen
kabellosen Staubsauger von Dyson
entschieden haben.
Um das Handbuch auf Deutsch zu lesen,
gehen Sie auf Seite 12.
Gracias por comprar una aspiradora sin
cable Dyson.
Para leer la guía del usuario en español,
vaya a la página 21.
Merci d’avoir choisi de vous équiper d’un
aspirateur sans fil Dyson.
Pour lire votre manuel en français,
rendez-vous à la page 30.
Scan wit h your phone or QR re ader to get the mo st out of your mach ine.
Requires A pple iOS 11 or later, a compat ible Android dev ice or a QR reader.
Scanne n Sie den Code mit I hrem Mobiltele fon oder einem Q R Scanner, um das Be ste aus Ihrem Ge rät herauszuh olen.
Erford ert mindest ens Apple iOS 11, ein kompatib les Android Ge rät oder einen Q R Scanner.
Escane e con su teléfono o s u lector QR para s acar el máximo p artido a su máq uina
Requiere A pple iOS 11 o versiones p osteriores , un dispositivo A ndroid compat ible o un lector Q R.
Veuillez sca nner avec votre té léphone ou votr e ecteur de cod es QR pour tirer le m eilleur part i de votre appareil .
Nécess ite iOS Apple 11 ou plus ré cent, un appareil A ndroid compati ble ou un lecteu r de lecteur de c odes QR.
Eseguire l a scansione con il t elefono o un let tore QR per ot tenere il massi mo dalla macchin a.
Richied e Apple iOS 11 o versione su ccessiva, un dis positivo Andr oid compatibil e o un lettore di co dici QR.
Scan met d e camera van uw tel efoon of QR-lez er om het meest e uit uw machine te h alen.
Vereist Ap ple iOS 11 of later, een vergeli jkbaar Androi d apparaat of een Q R lezer.
Zeskanuj t elefonem lub c zytnikiem ko dów QR, aby w pe łni wykorz ystać możli wości Twojego ur ządzenia.
Wymaga s ystemu iOS 11 lub późni ejszego, kompat ybilnego ur ządzenia z sys temem Androi d lub czytni ka kodów QR.
Используйте камеру вашего телефона или сканер QR-кодов для получения дополнительной информации
по ваше му продук ту.
Требует ся устро йство с оп ерацион ной систе мой Apple iOS 11 или б олее позд ними верс иями,
Android-совместимое устройство или сканер QR-кодов.
Skenirajt e s telefonom ali b ralnikom QR, da kar n ajbolje izkoris tite svojo napra vo.
Zahteva A pple iOS 11 ali novejšo razli čico, združljivo n apravo Android a li bralnik QR.
Grazie per aver scelto di acquistare un
aspirapolvere senza filo Dyson.
Per leggere il Manuale dell’utente in italiano,
andare a pagina 39.
Bedankt dat u voor een Snoerloze Dyson
stofzuiger hebt gekozen.
Ga naar pagina 48 om de
gebruiksaanwijzing te lezen in
het Nederlands.
Dziękujemy za wybór odkurzacza
bezprzewodowego Dyson.
Instrukcja obsługi w języku polskim jest
dostępna na stronie 57.
Благодарим вас за выбор беспроводного
пылесоса Dyson!.
Инструкция на русском языке находится
на странице 66.
Hvala, da ste se odločili za nakup
brezžičnega sesalnika Dyson.
Priročnik v slovenščini je na strani 76.
2
EN
Thank you for choosing to buy
a Dyson cord-free vacuum
Activating your guarantee
We don’t stop caring about our machines
once they’re yours.
After activating your free two-year
guarantee, your Dyson cord-free vacuum
will be covered for parts and labour
(excluding filters) for two years from the
date of purchase, subject to the terms of
the guarantee.
Your serial number can be found on your rating plate which is on the base of
your machine.
Note your serial number for future reference.
This illustration is for example purposes only.
Even after your guarantee has ended, we’ll
still be on hand to help.
Free Dyson parts and labour
Hassle-free replacement
Expert advice. Seven days a week
‘How to’ videos and helpful tips
How can we help? Dyson customer care
Solve a problem
Get tips and guides
Learn about Dyson technology
and other Dyson machines
Online:
www.dyson.com
Phone:
08002980298
If you have a question about your
Dyson cord-free machine, call the
Dyson Helpline with your serial number
and details of where and when you
bought the machine, or contact us
through the Dyson website.
3
IMPORTANT SAFETY
INSTRUCTIONS
BEFORE USING THIS APPLIANCE READ ALL
INSTRUCTIONS AND CAUTIONARY MARKINGS
IN THE USER MANUAL AND ON THE APPLIANCE.
When using an electrical appliance, basic
precautions should always be followed, including
the following:
WARNING
These warnings apply to the appliance, and also
where applicable, to all tools, accessories, chargers,
batteries or mains adaptors.
TO REDUCE THE RISK OF FIRE, ELECTRIC SHOCK,
OR INJURY:
1. This Dyson appliance can be used by children
aged from 8 years and above and persons
with reduced physical, sensory or reasoning
capabilities, or lack of experience and
knowledge, only if they have been given
supervision or instruction by a responsible person
concerning use of the appliance in a safe way
and understand the hazards involved. Cleaning
and user maintenance should not be performed
by children without supervision.
2. Do not allow to be used as a toy. Close attention
is necessary when used by or near children.
Children should be supervised to ensure that they
do not play with the appliance.
3. Use only as described in your Dyson User
manual. Do not carry out any maintenance other
than that shown in your User manual, or advised
by the Dyson Helpline.
4. Suitable for dry locations ONLY. Do not use
outdoors or on wet surfaces.
5. Do not handle any part of the charger
or appliance with wet hands.
6. Do not use with a damaged charger or cable.
7. If the appliance is not working as it should,
if it has received a sharp blow, if it has been
dropped, damaged, left outdoors, or dropped
into water, do not use and contact the
Dyson Helpline.
8. Contact the Dyson Helpline when a service
or repair is required. Do not disassemble the
appliance as incorrect reassembly may result
in an electric shock or fire.
9. Do not stretch the cable or place the cable
under strain. Keep the cable away from heated
surfaces. Do not close a door on the cable,
or pull the cable around sharp edges or corners.
Arrange the cable away from traffic areas and
where it will not be stepped on or tripped over.
Do not run over the cable.
10. Do not use to pick up water.
11. Do not use to pick up flammable or combustible
liquids, such as petrol, or use in areas where they
or their vapours may be present.
12. Do not pick up anything that is burning
or smoking, such as cigarettes, matches,
or hot ashes.
13. Keep hair, loose clothing, fingers, and all parts
of the body away from openings and moving
parts, such as the brush bar. Do not point the
hose, wand or tools at your eyes or ears or put
them in your mouth.
14. Do not insert any objects into openings. Do not
use with any openings blocked; keep free of dust,
lint, hair, and anything that may reduce airflow.
15. Use only Dyson recommended accessories and
replacement parts.
16. Do not use without the clear bin and filter(s)
in place.
17. Unplug the charger when not in use for
extended periods.
18. Use extra care when cleaning on stairs.
19. To prevent unintentional starting, be careful
to keep your hands and fingers away from
the power trigger until you are ready to begin
vacuuming, especially when picking up or
carrying the appliance. Carrying the appliance
with your finger on the power trigger
invites accidents.
20. Do not install, charge or use this appliance
outdoors, in a bathroom or within 3 metres
(10 feet) of a pool. Do not use on wet surfaces
and do not expose to moisture, rain or snow.
21. When removing or replacing a motorised brush
bar, be careful not to pull the power trigger until
the cleaner head has been reassembled.
22. Do not use a battery or appliance that
is damaged or modified. Damaged or modified
batteries may exhibit unpredictable behaviour
resulting in fire, explosion or risk of injury. The
battery used in this appliance may present a risk
of fire or chemical burn if mistreated. Do not
disassemble or short-circuit the battery's supply
terminals. Do not expose the battery or appliance
to fire or excessive temperatures. Exposure
to fire or temperatures above 60°C (140°F) may
cause explosion.
4
23. Use only the Dyson charger Part Number
217160 or 270576 for charging this appliance.
Use only the Dyson battery Part Number
355983 for this appliance. Other types
of batteries may explode, causing damage and
injury to persons.
24. Disconnect the battery from the appliance before
cleaning, maintaining or storing the appliance for
extended periods of time.
25. When the battery is not in use, keep it away
from other metal objects, like paper clips, coins,
keys, nails, screws or other small metal objects,
that can make a connection from one terminal
to another. Shorting the battery terminals
together may cause burns or a fire.
26. The battery should be removed from the
appliance and safely disposed of in accordance
with local ordinances or regulations.
27. The battery is a sealed unit and under normal
circumstances poses no safety concerns. In the
unlikely event that liquid leaks from the battery,
do not touch the liquid as it may cause irritation
or burns, and observe the following precautions:
• Skin contact – can cause irritation. Wash with
soap and water.
• Inhalation – can cause respiratory irritation.
Expose to fresh air and seek medical advice.
• Eye contact – can cause irritation. Immediately
flush eyes thoroughly with water for at least
15 minutes. Seek medical attention.
• Disposal – wear gloves to handle the battery
and dispose of immediately, following local
ordinances or regulations.
28. Follow all charging instructions and refer to the
'Changing your battery' section for details on how
to change the battery. Do not charge the battery
or the appliance outside of the temperature
range specified in the instructions. Charging
improperly or at a temperature outside of the
specified range may damage the battery and
increase risk of fire. To ensure maximum battery
life, Dyson recommends the following:
• When not in use the appliance should be stored
at room temperature. Recommended range:
18°C (64°F) to 28°C (82°F).
• The ambient temperature range for operation
and charging should be 10°C (50°F) to 30°C
(86°F).
29. FIRE WARNING – Do not place this appliance
on or near a cooker or any other hot surface
and do not incinerate this appliance even if it
is severely damaged. The battery might catch fire
or explode.
30. FIRE WARNING – Do not apply any fragrance
or scented product to the filter(s) of this appliance.
The chemicals in such products are known
to be flammable and can cause the appliance
to catch fire.
READ AND SAVE THESE
INSTRUCTIONS
This Dyson appliance is intended for household
use only.
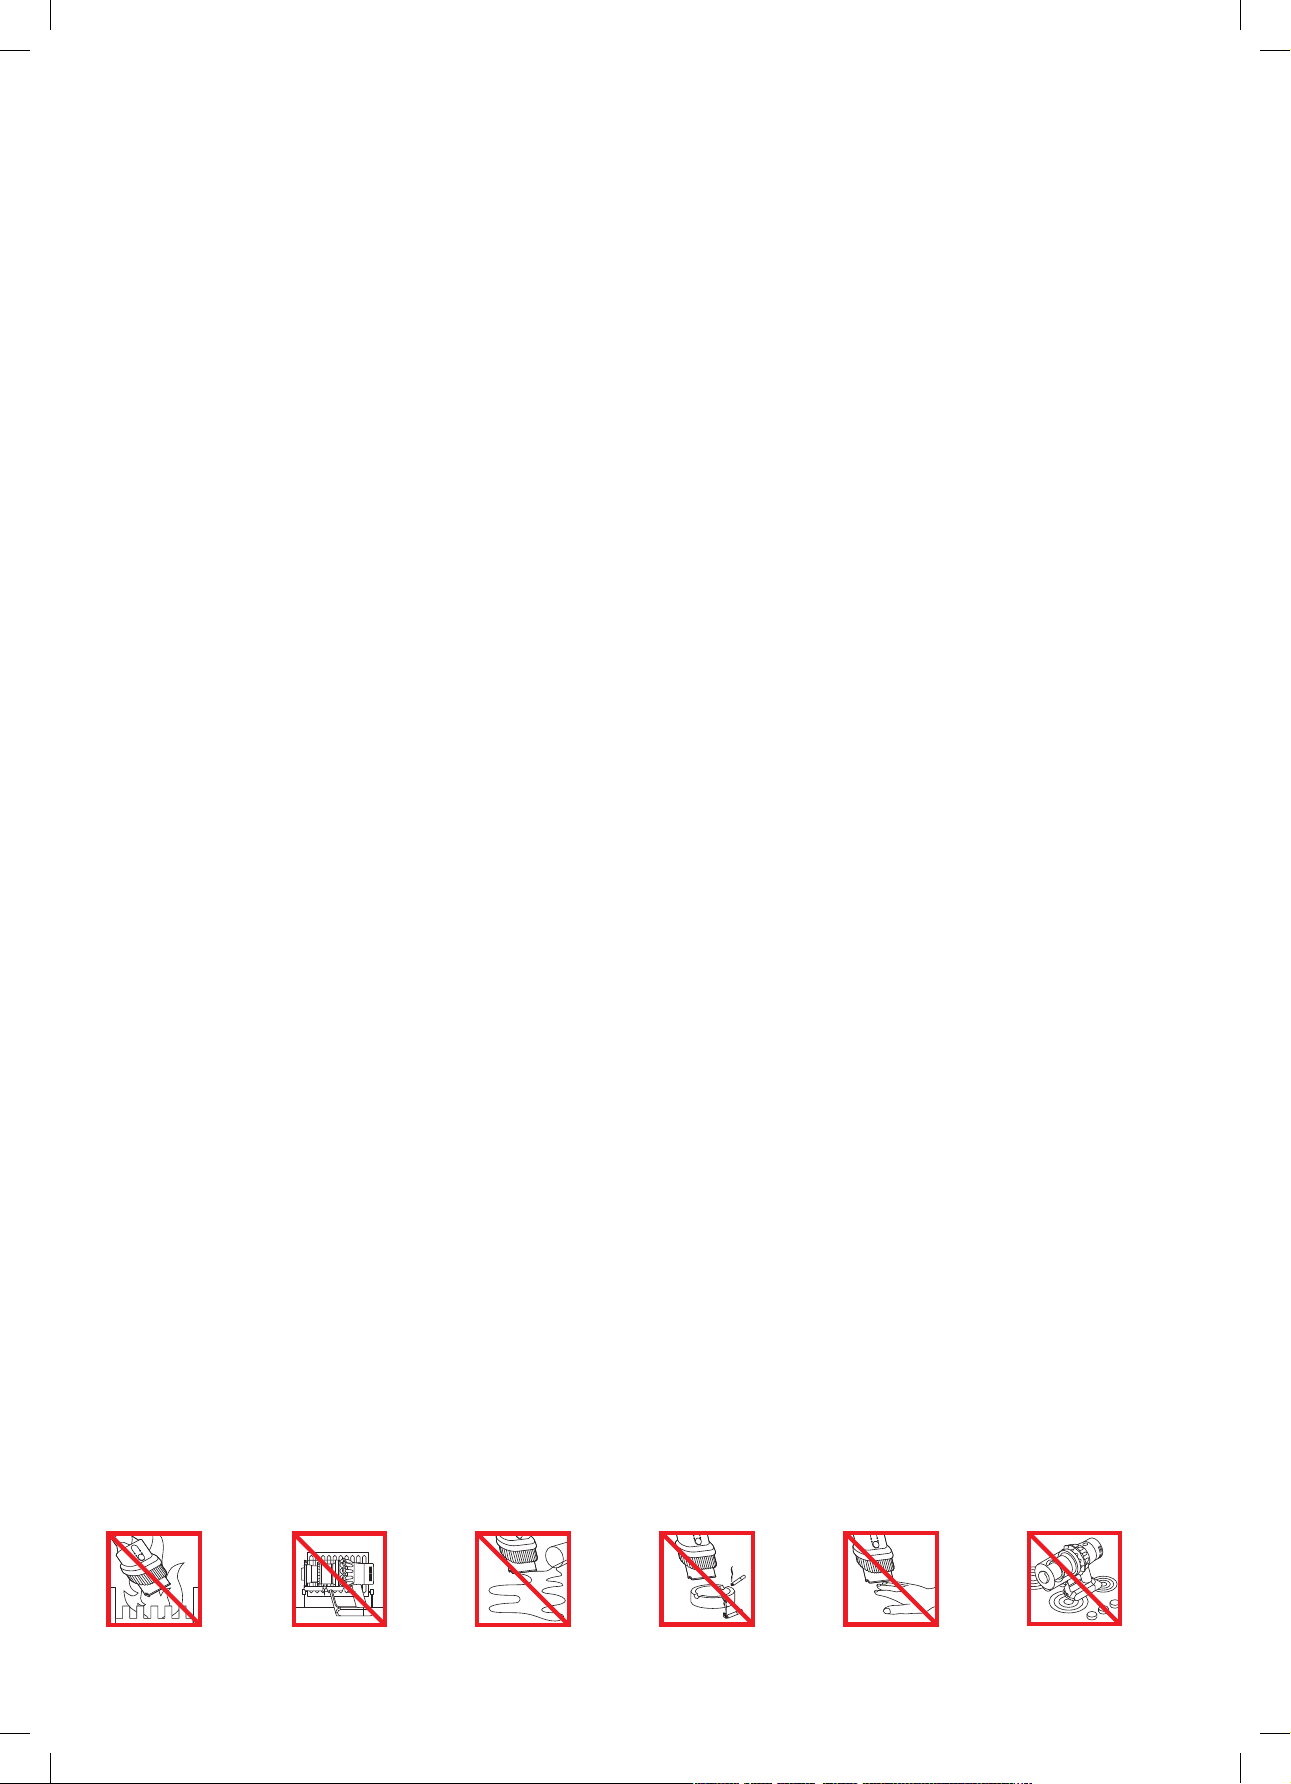
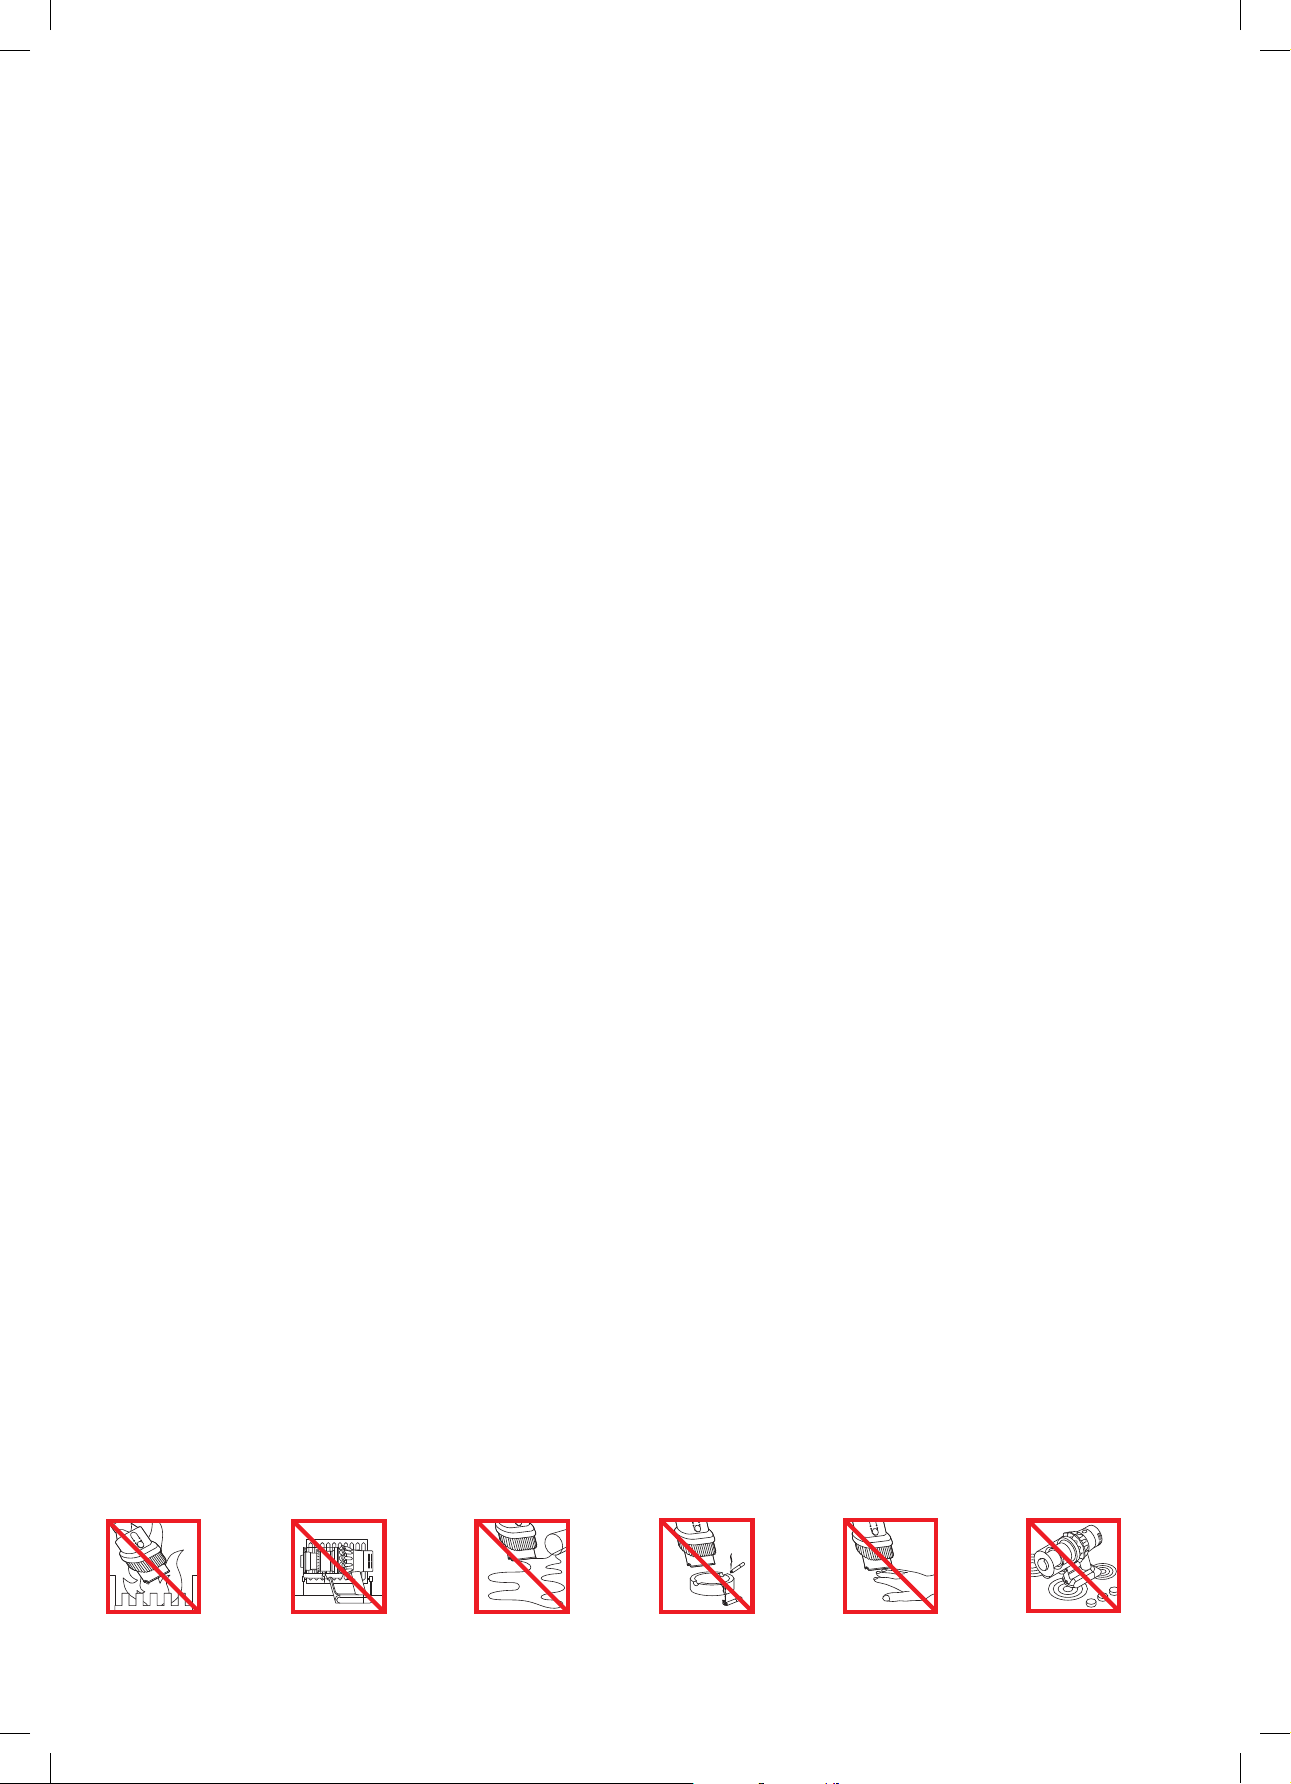
Do not use near
naked flames.
Do not st ore near
heat sources.
Do not pick up water
or liquids.
Do not pick up
burning obje cts.
Do not put hands near
the brush bar when the
applian ce is in use.
Do not pla ce on or near
a co oker.
5

Boost
Eco
Auto Med
100%
English English
selected
4:50 Auto
Low
run time
Exit
Off
On
Boost
Auto Med
English English
selected
4:50 Auto
Low
run time
Exit
Off
On
Boost
Auto
Boost
Eco
Auto Med
100%
4:50 Auto
Low
run time
Boost
Eco
Auto Med
100%
English
Espanol
English English
selected
4:50 Auto
Low
run time
Exit
Off
On
The screen
Settings menu
Control the settings on your machine
using the Selection button.
To enter the settings menu, press and
hold the button until the menu screen
appears. Tap to scroll through the
options available.
Change
language
English
Espanol
Follow the steps in the language
set-up to change your language.
English
selected
Change alert
setting
Tap to scroll through the settings
menu. Select the 'Alerts' option.
Scroll to select on or off. Hold
the Selection button until the
countdown ends and a tick appears
on the screen.
To cancel your selection, release the
button during the countdown.
Low battery
4:50
Your machine will pulse three times
and a low battery icon will appear
on the screen to alert you that your
battery needs to be charged.
When your battery is empty, a
final warning icon will appear on
the screen.
Battery health
To get the best performance and
life from your battery, use Eco or
Auto/Med mode.
Exit settings menu
6
To exit the settings menu, tap to
scroll through the settings menu.
Select 'Exit menu'.
Alerts
Alerts will appear on the screen when
your machine needs your attention.
A filter icon will alert you when
the filter isn't fitted correctly or
needs cleaning.
A blockage icon will alert you when
a blockage needs removing from
your machine.

Boost
Eco
Auto Med
clik
clik
clik
Charging and storing
Changing your battery
your machine
It's impor tant to fully charge your new machine before
using it for the first time, and after ever y clean. This is
3-4.5hrs
Connect to the charger either directly
or in the docking station.
The blue LEDs on either side of the
battery will flash during charging.
When the battery is fully charged,
both LEDs will light for 5 seconds.
Your battery is fully charged when
the display shows 100%.
because the battery and monitoring system's algorithm
'learns' over time, and fully charging your machine
helps it to more accurately calculate and display
remaining run time.
100%
Your machine won't operate if the
ambient temperature is below 0°C
(32°F). This is designed to protect
both the motor and battery.
Where you have additional batteries, we
recommend that you alternate the batteries to
maintain even performance.
clik
To remove a battery
Hold your hand under the
battery to support it.
Press the battery release
button and slide the battery
off the handle.
Place the battery on charge.
To install a battery
Slide the battery onto
the handle until it clicks
securely in place.
Emptying your clear bin
2
1
3
clik
Be careful not to pull the power trigger
while the clear bin is open for emptying.
clik
Close the clear bin by pushing the bin base
upwards until the clear bin and bin base click
into place.
7
clik
3
4
2
1
3
4
2
1
3
3
4
clik
2
1
3
1
3
2
1
3
4
clik
2
1
Looking for blockages
1 2
1
3
4
2
4
5 6
Close the clear bin by pushing the bin base
upwards until the clear bin and bin base click
into place.
8
clik
Washing your filter unit
21
543 6
Direct drive cleaner head maintenance
1 2 3
9
Additional information
Please read the ‘Important safet y instructions’ in the Dyson User manual before proceeding.
Installing your docking station
• Unpack the docking station, charger and installation leaflet.
• Choose a suitable location for the docking station and make sure there is no
pipework (gas, water or air), electrical cables, wires or ductwork directly behind the
mounting location.
• Don't locate the docking station near a heat source such as a cooker, radiator or in
direct sunlight.
• Follow the instructions on the installation leaflet.
• Click the tools into place on the docking station.
• Place the machine into the docking station.
• Plug the charger into the mains elec tricity supply. Switch on (if necessary) to charge
the batter y.
• It's important to fully charge your new machine before using it for the first time, and after
every use.
The docking station must be mounted in accordance with regulations and applicable codes/
standards (state and local laws may apply).
Dyson recommends the use of protective clothing, eyewear and materials when installing the
docking station.
Using your machine
• Check that the underside of the cleaner head or tool is clean and free from foreign
objects that may cause damage.
• Before vacuuming your flooring, rugs and carpets, check the
manufacturer’s recommended cleaning instructions.
• The brush bar on the machine can damage cer tain carpet types and floors. Some
carpets will fuzz if a rotating brush bar is used when vacuuming. If this happens,
we recommend vacuuming without the motorised floor tool and consulting with your
flooring manufacturer.
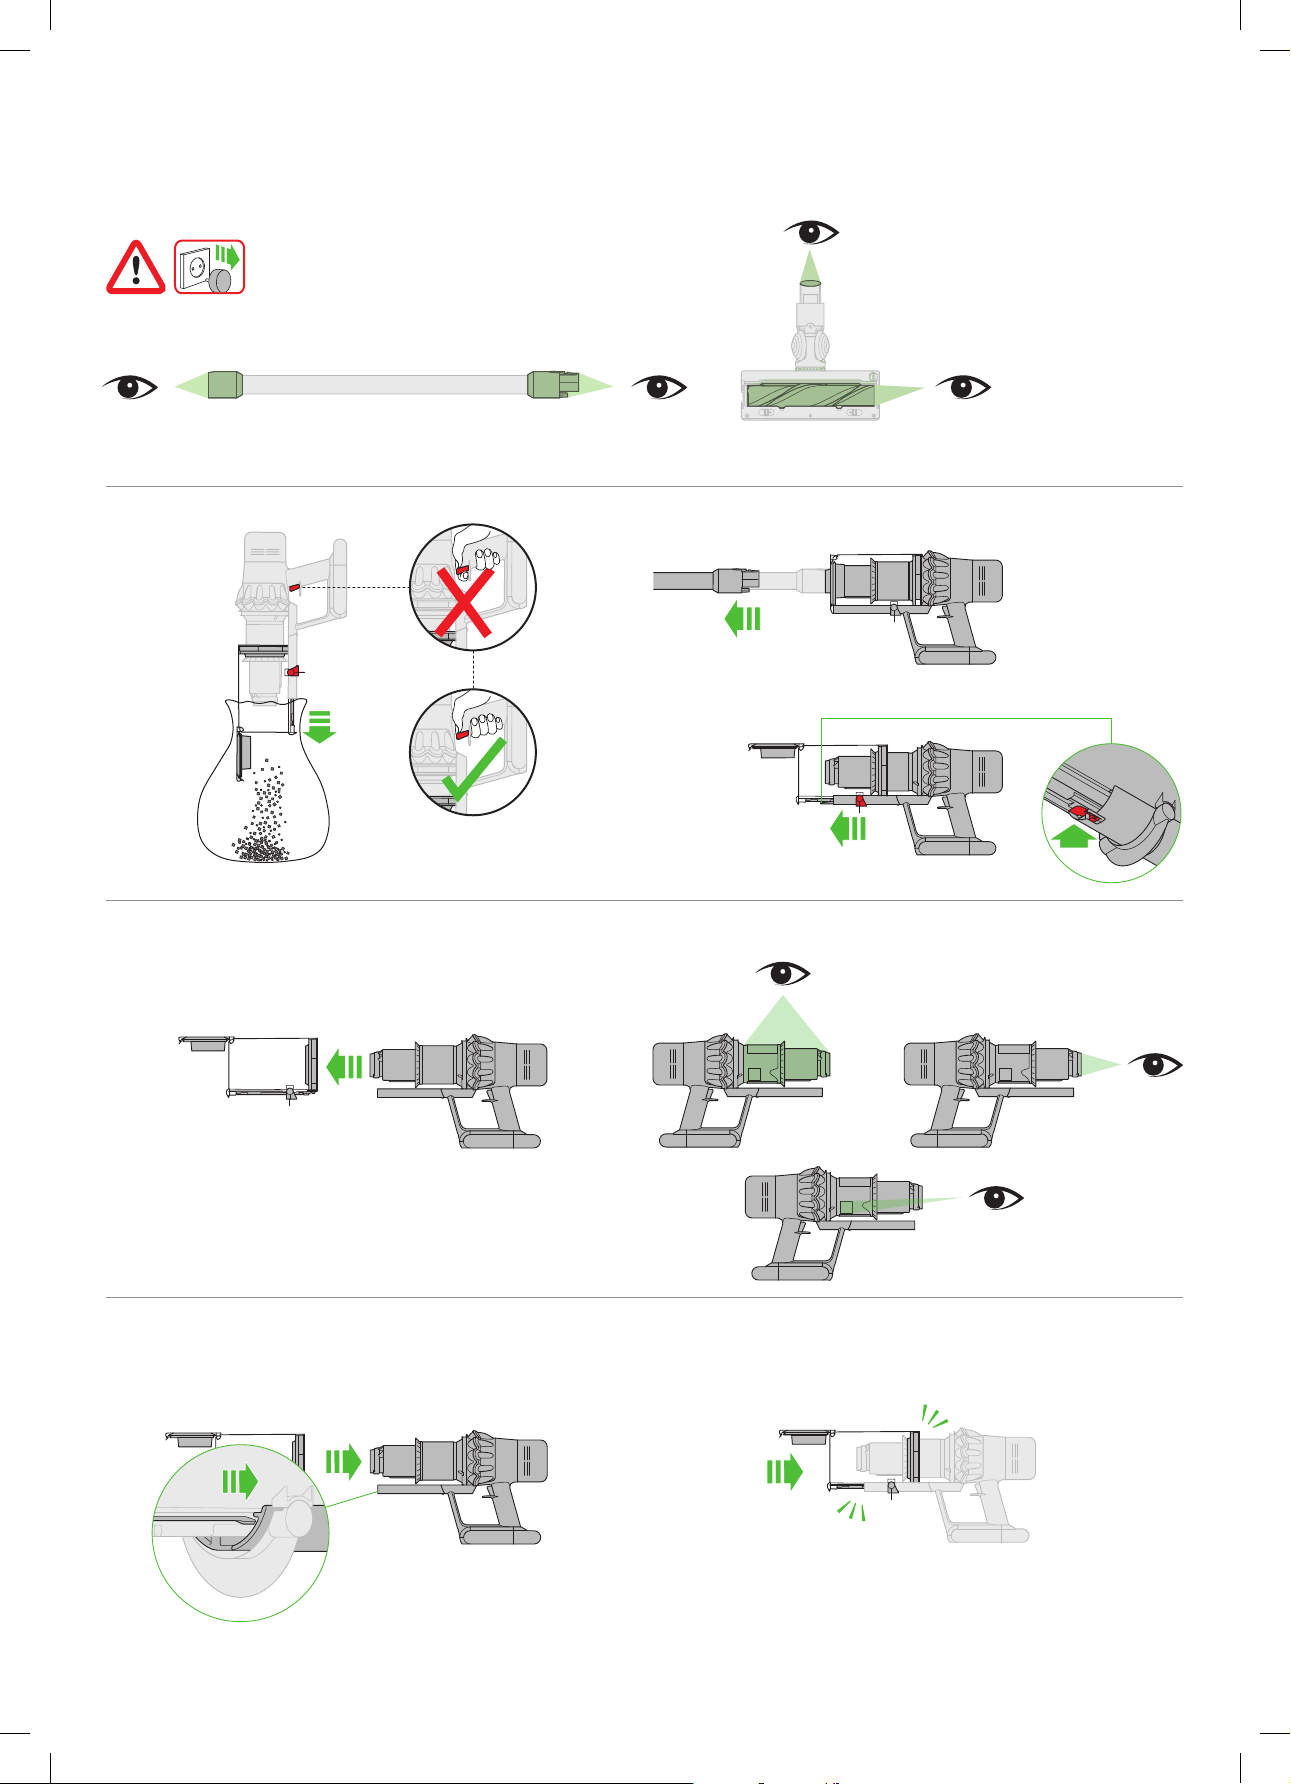
Emptying your clear bin
• Empty as soon as the dirt reaches the M AX level – don't overfill. Using the machine when
the dirt is above the MA X line may cause the dirt to reach the filter and more frequent
maintenance will be required.
• Be careful not to pull the power trigger while the clear bin is open for emptying.
• Press the red wand release button and pull the wand away from the bin.
• To re lease the dir t:
– Hold the machine over a bin in a downwards position.
– Firmly push the red bin release but ton.
– The bin will slide down, cleaning the shroud as it goes and the bin base will open.
– The bin base won' t open if the red bin release button isn' t pushed down all the way.
To minimise dust/allergen contact when emptying, cover the clear bin tightly in a dust proof
bag while you empt y.
Remove the clear bin carefully from the bag. S eal the bag tightly and dispose.
Be careful not to pull the power trigger while the clear bin is open for emptying.
• To close the clear bin:
– Push the bin base upwards until the clear bin and bin base click into place.
Cleaning your clear bin
If it is necessary to clean your clear bin, empty the bin as shown in the 'Emptying your clear bin'
section.
• Press the red button located on the bin runner to release the bin and slide the bin off
the runner.
• Clean the clear bin with a damp cloth only.
• Make sure that the clear bin and seals are completely dry before replacing.
• To re fit the clear bin:
– Inser t the spine on to the bin runner.
– Close the clear bin by pushing the bin base upwards until the clear bin and bin base click
into place.
The clear bin is not dishwasher safe and the use of detergents, polishes or air fresheners
to clean the clear bin is not recommended as this may damage your machine.
Looking for blockages
• Your machine is fitted with an automatic cut-out. If any part becomes blocked, the
machine may automatically cut out.
• The motor will pulse and the LCD screen will indicate that there is a blockage.
• Leave to cool down before looking for blockages.
• Be careful not to pull the power trigger while looking for blockages.
• Make sure any blockages are clear and all parts are refitted before using your machine.
• Beware of sharp objects when checking for blockages.
• Clearing blockages is not covered by your guarantee.
• To check for blockages in the main body of your machine, remove the clear bin following
the instructions in the 'Emptying your clear bin' section and remove any blockage.
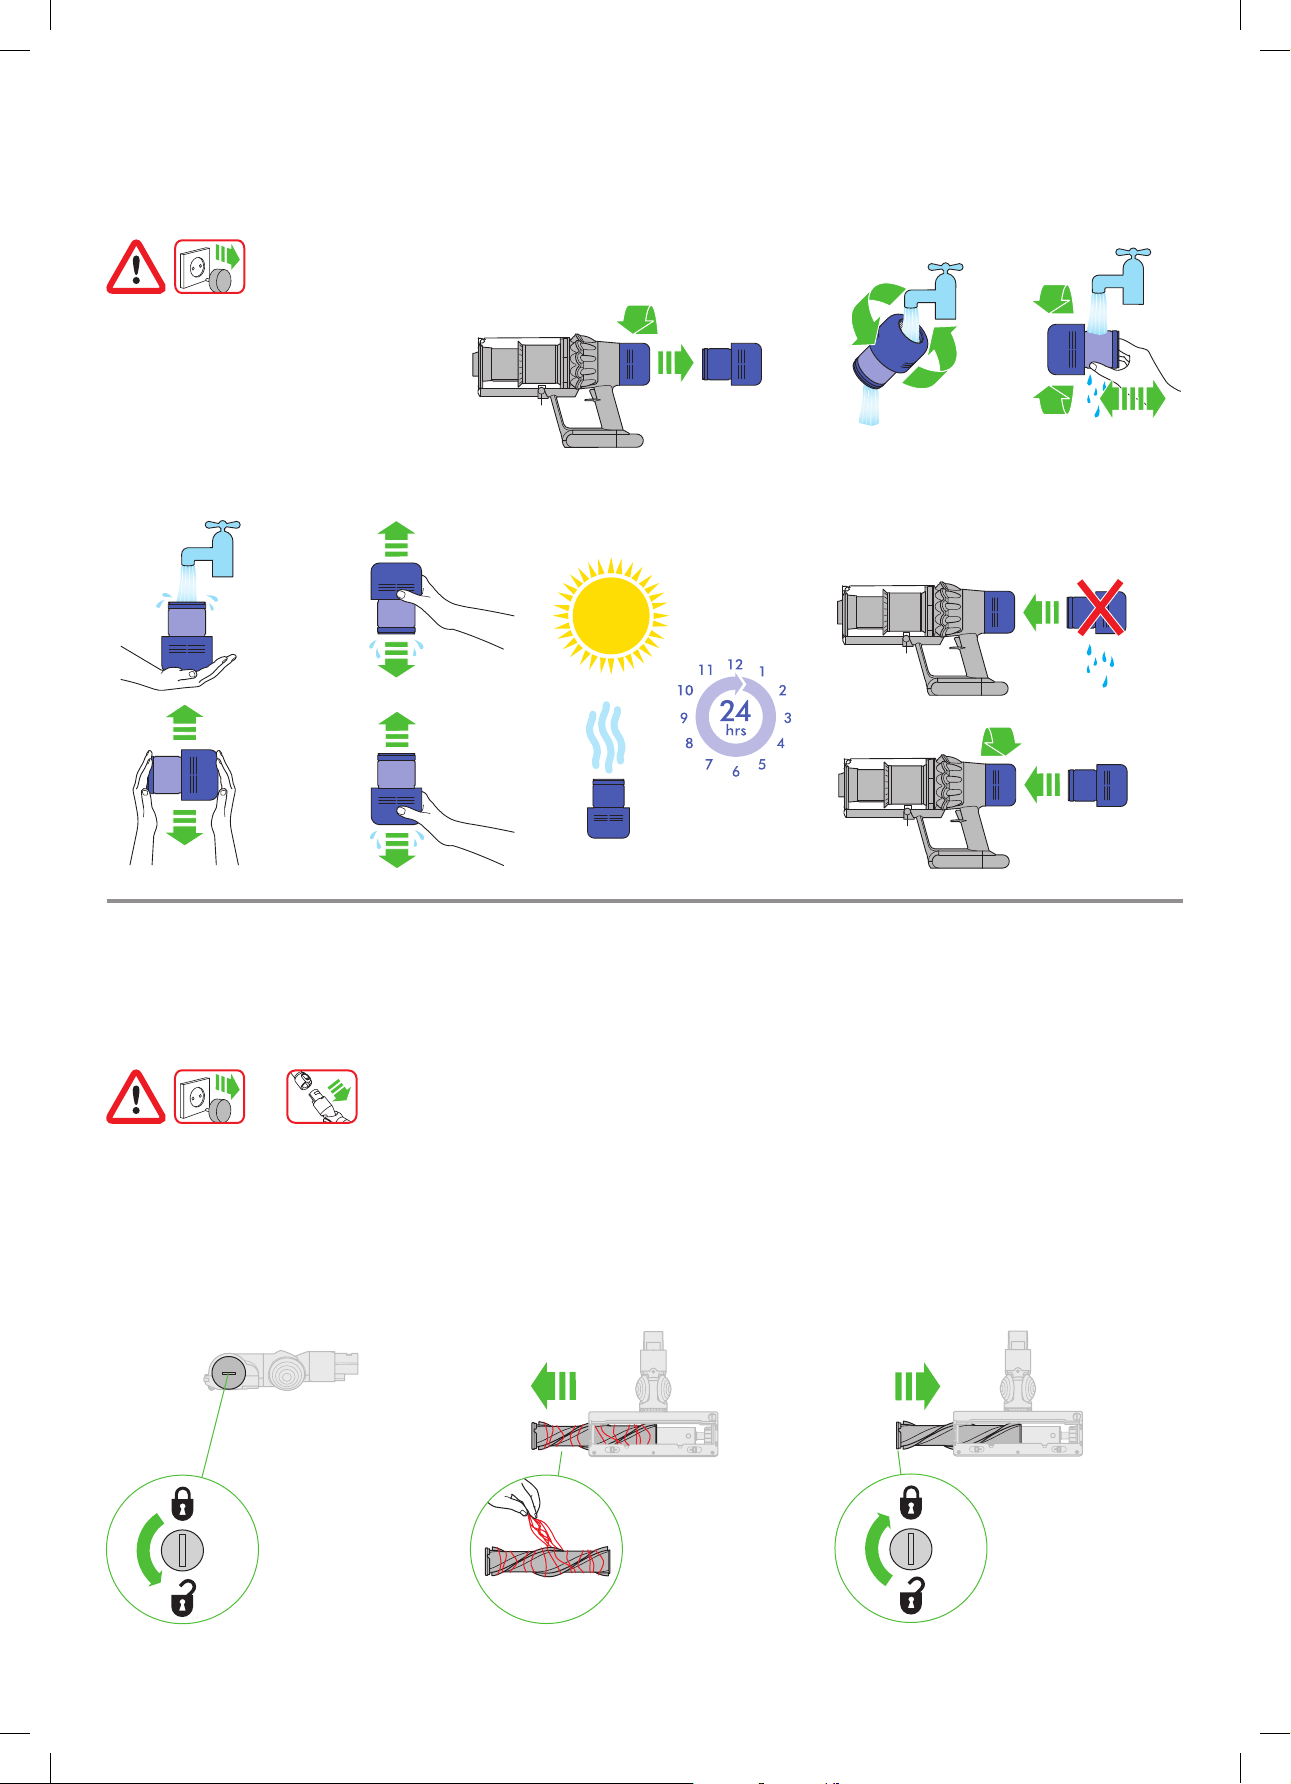
• If you can't clear an obstruction from the cleaner head, you may need to remove the
brush bar. Use a coin to unlock the fastener, slide the brush bar out of the cleaner head
and remove the obstruction. Replace the brush bar and securely tighten the fastener.
Make sure it is fixed firmly before using your machine.
• Your machine has carbon fibre brushes. Take care if coming into contact with them,
as they may cause minor skin irritation. Wash your hands after handling the brushes.
Washing your filter unit
To al ways get the best performance from your machine, it is important to regularly clean the
filters and check for blockages.
The LCD display will alert you when the filter unit needs washing. We recommend that you
wash your filter at least once a month or when your machine alerts you.
• Remove the filter unit by twisting it anticlockwise. Gently pull away from the machine.
• Tap the filter unit gently, to remove any excess dust and debris before washing it.
• Wash the filter unit in cold water only.
• Wash the pleated paper element of the filter unit first; hold the filter unit under a cold
water tap with the foam element downwards and run cold water over the pleated pap er.
• Wash the foam element of the filter unit next; hold the filter unit under a cold water tap
with the foam element downwards so that dir ty water does not contaminate the pleated
paper element. Run cold water over the inside and outside of the foam element and
squeeze the foam gently to expel the dirt.
• Repeat washing both parts of the filter unit until the water runs cle ar.
• Gently shake the filter unit to remove any excess water and leave to drain with the foam
element end facing up.
• Leave the filter unit to dr y completely in a dry environment with good air flow, for
a minimum of 24
• Check that the filter unit is completely dry.
• To re fit, position the filter unit in place on the main body and twist clockwise until it clicks
into place.
The filter unit may require more frequent washing if vacuuming fine dust or if use is mainly
in Boost mode.
Don't put any part of your machine in a dishwasher, washing machine, tumble dryer, oven,
microwave or near a naked flame.
Charging and storing
• This machine will switch off if the battery temperature is below 10°C (50°F). This
is designed to protect the motor and battery. Do not charge the machine and then move
it to an area with a temperature below 10°C (50°F) for storage purposes.
• To he lp prolong battery life, avoid recharging immediately after a full discharge. Allow
to cool for a few minutes.
• Avoid using the machine with the bat tery flush to a surface. This will help it run cooler
and prolong battery run time and life.
Battery safety instructions
• If the battery needs replacing, please contact the Dyson Helpline.
• Use only the Dyson charger Part Number 217160 or 270576 for charging this machine.
• Use only the Dyson battery Part Number 355983 for this Dyson machine. Other type
of batteries may explode, resulting in fire and causing injury to persons and damage.
Caution
The bat tery used in this machine may present a risk of fire or chemical burn if mistreated.
Do not short contacts, heat above 60°C(140°F) or incinerate. Keep away from children.
Do not disassemble or dispose of in fire.
Disposal information
• Dyson products are made from high grade recyclable materials. Recycle where possible.
• The bat tery should be removed from the machine before disposal.
• Dispose of or recycle the battery in accordance with local ordinances or regulations.
• Dispose of the exhausted filter unit in accordance with local ordinances or regulations.
• This symbol indicates that this machine should not be disposed with your general
household waste. To preve nt possible harm to the environment or human health from
uncontrolled waste disposal, recycle it responsibly to promote the sustainable reuse
of material resources. W hen this machine has reached the end of its serviceable
life, please take it to a recognised WEEE (Waste Electrical and Electronic Equipment)
collection facility such as your local civic amenity site for recycling. Your local authority
or retailer will be able to advise you of your nearest recycling facility.
Dyson customer care
After registering your two-year guarantee, your Dyson machine will be covered for parts and
labour (excluding filters), for twoyears from the date of purchase, subject to the terms of the
guarantee. If you have any queries regarding your Dyson machine, visit w ww.dyson.com for
online help, general tips and useful information about Dyson.
Alternatively, you can call the Dyson Helpline with your serial number and details of where and
when you bought the machine.
If your Dyson machine needs a repair, call the Dyson Helpline so we can discuss the
available options. If your Dyson machine is under guarantee, and the repair is covered, it will
be repaired at no cost.
Limited 2-year guarantee
Terms and conditions of the Dyson 2-year limited guarantee are set out below. The name and
address details of the Dyson guarantor for your country are set out elsewhere in this document
– please refer to the table setting out these details.
What is covered
• The repair or replacement of your Dyson machine (at Dyson’s discretion) if it is found
to be defective due to faulty materials, workmanship or function within two years
of purchase or delivery (if any part is no longer available or out of manufacture, Dyson
will replace it with a functional replacement part).
• Where this machine is sold outside of the EU, this guarantee will only be valid if the
machine is used in the country in which it was sold.
• Where this machine is sold within the EU, this guarantee will only be valid (i) if the
machine is used in the country in which it was sold or (ii) if the machine is used in Austria,
Belgium, Denmark, Finland, France, Germany, Ireland, Italy, Netherlands, Norway,
Poland, Spain, Sweden, Switzerland or the United Kingdom and the same model as this
machine is sold at the same voltage rating in the relevant country.
What is not covered
Dyson does not guarantee the repair or replacement of a produc t where a defect is the
result of:
• Accidental damage, faults caused by negligent use or care, misuse, neglect,
carelessness or operation or handling of the machine which is not in accordance with
the Dyson User manual.
• Use of the machine for anything other than normal domestic household purposes.
• Use of par ts not assembled or installed in accordance with the instructions of Dyson.
• Use of par ts and accessories which are not genuine Dyson components.
• Faulty installation (except where installed by Dyson).
• Repairs or alterations carried out by parties other than Dyson or its authorise
• Blockages – please refer to the Dyson User manual for details on how to look for and
clear blockages.
• Normal wear and tear (e.g. fuse, brush bar etc.).
• Use of this machine on rubble, ash, plaster.
• Reduction in battery discharge time due to battery age or use (where applicable).
If you are in any doubt as to what is covered by your guarantee, please contact the
Dyson Helpline.
hours.
d agents.
10

Summary of cover
• The guarantee becomes effective from the date of purchase (or the date of delivery
if this is later).
• You must provide proof of (both the original and any subsequent) delivery/purchase
before any work can be carried out on your Dyson machine. Without this proof, any
work carried out will be chargeable. Keep your receipt or delivery note.
• All work will be carried out by Dyson or its authorised agents.
• Any par ts which are replaced by Dyson will become the property of Dyson.
• The repair or replacement of your Dyson machine under guarantee will not extend the
period of guarantee unless this is required by local law in the country of purchase.
• The guarantee provides benefits which are additional to and do not affect your statutory
rights as a consumer and will apply whether you purchased your product directly from
Dyson or from a third part y.
Important data protection information
When registering your Dyson machine:
• You will need to provide us with basic contact information to register your machine and
enable us to support your guarantee.
• When you register, you will have the opportunity to choose whether you would like
to receive communications from us. If you opt-in to communications from Dyson, we will
send you details of special offers and news of our latest innovations.
• We never sell your information to third parties and only use information that you
share with us as defined by our privacy policies which are available on our website
at privacy.dyson.com.
11

DE/AT/CH
Vielen Dank, dass Sie sich für
einen kabellosen Staubsauger
von Dyson entschieden haben
Aktivieren Sie Ihre Garantie
Wir kümmern uns weiterhin um unsere
Geräte, auch wenn diese bereits
Ihnen gehören.
Nach der Registrierung gewähren wir
Ihnen für Ihr Dyson Gerät gemäß unseren
Garantiebestimmungen ab Kaufdatum eine
kostenlose 2-Jahres-Garantie auf alle Teile
(ausschließlich Filter) und Arbeiten.
Die Seriennummer finden Sie auf dem Typenschild auf der Rückseite der
Batterie.
Bitte notieren Sie die Seriennummer für eventuelle Rückfragen.
Nur für Illustrationszwecke.
Selbst nach dem Ende Ihrer Garantie stehen
wir Ihnen gerne zur Verfügung.
Kostenlose Ersatzteile und
Reparaturarbeiten von Dyson
Unkomplizierter Ersatz
Kompetente Beratung. 7 Tage die Woche
Videoanleitungen und hilfreiche Tipps
Wie können wir helfen? Dyson Kundendienst
Ein Problem lösen
Tipps und Hinweise
Erfahren Sie mehr zur Dyson Technologie
und anderen Geräten von Dyson
Internet:
www.dyson.de
Tel.:
0800 31 31 31 8
(kostenfreie Service-Nummer)
12
Wenn Sie Fragen zu Ihrem kabellosen
Dyson Staubsauger haben, wenden
Sie sich an unseren Kundendienst.
Geben Sie die Seriennummer Ihres
Staubsaugers sowie Informationen
darüber an, wann und wo Sie das
Gerät gekauft haben. Sie können sich
auch über unsere Website mit uns in
Verbindung setzen.

WICHTIGE SICHERHEITSHINWEISE
LESEN SIE VOR DER BENUTZUNG DIESES
GERÄTES ZUNÄCHST ALLE ANWEISUNGEN
UND WARNHINWEISE IN DIESER
BEDIENUNGSANLEITUNG SOWIE AM
GERÄT SELBST.
Bei der Verwendung von Elektrogeräten sollten
stets grundlegende Vorsichtsmaßnahmen beachtet
werden, einschließlich der folgenden:
ACHTUNG
Diese Warnhinweise beziehen sich auf das Gerät und
gegebenenfalls auf sämtliches Zubehör, Ladegeräte
oder Netzteile.
UM DIE GEFAHR EINES FEUERS, STROMSCHLAGS
ODER VON VERLETZUNGEN ZU VERMEIDEN:
1. Dieses Dyson Gerät kann von Kindern
ab 8 Jahren und Personen mit eingeschränkten
physischen, sensorischen oder geistigen
Fähigkeiten bzw. von unerfahrenen und
ungeschulten Personen verwendet werden,
sofern diese von einer verantwortlichen Person
im Hinblick auf die sichere Nutzung des Geräts
beaufsichtigt oder instruiert werden und sich
der möglichen Risiken bewusst sind. Reinigung
und Pflege dürfen von Kindern nicht ohne
Beaufsichtigung durchgeführt werden.
2. Das Gerät darf nicht als Spielzeug verwendet
werden. Wird das Gerät von Kindern oder
in deren Nähe genutzt, muss die Situation
aufmerksam beobachtet werden. Kinder sollten
beaufsichtigt werden, damit sie nicht mit dem
Gerät spielen.
3. Das Gerät darf nur wie in der Dyson
Gebrauchsanleitung beschrieben verwendet
werden. An dem Gerät dürfen keine anderen
als die in dieser Anleitung beschriebenen
bzw. vom Dyson Kundendienst empfohlenen
Wartungsarbeiten durchgeführt werden.
4. Verwenden Sie das Gerät NUR an trockenen
Standorten. Verwenden Sie es nicht im Freien
oder auf nassem Untergrund.
5. Die Ladestation bzw. das Gerät nicht mit nassen
Händen anfassen.
6. Nicht verwenden, wenn Ladestation oder Kabel
beschädigt sind.
7. Wenn das Gerät nicht so funktioniert, wie
es sollte, einen heftigen Schlag erhalten hat,
fallen gelassen, beschädigt, im Freien vergessen
oder ins Wasser fallen gelassen wurde,
verwenden Sie das Gerät nicht mehr und wenden
sich an den Dyson Kundendienst.
8. Wenn eine Wartung oder Reparatur erforderlich
ist, wenden Sie sich an den Kundendienst von
Dyson. Nehmen Sie das Gerät nicht eigenständig
auseinander, da es aufgrund eines falschen
Zusammensetzens zu Stromschlägen oder
Bränden kommen kann.
9. Das Kabel darf nicht gespannt werden. Halten
Sie das Kabel von heißen Oberflächen fern.
Klemmen Sie das Kabel nicht in der Tür ein
und ziehen Sie es nicht um scharfe Kanten
oder Ecken. Sorgen Sie dafür, dass das Kabel
niemandem im Weg ist. Fahren Sie nicht über
das Kabel.
10. Saugen Sie mit dem Gerät kein Wasser auf.
11. Saugen Sie keine entflammbaren oder leicht
entzündbaren Flüssigkeiten wie Benzin auf und
benutzen Sie das Gerät nicht in Umgebungen,
in denen diese flüssig oder in Dämpfen
auftreten können.
12. Verwenden Sie das Gerät nicht zum Aufsaugen
von brennenden oder rauchenden Substanzen
wie Zigaretten, Streichhölzern oder heißer Asche.
13. Achten Sie darauf, dass Haare, lose Kleidung,
Finger und sonstige Körperteile nicht in die Nähe
von Öffnungen oder beweglichen Teilen wie z.
B. der Bürstwalze gelangen. Richten Sie weder
Schlauch noch Rohr oder Düsen auf Augen
oder Ohren und nehmen Sie nichts davon
in den Mund.
14. Stecken Sie keine Gegenstände in Öffnungen
des Geräts. Benutzen Sie das Gerät nicht,
wenn eine Öffnung blockiert ist. Entfernen Sie
Blockierungen durch Staub, Flusen, Haare usw.,
da diese den Luftstrom reduzieren können.
15. Benutzen Sie nur Zubehör und Ersatzteile
von Dyson.
16. Verwenden Sie das Gerät nicht ohne
Auffangbehälter und Filter.
17. Trennen Sie die Ladestation von der Steckdose,
wenn sie längere Zeit nicht verwendet wird.
18. Seien Sie beim Saugen von Treppen
besonders vorsichtig.
19. Um ein versehentliches Starten zu verhindern,
achten Sie darauf, dass Ihre Hände und Finger
den Ein-/Aus-Schalter erst berühren, wenn Sie
bereit sind zu saugen, vor allem auch, wenn Sie
das Gerät aufheben oder tragen. Das Tragen
des Geräts mit dem Finger am Ein-/Aus-Schalter
lädt zu Unfällen ein.
13
20. Installieren, laden und verwenden Sie dieses
Gerät nicht im Freien, in Feuchträumen
oder in einem Umkreis von 3Metern von
Schwimmbecken. Arbeiten Sie damit nicht auf
feuchten Oberflächen und setzen Sie es nicht
Feuchtigkeit, Regen oder Schnee aus.
21. Wenn Sie die motorisierte Bürstwalze
herausnehmen oder ersetzen, achten Sie darauf,
den Ein-/Aus-Schalter erst zu betätigen, wenn die
Bürste wieder zusammengebaut ist.
22. Verwenden Sie keine Akkus oder Geräte,
die beschädigt oder verändert wurden.
Beschädigte oder veränderte Akkus können
zu unvorhersehbarem Verhalten, Bränden,
Explosionen und Verletzungsgefahr führen.
Setzen Sie den Akku und das Gerät weder Feuer
noch überhöhten Temperaturen aus. Bei Feuer
oder Temperaturen über 60° C kann es zu einer
Explosion kommen.
23. Verwenden Sie zum Laden dieses Geräts
ausschließlich das Dyson-Ladegerät mit der
Teilenummer 217160 oder 270576. Verwenden
Sie ausschließlich den Dyson Akku mit der
Artikelnr. 355983 für das Laden dieses Dyson
Geräts. Andere Akkus könnten platzen und
zu Brand, Verletzungen oder Beschädigungen
des Geräts führen.
24. Trennen Sie den Akku vor der Reinigung,
Wartung oder Lagerung des Geräts für längere
Zeiträume vom Gerät.
25. Wenn der Akku nicht benutzt wird, halten Sie
diesen von anderen Metallgegenständen,
wie Büroklammern, Münzen, Schlüsseln,
Nägeln, Schrauben oder anderen kleinen
Metallgegenständen fern, die eine Verbindung
von einem Anschluss zum anderen herstellen
können. Wenn die Akkuanschlüsse sich berühren,
kann dies zu Verbrennungen oder einem
Brand führen.
26. Akkus sind aus dem Gerät zu entfernen
und in Übereinstimmung mit den örtlichen
Verordnungen oder Vorschriften sicher
zu entsorgen.
27. Der Akku mit den Batterien ist versiegelt und stellt
unter normalen Umständen kein Risiko für Ihre
Sicherheit dar. Im unwahrscheinlichen Fall, dass
Flüssigkeit aus dem Akku austritt, berühren Sie
die Flüssigkeit nicht, da sie Hautreizungen und
Verbrennungen verursachen kann, und beachten
Sie folgende Hinweise:
• Hautkontakt – kann zu Hautirritationen führen.
Waschen Sie betroffene Stellen mit Seife
und Wasser.
• Inhalation – kann zu einer Reizung der
Atemwege führen. Sorgen Sie für frische Luft und
konsultieren Sie einen Arzt.
• Kontakt mit den Augen – kann zu einer Reizung
führen. Spülen Sie die Augen unverzüglich
mindestens 15 Minuten lang mit Wasser.
Konsultieren Sie einen Arzt.
• Entsorgung – Handschuhe anziehen
und unverzüglich entsprechend örtlichen
Bestimmungen und Gesetzen entsorgen.
28. Folgen Sie den Anweisungen zum Laden
des Akkus und laden Sie den Akku
bzw. das Gerät nicht außerhalb des
in dieser Bedienungsanleitung angegebenen
Temperaturbereichs. Unsachgemäßes
Laden oder Laden des Akkus außerhalb
des empfohlenen Temperaturbereichs kann
zu Beschädigungen des Akkus führen und das
Risiko eines Feuers erhöhen.
Um die maximale Akkulebensdauer
zu gewährleisten, empfiehlt Dyson Folgendes:
• Wenn das Gerät nicht verwendet wird, bewahren
Sie es bei Zimmertemperatur auf. Empfohlener
Bereich: 18° C bis 28° C.
29. BRANDGEFAHR – Dieses Produkt darf nicht
auf oder neben einen Küchenherd oder andere
heiße Oberflächen gestellt werden. Das Produkt
darf nicht verbrannt werden, selbst wenn
es schwer beschädigt ist. Der Akku könnte Feuer
fangen oder explodieren.
30. BRANDGEFAHR – Verwenden Sie an den Filtern
dieses Geräts keine Duftstoffe oder parfümierten
Produkte. Die in derartigen Produkten
enthaltenen Chemikalien sind bekanntermaßen
entzündbar und können dazu führen, dass das
Gerät in Brand gerät.
LESEN UND BEWAHREN SIE
DIESE ANWEISUNGEN AUF
Dieses Dyson Gerät ist ausschließlich für die
Verwendung im Haushalt geeignet.
Nicht in der Nähe einer
offenen Flamme verwenden.
14
Nicht in der Nähe vo n
Hitzequellen abstellen.
Saugen Sie kein
Wasser oder andere
Flüssigkeiten auf.
Verwenden Sie das Gerät
nicht zum A ufsaugen von
brennbaren Substanzen.
Achten Sie darauf, dass Ihre
Hände b eim Gebrauch des
Gerät s nicht in die Nähe der
Bürstwalze kom men.
Nicht auf oder neben einen
Küchenherd stellen.

Boost
Eco
Auto Med
100%
English English
selected
4:50 Auto
Low
run time
Exit
Off
On
Boost
Auto Med
English English
selected
4:50 Auto
Low
run time
Exit
Off
On
Boost
Auto
Boost
Eco
Auto Med
100%
4:50 Auto
Low
run time
Boost
Eco
Auto Med
100%
English
Espanol
English English
selected
4:50 Auto
Low
run time
Exit
Off
On
Der Bildschirm
Auswahltaste
Sie können die Einstellungen
Ihres Geräts über die
Auswahltaste steuern.
Um in das Einstellungsmenü zu
gelangen, halten Sie die Taste
gedrückt, bis der Menübildschirm
angezeigt wird. Tippen Sie, um
durch die verfügbaren Optionen
zu scrollen.
Sprachauswahl
English
Espanol
Führen Sie die Schritte in der
Spracheinstelung aus, um Ihre
Sprache zu ändern.
English
selected
Warneinstellung
ändern
Tippen Sie, um durch das
Einstellungsmenü zu scrollen. Wählen
Sie die Option „Warnungen“ aus.
Scrollen Sie, um „Ein“ oder „Aus“
auszuwählen, und halten Sie die
Taste gedrückt, bis der Countdown
abgelaufen ist und ein Häkchen auf
dem Bildschirm angezeigt wird.
Schwacher Akku
4:50
Ihr Gerät blinkt dreimal und auf
dem Bildschirm wird ein Symbol für
einen schwachen Akku angezeigt,
um Sie zu warnen, dass Ihr Akku
aufgeladen werden muss.
Wenn der Akku leer ist, wird ein
letztes Warnsymbol auf dem
Bildschirm angezeigt.
Akkulebensdauer
Verwenden Sie den Eco- oder
Auto-/Med-Modus, um die beste
Leistung und Lebensdauer von
Ihrem Akku zu erhalten.
Um Ihre Auswahl abzubrechen,
lassen Sie die Taste während des
Countdowns los.
Einstellungsmenü
beenden
Um das Einstellungsmenü zu
beenden, tippen Sie, um durch
das Einstellungsmenü zu scrollen.
Wählen Sie „Menü beenden“.
Warnungen
Warnungen werden auf dem
Bildschirm angezeigt, wenn Ihr Gerät
Ihre Aufmerksamkeit benötigt.
Ein Filtersymbol weist Sie darauf hin,
dass der Filter nicht richtig montiert
wurde oder gereinigt werden muss.
Ein Sperrsymbol weist Sie darauf hin,
dass eine Blockade aus Ihrem Gerät
entfernt werden muss.
15

Boost
Eco
Auto Med
clik
clik
clik
Aufladen und Aufbewahrung
Wie Sie einen Akku richtig
Ihres Geräts
Es ist wichtig, dass Sie Ihre neue M aschine vor dem
ersten Gebrauch und nach jeder Reinigung volls tändig
3-4.5hrs
Schließen Sie das Gerät entweder
direkt oder über die Ladehalterung
an die Ladestation an.
Die blauen LEDs – eine je Seite
des Akkus – blinkt während
des Ladevorgangs.
Wenn der Akku geladen ist, leuchten
beide LEDs 5 Sekunden lang und
erlöschen dann.
Der Akku ist vollständig geladen,
wenn das Display 100 % anzeigt.
aufladen. Dies liegt daran, dass der Algorithmus des
Batterie- und Überwachungssystems im Laufe der Zeit
„lernt“, und das volls tändige Laden Ihrer Maschine trägt
dazu bei, die verbleibende Betriebsdauer genauer zu
berechnen und anzuzeigen.
100%
Ihr Gerät setzt sich bei einer
Umgebungstemperatur von unter
0 °C (32°F) nicht in Betrieb. Auf diese
Weise werden sowohl Motor wie auch
Akku geschützt.
wechseln
Wenn Sie über zusätzliche Akkus verfügen,
empfehlen wir Ihnen, die Akkus regelmäßig zu
wechseln, um die Akkuleistung zu gewährleisten.
clik
Den Akku richtig entfernen
Halten Sie Ihre Hand unter
der Akku, um ihn auffangen
zu können.
Drücken Sie den AkkuAuslöseknopf und lösen
Sie den Akku aus seiner
Halterung.
Platzieren Sie den Akku in
die Ladestation.
Den Akku richtig
einsetzen
Setzen Sie den Akku
in seine Halterung
ein, bis Sie ein Klicken
wahrnehmen.
Behälterentleerung
2
1
3
clik
16
Achten Sie darauf, nicht den Ein-/AusSchalter zu betätigen, während der
Auffangbehälter zum Leeren geöffnet ist.
clik
Schließen Sie den Auffangbehälter, indem
Sie den Behälterboden nach oben drücken,
bis Auffangbehälter und Behälterboden
hörbar einrasten.

clik
clik
3
4
2
1
3
4
2
1
3
3
4
clik
2
1
3
1
3
2
1
3
4
clik
2
1
Blockierungen entfernen
1 2
1
3
4
2
4
5 6
Schließen Sie den Auffangbehälter, indem
Sie den Behälterboden nach oben drücken,
bis Auffangbehälter und Behälterboden
hörbar einrasten.
17

clik
Reinigung des Filters
21
543 6
Wartung des Reinigungskopfes mit Direktantrieb
1 2 3
18
Zusätzliche Informationen
Bitte lesen Sie den Abschnitt „wichtige Sicherheitshinweise“ in dieser Dyson
Bedienungsanleitung, bevor Sie das Gerät benutzen.
Montage der Wandhalterung
• Packen Sie Ladehalterung, Ladestation und Installationsbroschüre aus.
• Wählen Sie für die Ladehalterung einen Standor t aus und stellen Sie sicher, dass direk t
hinter dem Montageor t keine Leitungen (Gas, Wasser oder Luf t), Stromkabel, Drähte
oder Rohre verlaufen.
• Bringen Sie die Wandhalterung nicht in der Nähe von Wärmequellen (z.B. Herd oder
Heizung) oder in direkter Sonneneinstrahlung an.
• Befolgen Sie die Anweisungen in der Montageanleitung.
• Befestigungen einrasten lassen.
• Gerät in der Ladehalterung platzieren.
• Schließen Sie die Ladestation an die Stromversorgung an. Schalten Sie sie (bei Bedarf)
ein, um den A kku zu laden.
• Es ist wichtig, dass Sie Ihre Maschine vor dem ersten und nach jedem weiteren
Gebrauch vollständig aufladen.
Die Ladehalterung muss entsprechend den gesetzlichen Bestimmungen und den
entsprechenden Vorschriften und Normen (Bundes- und Landesgesetze beachten!)
montiert werden.
Dyson empfiehlt den Einsatz von Schutzkleidung, Augenschutz und Schutzmaterial für die
Montage der Ladehalterung.
Staubsaugen
• Überprüfen Sie, dass die Unterseite der Elektrobürste oder des Zubehörteils sauber und
frei von Fremdkörpern ist, die Schäden verursachen könnten.
• Vor dem Saugen Ihrer Fußböden und Fußbodenbeläge sollten Sie die Pflegehinweise
des jeweiligen Herstellers lesen.
• Die Elek trobürste des Geräts kann bei bestimmten Teppichen und Hartböden Schäden
verursachen. Einige Teppichböden fusseln, wenn sie mit einer rotierenden Elektrobürste
gereinigt werden. Sollte das der Fall sein, empfehlen wir, beim Saugen auf die
Elektrobürste zu verzichten und den Bodenbelaghersteller zu kontaktieren.
Behälterentleerung
• Leeren Sie den durchsichtigen Behälter, sobald der Schmutz an einer Stelle die MA XMarkierung erreicht hat. Er darf nicht über füllt werden.
• Achten Sie darauf, nicht den Ein-/Aus-Schalter zu betätigen, während der
Auffangbehälter zum Leeren geöffnet ist.
• Das Saugrohr durch Drücken der Verriegelung ent fernen und vom
Auffangbehälter abziehen.
• Schmutz entsorgen:
– Das Gerät so halten, dass der Auf fangbehälter nach unten zeigt.
– Fest auf die rote Auffangbehälter verriegelung drücken.
– Der Auf fangbehälter lässt sich nach unten schieben, wodurch das Sieb freigelegt wird.
– Daraufhin öffnet sich die Bodenplatte des Auffangbehälters.
– Die Klappe des Auffangbehälters wird sich nur öffnen, wenn die Behälter verriegelung
vollständig nach unten gedrückt ist.
Um Kontakt mit Staub und anderen Allergenen bei der Entleerung zu vermeiden, sollten Sie
den Behälter in einen staubdichten Beutel entleeren.
Ziehen Sie den durchsichtigen Behälter anschließend vorsichtig aus der Plastiktüte.
Schließen Sie die Plastiktüte und entsorgen Sie sie auf dem normalen Weg.
Achten Sie darauf, nicht den Ein-/Aus-Schalter zu betätigen, während der Auffangbehälter
zum Leeren geöffnet ist.
• Zum Schließen des Auffangbehälters:
– Schieben Sie die Bodenplat te des Auffangbehälters nach oben, bis beide einrasten.
Reinigen des Auffangbehälters (optional)
Falls der durchsichtige Auffangbehälter gereinigt werden muss, Anweisung im Abschnitt
„Auffangbehälter leeren“ befolgen.
• Den roten Knopf an der Gleitschiene des Behälters drücken, um den Auffangbehälter
von der Gleitschiene zu schieben.
• Reinigen Sie den durchsichtigen Behälter nur mit einem feuchten Lappen.
• Der Auf fangbehälter und die Dichtungen müssen trocken sein, bevor sie wieder
eingesetzt werden.
• Durchsichtigen Auffangbehälter wieder einsetzen:
– Die Rückseite auf die Gleitschiene des Behälters schieben.
– Die Bodenplatte zum Schließen des Auffangbehälters nach oben drücken, bis sie
hörbar einrastet.
Der Auf fangbehälter ist nicht spülmaschinengeeignet und die Verwendung von Lösungs- und
Putzmitteln oder Raumsprays zur Reinigung des Behälters wird nicht empfohlen, da diese das
Gerät beschädigen können.
Suchen nach Blockierungen
• Das Gerät ist mit einem Überhit zungsschutz ausgestat tet. Sollte eine Blockierung
auftreten, schaltet sich das Gerät automatisch ab.
• Der Motor pulsiert und wenn eine Blockierung vorliegt, wird dies auf dem LCDBildschirm angezeigt.
• Lassen Sie das G erät abkühlen, bevor Sie nach Blockierungen suchen.
• Achten Sie darauf, den Ein-/Aus-Schalter nicht zu betätigen, wenn Sie nach
Blockierungen suchen.
• Entfernen Sie alle Blockierungen, bevor Sie das Gerät wieder einschalten.
• Achten Sie auf scharfe Objekte, wenn Sie Blockierungen entfernen.
• Das Ent fernen von Blockierungen fällt nicht unter die Garantie.
• Um die Haupteinheit des Geräts auf Blockierungen zu prüfen, den Auffangbehälter
gemäß den Anweisungen im Abschnitt „Auffangbehälter reinigen“ entfernen.
Anschließend etwaige Blockierungen beseitigen.
• Wenn ein Hindernis nicht beseitigt werden kann, muss eventuell die Bürstenwalze
abgenommen werden. Hierfür den Verschluss mithilfe einer Münze lösen, die
Bürstenwalze aus der Reinigungsdüse schieben und das Hindernis entfernen. Die
Bürstenwalze wieder einset zen und den Verschluss schließen. Vergewissern Sie sich,
dass dieser fest sitzt, bevor Sie das Gerät verwenden.
• Dieses Gerät ist mit Bürsten mit feinen Carbonfasern ausgestattet. Kontakt mit diesen
Fasern kann u. U. zu Hautirritationen führen. Waschen Sie Ihre Hände nach dem
direkten Kontakt mit den Carbonfasern.
Filtereinheit säubern
Um stets die beste Leistung Ihres Geräts zu nutzen ist es wichtig, den Filter regelmäßig
zu reinigen und auf Blockagen zu prüfen.
Der LCD-Bildschirm sendet eine Meldung, wenn die Filtereinheit gereinigt werden muss. Wir
empfehlen, den Filter mindestens einmal pro Monat zu reinigen, oder wenn das Gerät eine
Meldung ausgibt.
• Entfernen Sie die Filtereinheit durch Drehen gegen den Uhrzeigersinn. Ziehen Sie sie
leicht vom Gerät weg.
• Schütteln Sie die Filtereinheit leicht, um Staub und Schmutz zu entfernen, bevor Sie
sie waschen.
• Waschen Sie die Filtereinheit ausschließlich mit kaltem Was ser.
• Waschen Sie zunächst das gefaltete Papierelement der Filtereinheit. Halten Sie die
Filtereinheit mit dem Schaumstoffelement nach unten zeigend unter fließendes
Kaltwasser und lassen Sie das Wasser über das gefaltete Papier laufen.
• Waschen Sie anschließend das Schaumstoffelement der Filtereinheit. Halten Sie
die Filtereinheit mit dem Schaumstoffelement nach unten zeigend unter fließendes
Kaltwasser, damit das Schmutz wasser nicht über das gefaltete Papierelement läuf t.
Lassen Sie das Kaltwasser innen und außen über das Schaumstoffelement laufen und
drücken Sie den Schaumstoff leicht, um den Schmutz zu lösen.
• Waschen Sie den Filter, bis das Wasser klar bleibt.
• Waschen Sie dann die Außenseite der Filtereinheit. Füllen Sie anschließend die Einheit
mit Kaltwasser, schließen Sie die of fenen Enden mit Ihren Händen und schüt teln
Sie vorsichtig.
• Wiederholen Sie das Waschen der Elemente und der Außenseite der Filtereinheit, bis
das Wasser klar bleibt.
• Schütteln Sie die Filtereinheit vorsichtig, um restliches Wasser zu entfernen und lassen
Sie sie mit dem Schaumstoffelement nach oben trocknen.
• Lassen Sie die Filtereinheit in einer trockenen Umgebung mit guter Lüftung mindestens
24 Stunden lang vollständig trocknen.
• Überprüfen Sie, dass die Filtereinheit trocken ist.
• Um die Filtereinheit wieder einzusetzen, setzen Sie sie wieder in das Gerät ein und
drehen Sie sie im Uhrzeigersinn, bis sie einrastet.
Die Filtereinheit muss öf ter gereinigt werden, wenn viel feiner Staub gesaugt wird oder Sie
hauptsächlich den Boost-Modus verwenden.
Reinigen Sie keines der Teile Ihres Geräts in der Spül- oder Waschmaschine, im Trockner,
im Herd, in der Mikrowelle oder bei of fenem Feuer.
Laden und Aufbewahren
• Dieses Gerät schaltet sich AUS, wenn die Akkutemperatur unter 10° C sink t. Auf diese
Weise werden Motor und Akku geschützt. Laden Sie das Gerät nicht auf und bewahren
Sie es nicht bei einer Temperatur unter 10° C auf.
• Um die Langlebigkeit des Akkus zu erhalten, laden Sie das Gerät nicht direkt wieder
auf, wenn es komplett entladen is t. Lassen Sie es in solchen Fällen am besten für einige
Minuten abkühlen und laden es dann wieder auf.
• Achten Sie darauf, dass der Akku nicht flach auf einer Ober fläche liegt. Auf diese
Weise sorgen Sie für eine bessere Kühlung und eine längere Laufzeit und Lebensdauer
des Akkus.
Sicherheitshinweise für den Akku
• Wenn der Akku ausgetauscht werden muss, kontaktieren Sie bitte den
Dyson Kundendienst.
• Verwenden Sie ausschließlich die Dyson Ladestation, Artikelnr. 217160 oder 270576,
für das Laden dieses Dyson Geräts.
• Verwenden Sie ausschließlich den Dyson Akku, Artikelnummer 355983 für dieses Dyson
Gerät. Andernfalls können Akkus explodieren, was zu Bränden und Verletzungen und
Schäden führen kann.
Achtung
Der in diesem Gerät eingebaute Akku kann bei unsachgemäßer Handhabung ein Brand- und
Verätzungsrisiko darstellen. Der Akku darf nicht auseinandergenommen, kurzgeschlossen,
auf über 60° C erhitzt oder verbrannt werden. Halten Sie ihn von K indern fern. Nehmen Sie
ihn nicht auseinander und verbrennen Sie ihn nicht.
Hinweise zur Entsorgung
• Produkte von Dyson bestehen aus hochwertigem, wiederverwertbarem Material.
Entsorgen Sie dieses Produkt auf verantwortungsvolle Weise und führen Sie es nach
Möglichkeit einer Wiederverwertung zu.
• Der Akku sollte zur getrennten Wiederverwertung entfernt werden.
• Bitte entsorgen oder recyceln Sie den Akku gemäß den entsprechenden
örtlichen Bestimmungen.
• Den gebrauchten Filter gemäß den entsprechenden lokalen Bestimmungen oder
Vorschriften entsorgen.
• Diese Kennzeichnung bedeutet, dass dieses Produkt innerhalb der EU nicht zusammen
mit dem normalen Haushaltsmüll entsorgt werden darf. Damit durch unkontrollier te
Abfallentsorgung verursachte mögliche Umwelt- oder Gesundheitsschäden verhindert
werden können, entsorgen Sie dieses Produkt bitte ordnungsgemäß, um die nachhaltige
Wiederverwertung von stofflichen Ressourcen zu fördern. Nutzen Sie zur Rückgabe Ihres
gebrauchten Geräts bitte die entsprechenden Rückgabe- und Sammelsysteme oder
wenden Sie sich an den Händler, bei dem das Produkt gekauft wurde. Ihre Gemeinde
oder Ihr Händler kann Sie über die nächstgelegene Rec yclinganlage informieren.
Dyson Kundendienst
Nach der Registrierung für die Garantie für Ihr Dyson Gerät gewähren wir Ihnen
ab Kaufdatum für einen Zeitraum von 2Jahren gemäß unseren Garantiebestimmungen
eine Garantie auf alle Teile und A rbeiten. Wenn Sie Fragen zu Ihrem Dyson Gerät haben,
besuchen Sie w ww.dyson.de/support (DE), w ww.dyson.at/support (AT) oder ww w.dyson.
ch/support (CH), um Onlinehilfe, allgemeine Tipps und nützliche Informationen zu Dyson
zu erhalten.
Alternativ können Sie sich auch telefonisch an den Kundendienst von Dyson wenden. Geben
Sie dazu die Seriennummer Ihres Gerätes sowie das Datum und den Ort des Gerätekaufs an.
Wenn Ihr Dyson Gerät repariert werden muss, rufen Sie den Kundendienst von Dyson an,
damit wir die verfügbaren Optionen besprechen können. Wenn die Garantie Ihres Dyson
Gerätes noch gültig ist und die Reparatur in den Rahmen der Garantieleistung fällt, ist die
Reparatur kostenlos.
19

Bitte registrieren Sie sich als Eigentümer eines Dyson Produkts
Die Garantie für dieses Produkt gilt 2Jahre ab dem Kaufdatum. Bitte registrieren Sie Ihre
Garantie innerhalb von 30Tagen ab dem Kaufdatum. Damit wir Ihnen schnellen und
effizienten Ser vice bieten können, regis trieren Sie sich bitte direkt nach dem Kauf. Bit te
bewahren Sie den Kaufbeleg, aus dem das Kaufdatum ersichtlich is t, auf.
Dafür stehen Ihnen drei Möglichkeiten zur Auswahl:
• Online unter www.dyson.de bzw. www.dyson.at bzw. www.dyson.ch
• Telefonisch über den Dyson Kundendienst: Für Deutschland: 0800 - 3131318. Für
Österreich: 0800 28 67 45. Für die Schweiz: 08 00 740 183.
Durch die Onlineregistrierung oder telefonisch können Sie:
• Ihre Investition dank zwei Jahren Garantie auf Teile und Arbeitsleistung schützen.
• Hilfreiche Tipps zur Nutzung Ihres Geräts bekommen.
• Fachliche Beratung über den Dyson Kundendienst erhalten.
• Brandaktuelle Neuigkeiten zu unseren Innovationen erfahren.
• Die Registrierung dauert nur ein paar Minuten und Sie müssen lediglich die
Seriennummer angeben.
2-Jahres-Garantie
Terms and conditions of the Dyson 2-year limited guarantee are set out below. The name and
address details of the Dyson guarantor for your country are set out elsewhere in this document
– please refer to the table setting out these details.
Was ist von der Garantie abgedeckt?
• Die Reparatur oder der Austausch Ihres Geräts erfolgt (im Ermessen von Dyson), wenn
es innerhalb von 2 Jahren nach Kauf oder Lieferung Mängel aufgrund von fehlerhaftem
Material, fehlerhaf ter Verarbeitung oder fehlerhafter Funk tion aufweist. Sollte ein Teil
nicht mehr verfügbar sein oder nicht mehr hergestellt werden, tauscht Dyson es gegen
ein funktionsfähiges Ersatzteil aus.
• Wenn dieses Gerät außerhalb der EU verkauft wird, gilt diese Garantie nur, wenn das
Gerät in dem Land, in dem es verkauft wurde, verwendet wird.
• Where this machine is sold within the EU, this guarantee will only be valid (i) if the
machine is used in the country in which it was sold or (ii) if the machine is used in Austria,
Belgium, Denmark, Finland, France, Germany, Ireland, Italy, Netherlands, Norway,
Poland, Spain, Sweden, Switzerland or the United Kingdom and the same model as this
machine is sold at the same voltage rating in the relevant country.
Was ist nicht abgedeckt
Dyson übernimmt keine Garantie für die Reparatur oder den Austausch eines Produkts, sofern
der Defekt auf Folgendes zurückzuführen ist:
• Unfallschäden, die durch unsachgemäße Verwendung oder Pflege, Missbrauch,
Vernachlässigung sowie unvorsichtige Behandlung des Gerätes entstanden und daher
nicht mit der Dyson Bedienungsanleitung konform sind.
• Verwendung des Gerätes zu anderen als den üblichen Haushaltszwecken.
• Verwendung von Teilen, die nicht gemäß den Richtlinien von Dyson montiert oder
eingebaut wurden.
• Verwendung von Teilen und Zubehör anderer Hersteller.
• Fehlerhafte Installation (gilt nicht für von Dyson vorgenommene Installation).
• Reparaturen oder Änderungen, die nicht von Dyson oder seinen autorisierten Partnern
vorgenommen wurden.
• Blockierungen – bitte lesen Sie in der Dyson Bedienungsanleitung, wie Sie nach
Blockierungen suchen und diese entfernen können.
• Normaler Verschleiß (z.B. Sicherung, Bürstenwalze usw.)
• Verwendung des Gerätes für Schutt, Asche oder Putz.
• Kürzere Entladungszeit des Akkus aufgrund des Alters des Akkus oder der Nutzung
(sofern zutreffend).
Wenn Sie sich unsicher sind, welche Fälle von Ihrer Garantie abgedeckt sind, wenden Sie sich
bitte an den Kundendienst von Dyson.
Garantieübersicht
• Die Garantie beginnt mit dem Kaufdatum oder mit dem Lieferdatum, wenn die
Lieferung später erfolgte.
• Sie müssen einen Kaufbeleg bz w. Lieferschein (sowohl das Original als auch Folgende)
vorlegen, bevor jegliche Arbeiten ausgeführt werden können. Ohne diesen Beleg
werden Ihnen die Kosten sämtlicher anfallenden Arbeiten in Rechnung gestellt. Bitte
bewahren Sie Ihren Kaufbeleg oder Lieferschein daher sorgfältig auf.
• Sämtliche Arbeiten werden durch Dyson oder seine autorisierten Partner ausgeführt.
• Alle von Dyson ersetzten Teile werden zum Eigentum von Dyson.
• Durch Reparatur oder Ersatz Ihres Gerätes unter Garantie wird die Garantiedauer
nicht verlängert.
• Die Garantie bietet zusätzliche Vorteile, die Ihre gesetzlich festgelegten Rechte als
Kunde ergänzen, diese jedoch in keiner Weise berühren.
Wichtige Informationen zum Datenschutz
Registrierung Ihres Dyson Produkts:
• Sie müssen Kontaktinformationen angeben, damit Sie Ihr Produkt registrieren und wir
Garantieleistungen ausführen können.
• Bei Ihrer Registrierung können Sie auswählen, ob Sie Mitteilungen von uns erhalten
möchten. Wenn Sie sich für den Erhalt der Mit teilungen von Dyson entscheiden, senden
wir Ihnen Informationen zu besonderen Angeboten und Neuigkeiten zu unseren
aktuellen Innovationen.
• Ihre Informationen werden nicht an Drit te weitergegeben und von uns ausschließlich
in Übereinstimmung mit den auf unserer Website angegebenen Datenschutzrichtlinien
verwendet: privacy.dyson.com
20

ES
Gracias por comprar una
aspiradora sin cable Dyson
Activación de la garantía
No dejamos de preocuparnos por nuestros
dispositivos, ni siquiera cuando ya son suyos.
Después de registrar la garantía, su aparato
Dyson estará cubierto en piezas y mano
de obra (salvo los filtros) durante dos años
desde la fecha de compra, sujeto a los
términos de la garantía.
Aun después de que su garantía haya
terminado, estaremos a su disposición
para ayudarle.
Mano de obra y piezas gratuitas de Dyson
Sustitución sin trámites complicados
Asesoramiento de expertos, los siete días
de la semana
Videos instructivos y consejos útiles
Su número de serie se encuentra en la placa de especificaciones situada en
la base de la máquina.
Apunte su número de serie para futuras referencias.
Esta ilustración solo se incluye como ejemplo.
¿Cómo podemos serle
de ayuda?
Servicio de atención al
cliente Dyson
Resolver un problema
Obtener consejos y guías
Más información sobre la
tecnología Dyson y otros
aparatos Dyson
En línea:
www.dyson.es
Teléfono:
900 80 36 49
Si tiene alguna duda sobre el aspirador
sin cables Dyson, llame a la línea de
servicio al cliente de Dyson con su
número de serie y la información del
lugar y la fecha en la que lo compró,
o póngase en contacto con nosotros a
través de la página web de Dyson.
21

INSTRUCCIONES DE
SEGURIDAD IMPORTANTES
ANTES DE UTILIZAR ESTE ELECTRODOMÉSTICO,
LEA TODAS LAS INSTRUCCIONES Y ETIQUETAS
DE ADVERTENCIA INCLUIDAS EN ESTE MANUAL Y
EN LA MÁQUINA
Cuando use un aparato eléctrico, siempre se deben
seguir unas precauciones básicas, incluyendo
las siguientes:
AVISO
Estas advertencias se aplican a la máquina, así como
a todas las herramientas, accesorios, cargadores o
adaptadores de corriente.
PARA REDUCIR EL RIESGO DE INCENDIO,
DESCARGA ELÉCTRICA O LESIÓN:
1. Este aparato Dyson pueden utilizarlo niños desde
los 8 años de edad y personas con limitaciones
físicas, sensoriales o de razonamiento, o falta
de experiencia y conocimiento, a condición
de que hayan estado bajo la supervisión
o recibido instrucción de una persona
responsable con respecto al uso del aparato
de manera segura y que entiendan los riesgos
que esto conlleva. Se prohíbe que los niños
realicen la limpieza y el mantenimiento del
aparato sin supervisión.
2. No permita que la máquina se utilice como
un juguete. Preste mucha atención si lo utilizan
niños osi se utiliza cerca de ellos. Se debe vigilar
a los niños para asegurarse de que no juegan
con la máquina.
3. Úselo únicamente como se indica en el Manual
del usuario de Dyson. No lleve a cabo ningún
mantenimiento o reparación que no se indique
en este manual o le haya aconsejado la línea
de servicio al cliente de Dyson.
4. Esta máquina está diseñada para uso doméstico
exclusivamente. No la utilice en el exterior
ni sobre superficies mojadas.
5. No manipule ningún componente del cargador
o del aparato con las manos mojadas.
6. No utilice el aparato si el cable o el cargador
están dañados.
7. No utilice el aparato si no funciona
correctamente, ha recibido un golpe, se ha
caído, ha sufrido daños, se ha dejado a la
intemperie o se ha sumergido en agua. Póngase
en contacto con la línea de servicio al cliente
de Dyson.
8. Póngase en contacto con la línea
de servicio al cliente de Dyson cuando necesite
mantenimiento o reparación. No desmonte
el aparato, ya que un montaje incorrecto puede
ocasionar una descarga eléctrica o un incendio.
9. No estire el cable ni lo someta a tensión.
Mantenga el cable alejado de superficies
calientes. Evite atrapar el cable al cerrar
cualquier puerta, y no tire del cable alrededor
de bordes o esquinas con bordes afilados.
Coloque el cable alejado de las zonas de paso
para evitar pisarlo y posibles tropiezos. No pase
la máquina por encima del cable.
10. No utilice la aspiradora para recoger agua.
11. No lo use para recoger líquidos inflamables
o combustibles, como la gasolina, ni lo use
en áreas donde puedan estar presentes
o sus vapores.
12. No aspire nada que esté en llamas o desprenda
humo como, por ejemplo, cigarrillos, cerillas
o cenizas incandescentes.
13. Evite que el pelo, la ropa, los dedos o cualquier
otra parte del cuerpo entre en contacto con las
aberturas o las piezas móviles, como el cepillo.
No apunte con la manguera, la empuñadura
o los accesorios a los ojos u orejas, ni se los meta
en la boca.
14. No introduzca ningún objeto en las aberturas
de la máquina. No utilice la máquina si alguna
abertura estuviera bloqueada; manténgalo
limpio de polvo, pelusa, pelo o cualquier otra
sustancia que pueda reducir el flujo de aire.
15. Utilice solamente accesorios y repuestos
Dyson recomendados.
16. No utilice la aspiradora sin el cubo transparente
o los filtros debidamente colocados.
17. Desenchufe el cargador cuando no lo vaya
a usar durante un largo periodo de tiempo.
18. Ponga atención mientras limpie en escaleras.
19. Para prevenir que se encienda de manera
accidental, procure mantener las manos
y los dedos alejados del gatillo hasta que
esté preparado para empezar el aspirado,
especialmente cuando mueva el aparato.
Transportarlo con
provocar accidentes.
20. No instale, cargue o utilice este aparato en el
exterior, en un baño o a menos de tres metros
de distancia de una piscina. No lo utilice
en superficies mojadas ni lo exponga a la
humedad, lluvia o nieve.
el dedo cerca del gatillo puede
22
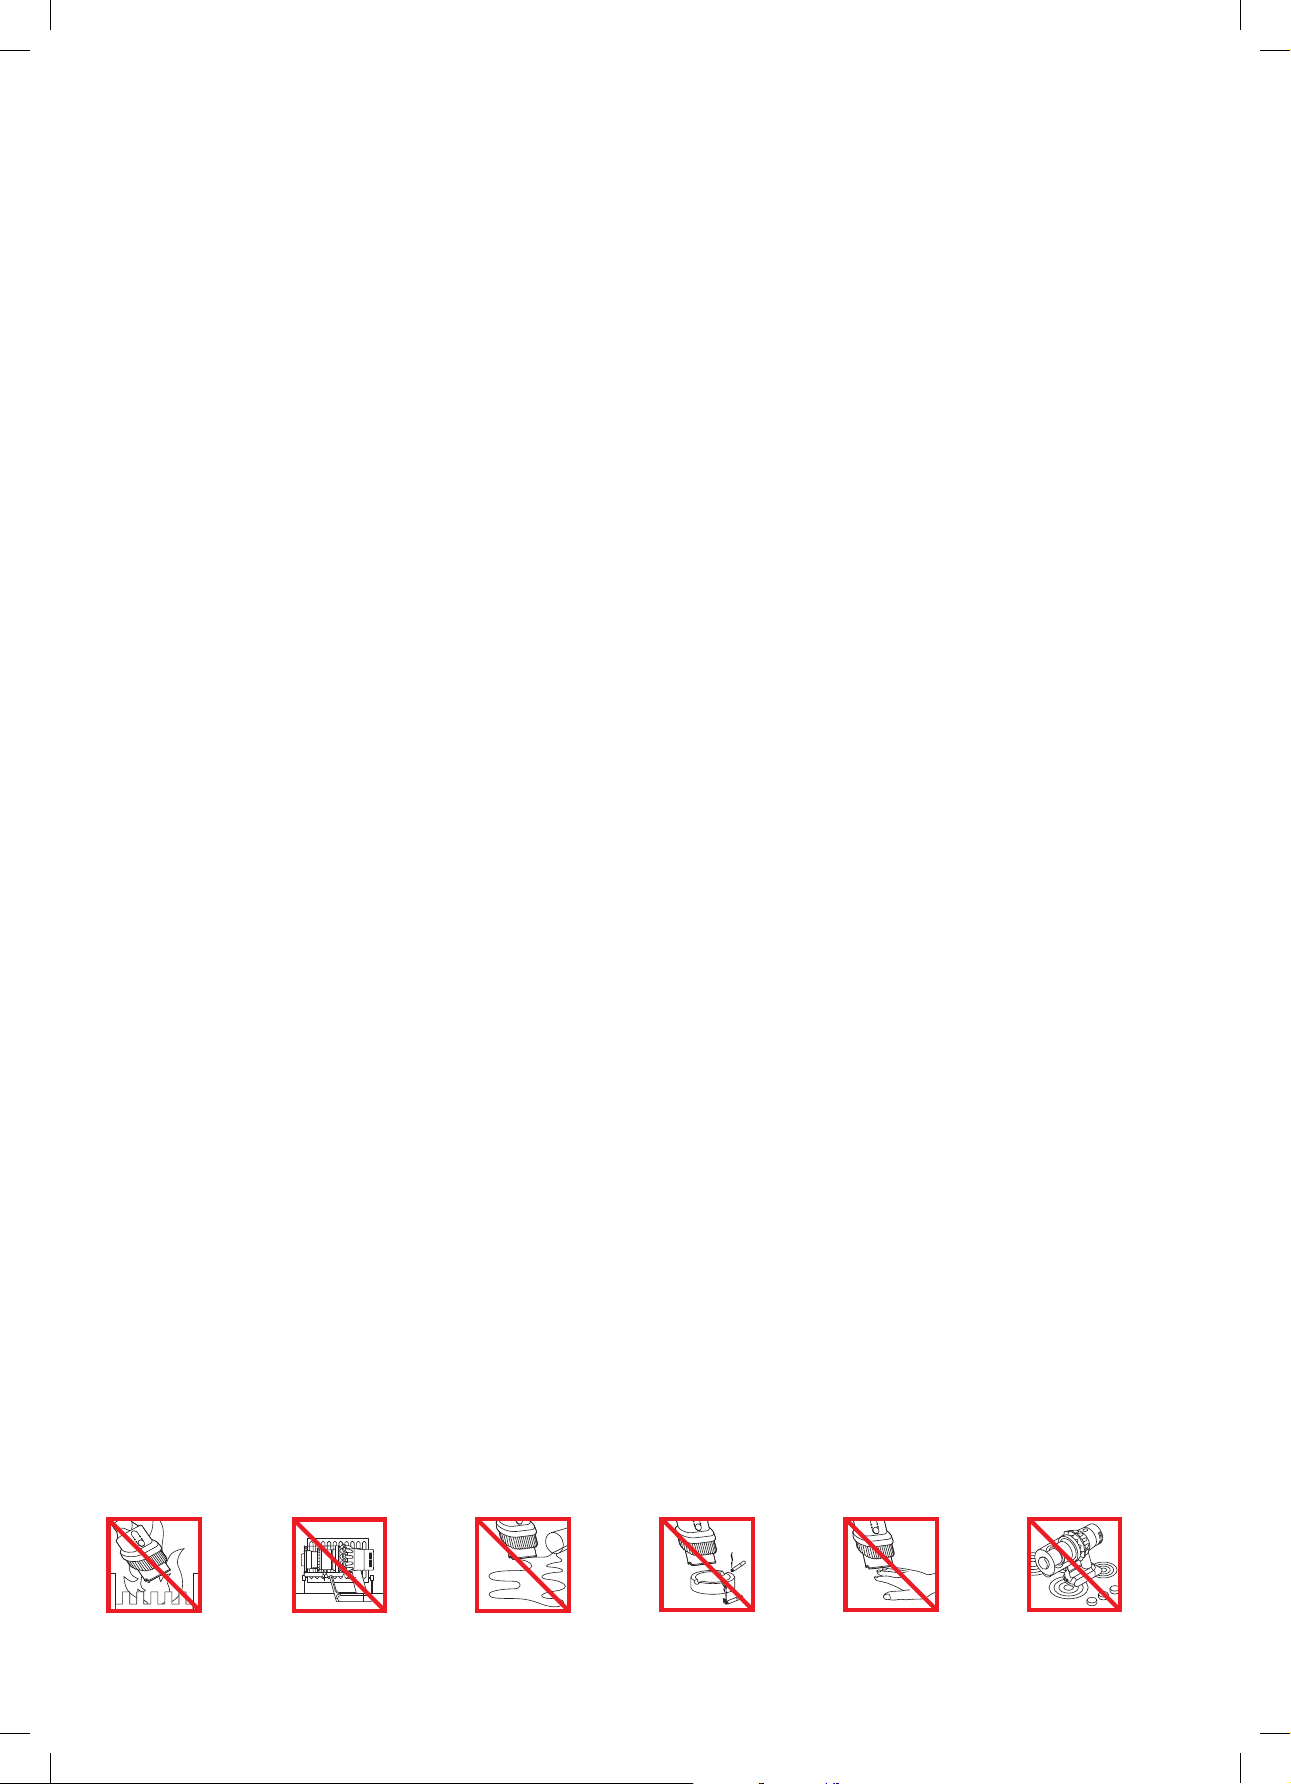
21. Cuando quite o reemplace el cepillo motorizado,
tenga cuidado de no pulsar el gatillo hasta que
el cabezal de limpieza haya sido montado.
22. No use una batería o un dispositivo que
estén dañados o modificados. Las baterías
dañadas o modificadas pueden presentar
comportamientos inesperados que pueden
acabar en fuego, explosión o riesgo de lesión.
La manipulación incorrecta de la batería
utilizada en este aparato puede presentar
un riesgo de incendio o quemadura química.
No desinstale ni cortocircuite los terminales
de alimentación de la batería. No exponga
la batería o el aparato al fuego ni a
temperaturas excesivas. La exposición al fuego
o a temperaturas por encima de 60°C (140°F)
puede provocar una explosión.
23. Utilice únicamente el cargador Dyson, número
de pieza217160 o 270576, para cargar este
aparato. Use únicamente la batería Dyson con
el número de pieza 355983 para este aparato
Dyson. Otros tipos de baterías pueden explotar
y, como consecuencia, causar un incendio
y lesiones a personas y daños.
24. Desconecte la batería del aparato antes
de limpiar, mantener o almacenar el aparato
durante largos períodos de tiempo.
25. Cuando el paquete de baterías no esté en uso,
manténgalo alejado de otros objetos metálicos,
como clips, monedas, llaves, clavos, tornillos
u otros objetos metálicos pequeños, que pueden
hacer una conexión de un terminal a otro. Poner
en cortocircuito los terminales de la batería
puede causar quemaduras o un incendio.
26. Retire los paquetes de baterías del aparato
y elimínelos de forma segura de conformidad
con las reglamentaciones y normas locales.
27. La batería está cerrada herméticamente y en
circunstancias normales no presenta ningún
tipo de riesgo para la seguridad. En el caso
improbable de que se produzca una fuga
de la batería, no toque el líquido, ya que puede
causar irritación y quemaduras, y tome las
siguientes precauciones:
• El contacto con la piel puede producir irritación.
Lave la zona afectada con agua y jabón.
• La inhalación puede causar irritación
respiratoria. Tome aire fresco y acuda
al médico.
• El contacto con los ojos puede causar
irritación. Enjuáguese bien los ojos con agua
inmediatamente durante al menos 15 minutos.
Acuda al médico.
• Disponga de o lleve guantes para manipular
la batería y deséchelos inmediatamente según
las normativas o reglamentos.
28. Siga todas las instrucciones de carga y no
cargue la batería o el dispositivo fuera del rango
de temperatura especificado en las instrucciones.
La carga incorrecta a una temperatura fuera
del rango especificado puede dañar la batería
y aumentar el riesgo de incendio. Para asegurar
que la vida útil de la batería sea la máxima,
Dyson recomienda lo siguiente:
• Cuando no use el aparato, este debería estar
guardado a temperatura ambiente. Rango
recomendado: De 18°C (64°F) a 28°C (82°F).
• El rango de temperatura ambiente
de funcionamiento debe oscilar entre 10°C
(50°F) y 30°C (86°F).
29. PELIGRO DE INCENDIO: No coloque este
producto encima o cerca de una cocina
o cualquier otra superficie caliente y no incinere
este aparato incluso si está muy dañado.
La batería podría incendiarse o explotar.
30. ADVERTENCIA DE INCENDIO - No aplique
ninguna fragancia o producto perfumado al filtro
(s) de este aparato. Se sabe que los productos
químicos en dichos productos son inflamables
y pueden causar que la máquina se incendie.
LEA Y GUARDE ESTAS
INSTRUCCIONES
Este aparato Dyson está diseñado para uso
doméstico exclusivamente.
No lo utilice cerca de
una llama.
No lo guarde cerca de una
fuent e de cal or.
No recoja agua o líquidos. No recoja objetos
incandescentes.
No acerque las ma nos al
cepillo cuando el aparato
esté funcionando.
No lo colo que encima o
cerca de una cocina.
23

Boost
Eco
Auto Med
100%
English English
selected
4:50 Auto
Low
run time
Exit
Off
On
Boost
Auto Med
English English
selected
4:50 Auto
Low
run time
Exit
Off
On
Boost
Auto
Boost
Eco
Auto Med
100%
4:50 Auto
Low
run time
Boost
Eco
Auto Med
100%
English
Espanol
English English
selected
4:50 Auto
Low
run time
Exit
Off
On
Pantalla
Botón de selección
Puede configurar los ajustes
de su aparato usando el botón
de selección.
Para entrar en el menú de ajustes,
pulse sin soltar el botón hasta que
aparezca la pantalla del menú.
Toque para desplazarse por las
opciones disponibles.
Cambio de
idioma
English
Espanol
Siga los pasos de la configuración
de idioma para cambiarlo.
English
selected
Cambio de la
configuración de
alerta
Presione para desplazarse por el
menú de configuración. Seleccione
la opción “Alertas”.
Desplácese para activar o
desactivar esta función, y mantenga
presionado el botón hasta que
finalice la cuenta regresiva y
aparezca una marca de verificación
en pantalla.
Nivel bajo de
carga de batería
4:50
La pantalla le alertará cuando
la batería esté agotándose.
Cuando la batería esté vacía,
aparecerá un icono de advertencia
final en la pantalla.
Estado de la
batería
Para conseguir el mejor
rendimiento y vida útil de su
batería, utilice el modo Eco o
Auto/Med.
Para cancelar la selección, suelte el
botón durante la cuenta regresiva.
Salida del menú de
configuración
24
Para salir del menú de
configuración, toque para
desplazarse por el menú de
configuración. Seleccione “Exit
menu” (Salir del menú).
Alertas
Aparecerán alertas en la pantalla
cuando la máquina necesite
su atención.
Un icono de filtro le avisará de que el
filtro no está correctamente ajustado
o necesita limpieza.
Un icono de bloqueo le avisará de
que se debe retirar un atasco de
la máquina.
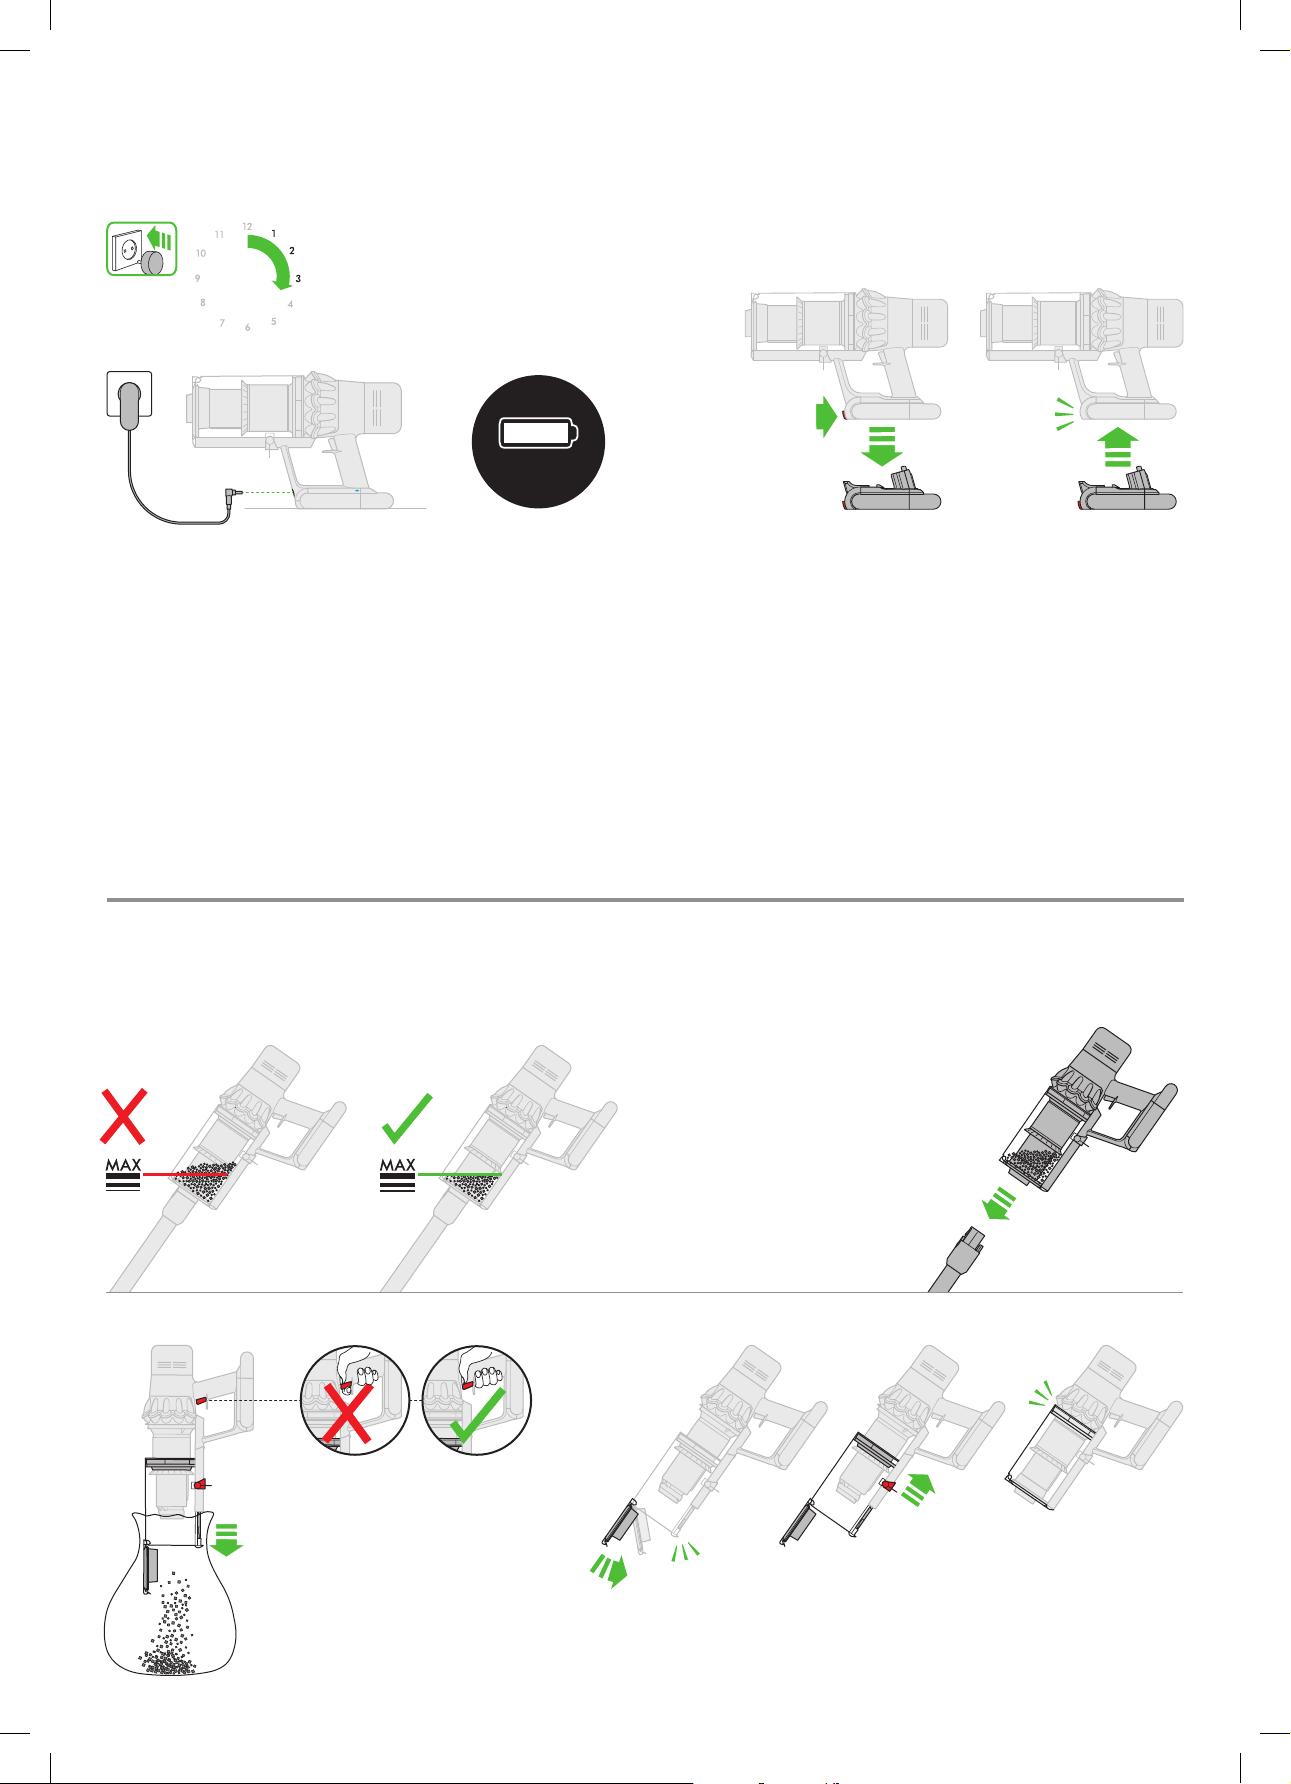
Boost
Eco
Auto Med
clik
clik
clik
Carga y almacenamiento
Cambio de la batería
del aparato
Es impor tante que cargue por completo su máquina
nueva antes de usarla por primera vez y luego de
3-4.5hrs
Conecte el aparato al cargador,
ya sea directamente o a través del
puesto de carga.
Los LEDs azules, uno a cada lado
de la batería, se encenderán y
apagarán de manera intermitente
mientras cargue.
Cuando la batería está cargada,
ambos LEDs se iluminarán durante
5 segundos y luego se apagarán.
La batería está completamente
cargada cuando la pantalla
muestra la batería al 100%.
cada uso. Esto se debe a que el algoritmo del sistema
de monitorización y de batería "aprende" con el
tiempo, y cargar su máquina por completo le ayuda
a calcular y mostrar con mayor precisión el tiempo de
funcionamiento restante.
100%
El aparato no funcionará si la
temperatura ambiente es inferior a
0°C (32°F). Está diseñado así para
proteger el motor y la batería.
Cuando disponga de baterías adicionales, le
recomendamos que las alterne regularmente para
garantizar su rendimiento.
clik
Para quitar una batería
Ponga la mano debajo de la
batería para sostenerla.
Presione el botón de
liberación de la batería y
deslice la batería fuera de la
palanca.
Ponga la batería a cargar.
Para poner una batería
Deslice la batería
sobre la palanca hasta
que encaje de manera
firme en su lugar.
Vaciado del cubo transparente
2
1
3
clik
Tenga cuidado de no pulsar el
gatillo mientras esté abierto el cubo
transparente para vaciarlo.
clik
Cierre el cubo transparente empujando hacia
arriba la base del cubo hasta que ambos
encajen correctamente.
25

clik
3
4
2
1
3
4
2
1
3
3
4
clik
2
1
3
1
3
2
1
3
4
clik
2
1
Eliminación de obstrucciones
1 2
1
3
4
2
4
5 6
Cierre el cubo transparente empujando
hacia arriba la base del cubo hasta que
ambos encajen correctamente.
26

clik
Limpieza del filtro
21
543 6
Mantenimiento del cabezal de limpieza de transmisión directa
1 2 3
27
Información adicional
Lea las " Instrucciones de seguridad impor tantes" en este Manual de funcionamiento de Dyson
antes de continuar.
Instalación del puer to de carga
• Desempaquete el puesto de carga, el cargador y el folleto de instalación.
• Elija un sitio donde colocar el puesto de carga y asegúrese de que detrás de dicha
ubicación no pasan tuberías (de gas, agua o aire), cables eléctricos, cableados
o conductos.
• No sitúe la estación de acoplamiento cerca de una fuente de calor como una olla o un
radiador, o bajo la luz solar directa.
• Siga las instrucciones del folleto de instalación.
• Encaje los accesorios en su luga r.
• Coloque el dispositivo en el puesto de carga.
• Enchufe el cargador a la red eléc trica. Enciéndalo (si es necesario) para cargar
la batería.
• Es importante cargar completamente el dispositivo antes de usarlo por primera vez
y después de cada uso.
El puesto de carga debe montarse de acuerdo con las normas y los estándares en vigor
(cumpliendo con las leyes nacionales y locales correspondientes).
Dyson recomienda el uso de ropa, gafas y materiales de protección durante la instalación del
puesto de carga.
ASPIRADO
• Compruebe que la parte inferior del cepillo o del accesorio esté limpia y no contenga
objetos extraños que puedan causar daños.
• Antes de aspirar el suelo o las alfombras, consulte las instrucciones de limpieza
recomendadas por el fabricante de los mismos.
• El cepillo del aparato puede dañar determinados tipos de alfombras y suelos. Las f ibras
de determinadas alfombras se levantarán si se utiliza el cepillo con cabezal giratorio
para aspirar. Si esto ocurre, recomendamos aspirar sin el cepillo motorizado y consultar
con el fabricante del material del suelo.
Vaciado del cubo transparente
• Vacíe el recipiente tan pronto como la suciedad llegue a la marca M AX. No permita
que la sobrepase. Si usa el aparato cuando la suciedad sobrepasa la línea M AX,
puede provocar que la suciedad llegue al f iltro y será necesario un mantenimiento
más frecuente.
• Desmonte la empuñadura presionando el botón de liberación rojo de la misma,
y sepárela del cubo.
• Para vaciar la suciedad:
– Mantenga el dispositivo con el cubo mirando hacia abajo.
– Presione con firmeza el botón rojo de extracción.
– El cubo se deslizará hacia abajo limpiando la rejilla en su camino.
– La base del cubo se abrirá.
– La base del cubo no se abrirá si el botón rojo no está completamente presionado.
Para minimizar el contacto con el polvo/alérgenos al vaciarlo, coloque el cubo transparente
firmemente en una bolsa y vacíelo. Saque el cubo transparente con cuidado de la bolsa.
Cierre bien la bolsa y deséchela como lo hace normalmente.
Tenga cuidado de no pulsar el gatillo mientras esté abierto el cubo transparente
para vaciarlo.
• Para cerrar el cubo transparente:
– Empuje la base del cubo transparente hacia arriba hasta que el cubo y la base encajen
correctamente.
Limpieza del cubo transparente (opcional)
Si es necesario limpiar el cubo transparente, vacíelo como se indica en la sección “Vaciado
del cubo transparente”.
• Siga las instrucciones de la sección " Vaciado del cubo transparente".
• Presione el botón rojo situado en la guía del cubo para liberarlo y deslícelo por la guía
hasta extraerlo.
• Lave el cubo transparente con un paño húmedo únicamente.
• Asegúrese de que el cubo transparente y las juntas están completamente secos antes
de volver a colocarlo.
• Para volver a colocar el cubo transparente:
– Inser te el chasis en la guía del cubo.
Cierre el cubo transparente empujando hacia arriba la base del cubo hasta que ambos
encajen correctamente.
El cubo transparente no es apto para lavavajillas y no se recomienda el uso de detergentes,
abrillantadores o ambientadores para limpiarlo, ya que puede dañar el dispositivo.
Eliminación de obstrucciones
• Este aparato incluye un sistema de desconexión automática. Si se produce una
obstrucción, el aparato puede apagarse automáticamente.
• El motor arrancará y la pantalla LCD indicará que hay una obstrucción.
•
Deje que el aparato se enfríe antes de inspeccionar obstrucciones.
• Tenga cuidado de no pulsar el gatillo mientras busca obstrucciones. Poner en marcha
el aparato cuando está parcialmente desmontado podría producir daños personales.
• Elimine cualquier obstrucción antes de volver a usar la máquina.
• Tenga cuidado con posibles objetos afilados cuando intente eliminar las obstrucciones.
• La eliminación de obstrucciones no está cubierta por la garantía.
• Para inspeccionar obstrucciones en el cuerpo principal de la máquina, extraiga el cubo
transparente siguiendo las instrucciones de la sección «Limpieza del cubo transparente»
y elimine la obstrucción.
• Si no puede eliminar una obstrucción del cabezal de limpieza, es posible que deba
extraer el cepillo. Use una moneda para aflojar la pestaña de fijación, deslice el cepillo
fuera del cabezal de limpieza y elimine la obstrucción. Vuelva a colocar el cepillo
y asegúrelo apretando la pestaña de fijación. Asegúrese de que esté bien firme antes
de utilizar la máquina.
• Este producto tiene cerdas de fibra de carbono. Tenga cuidado si las toca, pueden
causar irritación de la piel. Lávese las manos después de tocar el cepillo.
Lavado de la unidad de filtro
Lave la unidad de filtro al menos una vez al mes, o siempre que el indicador
de mantenimiento del filtro se encienda.
Compruebe y lave la unidad de filtro, siguiendo las instrucciones, para mantener
su rendimiento.
• Extraiga la unidad de filtro girándola en el sentido contrario de las agujas del reloj.
Retírela suavemente del dispositivo.
• Golpee suavemente la unidad de filtro para eliminar cualquier exceso de polvo y restos
antes de lavarlo.
• Lave la unidad de filtro solo con agua fría: no utilice detergentes ni lave los filtros en un
lavavajillas o una lavadora.
• Lave el papel plisado de la unidad de filtro primero. Mantenga la unidad de filtro bajo
el agua fría y golpee con la pieza de espuma hacia abajo y deje que el agua fría corra
por el papel plisado.
• Lave la pieza de espuma de la unidad de filtro. Mantenga la unidad de filtro bajo
el agua fría y golpee con la pieza de espuma hacia abajo para que el agua sucia
no contamine el papel plisado. Deje que corra el agua por dentro y fuera de la pieza
de espuma y apriete con delicadeza la espuma para expulsar la suciedad.
• Continúe la limpieza hasta que el agua se vuelva transparente.
• Lave el exterior de la unidad de filtro. Luego llene la unidad de filtro con agua fría,
ponga las manos sobre las puntas y sacúdalo ligeramente.
• Repita el lavado de los elementos y el exterior de la unidad de filtro hasta que el agua
se vuelva transparente.
• Sacuda suavemente la unidad de filtro hasta eliminar el exceso de agua y deje secar
junto con la pieza de espuma hacia arriba.
• Deje secar por completo la unidad de filtro en un ambiente seco con buena ventilación
durante al menos 24 horas.
• Compruebe que la unidad de filtro está complemente seca.
• Para volver a colocarlo, vuelva poner la unidad de filtro al aparato principal y gire en el
sentido de las agujas del reloj hasta que haga clic.
La unidad de filtro quizás requiera una limpieza más frecuente si aspira polvo fino o si se usa
principalmente en modo Máxima potencia.
No ponga ninguna parte de su aparato en lavavajillas, lavadoras, secadoras, hornos,
microondas o cerca de una llama candente.
Carga y almacenamiento
• Este aparato se apagará si la temperatura de la batería es menor a 10°C (50°F). Está
diseñado así para proteger el motor y la batería.
a un área donde la temperatura está por debajo de los 10°C (50° F) para almacenarlo.
• Para ayudar a prolongar la vida de la batería, evite recargarla inmediatamente después
de una descarga completa. Deje que se enfríe antes durante unos minutos.
• Evite usar el aparato con la batería rozando alguna superficie, esto ayudará a que
se enfríe mejor y prolongará la vida y uso del mismo.
Instrucciones de seguridad de la batería
• Si es necesario cambiar la batería, póngase en contacto con la línea de atención
al cliente de Dyson.
• Utilice solo el cargador Dyson, pieza número 217160 o 270576, para cargar
este aparato.
• Utilice únicamente la batería Dyson, número de pieza355983, para esta máquina
Dyson. Otros tipos de baterías podrían explotar y provocar un incendio, con
el consiguiente riesgo de lesiones o daños materiales.
PRECAUCIÓN
La batería de este aparato puede presentar riesgo de incendio o quemadura química si se
manipula de forma incorrecta. No la desmonte, cortocircuite, someta a temperaturas
superiores a los 60 ° C ni la incinere. Manténgala alejada de los niños. No la desmonte ni la
arroje al fuego.
Información acerca de la eliminación del producto
• Los productos Dyson están fabricados con materiales reciclables de alta calidad.
Recicle este producto en la medida de lo posible.
• Antes de desechar el producto, debe ex traerse la batería del mismo.
• Deseche o recicle la batería de acuerdo con las normativas o los reglamentos locales.
• Deseche la unidad de filtro usada de acuerdo con las normativas o reglamentos locales.
• Esta marca indica que este producto no debe eliminarse junto con otros residuos
domésticos en la UE. Para evitar posibles daños al medio ambiente o a la salud humana
debido a la eliminación no controlada de residuos, recíclelos adecuadamente para
promover la reutilización sostenible de recursos materiales. Para devolver el dispositivo
utilizado, utilice los sistemas de devolución y recogida, o bien póngase en contacto con
el establecimiento en el que adquirió el producto. Ellos podrán encargarse del reciclaje
de forma segura para el medio ambiente.
Servicio de atención al cliente Dyson
Después de registrar la garantía de 2 años, su aparato Dyson estará cubierto en piezas
y mano de obra (filtros excluídos) durante 2 años desde la fecha de compra, sujeto a los
términos de la garantía. Si tiene alguna pregunta sobre su aparato Dyson, visite www.dyson.
es/support para recibir asistencia en línea, obtener consejos generales e información útil
sobre Dyson.
O bien, llame a la línea de servicio al cliente de Dyson e indique su número de serie y los
detalles de dónde y cuándo compró el aparato.
Si su aparato Dyson necesita reparación, llame a la línea de servicio al cliente de Dyson
y trataremos las opciones disponibles. Si su aparato Dyson está en periodo de garantía y la
reparación está cubier ta, la reparación se realizará sin coste alguno para usted.
Regístrese como propietario de un aparato Dyson
La garantía de este producto es de 2 años a partir de la fecha de compra. Registre su garantía
en los 30 días posteriores a su fecha de compra. A fin de ayudarnos a garantizar un servicio
rápido y ef iciente, regístrela inmediatamente después de la compra. Guarde el ticket con
la fecha de compra.
Dispone de tres formas para ello:
• En línea w ww.dyson.es
• Por teléfono en la líne a de servicio al cliente de Dyson en el 900 8 0 36 49.
• Rellene el formulario adjunto y envíenoslo por correo.
Ventajas de registrarse en línea o por teléfono:
• Proteger su inversión con una garantía de dos años en piezas y mano d
• Recibir útiles consejos de uso del aparato.
• Obtener asesoramiento de expertos en la línea de servicio al cliente de Dyson.
• Ser el primero en conocer nuestros nuevos inventos.
• Se tarda unos minutos en registrarse y solo se necesita el número de serie.
No cargue el aparato y luego lo mueva
e obra.
28

Toda reparación deberá realizarse por los servicios técnicos autorizados por DYSON SPAIN,
S.L.U.
Cualquier componente sustituido dentro del periodo de garantía será propiedad de DYSON
SPAIN, S.L.U.
Qué cubre
Toda reparación o sustitución a la discreción de Dyson de su aparato si este tiene un defecto
por material defectuoso, de mano de obra o de funcionamiento dentro de los 2 años desde
la fecha de compra o entrega (si alguna pieza no estuviera disponible o ya no se fabricara,
Dyson le proporcionará una pieza de sustitución con la misma función).
• Cuando este aparato se venda fuera de la Unión Europea, esta garantía solo será
válida si el aparato se usa en el país donde se vendió.
• Where this machine is sold within the EU, this guarantee will only be valid (i) if the
machine is used in the country in which it was sold or (ii) if the machine is used in Austria,
Belgium, Denmark, Finland, France, Germany, Ireland, Italy, Netherlands, Norway,
Poland, Spain, Sweden, Switzerland or the United Kingdom and the same model as this
machine is sold at the same voltage rating in the relevant country.
¿Qué no está cubierto?
Dyson no garantiza la reparación o el cambio del producto cuando el defecto que presenta
es resultado de:
• Daños accidentales, fallos ocasionados por un uso o mantenimiento negligente, uso
indebido, descuido, funcionamiento o manejo imprudente del aparato no acordes con
el manual de funcionamiento de Dyson.
• Uso del aparato para fines que no sean el doméstico.
• Uso de piezas no montadas o instaladas conforme a las instrucciones de Dyson.
• Uso de piezas y accesorios no originales de Dyson.
• Una instalación defectuosa, excepto cuando haya sido instalado por Dyson.
• Reparaciones o modificaciones realizadas por terceros ajenos a Dyson o por sus
agentes autorizados.
• Obstrucciones: consulte el Manual de funcionamiento de Dyson para obtener
información sobre cómo detectar y eliminar obstrucciones.
• Desgaste normal (por ejemplo, fusible, cepillo, etc.).
• Uso del aparato en lugares con escombros, cenizas o yeso.
• Reducción en el tiempo de descarga de la batería debido al uso o los años de la batería
(si procede).
Si desea realizar cualquier consulta sobre la cobertura de su garantía, póngase en contacto
con la línea de servicio al cliente de Dyson.
Resumen de coberturas
• La garantía entra en vigor el día de la compra (o de la entrega si es posterior).
• Sin este comprobante, cualquier trabajo realizado se cobrará. Por favor, guarde
su recibo o nota de entrega.
• Toda reparación deberá realizarse por Dyson o sus servicios técnicos autorizados.
• Cualquier componente sustituido por D yson será propiedad de Dyson.
• El cambio de piezas o la sus titución del producto de Dyson cubierto por la garantía
no ampliarán el período de garantía.
• Esta garantía proporciona ventajas adicionales y no afecta sus derechos legales
como consumidor.
Información importante de protección de datos
Al registrar su producto Dyson:
• Deberá proporcionarnos información de contacto básica acerca de usted para que
podamos registrar su producto y prestarle garantía.
• Durante el registro, tendrá la opor tunidad de aceptar la recepción de comunicaciones
de nosotros. Si accede a recibir comunicaciones de Dyson, le enviaremos ofertas
especiales y noticias sobre nuestras innovaciones más recientes.
• Nunca venderemos a terceros la información que comparta con nosotros y la
utilizaremos siempre según lo estipulado en las políticas de privacidad publicadas
en nuestro sitio web. privacy.dyson.com
29

FR/BE/CH
Merci d’avoir choisi de vous équiper
d’un aspirateur sans fil Dyson
Activer votre garantie
Nous continuons de nous soucier de nos
appareils même une fois que vous les
avez achetés.
Une fois que vous vous serez enregistré
pour la garantie de 2ans, votre appareil
Dyson sera couvert pour les pièces et la
main-d’œuvre (à l’exception des filtres)
pendant 2ans à compter de la date d’achat,
conformément aux conditions de garantie.
Le numéro de série se trouve sur la plaque signalétique située à la base de
l’appareil.
Veuillez noter votre numéro de série pour pouvoir vous y référer
ultérieurement.
Image donnée à titre d’exemple.
Nous restons à votre disposition pour vous
aider y compris lorsque votre garantie
a expiré.
Main-d’œuvre et pièces Dyson gratuites
Remplacement sans souci
Conseils d’expert. 7jours sur 7
Vidéos didactiques et conseils utiles
Comment pouvonsnous aider?
Résoudre un problème
Obtenir des conseils d'utilisation
En savoir plus sur la
technologieDyson et les autres
appareilsDyson
En ligne:
www.dyson.fr
Téléphone:
0800 94 58 01
30
Service consommateurs Dyson
Si vous avez des questions concernant
votre appareil sans filDyson, appelez
le Service consommateursDyson et
communiquez le numéro de série de
l’appareil et les détails concernant
la date et le lieu d’achat à votre
interlocuteur, ou contactez-nous sur le
siteinternet de Dyson.
CONSIGNES DE SÉCURITÉ
IMPORTANTES
AVANT D’UTILISER CET APPAREIL, LISEZ
ATTENTIVEMENT LES INSTRUCTIONS ET LES MISES
EN GARDE FIGURANT DANS CE MANUEL ET SUR
L’APPAREIL
Lors de l’utilisation d’un appareil électrique, il
convient de respecter certaines précautions de base,
notamment les suivantes:
AVERTISSEMENT
Ces avertissements s’appliquent à l’appareil et, le cas
échéant, à toutes les pièces, accessoires, chargeurs
ou adaptateurs secteur.
POUR ÉVITER TOUT RISQUE D’INCENDIE, DE
DÉCHARGE ÉLECTRIQUE OU DE BLESSURE :
1. Cet appareil Dyson peut être utilisé par les
enfants à partir de 8 ans et les personnes dont
les capacités physiques, sensorielles ou mentales
sont réduites, ou manquant d’expérience ou de
connaissances, uniquement s’ils sont supervisés
ou qu’ils ont reçu des instructions de la part
d’une personne responsable concernant
l’utilisation de l’appareil en toute sécurité, et qu’ils
comprennent les dangers associés. Le nettoyage
et l’entretien ne doivent pas être réalisés par des
enfants non supervisés.
2. Cet appareil n’est pas un jouet et ne doit
donc pas être utilisé comme tel. Une attention
particulière est nécessaire lors de son utilisation
par ou à proximité d’enfants. Il convient
de surveiller les enfants pour s’assurer qu’ils
ne jouent pas avec l’appareil.
3. Utilisez l’appareil uniquement tel que décrit dans
le manuel de l’utilisateur Dyson.N’effectuez pas
de travaux d’entretien autres que ceux indiqués
dans ce mode d’emploi Dyson ou que ceux
conseillés par le Service consommateurs Dyson.
4. Convient UNIQUEMENT à une utilisation dans
des endroits secs. N’utilisez pas cet appareil
en extérieur ou sur des surfaces humides.
5. Ne manipulez aucune partie du chargeur ou de
l’appareil avec les mains mouillées.
6. N’utilisez pas l’appareil si le câble ou le chargeur
est endommagé.
7. N’utilisez pas l’appareil s’il ne fonctionne pas
conformément à ses spécifications, s’il a reçu
un choc violent, s’il a subi une chute ou des
dommages, s’il a été entreposé à l’extérieur
ou s’il a été immergé dans l’eau. Contactez
le Service consommateurs Dyson.
8. Contactez le Service consommateurs Dyson pour
obtenir des conseils ou en cas de réparation.
Ne démontez pas l’appareil car un remontage
incorrect risque d’entraîner un choc électrique
ou un incendie.
9. N’étirez pas le câble et n’exercez pas de tension
dessus. Maintenez le câble à l’écart des surfaces
chaudes. Ne fermez pas de porte sur le câble
et ne tirez pas sur le câble lorsqu’il se trouve
à proximité d’angles ou de coins. Maintenez
le câble à l’écart des zones de passage, à un
endroit où personne n’est susceptible de marcher
ou de trébucher dessus. Ne faites pas rouler
l’appareil sur le câble.
10. N’utilisez pas l’appareil pour aspirer de l’eau.
11. Ne pas utiliser pour aspirer des liquides
inflammables ou combustibles, comme
de l'essence, ou dans des endroits où les vapeurs
de ces produits peuvent être présentes.
12. N’aspirez rien qui brûle ou qui fume,
comme des cigarettes, des allumettes ou des
cendres incandescentes.
13. Éloignez les cheveux, les vêtements amples,
les doigts et toute autre partie du corps des
ouvertures et des pièces mobiles de l’appareil,
notamment de la brosse rotative. Ne dirigez pas
le flexible, le tube ou les accessoires vers les yeux
ou les oreilles et ne les portez pas à la bouche.
14. Ne placez pas d’objets dans les ouvertures
de l’appareil. N'utilisez pas l’appareil en cas
d’obstruction d’une ouverture. Assurez-vous que
rien ne réduit le flux d’air : poussières, peluches,
cheveux ou autres.
15. N’utilisez que les accessoires et pièces
de rechange recommandés par Dyson.
16. N'utilisez pas l'appareil sans que le collecteur
transparent et le filtre soient en place.
17. Débranchez le chargeur lorsqu’il n’est pas utilisé
pendant des périodes prolongées.
18. Redoublez de prudence lors de l’utilisation dans
les escaliers.
19. Prenez soin de maintenir vos mains et vos doigts
à distance de la gâchette de mise en marche
tant que vous n’êtes pas prêt(e) à commencer
à aspirer, notamment lorsque vous ramassez
ou portez l’appareil, afin d’éviter qu’il ne démarre
accidentellement. Veillez à ne pas appuyer sur
la gâchette de mise en marche lorsque vous
portez l’appareil afin d’éviter tout accident.
20. N’installez pas, ne rechargez pas et n’utilisez
pas cet appareil à l’extérieur, dans une salle
31

de bains ou à moins de 3mètres d’une piscine.
Ne l’utilisez pas sur une surface humide et ne
l’exposez pas à l’humidité, la pluie ou la neige.
21. Lors du changement d'une brosse motorisée,
veillez à ne pas activer l'appareil tant que
la brosse n'a pas été remise en place.
22. N’utilisez pas une batterie ou un appareil qui
est endommagé(e) ou modifié(e). Les batteries
endommagées ou modifiées peuvent par
exemple prendre feu, exploser ou comporter
un risque de blessures. Évitez d’exposer
une batterie ou un appareil au feu ou à des
températures excessives. Toute exposition de la
batterie ou de l’appareil à des températures
supérieures à 60°C (140°F) peut entraîner
une explosion.
23. Utilisez uniquement un modèle
de chargeur21716 0 ou 270576 de Dyson pour
recharger cet appareil. Utilisez uniquement
un modèle de batterie355983 de Dyson avec
cet appareil. D’autres types de batteries risquent
d’exploser, provoquant des dommages et des
blessures corporelles.
24. Débranchez le bloc-batterie de l’appareil avant
de le nettoyer, d’effectuer son entretien ou de
le stocker pendant de longues périodes.
25. Lorsque le bloc-batterie n’est pas utilisé,
gardez-le à l’écart d’autres objets métalliques,
comme des trombones, des pièces de monnaie,
des clés, des clous, des vis ou d’autres petits
objets métalliques, qui peuvent entraîner une
connexion accidentelle entre les deuxbornes.
Le court-circuitage des bornes de la batterie peut
causer des brûlures ou un incendie.
26. Les bloc-batteries doivent être retirés de l’appareil
et éliminés en toute sécurité conformément à la
réglementation locale.
27. La batterie est une unité hermétique qui, dans
des circonstances normales, ne pose aucun
problème de sécurité. Dans l’éventualité peu
probable d’une fuite, ne touchez pas le liquide
au risque de provoquer des irritations ou des
brûlures et observez les précautions suivantes:
• Contact avec la peau: peut provoquer une
irritation. Nettoyez à l’eau et au savon.
• Inhalation: peut provoquer une irritation
des voies respiratoires. Respirez de l’air frais
et consultez un médecin.
• Contact avec les yeux: peut provoquer
une irritation. Rincez-vous immédiatement
et abondamment les yeux à l’eau pendant
au moins 15minutes. Consultez un médecin.
• Mise au rebut: utilisez des gants pour manipuler
la batterie et mettez-la immédiatement au rebut
conformément à la réglementation et aux
arrêtés locaux.
28. Suivez toutes les instructions de charge et ne
chargez pas la batterie ou l'appareil au delà des
intervalles de température spécifiées dans les
instructions. Un chargement incorrect ou à une
température au delà des intervalles spécifiées
peut endommager la batterie et augmenter
le risque d'incendie. Dyson recommande
de respecter les précautions suivantes afin
de conserver la batterie le plus longtemps
possible:
• Stocker l’appareil à température ambiante
lorsqu’il n’est pas utilisé. Intervalle
recommandée: entre 18°C (64°F) et 28°C
(82°F).
• L'inter valle de températures de fonctionnement
et de chargement doit être comprise entre 10°C
(50°F) et 30°C (86°F).
29. RISQUE D’INCENDIE – Ne placez pas ce produit
sur (ou à proximité) d’une cuisinière ou autre
surface chaude et ne l’incinérez pas même
s’il est fortement endommagé. La batterie risque
de prendre feu ou d’exploser.
30. AVERTISSEMENT INCENDIE - ne pas appliquer
de parfum ou produit parfumé sur le bloc filtres
de cet appareil. Les produits chimiques dans ces
produits sont connus pour être inflammables
et peuvent provoquer une prise de feu
de l'appareil.
LISEZ ATTENTIVEMENT
CES CONSIGNES ET
CONSERVEZ-LES
Cet appareil Dyson est exclusivement destiné à un
usage domestique.
N’utilise z pas l’appareil près
de flammes nues.
32
Ne rangez pas l’appareil
près d’une source
de chaleur.
N’utilise z pas l’appareil
pour aspirer de l’eau ou tout
autre liquide.
N’utilise z pas l’appareil
pour aspirer des objets
en combustion.
Gardez l es mains à l’écart
de la bros se rotative lorsque
l’appareil est en cou rs
d’utilisation.
Ne placez pas l’appareil
sur une cui sinière ou
à proximité.

Boost
Eco
Auto Med
100%
English English
selected
4:50 Auto
Low
run time
Exit
Off
On
Boost
Auto Med
English English
selected
4:50 Auto
Low
run time
Exit
Off
On
Boost
Auto
Boost
Eco
Auto Med
100%
4:50 Auto
Low
run time
Boost
Eco
Auto Med
100%
English
Espanol
English English
selected
4:50 Auto
Low
run time
Exit
Off
On
Écran
Bouton de sélection
Vous pouvez modifier les réglages
sur votre appareil à l’aide du bouton
de sélection.
Pour entrer dans le menu, appuyez
et maintenez le bouton enfoncé
jusqu'à ce que l'écran du menu
s'affiche. Appuyez pour parcourir les
options disponibles.
Modification de
la langue
English
Espanol
Suivez les étapes de configuration
de la langue pour changer cette
dernière et paramétrer la vôtre.
English
selected
Modifier le réglage
des alertes
Appuyez pour parcourir le menu
des réglages. Sélectionnez l’option
«Alerte».
Faites défiler pour sélectionner
Activer ou Désactiver et maintenez
le bouton enfoncé jusqu'à la fin du
compte à rebours et qu'une coche
apparaisse à l'écran.
Batterie faible
4:50
Votre appareil émettra des
impulsions trois fois et une icône de
batterie faible apparaîtra à l'écran
pour vous avertir que votre batterie
doit être chargée.
Lorsque votre batterie est vide, une
dernière icône d'avertissement
apparaît à l'écran.
Intégrité de la
batterie
Pour optimiser les performances
et la durée de vie de votre
batterie, utilisez le mode Eco ou
Auto/Med.
Pour annuler votre sélection,
relâchez le bouton pendant le
compte à rebours.
Quitter le menu
Réglages
Pour quitter le menu Réglages,
appuyez pour parcourir le menu
Réglages. Sélectionnez «Quitter
le menu».
Alertes
Les alertes s'affichent à l'écran
lorsque votre appareil a besoin de
votre attention.
Une icône de filtre vous avertit que le
filtre n'est pas correctement installé
ou qu'il a besoin d'être nettoyé.
Une icône de blocage vous avertit
qu'un blocage doit être retiré de
votre appareil.
33

Boost
Eco
Auto Med
clik
clik
clik
Chargement et stockage
Changement de la
de votre appareil
Il est important de charger complètement votre nouvel
appareil avant la première utilisation et après chaque
3-4.5hrs
Branchez le chargeur soit
directement, soit sur la station
d’accueil.
Les diodes bleues, placées de chaque
côté de la batterie, clignoteront
pendant le chargement.
Une fois la batterie chargée, les
deux diodes s’allumeront pendant
5secondes avant de s’éteindre.
La batterie est chargée lorsque
l’écran affiche un niveau de charge
de 100%.
nettoyage. Cela est, en effet, essentiel, car l'algorithme
de la bat terie et du système de surveillance «apprend»
au fil du temps, et la charge complète de votre appareil
l'aide à calculer plus précisément et à af ficher la durée
de fonctionnement restante.
100%
Votre appareil ne fonctionnera
pas si la température ambiante est
inférieure à 0°C (32°F). Ceci est
prévu dans le but de protéger le
moteur et la batterie.
batterie
Lorsque vous avez des batteries supplémentaires, nous
vous recommandons de les alterner régulièrement afin
de garantir les performances de la batterie.
clik
Pour retirer une batterie
Placez votre main sous la
batterie pour la soutenir.
Appuyez sur le bouton de
déverrouillage de la batterie
et faites glisser la batterie
hors de la poignée.
Mettez la batterie en charge.
Pour installer une
batterie
Faites glisser la batterie
sur la poignée jusqu'à
ce qu'elle s'enclenche
et qu'elle soit bien en
place.
Vidage du collecteur
transparent
2
1
3
clik
34
Veillez à ne pas tirer sur la gâchette de
mise en marche lorsque le collecteur
transparent est ouvert pour le vider.
clik
Refermez le collecteur transparent en poussant
vers le haut la base du collecteur jusqu’à ce
qu’elle s’enclenche.

clik
clik
3
4
2
1
3
4
2
1
3
3
4
clik
2
1
3
1
3
2
1
3
4
clik
2
1
Vérification de l’absence d’obstructions
1 2
1
3
4
2
4
5 6
Refermez le collecteur transparent en
poussant vers le haut la base du collecteur
jusqu’à ce qu’elle s’enclenche.
35

clik
Nettoyage du filtre
21
543 6
Entretien de la tête de nettoyage à entraînement direct
1 2 3
36

Informations supplémentaires
Veuillez lire les consignes importantes de sécurité de ce manuel d'utilisation Dyson avant
toute utilisation.
Installation de la station de chargement
• Déballez la station, le chargeur et la brochure d’installation.
• Choisissez l’emplacement de la station et assurez-vous qu’il n’y ait pas de canalisations
(gaz, eau ou air), de câbles électriques, de fils électriques ou de tuyauterie directement
derrière l’emplacement de montage.
• Ne placez pas la station d’accueil près d’une source de chaleur comme une cuisinière,
un radiateur ou en plein soleil.
• Suivez les instructions de la brochure d'installation.
• Fixez les accessoires.
• Placez l'appareil sur la station.
• Branchez le chargeur sur le réseau électrique. Mettez-le sous tension (si nécessaire)
pour charger la batterie.
• Il est important de charger complètement votre appareil avant la première utilisation
et après chaque utilisation.
La station doit être montée conformément aux réglementations et aux codes/normes
applicables (législation locale et nationale).
Dyson recommande le port de vêtements, de lunettes et d'équipements de protection lors
de l'installation de la station.
Utilisation de l’appareil
• Vérifiez que le dessous de la brosse ou de l'accessoire est propre et dépourvu de corps
étrangers pouvant l'endommager.
• Avant de passer l’aspirateur sur le sol, les tapis et les moquettes, lisez les instructions
de nettoyage recommandées par le fabricant.
• La brosse de l’appareil peut endommager cer tains types de tapis ou moquettes et de
sols. Certains tapis et moquettes peuvent pelucher si la brosse motorisée est utilisée
pendant l’aspiration. Dans ce cas, nous recommandons d’utiliser l’aspirateur sans
la brosse motorisée et de consulter le fabricant du revêtement de sol.
Vidage du collecteur transparent
• Videz l’appareil dès que la saleté a atteint le niveau MAX - ne le laissez pas se remplir
au-delà. Si vous utilisez l’appareil lorsque la saleté est au-dessus de la ligne MAX,
la saleté pourrait atteindre le filtre et un entretien plus fréquent serait nécessaire.
• Veillez à ne pas tirer sur la gâchette de mise en marche lorsque le collecteur transparent
est ouvert pour le vider.
• Retirez le tube en appuyant sur le bouton rouge du tube et en le retirant du collecteur.
• Pour vider la poussière :
– Tenez l'appareil avec le collecteur vers le bas.
– Appuyez fermement sur le levier rouge du collec teur.
– Le collecteur glisse vers le bas et nettoie la grille au passage.
– La base du collec teur s’ouvre ensuite.
– La base du collec teur ne s'ouvrira pas si le bouton rouge n'est pas complètement
poussé.
Pour réduire le contact avec la poussière et les allergènes lorsqu’on vide le collecteur, serrez
un sac étanche aux poussières autour de l’o uvertu re du collecteur transparent et videz
ce dernier. Retirez le collecteur transparent du sac avec soin.
Fermez le sac hermétiquement, puis jetez-le comme un déchet usuel.
Veillez à ne pas tirer sur la gâchette de mise en marche lorsque le collecteur transparent est
ouver t pour le vider.
• Pour fermer le collecteur transparent:
– Poussez la base du collecteur vers le haut jusqu’à ce qu’elle s’enclenche avec le collec-
teur transparent.
Nettoyage du collecteur transparent (facultatif)
Si un nettoyage du collecteur transparent est nécessaire:
• Suivez les instructions de la section «Vidage du collecteur transparent».
• Appuyez sur le bouton rouge situé sur la glissière du collecteur pour libérer le collecteur
et le sor tir en le faisant glisser vers le bas.
• Nettoyez le collecteur transparent avec un chiffon doux uniquement.
• Assurez-vous que le collecteur transparent et les joints sont complètement secs avant
de les réinstaller.
• Pour replacer le collecteur transparent:
– Insérez l'arrière du collecteur dans la glissière de l'appareil prévue à cet effet.
Refermez le collecteur transparent en faisant remonter la base du collecteur vers le haut
jusqu'à ce qu'elle se clipse.
Ne mettez pas le collecteur transparent au lave-vaisselle; l'utilisation de détergents, de vernis
ou de désodorisants pour nettoyer le collecteur transparent n'est pas recommandée, ces
produits pouvant endommager votre appareil.
Vérification de l’absence d’obstructions
• Cet appareil est équipé d’un coupe-circuit automatique. Si un élément est obstrué,
l’appareil peut s’éteindre automatiquement.
•
En cas d’obstruction, le moteur démarre et l’écran LCD indique qu’il y a une obstruction.
• Laissez l’appareil refroidir avant de rechercher les obstructions.
• Veillez à ne pas tirer sur la gâchette de mise en marche lorsque vous recherchez des
obstructions. Veuillez ne pas mettre l’appareil en marche lorsqu’il est en partie démonté
afin d’éviter de vous blesser.
• Éliminez les obstructions avant de redémarrer.
• Faites attention aux éventuels objets tranchants lorsque vous vérifiez l’absence
d’obstructions.
• L’élimination des obstructions n’est pas couverte par la garantie.
• Pour vérifier la présence d’obstructions dans l’unité principale de l’appareil, retirez
le collecteur transparent selon les instructions fournies dans la section «Vidange
du collecteur transparent» et retirez l’obstruction.
• Si vous n’arrivez pas à retirer l’obstruction de la brosse, essayez en retirant le gros
rouleau. Utilisez une pièce de monnaie pour déverrouiller l’attache, faites glisser le gros
rouleau pour la sortir de la brosse et retirez l’obstruction. Remettez le gros rouleau
en place et serrez bien l’attache. Assurez-vous qu'elle est bien fixée avant d'utiliser
votre appareil.
• Cet appareil contient des brosses avec des poils en fibre de carbone. Faites attention
si vous touchez les poils car ils peuvent causer de légères irritations cutanées. Lavezvous les mains après avoir manipulé les poils de la brosse.
Lavage du bloc de filtration
Nettoyez le bloc filtres au moins une fois par mois ou chaque fois que le témoin d’entretien
du filtre s’al lume.
Contrôlez et nettoyez le bloc de filtration en suivant les instructions afin de maintenir
les performances.
• Retirez le bloc filtres en tournant dans le sens anti-horaire. Retirez-le doucement
de l’appareil.
• Tapez doucement sur le bloc filtres pour retirer tout reste de poussière et de saleté avant
de la laver.
• Lavez le bloc filtres dans de l’ea u fro ide uniquement.
• Lavez d’abord l’élément en papier plissé du bloc filtres. Passez-le sous le robinet d’eau
froide en prenant soin de placer l’élément en mousse vers le bas et faites couler de l’eau
froide sur le papier plissé.
• Lavez ensuite l’élément en mousse de l’u nité de filtrage. Passez-la sous le robinet d’eau
froide en prenant soin de placer l’élément en mousse vers le bas afin que l’eau sale
ne contamine pas l’élément en papier plissé. Faites couler de l’eau froide sur l’intérieur
et l’extérieur de l’élément en mousse et comprimez la mousse délicatement pour faire
sortir la saleté.
• Refaites un lavage des éléments et de l’extérieur du bloc filtres jusqu’à ce que l’eau
soit claire.
• Secouez doucement le bloc filtres pour retirer toute eau résiduelle et laissez-le sécher
avec l’extrémité de l’élément en mousse vers le haut.
• Laissez sécher complètement l’unité de filtrage dans un endroit sec et parfaitement aéré
pendant au moins 24heures.
• Vérifiez que le bloc de filtration est complètement sec.
• Pour reposer le bloc filtres, replacez-le dans l’unité principale et tournez-le dans le sens
horaire jusqu’à ce qu’il s’enclenche.
L’un ité de filtrage peut nécessiter des lavages plus fréquents en cas d’aspiration de poussière
fine ou si l’appareil est utilisé principalement en mode Boos t.
Ne mettez aucune par tie de votre appareil au lave-vaisselle, dans le lave-linge ou le sèchelinge, au four, au micro-ondes et ne le placez pas à proximité d'une flamme nue.
Chargement et rangement
• Cet appareil s’éteint si la température de la batterie est inférieure à 10°C (50°F)
dans le but de protéger le moteur et la batterie. Ne rechargez pas l’appareil avant
de l’entreposer dans un endroit dans lequel la température est inférieure à 10°C
(50°F).
• Pour prolonger la durée de vie de la batterie, évitez de la recharger immédiatement
après l’avoir complètement vidée. Laissez-la refroidir quelques minutes.
• Évitez d’utiliser l’appareil avec la batterie à plat contre une sur face pour l’aider à rester
froide et prolonger son autonomie et sa durée de vie.
Consignes de sécurité relatives à la batterie
• S’
il est nécessaire de remplacer la batterie, contactez le Service Consommateurs
de Dyson.
• Utilisez uniquement un modèle de chargeur217160 ou 2 70576 de Dyson pour
recharger cet appareil.
• Utilisez uniquement un modèle de batterie 355983 de Dyson avec cet appareil.
Un autre t ype de batterie risque d’exploser et de provoquer un incendie, des blessures
corporelles et autres dommages.
ATTENTION
La batterie utilisée dans cet appareil peut présenter un risque d’incendie ou de brûlure
chimique si elle est mal utilisée. Elle ne doit pas être démontée, court-circuitée, chauffée à plus
de 60°C ou incinérée. Tenez-la hors de la por tée des enfants. Ne la démontez pas et ne
la jetez pas au feu.
Informations de mise au rebut
• Les produits Dyson sont fabriqués à partir de matériaux hautement recyclables.
Recyclez-les si possible.
• La batterie doit être retirée de l’appareil avant la mise au rebut de ce dernier.
• Mettez au rebut ou recyclez la batterie conformément à la réglementation et aux
arrêtés locaux.
• Mettez au rebut le bloc de filtration usagé conformément à la réglementation et aux
arrêtés locaux.
• Ce marquage indique que ce produit ne doit pas être jeté avec les déchets ménagers
dans l’ensemble de l’UE. Pour éviter tout ef fet nocif d’une élimination non contrôlée des
déchets sur l’environnement et la santé, recyclez ce produit de manière responsable,
de sorte à encourager la réutilisation durable des ressources en matériaux. Pour
renvoyer votre appareil usagé, utilisez les réseaux de retour et de collecte, ou contactez
le revendeur du produit, qui sera en mesure de le rec ycler d’une manière respectueuse
de l’environnement.
• La batterie doit être retirée pour être recyclée séparément.
Service consommateurs Dyson
Une fois que vous vous aurez enregistré la garantie de 2ans, votre appareil Dyson sera
couver t pour les pièces et la main-d’œuvre pendant 2ans à compter de la date d’achat,
conformément aux conditions de garantie. Si vous avez la moindre question concernant votre
appareil Dyson, consultez le site www.dyson.fr/support (FR), www.dyson.be/support (BE)
ou www.dyson.ch/support (CH) pour obtenir une aide en ligne, des conseils généraux et des
informations utiles sur Dyson.
Vous pouvez également appeler le Service consommateurs Dyson et lui communiquer
le numéro de série de l’appareil et les détails concernant la date/le lieu d’acha t.
Si votre appareil D yson a besoin d’être réparé, appelez le Service Consommateurs Dyson
afin de discuter des différentes options disponibles. Si votre appareil Dyson est sous garantie
et que la réparation est couverte, elle sera gratuite.
Enregistrez-vous comme propriétaire d’un appareil dyson
La garantie pour ce produit est de 2ans à compter de la date d’achat. Veuillez enregistrer
votre produit pour activer votre garantie dans les 30jours suivant la date d’achat. Pour nous
aider à garantir un service rapide et efficace, veuillez vous enregistrer immédiatement après
l’achat. Veuillez conserver la facture indiquant la date et le lieu d'achat.
Vous pouvez activer votre garantie de trois manières:
• En ligne à l’adresse ww w.dyson.fr
• En contactant le Service Consommateurs Dyson au 0800 94 58 01.
• En remplissant le formulaire joint et en le renvoyant.
37

En vous enregistrant en ligne ou par téléphone, vous :
• Sécurisez votre achat avec la garantie de 2 ans sur les pièces et la main d’œuvre;
• Recevez des conseils utiles sur l’utilisation de votre appareil ;
• Bénéficiez de conseils experts de la par t du Service consommateurs Dyson ;
• Etre le premier au courant des dernières innovations.
• S'enregistrer en ligne ne prend que quelques minutes et vous avez uniquement besoin
du numéro de série.
Garantie limitée de 2 ans
Terms and conditions of the Dyson 2-year limited guarantee are set out below. The name and
address details of the Dyson guarantor for your country are set out elsewhere in this document
– please refer to the table setting out these details.
Ce qui est couver t
• La réparation ou le remplacement de votre appareil Dyson (à l’entière discrétion
de Dyson) s’il présente un défaut matériel, de fabrication ou de fonctionnement dans
les 2 ans à compter de la date d’achat ou de livraison. (Si une pièce n’est plus disponible
ou fabriquée, Dyson la remplacera par une pièce fonctionnelle équivalente.)
• Lorsque l’appareil est vendu en dehors de l’UE, cet te garantie n’est valable que
si l’appareil est utilisé dans le pays dans lequel il a été vendu.
• Where this machine is sold within the EU, this guarantee will only be valid (i) if the
machine is used in the country in which it was sold or (ii) if the machine is used in Austria,
Belgium, Denmark, Finland, France, Germany, Ireland, Italy, Netherlands, Norway,
Poland, Spain, Sweden, Switzerland or the United Kingdom and the same model as this
machine is sold at the same voltage rating in the relevant country.
Ce qui n’est pas couvert
Dyson ne garantit pas la réparation ni le remplacement d’un produit si le défaut est dû à :
• Des dommages accidentels ou des défauts causés par une mauvaise utilisation,
un entretien incorrect, une utilisation abusive, une négligence, ou une utilisation
ou manipulation non conforme aux instructions du mode d’emp loi Dyson.
• Une utilisation de l’appareil à une fin autre que des travaux ménagers ordinaires.
• Une utilisation de pièces non assemblées ou installées conformément aux instructions
de Dyson.
• Une utilisation de pièces et accessoires autres que Dyson.
• Une erreur d’installation (sauf en cas d’installation par Dyson).
• Des réparations ou modifications effectuées par des personnes autres que Dyson ou ses
agents agréés.
• Des obstructions: veuillez vous repor ter au mode d’emploi Dyson pour savoir comment
vérifier l’absence d’obstructions et les éliminer.
• Une usure normale (par ex. brosse, etc.).
• Une utilisation de l’appareil sur des gravats, des cendres ou du plâtre.
• une baisse de l’autonomie de la batterie liée à son âge ou à son utilisation (le cas
échéant).
En cas de doute sur les éléments couverts par votre garantie, veuillez contacter le Service
consommateurs Dyson.
Résumé de la garantie
• La garantie prend ef fet à la date d’achat (ou à la date de livraison si celle-ci est
postérieure à la date d’achat).
• Pour qu’une intervention puisse être réalisée sur votre appareil Dyson, vous devez
fournir la preuve d’ach at/de livraison (document original et tout document ultérieur).
Sans cette preuve, toute intervention sera à votre charge. Veuillez conserver votre reçu
ou bon de livraison.
• Toute réparation sera effectuée par Dyson ou l’un de ses agents agréés.
• Toutes les pièces remplacées par Dyson deviennent la propriété de Dyson.
• La réparation ou le remplacement sous garantie de votre appareil Dyson ne prolonge
pas la période de garantie.
• La garantie offre des avantages qui viennent s’ajouter à vos droits légaux en tant que
consommateur, sans aucune incidence sur ces droits.
Informations importantes concernant la protection des données
Lors de l’enregistrement de votre appareil Dyson :
• Vous devez nous fournir des coordonnées de base pour pouvoir enregis trer votre
appareil et nous permettre de vous offrir la garantie.
• Lors de votre enregistrement, vous aurez la possibilité d’indiquer si vous souhaitez
ou non recevoir des communications de notre part. Si vous choisissez de recevoir
des communications de la part de Dyson, nous vous enverrons nos offres spéciales
détaillées et des informations sur nos toutes dernières innovations.
• Nous ne vendrons jamais vos informations à des tiers et nous utiliserons les informations
que vous partagez avec nous uniquement tel que défini dans nos politiques
de confidentialité, disponibles sur notre site Web, à la page privacy.dyson.com.
38

IT/CH
Grazie per aver scelto di
acquistare un aspirapolvere
senza filo Dyson
Attivazione della garanzia
Non smettiamo di preoccuparci dei nostri
apparecchi una volta che diventano vostri.
Dopo la scadenza della garanzia, saremo
ancora a disposizione per aiutarvi.
Dopo aver registrato la garanzia gratuita
di 2 anni, le parti (esclusi i filtri) e la
manodopera dell’apparecchio Dyson
saranno coperte in base alle condizioni
previste dalla garanzia.
Il numero seriale del prodotto è riportato sulla targhetta applicata alla base
della batteria.
Annota il tuo numero di serie per riferimento futuro.
Immagine a scopo illustrativo.
Parti di ricambio Dyson e
manodopera gratuite
Sostituzione senza problemi
Consulenza professionale. 7 giorni
alla settimana
Video con istruzioni d’uso e
suggerimenti utili
Come possiamo aiutarvi? Assistenza Clienti Dyson
Risoluzione di un problema
Suggerimenti e guide
Scopri di più sulla tecnologia
Dyson e sui prodotti Dyson
Online:
www.dyson.it
Telefono:
800 976 024
In caso di domande, chiamare il Centro
Assistenza Dyson indicando numero
di serie, luogo e data di acquisto
dell'apparecchio, oppure contattare
Dyson attraverso il sito Web.
39

IMPORTANTI PRECAUZIONI
D’USO
PRIMA DI USARE IL PRESENTE APPARECCHIO,
LEGGERE TUTTE LE ISTRUZIONI E LE AVVERTENZE
RIPORTATE ALL'INTERNO DEL PRESENTE MANUALE
E SULL' APPARECCHIO
Quando utilizzate un apparecchio elettrico, dovete
attenervi sempre alle precauzioni fondamentali, tra
cui le seguenti:
ATTENZIONE
Gli avvisi si riferiscono all’apparecchio e, se
applicabile, a tutti gli strumenti, gli accessori, i
caricatori o gli adattatori di elettricità.
PER RIDURRE IL RISCHIO DI INCENDI, SCOSSE
ELETTRICHE O INFORTUNI:
1. Questo apparecchio Dyson può essere utilizzato
dai bambini con età minima di 8 anni e da
persone con ridotte capacità fisiche, motorie
o mentali, o da persone che non possiedono
l’esperienza e le conoscenze necessarie,
ma seguiti da un supervisore al quale sono
state fornite le necessarie istruzioni per
l’uso dell'apparecchiatura in modo corretto
da parte di una persona responsabile e se
sono consapevoli dei rischi connessi. Interventi
di manutenzione e pulizia non devono essere
eseguiti da bambini senza supervisione.
2. Non consentire che l'apparecchio sia utilizzato
come giocattolo. Prestare la massima attenzione
quando viene adoperato da o in prossimità
di bambini piccoli. I bambini devono essere
sorvegliati per controllare che non giochino con
l'apparecchio.
3. Utilizzare l'apparecchio esclusivamente come
descritto nel Manuale utente Dyson. Non
eseguire interventi di manutenzione al di fuori
di quelli descritti in questo manuale o consigliati
dal Centro Assistenza Dyson.
4. Adatto ESCLUSIVAMENTE all'uso in ambienti
asciutti. Non utilizzare l'apparecchio all'esterno
né su superfici bagnate.
5. Non toccare il caricatore o l’apparecchio con
le mani bagnate.
40
6. Non utilizzare l’apparecchio con caricatori
o cavi danneggiati.
7. Se l’apparecchio non funziona correttamente,
ha ricevuto un forte colpo, è caduto
accidentalmente, è stato danneggiato o lasciato
all’aperto oppure è caduto in acqua, non
deve essere utilizzato; contattare il Centro
Assistenza Dyson.
8. Se è necessario effettuare la manutenzione
o la riparazione, contattare il Centro Assistenza
Dyson. Non smontare l’apparecchio: in caso
di rimontaggio errato, si corre il rischio di incendi
o scosse elettriche.
9. Non tirare il cavo né sottoporlo a tensione.
Tenere il cavo lontano da superfici calde. Non
schiacciare il cavo chiudendo porte o sportelli
né tenderlo su spigoli vivi. Far passare il cavo
lontano dalle zone di passaggio, in modo
che non venga calpestato né vi sia il rischio
di inciamparvi. Non passare sopra il cavo.
10. Non usare per aspirare acqua.
11. Non utilizzare per raccogliere liquidi infiammabili
o combustibili, come benzina, e in aree in cui
potrebbero essere presenti i loro vapori.
12. Non aspirare alcun materiale incandescente
o che emette fumo, come sigarette, fiammiferi
o cenere calda.
13. Tenere lontano capelli, vestiti, dita e tutte
le parti del corpo dalle aperture e dalle parti
in movimento, come ad esempio la spazzola.
Non dirigere il tubo flessibile, il tubo o gli
accessori verso gli occhi o le orecchie e non
metterli in bocca.
14. Non inserire oggetti nell’apparecchio. Non usare
l’aspirapolvere se le aperture sono ostruite;
eliminare polvere, fibre, capelli e qualsiasi cosa
possa ridurre il flusso d’aria.
15. Usare solo accessori e parti di ricambio
raccomandati da Dyson.
16. Non usare l’apparecchio senza il contenitore
trasparente e il filtro.
17. Scollegare il caricatore quando non si utilizza per
lunghi periodi.
18. Fare molta attenzione quando si puliscono
le scale.
19. Per evitare un avvio involontario
dell’apparecchio, specie quando lo si afferra o lo
si trasporta, avvicinare le mani all’interruttore
"ON" solo quando si è pronti a iniziare
ad aspirare. Trasportare l’apparecchio tenendo
il dito sull’interruttore "ON" può causare incidenti.
20. Non installare, caricare o utilizzare questo
apparecchio all’esterno, in bagno o entro tre
metri (10 piedi) da una piscina. Non utilizzare
su superfici bagnate e non esporre a umidità,
pioggia o neve.
21. Al momento di rimuovere o sostituire una
spazzola motorizzata, prestare attenzione a non
premere l’interruttore "ON" finché la spazzola
non è stata rimontata.

22. Non utilizzare gruppi batterie o apparecchi
danneggiati o modificati. L’utilizzo di batterie
danneggiate o modificate può provocare effetti
imprevedibili con rischio di incendi, esplosioni
o lesioni. In caso di gestione non corretta,
la batteria utilizzata in questo apparecchio
può causare incendi o ustioni chimiche. Non
smontare o mandare in cortocircuito i morsetti
di alimentazione della batteria. Non esporre
il gruppo batteria o l’apparecchio a fiamme
o temperature eccessive. L’esposizione a fiamme
o a temperature superiori a 60 °C (140 °F) può
provocare esplosioni.
23. Utilizzare solo il caricatore Dyson con codice
217160 o 270576 per ricaricare questo
apparecchio. Utilizzare solo la batteria Dyson
con codice 355983 per questo apparecchio.
Altri tipi di batterie possono esplodere, causando
danni e lesioni alle persone.
24. Prima di effettuare la pulizia, la manutenzione
o la conservazione dell’apparecchio per lunghi
periodi di tempo, scollegare la batteria.
25. Quando la batteria non è in uso, tenerla lontana
da altri oggetti metallici, quali graffette, monete,
chiavi, chiodi, viti o altri oggetti metallici di piccole
dimensioni, che possono creare un collegamento
da un morsetto all’altro. Mandare in cortocircuito
i morsetti della batteria può causare ustioni
o un incendio.
26. È necessario rimuovere le batterie
dall’apparecchio e smaltirle in modo
sicuro, in conformità con le ordinanze o le
normative locali.
27. La batteria è un componente perfettamente
sigillato che in condizioni normali non pone
alcun rischio per la sicurezza. Nell’improbabile
eventualità che si verifichino fuoriuscite di liquido
dalla batteria, non toccare il liquido per evitare
possibili irritazioni o bruciature e attenersi alle
seguenti precauzioni di sicurezza:
• Contatto con la pelle: può causare irritazioni.
Lavare immediatamente con acqua e sapone.
• Inalazione: può provocare irritazioni respiratorie.
Spostarsi in luogo ben aerato e consultare
un medico.
• Contatto con gli occhi: può causare irritazioni.
Sciacquare immediatamente gli occhi con
acqua, per almeno 15 minuti. Consultare
un medico.
• Smaltimento: indossare guanti per maneggiare
la batteria e smaltire immediatamente
in conformità alle normative locali vigenti.
28. Per ottenere informazioni dettagliate sulle
modalità di sostituzione della batteria, seguire
tutte le istruzioni sul caricamento e fare
riferimento alla sezione “Sostituzione della
batteria”. Caricare in modo errato o ad una
temperatura al di fuori dell'intervallo specificato
può danneggiare la batteria e aumentare
il rischio di incendio. Per garantire la massima
durata della batteria, Dyson raccomanda
quanto segue:
• Quando non è in uso, l’apparecchio deve essere
conservato ad una temperatura operativa
corretta. Intervallo consigliato: tra 18 °C (64 °F)
e 28 °C (82 °F).
• L’inter vallo di temperatura operativa per l’utilizzo
e la carica deve essere compreso tra 10 °C
(50 °F) e 30 °C (86 °F).
29. AVVISO DI INCENDIO – Non posizionare
il prodotto su o vicino a un piano di cottura
né su qualunque altra superficie calda e non
incenerire l’apparecchio anche se gravemente
danneggiato. La batteria potrebbe incendiarsi
o esplodere.
30. ALLARME INCENDIO - Non applicare alcun
profumo o prodotto profumato sui filtri di questo
apparecchio. Le sostanze chimiche contenute
in tali prodotti sono note per essere infiammabili
e possono causare l'incendio del prodotto.
LEGGERE E CONSERVARE
QUESTE ISTRUZIONI
L'apparecchio Dyson è destinato esclusivamente
all’uso domestico.
Non usare vicino a
fiamme libere.
Non posizionar e vicino a
fonti di calore.
Non aspirare acqua o
altri liquidi.
Non aspirare
oggetti incandescenti.
Non av vicinare le mani
alla spazzola quando
l’apparecchio è in funzione.
Non posizionar e su o vicino
a un piano di c ottura.
41

Boost
Eco
Auto Med
100%
English English
selected
4:50 Auto
Low
run time
Exit
Off
On
Boost
Auto Med
English English
selected
4:50 Auto
Low
run time
Exit
Off
On
Boost
Auto
Boost
Eco
Auto Med
100%
4:50 Auto
Low
run time
Boost
Eco
Auto Med
100%
English
Espanol
English English
selected
4:50 Auto
Low
run time
Exit
Off
On
Schermo
Menu Impostazioni
Controllare le impostazioni
dell’apparecchio tramite il pulsante
“Selection” (Selezione).
Per accedere al menu delle
impostazioni, tenere premuto
il pulsante fino a visualizzare la
schermata del menu. Premere per
scorrere le opzioni disponibili.
Modificare la
lingua
English
Espanol
Per cambiare la lingua, seguire
tutti i passaggi del processo di
configurazione della lingua.
English
selected
Modificare le
impostazioni di
avviso
Premere il pulsante per scorrere il
menu delle impostazioni. Selezionare
l’opzione ‘Avvisi’.
Scorrere per attivare o disattivare
e tenere premuto il pulsante per
confermare; a questo punto verrà
visualizzato un segno di spunta
sullo schermo.
Livello batteria
basso
4:50
Quando l’apparecchio vibra tre
volte e sullo schermo appare
un’icona raffigurante un livello
basso di batteria, è necessario
ricaricare la batteria.
Quando la batteria è scarica,
sullo schermo viene visualizzata
un’icona di avvertenza finale.
Stato della batteria
Per ottenere le migliori prestazioni
e durata dalla batteria, utilizzare
la modalità Eco o Auto/Med.
Per annullare la selezione, rilasciare
il pulsante durante il conto
alla rovescia.
Uscire dal menu delle
impostazioni
42
Per uscire dal menu delle
impostazioni, premere
per scorrere il menu delle
impostazioni. Selezionare “Exit
menu” (Esci dal menu).
Avvisi
Sullo schermo dell’apparecchio
vengono visualizzati alcuni avvisi per
richiamare l’attenzione dell’utente.
Un’icona del filtro indica che il filtro
non è montato correttamente o
necessita di pulizia.
Un’icona di blocco indica che è
necessario rimuovere un’ostruzione
dall’apparecchio.

Boost
Eco
Auto Med
clik
clik
clik
Come ricaricare e
Sostituzione della batteria
riporre la macchina
E' importante caricare completamente il prodotto
prima di utilizzarlo per la prima volta e dopo ogni
3-4.5hrs
Connettere al caricatore direttamente
o tramite docking station.
I LED blu, uno per ogni lato della
batteria, lampeggeranno in modo
intermittente durante la carica.
Quando la batteria è carica,
entrambi i LED si illumineranno per
5 secondi per poi spegnersi.
La batteria è carica quando il
display indica 100%.
pulizia. Questo poiché la batteria e l’algoritmo che
regola il sistema di monitoraggio “imparano” come
l’aspirapolvere performa nel tempo. Per questo motivo,
caricare totalmente il prodotto aiuta a calcolare in
modo più accurato l’autonomia residua.
La macchina non funziona se la
temperatura ambiente è inferiore a
0 °C (32 °F) al fine di proteggere sia il
motore sia la batteria.
100%
Quando si dispone di batterie aggiuntive, si consiglia di
alternarle regolarmente per garantirne le prestazioni.
clik
Per rimuovere una batteria
Tenere la mano sotto la
batteria per sostenerla.
Premere il pulsante di rilascio
della batteria e farla scivolare
fuori dal manico.
Mettere in carica la batteria.
Per installare una
batteria
Far scorrere la batteria
sul manico finché non
scatta saldamente in
posizione.
Come svuotare il contenitore
trasparente
2
1
3
clik
Prestare attenzione a non attivare
l’interruttore di accensione mentre il
contenitore trasparente è aperto per
lo svuotamento.
clik
Chiudere il contenitore trasparente
spingendone la base verso l’alto, finché
contenitore e base non scattano in posizione.
43

clik
3
4
2
1
3
4
2
1
3
3
4
clik
2
1
3
1
3
2
1
3
4
clik
2
1
Ricerca delle ostruzioni
1 2
1
3
4
2
4
5 6
Chiudere il contenitore trasparente
spingendone la base verso l’alto, finché
contenitore e base non scattano in posizione.
44

clik
Pulizia del filtro
21
543 6
Manutenzione della testina di pulizia ad azionamento diretto
1 2 3
45

Informazioni aggiuntive
Leggere attentamente le is truzioni di sicurezza in questo manuale d'uso prima di procedere.
Installazione della stazione di ricarica
• Estrarre dalla confezione la docking station, il caricatore e la guida all’installazione.
• Scegliere dove posizionare la docking station assicurandosi che non vi siano condut ture
(gas, acqua o aria), cavi elet trici o altre tubature dietro l’area di montaggio.
• Non posizionare la stazione di riposo vicino a fonti di calore, quali forni e radiatori,
e non esporla alla luce solare diretta.
• Seguire le istruzioni presenti nella guida all’installazione.
• Agganciare gli accessori.
• Posizionare l’apparecchio nella docking station.
• Collegare il caricatore alla rete elettrica. Accendere (se necessario) per caricare
la batteria.
• È importante caricare completamente la macchina prima di utilizzarla per la prima
volta e dopo ogni utilizzo.
La docking station deve essere montata in conformità alle disposizioni e agli standard/codici
applicabili (possono essere applicate leggi statali e locali).
Dyson consiglia di utilizzare indumenti, occhiali e materiali protettivi durante l'installazione
della docking station.
Aspirazione
• Verificare che la parte inferiore della spaz zola sia pulita e priva di corpi estranei che
potrebbero causare danni.
• Prima di passare l’aspirapolvere su pavimenti, tappeti e moquette, controllare
le istruzioni per la pulizia consigliate dal loro produttore.
• La spazzola dell'apparecchio può danneggiare alcuni tipi di tappeti e pavimenti. Alcuni
tipi di tappeti possono arruffarsi se puliti con una spazzola motorizzata. In tal caso,
si consiglia di non usare l'accessorio e consultare il produttore della moquette o del
tappeto per ulteriori informazioni.
Come svuotare il contenitore trasparente
• Svuotare il contenitore non appena lo sporco raggiunge il livello “MAX”. Non riempire
eccessivamente il contenitore.
• Prestare attenzione a non attivare l’interruttore di accensione mentre il contenitore
trasparente è aperto per lo svuotamento.
• Rimuovere l’asta premendo il pulsante di sblocco rosso ed estraendola dal contenitore.
• Per espellere lo sporco:
– Tenere l’apparecchio con il contenitore rivolto verso il basso.
– Premere con forza il pulsante di sblocco rosso del contenitore.
– Il contenitore scivola pulendo lo s trato di sporco man mano che si sposta e la base del
contenitore.
– La base del cestino non si apre se il pulsante rosso non è premuto completamente.
Per minimiz zare il contatto con lo sporco durante lo svuotamento, inserire il contenitore in un
sacchetto di plastica e svuotare.
Rimuovere il contenitore trasparente dal sacchetto con attenzione.
Chiudere bene il sacchetto e smaltirlo normalmente.
Prestare attenzione a non attivare l’interruttore di accensione mentre il contenitore
trasparente è aperto per lo svuotamento.
• Per chiudere il contenitore trasparente:
– Spingere la base del contenitore verso l’alto, finché contenitore e base non scat tano in
posizione.
Pulizia del contenitore trasparente
Se necessario, pulire il contenitore trasparente. Qualora risulti necessario pulire il contenitore
trasparente, svuotarlo come mostrato nella sezione “Svuotamento del contenitore
trasparente”.
• Premere il pulsante rosso sulla guida del contenitore per sbloccarlo e farlo scivolare
lungo la guida.
• Pulire il contenitore trasparente solo con un panno umido.
• Verificare che il contenitore trasparente e le guarnizioni siano completamente asciutti
prima di riposizionarli sull’apparecchio.
• Per reinserire il contenitore trasparente:
– Inserire la punta nella guida del contenitore.
– Chiudere il contenitore trasparente spingendo la base verso l'alto finché il contenitore e
la base non scat tano in posizione.
Il contenitore trasparente non è lavabile in lavastoviglie e l’uso di detergenti, solventi
o deodoranti per ambienti è sconsigliato in quanto potrebbe causare danni all’apparecchio.
Rimozione delle ostruzioni
• Questo apparecchio è dotato di spegnimento automatico. L’intasamento di qualsiasi
parte dell’apparecchio può determinarne lo spegnimento automatico.
• Gli impulsi del motore e lo schermo LCD indicheranno la presenza di un intasamento.
• Prima di cercare l’eventuale intasamento, lasciare raffreddare l’apparecchio.
• Fare attenzione a non premere l’interruttore "ON " durante la ricerca degli ostruzioni.
Se l’apparecchio è in funzione mentre è par zialmente smontato potrebbe causare
lesioni personali.
• Rimuovere le ostruzioni prima di riaccendere l’apparecchio.
• Fare attenzione agli oggetti appuntiti durante la ricerca delle ostruzioni.
• La rimozione delle ostruzioni non è coperta dalla garanzia.
• Per verificare la presenza di intasamenti nel corpo principale della propria macchina,
rimuovere il contenitore trasparente secondo quanto indicato nelle istruzioni
della sezione “Svuotamento del contenitore trasparente” e rimuovere quindi
qualsiasi intasamento.
• Se non è possibile eliminare un intasamento dalla testina di pulizia, potrebbe essere
necessario rimuovere la spazzola. Utilizzare una moneta per sbloccare il dispositivo
di blocco, far scivolare la spazzola dalla testina
Riposizionare la spazzola e fissarla serrando il dispositivo di blocco. Prima di utilizzare
la macchina, assicurarsi che la spazzola sia fissata saldamente.
• Questo prodotto è dotato di setole in carbonio. Fare attenzione se se si entra in contatto
con le setole in fibra di carbonio, dato che possono creare lievi irritazioni alla pelle.
Lavarsi le mani dopo aver maneggiato le setole.
46
di pulizia e rimuovere l’intasamento.
Lavaggio dell’unità del filtro
Per ottenere sempre le migliori prestazioni, è importante pulire i filtri dell’apparecchio
e verificare l’eventuale presenza di ostruzioni con regolarità.
Quando è necessario lavare l’unità del filtro, sul display LCD è visualizzato un avviso. Per
mantenere elevate le prestazioni, controllare e lavare l’unità del filtro in base alle istruzioni.
• Rimuovere l’unità del filtro ruotandola in senso antiorario. Estrarla delicatamente
dall’apparecchio.
• Scuotere delicatamente l’unità del filtro per rimuovere eventuale polvere in eccesso
e residui prima di lavarla.
• Lavare l’unità del filtro esclusivamente in acqua fredda.
• Lavare prima l’elemento in carta pieghettata dell’unità del filtro tenendo l’unità del filtro
sotto il rubinetto dell’acqua fredda con l’elemento in gommapiuma rivolto verso il basso
e lasciar scorrere l’acqua fredda sulla carta pieghettata.
• Poi lavare l’elemento in gommapiuma dell’unità del filtro tenendo l’unità del filtro
sotto il rubinetto dell’acqua fredda con l’elemento in gommapiuma rivolto verso
il basso, in modo tale che l’acqua sporca non finisca sull’elemento in carta pieghettata.
Lasciar scorrere l’acqua fredda all’interno e all’esterno dell’elemento in gommapiuma
e strizzare delicatamente la gommapiuma per espellere lo sporco.
• Continuare con il lavaggio finché l’acqua non risulta trasparente.
• Scuotere delicatamente l’unità del filtro per rimuovere eventuale acqua in eccesso
e lasciare asciugare con l’elemento in gommapiuma rivolto verso l’alto.
• Far asciugare completamente l’unità del filtro per almeno 24 ore in un ambiente
asciut to con un buon fluss o d’aria .
• Verificare che sia completamente asciutta.
• Per riposizionare l’unità del filtro, rimetterla nel corpo principale e ruotarla in senso
orario finché non scatta in posizione.
L’unità del filtro può richiedere lavaggi più frequenti se si aspira pulviscolo o si utilizza
l’apparecchio principalmente in modalità Boost.
Non met tere nessun pezzo dell'apparecchio in lavastoviglie, lavatrice, asciugatrice, forno,
microonde o vicino a fiamme libere.
Ricaricare e riporre l’apparecchio
• L’apparecchio passa sulla posizione "OFF" se la temperatura della batteria è inferiore
a 10 °C (50 °F), per proteggere il motore e la batteria. Non caricare l’apparecchio
e spostarlo in un’area con temperatura inferiore a 10 °C (50 °F) per riporlo.
• Per allungare la vita della batteria, evitare di ricaricarla immediatamente dopo che si è
scaricata. Far raffreddare per alcuni minuti.
• Evitare di usare l’apparecchio con la batteria appoggiata ad una superficie.
La temperatura di esercizio sarà più bassa e prolungherà la durata e la vita
della batteria.
Istruzioni di sicurezza per le batterie
• Se è necessario sostituire la batteria, contattare il Centro Assistenza Dyson.
• Utilizzare solo il caricatore Dyson con codice 217160 o 270 576 per caricare questo
apparecchio Dyson.
• Utilizzare solo la batteria Dyson con codice 355983 per questo apparecchio Dyson.
Altri tipi di batterie possono esplodere, provocando incendi e causando danni e lesioni
alle persone.
Attenzione
La batteria utilizzata in questo apparecchio può presentare il rischio di incendio o ustioni
chimiche in caso di uso non corretto. Non provocare cortocircuiti, non portare a temperature
superiori a 60 °C e non bruciare. Tenere lontano dalla portata dei bambini. Non aprire e non
gettare nel fuoco.
Informazioni sullo smaltimento
• I prodot ti Dyson sono realizzati con materiali altamente riciclabili. Riciclare il prodotto
quando possibile.
• La batteria deve essere rimossa prima di smaltire l’apparecchio.
• Smaltire o riciclare la batteria secondo le procedure previste dalle ordinanze
o normative locali.
• Smaltire l’unità del filtro esaurita in conformità alle direttive e alle normative
locali vigenti.
• Questo contrassegno indica che il prodotto non deve essere smaltito insieme
ad altri rifiuti domestici sul territorio dell' UE. Per evitare danni all'ambiente o alla
salute derivanti dallo smaltimento incontrollato, riciclare responsabilmente per
promuovere il recupero sostenibile delle risorse materiali. Per restituire il dispositivo
usato, servirsi dei sistemi di conferimento e raccolta o contattare il commerciante
presso il quale è stato acquistato il prodot to, che provvederà ad affidarlo ai servizi
di riciclo ecocompatibile. Le autorità o il rivenditore locali saranno in grado di indicarvi
l’impianto di riciclaggio più vicino.
• La batteria deve essere rimossa per essere riciclata separatamente.
Assistenza clienti Dyson
Dopo aver registrato la garanzia di 2 anni, le parti e la manodopera del vostro apparecchio
Dyson saranno coperte per 2 anni dalla data d’acquisto, in base alle condizioni previste
dalla garanzia. Se avete
it/assistenza (IT) oppure ww w.dyson.ch/support (CH) per assistenza online, suggerimenti
generali e informazioni utili relative a Dyson.
In alternativa, chiamare il Centro Assistenza Dyson, avendo a portata di mano il numero
di serie dell'apparecchio e le informazioni su dove e quando è stato acquistato.
Se l'apparecchio Dyson necessita di riparazioni, chiamate il servizio assistenza Dyson per
conoscere le opzioni disponibili. Se l’apparecchio Dyson è ancora in garanzia, verrà riparato
senza alcun costo a carico del cliente.
Vi invitiamo a registrarvi come proprietari di un prodotto Dyson
La garanzia del prodotto è di 2 anni a par tire dalla data di acquisto. Si prega di registrare
la garanzia entro 30 giorni dalla data di acquisto. Per consentire a Dyson di fornire un servizio
tempestivo ed efficiente, si prega di effettuare la registrazione immediatamente dopo
l’acquisto. Conser vare la ricevuta con la data di acquisto.
Per poter assicurare un’assistenza tempestiva ed efficiente, vi preghiamo di effettuare
la registrazione come proprietari di un apparecchio Dyson.
• Online su www.dyson.it
• Al telefono contattando il Centro Assistenza Dyson al numero 800 976 024.
Effettuando la registrazione online o per telefono sarà possibile:
• Tutelare l’investimento con una garanzia di due anni su componenti e manodopera.
• Ricevere suggerimenti utili sull’uso dell’apparecchio.
• Ottenere supporto dagli esperti del Centro Assistenza Dyson.
• Essere costantemente aggiornati sulle ultime tecnologie Dyson.
• La registrazione richiede pochi minuti ed è sufficiente avere a portata di mano il numero
di serie.
domande sul vostro apparecchio D yson visitate il sito www.dyson.

Garanzia di 2 anni
Terms and conditions of the Dyson 2-year limited guarantee are set out below. The name and
address details of the Dyson guarantor for your country are set out elsewhere in this document
– please refer to the table setting out these details.
Copertura della garanzia
• Sono coperti da garanzia la riparazione o la sostituzione del vostro apparecchio
(a discrezione di Dyson), in caso di difetti relativi a materiali, lavorazione
o funzionamento entro 2anni dall’acquisto o dalla consegna (se un pezzo non
è più disponibile o fuori produzione, D yson lo sostituirà con un altro pezzo in grado
di svolgere la stessa funzione).
• Nel caso in cui l’apparecchio sia venduto al di fuori della UE, la presente garanzia sarà
valida soltanto se (I) l’apparecchio viene utilizzato nel Paese in cui è stato venduto.
• Where this machine is sold within the EU, this guarantee will only be valid (i) if the
machine is used in the country in which it was sold or (ii) if the machine is used in Austria,
Belgium, Denmark, Finland, France, Germany, Ireland, Italy, Netherlands, Norway,
Poland, Spain, Sweden, Switzerland or the United Kingdom and the same model as this
machine is sold at the same voltage rating in the relevant country.
Elementi esclusi dalla garanzia
Dyson non garantisce la riparazione o sostituzione di un prodot to nel caso in cui un guasto sia
dovuto a:
• Danni accidentali, guasti causati da negligenza, cattivo uso, trascuratezza,
funzionamento o utilizzo non diligente dell’apparecchio non in linea con quanto
previsto dal Manuale d’uso di Dyson.
• Uso dell’apparecchio per qualsiasi scopo dif ferente dai normali impieghi domestici.
• Uso di par ti non assemblate o installate in conformità alle istruzioni di Dyson.
• Uso di par ti e accessori che non siano componenti originali Dyson.
• Installazione non corretta (eccetto quando il prodotto è stato installato da Dyson).
• Riparazioni o alterazioni compiute da soggetti diversi da Dyson o dai suoi
agenti autorizzati.
• Intasamenti: fare riferimento al manuale d’uso Dyson per le informazioni su come
cercare l'eventuale presenza di intasamenti e rimuoverli.
• Usura e difetti causati da impiego normale (ad esempio fusibili, spazzola, ecc.).
• Utilizzo dell’apparecchio su calcinacci, intonaco o cenere.
• Riduzione dell'autonomia della batteria dovuta all’uso o al tempo (se applicabile).
Per qualsiasi dubbio relativamente a cosa sia coper to dalla garanzia, contat tare il Centro
Assistenza Dyson.
Sintesi della copertura
• La garanzia entra in vigore al momento dell’acquisto (o dalla data di consegna
se successiva).
• È necessario presentare la prova (sia originale che successiva) della consegna/
dell'acquisto prima che possa essere effettuato qualsiasi intervento sul vostro
apparecchio Dyson. Senza questa prova, ogni intervento sarà a pagamento. Si prega
di conservare eventuali ricevute d'acquisto o prove dell'avvenuta consegna.
• Tutti gli interventi saranno eseguiti da Dyson o da suoi agenti autorizzati.
• Qualsiasi par te sostituita diverrà di proprietà di Dyson.
• La riparazione o la sos tituzione del vostro apparecchio in garanzia non es tenderà
il periodo di garanzia.
• La garanzia prevede benefici ulteriori che non modificano i diritti garantiti dalla legge
ai consumatori.
Informazioni impor tanti sulla tutela dei dati
Quando si registra l'apparecchio Dyson:
• È necessario fornire i dati di contatto principali, per registrare il prodotto e consentirci
di fornire assistenza durante il periodo di garanzia.
• In fase di registrazione, si può scegliere di ricevere o meno comunicazioni da parte
nostra. Se si acconsente a ricevere comunicazioni da parte di Dyson, verranno inviate
informazioni relative a promozioni speciali e notizie sui nostri ultimi prodotti.
• Non venderemo a terzi le informazioni ricevute, che saranno utilizzate esclusivamente
in conformità con la policy sulla privacy, consultabile sul nostro sito web
privacy.dyson.com
47

NL/BE
Bedankt dat u voor een Snoerloze
Dyson stofzuiger hebt gekozen
Uw garantie activeren
Onze zorg voor onze producten stopt niet
wanneer ze van u worden.
Na het registreren van uw gratis tweejarige
garantie, is uw Dyson toestel twee jaar
gedekt voor onderdelen en arbeidskosten
(exclusief filters) vanaf de datum van
aanschaf, onderhevig aan de voorwaarden
van de garantie.
Het serienummer bevindt zich op het typeplaatje, aan de onderkant van uw
apparaat.
Noteer hier uw serienummer ter referentie.
Uitsluitend ter illustratie.
Zelfs als uw garantie verlopen is, blijven we
voor u klaar staan.
Gratis Dyson-onderdelen en arbeid
Vervanging zonder gedoe
Deskundig advies. 7 dagen per week
Instructie video's en handige tips
Hoe kunnen we u helpen? Dyson Klantenservice
Problemen oplossen
Tips en handleidingen
Meer informatie over Dyson-technologie
en andere Dyson-machines.
Online:
www.dyson.nl
Telefoon:
0800-0206203
48
Bel voor vragen over uw Dyson
draadloze machine met de Dyson
Benelux Helpdesk en zorg dat u het
serienummer, de aankoopdatum en de
naam van uw leverancier bij de hand
hebt. U kunt tevens contact opnemen
via de Dyson website.

BELANGRIJKE
VEILIGHEIDSINSTRUCTIES
LEES ALLE INSTRUCTIES EN WAARSCHUWINGEN
IN DEZE GEBRUIKERSHANDLEIDING EN OP HET
APPARAAT ALVORENS HET TE GEBRUIKEN
Bij het gebruik van elektrische apparaten dienen
altijd minimale voorzorgsmaatregelen in acht
genomen te worden, waaronder het volgende:
WAARSCHUWING
Deze waarschuwingen zijn van toepassing op
het apparaat en indien relevant tevens op alle
hulpstukken, accessoires, opladers of netadapters.
OM HET RISICO VAN BRAND, ELEKTRISCHE
SCHOKKEN EN VERWONDINGEN TE VERKLEINEN:
1. Dit Dyson-apparaat kan uitsluitend worden
gebruikt door kinderen vanaf 8 jaar en ouder,
personen met verminderde fysieke, sensorische
of verstandelijke vermogens of personen
met gebrek aan kennis en ervaring, indien zij
supervisie of instructies hebben ontvangen
van een verantwoordelijk persoon over het
veilig gebruiken van het apparaat en inzicht
hebben in de risico's van het gebruik. Reiniging
en onderhoud mogen niet zonder supervisie
verricht worden door kinderen.
2. Het apparaat mag niet als speelgoed worden
gebruikt. Let goed op bij gebruik van het
apparaat in de buurt van jonge kinderen. Houd
toezicht op kinderen om te zorgen dat zij het
apparaat niet als speelgoed gebruiken.
3. Gebruik de machine uitsluitend zoals beschreven
in de Dyson-gebruikershandleiding. Voer geen
onderhoud uit anders dan hetgeen in deze
handleiding wordt toegelicht of door de Dyson
Helpline wordt geadviseerd.
4. UITSLUITEND geschikt voor droge
omgevingen. Niet buitenshuis of op natte
oppervlakken gebruiken.
5. Raak geen enkel deel van de lader of het
apparaat aan met natte handen.
6. Niet gebruiken als de lader of het snoer
zijn beschadigd.
7. Als het apparaat niet naar behoren functioneert,
een harde klap heeft gekregen, is gevallen,
beschadigd is, buiten heeft gestaan of in het
water is terechtgekomen, gebruik het dan niet
en neem contact op met de Dyson Helpdesk.
8. Neem contact op met de Dyson Benelux
Helpdesk wanneer onderhoud of reparatie
vereist is. Haal het apparaat niet uit elkaar omdat
het incorrect weer in elkaar zetten kan leiden tot
brand of elektrische schokken.
9. Rek het snoer niet en houd het niet
strakgetrokken. Houd het snoer uit de buurt van
verwarmde oppervlakken. Sluit geen deuren
als het snoer ertussen zit. Trek het snoer niet
om scherpe hoeken of randen. Leg het snoer uit
de buurt van veelbelopen ruimtes zodat er niet
over gestruikeld of op gestapt kan worden. Rijd
niet over het snoer heen.
10. Niet gebruiken om water op te zuigen.
11. Niet gebruiken om ontvlambare of brandbare
vloeistoffen op te vangen, zoals benzine, en niet
gebruiken in gebieden waar deze of hun
dampen aanwezig kunnen zijn.
12. Zuig nooit brandende voorwerpen op, zoals
sigaretten, lucifers of hete as.
13. Houd uw haar, losse kleding, vingers en andere
lichaamsdelen weg van de openingen en van
de bewegende onderdelen, zoals de borstel.
Richt de slang, buis of hulpstukken niet op ogen,
oren, of in uw mond.
14. Steek geen voorwerpen in de openingen van het
apparaat. Niet gebruiken wanneer de openingen
zijn geblokkeerd; vrij houden van stof, pluizen,
haar en andere zaken die de luchtstroom
kunnen beperken.
15. Gebruik alleen door Dyson aanbevolen
accessoires en vervangende onderdelen.
16. Niet gebruiken zonder dat het doorzichtige
stofreservoir en de filter zijn geplaatst.
17. Trek de stekker van de oplader uit het stopcontact
wanneer deze gedurende langere tijd niet wordt
gebruikt.
18. Wees extra voorzichtig bij het reinigen
van trappen.
19. Om onbedoeld starten te voorkomen, moet
u voorzichtig zijn om uw handen en vingers weg
te houden van de 'AAN'-knop totdat u klaar
bent om te beginnen met stofzuigen, vooral
wanneer u het apparaat oppakt of draagt. Als
u het apparaat met uw vinger op de 'AAN'-knop
draagt, kan dit ongelukken veroorzaken.
20. Installeer, gebruik en laad dit apparaat niet
buitenshuis, in een badkamer/toilet of binnen
een straal van 3 meter van een zwembad.
Niet gebruiken op natte oppervlakken en niet
blootstellen aan vocht, regen of sneeuw.
21. Bij het verwijderen of vervangen van een
gemotoriseerde borstel, moet u uitkijken
49

dat u de 'AAN'-knop niet overhaalt totdat
de vloerzuigmond weer in elkaar is gezet.
22. Gebruik geen beschadigd of aangepaste
accu of apparaat. Beschadigde of aangepaste
accu’s kunnen leiden tot onvoorspelbaar gedrag
met brand, explosie of risico op letsel als gevolg.
De accu in dit apparaat kan bij incorrect gebruik
een risico op brand of chemische brandwonden
met zich meebrengen. Demonteer de polen van
de accu niet en sluit ze niet kort. Stel de accu
of het apparaat niet bloot aan brand of te
hoge temperaturen. Blootstelling aan brand
of temperaturen van hoger dan 60°C (140°F)
kan leiden tot explosie.
23. Gebruik alleen de Dyson-oplader met
onderdeelnummer 21716 0 of 270576 voor
het opladen van dit apparaat. Gebruik alleen
de Dyson-accu met onderdeelnummer
355983 voor dit apparaat. Andere type
accu's kunnen mogelijk exploderen met brand
en persoonlijk letsel of schade als gevolg.
24. Ontkoppel de accu van het apparaat voor
schoonmaken, onderhoud of voor het langdurig
opslaan van het apparaat.
25. Wanneer de accu niet in gebruik is, houd deze
dan uit de buurt van andere metalen objecten
zoals paperclips, munten, sleutels, spijkers,
schroeven en andere kleine metalen objecten
die de twee polen kunnen verbinden. Kortsluiting
tussen de accupolen kan brandwonden of brand
als gevolg hebben.
26. Accu's moeten in overeenstemming met
de plaatselijke wettelijke voorschriften
en bepalingen uit het apparaat worden
verwijderd en veilig worden weggegooid.
27. De accu is een afgedichte unit en brengt
onder normale omstandigheden geen
veiligheidsrisico’s met zich mee. In het
onwaarschijnlijke geval dat er vloeistof uit de accu
lekt, raak de vloeistof dan niet aan omdat dit
kan leiden tot irritatie en brandwonden, en neem
de volgende voorzorgsmaatregelen in acht:
• Huidcontact – kan irritatie veroorzaken. Was met
zeep en water.
• Inademing – kan irritatie aan de luchtwegen
veroorzaken. Zorg voor frisse lucht en raadpleeg
een arts.
• Oogcontact – kan irritatie veroorzaken. Spoel
de ogen direct grondig met water, minimaal
15minuten. Raadpleeg een arts.
• Weggooien – draag handschoenen om de accu
te hanteren en gooi de accu direct weg conform
de plaatselijke bepalingen en regels.
28. Volg alle oplaadinstructies op en lees het
gedeelte 'De accu vervangen' voor meer
informatie over het vervangen van de accu.
Laad de accu of het apparaat niet op buiten
het temperatuurbereik dat is aangegeven
in de instructies. Niet correct opladen of een
temperatuur buiten het gespecificeerde bereik
kan de batterij beschadigen en het risico
op brand verhogen.
Om een maximale levensduur van de batterij
te garanderen, beveelt Dyson het volgende aan:
• Wanneer het apparaat niet wordt gebruikt, moet
het bij kamertemperatuur worden opgeslagen.
Aanbevolen bereik: 18°C (64°F) tot 28°C (82°F).
• Het omgevingstemperatuurbereik voor gebruik
en opladen moet 10°C (50°F) tot 30°C (86°F)
zijn.
29. BRANDWAARSCHUWING – Plaats dit product
niet op of in de buurt van een kookplaat of enig
ander heet oppervlak en verbrand dit apparaat
niet, zelfs als het ernstig beschadigd is. De accu
kan vlam vatten of exploderen.
30. BRANDWAARSCHUWING - Breng geen
geur- of geurstoffen aan op de filter(s) van dit
apparaat. Het is bekend dat de chemicaliën
in dergelijke producten ontvlambaar zijn en het
apparaat vlam kunnen doen vatten.
LEES EN BEWAAR DEZE
INSTRUCTIES
Dit Dyson-apparaat is uitsluitend bedoeld voor
huishoudelijk gebruik.
Niet in de b uurt van open
vuur gebruiken.
50
Niet in de b uurt van
warmtebronnen bewaren.
Niet gebruiken o m water of,
andere v loeibare stof fen op
te zuigen.
Nooit brandende
voorwerpen opzuigen.
Houd de handen uit de
buurt van de bor stel als het
apparaat wordt gebruikt.
Niet op of in de buur t van
een kookplaat plaatsen.

Boost
Eco
Auto Med
100%
English English
selected
4:50 Auto
Low
run time
Exit
Off
On
Boost
Auto Med
English English
selected
4:50 Auto
Low
run time
Exit
Off
On
Boost
Auto
Boost
Eco
Auto Med
100%
4:50 Auto
Low
run time
Boost
Eco
Auto Med
100%
English
Espanol
English English
selected
4:50 Auto
Low
run time
Exit
Off
On
Het scherm
Instellingenmenu
U kunt de instellingen op uw
apparaat regelen met gebruik van
de selectieknop.
Om naar het instellingenmenu te
gaan, houdt u de knop ingedrukt
totdat het menuscherm wordt
weergegeven. Tik om te scrollen door
de beschikbare opties.
Taal wijzigen
English
Espanol
Volg de stappen in de taalinstelling
om uw taal te wijzigen.
English
selected
Waarschuwingsinstelling wijzigen
Tik om door het instellingenmenu
te scrollen. Selecteer de optie
'Waarschuwingen'.
Scroll voor het selecteren van aan of
uit. Houd de selectieknop ingedrukt
totdat het aftellen is voltooid en
een vinkje wordt weergegeven op
het scherm.
Om uw selectie te annuleren, laat u
de knop tijdens het aftellen los.
Accu bijna leeg
4:50
Uw apparaat pulseert drie keer
en een pictogram Accu bijna leeg
wordt weergegeven op het scherm
om u te waarschuwen dat uw accu
moet worden opgeladen.
Wanneer uw accu leeg
is, wordt een laatste
waarschuwingspictogram
weergegeven op het scherm.
Gezondheid van
de accu
Om de beste prestatie en
levensduur te krijgen van uw
accu, gebruikt u de Eco- of Auto/
Med-modus.
Instellingenmenu
afsluiten
Voor het afsluiten van het
instellingenmenu, tikt u om te
scrollen door het instellingenmenu.
Selecteer 'Menu afsluiten'.
Waarschuwingen
Waarschuwingen worden
weergegeven op het scherm wanneer
uw apparaat uw aandacht nodig heeft.
Een filterpictogram waarschuwt u dat
het filter niet correct is gemonteerd of
moet worden gereinigd.
Een opstoppingspictogram
waarschuwt u dat een opstopping
moet worden verwijderd uit
uw apparaat.
51

Boost
Eco
Auto Med
clik
clik
clik
De machine opladen
De accu vervangen
en opbergen
Het is belangrijk om uw nieuwe apparaat volledig op te
laden voordat u het voor de eerste keer gebruikt en na
3-4.5hrs
Sluit de lader direct aan of in
de wandbevestiging.
De blauwe ledlampjes – een aan elke
zijde van de accu – knipperen aan en
uit tijdens opladen.
Wanneer de accu is opgeladen,
gaan beide LED-lampjes
5 seconden branden en deze gaan
vervolgens uit.
De accu is opgeladen wanneer de
display 100% accu aangeeft.
elke reiniging. Dit omdat het algoritme van de batterij
en het bewakingssysteem 'leer t' in de loop van de tijd,
en het volledig opladen van uw apparaat helpt bij het
meer nauwkeurig berekenen en weergeven van de
resterende looptijd.
100%
De machine werkt niet als de
omgevingstempertauur lager is dan
0 °C (32°F). Dit is ter bescherming
van de motor en de accu.
In geval van aanvullende accu’s raden wij u aan
om de accu’s regelmatig af te wisselen om te
zorgen voor de prestatie van de accu.
clik
De accu verwijderen
Houd uw hand onder
de accu om deze te
ondersteunen.
Druk op de ontgrendelknop
van de accu en schuif de
accu van de handgreep.
Plaats de accu aan de
oplader.
Een accu plaatsen
Schuif de accu op de
handgreep en zorg
ervoor dat deze goed
vastklikt.
Het doorzichtige stofreservoir legen
2
1
3
clik
52
Zorg ervoor dat u de 'AAN'-knop niet
bedient wanneer het doorzichtige
stofreservoir open staat voor legen.
clik
Sluit het doorzichtige stofreservoir door het naar
boven te duwen tot het doorzichtige reservoir en
het stofreservoir op hun plaats klikken.

clik
clik
3
4
2
1
3
4
2
1
3
3
4
clik
2
1
3
1
3
2
1
3
4
clik
2
1
Controleren op verstoppingen
1 2
1
3
4
2
4
5 6
Sluit het doorzichtige stofreservoir door het
naar boven te duwen tot het doorzichtige
reservoir en het stofreservoir op hun
plaats klikken.
53

clik
Het filter reinigen
21
543 6
Onderhoud vloerzuigmond met directe aandrijving
1 2 3
54
Aanvullende informatie
Lees de 'Belangrijke veiligheidsinstructies' in deze Dyson-handleiding voordat u doorgaat.
Installatie wandbevestiging
• Pak de wandbevestiging, de lader en de installatiefolder uit.
• Kies de locatie van de wandbevestiging en zorg ervoor dat er zich geen leidingen
(gas, water of lucht), elektrische kabels, draden of kanaalsystemen direct achter
de bevestigingslocatie bevinden.
• Plaats het dockingstation niet dichtbij een warmtebron zoals een kookplaat,
verwarmingselement of in direct zonlicht.
• Volg de instruc ties in de installatiefolder.
• Klik de bevestigingsdelen op hun plaats.
• Plaats het apparaat in de wandbevestiging.
• Sluit de lader aan op een stopcontact. Schakel in (indien nodig) om de accu op te laden.
• Het is belangrijk om uw apparaat volledig op te laden voordat u het voor de eerste keer
gebruikt en na elk gebruik.
De wandbevestiging moet worden gemonteerd overeenkomstig de geldende voorschriften
en richtlijnen/normen (ga na of er sprake is van relevante nationale of lokale wetgeving).
Dyson adviseert het gebruik van beschermende kleding, een veiligheidsbril en passende
materialen waar nodig bij het installeren van de wandbevestiging.
Stofzuigen
• Controleer dat de onderkant van de reinigingskop of het hulpstuk schoon en vrij is van
vreemde objecten die mogelijk schade kunnen veroorzaken.
• Raadpleeg de onderhoudsinstructies van de fabrikant van uw vloerbedekking voordat
u uw vloeren, tapijten en kleden gaat stofzuigen.
• De bors tel op de machine kan bepaalde tapijten en vloeren beschadigen. Sommige
tapijten kunnen gaan rafelen als u er een roterende bors tel op zet bij het stofzuigen.
Mocht dit het geval zijn, dan raden wij u aan zonder de gemotoriseerde borstel
te stofzuigen en de fabrikant van uw vloerbedekking om advies te vragen.
Het doorzichtige stofreservoir legen
• Maak het reser voir leeg zodra de markering MA X is bereikt - vul het reservoir
niet verder.
• Zorg ervoor dat u de 'AAN'-knop niet bedient wanneer het doorzichtige stofreservoir
open staat voor legen.
• Verwijder de buis door op de rode ontgrendelingsknop te drukken en de buis uit het
reser voir te trekken.
• Het stof verwijderen:
– Houd het apparaat vast met het reservoir aan de onderkant.
– Druk op de rode knop voor het vrijgeven van het stofreservoir.
– Het reservoir schuif t naar beneden en reinigt zo de kap: het s tofreservoir opent zich.
– Het reservoir gaat niet open als de rode knop niet volledig naar beneden is gedruk t.
Om aanraking met stof en allergenen te minimaliseren bij het legen van het stofreservoir,
plaats u het stofreservoir in een stofdichte zak alvorens u het leegt.
Haal het doorzichtige stofreser voir voorzichtig uit de zak.
Sluit de zak goed; gooi deze op de gebruikelijke manier weg.
Zorg ervoor dat u de 'AAN'-knop niet bedient wanneer het doorzichtige stofreservoir open
staat voor legen.
• Het stofreservoir sluiten:
– Duw het stofreservoir omhoog totdat het doorzichtige stofreservoir in de houder klik t.
Het doorzichtige stofreservoir schoonmaken
Als het doorzichtige stofreservoir gereinigd moet worden:
• Volg de instruc ties in het hoofdstuk 'Het doorzichtige reservoir legen'.
• Druk op de rode knop op de geleiderail van het reservoir om deze vrij te geven en schuif
het reservoir over de geleiderail.
• Gebruik alleen een vochtige doek om het doorzichtige stofreservoir te reinigen.
• Zorg ervoor dat het doorzichtige stofreservoir en de afdichtingen volledig droog zijn
voordat u deze terugplaatst.
• Het doorzichtige stofreservoir terugplaatsen:
– Plaats de rib op de geleiderail van het reservoir.
Sluit het doorzichtige stofreser voir door het naar boven te duwen tot het door zichtige reser voir
en het stofreservoir op hun plaats klikken.
Het doorzichtige stofreservoir is niet geschikt voor de vaatwasmachine en het gebruik van
schoonmaakmiddelen, poetsmiddelen of luchtverfrissers om het doorzichtige reservoir
te reinigen wordt afgeraden omdat dit schade aan uw apparaat kan veroorzaken.
Controleren op verstoppingen
• Dit apparaat is uitgerust met een automatische uitschakelfunctie. Als een onderdeel
geblokkeerd raakt, kan het apparaat automatisch uitgeschakeld worden.
• De motor zal pulseren en het lcd-scherm zal aangeven dat er sprake is van
een verstopping.
• Laat het apparaat afkoelen voordat u controleert op verstoppingen.
• Zorg ervoor dat u de 'AAN'-knop niet bedient bij het zoeken naar verstoppingen.
• Verwijder eventuele verstoppingen en zorg dat alle onderdelen zijn geplaatst voordat
u het apparaat weer inschakelt.
• Pas op voor scherpe voorwerpen bij het verwijderen van verstoppingen.
• Het ver wijderen van verstoppingen wordt niet gedekt door de garantie.
• Om te controleren op verstoppingen in het basisonderdeel van uw machine, verwijder t
u het stofreservoir volgens de instructies in het deel over het legen van het stofreservoir
en verwijder alle verstopping.
• Als u een verstopping niet kunt verwijderen uit de reinigingskop, is het wellicht nodig
om de borstel te verwijderen. Gebruik een munt om de sluiting te ontgrendelen,
schuif de borstel uit de reinigingskop
terug en draai de sluiting stevig vast. Controleer of deze goed vastzit voordat u uw
machine gebruikt.
• De bors tels van dit produc t zijn gemaakt van koolstofvezels. Wees voorzichtig wanneer
u in contact komt met de koolstofvezels, aangezien deze lichte huidirritatie kunnen
veroorzaken. Was uw handen na aanraking met de borstels.
en verwijder de verstopping. Plaats de borstel
Wassen van de filtereenheid
Om altijd de beste prestaties van uw machine te krijgen, is het belangrijk om de filters
regelmatig schoon te maken en te controleren op verstoppingen.
• Verwijder de filtereenheid door deze tegen de klok in te draaien. Trek deze voor zichtig
uit het apparaat.
• Klop voorzichtig tegen de filtereenheid voor het ver wijderen van enig overmatig stof
en vuil voordat u het gaat wassen.
• Was de filtereenheid alleen in koud wa ter.
• Was eerst het geplooide papieren element van de filtereenheid; houd de filtereenheid
onder een kraan met koud water met het schuimelement omlaag en laat koud water
stromen over het geplooide pap ier.
• Was daarna het schuimelement van de filtereenheid; houd de filtereenheid onder een
kraan met koud water met het schuimelement omlaag zodat vuil water het geplooide
papieren element niet verontreinigt. Laat koud water stromen over de binnenkant
en de buitenkant van het schuimelement en knijp voorzichtig in het schuim om het vuil
te verwijderen.
• Ga door met spoelen totdat het water helder is.
• Was de buitenkant van de filtereenheid. Vul de eenheid met koud water, plaats
uw handen over de openingen en schud voorzichtig.
• Herhaal het wassen van de elementen en buitenkant totdat het water er helder uitloopt.
• Schud de filtereenheid voorzichtig om eventueel achterblijvend water te verwijderen
en laat het drogen met hem schuimelement omhoog gericht.
• Laat de filtereenheid tenminste 24 uur volledig drogen in een droge omgeving met
goede luchtstroom.
• Controleer dat de filtereenheid volledig droog is.
• Om de filtereenheid terug te plaatsen, plaatst u deze in het basisonderdeel en draait
u hem met de klok mee totdat hij vastklikt.
De filtereenheid moet mogelijk vaker worden gewassen bij het opzuigen van fijn stof of als
voornamelijk de Boost-modus wordt gebruik t.
Plaats geen enkel onderdeel van uw apparaat in een afwasmachine, wasmachine, droger,
oven, magnetron en plaats ze niet in de buurt van open v uur.
Opladen en opbergen
• Dit apparaat zal automatisch worden uitgeschakeld als de temperatuur van de accu
lager is dan 10°C. Dit is ter bescherming van de motor en de accu. Laad het apparaat
niet op om het vervolgens op te bergen in een ruimte waar de temperatuur lager is dan
10° C.
• Om de levensduur van de accu te verlengen, is het beter de accu na een volledige
ontlading niet direct op te laden. Laat de accu daarom enkele minuten afkoelen.
• Vermijd het gebruik van het apparaat met de accu vlak boven een oppervlak. Hierdoor
blijft de accu tijdens gebruik koeler en worden de werking en levensduur verlengd.
Veiligheidsinstructies voor accu
• Neem contact op met de Dyson Benelux Helpdesk als de accu moet worden vervangen.
• Gebruik alleen de Dyson-oplader met onderdeelnummer 217160 of 270 576 voor het
opladen van dit apparaat.
• Gebruik alleen de Dyson-accu met onderdeelnummer 355983 voor deze Dysonmachine. Andere soorten accu's kunnen mogelijk exploderen met brand en persoonlijk
letsel of schade als gevolg.
LET OP
De in dit apparaat gebruik te accu kan bij verkeerde behandeling brandgevaar of chemische
brandwonden veroorzaken. Niet kortsluiten, niet boven 60 °C verhitten of verbranden. Buiten
bereik van kinderen houden. Niet demonteren of in het vuur gooien.
Informatie over weggooien
• Dyson-producten worden gemaakt van hoogwaardige recyclebare materialen. Recycle
dit product indien mogelijk.
• Verwijder de batterij uit het apparaat voordat u het weggooit.
• Recycle of gooi de batterij weg in overeenstemming met de wettelijke voorschriften
en bepalingen.
• Gooi de opgebruikte filtereenheid weg in overeenstemming met de plaatselijke
wettelijke voorschriften of bepalingen.
• Deze markering geeft aan dat dit produc t in de EU niet met ander huishoudelijk afval
weggegooid mag worden. Om mogelijke schade aan het milieu en de algemene
volksgezondheid door het onbeheerd weggooien van af val te voorkomen, hoort u te
recyclen op een verantwoorde manier om duurzaam hergebruik van materiaalbronnen
te bevorderen. Om uw gebruikte apparaat in te leveren, kunt u gebruikmaken van
de inlever- en ophaalservices of contact opnemen met de winkel waar het product
is gekocht. Zij kunnen dit product innemen voor milieuvriendelijke recycling.
• De accu moet verwijderd worden voor afzonderlijke recycling.
Dyson klantenservice
Na registratie voor uw tweejarige garantie valt
na de datum van aankoop onder de garantie voor onderdelen en werkzaamheden (exclusief
filters), afhankelijk van de garantievoorwaarden. Als u vragen hebt over uw Dyson-apparaat,
ga dan naar www.dyson.nl/suppor t (NL) of www.dyson.be/support (BE) voor online hulp,
algemene tips en nuttige informatie over D yson.
U kunt ook bellen met de Dyson Benelux Helpdesk. Houdt uw serienummer en gegevens over
waar en wanneer uw het apparaat hebt gekocht bij de hand.
Als uw Dyson apparaat moet worden gerepareerd, neem dan telefonisch contact op met
de Dyson Benelux Helpdesk om de beschikbare opties te bespreken. Als uw Dyson apparaat
nog in de garantieperiode is en als de reparatie wordt gedekt, wordt het apparaat gratis
gerepareerd.
Registreer uzelf als eigenaar van een Dyson-apparaat
De garantie voor dit product is twee jaar vanaf de datum van aanschaf. Registreer uw garantie
binnen 30 dagen na de datum van aanschaf. Wij ver zoeken u zich onmiddellijk na de
aanschaf te registreren, zodat wij u snel en efficiënt service kunnen verlenen. Bewaar de bon
met daarop de datum van aanschaf.
U kunt dat op drie manieren doen:
• Online op www.dyson.be of www.dyson.nl
• Door te bellen met de Dyson Benelux Helpdesk in Nederland 080 002 06 203 of in
België op 0800 392 08.
• Vul het bijgevoegde formulier in en stuur het naar ons op.
Door online of per telefoon te registreren kunt u:
• Uw investering beschermen met een garantie van t wee jaar op onderdelen en arbeid.
• Handige tips ont vangen voor gebruik van uw machine.
• Deskundig advies krijgen van de Dyson Benelux Helpdesk.
• Als eerste op de hoogte zijn van onze nieuwste uitvindingen.
• Registreren duurt slechts een paar minuten en u hebt alleen uw serienummer nodig.
uw Dyson-apparaat gedurende twee jaar
55

Garantie gedurende 2 jaar
Terms and conditions of the Dyson 2-year limited guarantee are set out below. The name and
address details of the Dyson guarantor for your country are set out elsewhere in this document
– please refer to the table setting out these details.
Wat wordt gedekt door de garantie
• De reparatie of vervanging (ter beoordeling door Dyson) als blijkt dat uw apparaat
defec t is geraakt als gevolg van ondeugdelijke materialen, fabricageof functioneringsfouten binnen twee jaar na aankoop of levering. (Als een onderdeel
niet langer beschikbaar is of niet meer wordt geproduceerd, zal Dyson het onderdeel
vervangen door een doelmatig alternatief.)
• Indien dit apparaat buiten de EU wordt verkocht, is de garantie alleen van kracht als het
apparaat wordt gebruik t in het land waarin het werd verkocht.
• Where this machine is sold within the EU, this guarantee will only be valid (i) if the
machine is used in the country in which it was sold or (ii) if the machine is used in Austria,
Belgium, Denmark, Finland, France, Germany, Ireland, Italy, Netherlands, Norway,
Poland, Spain, Sweden, Switzerland or the United Kingdom and the same model as this
machine is sold at the same voltage rating in the relevant country.
Wat wordt niet gedekt door de garantie
Dyson geeft geen garantie op reparaties of vervanging van producten als gevolg van
de volgende oorzaken:
• Schade door ongelukken, problemen veroorzaakt door verwaarlozing, verkeerd
of onvoorzichtig gebruik of gebruik dat niet geschiedt in overeenstemming met
de Dyson gebruikershandleiding.
• Gebruik van het apparaat voor iets anders dan normaal huishoudelijk gebruik.
• Gebruik van onderdelen die niet in overeenstemming met de instructies van Dyson
aangesloten of geplaatst zijn.
• Gebruik van andere dan originele Dyson onderdelen en accessoires.
• Foutieve installatie (behalve installaties die door Dyson zelf verricht zijn).
• Reparaties of aanpassingen die door derden anders dan Dyson of haar gecertificeerde
agenten zijn uitgevoerd.
• Verstoppingen – wij verwijzen u naar de Dyson gebruikershandleiding voor details
betreffende het zoeken naar en verwijderen van verstoppingen.
• Normale slijtage (bijv. zekering, borstel, enz.).
• Gebruik van dit apparaat op puin, as, gips.
• Korter wordende levensduur van de batterij veroorzaakt door veroudering of gebruik
van de batterij (indien van toepassing).
Als u twijfels hebt over zaken die door deze garantie worden gedekt, neem dan contact op met
de Dyson Benelux Helpdesk.
Overzicht van dekking
• De garantie gaat in op de datum van aankoop (of een eventueel latere leverdatum).
• U dient uw bewijs van (oorspronkelijke en eventuele latere) aankoop/levering
te overleggen voordat er enig onderhoud aan uw apparaat kan worden verricht. Zonder
dit bewijs zullen wij kosten in rekening brengen voor verrichte werkzaamheden. Bewaar
uw aankoop- of leveringsbewijs goed.
• Reparaties zullen worden uitgevoerd door Dyson of gecertificeerde partners.
• Onderdelen die zijn vervangen door Dyson worden eigendom van Dyson.
• Door reparatie of vervanging van uw Dyson- apparaat onder garantie wordt
de garantieperiode niet verlengd.
• De garantie is een aanvulling op uw wet telijke rechten als consument en beïnvloedt
deze niet.
Belangrijke informatie over gegevensbeveiliging
Bij het registreren van uw Dyson apparaat:
• Om uw apparaat te registeren verstrekt u uw standaard gegevens en om ons in staat
te stellen om uw garantie te ondersteunen.
• Bij het registreren hebt u de mogelijkheid om te kiezen of u wel of niet communicatie van
ons wilt ontvangen. Als u kiest voor het ontvangen van communicatie van Dyson, sturen
wij u informatie over speciale aanbiedingen en nieuws over onze innovaties.
• Wij verkopen uw gegevens nooit aan derden en wij gebruiken alleen gegevens die
u met ons deelt zoals gedefinieerd in ons privac ybeleid dat beschikbaar is op onze
website privacy.dyson.com
56
PL
Dziękujemy za wybór odkurzacza
bezprzewodowego Dyson
Aktywowanie gwarancji
Nie przestajemy dbać o nasze urządzenia po
przekazaniu ich użytkownikom.
Po zarejestrowaniu dwuletniej bezpłatnej
gwarancji urządzenie firmy Dyson będzie
nią objęte w zakresie części i robocizny
(z wyłączeniem filtrów) przez okres 2lat
od daty zakupu zgodnie z określonymi w
niej warunkami.
Numer seryjny znajduje się na tabliczce znamionowej na podstawie
urządzenia.
Należy zapisać numer seryjny, aby móc później z niego korzystać.
Ta ilustracja służy wyłącznie jako przykład.
Nawet jeśli gwarancja wygaśnie, nadal
będziemy świadczyli pomoc w tym zakresie.
Bezpłatne części i robocizna Dyson
Bezproblemowa wymiana
Pomoc specjalistów przez 7 dni w tygodniu
Samouczki wideo i przydatne wskazówki
Jak możemy pomóc? Dział obsługi klienta firmy
Dyson
Rozwiązywanie problemów
Instrukcje i wskazówki
Dowiedz się więcej na temat
innych urządzeń i technologii
Dyson
przez Internet:
www.dyson.pl
Telefonicznie:
800 702 025
Wprzypadku pytań dotyczących
odkurzacza bezprzewodowego Dyson
prosimy o kontakt zInfolinią Dyson
ipodanie numeru seryjnego urządzenia
oraz szczegółów dotyczących miejsca
idaty zakupu. Inną możliwością
kontaktu jest witryna internetowa
firmy Dyson.
57
WAŻNE INSTRUKCJE
DOTYCZĄCE
BEZPIECZEŃSTWA
PRZED PRZYSTĄPIENIEM DO KORZYSTANIA Z
TEGO URZĄDZENIA NALEŻY ZAPOZNAĆ SIĘ ZE
WSZYSTKIMI INSTRUKCJAMI I OSTRZEŻENIAMI
UMIESZCZONYMI W NINIEJSZEJ INSTRUKCJI
OBSŁUGI I NA URZĄDZENIU.
Podczas użytkowania sprzętu elektrycznego
należy zawsze przestrzegać podstawowych zasad
bezpieczeństwa, włączając poniższe:
OSTRZEŻENIE
Te ostrzeżenia dotyczą urządzenia, a w stosownych
przypadkach mają także zastosowanie do wszystkich
narzędzi, końcówek, ładowarek oraz wtyczek i
gniazd zasilania.
ABY ZMNIEJSZYĆ RYZYKO POŻARU, PORAŻENIA
PRĄDEM LUB URAZU:
1. Dzieci powyżej 8 roku życia oraz osoby
o ograniczonych możliwościach fizycznych,
czuciowych lub umysłowych bądź nieposiadające
odpowiedniego doświadczenia i wiedzy mogą
korzystać z tego urządzenia firmy Dyson
jedynie pod nadzorem osoby odpowiedzialnej
lub po uzyskaniu od takiej osoby instrukcji
dotyczących bezpiecznego użytkowania
urządzenia, jeśli rozumieją związane z tym
zagrożenia. Dzieci nie powinny przeprowadzać
czyszczenia ani prac konserwacyjnych bez
nadzoru dorosłych.
2. Urządzenie nie służy do zabawy. W przypadku
używania urządzenia przez małe dzieci lub
w ich pobliżu należy zachować szczególną
ostrożność. Nie należy zezwalać dzieciom
na zabawę urządzeniem.
3. Użytkować wyłącznie zgodnie z podręcznikiem
użytkownika firmy Dyson. Nie przeprowadzać
prac konserwacyjnych innych niż określone
w podręczniku użytkownika lub zalecane przez
Infolinię Dyson.
4. Używać TYLKO w suchych pomieszczeniach.
Nie używać na zewnątrz ani
na mokrych powierzchniach.
5. Nie chwytać ładowarki ani urządzenia
mokrymi rękami.
6. Nie używać urządzenia w przypadku
uszkodzenia ładowarki lub kabla.
7. Jeżeli urządzenie nie działa poprawnie
w wyniku uderzenia, upuszczenia, zniszczenia,
pozostawienia na zewnątrz lub upuszczenia
do wody, należy zaprzestać jego użytkowania
i skontaktować się z Infolinią Dyson.
8. Jeśli potrzebna jest pomoc techniczna lub
naprawa, należy skontaktować się z Infolinią
Dyson. Nie rozbierać urządzenia samodzielnie.
Niefachowe ponowne zmontowanie może być
przyczyną pożaru bądź porażenia prądem.
9. Nie rozciągać ani nie przygniatać przewodu
zasilającego. Trzymać przewód zasilający
w odpowiedniej odległości od nagrzanych
powierzchni. Nie przytrzaskiwać przewodu
drzwiami ani nie przeciągać go przez ostre
krawędzie i kąty. Nie rozkładać przewodu
w przejściach i w miejscach, gdzie można
go nadepnąć lub się o niego potknąć. Nie należy
najeżdżać urządzeniem na przewód.
10. Nie używać odkurzacza do zbierania wody.
11. Nie używać do zbierania łatwopalnych lub
palnych płynów, takich jak benzyna oraz nie
używać w miejscach, gdzie takie płyny lub ich
opary mogą występować.
12. Nie używać odkurzacza do sprzątania płonących
lub dymiących przedmiotów, takich jak papierosy,
zapałki lub gorący popiół.
13. Włosy, luźne części ubrania, palce i inne
części ciała trzymać z daleka od otworów
urządzenia i jego ruchomych części, takich jak
elektroszczotka. Nie kierować węża, rury i ssawek
w stronę oczu lub uszu ani nie wkładać ich do ust.
14. Nie wkładać żadnych przedmiotów w otwory
odkurzacza. Nie używać odkurzacza, jeśli
którykolwiek z otworów jest zablokowany; usunąć
kurz, kłaczki i włosy oraz wszystko, co może
utrudniać swobodny przepływ powietrza.
15. Należy używać tylko akcesoriów i części
zamiennych zalecanych przez firmę Dyson.
16. Nie używać odkurzacza, jeśli przezroczysty
pojemnik lub filtry nie są zamontowane.
17. Odłączyć ładowarkę od zasilania, jeśli nie jest
używana przez dłuższy czas.
18. W trakcie sprzątania schodów należy zachować
szczególną ostrożność.
19. Aby uniknąć przypadkowego uruchomienia,
szczególnie podczas podnoszenia lub
przenoszenia urządzenia, nie zbliżać dłoni
do włącznika. Dotykanie włącznika podczas
przenoszenia urządzenia stwarza wysokie
ryzyko wypadku.
20. Urządzenia nie należy instalować, ładować ani
używać poza pomieszczeniami zamkniętymi,
w łazienkach oraz w odległości mniejszej niż
3 metry od basenu. Nie używać na mokrych
58
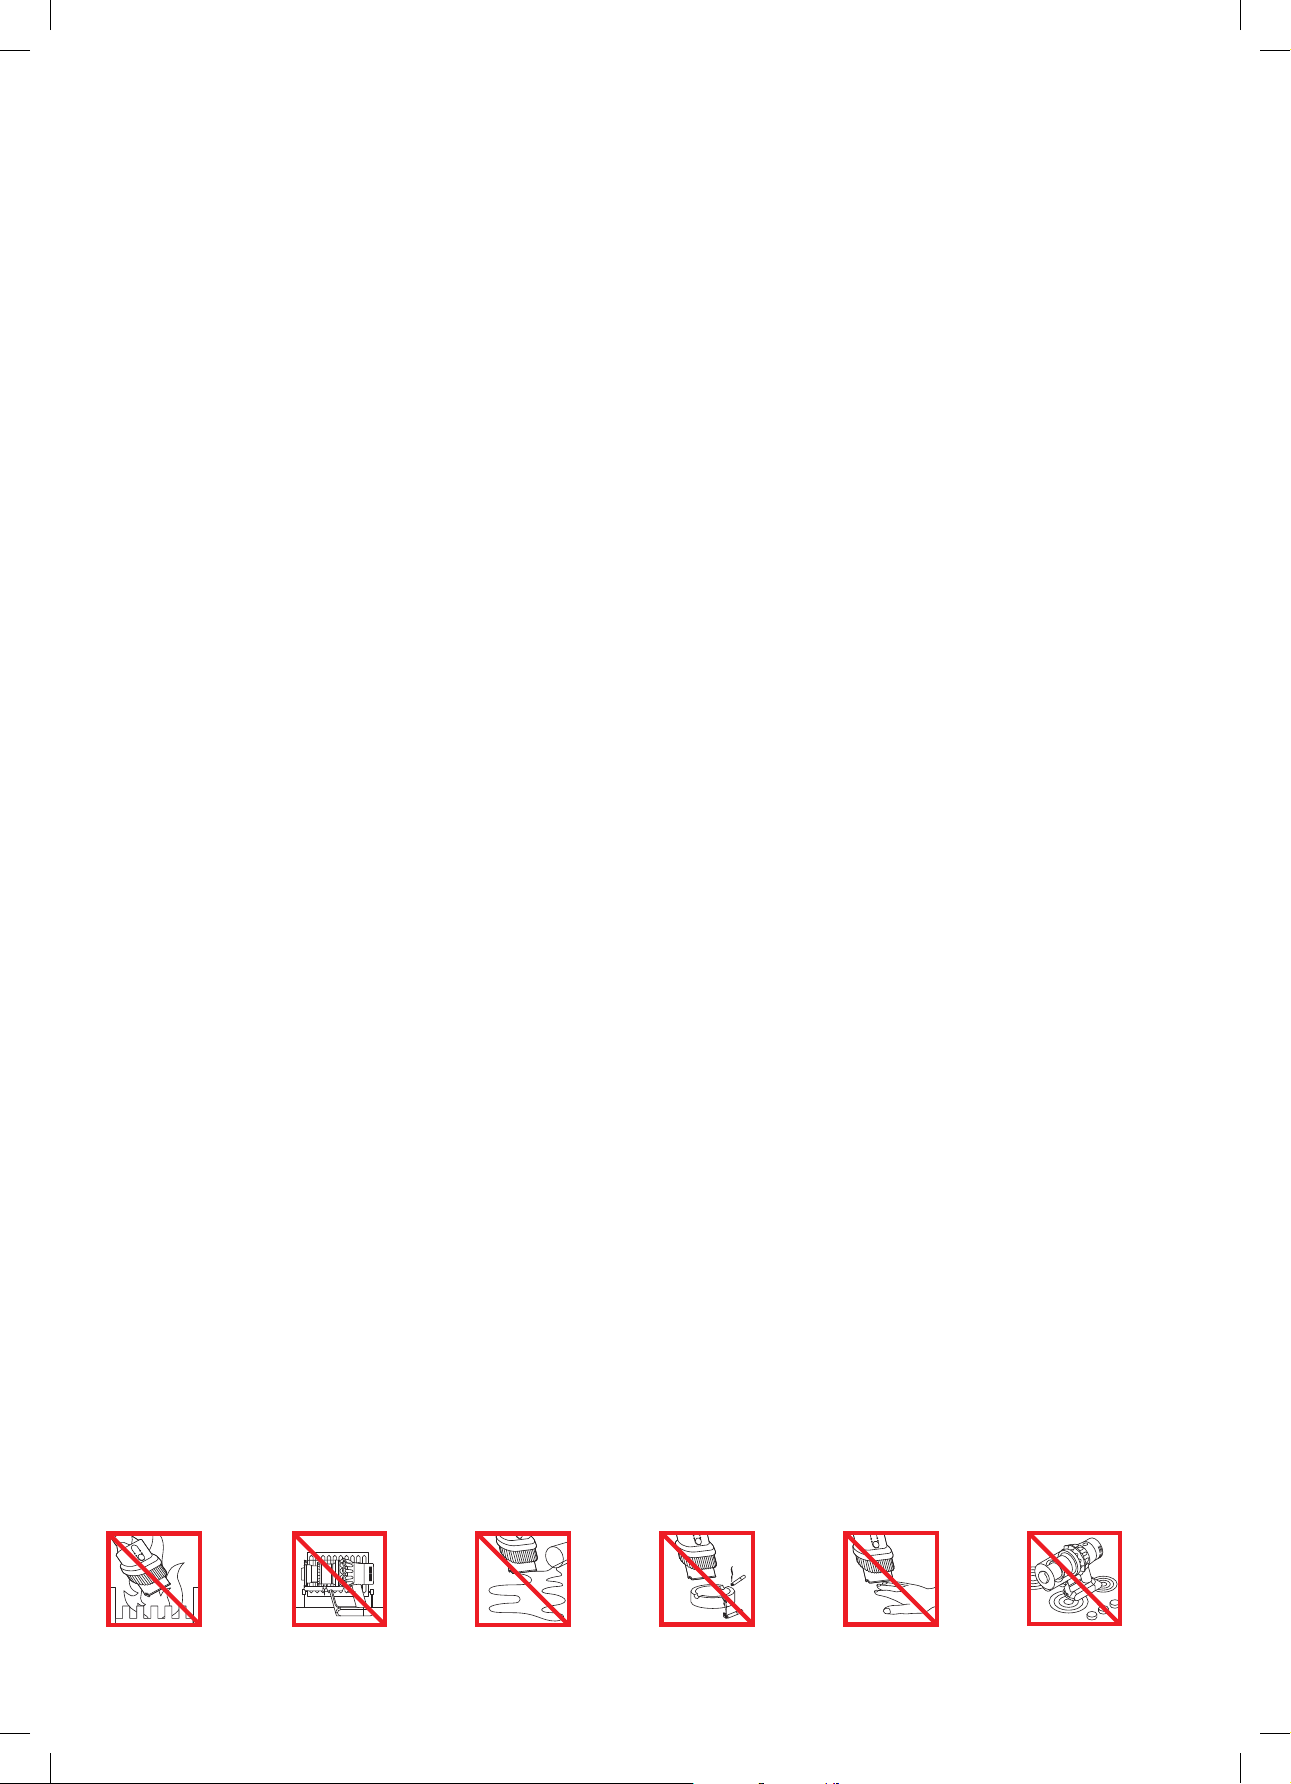
powierzchniach ani nie narażać na działanie
wilgoci, deszczu lub śniegu.
21. Uważać, aby nie pociągnąć za włącznik podczas
usuwania lub wymieniania turboszczotki
napędzanej silnikiem do czasu ponownego
złożenia głowicy czyszczącej.
22. Nie używać uszkodzonych lub zmodyfikowanych
baterii i urządzeń. Skutki używania
uszkodzonych lub zmodyfikowanych baterii
są nieprzewidywalne i stwarzają ryzyko
pożaru, eksplozji lub obrażeń. Nieprawidłowe
obchodzenie się z bateriami urządzenia
może doprowadzić do pożaru lub poparzeń
chemicznych. Nie narażać baterii ani urządzenia
na działanie ognia lub wysokich temperatur.
Narażenie na działanie ognia lub temperatur
wyższych niż 60°C może spowodować eksplozję.
23. Do ładowania urządzeń Dyson należy używać
wyłącznie ładowarek Dyson o numerze części
217160 lub 270576. Do ładowania tego
urządzenia Dyson należy używać wyłącznie
akumulatorów Dyson o numerze części 355983.
Inne typy akumulatorów mogą eksplodować,
powodując obrażenia ciała i szkody materialne.
24. Przed czyszczeniem, konserwacją lub
odstawieniem urządzenia na dłużej należy
odłączyć od niego akumulator.
25. Nieużywany akumulator należy przechowywać
z dala od innych metalowych przedmiotów,
takich jak spinacze do papieru, monety, klucze,
gwoździe, śruby lub inne niewielkie metalowe
przedmioty, które mogą połączyć styki. Zwarcie
styków może spowodować poparzenia skóry lub
doprowadzić do pożaru.
26. Zużyty akumulator należy wyjąć z urządzenia
i zutylizować zgodnie z lokalnymi przepisami
prawa lub rozporządzeniami.
27. Bateria jest szczelnie zamknięta i nie stanowi
zagrożenia w normalnych warunkach.
W przypadku mało prawdopodobnego
wycieku z baterii nie dotykać cieczy, aby
uniknąć podrażnień lub oparzeń, i przestrzegać
następujących środków bezpieczeństwa:
• Kontakt ze skórą — może spowodować
podrażnienie. Przemyć wodą z mydłem.
• Wdychanie — może spowodować podrażnienie
układu oddechowego. Wdychać świeże
powietrze i zasięgnąć porady lekarza.
• Kontakt z oczami — może spowodować
podrażnienie. Niezwłocznie przemyć oczy dużą
ilością wody, czynność kontynuować przez
co najmniej 15 minut. Zasięgnąć porady lekarza.
• Utylizacja — nosić rękawice ochronne w celu
wyjęcia i natychmiastowej utylizacji baterii
zgodnie z miejscowymi przepisami.
28. Należy postępować zgodnie ze wszystkimi
instrukcjami dotyczącymi ładowania i ładować
baterię lub urządzenie wyłącznie w zakresie
temperatur określonym w instrukcji. Niewłaściwe
ładowanie lub ładowanie w temperaturze
niezgodnej z określonym zakresem temperatur
może uszkodzić baterię oraz zwiększyć ryzyko
wybuchu ognia. Aby zapewnić maksymalną
żywotność baterii, firma Dyson zaleca podjęcie
następujących działań:
• Przechowywać urządzenie w temperaturze
pokojowej, jeśli nie jest używane przez dłuższy
czas. Zalecany zakres temperatury: od 18°C do
28°C.
• Zakres temperatury otoczenia odpowiedniej
do użytkowania i ładowania urządzenia wynosi
od 10°C do 30°C.
29. ZAGROŻENIE POŻAREM — Nie umieszczać
urządzenia na kuchence ani innej gorącej
powierzchni bądź w ich pobliżu. Nie palić
urządzenia, nawet jeśli jest poważnie
uszkodzone. Może dojść do zapalenia lub
wybuchu baterii.
30. ZAGROŻENIE POŻAREM - Nie stosować
żadnych substancji zapachowych lub produktów
perfumowanych do filtru (filtrów) urządzenia.
Substancje chemiczne występujące w tego typu
produktach są łatwopalne i mogą doprowadzić
do zapalenia urządzenia.
NINIEJSZE INSTRUKCJE
NALEŻY PRZECZYTAĆ I
ZACHOWAĆ
Urządzenie jest przeznaczone wyłącznie do
użytku domowego.
Nie używać w pobliż u
otwartego ognia.
Nie przechow ywać w
pobliżu źródeł ciepła.
Nie nale ży używa ć do
zbierania wody ani
innych pły nów.
Nie nale ży używa ć
do zbierania
płonących przedmiotów.
Nie zbliżać rąk zbyt blisko
do szczotki w czasie
pracy urządzenia.
Nie umie szczać na kuchence
ani w jej pobliżu.
59

Boost
Eco
Auto Med
100%
English English
selected
4:50 Auto
Low
run time
Exit
Off
On
Boost
Auto Med
English English
selected
4:50 Auto
Low
run time
Exit
Off
On
Boost
Auto
Boost
Eco
Auto Med
100%
4:50 Auto
Low
run time
Boost
Eco
Auto Med
100%
English
Espanol
English English
selected
4:50 Auto
Low
run time
Exit
Off
On
Ekran
Menu ustawień
Ustawienia urządzenia
można zmieniać za pomocą
przycisku wyboru.
Aby przejść do menu ustawień,
należy nacisnąć i przytrzymać
przycisk, aż wyświetli się ekran
menu. Naciskając przycisk, wybrać
odpowiednią z dostępnych opcji.
Zmiana
języka
English
Espanol
Aby zmienić preferowany język,
wykonaj poniższe czynności
konfiguracji języka.
English
selected
Zmiana ustawień
powiadomień
Dotknij, aby przewinąć menu
ustawień. Wybierz opcję
Alerts (Alerty).
Przewijając, wybrać opcję wł.
lub wył. Przytrzymać przycisk
wyboru, aż odliczanie się zakończy,
a na ekranie wyświetli się
symbol potwierdzenia.
Niski poziom
naładowania
baterii
4:50
Urządzenie trzy razy zadrga, a na
wyświetlaczu wyświetli się ikona
niskiego stanu baterii. Oznacza to,
że należy naładować baterię.
Gdy bateria jest na granicy
wyczerpania, na wyświetlaczu
pojawi się ostatnie ostrzeżenie.
Stan baterii
Aby uzyskać największą
wydajność i najdłuższą żywotność
baterii, należy korzystać z trybu
Eco lub Auto/Med.
Aby anulować wybór, należy zwolnić
przycisk w trakcie odliczania.
Zamykanie menu
ustawień
60
Aby zamknąć menu
ustawień, przewiń do pozycji
zamknięcia menu.
Powiadomienia
Na wyświetlaczu pojawią się
powiadomienia w sytuacjach, gdy
należy sprawdzić stan urządzenia.
Ikona filtra oznacza, że filtr nie
jest zamontowany prawidłowo lub
wymaga czyszczenia.
Ikona zatoru oznacza, że należy
usunąć zator urządzenia.

Boost
Eco
Auto Med
clik
clik
clik
Ładowanie i przechowywanie
Wymiana akumulatora
urządzenia
Nowe urządzenie należy całkowicie naładować przed
pierwszym użyciem oraz po każdym użyciu. Wynika
3-4.5hrs
Podłączyć urządzenie do ładowarki
bezpośrednio lub wstacji dokującej.
Niebieskie światła LED — po jednym
na każdej stronie baterii — będą
migać podczas ładowania.
Po naładowaniu baterii oba światła
LED zaświecą się na 5sekund.
Bateria jest naładowana, gdy
wyświetlacz pokazuje stan
naładowania baterii 100%.
to z tego, że algorytm systemu monitorowania i
baterii podlega zasadzie „nauczania”, zaś całkowite
ładowanie urządzenia pozwala dokładniej obliczać i
wyś wietlać pozostał y czas pracy na baterii.
100%
Urządzenie nie pracuje, gdy
temperatura otoczenia jest niższa niż
0°C. Ma to na celu ochronę silnika
i akumulatora.
Jeśli są dostępne dodatkowe akumulatory, zaleca
się je regularnie zamieniać, by zapewnić ich
optymalne działanie.
clik
Wyjmowanie akumulatora
Ustawić dłoń poniżej
akumulatora, aby zapewnić
podparcie.
Nacisnąć przycisk zwalniania
akumulatora i zsunąć
akumulator z uchwytu.
Podłączyć akumulator do
ładowarki.
Instalowanie
akumulatora
Wsunąć akumulator na
uchwyt, aż zatrzaśnie
się w odpowiednim
położeniu.
Opróżnianie przezroczystego pojemnika
2
3
1
clik
Uważać, aby nie pociągnąć za włącznik,
jeśli przezroczysty pojemnik jest otwarty
w celu opróżnienia.
clik
Zamknąć przezroczysty pojemnik, wsuwając
podstawę pojemnika do góry, aż pojemnik oraz
jego podstawa się zatrzasną.
61

clik
3
4
2
1
3
4
2
1
3
3
4
clik
2
1
3
1
3
2
1
3
4
clik
2
1
Poszukiwanie źródeł zatorów
1 2
1
3
4
2
4
5 6
Zamknąć przezroczysty pojemnik, wsuwając
podstawę pojemnika do góry, aż pojemnik
oraz jego podstawa się zatrzasną.
62

clik
Czyszczenie filtra
21
543 6
Konserwacja głowicy czyszczącej z napędem bezpośrednim
1 2 3
63

Informacje dodatkowe
Przed rozpoczęciem korzystania z urządzenia należy zapoznać się z „Ważnymi Instrukcjami
dotyc zącymi Bezpieczeńst wa” zawartymi w niniejszej Instrukcji Obsł ugi firmy Dyson
Montaż stacji dokującej
• Rozpakować stację dokującą, ładowarkę i ulotkę montażową.
• Wybrać miejsce montażu stacji dokującej i upewnić się, że bezpośrednio za nim nie
biegną rurociągi (gazowe, wodne lub powietrza), kable elektryc zne, przewody c zy
kanały wentylacyjne.
• Stacji dokującej nie należy umieszczać w pobliżu źróde ł ciepła takich jak kuchenka lub
grzejnik ani w miejscach nasłonecznionych.
• Postępować zgodnie z instrukcjami zamieszczonymi w ulotce instalacyjnej.
• Zatrzasnąć mocowania na swoim miejscu.
• Umieścić urządzenie w stacji dokującej.
• Podłączyć ładowarkę do sieci elektrycznej. Włącz yć (jeśli koniec zne), aby
naładować baterię.
• Urządzenie należy całkowicie naładować przed pierwszym użyciem oraz
po każdym użyciu.
Stację dokującą należy montować zgodnie z przepisami i obowiązującymi zasadami/
normami (mogą mieć zastosowanie przepisy krajowe lub lokalne).
Firma Dyson zaleca przeprowadzanie montażu w odzieży ochronnej, okularach ochronnych
i z użyciem materiałów ochronnych.
Odkurzanie
• Sprawdzić, czy spód głowicy cz yszczącej lub końcówki jest wolny od zanieczyszczeń,
które mogą spowodować uszkodzenie.
• Przed odkurzaniem podłóg i dywanów należ y zapoznać się z odpowiednią
instrukcją czyszczenia.
• Elektroszczotka może uszkodzić niektóre rodzaje wykładzin lub podłóg. Niektóre
wykładziny mogą się mechacić pod wpływem obracającej się elektroszczotki. W takim
przypadku zaleca się kontynuowanie sprzątania bez części napędzanej silnikiem oraz
konsultację z producentem pokrycia podłogowego.
Opróżnianie przezroczystego pojemnika
• Opróżnić, kiedy ilość zebranych zanieczyszczeń osiągnie poziom M AX — nie
przepełniać. Kor zystanie z urządzenia, gdy ilość zebranych zaniec zyszczeń przekracza
poziom M AX, może powodować przedostawanie się zaniec zyszczeń do filtra
i konieczność częstszej konserwacji.
• Uważać, aby nie pociągnąć za włącznik, jeśli przezroczysty pojemnik jest otwar ty
w celu opróżnienia.
• Odłączyć rurę teleskopową, naciskając czerwony przycisk zwalniania rur y, a następnie
wyciągając ją z pojemnika.
• Aby pozbyć się kur zu, należy:
– Zwrócić ur ządzenie wraz z pojemnikiem w dół.
– Zdecydowanie nacisnąć czerwony przycisk zwalniania pojemnika.
– Pojemnik się zsunie, jednocześnie czyszcząc osłonę. Podstawa pojemnika się otworzy.
– Podstawa pojemnika nie ot worzy się, jeśli czerwony przycisk nie zostanie maksymalnie
wciśnięty.
Aby zminimalizować kontakt z kurzem i alergenami podczas oczyszczania przezroczystego
pojemnika, należ y włożyć go do szczelnej torby i opróżnić.
Ostrożnie wyjąć pr zezroczysty pojemnik z worka.
Zamknąć szczelnie worek i wyrzucić.
Uważać, aby nie pociągnąć za włącznik, jeśli przezroczysty pojemnik jest otwar ty
w celu opróżnienia.
• Aby zamknąć przezroc zysty pojemnik:
– Pchnąć podstawę pojemnika do góry, aż pojemnik oraz jego podstawa się zatrzasną.
Czyszczenie przezroczystego pojemnika
Jeśli konieczne jest wyczyszczenie przezroczystego pojemnika należy. Jeśli konieczne jest
wyczyszczenie przezroczystego pojemnika należy postępować zgodnie z instrukcjami
zamieszczonymi w części „Opróżnianie przezroczystego pojemnika”.
• Nacisnąć czerwony przycisk znajdując y się na przenośniku pojemnika, aby zwolnić
pojemnik, a następnie zsunąć pojemnik z przenośnika.
• Przezroczysty pojemnik należy cz yścić tylko wilgotną ściereczką.
• Przed zamontowaniem sprawdzić, czy pojemnik i uszczelki są całkowicie suche.
• Aby zamontować przezroczysty pojemnik:
– Wprowadzić prowadnicę do przenośnika pojemników.
– Zamknąć przezrocz ysty pojemnik, wsuwając podstawę pojemnika do góry, aż pojemnik
oraz jego podstawa się zatrzasną.
Przezroczysty pojemnik nie nadaje się do mycia w zmywarce. Nie zaleca się czyszczenia
przezroczystego pojemnika przy użyciu detergentów, środków do polerowania cz y
odświeżaczy powietrza, ponieważ mogą one spowodować uszkodzenie urządzenia.
Poszukiwanie źródeł zatorów
• Urządzenie jest wyposażone w wyłącznik automat yczny. Jeśli w którejkolwiek części
utworzy się zator, urządzenie może automatycznie się wyłączyć.
• W przypadku wystąpienia zatoru silnik zacznie pulsować, a na wyświetlaczu LCD pojawi
się odpowiednia informacja.
• Przed rozpoczęciem lokalizowania zatorów pozostawić silnik do schłodzenia.
• Uważać, aby nie pociągnąć za włącznik podczas poszukiwania źródeł zatorów.
• Przed ponownym uruchomieniem usunąć wszelkie zat ory.
• Podczas poszukiwania zatorów uważać na ostre c zęści i przedmioty.
• Usuwanie zatorów nie jest objęte gwarancją.
• Aby sprawdzić obudowę urządzenia pod kątem w ystępowania zatorów, należy
wyjąć przezroczysty pojemnik, postępując zgodnie z instrukcjami zawartymi w części
dotyc zącej opróżniania przezroczystego pojemnika, i usunąć z ator.
• Jeśli nie udaje się usunąć zatoru w głowicy cz yszczącej, może być konieczne wyjęcie
turboszczotki. Odblokować zamknięcie za pomocą monety, wysunąć turboszczotkę
z głowicy czyszczącej i usunąć zator. Zamontować turboszczotkę i dokładnie
dokręcić zamknięcie. Przed użyciem urządzenia sprawdzić, czy turboszczotka jest
prawidłowo przymocowana.
• Produkt wyposażony jest w szczotki z włókna węglowego. Należy zachować
ostrożność przy kontakcie z nimi. Mogą one wy wołać niewielkie podrażnienia skór y.
Po zakońc zeniu pracy ze szczotkami należ y umyć ręce.
Czyszczenie filtra
Myć filtr co najmniej raz w miesiącu lub gdy zaświeci się wskaźnik konser wacji filtra.
Sprawdzać i cz yścić filtr zgodnie z instrukcją, aby utrzymać ich sprawność.
• Zdjąć filtr, obracając go w lewo. Delikatnie odłączyć filtr od urządzenia.
• Delikatnie postukać filtr, aby usunąć nadmiar pyłu i osadu przed umyciem.
• Myć filtr wyłącznie w zimnej wodzie, nie uży wać detergentów, nie czyścić w zmywarce
ani w pralce.
• Najpierw umyć karbowany sączek bibułkowy filtra; pr zytrzymać filtr pod strumieniem
zimnej wody, z wkładem gąbkowym skierowanym w dó ł, i przemyć karbowaną bibułę
bieżącą zimną wodą.
• Następnie umyć wkład gąbkow y filtra; przy trzymać filtr pod strumieniem zimnej
wody, z wkładem gąbkowym skierowanym w dół, aby brudna woda nie zanieczyściła
karbowanego sączka bibułkowego. Przemyć bieżącą zimną wodą wnętrze i zewnętrzną
stronę wkładu gąbkowego i delikatnie wycisnąć gąbkę, aby usunąć brud.
• Myć do momentu, aż spływająca woda będzie cz ysta.
• Umyć zewnętrzną stronę filtra. Nas tępnie wlać do filtra zimną wodę, trzymając rękami
otwar ty koniec filtra i delikatnie potrząsać.
• Powtar zać spłukiwanie części i zewnętrznej strony filtra do momentu, aż spływająca
woda będzie czysta.
• Delikatnie potr ząsnąć filtr, aby usunąć nadmiar wody i pozostawić do wyschnięcia
stroną wkładu gąbkowego ustawioną do góry.
• Pozostawić filtr do całkowitego wyschnięcia w suchym miejscu z dobrym przepływem
powietrza na co najmniej
• Upewnić się, że filtr całkowicie wysech ł.
• W celu ponownego założenia filtra włożyć go ponownie do obudowy urządzenia
i obrócić w w prawo, aż filtr zatrzaśnie się na swoim miejscu.
W przypadku usuwania bardzo drobnych zanieczyszczeń lub korzystania głównie z trybu
pracy ze zwiększoną mocą ssania filtr może w ymagać częstszego mycia.
Nie wkładać żadnej części urządzenia do zmywarki, pralki, suszarki, piekarnika, kuchenki
mikrofalowej ani nie przechowywać w pobliżu otwartego ognia.
Ładowanie i przechowywanie
• Urządzenie w yłączy się, jeśli temperatura akumulatora jest niższa niż 10°C. Ma to
na celu ochronę silnika i baterii. Po naładowaniu nie przechowywać urządzenia
w temperaturze niższej niż 10°C.
• Aby przedłużyć żywotność baterii, należy unikać ładowania zaraz po pełnym
rozładowaniu. Pozostawić do ostudzenia na kilka minut.
• Należ y unikać używania urządzenia z baterią przyłożoną do jakiekolwiek powierzchni.
Pomoże to w ostudzeniu baterii i przedłużeniu jej żywotności.
Instrukcje bezpieczeństwa dotyczące baterii
• Jeśli konieczna jest wymiana baterii, skontaktować się z infolinią firmy Dyson.
• Do ładowania urządzeń Dyson należy uż ywać wyłącznie ładowarek Dyson o numerze
części 217160 lub 270576.
• Do ładowania tego urządzenia Dyson należy używać wyłącznie akumulatorów Dyson
o numerze części 355983. Inne typy akumulatorów mogą eksplodować, prowadząc
do pożaru oraz powodując obrażenia ciała i szkody materialne.
Ostrzeżenie
Niewłaściwe korzystanie z baterii może wywołać ryzyko pożaru lub oparzenia chemicznego.
Nie rozmontowy wać, nie zwierać st yków, nie ogrzewać do temperatury powyżej 60°C (140°F)
i nie podpalać. Trzymać z dala od dzieci. Nie rozkładać i nie wrzucać do ognia.
Informacje o utylizacji
• Produkty Dyson są wykonane z wysokiej klasy materiałów nadających się do recyklingu.
Jeśli t ylko to możliwe, należy oddać produkt y Dyson do recyklingu.
• Przed utylizacją ur ządzenia należy wymontować z niego baterię.
• Baterie należy utylizować lub poddać recyklingowi zgodnie z przepisami miejscowego
prawa lub rozporządzeniami.
• Zuży ty filtr należy zut ylizować zgodnie z lokalnymi przepisami prawa
lub rozporządzeniami.
• Oznaczenie to wskazuje, że na terenie krajów członkowskich Unii Europejskiej nie
należy utylizować tego produktu wraz z innymi odpadami z gospodarstw domowych.
W celu uniknięcia potencjalnego zagrożenia dla środowiska lub ludzi, spowodowanego
niekontrolowaną utylizacją odpadów, należy odpowiedzialnie poddawać produkt
recyklingowi, a tym samym promować ekologiczne powtórne przetwarzanie zasobów
materiałow ych. Aby zwrócić zużyte urządzenie, należy skorzystać z systemu zwrotu
i odbioru lub skontaktować się ze sprzedawcą, u którego produkt zosta ł zakupiony.
Sprzedawca przekaże go do bezpiecznego ekologicznie recyklingu.
• Baterię należy wyjąć i przekazać do recyklingu osobno.
Obsługa klienta Dyson
Po zarejestrowaniu 2-letniej gwarancji urządzenie firmy Dyson będzie objęte gwarancją
w zakresie części i serwisu przez okres 2 lat od daty zakupu, zgodnie z określonymi w niej
warunkami. W razie pytań dotyczących urządzenia firmy Dyson można odwiedzić stronę
www.dyson.pl/pomoc, aby uzyskać pomoc, ogólne wskazówki i użyteczne informacje.
Można też skontaktować się z infolinią firmy Dyson, podając numer seryjny oraz informacje
dotyc zące miejsca i daty zakupu urządzenia.
W przypadku konieczności napraw y urządzenia f irmy Dyson prosimy o kontakt z infolinią
firmy Dyson w celu przedyskutowania możliw ych wariantów. Jeśli urządzenie Dyson
jest na gwarancji i obejmuje ona rodzaj przeprowadzanej naprawy, zostanie ona
wykonana nieodpłatnie.
Zarejestruj się jako właściciel urządzenia Dyson
Gwarancja na ten produkt jest ważna przez okres dwóch lat od daty zakupu.Gwarancję
należy zarejestrować wciągu 30dni od dat y zakupu. Rejestracja produktu natychmiast
po zakupie umożliwi nam szybki iefektywny serwis. Należy zachować dowód zakupu
zawierający datę zakupu.
Można to zrobić na trzy sposoby:
• Online w www.dyson.pl
• Dzwoniąc na infolinię Dyson pod numerem 800 702 025.
• Wype łniając dołączony formularz i wysyłając go do nas pocztą.
Rejestrując się online lub przez telefon:
• zabezpieczysz swoją inwestycję dzięki dwuletniej gwarancji na c zęści i pracę,
• otrzymasz pomocne wskazówki dot yczące obsł ugi Twojej ma szy ny,
• uzyskasz porady od ekspertów infolinii firmy Dyson,
24godziny.
64

• zapewnisz sobie natychmiastowy dostęp do informacji o naszych
najnowszych innowacjach.
• Rejestracja zajmuje tylko kilka minut, a wsz ystko, czego potrzebujesz, to Twój
numer se ryjny.
Ograniczona dwuletnia gwarancja
Terms and conditions of the Dyson 2-year limited guarantee are set out below. The name and
address details of the Dyson guarantor for your country are set out elsewhere in this document
– please refer to the table setting out these details.
Gwarancja obejmuje:
• Naprawę lub wymianę urządzenia (w zależności od decyzji firmy Dyson) — o ile
posiadane urządzenie okaże się niesprawne ze względu na wadliwe materiały,
wykonanie lub nieprawidłowe działanie — w ciągu 2lat od dat y zakupu (jeśli
którakolwiek z części jest niedostępna lub została wycofana z produkcji, firma Dyson
lub jej dystrybutor zastąpi ją odpowiednią częścią zastępczą).
• W przypadku sprzedaży tego urządzenia poza obszarem UE niniejsza gwarancja
będzie ważna t ylko wówczas, gdy urządzenie będzie uż ywane w kraju, w którym
zostało sprzedane.
• Where this machine is sold within the EU, this guarantee will only be valid (i) if the
machine is used in the country in which it was sold or (ii) if the machine is used in Austria,
Belgium, Denmark, Finland, France, Germany, Ireland, Italy, Netherlands, Norway,
Poland, Spain, Sweden, Switzerland or the United Kingdom and the same model as this
machine is sold at the same voltage rating in the relevant country.
Gwarancja nie obejmuje:
Firma Dyson nie gwarantuje naprawy ani wymiany produktu niesprawnego
z następujących powodów:
• Przypadkowego uszkodzenia, usterek wynikających z nieprawidłowego albo
nieostrożnego użycia lub konserwacji, użycia urządzenia niezgodnie z przeznaczeniem,
niestaranności, nieostrożnej obsługi lub przenoszenia urządzenia niezgodnie
z instrukcją obsługi firmy Dyson.
• Wykorzystywania urządzenia do celów innych niż uży tek domowy.
• Użycia części złożonych lub zamontowanych niezgodnie z instrukcjami firmy Dyson.
• Użycia części i ssawek innych niż oryginalne produkty firmy Dyson.
• Nieprawidłowego montażu (z wyjątkiem montażu dokonanego przez pracowników
firmy Dyson).
• Modyfikacji i napraw przeprowadzanych przez osoby inne niż autory zowani serwisanci
firmy Dyson.
• Zatorów — szczegółowe instrukcje dotyczące poszukiwania zatorów w odkurzaczu
można znaleźć w instrukcji obsługi.
• Zużycia się części w w yniku standardowego użytkowania (bezpiecznik, elektroszczotka,
itp).
• Użycia urządzenia do zbierania gruzu, popio łu i tynku.
• Skrócenia czasu rozładowania akumulatora ze względu na jego wiek lub naturalne
zużycie (w stosownych przypadkach).
W razie wątpliwości dotyczących zakresu ochrony gwarancyjnej należy skontaktować się
z infolinią firmy Dyson.
Podsumowanie gwarancji
• Gwarancja obowiązuje od dnia zakupu (lub od daty dostawy, jeśli jest późniejsza).
• Warunkiem przeprowadzenia jakichkolwiek prac serwisowych związanych
z urządzeniem jest okazanie dowodu zakupu/dostawy (zarówno pierwotnych, jak
i późniejszych dokumentów). W przypadku braku tych dokumentów wszelkie prace
będą dokonywane odp łatnie. Prosimy o zachowanie paragonu lub dowodu dostawy.
• Wszelkie prace przeprowadzane będą pr zez pracowników firmy Dyson lub jej
autoryzowanych przedstawicieli.
• Wszelkie w ymienione części przechodzą na własność firmy Dyson.
• Gwarancja zapewnia dodatkowe kor zyści poza tymi, które wynikają z praw statutowych
konsumenta, i nie wpływa na nie w żaden sposób.
Ważne informacje dotyczące ochrony danych
W przypadku rejestrowania produktu firmy Dyson:
• Aby zarejestrować produkt i umożliwić nam obsługę gwarancyjną, należy podać
podstawowe informacje kontaktowe.
• Proces rejestracji obejmuje możliwość wyrażenia zgody na otrzymywanie od nas
wiadomości. Jeśli wyrażono zgodę na otrzymywanie wiadomości od firmy Dyson,
wówczas będziemy wysyłali szczegółowe informacje o ofertach specjalnych
i powiadomienia o naszych innowacjach.
• Informacji kontaktow ych nigdy nie sprzedamy innym firmom. Uż ywamy ich tylko
zgodnie z naszą polityką pry watności, która jest dostępna na naszej stronie:
privacy.dyson.com
65

RU
Благодарим вас за выбор
беспроводного пылесоса Dyson!
Информация о гарантийном
обслуживании
Мы не перестаем заботиться об
устройствах Dyson даже после того, как
они становятся вашими.
Ваше устройство Dyson находится
на гарантийном обслуживании (за
исключением фильтров) в течение 2 лет
с момента покупки в соответствии с
условиями и исключениями, указанными
в данном руководстве.
Серийный номер находится на паспортной табличке, расположенной
на основании устройства
Запишите ваш серийный номер на будущее.
This illustration is for example purposes only.
Даже по завершении срока действия
гарантии мы всегда готовы помочь.
Бесплатная замена деталей Dyson
Замена без проблем
Консультации экспертов 7дней в
неделю
Видеоролики и полезные советы
Как мы можем помочь?
Решение проблемы
Полезные советы и
руководства
Узнайте больше о технологиях
и другой технике Dyson
Веб-сайт:
www.dyson.com.ru
Телефон:
8-800-100-100-2
66
Служба поддержки клиентов
Dyson
Если у вас есть вопросы,
относящиеся к беспроводному
пылесосу Dyson, вы можете
позвонить в службу поддержки
компании Dyson, назвав серийный
номер и указав, где и когда вы
приобрели устройство, или
связаться с нами через веб-сайт
компании Dyson.

ВАЖНЫЕ ИНСТРУКЦИИ
ПО ТЕХНИКЕ
БЕЗОПАСНОСТИ
ПЕРЕД ИСПОЛЬЗОВАНИЕМ УСТРОЙСТВА
ПРОЧИТАЙТЕ ВСЕ ИНСТРУКЦИИ И
ПРЕДУПРЕЖДЕНИЯ В ДАННОМ РУКОВОДСТВЕ
И НА УСТРОЙСТВЕ
При пользовании электроприбором
необходимо всегда соблюдать основные
меры предосторожности, включая те, что
приведены ниже:
ПРЕДУПРЕЖДЕНИЕ
Эти предупреждения относятся к устройству,
а также к любым съемным приспособлениям,
принадлежностям, зарядным устройствам
и адаптерам питания в случаях, где
они применимы.
ВО ИЗБЕЖАНИЕ РИСКА ВОЗГОРАНИЯ,
ПОРАЖЕНИЯ ЭЛЕКТРИЧЕСКИМ ТОКОМ ИЛИ
ПОЛУЧЕНИЯ ТРАВМЫ:
1. Дети в возрасте от 8лет, лица
с ограниченными физическими, сенсорными
или умственными возможностями,
а также лица, не имеющие достаточного
опыта и знаний, могут использовать это
устройство Dyson только в присутствии
человека, отвечающего за их безопасность,
или после получения от ответственного
лица инструкций по безопасному
использованию устройства при условии
понимания существующих рисков.
Очистка и осуществляемое пользователем
обслуживание устройства не должны
выполняться детьми без присмотра.
2. Не разрешайте детям играть с устройством.
Будьте очень бдительны при использовании
устройства детьми или рядом с детьми.
Эксплуатация устройства детьми возможна
только под постоянным присмотром
взрослых, чтобы дети не играли с ним.
3. Используйте устройство только
в соответствии с указаниями руководства
пользователя Dyson.Не выполняйте работы
по обслуживанию самостоятельно, кроме
указанных в данном руководстве или
рекомендованных службой поддержки
компании Dyson.
4. Предназначено для использования
ТОЛЬКО в сухих местах. Не используйте вне
помещений или на влажных поверхностях.
5. Не касайтесь каких-либо деталей устройства
или зарядного устройства влажными руками.
6. Не используйте устройство с поврежденным
зарядным устройством или кабелем.
7. Если устройство не работает, как должно,
если по нему был нанесен резкий удар, если
его уронили, повредили, оставили на улице
или оно попало в воду, не используйте
данное устройство и обратитесь по телефону
в службу поддержки компании Dyson.
8. При необходимости проведения
обслуживания или ремонта обратитесь
в службу поддержки компании Dyson.
Не разбирайте устройство, так как это может
стать причиной пожара или поражения
электрическим током.
9. Не растягивайте и не натягивайте кабель
слишком сильно. Держите кабель вдали
от горячих поверхностей. Не защемляйте
кабель дверями, не наматывайте его вокруг
острых краев или углов. Не располагайте
кабель в проходах и в местах, где на него
можно наступить или споткнуться об него.
Не пережимайте кабель.
10. Не используйте для уборки жидкостей.
11. Не пользуйтесь пылесосом для сбора
легковоспламеняющихся или взрывоопасных
жидкостей, таких как бензин, и не
пользуйтесь пылесосом в местах, где могут
находиться такие жидкости или их пары.
12. Не используйте для сбора горящего или
тлеющего мусора, такого как сигареты,
спички или горячий пепел.
13. Следите, чтобы волосы, края одежды, пальцы
и другие части тела не попадали в отверстия
или подвижные детали, например в щетку.
Не направляйте шланг, трубку и насадки
в глаза или уши и не берите их в рот.
14. Не вставляйте какие-либо предметы
в отверстия. Не используйте устройство,
если его отверстия заблокированы; следите
за тем, чтобы пыль, мусор, волосы и пр.
не мешали свободному прохождению
воздушного потока.
15. Используйте только рекомендуемые Dyson
аксессуары и запчасти.
16. Не используйте, если не установлен
прозрачный контейнер или фильтр.
17. Отсоединяйте зарядное устройство от сети
при длительных перерывах в использовании.
18. Будьте крайне аккуратны при
уборке лестниц.
67

19. Во избежание случайного включения
будьте осторожны и не подносите руки
и пальцы к курку включения, пока не будете
готовы начать уборку, особенно когда
вы берете или переносите устройство. Если
переносить устройство, удерживая палец
на курке включения, может произойти
несчастный случай.
20. Данное устройство нельзя устанавливать,
заряжать и использовать вне помещения,
в ванной комнате или в пределах 3 метров
от бассейна. Не используйте его на влажных
поверхностях и не подвергайте воздействию
сырости, дождя или снега.
21. При снятии или замене электрощетки будьте
осторожны, чтобы не нажать на курок
включения, пока не установите насадку.
22. Не используйте аккумулятор или устройство
в случае повреждения или модификации.
Использование поврежденных или
модифицированных аккумуляторов может
привести к непредсказуемому результату
и стать причиной пожара, взрыва или
нанесения травмы. Не подвергайте
аккумулятор или устройство воздействию
огня или высоких температур. Под
воздействием огня или при температуре выше
60°C возможен взрыв.
23. Для зарядки данного устройства
используйте только зарядное устройство
Dyson с артикулом 217160 или 270576. Для
данного устройства используйте только
аккумулятор Dyson с артикулом 355983.
При использовании аккумуляторов других
типов может произойти взрыв, что приведет
к нанесению материального ущерба, а также
причинению вреда здоровью.
24. Отключайте аккумулятор от устройства
перед очисткой, обслуживанием или
длительными перерывами в использовании.
25. Когда аккумулятор не используется,
держите его вдали от других металлических
предметов, таких как скрепки, монеты,
ключи, гвозди, винты или другие мелкие
металлические предметы, которые могут
замкнуть клеммы аккумулятора. Замыкание
клемм аккумулятора может привести
к ожогам или возникновению пожара.
26. Извлечение элементов питания из устройства
и их безопасная утилизация должны
осуществляться в соответствии с местными
предписаниями или постановлениями.
27. Аккумулятор является герметичным
устройством и в нормальных условиях
не представляет опасности. Вероятность
утечки электролита из аккумулятора крайне
мала, но если это случилось, не трогайте
электролит, поскольку он может вызвать
раздражение или ожоги, и соблюдайте
следующие меры предосторожности:
• При контакте с кожей возможно
раздражение. Промойте пораженный
участок водой с мылом.
• Вдыхание электролита может привести
к раздражению верхних дыхательных путей.
Выйдите на свежий воздух и обратитесь
за медицинской помощью.
• При попадании в глаза возможно
раздражение. Немедленно тщательно
промойте глаза водой в течение
как минимум 15 минут. Обратитесь
за медицинской помощью.
• Утилизация: при обращении с аккумулятором
надевайте перчатки, а затем немедленно
утилизируйте их в соответствии с местными
правилами и нормами.
28. Следуйте всем инструкциям по зарядке
устройства, представленным в данном
руководстве ,и не пытайтесь осуществлять
зарядку устройства, находящегося вне
рабочего диапазона температур, указанного
в данном руководстве. Неправильная зарядка
устройства и зарядка, проводящаяся вовне
рабочего диапазона температур, могут
привести к повреждению аккумулятора
и повысить риск его возгорания. Для
продления срока службы аккумулятора
компания Dyson рекомендует следующее:
• Когда устройство не используется,
храните его при комнатной температуре.
Рекомендованный диапазон: от 18 до 28°C.
• Диапазон температур окружающей
среды во время работы и зарядки должен
составлять от 10 до 30°C.
29. ПРЕДУПРЕЖДЕНИЕ
О ПОЖАРООПАСНОСТИ. Не размещайте
данное устройство на плите или рядом
с плитой или с любыми другими горячими
поверхностями и не сжигайте данное
устройство даже в том случае, если оно
сильно повреждено. Аккумулятор может
вспыхнуть или взорваться.
30. ПРЕДУПРЕЖДЕНИЕ
О ПОЖАРООПАСНОСТИ. Не применяйте
к фильтрам данного устройства
какие-либо ароматизирующие или
парфюмерные продукты. Химические
вещества в таких продуктах являются
легковоспламеняющимися и могут привести
к возгоранию устройства.
68

ПРОЧИТАЙТЕ И
СОХРАНИТЕ ДАННЫЕ
ИНСТРУКЦИИ
Данное устройство Dyson предназначено только
для бытового пользования.
Не исп ользуйт е вблизи
открытого огня.
Не хра ните вбли зи
источников тепла.
Не исп ользуйт е для убор ки
воды и жидкостей.
Не исп ользуйт е для убор ки
горящих пре дметов.
Не кл адите руки
возл е щетки при
использовании устройства.
Не размещайте на плите
или ря дом с плито й.
69
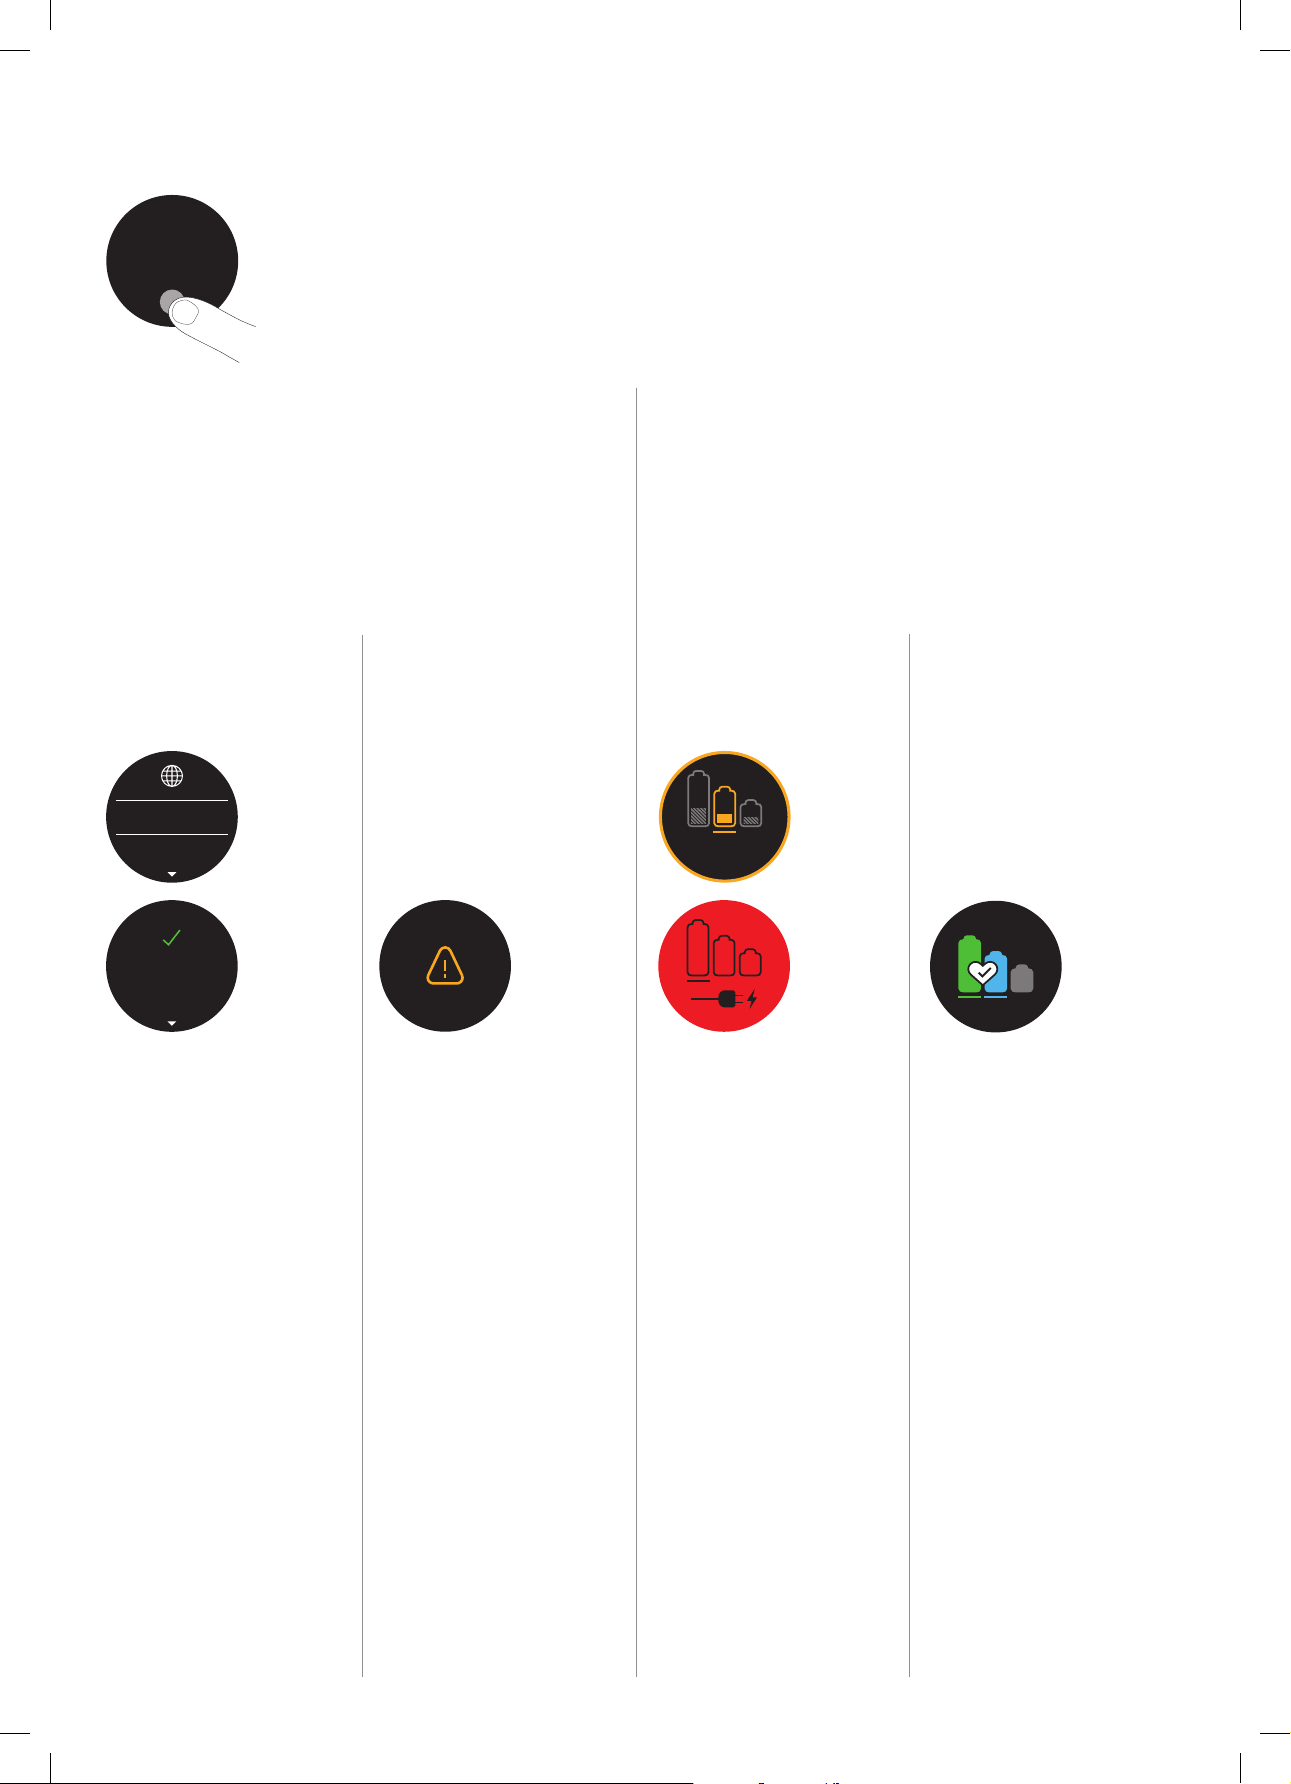
Boost
Eco
Auto Med
100%
English English
selected
4:50 Auto
Low
run time
Exit
Off
On
Boost
Auto Med
English English
selected
4:50 Auto
Low
run time
Exit
Off
On
Boost
Auto
Boost
Eco
Auto Med
100%
4:50 Auto
Low
run time
Boost
Eco
Auto Med
100%
English
Espanol
English English
selected
4:50 Auto
Low
run time
Exit
Off
On
Дисплей
Кнопка выбора
Настройки устройства
можно изменять с помощью
кнопки выбора.
Чтобы войти в меню настроек,
нажмите и удерживайте кнопку
до тех пор, пока не появится экран
меню. Нажимайте для прокрутки
доступных вариантов.
Изменение языка
English
Espanol
Чтобы изменить язык, выполните
действия в настройках языка.
English
selected
Изменение
настройки
оповещения
Нажимайте для прокрутки меню
настроек. Выберите пункт «Alerts»
(Предупреждения).
Выполните прокрутку для
включения или отключения
и удерживайте кнопку до
окончания обратного отсчета,
после чего на дисплее
появится галочка.
Низкий
уровень заряда
аккумулятора
4:50
На дисплее отображается
предупреждение, когда
уровень заряда аккумулятора
становится низким.
Когда аккумулятор
полностью разрядится, на
дисплее появится значок
последнего предупреждения.
Состояние
аккумулятора
Для обеспечения лучшей
производительности и
увеличения срока службы
аккумулятора используйте
режим «Eco» (Эко) и «Auto/Med»
(Авто/Средний).
Чтобы отменить выбор,
отпустите кнопку во время
обратного отсчета.
Выход из меню
настроек
70
Для выхода из меню настроек
нажимайте кнопку для
прокрутки меню. Выберите
«Exit menu» (Выйти из меню).
Предупреждения
Предупреждения появляются на
дисплее, когда ваше устройство
требует внимания.
Изображение фильтра означает,
что фильтр установлен неправильно
или требует обслуживания.
Изображение засора означает,
что требуется устранить засорение
в устройстве.

Boost
Eco
Auto Med
clik
clik
clik
Зарядка и хранение
Замена аккумуляторной
устройства
Перед первым использованием и после каждой
уборки важно полностью заряжать новое
3-4.5hrs
Подключите устройство
непосредственно к зарядному
устройству или установите его в
док-станцию.
Во время зарядки будут мигать
синие индикаторы, по одному с
каждой стороны аккумулятора.
Когда аккумулятор зарядится,
оба индикатора включатся на
5 секунд, а затем погаснут.
устройс тво. Это необходимо, так как алгоритм
работы аккумулятора и системы мониторинга
«получает сведения» через некоторое время, и
полная зарядка устройс тва помогает ему бол ее
точно рассчитывать и отображать оставшееся
время работы.
100%
Устройство не будет работать
при температуре окружающей
среды ниже 0°C (32°F). Таким
образом обеспечивается
защита электродвигателя и
аккумуляторной батареи.
батареи
При наличии дополнительных батарей
рекомендуется их регулярное чередование для
обеспечения одинаковой производительности.
clik
Отсоединение
аккумуляторной батареи
Поместите руку под
батарею, чтобы
поддерживать ее.
Нажмите кнопку фиксации
аккумуляторной батареи и
отсоедините ее от ручки.
Поставьте батарею на
зарядку.
Установка
аккумуляторной батареи
Вставьте
аккумуляторную
батарею в рукоятку до
щелчка.
Аккумулятор заряжен, когда
на дисплее указан уровень
заряда 100%.
Опустошение прозрачного
контейнера
2
1
3
clik
Будьте осторожны, чтобы не
нажать на кнопку включения, пока
прозрачный контейнер открыт для
вытряхивания пыли.
clik
Закройте прозрачный контейнер,
продвинув основание прозрачного
контейнера вверх до щелчка.
71

clik
3
4
2
1
3
4
2
1
3
3
4
clik
2
1
3
1
3
2
1
3
4
clik
2
1
Поиск засоров
1 2
1
3
4
2
4
5 6
Закройте прозрачный контейнер,
продвинув основание прозрачного
контейнера вверх до щелчка.
72

clik
Очистка фильтра
21
543 6
Обслуживание насадки с высоким крутящим моментом
1 2 3
73
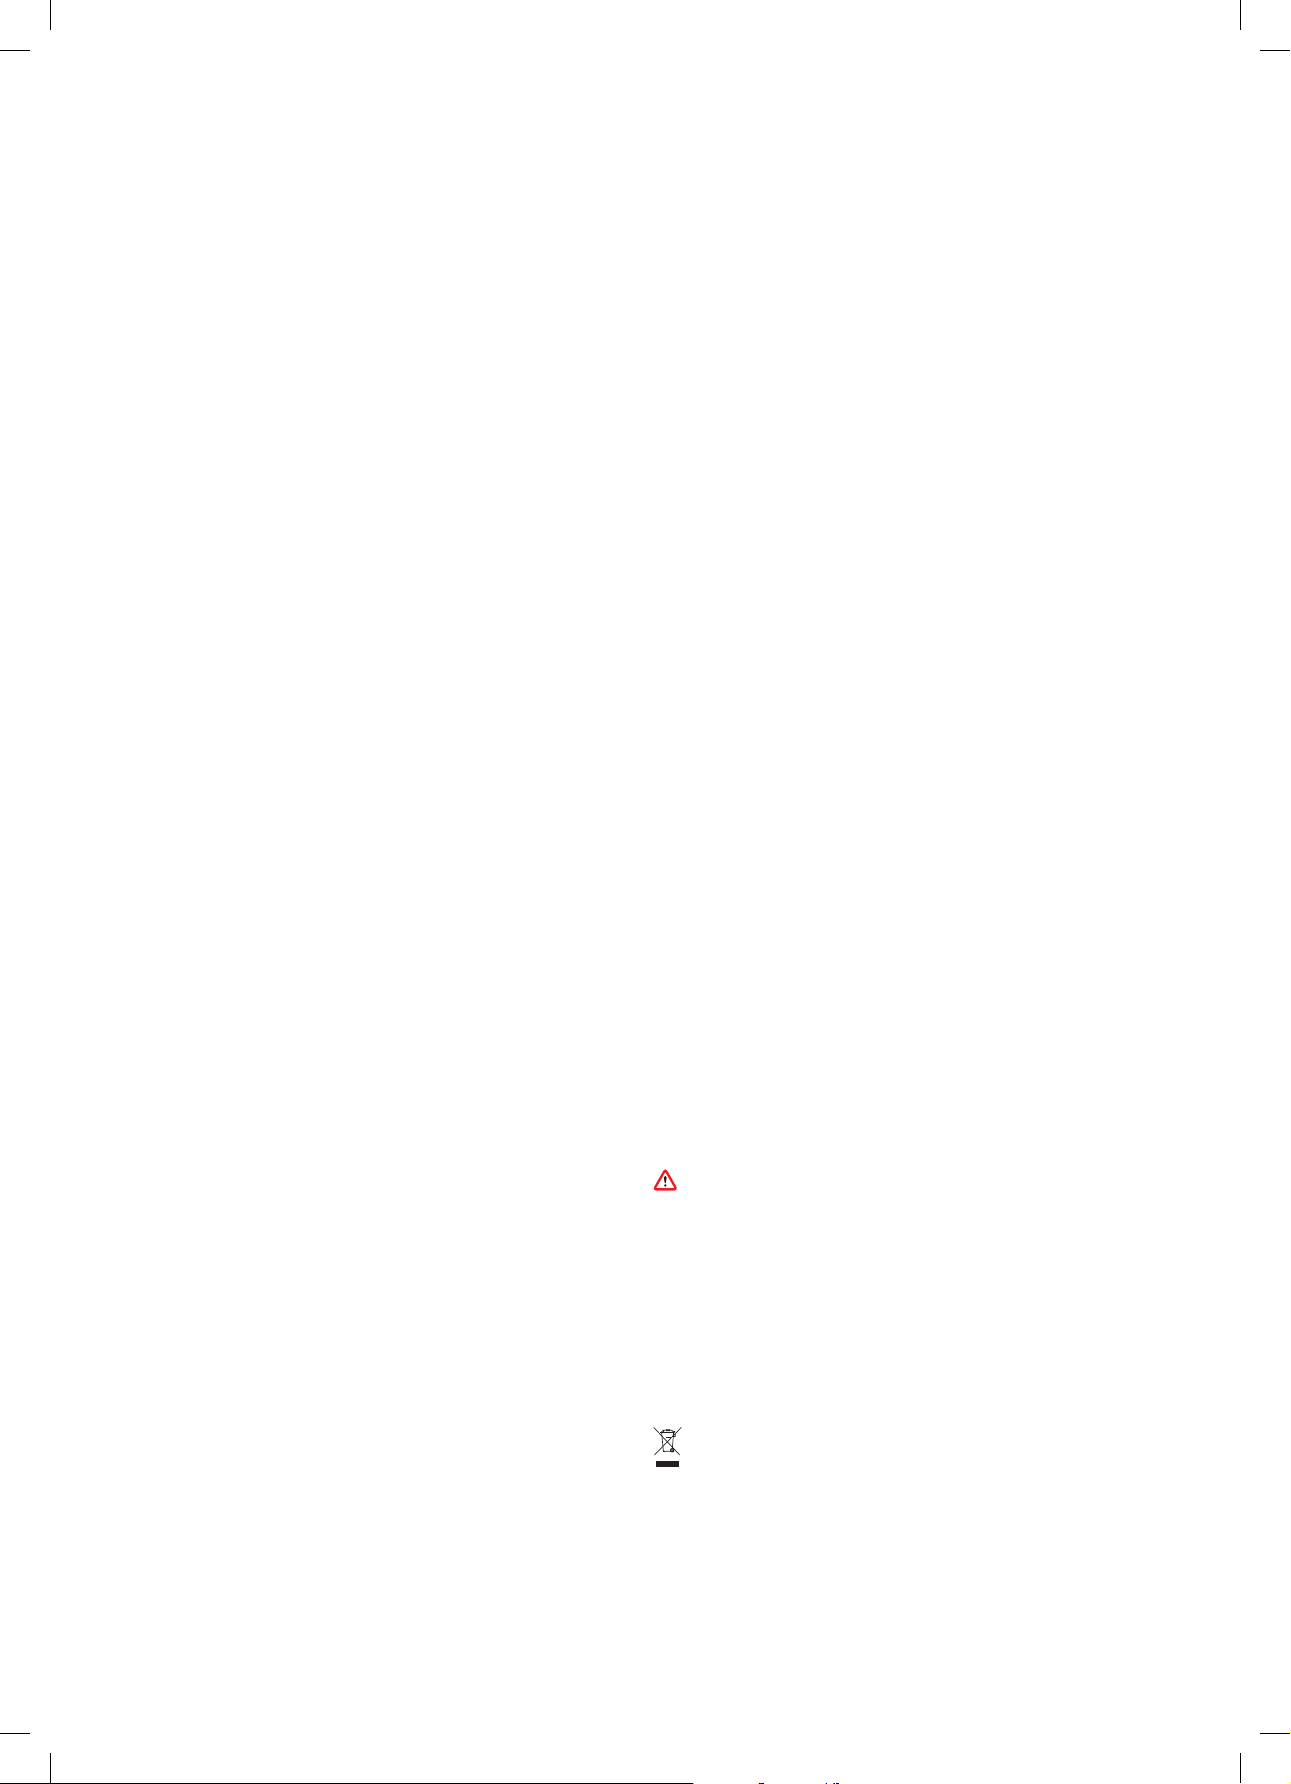
Дополнительная
информация
ПЕРЕД ПРОДОЛЖЕНИЕМ ОЗНАКОМЬТЕСЬ С ВАЖНЫМИ ИНСТРУКЦИЯМИ ПО
ТЕХНИКЕ БЕЗОПАСНОСТИ В Д АННОМ РУКОВОДСТВЕ DYSON ПО ЭКСПЛУАТАЦИИ.
Установка настенного крепления
• Достаньте из упаковки док-станцию, зарядное устройство и инструкцию
по установке.
• Выберите место для установки настенного крепле ния так, чтобы
непосредственно за настенным креплением не было тру б (газовых,
водопроводных или вентиляционных), электрических кабелей, проводов
и кабельных коробов.
• Не размещайте настенное крепление вблизи источников тепла, например
у кухонной плиты и батарей отопления, а также избегайте попадания на него
прямых солнечных лучей.
• Следуйте инструкции по установке.
• Прикрепите насадки до щелчка.
• Поместите устройство в настенное крепление.
• Подключите зарядное устройство к розетке электропитания. Включите (при
необходимости) для зарядки аккумулятора.
• Перед каждым использованием и после него важно полностью
зарядить устройство.
Настенное крепление следует устанавливать в соответствии с нормативной
документацией и действующими законами/стандартами (может применяться как
местное, так и государственное законодательство).
При установке настенного крепления компания Dyson рекомендует использовать
защитную одежду, защитные очки и другие средства защиты.
Чистка пылесосом
• Убедитесь, что нижняя поверхность электрощетки или насадки чистая и на ней
нет посторонних предметов, которые могу т вызвать повреждения.
• Перед использованием пылесоса для уборки пола и ковров ознакомьтесь
с рекомендациями производителя покрытий по их очис тке.
• Щетка устройс тва может повре дить некоторые виды ковровых покрытий
и полов. Некоторые ковры распушаются, ес ли их пылесосить с использованием
электрощетки. В этом случае мы рекомендуем пылесосить без элек трощетки
и проконсультироваться у производителя покрытия.
Опустошение прозрачного контейнера
• Опустошайте прозрачный контейнер, когда он заполнится до отметки
MAX. Использование устройства с переполненным контейнером может
привести к тому, что загрязнение о сядет на фильтре и потребуется более
частое обслуживание.
• Будьте осторожны, чтобы не нажать на кнопку включения, пока прозрачный
контейнер открыт для вытряхивания пыли.
• Чтобы отсо единить трубу, нажмите красную кнопк у фиксатора трубы
и извлеките трубу из контейнера.
• Вытряхивание мусора:
– Держите устройство так, чтобы контейнер находился внизу.
– Нажмите до конца красную кнопку фиксатора контейнера.
– Контейнер соскользнет вниз, очищая по ходу сетчатый экран.
– Основание контейнера затем откроется.
– Контейнер не откроется до тех пор, пока к расная кнопка фиксатора контейнер а
не будет опущена до конца.
Чтобы снизить контакт с пылью и аллергенами при опустошении прозрачного
контейнера, полностью поместите его в пакет для мусора и опустошите.
Осторожно доставайте прозрачный контейнер из пакета.
Плотно закройте пакет и утилизируйте с бытовыми отходами.
Будьте осторожны, чтобы не нажать на кнопку включения, пока прозрачный
контейнер открыт для вытряхивания пыли.
• Для закрытия прозрачного контейнера:
– Продвиньте основание прозрачного контейнера вверх до щелчка.
Очистка прозрачного контейнера
При необходимости очис тить прозрачный контейне р опустошите его, как показано
в разделе «Опустошение прозрачного контейнера».
• Нажмите красную кнопку на направляющей контейнера, чтобы разблокировать
контейнер и снять его с направляющей.
• Выполняйте очистку прозрачного контейнера только с помощью влажной ткани.
• Перед установкой дайте прозрачному контейнеру и уплотнителям
полностью высохнуть.
• Для установки прозрачного контейнера на место выполните
следующие действия:
– Установите основу на направляющую контейнера.
– Закройте прозрачный контейнер, продвинув основание прозрачного контейнера
вверх до щелчка.
Прозрачный контейнер не предназначен для мытья в посудомоечной машине,
и при его очистке не рекомендуется применять моющие и полирующие сре дства
и освежители воздуха, поскольку они могут повредить устройство.
Устранение засорений
• Данное устройство оснащено автоматическим выключателем. Засорение какойлибо части может привест и к автоматическому выключению устройства.
• При засорении работа электродвигателя станет прерывистой, а на ЖК-дисплее
появится предупреж дение о наличии засора.
• Перед устранением засорений дайте двигателю остыть.
• Будьте осторожны, чтобы не нажать на курок включения во время поиска
засорений. Включение устройства в частично разобранном состоянии может
стать причиной травмы.
• Устраните засорения и установите все компоненты устройства на место перед
повторным использованием.
• При проверке на наличие засорений следите, чтобы не пораниться
об острые предметы.
• Устранение засорений не входит в гарантийное обслуживание.
74
• Чтобы пров ерить наличие засорения в корпусе устройства, отсоедините
прозрачный контейнер, следуя инструкциям в разделе о вытряхивании пыли
из прозрачного контейнера, затем устраните засорение.
• Если не удается устранить засорение внутри насадки, может потребоваться
извлечь вращающийся валик. Разблокируйте фиксатор с помощью
монеты, сдвиньте вращающийся вал из насадки и устраните засорение.
Установите вращающийся валик на место и надежно затяните фиксатор.
Перед использованием устройства убедитесь, что вращающийся валик
надежно зафиксирован.
• Насадка данного пылесоса имеет валик со щетиной из углеродного волокна.
Будьте осторожны, касаясь ее руками. Это может вызвать незначительное
раздражение кожи. Рекомендуе тся вымыть руки пос ле контакта со щетиной
валика насадки.
Промывка фильтра
Чтобы эксплуатационные характеристики устройства всегда были оптимальными,
важно рег улярно обслуж ивать фильтр и проверять наличие засоров.
Если необходимо промыть фильтр, на ЖК-дисплее появится оповещение.
Рекомендуется мыть фильтр не реже одного р аза в месяц или после
оповещения устройством.
• Снимите фильтр, повернув его против часовой стрелки. Осторожно вытяните его
из устройства.
• Осторожно пос тучите по фильтру, чтобы с тряхну ть с него пыль и мусор
перед промывкой.
• Промывайте фильтр только в холодной воде.
• Сначала промойте гофрированный элемент фильтра; удерживайте фильтр
под струей холодной воды, повернув его пористым элементом вниз, чтобы вода
лилась на гофрированный фильт р.
• Затем промойте пористый элемент фильтра; удерживайте фильтр под струей
холодной воды, повернув его пористый элементом вниз, чтобы грязная вода
не испачкала гофрированный элемент. Промывайте пористый элемент холодной
водой с внутренней и наружной стороны и о сторожно отжимайте пористый
элемент для удаления грязи.
• Продолжайте промывать, пока вода не станет прозрачной.
• Осторожно потрясите фильтр, чтобы стряхнуть воду, и положите его пористым
элементов вверх, чтобы стекли остатки воды.
• Оставьте фильтр как минимум на 24часа в сухом месте с хорошей вентиляцией
до полного высыхания.
• Убедитесь, что фильтр полностью высох.
• Чтобы установить фильтр на место, вставьте его в корпус устройства и поверните
по часовой стрелке до фиксации.
При уб орке мелкой пыли или при частом использовании режима «Boost» (Турб о) может
потребоваться чаще промывать фильтр.
Не мойте какие-либо компоненты устройства в посудомоечной или стиральной
машине, не сушите в суши льном бара бане, духовке, микроволновой печи и ли возле
открытого огня.
Зарядка и хранение
• Это устройство автоматически отключается при падении температуры
аккумулятора ниже 10°С. Данная функция предназначе на для предохранения
двигателя и аккумулятора. Не заряжайте устройство, ес ли оно будет храниться
при температ уре ниже 10°С.
• Для продления срока слу жбы аккумуляторной батареи, рекомендуетс я
не производить зарядку сразу пос ле полной разрядки аккумулятора. Дайте
аккумулятору остыть в течение нескольких мину т, преж де чем вновь заря жать его.
• Не прижимайте аккумулятор к поверхностям во врем я использования устройства.
Это позволит избежать перегрева и увеличить срок службы аккумулятора.
Правила техники безопасности по эксплуатации аккумуляторов
• Если аккумулятор требует замены, обратит есь в службу поддержки
клиентов Dyson.
• Для зарядки данного устройс тва используйте то лько зарядное ус тройство Dyson
с артикулом 21716 0 или 270576.
• Для данного устройства Dyson используйте только аккумулятор Dyson
с артикулом 355983. При использовании аккумулятор ов другого типа может
произойти взрыв, что приведет к возгоранию и нанесению материального
ущерба, а также причинению вреда здоровью.
Предостережение
При неправильном обращении аккумуляторы, используемые в данном устройстве,
могут представлять опасность вследствие возгорания или получения химического
ожога. Не пытайтесь закоротить контакты и не нагревайте аккумуляторы
до температуры выше 60˚C (140˚F). Храните вдали от детей. Не разбирайте и не
бросайте в огонь.
Информация по утилизации
• Устройства компании Dyson производятся из высококачественных
материалов, допускающих переработку. По возможности сдавайте устройство
на переработку.
• Перед утилизацией элемент питания необходимо извлечь из устройства.
• Утилизация или переработка элементов питания должна производиться
в соответствии с местными предписаниями или постановлениями.
• Утилизацию отработанного фильтра необходимо проводить в соответствии
с местными законами и нормативами.
• Такая маркировка означает, что данное устройс тво не должно утилизироваться
вместе с бытовыми отходами на всей территории ЕС. Во избежание
загрязне ния окружающей сре ды или причинения вре да здоровью людей
из-за неконтролируемой утилизации отходов отнеситесь ответственно
к переработке отходов, чтобы обеспечить экологически безопасное повторное
использование материальных ресурсов. Для передачи устройства на утилизацию
воспользуйтесь системами возврата и сбора отходов или обратитесь
к розничному продавцу, у которого оно было приобретено. Продавец сможет
обеспечить экологически безопасную переработку устройства.
• Аккумулятор должен быть снят для отдельной переработки.
Служба поддержки Dyson
Ваше устройство Dyson наход ится на гарантийном обслуживании в течение 2 лет
с момента покупки в соответствии с условиями и исключениями, указанными в данном
руководстве. В случае возникновения вопросов по устройству Dyson на веб-сайте
www.dyson.com.ru можно получить онлайн-консультации, общие советы и полезную
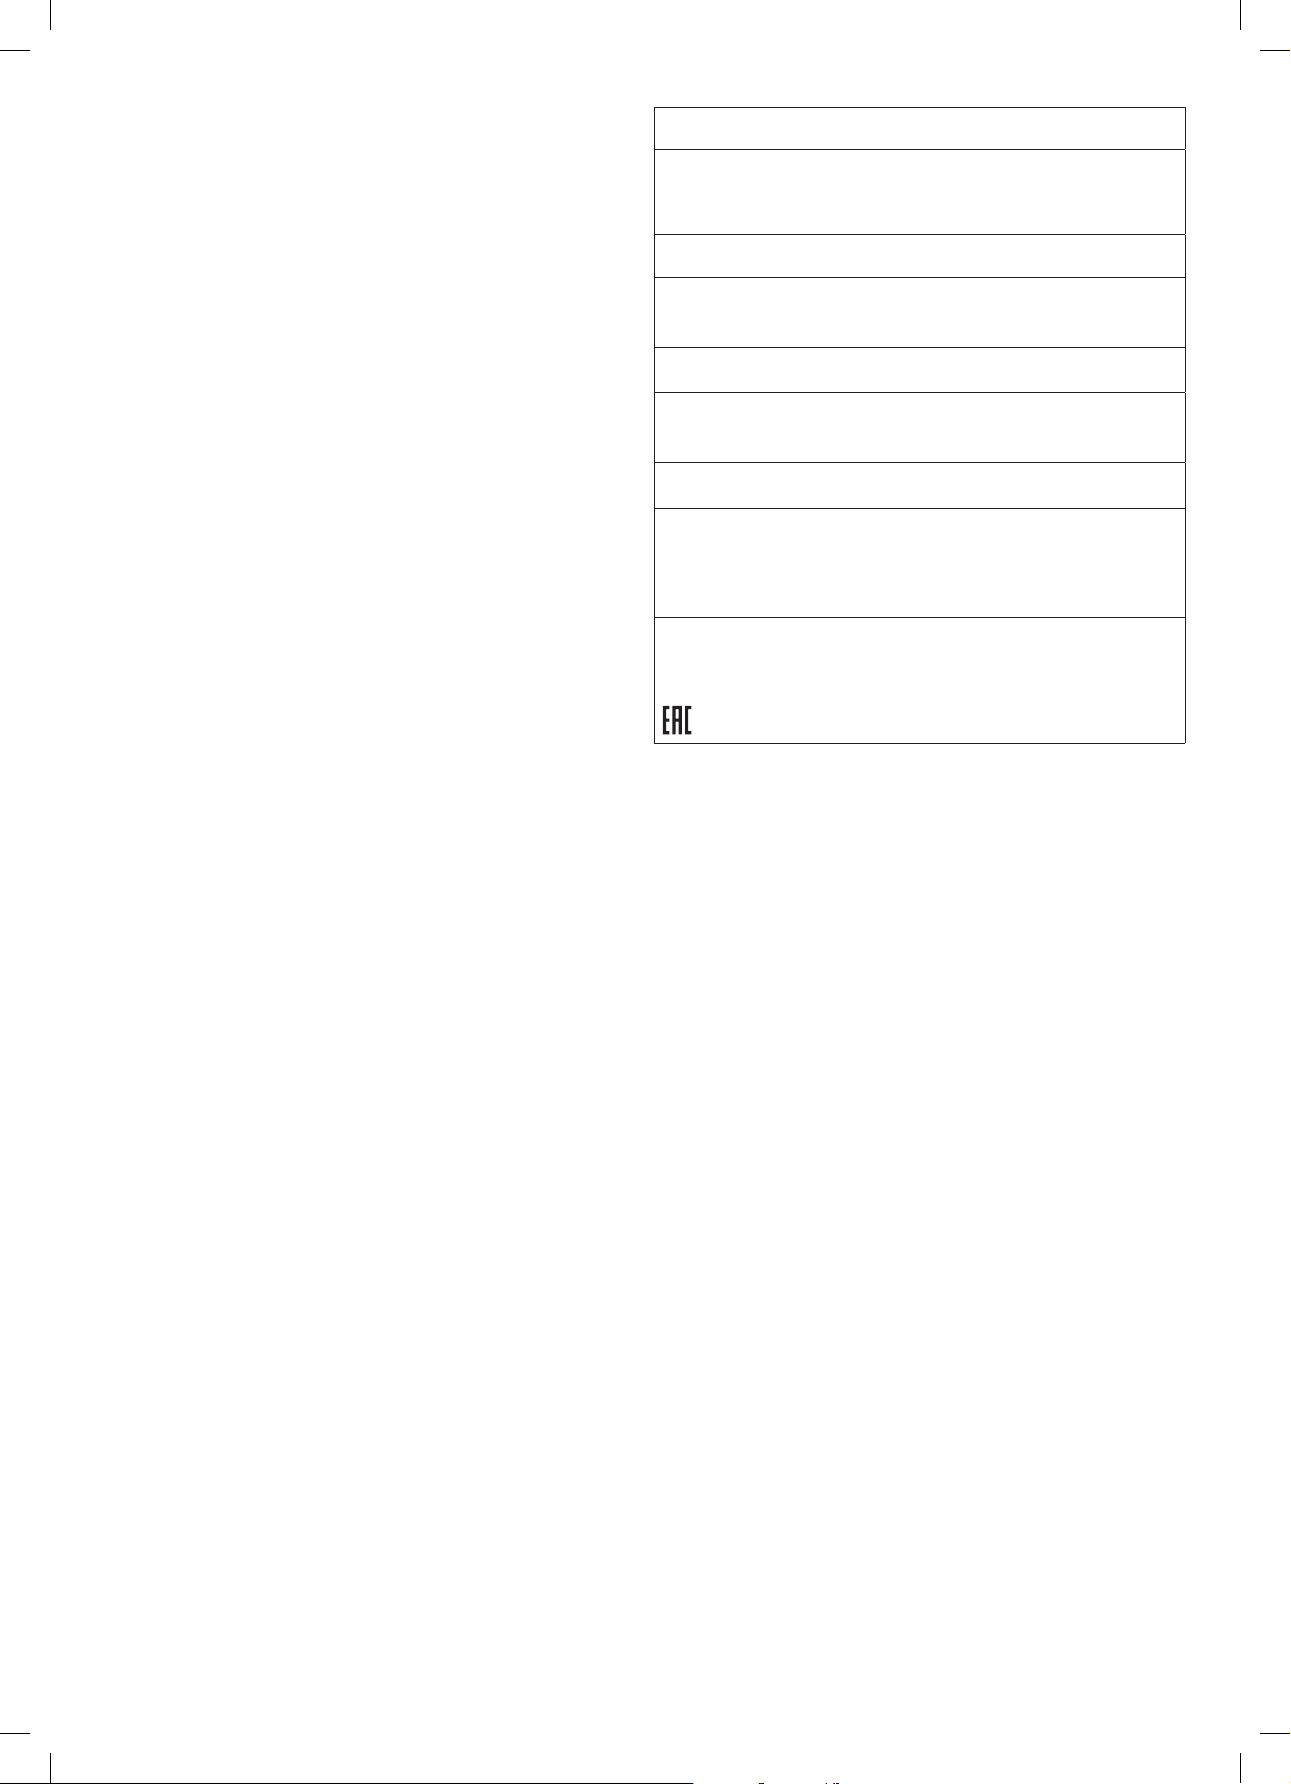
информацию о компании Dyson.
Можно также позвони ть в службу под держки к лиентов Dyson, назвав серийный номер
устройства и подробную информацию о том, гд е и когда оно было приобретено.
При необходимости ремонта устройства Dyson позвоните в службу поддержки
клиентов Dyson, и мы сможем обсудить варианты решения проблемы. Если устройство
Dyson находится на гарантии, а неисправность входит в перечень покрываемых, оно
будет отремонтировано бесплатно.
Зарегистрируйтесь в качестве владельца устройства Dyson
Гарантия на данное устройство — 2 года с даты приобретения. Чтобы мы могли
оказать вам быстрый и качественный сервис, пожалуйста, зарегистрируйтесь сразу
после приобретения. Сохраните чек, отображающий дату приобретения.
Это можно сделать двумя способами:
• По адр есу shop.dyson.ru/register/
• По телефону службы под держки компании Dyson 8800 100 10 02.
Регистрация приобретенного устройства позволит вам:
• Получать полезные советы по эксплуатации устройства
• Консультироваться со специалистами службы поддержки компании Dyson
• Узнавать об о всех наших новинках в числе первых
• Регистрация занимает всего несколько мину т. Все, что д ля нее нужно- это
серийный номер приобретенного устройства, дата покупки и название магазина
по чеку и ваши контактные данные.
Ограниченная 2-летняя гарантия
Terms and conditions of the Dyson 2-year limited guarantee are set out below. The name and
address details of the Dyson guarantor for your country are set out elsewhere in this document
– please refer to the table setting out these details.
Что входит в гарантию
• Ремонт или замена устройства Dyson (по решению Dyson) в случае отказа
устройства в работе по причине заводского брака в течение 2 лет с момента
покупки или доставки (если к моменту ремонта/замены отдельные запчасти
не производятся, Dyson заменит бракованные части на функциональные).
• Если это устройство было продано за пределами ЕС, данная гарантия будет
действительна, только если устройство используется в стране, в которой оно
было продано.
• Where this machine is sold within the EU, this guarantee will only be valid (i) if the
machine is used in the country in which it was sold or (ii) if the machine is used in Austria,
Belgium, Denmark, Finland, France, Germany, Ireland, Italy, Netherlands, Norway,
Poland, Spain, Sweden, Switzerland or the United Kingdom and the same model as this
machine is sold at the same voltage rating in the relevant country.
Что не входит в гарантию
Компания Dyson не гарантирует ремонт или замену устройств, дефекты которых
появились в результате:
• Случайного повреждения и неисправностей, вызванных небрежной
эксплуатацией или обращением, ненадлежащим использованием, халатностью,
неосторожностью, эксплуатацией или обращением с устройством,
не предусмотренными данным руководством по эксплуатации Dys on;
• Использования устройства для каких-либо нужд, отличных от обычных
хозяйственно-бытовых це лей;
• Использования компонентов, установленных не в соответствии с инструкциями
компании Dyson;
• Использования деталей и компонентов, не являющихся оригинальными
запчастями Dyson;
• Неправильной установки (за исключением случаев, когда установка выполнялась
специалистами Dyson);
• Pабот по ремонту или изменений конструкции, производимых не компанией
Dyson или не ее уполномоченными агентами;
• Засорений — информацию по устранению засорений см. в руководстве
по эксплуатации Dyson;
• Hормального физического износа (например, предохранителей, щетины
на валиках и т. д);
• Использования устройства для уборки щебня, золы, штукатурки;
• Сокращение времени разряда батареи из-за срока слу жбы или ус ловий
эксплуатации (где применимо).
По вопросам относительно содержания гарантии обращайтесь в слу жбу поддержки
клиентов Dyson.
Информация о гарантии
• Гарантия предоставляется с момента покупки устройства (или с даты доставки,
если доставка произведена позже).
• Мы рекомендуем предоставить подтверждающие документы (оригиналы и копии)
на доставку/покупку устройства до начала каких-либо работ с устройством
Dyson по гарантии. Сохраняйте док ументы о получении или доставке устройства.
• Все ра боты буду т произве дены компанией Dyson или
ее авторизованными представителями.
• Все компоненты устройства, которые заменяются в процессе работ на новые,
становятся собственностью компании Dyson.
• При гарантийном ремонте или замене устройс тва Dyson срок действия гарантии
не увеличивается.
• Гарантия предоставляет преимущества, которые являются дополнительными и не
влияют на ваши права как потребителя.
Важная информация о защите данных
При регистрации устройства Dyson:
• Вам не обходимо предоставить нам основную контактную информацию
для регистрации вашего устройства и разрешения нам выполнять
гарантийные обязательства.
• После регистрации вы сможете выбрать, разрешить нам обращаться к вам или
нет. Если вы дад ите согласие на обращение к вам от имени компании Dyson,
то будете получать информацию о специальных предложениях, а также новости
о новых разработках нашей компании.
• Мы никогда не передаем вашу информацию сторонним лицам или организациям
и используем информацию, котору ю вы нам предоставили, как указано
в нашей политике конфиденциальности, которая доступна на нашем веб-сайте
по адресу: privacy.dyson.com
Наименование изделия: Пылесос беспроводной Dyson V11
Мо де ль: SV17
Напряжение питания: 220 Вольт
Частота: 50-60 Гц
Мощность потребляемая: 610 Вт.
Пожалуйста, обратите внимание: Мелкие детали могут отличаться от показанных.
Срок с лужбы из делия: 7 лет.
Срок га рантии: 2 го да.
Нами пр иложены вс е возможны е усилия, чт обы избежа ть любых о шибок и обе спечить т очность и
наде жность ин формации , изложенн ой в настоя щем руково дстве. Одн ако мы не дае м полной гар антии
отсу тствия о шибок, ко торые не бы ли обнару жены и испр авлены до в ыхода ру ководст ва в печать.
Указанные особенности и технические параметры изделия могут отличаться от реальных.
Местонахождение организации, производящей ремонт и техническое обслужив ание:
г. Москв а, ул. Ворон цовская, д. 20.
Стран а произво дства ука зана в табл ичке на обор оте руков одства.
Адр ес изгото вителя: Да йсон Технол оджи Лим итед., Тетб ери Хил, Мал мсбери, Уил тшир, Англи я, СН16ОРП
Импортер и организация, уполномоченная изготовителем на принятие претензий:
ООО «Д айсон», 119048, г. Москв а ул. Усачева, д . 35А, тел.: +7 499 530 12 12
Для информационной поддержки: info.russia@dyson.com,
тел.: 8 80 0 100 100 2 (звоно к по России бе сплатн ый) c 9:00 до 21:00 (кром е гос. праз дников)
Опре деление д аты произ водства п о серийно му номеру:
Перв ая латинск ая буква в во сьмизна чном блоке с имволов оп ределяе т год произ водств а:
А - 2009, В - 2010, С - 2011, D - 2012, E - 2013 и т.д. по воз растани ю в соответ ствии
с английским алфавитом.
След ующая лат инская бу ква в диапа зоне от А до N (з а исключ ением бук в I и L – они не испо льзуютс я)
опре деляет ме сяц изгот овления: А – я нварь, В – фев раль, С – март, D – апр ель,
E – май, F – июн ь, G – июль, H – авг уст, J – сентя брь, K – октяб рь, M – ноябрь, N – д екабрь.
Товар соответствует требованиям Технических регламентов Таможенного союза
“О безопасности низковольтного оборудования” (ТР ТС 004/2011) и “Электромагнитной совместимости
техн ически х средст в” (ТР ТС 020/2011), о чем свиде тельств уют соотв етству ющие серт ификаты, а т акже
маркировка товара единым знаком обращения продукции на рынке государств -
членов Таможенного союза.
75

SI
Hvala, da ste se odločili za nakup
brezžičnega sesalnika Dyson
Aktivacija vaše garancije
Tudi po izteku garancijskega obdobja vam
Naša skrb za aparate se ne konča, ko
jih kupite.
bomo na voljo za pomoč.
Po registraciji brezplačne 2-letne garancije
za vašo napravo Dyson skladno z določili
garancije velja kritje za nadomestne dele in
popravila (brez filtrov) za obdobje 2 let od
datuma nakupa.
Serijsko številko najdete na napisni ploščici na dnu naprave.
Zapišite si serijsko številko za poznejšo uporabo.
Za ponazoritev.
Brezplačni deli in delovne ure družbe
Dyson
Zamenjava brez zapletov
Strokovno svetovanje. 7 dni na teden
Videovadnice in uporabni nasveti
Kako vam lahko pomagamo? Dysonova pomoč strankam
Odpravite težavo
Nasveti in navodila
Več o Dysonovi tehnologiji in
drugih napravah Dyson
Po spletu::
www.dyson.si
Telefon:
386 4 537 66 00
76
Če imate vprašanja o brezžičnem
sesalniku Dyson, pokličite Dysonovo
številko za pomoč uporabnikom
(imejte pripravljeno serijsko številko ter
podatke o lokaciji in datumu nakupa
naprave) ali nam pišite prek spletnega
mesta Dyson.
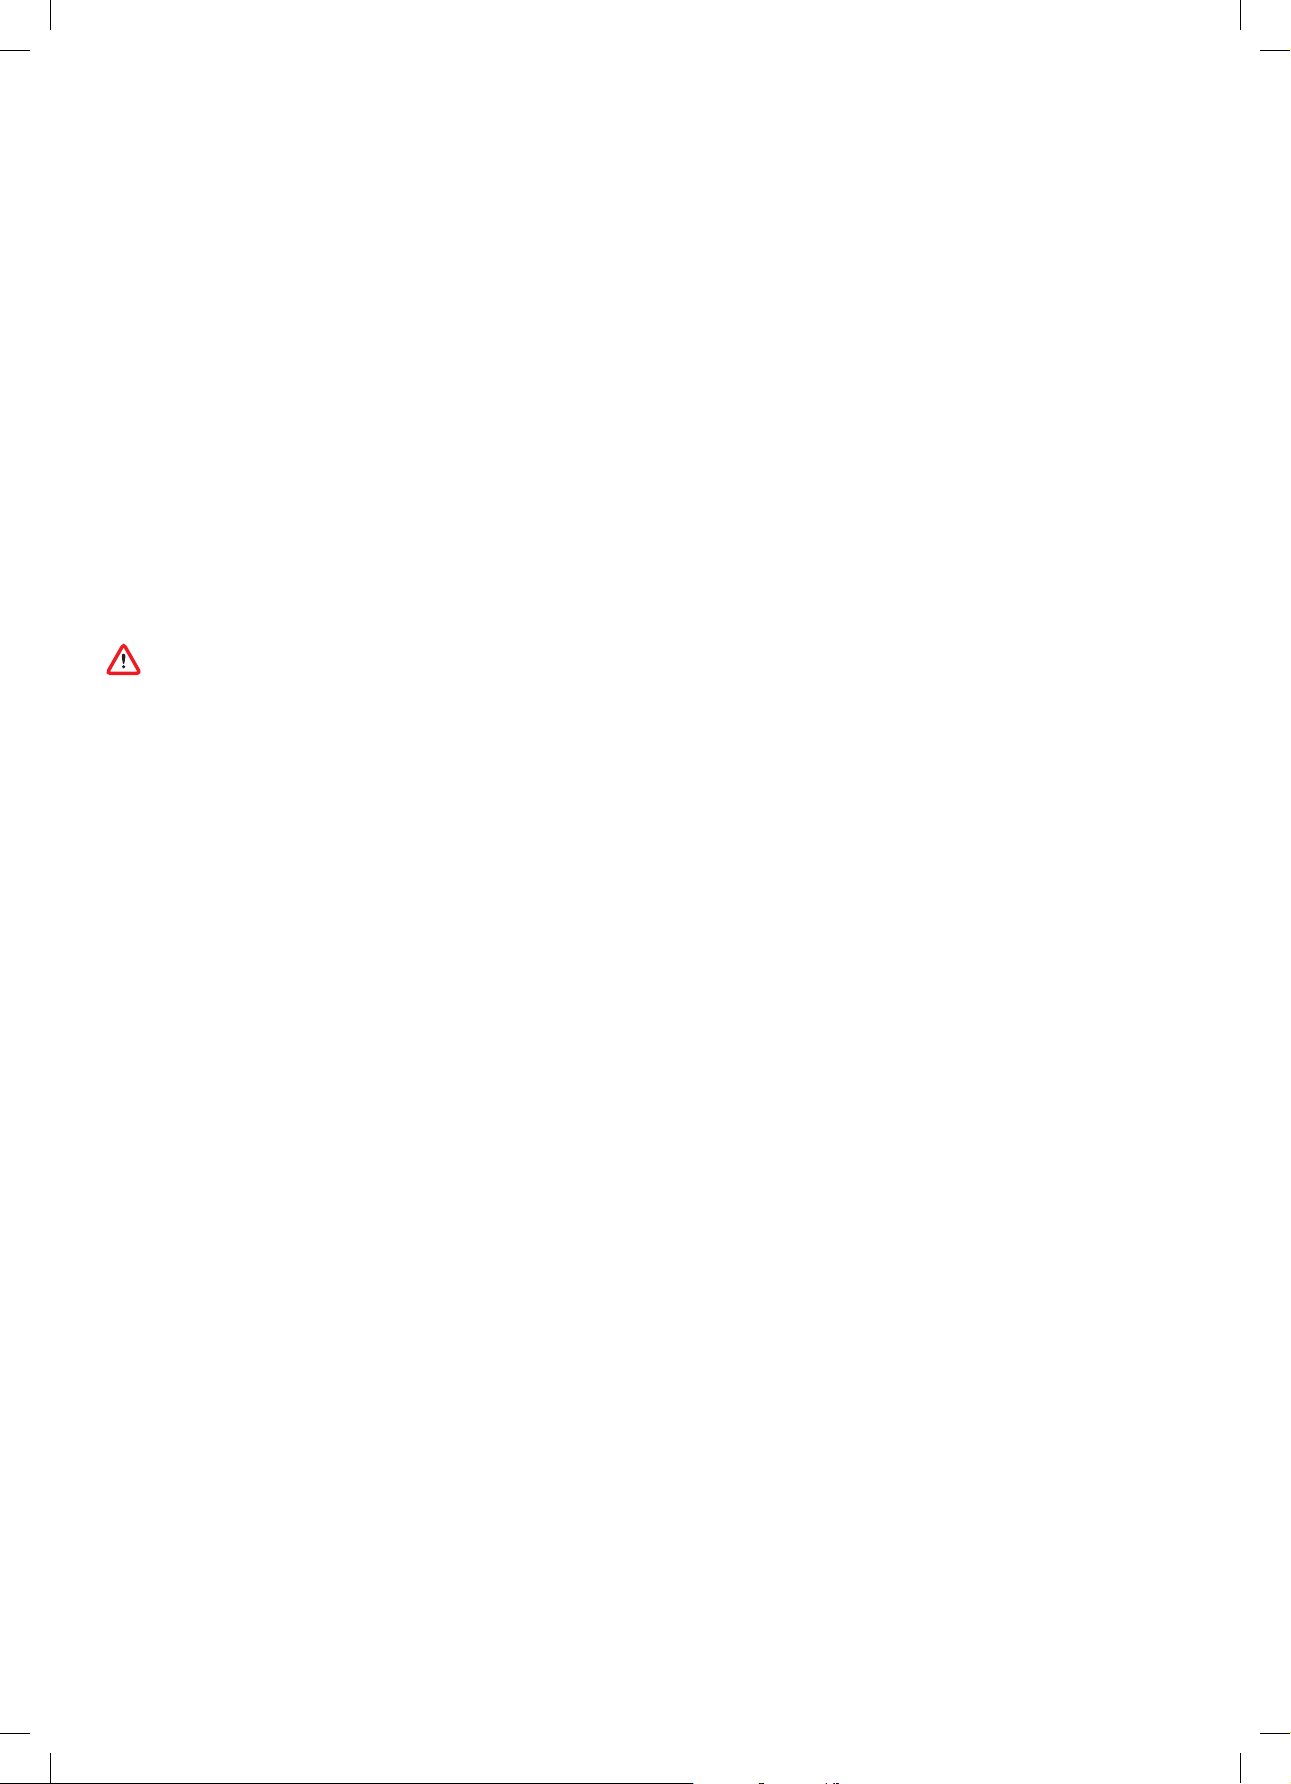
POMEMBNA VARNOSTNA
NAVODILA
PRED UPORABO TE NAPRAVE PREBERITE VSA
NAVODILA IN OPOZORILA V TEM PRIROČNIKU
ZA UPORABO IN NA NAPRAVI
Pri uporabi električne naprave upoštevajte osnovne
varnostne ukrepe, vključno z naslednjimi:
OPOZORILO
Ta opozorila veljajo za napravo ter za vse
pripomočke, nastavke, polnilnike in omrežne
vmesnike, kjer je to primerno.
ZA PREPREČITEV TVEGANJA POŽARA,
ELEKTRIČNEGA UDARA ALI POŠKODBE:
1. To napravo Dyson smejo uporabljati otroci
od starosti 8 let dalje ali osebe z omejenimi
fizičnimi, čutnimi ali intelektualnimi sposobnostmi
oziroma osebe brez izkušenj ali znanja
le pod nadzorom ali po navodilih odgovorne
osebe glede varne uporabe naprave in s tem
povezanih nevarnosti. Čiščenja in uporabniškega
vzdrževanja otroci ne smejo opravljati
brez nadzora.
2. Naprava ni igrača. Ko jo uporabljajo majhni
otroci, jih vedno nadzorujte. Otroke je treba
nadzorovati, da se ne bi igrali z napravo.
3. Uporabljajte samo na načine, opisane
v Dysonovem uporabniškem priročniku.
Ne izvajajte vzdrževalnih del ali popravil, razen
tistih, ki so prikazana v tem priročniku ali ki vam
jih svetuje strokovnjak Dysonove telefonske linije
za pomoč uporabnikom.
4. Naprava je primerna za uporabo SAMO
v suhem okolju. Ne uporabljajte je na prostem ali
na mokrih površinah.
5. Nobenega dela polnilnika ali naprave se ne
dotikajte z mokrimi rokami.
6. Naprave ne uporabljajte, če je poškodovan
polnilnik ali kabel.
7. Če naprava ne deluje pravilno, če je utrpela
močan udarec, je padla na tla, je bila
poškodovana, ste jo pustili na prostem ali
je padla v vodo, naprave ne uporabljajte
in pokličite Dysonovo telefonsko linijo
za pomoč uporabnikom.
8. Če potrebujete servis ali popravilo, pokličite
Dysonovo telefonsko linijo za pomoč
uporabnikom. Naprave ne razstavljajte, saj
lahko nepravilno vnovično sestavljanje povzroči
električni udar ali požar.
9. Kabla ne raztegujte in ga ne obremenjujte.
Kabla ne približujte ogretim površinam. Kabla
ne zapirajte z vrati in ga ne vlecite okrog ostrih
robov ali vogalov. Kabel razporedite zunaj
delovnega območja in tja, kjer nanj ne boste
stopili ali se obenj spotaknili. Ne vozite čez kabel.
10. Ni primerna za sesanje vode.
11. Ne uporabljajte za sesanje vnetljivih ali
eksplozivnih tekočin, kot je na primer
bencin ali ne uporabljajte na območjih, kjer
so lahko prisotni.
12. Ne sesajte gorečih ali kadečih se predmetov, kot
so cigarete, vžigalice ali vroč pepel.
13. Pazite, da lasje, široka oblačila, prsti ali drugi deli
telesa ne pridejo v odprtine ali gibljive dele, kot
je krtača. Ne usmerjajte cevi ali nastavka proti
očem ali ušesom ali jih dajajte v usta.
14. V odprtine ne vstavljajte nobenih predmetov.
Ne uporabljajte naprave z zamašenimi
odprtinami; redno čistite prah, vlakna, dlake
in vse drugo, kar lahko zmanjša pretok zraka.
15. Uporabljajte le z Dysonovimi nastavki
in pripomočki.
16. Ne uporabljajte brez nameščenega zbiralnika
smeti in filtrov.
17. Če naprave dalj časa ne uporabljate,
izključite polnilnik.
18. Pri uporabi na stopnicah bodite še zlasti previdni.
19. Če želite preprečiti nenameren vklop naprave,
se z rokami in prsti ne približujte gumbu za vklop,
dokler niste pripravljeni na sesanje. Zlasti bodite
previdni pri dvigovanju ali prenašanju naprave.
Če napravo prenašate s prstom na gumbu
za vklop, lahko pride do nesreče.
20. Naprave ne nameščajte, polnite ali uporabljajte
na prostem, v kopalnici ali v oddaljenosti
3 m od bazena. Prav tako je ne uporabljajte
na mokrih površinah in je ne izpostavljajte vlagi,
dežju ali snegu.
21. Pri odstranjevanju ali zamenjavi motorne krtače
bodite previdni, da ne pritisnete gumba za vklop,
dokler čistilna glava ni znova sestavljena.
22. Ne uporabljajte baterijskega sklopa ali
naprave, če sta poškodovana ali spremenjena.
Poškodovane ali spremenjene baterije lahko
delujejo nepredvidljivo in povzročijo požar,
eksplozijo ali poškodbe. Baterijskega sklopa
ali naprave ne izpostavljajte odprtemu ognju
oziroma visokim temperaturam. Izpostavljanje
ognju oziroma temperaturam nad 60 °C (140 °F)
lahko povzroči eksplozijo.
77

23. Za polnjenje te Dysonove naprave uporabljajte
samo Dysonov polnilnik (številka dela 217160 ali
270576). S tem aparatom Dyson uporabljajte
samo baterijo Dyson s št. dela 355983. Druge
vrste baterij lahko eksplodirajo ter povzročijo
telesne poškodbe ali materialno škodo.
24. Pred čiščenjem, vzdrževanjem ali shranjevanjem
aparata za dlje časa odklopite baterijo
iz aparata.
25. Kadar ne uporabljate baterije, jo hranite stran
od drugih kovinskih predmetov, kot so sponke
za papir, kovanci, ključi, žeblji, vijaki ali drugi
majhni kovinski predmeti, ki bi lahko pola
povezali med seboj. Kratki stik polov baterije
lahko povzroči opekline ali požar.
26. Baterijske pakete morate odstraniti iz aparata
in jih varno zavreči v skladu z lokalnimi odloki
ali predpisi.
27. Baterijski vložek je zatesnjen in v običajnih
okoliščinah ne predstavlja nobene nevarnosti.
V malo verjetnem primeru, da bi iz baterijskega
vložka začela iztekati tekočina, se tekočine
ne dotikajte, saj lahko povzroči draženje
ali opekline, in upoštevajte naslednje
varnostne ukrepe:
• Ob stiku s kožo lahko povzroči draženje. Umijte
z milom in vodo.
• Ob vdihavanju lahko povzroči draženje
dihalnih poti. Pojdite na svež zrak in poiščite
zdravniško pomoč.
• Če pride v oči, lahko povzroči draženje. Oči
takoj temeljito izpirajte z vodo najmanj 15minut.
Poiščite zdravniško pomoč.
• Odstranjevanje – nosite rokavice in baterijski
vložek nemudoma odstranite skladno
z lokalnimi predpisi.
28. Upoštevajte vsa navodila za polnjenje
in ne polnite akumulatorja ali aparata zunaj
temperaturnega območja, navedenega
v navodilih. Polnjenje, ki je nepravilno ali pri
temperaturi zunaj določenega območja lahko
poškoduje baterijo in poveča nevarnost požara.
Za zagotovitev kar najdaljše življenjske dobe
baterije Dyson priporoča naslednje:
• Ko naprave ne uporabljate, jo shranjujte pri
sobni temperaturi. Priporočen razpon: od 18 °C
(64 °F) do 28 °C (82 °F).
• Priporočen razpon temperature okolja med
delovanjem in polnjenjem je od 10 °C (50 °F)
do 30 °C (86 °F).
29. NEVARNOST POŽARA – Izdelka ne polagajte
na ali v bližino štedilnika ali katere koli vroče
površine; izdelka ne poskušajte sežgati, tudi
če je hudo poškodovan. Baterija se lahko vname
ali eksplodira.
30. POŽARNO OPOZORILO - Ne uporabljajte dišav
ali dišečih izdelkov s filtrom te naprave. Znano je,
da so kemikalije v teh izdelkih vnetljive in lahko
povzročijo požar.
PREBERITE IN SHRANITE TA
NAVODILA
Naprava Dyson je namenjena samo za
domačo uporabo.
Ne uporabljajt e v bližini
odprtega ognja.
78
Ne hranite v bližini
virov toplote.
Ne sesa jte vode ali
drugih tekočin.
Ne sesa jte
gorečih predmetov.
Ko napravo uporab ljate,
ne polagajte rok v bližino
krta če.
Ne pola gajte na ali v
bližino štedilnika.

Boost
Eco
Auto Med
100%
English English
selected
4:50 Auto
Low
run time
Exit
Off
On
Boost
Auto Med
English English
selected
4:50 Auto
Low
run time
Exit
Off
On
Boost
Auto
Boost
Eco
Auto Med
100%
4:50 Auto
Low
run time
Boost
Eco
Auto Med
100%
English
Espanol
English English
selected
4:50 Auto
Low
run time
Exit
Off
On
Zaslon
Gumb za izbiranje
Z gumbom za izbiranje lahko
upravljate nastavitve naprave.
Za vstop v meni z nastavitvami
pritisnite in držite gumb, dokler se
ne pojavi zaslon menija. Tapnite za
pomikanje po možnostih.
Spreminjanje
jezika
English
Espanol
Če želite spremeniti jezik,
upoštevajte navodila postopka
nastavitve jezika.
English
selected
Spreminjanje
nastavitve opozorila
Tapnite, da se pomaknete po meniju
z nastavitvami. Izberite možnost
»Alerts (Opozorila)«.
S pomikanjem izberite vklop ali
izklop in držite gumb, dokler se
odštevanje ne konča in se na
zaslonu prikaže kljukica.
Skoraj prazna
baterija
4:50
Naprava bo trikrat utripnila, na
zaslonu pa se bo pojavilo opozorilo
za skoraj prazno baterijo, ki vas
opozarja, da jo morate napolniti.
Ko je baterija prazna, se na zaslonu
prikaže ikona končnega opozorila.
Stanje baterije
Za kar najboljše delovanje in
življenjsko dobo baterije uporabite
način Eco ali Auto/Med.
Če želite preklicati izbiro, spustite
gumb med odštevanjem.
Izhod iz menija
nastavitev
Če želite zapreti meni nastavitev,
tapnite za pomikanje po meniju.
Izberite »Exit menu (Zapusti meni)«.
Opozorila
Ko naprava potrebuje vašo
pozornost, bo prikazano opozorilo.
Ikona filtra vas bo opozorila, da
filter ni pravilno nameščen ali da ga
morate očistiti.
Ikona blokade vas bo opozorila, da
morate odstraniti blokado v napravi.
79

Boost
Eco
Auto Med
clik
clik
clik
Polnjenje in shranjevanje
Zamenjava baterije
naprave
Pred pr vo uporabo in po vsakem čiščenju je treba novi
stroj obvezno popolnoma napolniti. To je pomembno,
3-4.5hrs
Napravo priklopite neposredno
na polnilnik ali jo postavite v
priklopno postajo.
Modri lučki LED (po ena na
vsaki strani baterije) bosta med
polnjenjem utripali.
Ko bo baterija napolnjena, bosta
obe lučki LED 5 sekund svetili, nato
pa ugasnili.
Baterija je napolnjena, ko je za stanje
baterije na zaslonu prikazano 100 %.
ker se baterija in algoritem nadzornega sistema
sčasoma »učita« in s popolnim polnjenjem prispevate k
natančnejšemu izračunu preostalega časa delovanja.
100%
Naprava ne deluje, če je temperatura
okolja nižja od 0 °C (32°F). Ta
funkcija ščiti motor in baterijo.
Če imate dodatne baterije, priporočamo, da
baterije redno menjujete in tako zagotovite
pravilno delovanje baterije.
clik
Če želite odstraniti baterijo
Z dlanjo podprite baterijo na
spodnjem delu.
Pritisnite gumb za sprostitev
baterije in potisnite baterijo
z ročaja.
Baterijo namestite v
polnilnik.
Če želite namestiti
baterijo
Potisnite baterijo na
ročaj, da se varno
zaskoči na mesto.
Praznjenje zbiralnika smeti
2
1
3
clik
80
Pazite, da med praznjenjem zbiralnika
smeti ne vklopite naprave.
clik
Zbiralnik smeti zaprete tako, da dno potiskate
navzgor, dokler se zbiralnik in dno ne zaskočita.

clik
clik
3
4
2
1
3
4
2
1
3
3
4
clik
2
1
3
1
3
2
1
3
4
clik
2
1
Iskanje blokad
1 2
1
3
4
2
4
5 6
Zbiralnik smeti zaprete tako, da dno potiskate
navzgor, dokler se zbiralnik in dno ne zaskočita.
81

clik
Čiščenje filtra
21
543 6
Vzdrževanje čistilne glave pogona
1 2 3
82

Dodatne informacije
Pred nadaljevanjem preberite »Pomembna varnostna navodila« v tem priročniku za uporabo
sistema Dyson.
Namestitev priklopne postaje
• Iz embalaže vzemite priklopno postajo, polnilnik in priročnik za namestitev.
• Določite mesto za priklopno postajo. Neposredno za mestom namestitve ne smejo biti
cevi (za plin, vodo ali zrak), električni kabli, žice ali kanali prezračevalnih s iste mov.
• Priklopne postaje ne postavite v bližino virov toplote, kot so štedilnik, radiator ali
neposredna sončna svetloba.
• Upoštevajte navodila v priročniku za namestitev.
• Priključke namestite na ustrezna mesta.
• Napravo postavite v priklopno postajo.
• Polnilnik priključite v električno napajanje. Po potrebi vklopite napravo,
da napolnite baterijo.
• Pomembno je, da popolnoma napolnite vaš s troj pred prvo uporabo in po
vsaki uporabi.
Priklopna postaja mora biti pritrjena skladno z veljavnimi predpisi in lokalnimi standardi/
kodeksi (državnimi in lokalnimi zakoni).
Dyson priporoča, da med nameščanjem priklopne pos taje nosite zaščitna oblačila, očala
in druga zaščitna sredstva.
Vakuumsko sesanje
• Preverite, ali je spodnja stran glave sesalnika oziroma orodja čista in brez t ujkov, ki bi
lahko poškodovali napravo.
• Pred sesanjem tal, debelih preprog in preprog preverite proizvajalčeva priporočena
navodila za čiščenje.
• Motorna krtača naprave lahko poškoduje nekatere vrs te preprog in površin. Nekatere
preproge se pri uporabi vrteče krtače lahko scefrajo. V tem primeru priporočamo, da jih
sesate brez motoriziranega nastavka za tla in se posvetujete s proizvajalcem preprog.
Praznjenje zbiralnika smeti
• Izpraznite, kakor hitro umazanija doseže oznako M AX – ne prenapolnite.
• Pazite, da med praznjenjem zbiralnika smeti ne vklopite naprave.
• Odstranite cevni podaljšek, tako da pritisnete rdeči gumb za izmet cevnega podaljška,
ki ga nato potegnete iz zbiralnika smeti.
• Postopek za sprostitev umazanije:
– Napravo držite tako, da je zbiralnik smeti usmerjen navzdol.
– Močno pritisnite rdeči gumb za sprostitev zbiralnika smeti.
– Zbiralnik bo zdrsnil navzdol in spotoma očistil okrov. Dno zbiralnika se bo odprlo.
– Spodnji pokrov se ne bo odprl, če rdeči gumb ni popolnoma potisnjen navzdol
Da med praznjenjem zmanjšate stik s prahom/alergeni, zaprite zbiralnik smeti tesno
v plastično vrečko in ga izpraznite.
Pazljivo odstranite enoto zbiralnika smeti od vrečke.
Vrečko tesno zaprite in odstranite kot običajno.
Pazite, da med praznjenjem zbiralnika smeti ne vklopite naprave.
• Zapiranje praznega zbiralnika:
– Zbiralnik smeti zaprete tako, da dno potiskate navzgor, dokler se zbiralnik in dno ne
zaskočita.
Čiščenje zbiralnika smeti (izbirno)
Če je treba očistiti zbiralnik smeti:
• Upoštevajte navodila v razdelku »Praznjenje zbiralnika smeti«.
• Pritisnite rdeči gumb na vodilu zbiralnika, da zbiralnik sprostite, nato pa ga potisnite
z vodila.
• Zbiralnik smeti čistite samo z vlažno krpo.
• Preden ga znova namestite, preverite, ali so zbiralnik in tesnila popolnoma suhi.
• Za vnovično namestitev zbiralnika smeti:
– Vstavite pritrdilo v vodilo zbiralnika.
Zaprite zbiralnik, tako da potiskate dno navzgor, dokler se zbiralnik in dno ne zaskočita.
Odsvetujemo pranje zbiralnika smeti v pomivalnem stroju. Tudi uporaba detergentov,
loščil ali osvežilcev zraka za čiščenje zbiralnika smeti ni priporočljiva, saj lahko pov zročijo
poškodbe naprave.
Iskanje blokad
• Ta naprava je opremljena s sistemom za samodejni izklop. Če je kateri del blokiran,
se lahko naprava samodejno izklopi.
• Ob zamašitvi pride do tokovnega sunka motorja, na zaslonu LCD pa je označ eno,
da gre za zamašitev.
• Preden poiščete zamašitve, počakajte, da se ohladi.
• Pazite, da med iskanjem blokad ne pritisnete gumba za vklop. Uporaba delno
razstavljene naprave lahko povzroči telesne poškodbe.
• Pred ponovnim zagonom očistite morebitne blokade.
• Ko iščete blokade, pazite na ostre predmete.
• Iskanja blokad garancija ne pokriva.
• Če želite preveriti, ali je do zamašitve prišlo v glavnem delu stroja, skladno z navodili
v razdelku »Praznjenje zbiralnika« odstranite zbiralnik in odpravite zamašitev.
• Če s čistilne glave ni mogoče odstraniti zamašitve, boste morda morali odstraniti
krtačo. S kovancem odvijte pritrdilni element, potisnite krtačo s čistilne glave
in odstranite oviro. Znova namestite krtačo in privijte pritrdilni element. Pred uporabo
aparata se prepričajte, da je trdno pritrjena.
• Ta naprava vsebuje ogljikove ščetke. Bodite pozorni, če pridete v stik z njimi. Lahko
povzročijo manjše vnetje kože. Po s tiku s ščetko umijte roke.
Pranje filtrske enote
Filter operite vsaj enkrat na mesec oziroma vedno, ko se prikaže indikator
za vzdrževanje filtra.
Filtrsko enoto preverjajte in perite skladno z navodili, da ohranite učinkovitost delovanja.
• Filtrsko enoto odstranite tako, da jo zavrtite v nasprotni smeri urnega kazalca. Nežno
jo izvlecite iz naprave.
• Pred pranjem nežno otresite filtrsko enoto, da odstranite ostanke prahu in smeti.
•
Filtrsko enoto perite samo s hladno vodo – ne uporabljajte čistila in ne perite je v
pomivalnem ali pralnem stroju.
• Najprej operite naguban papirnati element filtrske enote – filtrsko enoto držite pod
curkom hladne vode tako, da je penasti element usmerjen navzdol, in s hladno vodo
operite naguban pa pir.
• Nato operite penasti element filtrske enote – filtrsko enoto držite pod curkom hladne
vode tako, da je penasti element usmerjen navzdol, da umazana voda ne teče
po nagubanem papirnatem elementu. S hladno vodo operite notranji in zunanji del
penastega elementa, nato pa nežno ožemite peno, da iztisnete umazanijo.
• Perite, dokler ne priteče čista voda.
• Operite zunanji del filtrske enote. Nato enoto napolnite s hladno vodo, z dlanmi
prekrijte odprta dela in nežno pretresite.
• Postopek pranja elementov in zunanjega dela filtrske enote ponavljajte, dokler iz nje
ne priteče čista voda.
• Nežno otresite filtrsko enoto, da odstranite ostanke vode, nato pa z navzgor obrnjenim
penastim elementom pustite, da se posuši.
• V suhem okolju z dobrim pretokom zraka jo pustite vsaj 24 ur, da se popolnoma posuši.
• Preverite, ali je filtrska enota popolnoma suha.
• Če želite filtrsko enoto znova namestiti, jo vstavite v glavni del naprave in jo vrtite v smeri
urnega kazalca, dokler se ne zaskoči.
Filtrsko enoto boste morda morali prati pogosteje, če sesate fin prah ali če jo največkrat
uporabljate v načinu Boost (Močnejši način).
Nobenega dela naprave ne dajajte v pomivalni, pralni ali sušilni s troj, v običajno ali
mikrovalovno pečico oziroma v bližino odprtega ognja.
POLNJENJE IN SHRANJEVANJE
• Naprava se bo izklopila, če bo temperatura baterije padla pod 10 °C (50 °F). Ta funkcija
ščiti motor in baterijo. Naprave nikoli ne napolnite in nato shranite v prostoru
s temperaturo pod 10 °C (50 °F).
• Za podaljšanje življenjske dobe baterije jo napolnite takoj, ko je prazna. Pustite, da se
hladi nekaj minut.
• Izogibajte se uporabi naprave, če se baterija dotika površine. S tem dosežete hladnejše
delovanje ter podaljšanje časa delovanja in trajanja baterije.
Varnostna navodila za baterijski vložek
• Če morate zamenjati baterijo, se obrnite na telefonsko linijo za pomoč
uporabnikom Dyson.
• Za polnjenje te Dysonove naprave uporabljajte samo Dysonov polnilnik (številka dela
217160 ali 270576).
• S tem aparatom Dyson uporabljajte samo baterijo Dyson s št. dela 355983. Druge vrste
baterij lahko eksplodirajo ter povzročijo telesne poškodbe ali materialno škodo.
POZOR
Nepravilno ravnanje z baterijskim vložkom lahko privede do požara ali kemičnih opeklin.
Hranite zunaj dosega otrok. Baterijskega vložka ne razstavljajte in ga ne odlagajte v ogenj.
Informacije o odstranjevanju
• Izdelki Dyson so izdelani iz visokokakovostnih materialov, ki jih je mogoče reciklirati.
Kadar je le mogoče, materiale reciklirajte.
• Preden napravo zavržete, morate iz nje odstraniti baterijo.
• Baterijo odstranite ali reciklirajte skladno z lokalnimi odloki ali pravilniki.
• Porabljeno filtrsko enoto odstranite skladno z lokalnimi odloki in predpisi.
• Ta oznak a kaže, da tega izdelka v EU ne smete odstranjevati skupaj s preostalimi
gospodinjskimi odpadki. Da bi preprečili morebitno škodo za okolje ali človeško zdravje
zaradi nenadzorovanega odstranjevanja odpadkov, ta izdelek odgovorno reciklirajte
in s tem spodbujajte trajnostno uporabo materialnih virov. Če želite vrniti uporabljeno
napravo, uporabite sisteme za vračilo in zbiranje ali se obrnite na prodajalca, pri
katerem ste kupili izdelek. Ti lahko prevzamejo izdelek za okolju varno recikliranje.
• Baterijo morate odstraniti in oddati v ločeno recikliranje.
Dysonova pomoč uporabnikom
Hvala, ker ste se odločili za nakup aparata Dyson!
Potem ko registrirate 2-letno garancijo, bo za napravo Dyson veljala 2-letna garancija
skladno z garancijskimi pogoji. Če imate kakršna koli vprašanja o napravi Dyson, obiščite
spletno stran w ww.dyson.si/support, kjer lahko najdete spletno pomoč, splošne nasvete
in koristne informacije o podjetju Dyson.
Lahko pa pokličete tudi tehnično podporo Dyson in navedete serijsko številko naprave ter
natančno lokacijo in datum nakupa.
Če naprava Dyson potrebuje popravilo, pokličite tehnično podporo Dyson in se pogovorite
o rešit vah, ki so na voljo. Če je naprava Dyson še v garanciji in če ta krije potrebno popravilo,
bo popravilo za vas brezplačno.
Prosimo, registrirajte se kot lastnik Dysonovega izdelka
Garancija za ta izdelek velja 2leti od datuma nakupa. Garancijo registrirajte v 30 dneh
od dneva nakupa. Če registracijo opravite takoj po nakupu, nam boste pomagali zagotavljati
takojšnjo in učinkovito storitev. Shranite račun, na katerem je naveden datum nakupa.
To lahko naredite na 2 načina:
• Prek spleta na www.dyson.si
• Po telefonu s klicem tehnične podpore na 386 4 537 66 00.
Z registracijo prek spleta ali telefona boste:
• Zaščitili svojo naložbo z 2-letno garancijo za dele in servis
• Prejemali koristne nasvete o uporabi stroja.
• Prejemali strokovne nasvete od tehnične službe Dyson.
• Prvi izvedeli za naše najnovejše izdelke.
• Registracija traja samo nekaj minut, potrebujete pa samo serijsko številko.
Omejena 2-letna garancija
Terms and conditions of the Dyson 2-year limited guarantee are set out below. The name and
address details of the Dyson guarantor for your country are set out elsewhere in this document
– please refer to the table setting out these details.
Garancija krije
• Popravilo ali zamenjavo vaše naprave (po izbiri Dysona), če se naprava pokvari
zaradi napake v materialu, izdelavi ali delovanju v dveh letih od nakupa ali dostave
(če kateri koli del ni več na voljo ali se ne izdeluje več, ga bo Dyson zamenjal z ustreznim
nadomestnim delom).
• Če je bila ta naprava prodana v državo, ki ni članica EU, bo ta garancija veljavna, samo
če je bila naprava uporabljena v državi, kamor je bila prodana.
• Where this machine is sold within the EU, this guarantee will only be valid (i) if the
machine is used in the country in which it was sold or (ii) if the machine is used in Austria,
Belgium, Denmark, Finland, France, Germany, Ireland, Italy, Netherlands, Norway,
Poland, Spain, Sweden, Switzerland or the United Kingdom and the same model as this
machine is sold at the same voltage rating in the relevant country.
.
83

Garancija ne krije
Dysonova garancija ne krije popravila ali zamenjave izdelka, če je okvara nastala zaradi:
• Naključne škode, okvar, ki so posledica malomarne uporabe ali nege, nepravilne
uporabe, zanemarjanja, neprevidne uporabe ali ravnanja z napravo, ki ni skladno
z Dysonovim priročnikom za uporabo.
• Uporabe naprave za katerikoli drug namen, razen za običajne gospodinjske namene.
• Uporabe delov, ki niso sestavljeni ali nameščeni skladno z Dysonovimi navodili.
• Uporabe delov in nastavkov, ki niso originalni Dysonovi izdelki.
• Nepravilne namestitve (razen če jo je opravil Dyson).
• Popravil ali predelav, ki jih ne izvede Dyson ali njegovi pooblaščeni zastopniki.
• Blokad – preberite podrobnosti o iskanju in odpravljanju blokad v Dysonovem
priročniku za uporabo.
• Normalne obrabe (varovalka, krtačkeitd.).
• Uporabe naprave za sesanje kamnov, pepela ali mavca.
• Hitrejšega praznjenja baterije zaradi staros ti ali izrabe baterije (kjer je to veljavno).
Če niste prepričani, kaj krije garancija, pokličite tehnično podporo Dyson.
Povzetek kritja
• Garancija začne veljati na dan nakupa (ali na dan dostave, če je ta poznejši).
• Predložiti morate dokazilo o dostavi/nakupu, preden se popravilo vaše naprave lahko
začne. Brez dokazila se vse delo zaračuna. Prosimo, shranite račun ali dobavnico.
• Vsa dela bo izvedel Dyson ali njegovi pooblaščeni zastopniki.
• Vsi nadomestni deli, ki jih zamenja Dyson, pripadajo Dysonu.
• Garancijsko obdobje se ne bo podaljšalo zaradi popravila ali zamenjave naprave
v garanciji.
• Garancija nudi dodatne ugodnosti, ki ne vplivajo na pravice, ki jih imate po zakonu
kot potrošnik.
Informacije o zaščiti pomembnih podatkov
Pri registraciji izdelka D yson:
• Za registracijo in garancijo vašega izdelka potrebujemo vaše osnovne
kontaktne podatke.
• Ob registraciji lahko izberete, ali želite prejemati naša obvestila. Če se boste odločili
za prejemanje obvestil družbe Dyson, boste prejemali podrobnosti o posebnih
ponudbah in novice o naših najnovejših inovacijah.
• Vaših podatkov ne bomo posredovali tretjim osebam. Uporabili bomo le tiste
informacije, ki nam jih boste zaupali, kot je to določeno v pravilniku o zasebnosti
na naši spletni strani privacy.dyson.com
84

DŮLEŽITÁ BEZPEČNOSTNÍ
UPOZORNĚNÍ
PŘED POUŽITÍM TOHOTO SPOTŘEBIČE SI
PŘEČTĚTE VEŠKERÉ POKYNY A UPOZORNĚNÍ
V TÉTO PŘÍRUČCE A NA SPOTŘEBIČI
Při použití elektrického spotřebiče dodržujte základní
bezpečnostní opatření včetně následujících:
VAROVÁNÍ
Tato upozornění platí pro spotřebič a také pro
všechny nástroje, příslušenství, nabíječku a síťový
adaptér, jsou-li k dispozici.
K OMEZENÍ NEBEZPEČÍ VZNIKU POŽÁRU, ÚRAZU
ELEKTRICKÝM PROUDEM NEBO ZRANĚNÍ:
1. Tento spotřebič společnosti Dyson mohou
používat děti od věku 8 let a osoby se sníženými
fyzickými, smyslovými a rozumovými
schopnostmi nebo nedostatkem znalostí
a zkušeností pouze v případě, že jsou pod
dozorem nebo jim odpovědná osoba
poskytla příslušné pokyny a informace týkající
se bezpečného používání spotřebiče a možných
rizik s ním spojených. Čištění a uživatelská
údržba spotřebiče nesmí být prováděna dětmi
bez dozoru.
2. Nedovolte, aby si děti s tímto spotřebičem hrály.
Pokud budou spotřebič používat malé děti nebo
osoba vjejich blízkosti, je třeba dbát maximální
opatrnosti. Malé děti by měly být pod dohledem,
aby bylo zajištěno, že si nebudou s tímto
spotřebičem hrát.
3. Spotřebič používejte pouze způsobem, který
je popsán vtomto návodu. Neprovádějte
žádnou údržbu, která není popsána
vtomto návodu kpoužití nebo vám nebyla
doporučena prostřednictvím zákaznické linky
společnosti Dyson.
4. Vhodné POUZE pro suché prostory. Nepoužívejte
venku ani na mokrých místech.
5. Nemanipulujte s žádnou částí nabíječky nebo
spotřebiče mokrýma rukama.
6. Nepoužívejte spotřebič s poškozenou nabíječkou
nebo poškozeným kabelem.
7. Pokud spotřebič nefunguje správně, pokud utrpěl
prudký úder, upadl na zem, byl poškozen, zůstal
venku nebo spadl do vody, nepoužívejte ho a
volejte zákaznickou linku společnosti Dyson.
8. Vyžaduje-li spotřebič servisní zásah nebo opravu,
obraťte se na zákaznickou linku společnosti
Dyson. Spotřebič sami nerozebírejte, protože
nesprávná následná montáž může způsobit úraz
elektrickým proudem nebo požár.
9. Napájecí kabel nenatahujte ani jej nevystavujte
nadměrnému namáhání. Chraňte kabel
před kontaktem s horkými plochami. Kabel
nepřivírejte do dveří ani jej neveďte kolem ostrých
hran nebo rohů. Napájecí kabel nepokládejte
na místa, kudy se chodí, ani tam, kde by se
na něj šlapalo nebo se musel překračovat. Přes
kabel nepřejíždějte.
10. Nepoužívejte vysavač kvysávání vody.
11. Nepoužívejte k vysávání hořlavých kapalin, jako
je benzín, ani spotřebič nepoužívejte v místech,
kde mohou být tyto kapaliny nebo jejich
výpary přítomny.
12. Nevysávejte nic, co hoří nebo z čeho
se kouří, jako například cigarety, zápalky nebo
horký popel.
13. Dbejte na to, aby vlasy, volné oblečení, prsty
a další části těla byly v dostatečné vzdálenosti
od otvorů apohyblivých částí, jako je kartáč.
Hadici, sací trubici ani nástavce nepřibližujte
k očím ani uším a nedávejte si je do úst.
14. Do otvorů nevkládejte žádné předměty.
Spotřebič nepoužívejte, pokud jsou některé
otvory ucpané; odstraňujte prach, chuchvalce,
vlasy a cokoli jiného, co by mohlo omezovat
průchod vzduchu.
15. Používejte pouze příslušenství a náhradní díly
doporučené společností Dyson.
16. Spotřebič použijte pouze tehdy, pokud obsahuje
průhlednou nádobu na prach a má správně
umístěné filtry.
17. Nebudete-li nabíječku používat delší dobu,
odpojte ji ze zásuvky.
18. Při vysávání schodů dbejte zvýšené opatrnosti.
19. Dokud nehodláte začít s vysáváním, mějte
ruce a prsty zejména při zvedání a přenášení
spotřebiče v dostatečné vzdálenosti
od spouštěcího tlačítka, aby nedošlo
k nechtěnému zapnutí. Přenášení spotřebiče
s prstem na spouštěcím tlačítku může vést
k úrazu.
20. Neinstalujte, nenabíjejte ani nepoužívejte tento
spotřebič venku, vkoupelně nebo do vzdálenosti
3 metrů od bazénu. Nepoužívejte jej na mokrých
površích a nevystavujte jej vlhkosti, dešti
ani sněhu.
21. Při demontáži nebo výměně motorového
rotačního kartáče dejte pozor, abyste nestiskli
spouštěcí tlačítko, dokud není podlahová hubice
vysavače opět smontována.
85

22. Nepoužívejte akumulátor nebo spotřebič, který
je poškozen nebo modifikován. Poškozené nebo
modifikované akumulátorové baterie mohou
vykazovat nepředvídatelné chování, které může
mít za následek požár, explozi nebo nebezpečí
zranění. Nevystavujte akumulátor nebo spotřebič
působení ohně nebo nadměrné teploty. Působení
ohně nebo teploty vyšší než 60 °C (140 °F) může
způsobit explozi.
23. K nabíjení tohoto spotřebiče používejte
pouze nabíječku Dyson číslo 21716 0 nebo
270576. Pro tento spotřebič používejte pouze
akumulátorovou baterii Dyson číslo 355983. Jiné
typy baterií mohou explodovat a způsobit škody
a zranění osob.
24. Před čištěním, údržbou nebo uložením spotřebiče
na delší dobu odpojte akumulátor.
25. Pokud se akumulátor nepoužívá, neskladujte
jej společně sjinými kovovými předměty, jako
jsou například spony na papír, mince, klíče,
hřebíky, šrouby ajiné malé kovové předměty,
které by mohly spojit kontakty akumulátoru. Zkrat
kontaktů akumulátoru může způsobit popálení
nebo požár.
26. Akumulátor je nutno vyjmout ze spotřebiče
abezpečně zlikvidovat vsouladu smístními
nařízeními nebo předpisy.
27. Akumulátor je uzavřená jednotka a za
normálních okolností nepředstavuje žádné
bezpečnostní riziko. V nepravděpodobném
případě úniku kapaliny z akumulátoru
se kapaliny nedotýkejte, protože může způsobit
podráždění nebo poleptání, a dodržujte
následující bezpečností pokyny:
• Při styku s pokožkou – může způsobit
podráždění. Omyjte mýdlem a vodou.
• Vdechnutí – Může způsobit podráždění
dýchacích cest. Dýchejte čerstvý vzduch
a vyhledejte lékařskou pomoc.
• Při zasažení očí – může způsobit podráždění.
Okamžitě vyplachujte oči důkladně vodou
po dobu minimálně 15 minut. Vyhledejte
lékařskou pomoc.
• Likvidace – Při manipulaci s akumulátorem
používejte rukavice a okamžitě jej zlikvidujte dle
místních předpisů a nařízení.
28. Dodržujte veškeré pokyny týkající se nabíjení
a nenabíjejte akumulátor ani spotřebič mimo
rozsah okolních teplot uvedených vtěchto
pokynech. Nesprávně nabíjení nebo nabíjení
při teplotách mimo stanovený rozsah může
poškodit akumulátor a zvýšit riziko vzniku požáru.
Pro zajištění maximální životnosti akumulátoru
Dyson doporučuje:
• Není-li spotřebič používán, měl by být uskladněn
při pokojové teplotě. Doporučený rozsah: 18 °C
(64 °F) až 28 °C (82 °F).
• Rozsah okolních teplot pro provoz a nabíjení
by měl být 10 °C (50 °F) až 30 °C (86 °F).
29. VAROVÁNÍ PŘED NEBEZPEČÍM POŽÁRU – Tento
spotřebič nepokládejte na vařič ani jiný horký
povrch či do jeho blízkosti nevhazujte jej do ohně,
ani když je silně poškozený. Akumulátor by se
mohl vznítit nebo explodovat.
30. VAROVÁNÍ PŘED NEBEZPEČÍM POŽÁRU
– Nepoužívejte na filtr(y) tohoto spotřebiče
žádný vonný nebo parfémovaný produkt.
O chemikáliích v takových produktech
je známo, že jsou hořlavé a mohou způsobit
vznícení spotřebiče.
TYTO POKYNY SI PŘEČTĚTE
A USCHOVEJTE
Tento typ spotřebiče je určen pouze k použití
v domácnosti.
Nepoužívejte v blízkosti
otevřeného ohně.
86
Neskl adujte blízko
zdrojů tepla.
Nevy sávejte vodu ani
jiné kapaliny.
Nevy sávejte
hořící předměty.
Pokud je sp otřebič v
provozu, nedávejte ruce do
blízkos ti kartáče.
Nepok ládejte na vařič ani
do jeho blízkosti.

Doplňující informace
Předtím, než budete pokračovat, přečtěte si "Důležité bezpečnostní pokyny" v tomto návodu
kobsluze spotřebiče Dyson.
Instalace úchytu na stěnu
• Vybalte úchyt na stěnu, nabíječku a leták s pokyny k instalaci.
• Vyber te místo pro úchy t a přesvědč te se, že přímo za místem montáže není žádné
potrubí (plyn, voda nebo vzduch), elektrické kabely, dráty nebo kabelové vedení.
• Neumis ťujte dokovací stanici poblíž zdrojů tepla, jako např. vařiče, radiátoru nebo
přímého slunečního zářiče.
• Postupujte podle pokynů na letáku kinstalaci.
• Zaklapněte nástavce na příslušné místo.
• Umístěte spotřebič do úchytu na stěnu.
• Zapojte nabíječku do elektrické zásuvky. Zapněte ji (je-li třeba), aby
se akumulátor nabíjel.
• Před pr vním použitím bude nutné spotřebič plně nabít.
Úchyt na stěnu musí bý t namontován vsouladu snařízeními a platnými předpisy nebo
normami (státními nebo místními).
Společnost Dyson doporučuje, abyste při instalaci úchytu na stěnu používali ochranný oděv,
brýle a materiály.
Vysávání
• Zkontrolujte, zda je spodní strana podlahové hubice nebo nástavce čistá a bez cizích
předmětů, které by mohly způsobit poškození.
• Než začnete v ysávat podlahu, rohože nebo koberce, přečtěte si doporučení pro čištění,
které uvádí výrobce podlahové kry tiny.
• Kartáč spotřebiče může poškodit některé druhy koberců a podlah. Některé koberce
se mohou při vysávání spoužitím rotujícího kartáče třepit. Jestliže se to stane,
doporučujeme vysávat bez hubice smotorovým rotačním kar táčem a konzultovat
to svýrobcem koberce.
Vysypání nádoby na prach
• Nádobu na prach v yprázdněte, jakmile ne čistoty dosáhnou úrovně MAX – nádobu
nepřeplňujte. Používání spotřebiče, když jsou nečistoty nad úrovní MA X, může způsobit,
že se nečistoty dostanou do filtru, a bude nutná častější údr žba.
• Dávejte pozor, abyste při vyprazdňování nádoby na prach nestlačili spouštěcí tlačítko.
• Sací trubici odmontujete tak, že stisknete červené tlačítko pro uvolnění a trubici
vytáhnete znádoby.
• Vysypání nečistot:
– Držte spotřebič nádobou na prach dolů.
– Silně stiskněte červené tlačítko pro uvolnění nádoby na prach.
– Nádoba se bude posouvat dolů a současně očistí kryt.
– Pak se otevře dno nádoby.
– Dno nádoby na prach se neotevře, pokud není červené tlačítko zcela stlačeno dolů.
Pro minimalizaci kontaktu s prachem a alergeny při vysypávání nasaďte na průhlednou
nádobu na prach prachotěsný sáček, dobře jej utěsněte a teprve poté v ysypte nečistot y.
Potom průhlednou nádobu na prach ze sáčku opatrně v yjměte.
Sáček utěsněte av yhoďte.
Dávejte pozor, abyste při vyprazdňování nádoby na prach nestlačili spouštěcí tlačítko.
• Zavření průhledné nádoby na prach:
– Tlačte dno nádoby směrem nahoru, dokud průhledná nádoba na prach adno nádoby
nezaklapnou na místo.
Čištění průhledné nádoby na prach
Pokud je nutní vyčistit průhlednou nádobu na prach, postupujte podle pokynů v části
Vysypávání nádoby na prach.
• Stisknutím červeného tlačítka vedle vodící lišty nádoby na prach uvolněte nádobu
a stáhněte ji zvodící liš ty.
• Průhlednou nádobu na prach čistěte pouze vlhkým hadříkem.
• Před nasazením se přesvědčte, že průhledná nádoba na prach a těsnění jsou
zcela suché.
• Nasazení průhledné nádoby na prach:
– Nasuňte vodící lištu nádoby na prach do drážky.
– Průhlednou nádobu na prach zavřete tak, že zatlačíte její dno nahoru, dokud průhledná
nádoba na prach a dno nádoby nezaklapnou.
Průhledná nádoba na prach se nesmí umývat vmyčce na nádobí a nedoporučuje se při
jejím čiš tění používat mycí prostředk y, leštidla a osvěžovače vzduchu, protože by mohlo dojít
kpoškození spotřebiče.
Hledání ucpaných míst
• Tento spotřebič je v ybaven automatickou pojistkou. Pokud se nějaká část spotřebiče
zablokuje, může se spotřebič automaticky vypnout.
• Pokud dojde kucpání, motor bude pulzovat aLCD displej bude indikovat ucpání.
• Příčinu ucpání začněte hledat až poté, co necháte spotřebič vychladnout.
• Dejte pozor, abyste při hledání ucpaného místa nestiskli spouštěcí tlačítko. Spuštění
spotřebiče ve stavu, kdy je částečně rozebrán, by mohlo způsobit zranění osob.
• Před opětovným použitím spotřebiče se ujistěte, že všechny překážky byly odstraněny,
a že jsou všechny díly opět namontovány.
• Při hledání ucpaných míst dávejte pozor, abyste se neporanili oostré předměty.
• Na odstraňování blokujících předmětů se záruka nevztahuje.
• Chcete-li zkontrolovat, zda hlavní tělo spotřebiče není ucpané, vyjměte průhlednou
nádobku na prach podle pokynů včásti „Čištění průhledné nádoby na prach“
apřekážky odstraňte.
• Pokud se vám nepodaří odstranit překážku zpodlahové hubice, bude nutné vyjmout
kartáč. Pomocí mince uvolněte pojistku, vysuňte kar táč zpodlahové hubice aodstraňte
překážku. Kartáč znovu nasaďte a upevněte jej dotažením pojistky. Před spuštěním
spotřebiče se ujistěte, že je pojistka pevně dotažená.
• Tento spotřebič používá rotační kartáče s uhlíkovými vlákny. Při kontaktu s kůží mohou
způsobit menší podráždění. Po manipulaci s rotačními kartáči si omyjte ruce.
Mytí filtrační jednotky
Abyste zajistili co nejlepší funkčnost spotřebiče, je důležité pravidelně čistit filtry akontrolovat,
zda nedošlo kucpání.
LCD displej vás upozorní, když bude třeba filtrační jednotku omýt. Doporučujeme omývat filtr
nejméně jednou měsíčně, nebo když vás váš spotřebič upozorní.
• Chcete-li vyjmout filtrační jednotku, otočte ji proti směru hodinov ých ručiček. Opatrně
ji vysuňte ze spotřebiče.
• Než začnete filtrační jednotku mýt, jemně na ni
prach a nečistoty.
• Myjte filtrační jednotku pouze ve studené vodě: nepoužívejte čisticí prostředky a nemyjte
ji v myčce na nádobí nebo pračce.
• Nejpr ve umyjte část filtrační jednotky se skládaným papírem; drž te filtrační jednotku
pod kohoutkem se studenou vodou s látkovou částí směrem dolů a pusťte studenou
vodu na skládaný pa pír.
• Potom umyjte látkovou část filtrační jednotky; držte filtrační jednotku pod kohoutkem
se studenou vodou s látkovou část směrem dolů, aby špinavá voda neznečistila část
se skládaným papírem. Pusťte studenou vodu na vnitřní a vnější stranu látkové části
a látku jemně mačkejte, abyste vypudili nečistoty.
• Opakujte mytí obou částí filtru dokud nepoteče čistá voda.
• Jemně s filtrační jednotkou zatřepte, abyste odstranili přeby tečnou vodu, a nechte vodu
vytéct s látkovou částí směřující nahoru.
• Nechte filtrační jednotku kompletně vyschnout v suchém prostředí s dobrým prouděním
vzduchu nejméně po dobu 24 hodin.
• Zkontrolujte filtrační jednotku, zda je zcela suchá.
• Při vkládání zpět zasuňte filtrační jednotku do hlavního těla spotřebiče a otáčejte s ní
ve směru hodinových ručiček, dokud nezaklapne.
Jestliže vysáváte jemný prach nebo převážně používáte maximální sací výkon,
pravděpodobně bude zapotřebí filtrační jednotku umývat častěji.
Žádnou část spotřebiče nevkládejte do myčky na nádobí, pračk y, sušičk y, trouby nebo
mikrovlnné trouby ani nenechávejte v blízkosti otevřeného ohně.
Nabíjení a skladování
• Je-li teplota akumulátorové baterie niž ší než 10 °C (50 °F), spotřebič se vypne. Chrání
se tím motor a akumulátor. Nenabíjejte a poté neskladujte spotřebič v prostorách
s teplotou nižší než 10 °C (50 °F).
• Chcete-li prodloužit životnost baterie, nenabíjejte ji ihned po úplném vybití, ale nechte
ji nejpr ve několik minut vychladnout.
• Při používání spotřebiče dbejte na to, aby baterie nebyla ničím kr yta, bude se lépe
chladit, což prodlouží její životnos t a udrží vyšší kapacitu.
Bezpečnostní pok yny k baterii
• Jestliže baterie potřebuje vyměnit, kontaktuje zákaznickou linku společnosti Dyson.
• Pro nabíjení tohoto spotřebiče Dyson používejte pouze nabíječku Dyson, číslo 217160
nebo 2705 76.
• Pro napájení tohoto spotřebiče Dyson používejte pouze akumulátorovou baterii Dyson
číslo 355983. Jiný typ baterií může explodovat, což může vést k požáru a způsobit
zranění osob či jiné ško dy.
POZOR
Akumulátorové baterie použité v tomto spotřebiči mohou při nevhodném zacházení
představovat nebezpečí požáru nebo popálení chemikáliemi. Nerozebírejte, nezkratujte,
nevhazujte do ohně a nedovolte zahřátí nad 60 °C. Uchovávejte mimo dosah dětí.
Nerozebírejte a nevhazujte do ohně.
Informace k likvidaci
• Spotřebiče společnosti Dyson jsou vyrobeny z velmi dobře recyklovatelných materiálů.
Po skončení životnosti spotřebič zlik vidujte odpovědně, a pokud je to možné, nechte
jej recyklovat.
• Před likvidací elektrospotřebiče zněj vyjměte baterii.
• Baterii zlikvidujte nebo recyklujte v souladu s místními předpisy či nařízeními.
• Opotřebovanou filtrační jednotku zlikvidujte vsouladu splatnými místními předpisy
anormami.
• Toto označení znamená, že by tento elektrospotřebič neměl být v zemích EU likvidován
s běžným domovním odpadem. Aby nedocházelo k možnému poškození
životního prostředí nebo zdraví lidí nekontrolovanou likvidací odpadů, odpovědně
elektrospotřebiče recyklujte a podpořte tak udr žitelné opakované využívání
surovinových zdrojů. K vrácení použitého elektrospotřebiče využijte systémy vrácení
a sběru nebo se spojte s prodejcem, u kterého jste elektrospotřebič zakoupili. Tato místa
mohou elektrospotřebič odebrat k ekologicky bezpečné recyklaci.
• Baterie se musí vyjmout a recyklovat odděleně.
Zákaznická linka společnosti Dyson
Děkujeme, že jste se rozhodli zakoupit spotřebič Dyson.
Společnost Dyson posky tuje na tento spotřebič dvouletou záruční dobu. Pokud máte nějaké
dotazy týkající se spotřebiče Dyson, navštiv te stránky www.dyson.cz /suppor t sonline
nápovědou, všeobecnými tipy a užitečnými informacemi o společnosti Dyson.
Můžete také kontaktovat zákaznickou linku společnosti Dyson a sdělit sériové číslo spotřebiče
a informace o místě a datu zakoupení.
Pokud bude spotřebič Dyson vyžadovat opravu, kontaktujte zákaznickou linku společnosti
Dyson, abychom vás mohli informovat o dostupných možnostech. Pokud je váš spotřebič
Dyson vzáruce a oprava je kryta zárukou, bude oprava zcela bezplatná.
Limitovaná dvouletá záruka
Terms and conditions of the Dyson 2-year limited guarantee are set out below. The name and
address details of the Dyson guarantor for your country are set out elsewhere in this document
– please refer to the table setting out these details.
Na co se vztahuje záruka
• Oprava nebo výměna spotřebiče Dyson (podle uvážení společnosti D yson),
bude-li shledán vadným vdůsledku vady materiálu, provedení nebo funkce do 2 let
od data nákupu nebo dodání (nebude-li některý díl kdispozici nebo se již nebude
vyrábět, společnost Dyson jej v ymění za funkční náhradní díl).
• Byl-li tento spotřebič prodán v zemi mimo EU, tato záruka bude platná pouze v případě,
že spotřebič bude používán v zemi, kde byl zakoupen.
• Where this machine is sold within the EU, this guarantee will only be valid (i) if the
machine is used in the country in which it was sold or (ii) if the machine is used in Austria,
Belgium, Denmark, Finland, France, Germany, Ireland, Italy, Netherlands, Norway,
Poland, Spain, Sweden, Switzerland or the United Kingdom and the same model as this
machine is sold at the same voltage rating in the relevant country.
poklepejte, aby se odstranil přebytečný
87

Na co se záruka nevztahuje
Společnost Dyson neposky tuje záruku na opravu nebo výměnu spotřebiče, pokud k závadě
došlo vdůsledku:
• Náhodného poškození, závad způsobených nedbalým používáním či péčí, nesprávným
či neopatrným použitím nebo manipulací se spotřebičem, která není vsouladu
snávodem kpoužití spotřebiče Dyson.
• Použití spotřebiče pro jiné účely než pro běžné použití vdomácnosti.
• Použití součás tí nesmontovaných nebo nenainstalovaných vsouladu spokyny
společnosti Dyson.
• Použití jiných než originálních součástí apříslušenství společnosti Dyson.
• Nesprávné montáže (svýjimkou montáže pracovníkem společnosti Dyson).
• Oprav či úprav neprovedených společností Dyson nebo jejími autorizovanými
poskytovateli služeb.
• Ucpání (podrobné informace o hledání a odstraňování blokujících předmětů naleznete
vnávodu kpoužití spotřebiče Dyson).
• Běžného opotřebení (např. pojistky, kartáče atd.).
• Použití spotřebiče na suť, popel, omítku.
• Snížení kapacity baterie z důvodu jejího stáří nebo opotřebení (pokud přichází v úvahu).
Máte-li jakékoli pochybnosti ohledně toho, na co se vaše záruka vztahuje, kontak tujte prosím
zákaznickou linku společnosti Dyson.
Záruční podmínky
• Záruka nabývá platnos ti vden nákupu (nebo v den dodání, pokud k němu došlo
pozdě ji).
• Před započetím záruční opravy je nutno předložit originály záručního listu a prodejního
dokladu. Bez předložení těchto dokladů bude oprava úč tována jako mimozáruční. Proto
si prodejní doklad a záruční list pečlivě uschovejte.
• Všechny práce smí provádět pouze společnos t Dyson nebo její autorizovaní
poskytovatelé služeb.
• Veškeré vyměněné součásti v rámci záruční opravy se stávají majetkem
společnosti Dyson.
• Oprava nebo výměna vašeho spotřebiče Dyson prodlužuje platnost záruky o dobu,
po kterou byl spotřebič v záruční opravě.
• Záruka posky tuje výhody, které jdou nad rámec vašich zákonných spotřebitelských práv
a nijak je neomezují.
Důležité informace o ochraně údajů
Při registraci spotřebiče D yson:
• Bude třeba, abyste nám posky tli základní kontaktní údaje, abychom mohli registrovat
váš spotřebič apodporovat tím jeho záruku.
• Po registraci budete mít možnost si vybrat, zda od nás chcete dostávat různá sdělení.
Pokud se přihlásíte kodběru sdělení od společnosti Dyson, budeme vám zasílat
podrobnosti ospeciálních nabídkách azprávy onašich novinkách.
• Údaje, které nám sdělíte, nikdy neprodáme třetím stranám abudeme je používat pouze
vsouladu snašimi zásadami ochrany osobních údajů, které jsou kdispozici na našem
webu privacy.dyson.com
88
VIGTIGE
SIKKERHEDSANVISNINGER
FØR DETTE APPARAT TAGES I BRUG, SKAL DU
LÆSE ALLE ANVISNINGER OG ADVARSLER I
DENNE VEJLEDNING OG PÅ APPARATET
MAN SKAL ALTID TRÆFFE VISSE
SIKKERHEDSFORANSTALTNINGER VED BRUG AF
ET ELEKTRISK APPARAT, HERUNDER FØLGENDE
ADVARSEL
Disse advarsler gælder for selve apparatet og, hvor
det er relevant, alle redskaber, tilbehør, opladere
eller netadaptere.
FOR AT MINDSKE RISIKOEN FOR BRAND,
ELEKTRISK STØD ELLER PERSONSKADE:
1. Dette Dyson-apparat bør kun benyttes af børn
fra 8 år og personer med nedsatte fysiske eller
mentale funktioner eller manglende erfaring
eller viden, hvis en ansvarlig person overvåger
eller instruerer dem i sikker brug af apparatet
og i de farer, der er knyttet til brugen. Rengøring
og brugervedligehold bør ikke udføres af børn
uden opsyn.
2. Apparatet må ikke bruges som legetøj. Der skal
udvises særlig opmærksomhed, når det benyttes
af eller i nærheden af børn. Børn skal overvåges
for at sikre, at de ikke leger med apparatet.
3. Må kun bruges som beskrevet i Dyson-
brugervejledningen. Der må ikke udføres nogen
anden form for vedligeholdelse end den, der
er beskrevet i denne brugervejledning eller
er anvist af Dyson Helpline.
4. KUN egnet til tørre områder. Brug ikke udendørs
eller på våde overflader.
5. Ingen dele af opladeren eller apparatet
må berøres med våde hænder.
6. Må ikke bruges med en beskadiget oplader
eller ledning.
7. Hvis apparatet, ikke fungerer som det skal, hvis
det har fået et hårdt slag, hvis det er blevet tabt,
beskadiget, efterladt udendørs eller tabt i vand,
må det ikke bruges. Kontakt Dyson kundeservice.
8. Kontakt Dyson Helpline, hvis en service eller
reparation er nødvendig. Apparatet må ikke
skilles ad, da forkert samling kan medføre
elektrisk stød eller brand.
9. Ledningen må ikke strækkes eller belastes.
Hold ledningen væk fra varme overflader.
Ledningen må ikke klemmes i en dør eller
trækkes rundt om skarpe kanter eller hjørner.
Anbring ledningen væk fra trafikerede områder,
på et sted hvor den ikke trædes på eller udgør
en snublefare. Kør ikke over ledningen.
10. Må ikke anvendes til at opsamle vand.
11. Brug ikke apparatet til at opsamle letantændelige
eller brandbare væsker, såsom benzin, og brug
den ikke i områder, hvor sådanne væsker eller
deres dampe kan forekomme.
12. Brug ikke apparatet til at opsamle genstande,
som brænder eller ryger, såsom cigaretter,
tændstikker, gløder eller aske.
13. Hold hår, løst tøj, fingre og andre dele
af kroppen væk fra åbninger og bevægelige
dele, som f.eks børstehovedet. Du må aldrig rette
slange, rør og redskaber mod dine øjne eller ører
eller tage dem i munden.
14. Indsæt ikke noget i åbningerne. Brug ikke
apparatet med blokerede åbninger. Skal holdes
fri for støv, fnuller, hår og alt andet, der kan
formindske luftstrømmen.
15. Anvend kun tilbehør og reservedele, der
er anbefalet af Dyson.
16. Brug ikke apparatet, medmindre den
gennemsigtige beholder og filtrene
er korrekt monteret.
17. Frakobl opladeren når den ikke bruges
i længere tid.
18. Vær særligt forsigtig ved rengøring af trapper.
19. For at forhindre at apparatet starter utilsigtet,
skal du være omhyggelig med at holde hænder
og fingre væk fra tænd/sluk-knappen, indtil
du er klar til at støvsuge, især når du løfter eller
bærer apparatet. Hvis du bærer apparatet
med fingeren på tænd/sluk-knappen, øger det
risikoen for uheld.
20. Apparatet må ikke anvendes udendørs, i et
badeværelse eller på en afstand af 3 meter fra
et svømmebassin.
21. Når du fjerner eller udskifter et motoriseret
børstehoved, skal du være forsigtig med ikke
at trykke på start-knappen (ON), før mundstykket
er blevet genmonteret.
22. Brug ikke en batteripakke eller et apparat, der
er beskadiget eller ændret. Beskadigede eller
ændrede batterier kan udvise uforudsigelig
adfærd, der kan medføre brand, eksplosion
eller risiko for skader. Udsæt ikke batteripakken
eller apparatet for ild eller høje temperaturer.
Eksponering for ild eller temperaturer over 60°C
(140°F) kan medføre eksplosion.
23. Brug kun Dyson-batteriet med delnummer
217160 eller 270576 til dette apparat. Brug kun
Dyson-batteriet med delnummer 355983 til
89

opladning af dette apparat. Andre typer batterier
kan eksplodere og derved forårsage
personskade og/eller materielle skader.
24. Frakobl batteripakken fra apparatet inden
rengøring, vedligeholdelse eller opbevaring
af apparatet i længere tid.
25. Når batteripakken ikke er i brug, skal den
holdes væk fra andre metalgenstande, såsom
papirclips, mønter, nøgler, søm, skruer eller
andre små metalgenstande, som kan forbinde
batteriklemmerne. Forbindelse mellem
batteriklemmerne kan forårsage forbrændinger
eller brand.
26. Batteripakker skal fjernes fra apparatet
og bortskaffes sikkert i overensstemmelse med
lokale forskrifter eller bestemmelser.
27. Batteriet er forseglet og giver under normale
omstændigheder ingen anledning til
sikkerhedsforbehold. Skulle der imidlertid lække
væske fra batteriet, må det ikke berøres, da dette
kan medføre irritation eller forbrændinger, og der
skal træffes følgende sikkerhedsforanstaltninger:
• Hudkontakt – kan forårsage irritationer. Vask
med sæbevand.
• Indånding – kan forårsage irritationer
af luftvejene.
• Øjenkontakt – kan forårsage irritationer. Skyl
straks øjnene grundigt med vand i mindst
15minutter. Søg lægehjælp.
• Bortskaffelse – brug handsker til at håndtere
batteriet, og bortskaf det med det samme
i overensstemmelse med lokale bestemmelser
eller forordninger.
28. Følg alle opladningsanvisninger, og se afsnittet
"Opladning af batteriet" for oplysninger
om, hvordan du udskifter batteriet. Undlad
at oplade batteripakken eller apparatet uden
for det temperaturområder, der er angivet
i vejledningen. Ukorrekt opladning eller ved
en temperatur, der ligger uden for det angivne
område, kan beskadige batteriet og øge risikoen
for brand. For at sikre optimal batterilevetid,
anbefaler Dyson følgende:
• Når apparatet ikke er i brug, skal det
opbevares ved rumtemperatur. Anbefalet
temperaturområde: 18°C (64°F) til 28°C
(82°F).
• Omgivelsestemperaturområdet for drift
og opladning skal være mellem 10°C (50°F)
og 30°C (86°F).
29. BRANDFARE – Dette produkt må ikke anbringes
på eller i nærheden af et komfur eller en anden
varm overflade, og apparatet må ikke brændes,
selvom det er meget beskadiget. Der kan gå ild
i batteriet, eller det kan eksplodere.
30. BRANDFARE – Undlad at sprøjte parfume eller
duftprodukter på apparatets filter/filtre. Sådanne
produkter indeholder brandfarlige elementer,
som kan medføre, at apparatet bryder i brand.
LÆS OG GEM DENNE
VEJLEDNING
Dette Dyson-apparat er kun beregnet
til husholdningsbrug.
Beny t ikke i nærhede n af
åben ild.
90
Opbeva r ikke i nærheden af
en varmekilde.
Anvend ikke appa ratet til
opsamling af vand eller
anden væske.
Anvend ikke appa ratet til
opsamling af nog en form
for brændende objekter.
Anbring ikke hænderne i
nærheden af børstehovedet,
når appa ratet er i brug.
Må ikke anbringes på elle r i
nærhe den af et ko mfur.
Yderligere oplysninger
Læs ‘Vigtige sikkerhedsanvisninger’ i denne Dyson-vejledning, før du fortsætter.
Installation af dockingstation
• Pak dockingstationen, opladeren og installationsvejledningen ud.
• Vælg en placering til dockingstationen, og sørg f or, at der er ikke ledningsnet (gas, vand
eller luft), elektriske kabler, ledninger eller et kanalsystem direkte bag monteringsstedet.
• Du må ikke placere dockingstationen i nærheden af en varmekilde, såsom et komfur,
en radiator eller i direkte sollys.
• Følg anvisningerne i installationsvejledningen.
• Klik udstyret på plads.
• Placér apparatet i dockingstationen.
• Sæt opladeren i stikkontakten. Tænd (hvis nødvendigt) for at oplade batteriet.
• Dit apparat skal være fuldt opladet inden første brug.
Dockingstationen skal monteres i overensstemmelse med regler og gældende standarder/
love.
Dyson anbefaler brugen af beskyttelsesbeklædning, -briller og -materialer ved installation
af dockingstationen.
Brug af apparatet
• Kontrollér, at undersiden af støvsugerhovedet eller -redskabet er ren og fri for
fremmedlegemer, der kan forårsage skader.
• Før gulve, måtter og tæpper støvsuges, skal producentens anbefalede
rengøringsanvisninger efterfølges.
• Støvsugerens børstehoved kan beskadige visse tæpper og gulve. Nogle tæpper vil
fnulre, hvis du bruger det roterende børstehoved, når du støvsuger. Hvis det er tilfældet,
anbefaler vi, at du støvsuger uden det roterende mundstykke, og at du beder
fabrikanten af gulvtæppet om vejledning.
Tømning af den gennemsigtige beholder
• Tøm beholderen, så snart snavset når niveauet for MA X-markeringen –
må ikke overfyldes.
• Undlad at trykke på tænd/sluk-knappen, hvis den gennemsigtige beholder er åben.
• Afmonter røret ved at tr ykke på den røde rørudløserknap og trække det væk
fra beholderen.
• Frigørelse af snavs:
– Hold apparatet med beholderen i en nedadgående position.
– Tryk på den røde beholderudløserknap.
– Beholderen skydes ned, og kappen renses i takt hermed, og bundstykket åbnes.
– Bundstykket åbnes kun, hvis den røde knap er tr ykket i bund.
For at minimere kontakt med støv/allergener i forbindelse med tømning, skal den
gennemsigtige beholder dækkes omhyggeligt med en støvtæt pose.
Fjern forsigtigt den klare beholder fra posen.
Luk posen tæt, og bortskaf den på normal vis.
Undlad at trykke på tænd/sluk-knappen, hvis den gennemsigtige beholder er åben.
• For at lukke beholderen;
– Skal du skubbe basen opad, indtil basen og beholderen klikkes sammen.
Rengøring af den gennemsigtige beholder (valgfri)
Tøm beholderen i henhold til anvisningerne i afsnittet "Tømning af den gennemsigtige
beholder", hvis det er nødvendigt at rengøre den gennemsigtige beholder.
• Try k på den røde knap på beholderen for at frigøre beholderen, og skub beholderen
af skinnen.
• Den gennemsigtige beholder må kun rengøres med en fugtig klud.
• Sørg for, at den gennemsigtige beholder og pakningerne er helt tørre, inden den
monteres igen.
• Genmontering af den gennemsigtige beholder:
– Indsæt ryggen på beholderens løber.
Luk den gennemsigtige beholder ved at skubbe bundstykket opad, indtil den gennemsigtige
beholder og dens bundst ykke klikker på plads.
Den gennemsigtige beholder tåler ikke rengøring ved maskinopvask og brug
af rengøringsmidler, polermidler eller luftfriskere. Dette anbefales ikke, da det kan
beskadige apparatet.
Søg efter blokeringer
• Dette apparat er udstyret med en automatisk afbryder. Hvis en af apparatets dele bliver
blokeret, afbrydes det automatisk.
• Motoren slår til og fra, og LCD-skærmen angiver, at der er en blokering.
• Lad den k øle ned, før du søger efter blokeringer.
• Vær omhyggelig med ikke at tr ykke på tænd/sluk-knappen, når du foretager
blokeringseftersyn. Anvendelse af apparatet mens det er delvist adskilt, kan
medføre personskade.
• Fjern eventuelle blokeringer før genstart.
• Pas på skarpe gens tande ved søgning efter blokeringer.
• Fjernelse af blokeringer er ikke dækket af garantien.
• For at kontrollere, om der er blokeringer i apparatets hoveddel, skal du fjerne den
gennemsigtige beholder ved at følge anvisningerne i afsnittet "Tø mning af den
gennemsigtige beholder" og fjerne eventuel blokering.
• Hvis en tilstopning ikke kan fjernes fra støvsugerhovedet, skal børstehovedet
evt. afmonteres. Brug en mønt til at åbne fæsteskruen, før børstehovedet ud af
støvsugerhovedet, og fjern tilstopningen. Sæt børstehovedet på igen, og fastgør
det ved at stramme fæsteskruen godt. Sørg for, at den sidder fast, inden du bruger
din apparatet.
• Dette produk t har kulfiberbørster. Vær forsigtig, hvis du kommer i kontakt med dem,
da de kan forårsage mindre hudirritation. Vask hænder efter håndtering af børsterne.
Vask af filterenheden
Vask filterenheden mindst én gang om måneden, eller når f ilterets
vedligeholdelsesindikator lys er.
Kontroller og vask filterenheden regelmæssigt i henhold
at opretholde ydeevnen.
• Fjern filterenheden ved at dreje den mod uret. Træk den forsigtigt væk fra apparatet.
til vejledningen for
• Bank forsigtigt på filterenheden for at fjerne overskydende støv og snavs, inden
du vasker den.
• Vask kun filterenheden i koldt vand: brug ikke rengøringsmidler, og vask ikke
i opvaskemaskine eller vaskemaskine.
• Vask først det foldede papirelement på filterenheden. Hold filterenheden under
koldt vand fra hanen med skumelementet nedad, og lad koldt vand rinde over det
foldede p apir.
• Vask derefter skumelementet på filterenheden. Hold filterenheden under koldt vand
fra hanen med skumelementet nedad, så det beskidte vand ikke tilsmudser det foldede
papirelement. Lad koldt vand rinde på indersiden og ydersiden af skumelementet,
og tryk forsigtigt på skummet for at fjerne snavset.
• Fortsæt med at vaske, indtil vandet bliver klart.
• Vask ydersiden af filterenheden. Fyld derefter enheden op med koldt vand, og placer
hænderne over de åbne ender og ryst forsigtigt.
• Gentag vask af elementerne og ydersiden af filterenheden, indtil vandet er klart.
• Ryst f ilterenheden forsigtigt for at fjerne overskydende vand, og lad den tørre med
skumelementet opad.
• Lad filterenheden tørre fuldstændig i et tørt miljø med god luf tgennemstrømning
i minimum 24 timer.
• Kontroller, at filterenheden er helt tør.
• Når filterenheden skal sættes på igen, skal den sættes tilbage i hoveddelen, og derefter
skal du dreje med uret, indtil den klikker på plads.
Filterenheden kan kræve mere hyppig vask ved støvsugning af fint støv, eller hvis den primær t
bruges i Boost-tilstand.
Ingen dele fra apparatet må anbringes i en opvaskemaskine, vaskemaskine, tørretumbler,
ovn, mikroovn eller i nærheden af åben ild.
Opladning og opbevaring
• Apparatet slukkes (OFF), hvis batteritemperaturen er under 10°C (50°F). Dette sker
for at beskytte motoren og batteriet. Oplad ikke apparatet for derefter at stille det til
opbevaring på et sted, hvor temperaturen er under 10°C (50°F).
• Du kan forlænge batteriets levetid ved at undlade at genoplade det lige efter en fuld
afladning. Lad det køle af i et par m inutter.
• Undgå at anvende apparatet med batteriet klos op ad en flade. Det vil gøre det mindre
varmt under brug og forlænge batteritiden og dets levetid.
Batterisikkerhed
• Hvis batteriet skal udskif tes, skal du kontakte Dyson Helpline.
• Brug kun Dyson-opladeren med delnummer 217160 eller 270576 til opladning
af apparatet.
• Brug kun Dyson-bat teriet med delnummer 355983 til opladning af dette Dysonapparat. Andre t yper batterier kan eksplodere og derved forårsage personskade og/
eller materielle skader.
FORSIGTIG
Det batteri, der anvendes i det te apparat, kan ved forkert brug udgøre en brandfare eller
fare for ætsning. Må ikke kor tsluttes, opvarmes over 60 °C eller afbrændes. Opbevares
utilgængeligt for børn. Undlad at skille batteriet ad eller sætte ild til det.
Oplysninger om bortskaffelse
• Dysons produk ter er fremstillet af genanvendelige materialer af en høj kvalitet.
Genbrug dem, hvor det er muligt.
• Fjern batteriet, før apparatet bortskaffes.
• Bortskaf eller genbrug batteriet i henhold til de lokale miljøbestemmelser
eller forskrifter.
• Bortskaf den brugte filterenhed i overensstemmelse med lokale bestemmelser
eller regler.
• Denne mærkat angiver, at inden for EU bør dette apparat ikke bortskaffes sammen
med andet husholdningsaffald. For at forhindre mulig skade på miljøet eller
sundhedsfarer ved ukontrolleret affaldshåndtering skal det afleveres til genbrug med
henblik på bæredygtig genbrug af materialerne. Du kan aflevere dit brugte apparat via
genbrugssystemet eller ved at kontakte den forhandler, hvor apparatet er købt. De kan
håndtere dette apparat med henblik på miljømæssigt korrekt genbrug.
Dyson kundeservice
Når du har registreret din 2års garanti, vil Dyson-apparatet være dækket med hensyn til
reservedele og service i 2år efter købsdatoen i henhold til garantivilkårene. Hvis du har
spørgsmål vedrørende dit Dyson-apparat, kan du gå ind på: www.dyson.dk/suppor t for at få
online hjælp, generelle råd og nyttige oplysninger om Dyson.
Du kan også ringe til Dyson Helpline. Oplys i den forbindelse apparatets serienummer samt
detaljer om, hvor og hvornår du k øbte apparatet.
Hvis dit Dyson-apparat trænger til reparation, kan du ringe til Dysons Helpline, så vi
kan rådgive om de forskellige muligheder. Hvis dit Dyson-apparat er under garanti,
og reparationen er dækket heraf, vil reparationen være gratis.
Du bedes registrere dig som ejer af et Dyson-apparat
Garantien for dette apparat er 2 år fra købsdatoen. Du bedes registrere din garanti inden
30 dage fra købsdatoen. Du kan hjælpe os med at sikre, at du får hurtig og effektiv service,
ved at registrere dig straks efter købet. Gem kvitteringen, der viser købsdatoen.
Det kan du gøre på tre måder:
• Ring til Dyson Helpline på 80705843.
• Udfyld den vedlagte formular, og send den til os.
Ved at lade dig registrere online eller telefonisk kan du:
• Beskyt te din investering med to års garanti på reservedele og håndværk.
• Modtage nyttige tips til, hvordan du bruger apparatet.
• Få ekspertrådgivning fra Dyson Helpline.
• Høre om vores seneste opfindelser som den første.
• Det tager kun få sekunder at tilmelde sig online, og det eneste, du skal bruge,
er dit serienummer.
2 års begrænset garanti
Terms and conditions of the Dyson 2-year limited guarantee are set out below. The name and
address details of the Dyson guarantor for your country are set out elsewhere in this document
– please refer to the table setting out these details.
Hvad er dækket?
• Reparation eller udskiftning af dit Dyson-apparat (efter Dysons skøn), hvis dit apparat
er defekt på grund af materialefejl, fabrikationsfejl eller fejlfunktion inden for 2år fra
købsdatoen (hvis en reservedel ikke længere produceres, udskifter Dyson den med
en tilsvarende del).
91

• Hvor det te apparat sælges uden for EU, vil denne garanti kun gælde, hvis apparatet
anvendes i det land, hvor det er solgt.
• Where this machine is sold within the EU, this guarantee will only be valid (i) if the
machine is used in the country in which it was sold or (ii) if the machine is used in Austria,
Belgium, Denmark, Finland, France, Germany, Ireland, Italy, Netherlands, Norway,
Poland, Spain, Sweden, Switzerland or the United Kingdom and the same model as this
machine is sold at the same voltage rating in the relevant country.
Hvad er ikke dækket?
Dyson garanterer ikke reparation eller udskif tning af et produkt på grund af:
• Hændelige skader, fejl opstået som følge af fejlagtig brug eller vedligeholdelse,
misbrug og forsømmelse eller skødesløs betjening eller håndtering af enheden, der ikke
er i overensstemmelse med Dysons brugervejledning.
• Brug af apparatet til andet end normale husholdningsformål.
• Brug af dele, der ikke er samlet eller installeret i henhold til Dysons instruktioner.
• Brug af dele og tilbehør, som ikke er originale Dyson-komponenter.
• Fejlagtig montering (undtagen, hvis Dyson har foretaget monteringen).
• Reparationer eller ændringer, der er udført af andre end Dyson eller dets
autoriserede agenter.
• Blokering –se Dysons brugervejledning for nærmere oplysninger om, hvordan man
undersøger for og fjerner blokeringer.
• Normal slitage (f.eks. sikring, børstestang osv.).
• Brug af dette apparat til grus, aske og puds.
• Reduktion i batteriets afladningstid som følge af batteriets alder eller brug (hvor det
er relevant).
Kontakt Dyson Helpline, hvis du er i tvivl om, hvad garantien dækker.
Opsummering af dækningen
• Garantien træder i kraft fra og med købsdatoen (eller leveringsdatoen, hvis denne
ligger senere).
• Du skal fremvise leverings-/købsdokumentation (både original og efterfølgende),
før der kan udføres nogen former for arbejde på dit apparat. Uden dette bevis vil det
udfør te arbejde blive faktureret. Opbevar omhyggeligt kvitteringen eller følgesedlen.
• Alt arbejde udføres af Dyson eller dets autoriserede agenter.
• Ejerskabet af alle udskiftede dele overgår til Dyson.
• Reparation eller udskiftning af dit Dyson-apparat under garantien forlænger
ikke garantiperioden.
• Garantien berører ikke dine ufravigelige forbrugerrettigheder.
Vigtige oplysninger vedr. databeskyttelse
Når du registrerer dit Dyson-apparat:
• Du skal give os grundlæggende kontaktoplysninger for at kunne registrere dit apparat
og give os mulighed for at understøtte din garanti.
• Når du registrerer dig, vil du få mulighed for at vælge, om du vil modtage
kommunikation fra os. Hvis du vælger at modtage kommunikation fra Dyson, vil
vi sende dig oplysninger om særlige tilbud og produktnyheder.
• Vi vil aldrig videresælge dine oplysninger til tredjeparter, og vi anvender udelukkende
de oplysninger, du deler med os, som det er defineret i vores fortrolighedspolitik, som
kan findes på vores hjemmeside: privacy.dyson.com
92

TÄRKEITÄ TURVAOHJEITA
ENNEN TUOTTEEN KÄYTTÖÄ LUE KAIKKI
OHJEET JA VAROITUSMERKINNÄT, JOTKA
ON MAINITTU TÄSSÄ KÄYTTÖOHJEESSA TAI
MERKITTY LAITTEESEEN
Käytettäessä sähkölaitteita seuraavat turvaohjeet
tulee aina ottaa huomioon:
VAROITUS
Nämä varoitukset koskevat laitetta sekä mahdollisia
työkaluja, lisätarvikkeita, latureita ja verkkovirtaadaptereita.
TULIPALON, SÄHKÖISKUN JA
VAMMOJEN VÄLTTÄMISEKSI:
1. Tätä Dysonin laitetta saavat käyttää 8-vuotiaat
ja sitä vanhemmat lapset sekä henkilöt, joilla
on heikentyneet fyysiset, aistilliset tai henkiset
kyvyt tai kokemuksen ja tiedon puutetta, vain
jos he ovat saaneet vastuussa olevalta henkilöltä
opastusta ja ohjeita laitteen turvallisesta
käytöstä ja ymmärtävät laitteen käyttöön liittyvät
riskit. Lapset eivät saa suorittaa puhdistusta
ja käyttäjän ylläpitotoimia ilman valvontaa.
2. Laitetta ei saa käyttää leluna. Tarkkaavainen
valvonta on tarpeen lasten ollessa laitteen
läheisyydessä tai käyttäessä laitetta. Lapsia tulee
valvoa, jotteivät he leiki laitteella.
3. Laitetta tulee käyttää ainoastaan Dysonin
käyttöohjeen mukaisesti. Älä suorita mitään
sellaisia huoltotöitä, joita ei ole neuvottu tässä
käyttöohjeessa tai Dysonin asiakaspalvelussa.
4. Laitetta tulee käyttää AINOASTAAN kuivissa
paikoissa. Älä käytä laitetta ulkotiloissa tai märillä
pinnoilla.
5. Älä kosketa mitään laturin tai laitteen osaa
märillä käsillä.
6. Älä käytä viallista laturia tai kaapelia.
7. Jos laite ei toimi asianmukaisesti, jos siihen
on kohdistunut kova isku tai jos se on pudonnut,
vaurioitunut, jätetty ulkotiloihin tai pudonnut
veteen, lopeta laitteen käyttö ja ota yhteys
Dysonin asiakaspalveluun.
8. Jos laite vaatii huoltoa tai korjausta, ota yhteys
Dysonin asiakaspalveluun. Älä pura laitetta.
Väärin koottu laite voi aiheuttaa sähköiskun
tai tulipalon.
9. Virtajohtoa ei saa venyttää eikä siihen saa
kohdistua rasitusta. Pidä virtajohto poissa
kuumilta pinnoilta. Virtajohtoa ei saa jättää
oven väliin eikä sitä saa vetää teräviä reunoja tai
kulmia vasten. Sijoita virtajohto sivuun kulkuteistä
siten, ettei sen päälle astuta eikä siihen
kompastuta. Älä vedä imuria virtajohdon yli.
10. Laitteella ei saa imuroida vettä.
11. Älä imuroi syttyviä tai palonarkoja nesteitä, kuten
bensiiniä, äläkä käytä imuria paikoissa, joissa
saattaa olla tällaisia aineita tai niiden höyryjä.
12. Älä imuroi palavia tai savuavia materiaaleja,
kuten savukkeita, tulitikkuja tai kuumaa tuhkaa.
13. Pidä hiukset, vaatetus, sormet ja muut
ruumiinosat loitolla laitteen aukoista ja liikkuvista
osista, kuten harjasuulakkeesta. Letkulla, putkella
tai suulakkeella ei saa osoittaa silmiin tai korviin
eikä niitä saa laittaa suuhun.
14. Älä työnnä laitteen aukkoihin esineitä. Älä käytä
laitetta, jos jokin sen aukoista on tukkiutunut.
Pidä aukot puhtaana pölystä, nukasta, hiuksista
tms. ilmavirtaa haittaavista tukoksista.
15. Käytä vain Dysonin suosittelemia lisävarusteita
ja osia.
16. Älä käytä imuria, jos läpinäkyvä pölysäiliö tai
suodatin on pois paikoiltaan.
17. Irrota laturi, kun laitetta ei käytetä
pitkään aikaan.
18. Ole erityisen varovainen imuroidessasi portaita.
19. Estä tahaton käynnistyminen pitämällä kädet
ja sormet pois käynnistimeltä, kunnes olet
valmis aloittamaan imuroinnin, etenkin kun
nostat tai kannat laitetta. Laitteen kantaminen
siten, että sormi on käynnistimellä, voi
aiheuttaa tapaturman.
20. Älä asenna, lataa tai käytä laitetta ulkotiloissa,
kylpyhuoneessa tai alle kolmen metrin
etäisyydellä uima-altaasta. Älä käytä kosteilla
pinnoilla äläkä altista kosteudelle, sateelle
tai lumelle.
21. Kun irrotat tai vaihdat moottoroidun
harjasuulakkeen, varo vetämästä ONkäynnistintä, ennen kuin puhdistuspää
on koottu uudelleen.
22. Älä käytä vaurioitunutta tai muutettua
akkuyksikköä tai laitetta. Vaurioituneet tai
muutetut akut voivat yllättäen aiheuttaa tulipalon,
räjähdyksen tai loukkaantumisen. Älä altista
akkuyksikköä tai laitetta avotulelle tai korkeille
lämpötiloille. Avotuli tai yli 60°C:n (140°F)
lämpötila voi aiheuttaa räjähdyksen.
23. Käytä tämän laitteen lataamiseen vain Dysonlaturia, jonka osanumero on 217160 tai 270576.
Käytä tähän Dyson-laitteeseen vain Dysonakkua, jonka osanumero on 355983. Muunlaiset
93

akut voivat räjähtää ja aiheuttaa henkilöja omaisuusvahinkoja.
24. Irrota akku laitteesta ennen laitteen puhdistusta,
ylläpitoa tai varastointia pitkäksi aikaa.
25. Kun akku ei ole käytössä, pidä se loitolla muista
metalliesineistä, kuten paperiliittimistä, kolikoista,
avaimista, nauloista, ruuveista tai muista pienistä
metalliesineistä, jotka voivat yhdistää akun navat
toisiinsa. Akun napojen oikosulku voi aiheuttaa
palovammoja tai tulipalon.
26. Akut on poistettava laitteesta ja hävitettävä
turvallisesti paikallisten säädösten tai
määräysten mukaisesti.
27. Akku on suljettu yksikkö, joka ei normaaleissa
olosuhteissa aiheuta vaaraa. Jos akusta kuitenkin
jostain syystä vuotaa nestettä, nesteeseen ei saa
koskea, koska se voi aiheuttaa ihoärsytystä
tai palovammoja. Seuraavia varotoimia
on noudatettava:
• Aineen joutuminen iholle: voi aiheuttaa
ihoärsytystä. Pese saippualla ja vedellä.
• Aineen hengittäminen: voi aiheuttaa
hengitysteiden ärsytystä. Siirry raittiiseen ilmaan
ja käänny lääkärin puoleen.
• Aineen joutuminen silmiin: voi aiheuttaa
ärsytystä. Huuhtele silmiä välittömästi
vedellä vähintään 15 minuutin ajan. Käänny
lääkärin puoleen.
• Hävittäminen: käsittele akkua suojakäsineillä
ja hävitä se välittömästi paikallisten
määräysten mukaisesti.
28. Noudata kaikkia latausohjeita. Älä lataa akkua
tai laitetta ohjeiden mukaisen lämpötila-alueen
ulkopuolella. Lataaminen väärin tai määritetyn
lämpötila-alueen ulkopuolella voi vahingoittaa
akkua ja lisätä tulipalovaaraa. Pisimmän akun
käyttöiän varmistamiseksi Dyson suosittelee
seuraavia menettelyjä:
• Kun laite ei ole käytössä, se on varastoitava
huoneenlämmössä. Suositeltu alue: 18–28°C.
• Käyttö- ja latausympäristön lämpötilan on oltava
10–30°C.
29. PALOVAROITUS – Älä sijoita tuotetta hellan tai
muun kuuman pinnan päälle tai läheisyyteen
äläkä polta laitetta, vaikka se olisi pahasti
vahingoittunut. Akku voi syttyä tuleen
tai räjähtää.
30. PALOVAROITUS – Älä lisää mitään tuoksua
tai tuoksuvaa tuotetta tämän laitteen
suodattimiin. Tällaisten tuotteiden kemikaalit
ovat herkästi syttyviä ja voivat aiheuttaa laitteen
syttymisen tuleen.
LUE JA SÄILYTÄ NÄMÄ
OHJEET
Tämä laite on tarkoitettu vain kotitalouskäyttöön.
Älä käy tä
avotulen läheisyydessä.
94
Älä säil ytä lämmönlähteiden
läheisyydessä.
Älä imuroi vettä tai
muita nesteitä.
Älä imuroi palavia
esineitä.
Älä laita käsiä harjasuulakkeen
läheis yyteen laitteen olle ssa
käytö ssä.
Älä sijoita hellan päälle
tai läheisyyteen.
Lisätietoja
Lue tämän Dyson-käyttöohjeen kohta Tärkeitä turvaohjeita, ennen kuin jatkat.
Telakointiaseman asennus
• Pura telakka, laturi ja asennusvihkonen pakkauksesta.
• Valitse telakalle asennuspaikka ja varmista, ettei suoraan sen takana ole putkia (kaasu,
vesi tai ilma), sähkökaapeleita, johtoja tai kanavia.
• Älä aseta telakointiasemaa lämmön lähteen, kuten lieden, lämpöpatterin tai suoran
auringonvalon lähelle.
• Seuraa asennusvihkosen ohjeita.
• Napsauta lisäkkeet paikoilleen.
• Pane laite telakkaan.
• Kytke laturi pistorasiaan. Lataa akku (jos tarpeen) kytkemällä virta.
• Laitteen on oltava täysin ladattu ennen ensimmäistä käyttöä.
Telakan asennuksessa on noudatettava määräyksiä ja suosituksia (huomioi paikalliset lait
ja asetukset).
Dyson suosittelee käyttämään suojavaatteita, suojalaseja ja materiaaleja asennuksen/
korjauksen aikana tarpeen mukaan.
Imurointi
• Varmista, että puhdistimen pään tai työkalun alapinta on puhdas eikä siinä ole vieraita
esineitä, jotka voivat aiheuttaa vahinkoa.
• Tutustu valmistajan puhdistussuosituksiin ennen lattiapintojen ja mattojen imurointia.
• Laitteen harjasuulake saattaa vaurioittaa tietyntyyppisiä mattoja ja lattiapintoja.
Jotkin matot voivat nukkaantua, jos niitä imuroidaan pyörivällä harjasuulakkeella.
Jos näin tapahtuu, suosittelemme imuroimaan ilman moottoroitua lattiasuulaketta
ja kääntymään lattiamateriaalin valmistajan puoleen.
Pölysäiliön tyhjentäminen
• Tyhjennä säiliö heti, kun pölyä on MA X-merkkiin asti. Älä täytä säiliötä sen yli.
• Varo vetämästä käynnistintä, kun läpinäkyvä säiliö on avattuna tyhjennystä varten.
• Poista putki painamalla punaista putken irrotuspainiketta ja vetämällä
pois rikkasäiliöstä.
• Lian irrottaminen:
– Pidä laitetta siten, että sen rikkasäiliö osoittaa alas.
– Paina säiliön punaista avausnappia voimakkaasti.
– Säiliö liukuu alaspäin, jolloin kotelo samalla puhdistuu.
– Tämän jälkeen säiliön pohja aukeaa.
– Säiliön pohja ei aukea, jos punaista painiket ta ei ole painet tu pohjaan asti.
Pölyn ja allergeenien koskettamisen minimoimiseksi tyhjennyksen aikana sijoita pölysäiliö
tiukasti suljettavaan pölytiiviiseen pussiin ja tyhjennä.
Poisa läpinäkyvä pölysäiliö varovasti pussista.
Sulje pussi tiiviisti ja hävitä tavalliseen tapaan.
Varo vetämästä käynnistintä, kun läpinäkyvä säiliö on avattuna tyhjennystä varten.
• Läpinäkyvän säiliön sulkeminen:
– Paina säiliön pohjaa ylöspäin, kunnes läpinäkyvä säiliö ja säiliön pohja napsahtavat
paikoilleen.
Läpinäkyvän pölysäiliön puhdistaminen (valinnainen)
Jos läpinäky vä pölysäiliö tarvitsee puhdistaa, seuraa ohjeita kohdassa "Läpinäkyvän säiliön
tyhjentäminen".
• Vapauta rikkasäiliö painamalla säiliön ohjaimessa olevaa punaista painiket ta ja liu'uta
säiliö irti ohjaimesta.
• Puhdista läpinäkyvä pölysäiliö vain kostealla liinalla.
• Varmista, että läpinäkyvä rikkasäiliö ja tiivisteet ovat täysin kuivia ennen
niiden kiinnittämistä.
• Läpinäkyvän säiliön asentaminen takaisin:
– Aseta varsi säiliön ohjaimeen.
– Sulje läpinäkyvä rikkasäiliö painamalla säiliön pohjaa ylöspäin, kunnes läpinäkyvä
rikkasäiliö ja säiliön pohja napsahtavat paikoilleen.
Läpinäkyvää rikkasäiliötä ei pidä pestä astianpesukoneessa eikä se kestä puhdistusaineita,
kiillotusaineita tai ilmanraikastimia. Niiden käy ttö voi vahingoittaa laitetta.
Tukosten tarkastaminen
• Laitteessa on automaattinen virrankatkaisu. Jos jokin laitteen osa tukkeutuu, lait teen
virta saattaa katketa automaattisesti.
• Moottori toimii sykäyksittäin ja LCD-näy ttö kertoo, että laitteessa on tukos.
• Anna jäähtyä ennen tukosten etsintää.
• Varo vetämästä ON-käynnistintä tarkastaessasi tukoksia.
• Poista tukos ennen kuin jatkat laitteen käyttöä.
• Varo teräviä esineitä tukoksia tarkastaessasi.
• Taku u ei kata tukosten poistamista.
• Koneen päärungon tukosten tarkastus: läpinäkyvä säiliö irrotetaan sen
tyhjennysohjeiden mukaisesti ja kaikki tukokset poistetaan.
• Jos et pysty poistamaan tukosta puhdistussuulakkeesta, harjasuulake on ehkä
irrotet tava. Avaa kiinnitin kolikolla, liu’uta harjasuulake pois puhdistuspäästä ja pois ta
tukos. Vaihda harjasuulake ja kiristä kiinnike tiukasti. Varmista, että se on kiinnitetty
tiukasti ennen laitteen käyttämistä.
• Tässä tuotteessa on hiilikuituharjat. Ole varovainen, jos kosket niihin, sillä ne voivat
aiheut taa lievää ihon är tymistä. Pese kätesi harjas ten käsittelyn jälkeen.
Suodatinyksikön peseminen
Pese suodatinyksikkö vähintään kerran kuukaudessa tai aina, kun suodattimen
huoltomerkkivalo sy ttyy.
Tarkasta ja pese suodatinyksikkö ohjeiden mukaan suorituskyvyn ylläpitämiseksi.
• Irrota suodatinyksikkö kiertämällä sitä vastapäivään. Vedä se varoen irti laitteesta.
• Poista enimmät pölyt ja roskat ennen pesua naputtelemalla suodatinyksikköä kevyesti.
• Pese suodatinyksikkö kylmällä vedellä.
• Pese suodatinyksikön paperilaskoselement ti ensin. Pidä suodatinyksikköä vesihanan
alla vaahtomuovielementti alaspäin ja laske kylmää vettä paperilaskosten päälle.
• Pese seuraavaksi suodatinyksikön vaahtomuovielementti. Pidä suodatinyksikköä
vesihanan alla vaahtomuovielementti alaspäin, jotta likainen vesi ei sotke
puhdistettua paperilaskoselementtiä. Laske kylmää vettä vaahtomuovielementin sisäja ulkopinnoille ja poista lika puristelemalla vaahtomuovia varovasti.
• Jatka huuhtomista, kunnes vesi on kirkasta.
• Pese suodatinyksikön ulkopinta. Täytä sitten yksikkö k ylmällä vedellä, peitä aukot käsillä
ja ravistele varovasti.
• Pese elementtejä ja suodatinyksikön ulkopintaa, kunnes vesi on kirkasta.
• Ravista suodatinyksikköä kevyesti, jotta ylimääräinen vesi poistuu, ja jätä yksikkö
kuivumaan vaahtomuovielementti ylöspäin.
• Anna suodatinyksikön kuivua kokonaan kuivassa ympäristössä, jossa on hyvä
ilmanvaihto, vähintään 24 tunnin ajan.
• Tarkista, että suodatinyksikkö on kuivunut täysin.
• Asenna suodatinyksikkö takaisin runkoon ja käännä myötäpäivään, kunnes
se napsahtaa paikalleen.
Suodatinyksikkö saattaa tarvita pesua useammin, jos imuroidaan hienojakoista pölyä tai jos
imuria käytetään pääasiassa Boost-tilassa.
Mitään koneen osaa ei saa panna astianpesukoneeseen, pyykinpesukoneeseen,
kuivausrumpuun, uuniin, mikroaaltouuniin tai avotulen lähelle.
Lataus ja säilytys
• Laitteesta katkeaa virta, jos akun lämpötila on alle 10°C. Tämä on suunniteltu
suojaamaan moottoria ja akkua. Älä lataa laitetta ja siirrä sitä varastoon, jonka
lämpötila on alle 10°C.
• Pidentääksesi akun käyttöikää vältä lataamista heti akun t yhjentymisen jälkeen. Anna
akun jäähtyä muutaman minuutin ajan.
• Vältä lait teen käyttöä akun ollessa lattiapintaa vasten. Tämä auttaa laitetta käymään
viileämpänä ja pidentää akun latauksen kestoa ja käyttöikää.
Akun turvaohjeet
• Jos akku on vaihdettava, ota yhteys Dysonin asiakaspalveluun.
• Käytä tämän Dyson-laitteen lataamiseen vain D yson-laturia, jonka osanumero
on 21716 0 tai 270576.
• Käytä tähän Dyson-laitteeseen vain Dyson- akkua, jonka osanumero on 355983.
Muunlaiset akut voivat räjähtää ja aiheuttaa henkilö- ja omaisuusvahinkoja.
HUOMAUTUS
Tässä imurissa käytetty akku voi aiheuttaa tulipalon tai kemikaalivuodon vaaran, jos sitä
käsitellään väärin. Älä pura akkua, aiheuta oikosulkua tai käy tä yli 60 °C:n lämpötilassa. Pidä
akku pois lasten ulottuvilta. Älä heitä akkua avotuleen.
Laitteen hävittäminen
• Dysonin tuotteet valmistetaan hyvälaatuisista, kierrätettävistä materiaaleista. Kierrätä
se mahdollisuuksien mukaan.
• Akku on irrotettava laitteesta ennen laitteen hävittämistä.
• Hävitä tai kierrätä akku paikallisten määräysten mukaisella tavalla.
• Hävitä käytetty suodatinyksikkö paikallisten asetusten ja säännösten mukaisesti.
• Tämä merkintä osoittaa, että tätä tuotetta ei saa hävittää kotitalousjätteenä. Estä
mahdolliset hallitsemattomasta jätteiden hävittämisestä aiheutuvat ympäristö-
ja terveyshaitat kierrättämällä tuote vastuullisesti, mikä edistää materiaaliresurssien
kestävää uudelleenkäyttöä. Jos haluat palaut taa käytet yn laitteen, käytä palautusja keräysjärjestelmiä tai ota yhteyttä jälleenmyyjään, jolta olet ostanut tuotteen.
Viranomaiset tai jälleenmyyjäsi voivat neuvoa lähimmän kierrätyspisteen löytämisessä.
• Akku on irrotettava erillistä kierrät ystä varten.
Dysonin huoltopalvelu
Kun olet rekisteröinyt 2vuoden takuun, se kattaa Dyson-laitteen osat ja työn (paitsi
suodattimet) 2vuoden ajan ostopäivästä alkaen takuuehtojen mukaisesti. Jos sinulla
on jotakin kysyttävää Dyson-laitteestasi, löydät Dyson-laitteita koskevia ohjeita, yleisiä
neuvoja sekä hyödyllistä tietoa osoit teesta ww w.fi.dyson.com/support.
Vaihtoehtoisesti voit soittaa Dysonin asiakaspalveluun. Valmistaudu kertomaan laitteen
sarjanumero sekä ostopäivä ja -paikka.
Jos Dyson-laitteesi tarvitsee korjausta, kysy asiakaspalvelustamme saatavilla olevista
vaihtoehdoista. Jos Dyson-laitteesi takuu on voimassa ja kattaa korjauksen, korjaus
on maksuton.
Rekisteröidy Dyson-laitteen omistajaksi
Tuott eella on 2 vuoden takuu ostopäivästä alkaen. Rekisteröi takuu 30 päivän kuluessa
ostopäivämäärästä. Auta meitä tarjoamaan nopeaa ja tehokasta palvelua rekisteröitymällä
heti ostoksen tekemisen jälkeen. Säily tä ostokuitti todisteena ostopäivämäärästä.
Voit tehdä tämän kolmella tavalla:
• Osoitteessa www.fi.dyson.com
• Soittamalla Dysonin asiakaspalveluun numeroon 0800 07020.
Rekisteröitymällä verkossa tai puhelimitse saat seuraavat edut:
• Suojaat sijoitustasi kaksivuotisella osia ja työtä koskevalla takuulla.
• Saat hyödyllisiä vinkkejä koneen käytöstä.
• Saat asiantuntevia neuvoja Dysonin puhelinpalvelusta.
• Kuulet ensimmäisenä uusimmista keksinnöistämme.
• Rekisteröit yminen vie vain muutaman minuutin, ja tarvitset vain sarjanumeron.
2 vuoden takuun ehdot
Terms and conditions of the Dyson 2-year limited guarantee are set out below. The name and
address details of the Dyson guarantor for your country are set out elsewhere in this document
– please refer to the table setting out these details.
Mitä takuu kattaa
• Sellaisen Dyson-laitteen korjauksen tai vaihdon (Dysonin harkinnan mukaan),
jossa on todettu materiaalivika, valmistus- tai toimintavika 2vuoden sisällä osto- tai
toimituspäivästä (jos tarvittavaa osaa ei enää ole saatavilla, D yson vaihtaa sen
toimivaan varaosaan).
• Myytäessä tätä laitetta EU:n ulkopuolella takuu on voimassa vain, jos laitetta käy tetään
sen myyntimaassa.
• Where this machine is sold within the EU, this guarantee will only be valid (i) if the
machine is used in the country in which it was sold or (ii) if the machine is used in Austria,
Belgium, Denmark, Finland, France, Germany, Ireland, Italy, Netherlands, Norway,
Poland, Spain, Sweden, Switzerland or the United Kingdom and the same model as this
machine is sold at the same voltage rating in the relevant country.
95

Mitä takuu ei kata
Dysonin myöntämä takuu ei kata tuotteen korjausta tai vaihtoa silloin, kun vika johtuu
seuraavista syistä:
• Vahinko, huolimattomuudesta tai väärinkäytöstä aiheutunut vaurio tai Dysonin
käyttöoppaan ohjeiden vastaisesta käytöstä tai käsittelystä aiheutunut vaurio.
• Laitteen käyttö muussa kuin normaalissa kotikäytössä.
• Sellaisten osien käy tön aiheuttamat vauriot, joita ei ole koot tu tai asennet tu Dysonin
ohjeiden mukaises ti.
• Muiden kuin Dysonin alkuperäis ten osien tai lisävarusteiden käytön
aiheuttamat vauriot.
• Virheellinen asennus (ellei se ole valtuutetun huollon suorittama).
• Muun kuin Dysonin tai sen valtuut tamien edustajien suorittamat korjaukset
tai muutokset.
• Tukokset – katso käyttöohjeista ohjeet tukosten löy tämiseksi ja poistamiseksi.
• Normaali kuluminen (sulake, harjatanko ym.).
• Tämän lait teen käyttäminen kivimurskan, tuhkan tai laastin imuroimiseen.
• Akun varauksen purkausajan lyheneminen akun iästä tai käytöstä johtuen (soveltuvin
osin).
Jos et ole varma siitä, mitä takuusi kat taa, ota yhteys D ysonin asiakaspalveluun.
Takuun yhteenveto
• Takuu astuu voimaan ostopäivästä alkaen (tai toimituspäivästä, jos se on myöhempi
kuin ostopäivä).
• Ennen Dyson-laitteeseen suoritettavia huoltotoimenpiteitä tulee esittää
toimitusvahvistus/ostokuitti (alkuperäinen ja mahdolliset muut kuitit). Ilman tätä tositetta
suoritettava huoltotyö on maksullinen. Pidä kuittisi ja toimitusvahvistuksesi tallessa.
• Kaikki huoltotoimenpiteet suoritetaan Dyson-huollossa tai sen
valtuuttamassa huoltoliikkeessä.
• Kaikki vaihdetut osat siirtyvät Dysonin omistukseen.
• Dyson-lait teen takuukorjaus tai -vaihto ei pidennä takuuaikaa.
• Takuu tarjoaa lisäetuja, jotka eivät vaikuta kuluttajan laillisiin oikeuksiin.
Tärkeitä tietosuojatietoja
Dyson-tuotteen rekisteröinnin yhteydessä:
• Tarvitsemme perusyhteystietosi tuotteen rekisteröimistä ja takuun tarjoamista varten.
• Voit valita rekisteröitymisen yhteydessä, haluatko saada Dysonilta tiedot teita.
Jos sallit Dysonin lähettää tiedot teita, saat tietoja erikoistarjouksista sekä
uusimmista innovaatioista.
• Dyson ei koskaan myy tietojasi kolmansille osapuolille ja käy ttää antamiasi tietoja
ainoastaan Dysonin sivustolla olevien yksityisyydensuojakäytäntöjen mukaisesti.
(privacy.dyson.com)
96

ΣΗΜΑΝΤΙΚΕΣ ΟΔΗΓΙΕΣ
ΑΣΦΑΛΕΙΑΣ
ΠΡΙΝ ΤΗ ΧΡΗΣΗ ΑΥΤΗΣ ΤΗΣ ΣΥΣΚΕΥΗΣ, ΔΙΑΒΑΣΤΕ
ΠΡΟΣΕΚΤΙΚΑ ΟΛΕΣ ΤΙΣ ΟΔΗΓΙΕΣ ΚΑΙ ΤΙΣ
ΕΝΔΕΙΞΕΙΣ ΠΡΟΦΥΛΑΞΗΣ ΣΤΟ ΠΑΡΟΝ ΕΓΧΕΙΡΙΔΙΟ
ΚΑΙ ΤΗ ΣΥΣΚΕΥΗ
Όταν χρησιμοποιείτε μια ηλεκτρική συσκευή πρέπει
να ακολουθείτε κάποιες βασικές οδηγίες ασφαλείας:
ΠΡΟΕΙΔΟΠΟΙΗΣΗ
Οι προειδοποιήσεις που ακολουθούν αφορούν
τη συσκευή, καθώς επίσης και όλα τα εργαλεία,
τα εξαρτήματα, τους φορτιστές ή τους
μετασχηματιστές ρεύματος.
ΓΙΑ ΝΑ ΜΕΙΩΘΕΙ Ο ΚΙΝΔΥΝΟΣ ΠΥΡΚΑΓΙΑΣ,
ΗΛΕΚΤΡΟΠΛΗΞΙΑΣ Ή ΤΡΑΥΜΑΤΙΣΜΟΥ:
1. Αυτή η συσκευή Dyson μπορεί
να χρησιμοποιηθεί από παιδιά ηλικίας
8 ετών και πάνω και από άτομα με μειωμένες
φυσικές δυνατότητες και μειωμένες ικανότητες
αντίληψης ή από άτομα με έλλειψη εμπειρίας
και γνώσης, μόνον εάν επιτηρούνται ή τους
έχουν δοθεί οδηγίες από κάποιο υπεύθυνο
πρόσωπο, σχετικά με την ασφαλή χρήση της
συσκευής και την κατανόηση των κινδύνων που
ελλοχεύουν. Ο καθαρισμός και η συντήρηση δεν
θα πρέπει να πραγματοποιούνται από παιδιά,
χωρίς επιτήρηση.
2. Μ ην επιτρέπετε να χρησιμοποιείται η συσκευή
σαν παιχνίδι. Απαιτείται προσοχή όταν
η συσκευή χρησιμοποιείται από παιδιά ή κοντά
σε παιδιά. Τα παιδιά πρέπει να επιτηρούνται για
να διασφαλιστεί ότι δεν παίζουν με τη συσκευή.
3. Να χρησιμοποιείτε τη συσκευή μόνο σύμφωνα
με τις οδηγίες που αναφέρονται στο εγχειρίδιο
χρήσης της Dyson. Μην εκτελείτε καμία εργασία
συντήρησης, εκτός από αυτές που αναφέρονται
στο παρόν εγχειρίδιο ή που σας έχουν
υποδειχθεί από την γραμμή βοήθειας της Dyson.
4. Κατάλληλη για χρήση ΜΟΝΟ σε στεγνούς
χώρους. Μην χρησιμοποιείτε τη συσκευή
σε εξωτερικούς χώρους ή σε υγρές επιφάνειες.
5. Μην χειρίζεστε κανένα τμήμα του φορτιστή ή της
συσκευής με βρεγμένα χέρια.
6. Εάν ο φορτιστής ή το καλώδιο έχουν υποστεί
φθορές μην χρησιμοποιείτε τη συσκευή.
7. Εάν η συσκευή δεν λειτουργεί όπως πρέπει, εάν
έχει υποστεί δυνατό χτύπημα, πτώση, ζημιά
ή έχει αφεθεί στο ύπαιθρο ή έχει πέσει σε νερό,
μην τη χρησιμοποιήσετε και επικοινωνήστε με τη
γραμμή βοήθειας της Dyson.
8. Σε περίπτωση που απαιτούνται εργασίες
συντήρησης ή επισκευής, επικοινωνήστε
με τη γραμμή βοήθειας της Dyson. Μην
αποσυναρμολογείτε τη συσκευή, καθώς
η λανθασμένη επανασυναρμολόγηση
ενέχει κινδύνους ηλεκτροπληξίας
ή εκδήλωσης πυρκαγιάς.
9. Μ ην τεντώνετε και μην τοποθετείτε το καλώδιο
υπό πίεση. Τοποθετείτε το καλώδιο μακριά από
θερμαινόμενες επιφάνειες. Φροντίστε ώστε
το καλώδιο να μην πιέζεται από πόρτες και
να μην είναι τυλιγμένο γύρω από αιχμηρές άκρες
ή γωνίες. Τακτοποιήστε το καλώδιο μακριά από
χώρους κυκλοφορίας και σε σημείο όπου δεν
υπάρχει κίνδυνος να σκοντάψει κάποιος. Μην
περνάτε τη συσκευή πάνω από το καλώδιο.
10. Μ η χρησιμοποιείτε τη συσκευή για την
απορρόφηση νερού.
11. Μην χρησιμοποιείτε τη συσκευή για να συλλέξετε
εύφλεκτα ή καύσιμα υγρά, όπως βενζίνη, ή σε
χώρους όπου μπορεί να υπάρχουν ατμοί από
τέτοια υλικά.
12. Μην μαζεύετε με τη συσκευή θερμά αντικείμενα
ή αντικείμενα που βγάζουν καπνό, όπως
τσιγάρα, σπίρτα ή ζεστές στάχτες.
13. Κρατήστε τα μαλλιά, τα φαρδιά ρούχα,
τα δάκτυλα και όλα τα άλλα μέρη του σώματός
σας μακριά από τα ανοίγματα και τα κινούμενα
μέρη, όπως η κυλινδρική βούρτσα. Μην
στρέφετε τον εύκαμπτο και τον τηλεσκοπικό
σωλήνα ή τα εργαλεία προς τα μάτια ή τα αφτιά
σας και μην τα βάζετε στο στόμα σας.
14. Μην βάζετε αντικείμενα στα ανοίγματα της
συσκευής. Μην την χρησιμοποιείτε όταν
οποιοδήποτε άνοιγμα είναι φραγμένο.
Διατηρήστε τα ανοίγματα καθαρά από σκόνες,
χνούδια, τρίχες και ο,τιδήποτε θα μπορούσε
να μειώσει τη ροή του αέρα.
15. Χρησιμοποιείτε μόνο τα προτεινόμενα αξεσουάρ
και ανταλλακτικά της Dyson.
16. Χρησιμοποιήστε τη συσκευή μόνο όταν έχετε
τοποθετήσει τον διαφανή κάδο και τα φίλτρα.
17. Αποσυνδέετε το φορτιστή από την πρίζα,
όταν δεν χρησιμοποιείται για μεγάλα
χρονικά διαστήματα.
18. Προσέχετε ιδιαίτερα όταν καθαρίζετε σκάλες.
19. Για να αποφύγετε ακούσια εκκίνηση, κρατήστε
τα χέρια και τα δάκτυλά σας μακριά από τον
διακόπτη ενεργοποίησης, "ON", μέχρι να είστε
έτοιμοι να ξεκινήσετε το σκούπισμα, ιδιαίτερα
όταν σηκώνετε ή μεταφέρετε τη συσκευή.
Η μεταφορά της συσκευής με το δάκτυλό
σας στον διακόπτη ενεργοποίησης "ON"
προκαλεί ατυχήματα.
97

20. Μην εγκαταστήσετε, φορτίσετε
ή χρησιμοποιήσετε αυτήν τη συσκευή
σε εξωτερικούς χώρους, σε μπάνιο ή σε
απόσταση μικρότερη των 3 μέτρων από πισίνα.
Να μην χρησιμοποιείται σε υγρές επιφάνειες και
να μην εκτίθ εται σε υγρασία, βροχή ή χιόνι.
21. Κατά την αφαίρεση ή αντικατάσταση
μιας κυλινδρικής βούρτσας που κινείται
με μοτέρ, προσέξτε να μην τραβήξετε τον
διακόπτη "ON" μέχρι η κεφαλή καθαρισμού
να επανασυναρμολογηθεί.
22. Μην χρησιμοποιείτε συστοιχίες μπαταριών
ή συσκευή που έχουν φθαρεί ή τροποποιηθεί.
Οι φθαρμένες ή τροποποιημένες μπαταρίες
μπορεί να εμφανίσουν απροσδόκητη
συμπεριφορά που οδηγεί σε πυρκαγιά,
έκρηξης ή κίνδυνο τραυματισμού. Μην εκθέτετε
τη συστοιχία μπαταριών ή τη συσκευή σε φλόγα
ή υπερβολικές θερμοκρασίες. Η έκθεση
σε φλόγα ή σε θερμοκρασίες άνω των 60°C
(140°F) μπορεί να προκαλέσουν έκρηξη.
23. Χρησιμοποιήστε μόνο τον φορτιστή
Dyson με κωδικό εξαρτήματος
217160 ή 270576 για τη φόρτιση αυτής
της συσκευής. Χρησιμοποιήστε μόνο την
μπαταρία Dyson με κωδικό εξαρτήματος
355983 για τη φόρτιση αυτής της συσκευής
Dyson. Οι μπαταρίες άλλου τύπου ενδέχεται
να εκραγούν, προκαλώντας φωτιά, σωματικές
βλάβες στους παρευρισκόμενους, καθώς και
υλικές ζημίες.
24. Αποσυνδέστε την μπαταρία από τη συσκευή
πριν από τον καθαρισμό και τη συντήρηση
ή την αποθήκευση για μεγάλο χρονικό διάστημα
της συσκευής.
25. Όταν η μπαταρία δεν χρησιμοποιείται, φυλάξτε
την μακριά από άλλα μεταλλικά αντικείμενα,
όπως συνδετήρες, νομίσματα, κλειδιά, καρφιά,
βίδες ή άλλα μικρά μεταλλικά αντικείμενα,
τα οποία μπορούν να πραγματοποιήσουν
μια σύνδεση από τον έναν πόλο στον άλλο.
Το βραχυκύκλωμα των πόλων της μπαταρίας
μπορεί να προκαλέσει εγκαύματα ή πυρκαγιά.
26. Οι μπαταρίες πρέπει να αφαιρούνται από την
συσκευή και να απορρίπτονται με ασφάλεια
σύμφωνα με τις τοπικές διατάξεις ή κανονισμούς.
27. Η μπαταρία είναι σφραγισμένη και υπό
φυσιολογικές συνθήκες δεν εγκυμονεί
κινδύνους. Στην απίθανη περίπτωση
που παρατηρήσετε διαρροή υγρών από
τη μπαταρία, μην αγγίξετε το υγρό καθώς
μπορεί να προκαλέσει ερεθισμό ή εγκαύματα και
ακολουθήστε τις παρακάτω οδηγίες ασφαλείας:
• Επαφή με το δέρμα – ενδέχεται να προκαλέσει
ερεθισμούς. Πλύνετε με νερό και σαπούνι.
• Εισπνοή – ενδέχεται να προκαλέσει ερεθισμούς
στο αναπνευστικό. Μεταφερθείτε σε χώρο
με καθαρό αέρα και απευθυνθείτε σε ιατρό.
• Επαφή με τα μάτια – ενδέχεται να προκαλέσει
ερεθισμούς. Ξεπλύνετε τα μάτια σας επιμελώς
με άφθονο νερό για τουλάχιστον 15 λεπτά.
Απευθυνθείτε σε ιατρό.
• Απόρριψη μπαταρίας – φορέστε γάντια για τον
χειρισμό της μπαταρίας και ακολουθήστε τους
τοπικούς κανονισμούς ή τις ισχύουσες τοπικές
διατάξεις γ ια την απόρριψή τους.
28. Ακολουθείτε όλες τις οδηγίες φόρτισης και
μη φορτίζετε τη συστοιχία μπαταριών ή τη
συσκευή εκτός του εύρους θερμοκρασιών
που ορίζεται στις οδηγίες. Σε περίπτωση
εσφαλμένης φόρτισης ή φόρτισης υπό
θερμοκρασία εκτός του καθορισμένου εύρους,
ενδέχεται να προκληθεί ζημιά στην μπαταρία
και αυξάνεται ο κίνδυνος πυρκαγιάς. Για
τη διασφάλιση της μέγιστης διάρκειας ζωής των
μπαταριών, η Dyson συνιστά τα εξής:
• Όταν δεν χρησιμοποιείται, η συσκευή πρέπει
να αποθηκεύεται σε θερμοκρασία δωματίου.
Συνιστώμενο εύρος θερμοκρασιών: 18°C (64°F)
έως 28°C (82°F).
• Το εύρος θερμοκρασιών περιβάλλοντος για
τη λειτουργία και την αποθήκευση είναι από
10°C (50°F) έως 30°C (86°F).
29. ΠΡΟΕΙΔΟΠΟΙΗΣΗ ΠΥΡΚΑΓΙΑΣ – Μην
τοποθετείτε το προϊόν επάνω ή κοντά σε εστίες
μαγειρέματος ή οποιαδήποτε άλλη θερμή
επιφάνεια και μην καίτε τη συσκευή, ακόμη και
εάν έχει υποστεί σοβαρή ζημιά. Η μπαταρία
ενδέχεται να αναφλεγεί ή να εκραγεί.
30. ΠΡΟΕΙΔΟΠΟΙΗΣΗ ΠΥΡΚΑΓΙΑΣ – Μην
χρησιμοποιείτε οποιοδήποτε άρωμα
ή αρωματισμένο προϊόν στο(στα) φίλτρο(-α)
αυτής της συσκευής. Τα χημικά που περιέχουν
τα εν λόγω προϊό ντα είναι γνωστό ότι είναι
εύφλεκτα και μπορεί να προκαλέσουν ανάφλεξη
της συσκευής.
ΔΙΑΒΑΣΤΕ ΚΑΙ ΦΥΛΑΞΤΕ
ΑΥΤΕΣ ΤΙΣ ΟΔΗΓΙΕΣ
Αυτή η συσκευή Dyson προορίζεται μόνο για
οικιακή χρήση.
Μη χρησιμοποιείτε
τη συσκευή κον τά σε
ακάλυπτες φλόγες.
98
Μην αποθηκεύετε τη
συσκευή κοντ ά σε
πηγές θερμότητας.
Μην συλλέγετε νερ ό ή υγρά. Μην απορροφάτε
φλεγόμενα αντικείμε να.
Μην το ποθετεί τε τα χέρια
σας κοντά σ την κυλινδρική
βούρτσα ενώ η συσκευή
βρίσκετα ι σε λειτουργία.
Μην το ποθετεί τε τη
συσκευή ε πάνω ή κον τά σε
εστίες μαγειρέματος.

Πρόσθετες πληροφορίες
Πριν προχωρήσετε, διαβάστε τις «Σημαντικές οδηγίες για τ ην ασφάλεια» στο παρόν
Εγχειρίδιο λειτουργίας της Dyson.
Eγκατάσ ταση της επιτοίχιας βάσ ης
• Αποσυσκευάστε τη βάση, τον φορτιστ ή και ανοίξτε το φυλλάδιο εγκατάστασης.
• Επιλέξτε τ η θέση της επιτοίχιας εγκατάστασης και βεβαιωθείτε ότι δε ν υπάρχουν
σωληνώσεις (αερίου, νερού ή αέρος), καλώδια ρεύματος και γενικά καλωδιώσεις
ή κανάλια ακριβώς πίσω από τη θέση τοποθέτησης.
• Μην τοποθετείτε τον σταθμό σύνδεσης κον τά σε πηγή θερμότητας, όπως η ηλεκτρική
κουζίνα, το κα λοριφέρ ή το άμεσο ηλιακό φως.
• Ακολουθήσ τε τις οδηγίες που αναγράφονται στο φυλλάδιο εγκατάστασης.
• Κουμπώσ τε τα προσαρτήματα στη θέση τους.
• Τοποθετήστε τη συσκευή στην επιτοίχια βάση.
• Συνδέστε τον φορτιστή στην πρίζα παροχής ρεύματος. Ενεργοποιήστε (εάν είναι
απαραίτητο) για να φορτίσετε τη μπαταρία.
• Πριν από την πρώτη χρήση, η συσκευή θα πρέ πει να φορτιστεί πλήρως.
Η επιτοίχια βάση πρέπει να στερεωθεί σύμφωνα με τους κανονισμούς και τους ισχύοντες
κώδικες και πρότυπα (ενδέχεται να ισχύει επίσης κρατική και τοπική νομοθεσία).
Η Dyson συνιστά τη χρήση προστατευτικού ρουχισμού, γυαλιών και υλικών ασφαλείας, κατά
την ε γκατάσταση τ ης επιτοίχιας βάσης.
Χρήσ η της ηλεκτρικής σκούπας
• Βεβαιωθείτε ότι η κάτω πλευρά της κεφαλής καθαρισμού ή του εξαρτήματος είναι
καθαρή και απαλλαγμέν η από ξένα σώματα που μπορεί να προκαλέσουν βλάβη.
• Πριν τη χρήση της συσκευής σε δάπεδα, χαλιά και μοκέτες, διαβάστε τις προτεινόμενες
οδηγίες καθαρισμού του κατασκευαστ ή.
• Η χρήσ η της κυλινδρικής βούρτσας σ τη συσκευή ενδέχεται να προκαλέσει ζημιές
σε ορισμένους τύπους χαλιών ή δαπέδων. Ορισμέ να είδη χαλιών ενδέχεται να βγάλουν
χνούδι κατά τη χρήσ η της περιστρεφόμενης κυλινδρικής βούρτσας. Αν συμβεί αυτό,
συνιστάται ο καθαρισμός χωρίς το περιστρεφόμενο εργα λείο δαπέδων και η παροχή
συμβουλής από τον κα τασκευαστή του δαπέδ ου.
Άδειασμα του διαφανούς κάδου
• Αδειάζετε τον κάδο μόλις η σκόνη φτάσει στ ην ένδειξη ΜΑΧ - μη γεμίζετε υπερβολικά.
Όταν χρησιμοποιείτε το μηχάνημα ενώ η σκόνη είναι πάνω από την ένδειξη M AX,
αυτό μπορεί να έχει ως αποτέλεσμα η σκόνη να φτάσει στο φίλτρο και να απαιτείται πιο
συχνή συντ ήρηση.
• Απαιτείται προσοχή ώστε να μην τραβήξετε τη σκανδάλη λειτουργίας όταν ο διαφανής
κάδος είναι ανοικτός για άδειασμα.
• Αφαιρέσ τε τη ράβδο πιέζοντας το κόκκινο κουμπί απελευθέρωσης ράβδου και
τραβώντας την από τον κάδο.
• Για να απελευθερώσετε τη σκόνη:
– Κρατήσ τε τη συσκευή με τον κάδο σε θέση προς τα κάτω.
– Πιέστε σταθερά το κόκκινο κουμπί απελευθέρωσης του κάδου.
– Ο κάδος θα ολισθήσει προς τα κάτω, καθαρίζοντας το κάλυμμα κατά τ η διαδρομή του.
Στη συνέχεια, θα ανοίξει η βάση του κάδ ου.
– Η βάση του κάδου δε ν θα ανοίξει, εάν δεν πα τήσετε πλήρως το κόκκινο κουμπί.
Όταν αδειάζετε τον κάδο, για να ελαχιστοποιήσετε την επαφή με σκόνη και αλ λεργιογόνα,
καλύψτε σφιχτά τον διαφα νή κάδο με μια σακούλα και αδειάστε τον. Αφαιρέστε προσεκτικά
τον διαφανή κάδο από τη σακούλα. Σφραγίστε καλά τη σακούλα και απορρίψτε την.
Απαιτείται προσοχή ώστε να μην τραβήξετε τη σκανδάλη λειτουργίας όταν ο διαφανής κάδος
είναι ανοικτός για άδειασμα.
• Για να κλείσετε τον διαφανή κάδο:
– Ωθήστε τη βάσ η του κάδου προς τα επάνω μέχρι ο διαφανής κάδο ς και η βάση του
κάδου να ασφαλίσουν στη θέση τους.
Καθαρισμός του διαφανούς κάδου
Εάν είναι απαραίτητο να καθαρίσετε τον διαφανή κάδο, αδειάστε τον ακολουθώντας τις
οδηγίες της ενότητας "Άδειασμα του διαφανούς κάδου".
• Πατήστε το κόκκινο κουμπί που βρίσκεται στο αυλάκι οδήγησης του κάδου και βγάλτε
συρταρωτά τον κάδο από το αυλάκι οδήγ ησης.
• Καθαρίστε τον διαφανή κάδο μόνο με ένα βρεγμένο πανί.
• Βεβαιωθείτε ότι ο διαφανής κάδος και τα παρεμβύσματα είναι απόλυτα σ τεγνά πριν
από την αντικατάσταση.
• Για να επανατοποθετήσετε τον διαφανή κάδο:
– Περάστε τη ράχη επάνω στο αυλάκι οδήγησης του συλλέκτη.
– Κλείστε τον διαφαν ή κάδο πιέζοντας τη βάσ η του κάδου προς τα επάνω μέχρι ο
διαφανής κάδος και η βάση του κάδου να ασφαλίσουν σ τη θέση τους.
Ο διαφανής κάδος δεν μπορεί να πλυθεί σε πλυντήριο πιάτων και δεν συνιστάται η χ ρήση
απορρυπαντικών, γυαλιστικών ή αποσμητικών περιβάλλοντος για τον καθαρισμό του
διαφανούς κάδου, διότι μπορεί να προκληθεί ζημιά στη συσκευή σας.
Έλε γχος για εμφράξεις
• Η συσκευή αυτή είναι εξοπλισμέ νη με ένα σύστ ημα αυτόματης διακοπής λειτουργίας.
Σε περίπτωση που κάποιο αντικείμενο φράξει οποιοδήποτε εξάρτημα, ενδέχεται
να διακοπεί αυτόματα η λειτουργία της συσκευής.
• Το μο τέρ θα λειτουργ ήσει παλμικά και η οθόνη LCD θα δείξει ότι υπάρχει φράξιμο.
• Αφήσ τε το να κρυώσει πριν ελέγξετε για τυχόν φρ άξιμο.
• Προσέξτε να μην τραβήξετε τη σκανδάλη λειτουργίας ενώ εξετάζετε για έμφραξη.
• Βεβαιωθείτε ότι έχετε αφαιρέσ ει ό,τι φράζ ει τα εξαρτήματα της συσκευής και ότι έχετε
επανατοποθετ ήσει όλα τα εξαρτήματα πριν τη θέσετε ξανά σε λειτουργία.
• Κατά τον έλεγχο για εμφράξεις προσέξτε εάν υπάρχουν αιχμηρά αντικείμενα.
• Η εγγύηση της συσκευής δεν καλύπτει τον έλεγχο για εμφράξεις.
• Για να ελέγξετε για φράξιμο στο κύριο σώμα τ ης συσκευής, βγάλτε το διαφανές δοχείο
ακολουθώντας τις οδηγίες στην ενότητα «Άδειασμα του διαφανούς δοχείου» και
απομακρύνετε τυχόν αντικείμενα που προκαλούν φράξιμο.
• Αν δεν μπορείτε να εξαλείψετε το φράξιμο από την κεφαλή καθαρισμού, ίσως
χρειαστεί να αφαιρέσετε τον κύλινδρο με βούρτσα. Χρησιμοποιήστε ένα κέρμα για
να απασφαλίσετε την ασφάλεια συγκράτησης, σύρε τε τον κύλινδρο με βούρτσα έξω
από την κεφαλή καθαρισμού και αφαιρέστε το αντικείμενο που προκαλεί το φρ άξιμο.
Επανατοποθετήστε τον κύλινδρο με βούρτσα και σφίξτε καλά την ασφάλεια
συγκράτησης. Βεβαιωθείτε ότι έχει στερεωθεί σταθερά πριν χρησιμοποιήσετε
τη συσκευή.
• Το πρ οϊόν αυτό έχει βούρτσες από ανθρακονήματα. Προσέξτε εάν έρθετε σε επαφή
με αυτές. Μπορεί να προκαλέσουν ελαφρύ ερεθισμό στο δέρμα. Πλ ένετε τα χέρια σας
μετά την επαφή.
Πλύσιμο της μονάδας φίλτρου
Για να έχετε πάν τα την καλύτερη απόδοση από τη σ υσκευή σας, είναι σημαντικό
να καθαρίζετε τακτικά τα φίλτρα και να ε λέγχετε για φράξιμο.
Η οθόνη LCD θα σας
να πλένετε το φί λτρο τουλάχισ τον μια φορά το μήνα ή όταν σας ειδοποιεί η συσκευή.
• Αφαιρέσ τε τη μονάδα φίλτρου συστρέφοντας αριστερόστροφα. Τρ αβήξτε απαλά και
αφαιρέσ τε τη από τ η συσκευή.
• Κτυπήστε απαλά τη μονάδα φίλτρου για να αφαιρέσετε τυχόν περίσσεια σκόνης και
ρύπων πριν τ ην πλύνετε.
• Πλύνετ ε το φίλτρο με κρύο νερό μόνο.
• Πλύνετ ε πρώτα το χάρτινο στοιχείο φίλτρου με πτυχώσεις. Κρ ατήστε το φίλτρο κάτω
από κρύο τρεχούμενο νερό βρύσης με το αφρώδες σ τοιχείο προς τα κάτω και αφήστε
το κρύο νερό να ρεύσει επάνω από το χάρτινο στοιχείο με π τυχώσεις.
• Ακολούθως, πλύνετε το αφρώδες στοιχείο του φίλτρου. Κρατήστε τη μονάδα
φίλτρου κάτω από κρύο νερό βρύσης με το αφρώδες στοιχείο προς τα κάτω, ώστε
το νερό πλύσης να μην λερώσ ει το χάρτινο στοιχείο με πτυχώσεις. Αφήστε το κρύο
νερό να ρεύσει στο εσωτερικό και εξωτερικό του αφρώδους στοιχείου και σφίξτε τον
αφρώδες σ τοιχείο απαλά για να απορρίψετε τους ρύπους.
• Επαναλάβετε το πλύσιμο και των δύο σ τοιχείων τ ης μονάδας φίλτρου μέχρι να τρέξει
καθαρό νερό.
• Ανακινήστε απαλά τη μονάδα φίλτρου για να αφαιρέσετε τυχόν περίσσ εια νερού και
αφήσ τε να στεγνώσει με το αφρώδες στοιχείο στραμμένο προς τα επά νω.
• Αφήσ τε τη μονάδα φίλτρου να στεγ νώ σει τελείως σε στεγνό χώρο με κα λή κυκλοφορία
αέρα για τουλάχιστον 24 ώρες.
• Βεβαιωθείτε ότι η μονάδα φί λτρου έχει στεγ νώσει τελείως.
• Για να την επανατοποθετήσετε, επανατοποθετήστε τη μονάδα φί λτρου στο κυρίως
σώμα και περιστρέψτε δεξιόσ τροφα μέχρι να κουμπώσει με κλικ στη θέση της.
Η μονάδα φίλτρου ενδέχεται να απαιτεί συχνότερο καθαρισμό, εάν χρησιμοποιείτε
τη συσκευή για την απορρόφηση ψιλής σκόνης ή εάν χρησιμοποιείται κυρίως στη λειτουργία
Ενισχυμένης ισχύο ς.
Μην τοποθετήσετε κανένα μέρος της συσκευής σας σε πλυντήριο πιάτων, π λυντ ήριο,
στεγνωτήριο, φούρνο, φούρνο μικροκυμάτων ή κοντά σε γυμνή φλόγα.
Φόρτιση και αποθήκευση
• Αυτή η συσκευή απενεργοποιείται όταν η θερμοκρασία της μπαταρίας είναι κάτω
από 10°C (50°F). Αυτή η λειτουργία έχει προβλεφθεί για την προστασία του μοτέρ
και της μπαταρίας. Μην φορτίζε τε τη συσκευ ή και έπειτα τ η μεταφέρετε σε χώρο
με θερμοκρασία μικρότερη από 10°C (50°F) για να την αποθηκεύσετε.
• Για να επιμηκύνετε τη διάρκεια ζωής της μπαταρίας, αποφύγετ ε να την φορτίσετε
αμέσως μετά την πλήρη εκφόρτιση. Αφήσ τε την να κρυώσει για λίγα λεπτά.
• Αποφύγετε τη χρήση της συσκευής, όταν η μπαταρία ακουμπά σε άλλη επιφάνεια.
Με αυτόν τον τρόπο αποτρέπεται η υπερθέρμανσ η της μπαταρίας και επιμηκύνεται
ο χρόνος λειτουργίας, αλ λά και η διάρκεια ζωής της.
Οδηγίες ασφάλειας της μπαταρίας
• Εάν πρέπει να αντικαταστήσετε τη μπαταρία, επικοινωνήστε με τη Γραμμή υποστήριξ ης
της Dyson.
• Χρησιμοποιήστε μόνο τοv φορτιστή Dyson με κωδικό εξαρτήματος 2 17160 ή 270576
τη φόρτιση αυτής της συσκευής Dyson.
• Χρησιμοποιήστε μόνο τ ην μπαταρία Dyson με κωδικό εξαρτήματος 355983 για
τη φόρτιση αυτής της συσκευής Dyson. Οι μ παταρίες άλλου τύπου ενδέχεται
να εκραγούν, προκα λώντας φωτιά, σωματικές βλάβες στους παρευρισκόμενους, καθώς
και υλικές ζημίες.
ΠΡΟΣΟΧΗ
Η μπαταρία που χρησιμοποιείται σε αυτή τη σ υσκευή ενδέχεται να εγκυμονεί κινδύνους
πυρκαγιάς ή χημικού εγκαύματος σε περίπτωση ακατάλληλης μεταχείρισης. Μην έρχεστε
σε πολύ κοντινή επαφή μαζί τ ης, μην την θερμαίνετε πάνω από τους 60°C (140°F) και μην την
αποτεφρώνετε. Κρατήσ τε την μακριά από παιδιά. Μην τ ην αποσυναρμολογείτε και μην την
πετάτε μέσα σε φωτιά.
Πληροφορίες απόρριψης
• Τα πρ οϊόντα της Dyson κατασκευάζονται από υψηλής ποιότητας ανακυκλώσιμα υλικά.
Να ανακυκλώνετε όπου αυτό είναι δυνατό.
• Η μπαταρία θα πρέπει να αφαιρείται από το προϊόν πριν από τ ην απόρριψή του.
• Η απόρριψη ή η ανακύκλωσ η της μπαταρίας πρέπει να γίνεται με βάση τις τοπικές
οδηγίες ή κανονισμούς.
• Απορρίψτε τη μονάδα φίλτρου κατά το τέλος της ζωής της σύμφωνα με τις τοπικές
οδηγίες ή κανονισμούς.
• Το σύμβολο αυτό υποδεικνύει ότι το μηχάνημα αυτό δεν θα πρέπει να απορρίπτεται
μαζί με τα υπόλοιπα οικιακά απόβλητα. Για την αποτροπ ή πιθανής μόλυνσης του
περιβάλλοντος ή βλάβης της ανθρώπινης υγείας από τη μη ελεγχόμε νη απόρριψη των
αποβλήτων, ανα κυκλώστε τη συσκευή με υπεύθυνο τρόπο πρ οάγοντας τη βιώσιμη
επαναχρησιμοποίηση των υλικών πόρων. Ότα ν το μηχάνημα αυτό φτάσει σ το τέλος
της ωφέλιμης ζωής του, μεταφέρετέ το σ ε αναγνωρισμε νη εγκατάσταση συλλογής
αποβλήτων ηλεκτρικού και ηλεκτρονικού εξοπλισμού (ΑΗΗΕ), όπως το τοπικό
κέν τρο ανακύκλωσης, για ανακύκλωση. Για να βρείτε την πλησιέστερη εγκατάσταση
ανακύκλωσης, απ ευθυνθείτε σ την αντίστοιχ η δημοτική αρχή ή τον μεταπωλητ ή στην
περιοχή σας.
• Η μπαταρία πρέπει να αφαιρεθεί για ξεχωριστή ανακύκλωση.
Εξυπηρέτηση πελατών Dyson
Σάς ευχαριστούμε για τ ην επιλογή μιας συσκευής Dyson
Μετά την ενεργοποίηση της εγγύησης 2 ετών, η συσκευή σας Dyson θα καλύπτεται για
το κόστος ανταλ λακτικών και εργασίας για 2 έτη από την ημερομηνία αγοράς, σύμφωνα
με τους όρους της εγγύησης. Εά ν έχετε απορίες σχετικά με τη σ υσκευή Dyson, επισκεφτείτε
τη διεύθυνσ η www.gr.dyson.com/support για οδηγ ίες σ το διαδίκτυο, γενικές συμβουλές και
χρήσιμες πληροφορίες σχετικά με τη Dyson.
Εναλλακτικά, επικοινωνήσ τε με τη γραμμή βοήθειας της Dyson έχοντας διαθέσιμο τον
σειριακό αριθμό της συσκευής καθώς και λ επτομέρειες σχετικά με την τοποθεσία και τοv
χρόνο αγοράς της.
Αν η συσκευή σας Dyson χρειάζεται επισκευή, επικοινωνήστε με τη γραμμή βοήθειας της
Dyson για να συζητήσουμε τις διαθέσιμες επιλογές. Αν η συσκευή σας Dyson έχει εγγύησ η
σε ισχύ και η επισκευή κα λύπτεται, θα επισκευαστεί χωρί
ειδοποιήσει όταν χρειάζεται πλύσιμο της μονάδας φί λτρου. Συνιστούμε
ς κόστος.
99

Εγγραφή κατόχου προϊόντος Dyson
Η εγγύηση αυτή της συσκευής, ισχύει για 2 χρόνια από την ημερομηνία α γοράς. Εγγραφείτε
ως κάτοχος προϊόντος Dyson, εν τός 30 ημερών από την ημερομηνία α γοράς. Για την
ταχύτερη και αποτελεσματικότερη εξυπηρέτησή σας, προβείτε στην ε γγραφή αμέσως
μετά την α γορά της συσκευής σας. Φυλάξτε την απόδειξη αγοράς καθ' όλη τ η διάρκεια
της εγγύησης.
Η εγγραφή γίνε ται με τους εξής τρόπους:
• Τηλεφωνικά στην γραμμή βοήθειας Dyson στο 800 111 3500.
• Με τη σ υμπλήρωση του εσώκλειστου εντύπου και την ταχυδρομική αποστολή του.
Με την εγγραφή σας:
• Προστατεύετε την ε πένδυσή σας με εγγύηση εξαρτημάτων και εργασίας για διάστημα
δύο ετών.
• Λαμβάνετε χρήσιμες συμβουλές σχετικά με τη χρήσ η του μηχανήματός σας.
• Λαμβάνετε ειδικευμένες συμβουλές από την Τη λεφωνική γραμμή υποστήριξης
της Dyson.
• Μαθαίνετε πρώτοι τις πλέον πρόσφατες εφευρέσεις μας.
• Η εγγραφή απαιτεί λίγα μόλις λεπτά και χρειάζεσ τε μόνο τον σειριακό αριθμό.
Περιορισμέν η εγγύηση 2 ετών
Terms and conditions of the Dyson 2-year limited guarantee are set out below. The name and
address details of the Dyson guarantor for your country are set out elsewhere in this document
– please refer to the table setting out these details.
Τι καλύπτει η εγγύησ η
• Την ε πισκ ευή ή αντικατάσταση της συσκευής σας Dyson (κα τά την κρίσ η της Dyson) εάν
διαπιστωθεί ότι είναι ελαττωματική λόγω ελαττωματικών υλικών, εργασίας ή λειτουργίας
που ισχύει για 2 χρόνια από την ημερομηνία αγοράς ή παράδοσης (σε περίπτωση
που κάποιο ανταλλακτικό έχει καταργηθεί ή είναι εκτός παραγωγής, η Dyson θα το
αντικαταστήσει με ένα λειτουργικό ανταλλακτικό).
• Στις περιπτώσεις όπου η παρούσα συσκευή πωλείται εκτός ΕΕ, η παρούσα εγγύησ η
ισχύει μόνο εφόσον η συσκευή χρησιμοποιείται εντός της χώρας στην οποία πωλήθηκε.
• Where this machine is sold within the EU, this guarantee will only be valid (i) if the
machine is used in the country in which it was sold or (ii) if the machine is used in Austria,
Belgium, Denmark, Finland, France, Germany, Ireland, Italy, Netherlands, Norway,
Poland, Spain, Sweden, Switzerland or the United Kingdom and the same model as this
machine is sold at the same voltage rating in the relevant country.
Tι δεν καλύπτει η εγγύηση
Η Dyson δεν εγγυάται την επισκευή ή αντικατάσταση ενός προϊόντος, όταν το ε λάττωμα
οφείλεται σε:
• Βλάβη από ατύχ ημα, βλάβες που προκλήθηκα ν από αμελή χρήση ή συντήρηση, κακή
χρήσ η, αμέλεια, απροσεξία ή λαν θασμένο χειρισμό ή διαχείριση της συσκευής που δεν
είναι σύμφωνη με το εγχειρίδιο χρήσ ης της Dyson.
• Χρήσ η της συσκευής για άλλο σκοπό πέραν των συνηθισμένων οικιακών χρήσεων.
• Συναρμολόγηση ή εγκατάσταση εξαρτημάτων με τρόπο μη συμβατό με τις οδηγίες
της Dyson.
• Χρήση ανταλλακτικών και αξεσουάρ που δεν ανήκουν στα γνήσια εξαρτήματα Dyson.
• Ελαττωματική εγκατάσταση (εξαιρούνται οι εγκατασ τάσεις που πραγματοποιήθηκαν
από την Dyson).
• Επισκευές και μετατροπές που πραγματοποιήθηκαν από τρίτους και όχι από τ η Dyson
ή τους εξουσιοδοτημέ νους αντιπροσώπους της.
• Έμφραξη – δείτε περισσότερες λεπτομέρειες σχετικά με τον εντοπισμό εντοπισμό και
την εξάλειψη της στο Εγχειρίδιο Χρήσης της Dyson.
• Φυσιολογική χρήση και φθορά (π.χ. ηλεκτρικές ασφάλειες, κυλινδρική βούρτσα κ.λπ.).
• Χρήσ η της συσκευής σε μπάζα, τέφρα ή σοβά.
• Μείωσ η του χρόνου εκφόρτισης της μπαταρίας λόγω παλαιότητας ή χρήσης (όπου
αυτό εφαρμόζεται).
Αν έχετε αμφιβολίες σχετικά με το τι καλύπτεται από την εγγύησή σας, επικοινωνήσ τε με την
γραμμή βοήθειας της Dyson.
Οι όροι κάλυψης συνοπτικά
• Η εγγύηση τίθεται σε ισ χύ από την ημερομηνία αγοράς (ή την ημερομηνία παράδοσης
της συσκευής, όταν η τελευταία γίνει σε δεύτερο χρόνο).
• Η επίδειξη της απόδειξης αγοράς / παράδ οσ ης (είτε της αυθεντικής είτε οποιουδήποτε
άλλου σχετικού εγγράφου) είναι απαραίτητη πριν πρα γματοποιηθεί οποιαδήποτε
εργασία επισκευής στη συσκευ ή σ ας Dyson. Χωρίς τα ανωτέρω αποδεικτικά,
οι εργασίες επισκευής θα χρεώνονται. Για το λόγο αυτό, συνιστάται η διατήρηση της
απόδειξης ή του δελτίου παράδοσης.
• Όλες οι εργασίες/επιδιορθώσεις πραγματοποιούνται αποκλειστικά από την Dyson
ή τους εξουσιοδοτημέ νους αντιπροσώπους της.
• Κάθε εξάρτημα που αντικαθίσταται από την Dyson περιέρχεται σ την ιδιοκτησία
της Dyson.
• Η επισ κευή ή αντικατάστασ η της ηλεκτρικής συσκευής σας Dyson που καλύπτεται
με εγγύηση δεν παρατείνει τη σ υνολική διάρκεια της εγ γύησ ης.
• Η εγγύηση παρέχει επιπλέον προνόμια και δεν επηρεάζει τα νομοθετημένα δικαιώματα
του καταναλωτή.
Σημαντικές πληροφορίες προστασίας δεδομένων
Κατά την εγγραφή του προϊόντος Dyson:
• Θα χρειαστεί να μας παράσ χετε βασικά στοιχεία επικοινωνίας για την ε γγραφή του
προϊόντος σας και για να μας επιτρέψετε να υποστηρίξουμε την εγγύησή σας .
• Κατά την εγγραφή σας, θα έχετε τη δυνατότητα να επιλέξετε κατά πόσο θα λαμβάνετε
μηνύματα επικοινωνίας από εμάς. Εάν επι λέξετε να λαμβάνετε μηνύματα επικοινωνίας
από την Dyson, θα λαμβάνετε λεπτομέρειες ειδικών προσφορών και ειδήσεις των
τελευταίων καινοτομιών μας.
• Σε καμία περίπτωση δεν θα προβούμε σε πώληση των π ληροφοριών σας σε τρίτα μέρη
και δεν θα χρησιμοποιήσουμε τις πληροφορίες που κοινοποιείτε σε εμάς αποκ λειστικά
σύμφωνα με τα όσα ορίζονται στις πολιτικές απορρήτου μας, σ τις οποίες μπορείτε
να ανατρέξετε μέσω του ισ τοτόπου μας στην ιστοσελίδα privacy.dyson.com.
100
 Loading...