

Page 1
2
3
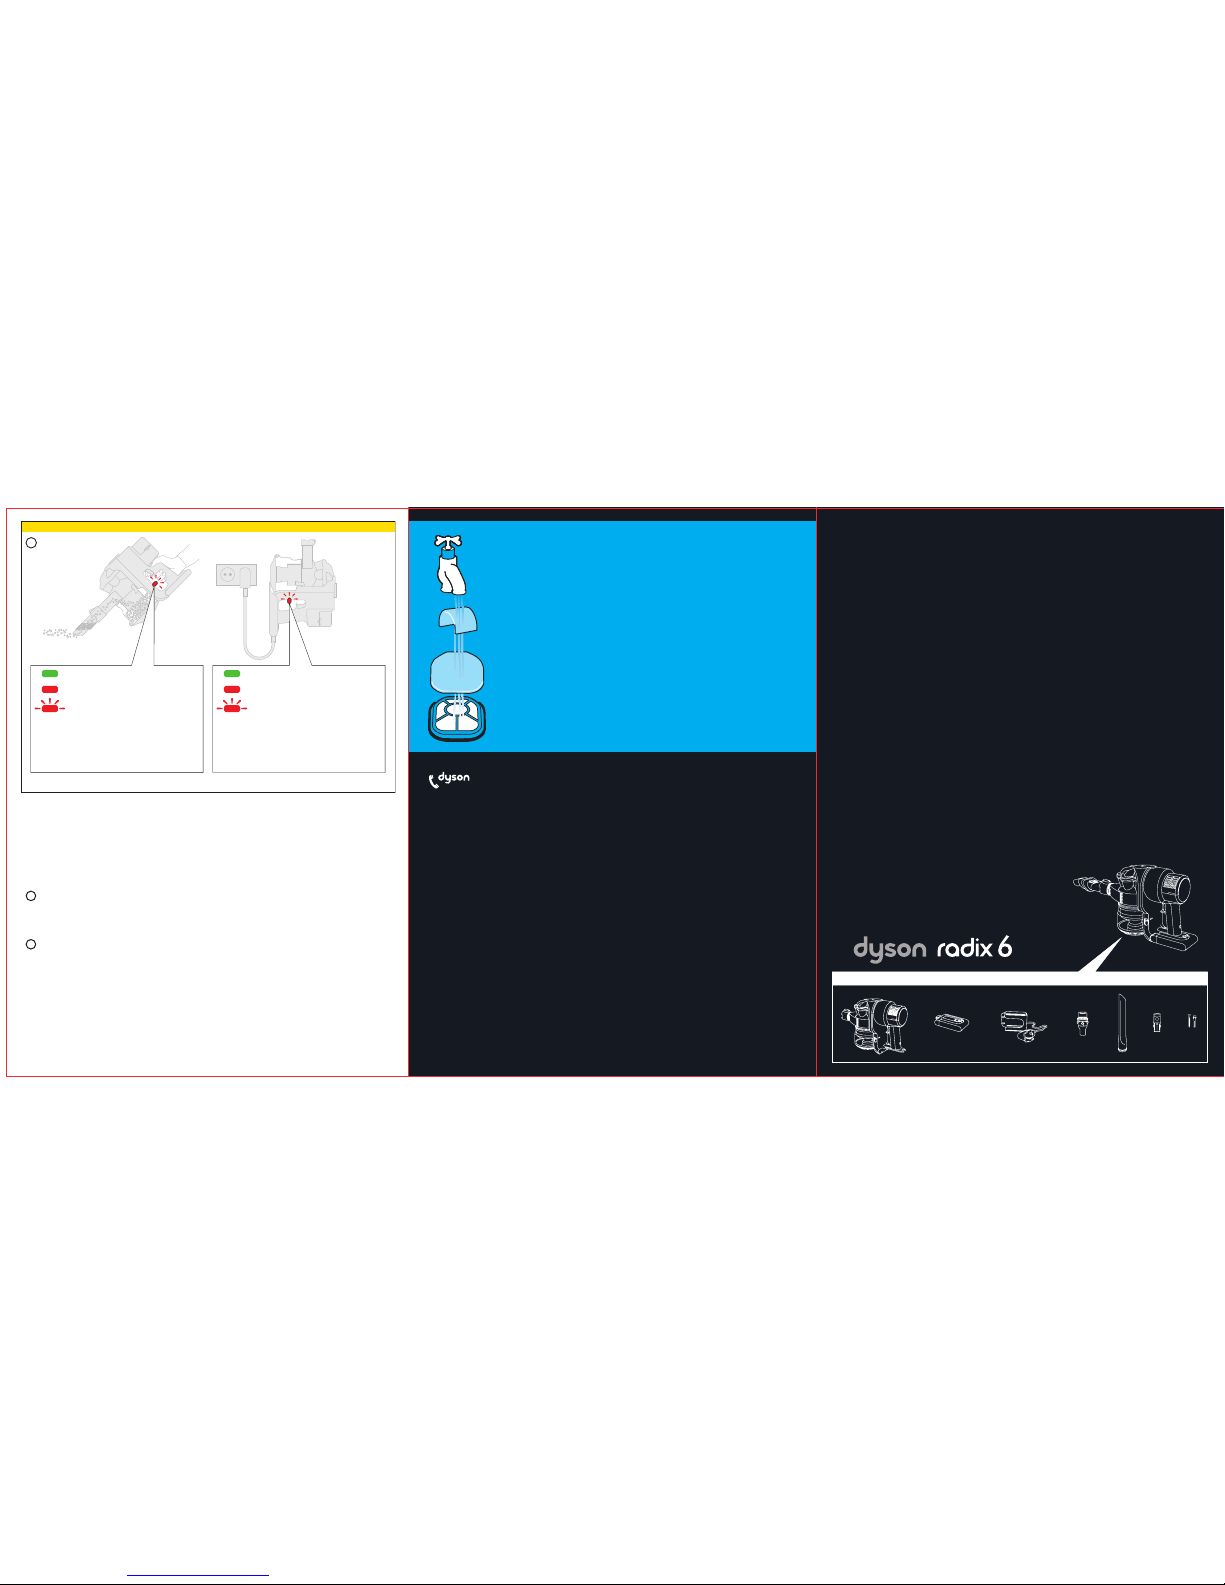
Box contents
+ + + + +
x2
+
AU
Dyson Cust omer Care
customercare@dyson. com.au
1800 239 766
(Mon-Fri 8:00am to 6 :00pm EST, Sat-Sun 8:3 0am to 4:00pm EST)
Dyson Appliances (Aus t) Pty Ltd, P O Box 2175, Taren Point,
Australia, NSW 2229
ID
Indonesia Service Centre
021 707 39766
(Mon-Fri 9:00am to 5 :00pm)
PT.Higienis Indonesia
Permata Plaza Top floor TF-04
J1. M. H. Thamrin Kav. 57, Jakarta 103 50
NZ
Dyson Customer Care
dyson@averyrobinson .co.nz
0800 397 667
(Mon-Fri 8:30am to 5:00pm)
Avery Robinson Ltd, Unit F, 151D Marua Road,
Ellerslie, Auckland
SG
Dyson Cu stomer Care
singapore@dyson.com
7000 435 75 4 6
(Mon-Fri 9:00am to 6 :00pm, Sat 9:00a m to 1:00pm, closed on
Sunday and public h olidays)
Dyson Singapore Pte Ltd, 2 Leng Kee Road,
04-09A Thye Hong Ce ntre, Singapore 159086
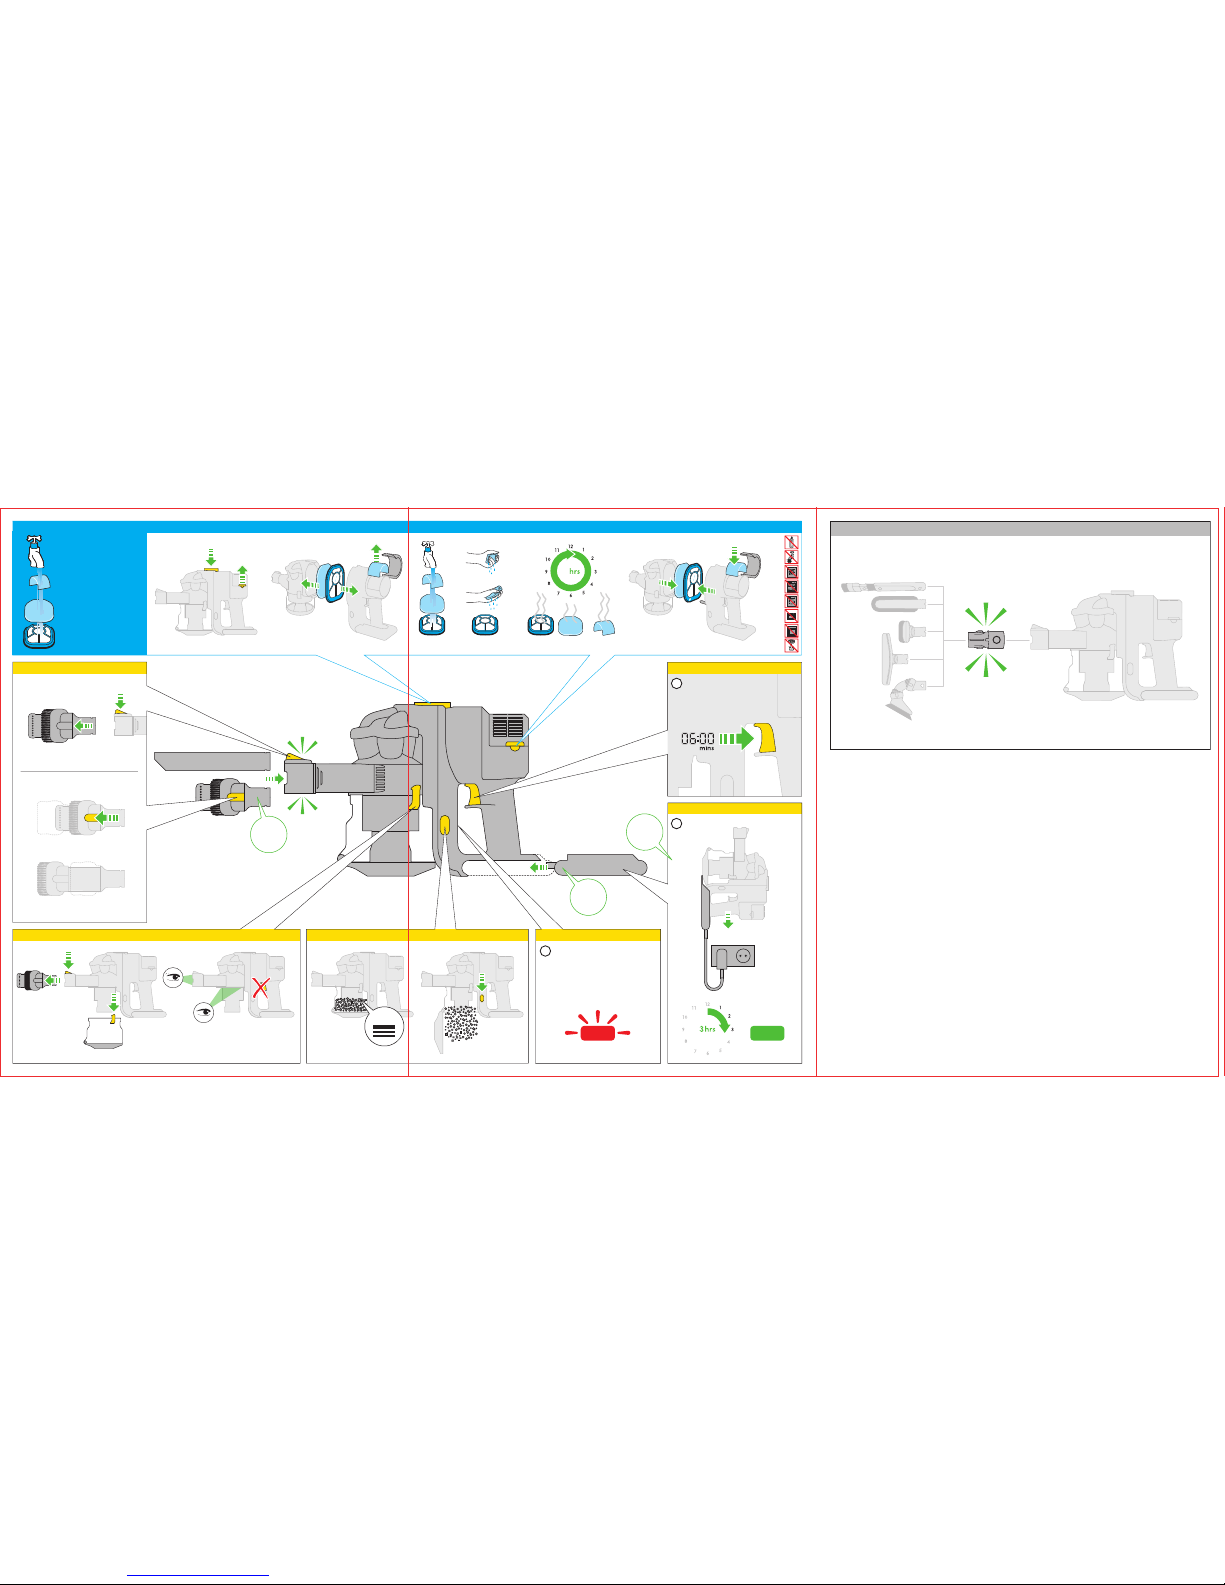
Remember
Wash your filters at least every 3-6 months
based on individual vacuuming habits.
Months
3-6
Very important
www.dyson.com
JN.16978 PN.12131-03-03 05.04.07
Troubleshooting
If flashing persists call the Dyson Helpline.
1
Fully or partly charged.
Fully discharged.
Filter missing/Filter fitted incorrectly.
Check/Refit Filter.
or
Machine outside of temperature
range. Leave at room temperature
until flashing stops.
Fully charged.
Machine charging.
Battery outside of temperature range.
Remove from the charger and leave at
room temperature until red light no
longer flashes when placed in the
charger.
or
Charging fault. Remove appliance and
refit to the recharging unit.
Instructions
1 When wall mounting the recharging unit, always use the appropriate fixings for your wall type.
2 Check to ensure there is no pipework or wiring directly behind the mounting/drilling area.
3 Fine dirt such as flour or plaster dust should only be vacuumed in very small amounts.
4 Do not press down on the nozzle with excessive force when using the appliance, as this may cause damage.
5 Ensure the appliance remains upright in use – do not hold upside-down while vacuuming.
6 If the motor overheats, the appliance will cut out automatically. Leave to cool down for at least an hour
before restarting.
1 When using the appliance, the light on the handle indicates the level of charge. A green light indicates the
battery is fully or partly charged. A red light indicates the battery is fully discharged and needs charging.
2 The battery will become hot during use – this is normal.
3 The appliance will cut out immediately when the battery has run out – recharge for continued use.
1 To ensure your appliance is always ready to use, store it on the charger.
2 When connected to the charger, a red light indicates the battery is charging.
A green light indicates the battery is fully or partly charged. Full charging takes around 3 hours.
3 Charging at below room temperature (< 68°F, 20°C) will significantly reduce run time.
Page 2
clik
clik
2
1
1 2
MA X
Emptying Troubleshooting
Storage/Charging
Power
Blockages
1 2
Tools
1
2
Filters
1 2 3 4 65
12
3-6
MONTHS
3
1
3
2
clik
clik
Connecting tools with the adaptor.
 Loading...