Page 1

Model HP Hand Pump
Specifications - Operating Instructions
5-29/32
[150]
3-17/64
[83]
MAX
4-1/16
[103]
MAX
Ø1-13/16
[46]
Ø1-13/16
[46]
Bulletin TE-HP
QUICK CONNECT
FITTINGS
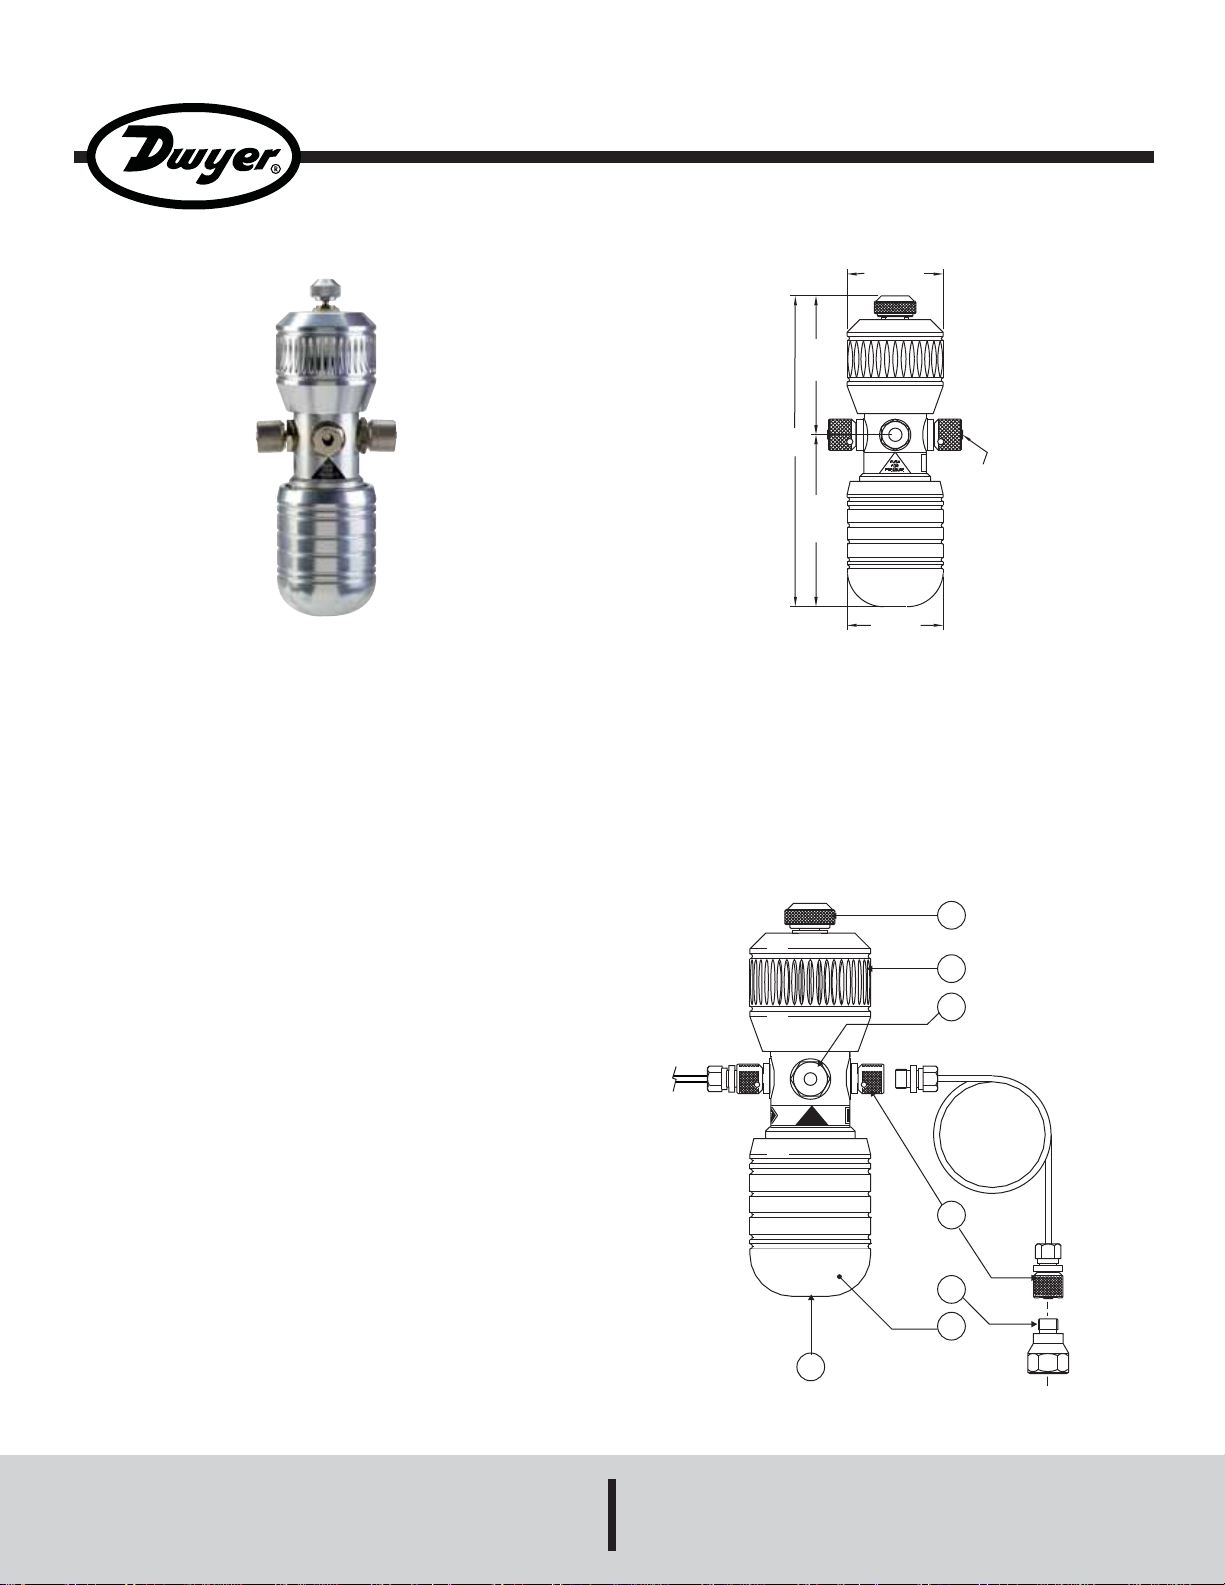
The Model HP Hand Pump provides a dual source of pneumatic
pressure and vacuum for verifying the calibration of pressure
instrumentation. Pump can generate pressures up to 45 psi (3 bar) and
vacuum to -27˝ Hg (-910 mbar). The compact pump is designed for
portability and single hand operation.
Model HP features a pressure relief valve and fine adjustment for control
better than 0.0015 psi (0.1 mbar). Pump includes two 39˝ (1 m) hoses
terminating in 1/4˝ female NPT connections and instruction manual.
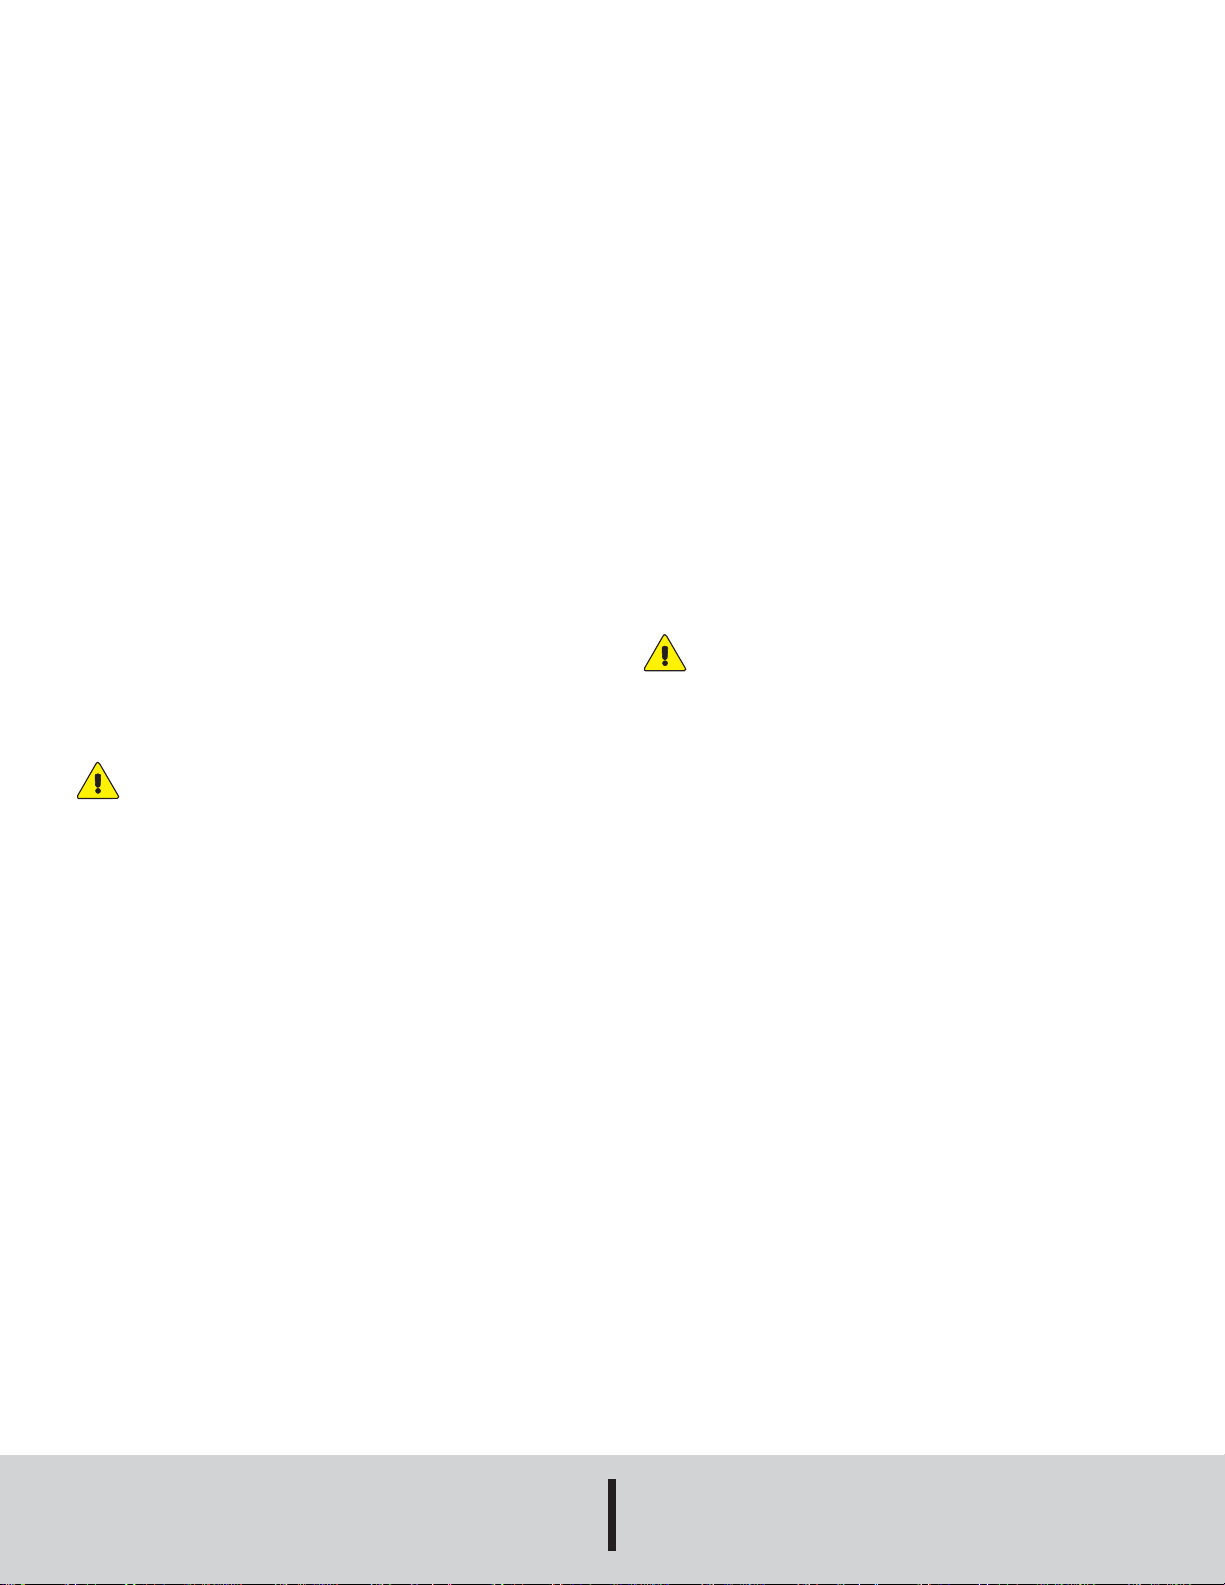
FIGURE 1 KEY:
1. Pressure release valve
2. Fine adjustment control
3. Pressure/vacuum selector
4. Knurled “quick fit” connectors
5. Two flexible hoses to item under test and master instrument
6. NPT adaptor set
7. Pump handle
8. Pressure relief valve
SPECIFICATIONS
Output Ranges: -27˝ Hg to 45 psi (-910 mbar to 3 bar).
Process Connection: 1/4˝ female NPT (quick fit).
Fine Adjustment: Better than 0.0015 psi (0.1 mbar).
Materials: Nickel plated brass and anodized aluminum.
Weight: 20 oz (587 g).
1
2
3
PUSH
FOR
PRESSURE
4
7
5
6
FIGURE 1
DWYER INSTRUMENTS, INC.
Phone: 219/879-8000 www.dwyer-inst.com
P.O. BOX 373 • MICHIGAN CITY, INDIANA 46361, U.S.A. Fax: 219/872-9057 e-mail: info@dwyer-inst.com
Page 2

DESCRIPTION OF KEY ITEMS
Release Valve (1)
This can be used to reduce or release the pressure in the system. The
rate of pressure reduction is dependent upon the degree of rotation
when opening the valve. Minimal force is required to seal the system.
Fine Adjustment Control (2)
The pressure generated can be finely adjusted by turning the fine
adjustment control (2) in or out to increase or decrease pressure
accordingly.
Important: Do not wind the fine adjustment control (2) any further
when the top of the pump body is visible.
GUIDELINES FOR USE
1. Calibration/comparison against analog gage
1.1 Connect a test gage using appropriate adaptor and sealing to one of
the flexible hoses (5) or directly to body using adaptor (6).
1.2 Connect item under test using appropriate adaptor and sealing to the
second flexible hose (5) or directly to body using adaptor (6).
Note: Adaptors tightened to a maximum torque or 15 Nm.
1.3 Screw fine adjustment control (2) in fully and then out 4-6 full turns.
1.4 Screw pressure valve (1) in fully, tightening to ensure good seal.
Pressure/Vacuum Selection (3)
Press the selector (3) as indicated on the label to engage the desired
mode. Ensure that the Release Valve (1) is open before changing mode.
Pressure Ports (4)
The hoses (5) and adaptors (6) are fitted by simply screwing them into
the connectors (4) by turning the knurled nut on the connector fully anticlockwise.
Adjustable Pressure Release Valve (8)
(For protection of sensitive instruments)
The maximum output pressure can be set using the pressure relief valve
located inside the main Piston, accessed via the handle retaining screw
(adjustment range between 50 mbar and 3 bar).
Note: The pump should only be used for pressurizing small
volumes due to its small displacement. If the pump has not been
used for a period of time, it could be difficult to operate on the first
stroke.
WARNING: Do not connect to external pressure source.
1.5 Using a flat blade screwdriver (2.5 mm wide max), adjust the
pressure relief valve (8) to se the desired maximum output pressure.
Turn the grub screw located in the main piston clockwise to increase or
anti-clockwise to decrease the pressure setting.
1.6 Operate handle (7) until the pressure is close to that finally required.
1.7 Wind the fine adjustment control (2) in to increase pressure or out to
decrease pressure until required pressure is reached.
Note: The pressure may take up to 30 seconds to settle after
increasing pressure due to thermodynamic effects, settling of seals
and expansion of the flexible hose.
CAUTION: STOP unscrewing the fine adjustment control (2)
when the top of the pump body becomes visible.
1.8 Reductions in pressure can also be achieved by careful use of the
pressure release valve (1).
1.9 Vacuum is achieved using the above procedure and having the
pressure/vacuum selector (3) pushed completely towards the vacuum
position.
Note: Release pressure before changing mode.
2. Fault Investigation
In the event that the pump appears to lose pressure then the procedure
above should be repeated ensuring new seals are used, adaptors are
tightened sufficiently and the pressure release valve (1) is tightened
firmly.
Note: The connections to the hand held test system are sealed with
“o” ring or bonded seals and should not leak.
DO NOT attempt to tighten the other fittings to the pump as this could
lead to damage of sealed joints. When testing for leaks it may be noticed
that air is drawn in or expelled from around the pressure/vacuum
selector. This is normal and should cause no concern.
©Copyright 2009 Dwyer Instruments, Inc. Printed in U.S.A. 7/09
DWYER INSTRUMENTS, INC.
Phone: 219/879-8000 www.dwyer-inst.com
FR# R6-443775-00
P.O. BOX 373 • MICHIGAN CITY, INDIANA 46361, U.S.A. Fax: 219/872-9057 e-mail: info@dwyer-inst.com
 Loading...