

Page 1

v.13.december.2012 ENG
Page 2

SAFETY INSTRUCTIONS
1. IMPORTANT SAFETY INSTRUCTIONS
1) Read these instructions;
2) Keep these instructions;
3) Heed all warnings;
4) Follow all instructions;
5) Do not use this apparatus near water;
6) Clean only with a dry cloth;
7) Install in accordance with the manufacturer’s instructions;
8) Do not install near any heat sources such as radiators, heat registers, stoves, or other
apparatuses (including amplifiers) that produce heat;
9) Protect the power cord from being walked on or pinched, particularly at plugs, convenience
receptacles, and the point where they exit from the apparatus;
10) Only use attachments/accessories specified by the manufacturer;
11) Unplug this apparatus during lightning storms or when unused for long periods of time;
12) Refer all servicing to qualified service personnel. Servicing is required when the apparatus
has been damaged in any way, such as when the power-supply cord or plug is damaged,
liquid has been spilled or objects have fallen into the apparatus, or when the apparatus has
been exposed to rain or moisture, does not operate normally, or has been dropped;
13) “Warning: to reduce the risk of fire or electric shock, do not expose this apparatus to rain
or moisture; and objects filled with liquids, such as vases, should not be placed on this
apparatus”;
14) The socket outlet shall be installed near the equipment and shall be easily accessible;
15) The power cord must be unplugged prior to servicing
1. PRÉCAUTIONS D’EMPLOI
1) Lire ces instructions;
2) Conserver ces instructions;
3) Suivre tous les conseils d’utilisations;
4) Suivre toutes les instructions;
5) Ne pas utiliser cet appareil au bord de l’eau;
6) Nettoyer uniquement avec un chiffon humide;
7) Ne pas bloquer le système de ventilation. Installer conformément aux instructions du fabricant;
8) Ne pas installer l’appareil près d’une source de chaleur tel qu’un radiateur, un fourneau, ou bien
un autre appareil qui produit de la chaleur;
9) Protéger le cordon d’alimentation afin qu’il ne soit pas piétiné ou écrasé tout particulièrement au
niveau des fiches, des prises de courant femelles, et des parties qui sortent de l’appareil;
10) Utiliser uniquement les accessoires recommendés par le fabricant;
11) Ne pas branché l’appareil en cas d’orage accompagné d’éclairs. Le débrancher en cas de non
utilisation prolongée;
12) S’adresser à un service assistance agréé si l’appareil a subi des dommages, si le cordon
d’alimentation ou la fiche a été endommagé, si un liquide a été renversé sur l’appareil ou bien si
un object est tombé dans l’appareil, si ce dernier a été exposé à la pluie ou à l’humidité, s’il ne
fonctionne pas correctement ou s’il est tombé;
13) “Avertissant: pour réduire le risque du feu ou de décharge électrique, n’exposez pas cet appareil
à la pluie ou l’humidité et les objets remplis de liquides; tels que des vases, ne devraient pas
être placés sur cet appareil”;
14) La prise de courant doit être installée près de l’appareil et doit être facilement accessible;
15) La fiche principale doit être débranchée avant toute opération d’entretien
MORE INFORMATION
For warranty and service information, please contact your local DV Mark distributor (contact information available at ww w.dvmark.it). For more technical information, please visit us at www.dvmark.it
and fill out the form on the Contact Us page. We hope you enjoy your amplifier and use it to make great music!
“The Lightning Flash with arrowhead symbol within an equilateral triangle, is intended to alert the user to the presence of uninsulated “dangerous voltage” within the product enclosure that may be of
sufficient magnitude to constitute a risk of shock to persons.”
“The exclamation point within an equilateral triangle is intended to alert the user to the presence of important operating and maintenance (servicing) instructions in the literature accompanying the
product.”
2
Page 3

MARK VISION
A Word from Marco De Virgiliis
Thank you for choosing DV Mark!
We are very excited to have you join us for an exciting new chapter in the history of guitar amplification. In less than 10 years, we have succeeded in making
Markbass the world’s leading bass amp brand, using technology to better serve the needs of bassists: great tone, reliability, versatility/flexibility, and light weight.
Now it’s time for guitarists to have their turn!
The classic tones guitarists have come to know and love over the last few decades are worthy of great respect. We have designed our amps with a great reverence
for these sounds. We’re not trying to start a revolution in guitar tone… because guitarists don’t want or need that.
However—there are some important areas where the classic amplifiers can be greatly improved upon, to better suit the needs of guitarists:
The first is reliability—and we are very proud of the high quality standard that we’re able to offer thanks to our 100% Made in Italy production, state-of the-art
testing and quality control facilities, top-quality components, and innovative technology that makes it easy to monitor the condition of your amp and its tubes. You
need to be able to always trust your amp… and we understand that!
The second is flexibility. One example of this is DV Mark’s patent pending Continuous Power Control feature (included on our 40W heads and combos), which
allows you to adjust the power incrementally, setting the power at anywhere between 1 and 40W. This means you can get the tone you want at the volume you need;
so you can use the same amp for everything, from larger gigs, to smaller gigs, right down to bedroom practicing—and never sacrifice your tone!
The third is light weight. Many of you have seen your bass players easily loading in and out of gigs with their lightweight Markbass gear, while you struggle
with a heavy 2x12 combo or 4x12 cabinet. It’s time you enjoyed the same benefits of lightweight gear! Especially if you play a lot, the weight of your gear is a real
factor. Once you learn that DV Mark allows you to get killer tone at a fraction of the weight… there’s no going back.
We hope you will enjoy your new guitar amp, and we invite you to contact us any time with your comments and questions, at [email protected].
Thanks again, and good music!
Marco De Virgiliis
3
Page 4

FRONT PANEL
1) INP UT Connect your g uitar to this input using a st andard ¼” shielded instr ument cab le.
2) PAD This switch pads the in put (1) at -6dB, 0dB, + 6dB, or +12dB to compensate for higher output sources, such as guit ars
with high-o utput pick ups or active electronics.
3) CH1 CH2 CH3 Push the se buttons to select the models of AM P’s for each slot.
4) SPEA KER This but ton allows to h ave quick access to the Cabine t Simulator param eters.
5) MAS TER This control is the mas ter fe ed of the power sta ge, it c ontrols the volume to the speake r and he adphone ou tput s
and it has no inf luence on th e XLR Balanced Outpu ts.
6) GAIN, BASS, MIDDLE, HIGH, P RESE NCE, LE VEL A MP simulator pream p section controls. The y reproduc e the same
func tions of the co ntrol pots of t he selected AMP m odel.
7) BANK The display shows the selecte d BANK PRESET.
8) PRESET The display shows the name an d number of th e selected PRES ET.
9) SLOT The Multiam p features 7 SLOTs where you c an put the AMP models and the effects, and 1 SLOT for the CA B models.
10) SY ST EM Us e this function to set stereo/mono option or to recall the Me mory Bank f rom an SD Card or to transfer the
Memory Ba nk onto an SD Card.
11) ST ER EO S hows t he output mode: STEREO (250W + 250W @ 4ohm, 150W + 15 0W @ 8ohm, 85 W + 85W @ 16 ohm) or
mono BRIDGE (500W@8ohm, 300W@16ohm).
12) PA D Shows the s elected in put pad (-6dB/O/+6d B/+12dB).
13) VALUE This control will increase/decrea se the selected v alue.
14) SLOT S ELEC T Enable/Disable the selected SLOT.
15) E XIT Push to exit from the func tion in use.
16) UP scroll button.
17) DO WN scroll button.
18) LE FT scroll bu tton. Whe n BANK func tion is selec ted this but ton allows yo u to scroll UP 8 pre sets at time (quick search).
19) RIGHT scroll but ton. When BA NK functio n is selecte d this bu tton allows you to scroll DOW N 8 presets at time (quick
sea rch).
20) STORE Pu sh to memoriz e a preset to the inte rnal memor y.
21) RECA LL Push to recall a preset f rom the internal memor y.
22) ON /OFF This sw itch deliv ers AC powe r to the unit. M ake sure th e unit is groun ded; all thre e termina ls of the AC pow er plug
must be connecte d to avoid any injury to the user or damage to the unit . DV Mar k Multiamp is manuf actured to b e used in the
country w here it has b een sold, an d is factor y preset to that co untry’s voltag e. So make su re you’re sending the correct v oltage
to your Multiamp before you c onnect it
to AC pow er.
23) SD CA RD Ins ert a n SD Card (fat 32
formatted) in this slot to m emorize/
recall preset /s and for firm ware update
function.
24) PHONES Headphone s mini plug
(1/8”) input.
25) ENTER Se nd/c onfir m but ton for a
selected function.
2
INPUT
1
GAIN
BASS MID
3
CH2CH1 PAD
HIGH
6
4
SPEAKERCH3
PRESENCE
PANNELLO FRONTALE
1) INP UT Ingresso chitarra.
2) PAD Re golazione livello del segnale in ingre sso.
3) CH1 CH2 CH3 Tasti per la selezione d ei modelli per lo slot AM P.
4) SPEA KER Tas to di acces so veloce ai p arametri del Cab Simula tor.
5) MAS TER Manopola della regolazione del volume di uscit a speaker e Cuffia. Questo controllo non influen za le USCITE
BILANCIATE XLR.
6) GAIN, BASS, MIDDLE, HIGH, P RESE NCE, LE VEL Co ntrolli dello stadio di prea mplifica zione dell’AMP simulator.
Ques ti controlli a ssumono le stesse funzioni delle manopole di cont rollo del mode llo di Ampli selezion ato.
7) BANK ll display visualizza il BA NCO del PRESET selezionato.
8) PRESET Il display visuali zza il nome e il numero del pre set selezionato.
9) SLOT Il Multiamp ha 7 S LOT dove poter inserire gli am p modelling e gli effetti e 1 SLOT dove inserire i vari tipi di cabine ts.
10) SY ST EM Qu esto coma ndo serve per l’i mposta zione della m acchina in mo dalita’ st ereo o mono, p er il richiamo d ei banchi
di memoria da una SD ca rd e per il tras ferimento dei banchi di m emoria ad una SD card.
11) ST EREO Visualiz za le moda lita’ di us cita STE REO (250 W + 250W @ 4o hm, 150W + 150 W @ 8ohm, 85 W + 85W @ 16 ohm)
o mono BRIDGE (500W@8ohm, 300W@16ohm).
12) PA D Visualiz za il guadag no di ingresso sele zionato.(- 6dB/O/+ 6dB/+12dB).
13) VALUE Manopola di incremento/decremento dei valori selezionati.
14) SLOT S ELEC T Attiva o dis attiva lo SLOT sel ezionato.
15) E XIT Puls ante di uscita fun zione.
16) Pulsante scorrimento cursore verso l’alto.
17) Pulsante scorrimento cursore verso il basso.
18) Pulsante scorrimento curs ore verso sinistra . Nella schermat a di sel ezione BAN K questo ta sto co nsen te di sa ltare verso
l’alto i preset di 8 per volta (ricerca velo ce).
19) Pulsante scorri mento cursore verso de stra.Nella scherma ta di selezione BA NK questo t asto c onse nte di s altare verso il
basso i preset di 8 per volt a (ricerca ve loce).
20) STORE Tasto per la m emorizz azione di un prese t sulla memoria interna.
21) RECA LL Tast o per il richiamo di un preset d alla memoria inter na.
22) ON /OFF Questo swit ch eroga corrente AC all’unità. Assicurarsi che l’unità sia messa a terra; tut ti e tre i terminali della
spina di a limen tazione AC devon o essere collegati per evitare lesione all’utente o da nni all’ unità. Il DV Ma rk Multiamp è
reali zzato pe r essere u tilizza to nel paes e in cui è stato v enduto, e d è settat o per la tensi one di quel pa ese. Ass icurarsi c he si sta
ENTER
20
STORE RECALL
19
PHONES
21
OFF
ON
5
MASTER
LEVEL
8
7
MULTIAMP
9
14 15 16
SLOT SELECT EXIT
SLOT ON/OFF
18
VALUE
25
SD CARD
17
10 11
12 13
23 24
usan do la giusta te nsione per il vostro
Multiamp prima di collegarlo alla rete
elettrica.
23) SD CA RD Ins erire una scheda
SD (formato FAT32) in questo slot per
memo rizza re / richiam are i pres et e per
eseguire l’aggiornamento del firmware
24) PHONE Ingress o mini jack per
22
cuffia.
25) ENTER Pulsant e di invio o di
conferma di una fun zione seleziona ta.
4
Page 5

REAR PANEL
MULTIAMP
OFF
ON
SPEAKERCH3
SLOT SELECT EXIT
ENTER
STORE RECALL
PHONES
CH2CH1 PAD
SLOT ON/OFF
BASS MID
HIGH
LEVEL
VALUE
MASTER
SD CARD
PRESENCE
GAIN
INPUT
1
2
3
4
5
6
9
10 11
12 13
14 15 16
17
18
19
20
21
22
7
8
23 24
25
26) AC SO CKET C onnection for the power c ord. This loc ation also houses t he main fuse o f the unit..
27/ 28 ) These speaker outs provid e power outputs for Left and Rig ht cha nnels (stere o mode) to speaker cabine ts. Do not
connect th ese outpu ts to a load of less tha n 4 ohms!
29) BRIDGE Th is speakon o ut is used wh en using the Multiam p power amp in m ono-brid ge mode. Do n ot connect t his output
to a load o f less than 8 ohms!
30) GROUND LIFT Occas ionally you ma y detect a c onstant h um when using t he Multiam p’s Balanc ed Line Out . This is almos t
always due to a grounding problem relate d to your power s ourc e; you will likely eliminate/reduc e this hu m simply by flipping
the Gro und Lift (GND) switc h.
BALANCED LINE OUT
31) Ba lanced XL R LEFT Out put to send the lef t channel sig nal to a mixer/PA (for mono connection use this out put).
32) Balanced XLR RIGH T Output to send the right channel signal to a mixe r/PA.
33) Output Level select button (+4/-10dB).
UNBALANCED LINE OUT Unbalanc ed stereo outpu t to connect t o an extern al power amp ( PRE OUT)
34) L EFT/ MONO PRE out lef t channel (for mono c onnection use this output).
35) RIGHT PRE out right ch annel.
36) USB port (for service/maintenance).
MIDI
37) MIDI IN.
38) MIDI THRU.
LOOP If y ou use exte rnal eff ect proce ssors or pe dals you ca n route the m through th e LOOP sect ion, it can be s electe d in Serial
or Parallel mode, and you can set it wher ever you like in the signal chain.
39) LOO P SEND Connec t this outpu t to your outbo ard effect processors or p edals input.
40) LOOP RETURN Connect this inp ut to your outboard effect proces sors or pedals out put.
26
27 2829
1 + = SIGNAL
1 = GND
LEFT
GND LIFT + 4
LEFT / MONO RIGHT
30 31 32
SPEAKER OUT
BRIDGE
RIGHT
- 10
33 34
PANNELLO POSTERIORE
26) PRESA AL IMENTAZIONE + FUSIBILE.
27/ 28 ) Uscite spe aker sinistr a e des tra per colle gamento in modalità stereo. Non collegare ques te uscite ad un carico con
impedenz a inferiore a 4 o hm.
29) BRIDGE Uscita speakon combo per c ollegamen to in modalit à mono. N on collegare ques ta uscita ad un car ico con
impedenz a inferiore a 8 o hm.
30) GROUND LIFT Di tanto in t anto si può rilevare un costant e ronzio quan do si utilizz a l’us cita di linea bilanci ata del
Multi amp. Questo è quasi semp re causa to da un proble ma di messa a terr a legato dall ’impianto c he eroga la c orrente el ettrica ;
semplicem ente cambiando p osizione allo switch Ground Lif t (GND) è molto prob abile elimina re / ridurre qu esto ronzio.
BALANCED LINE OUT
31) Uscita Bilanci ata XLR Left. Quest a uscita de ve essere u tilizzat a per il collegamen to in mono.
32) Uscita Bil anciata XRL Righ t.
33) Pulsant e selezione del livello di uscita (+ 4/-10dB).
UNBALANCED LINE OUT Uscite sbilanciate stereo per finale esterno (PRE OUT)
34) L EFT/ MONO PRE out Lef t. Quest a uscita deve ess ere usata nel ca so di collega mento in mono.
35) RIGHT PRE out Right.
36) USB Uscita per collegamento USB.
MIDI
37) IN Ingresso MIDI.
38) THRU Usci ta THRU.
LOOP La se zione Loop può essere utilizz ata si a in Serie che in P arallelo ,e pu o ess ere posizionata in qualunque punto della
catena audio.
39) SEND Ingres so LOOP. Collega que sto jack all’ingre sso di un multieffetto esterno.
40) RETURN U scita LOOP. Colleg a questo jack all’u scita di un mul tieffet to esterno.
UNBALANCED LINE OUTBALANCED LINE OUT
LEFT / MONO
RIGHT
35 36
CAUTION:
FOR CONTINUED PROTECTION
AGAINST RISK OF FIRE
REPLACE ONLY WITH SAME
TYPE AND RATING FUSE.
ATTENTION:
REMPLACER UNIQUEMENT PAR
UN FUSIBLE DE MEME TYPE.
AMP IN
RIGHT
LEFT
USB
MIDI LOOP
THRUIN
37 38
RETURN
SEND
39 40
5
Page 6
MULTIAMP OVERVIEW
CONNECTIONS
The Multiamp can be connected in many modes to fit the needs of each musician.
MONO CONNECTION BRIDGE output on the rear panel.
This output gives 5 00W @8ohm or 30 0W@16ohm power (Do not connect this output to a load of less than 8 ohms!)
STEREO CONNECTION LEF T and RIGHT SPEA KER OUT on th e rear panel.
Power: 250 W + 250 W @ 4ohm, 150W + 150W @ 8ohm or 85W + 85W @ 16 ohm (Do not connect these outputs to a
load of less than 4 ohms!).
P.A./STUDIO CONNECTION BALANCED LINE OUT L EFT and RIGHT outputs on the rear panel (optimize the output
level t hank s to the + 4/-10dB button).
EXTERNA L POWER AMP CONNECTION UNBAL ANCED OUT on the rear pan el.
Conne ct the MULTIA MP and optimize the right input level signal with the PAD button (2). The PAD SETTING section
will app ear on the dis play to pad th e input (1) at -6 dB, 0dB, +6 dB, or +12dB. A level m eter will hel p to set the rig ht value
for your signal source. The PAD value you choose is automatically related to the preset.
Select the SYSTEM menu with the but tons, press ENTER and go to the
SYSTEM SETTING menu.
Select AMP MODE, press ENTER and select STEREO or MONO BRIFGE mode.
The MONO/BRIDGE or STEREO mode is not related to the PRESET.
PRESET and MEMORY.
The Multiamp features 8 memory BANK, each one with 128 PRESETS subdivided in 3 FACTORY P RESETS Banks and
5 USERS Banks.
The Factor y Presets B anks are:
LIVE MONO for mono/bridge connection to a cabinet (a s example 4x12” cab).
LIVE S TEREO for stereo connection to two cabine ts (as example 2 1x12” cabs).
STUDIO P.A. for P.A. System or studio monitors connection.
For best results use our DV Mark Standard C412 Standard and C112 Small cabinets for LIVE option or our Markaudio
P.A . high-quality Syste m for STUDIO P.A. option.
Into the 5 USER Preset banks you c an memorize your presets or copy and modify ever y Factory Preset.
PRESET RECALL
To recall a preset press the RECAL L but ton, all the banks will appear on the display, selec t the desired bank with the
UP/DOWN buttons and pre ss EN TER. All the presets will appear on the display, select the prese t you like a nd press
ENTER to he ar it.
Press EXIT to see the preset’s SLOT configuration or to hear the other presets.
Press EXIT from the SLOT menu to go back to the PRESE T menu of the la st BANK in use.
IMPOSTAZIONE MULTIAMP
COLLEGAMENTI
Il Multiamp puo’ essere collegato in diverse modalit a’ per poter e ssere sfrutt ato a seconda delle esigenze di ciascun
musicista.
COLLEGAMENTO MONO uscita BRIDGE n el pannello posteriore.Q uesta uscita eroga un a potenza di 5 00W su 8 Ohm
o 300W su 16 Ohm (Non utilizzare impedenze inferiori a 8 ohm).
COLLEGAMENTO STEREO uscite LEFT RIGHT nel pannello posteriore SPEA KER OUT. Potenza max: 250W + 250W
su 4ohm, 150W + 150W su 8ohm o 85W + 85W su 16 ohm (Non utilizzare impedenze inferiori a 4 ohm).
COLLEGAMENTO P.A./STUDIO uscite LEFT RIGHT nella sezione BALANCED LINE OUT nel pannello posteriore
(ottimizzate il livello di us cita del segnale con il puls ante +4/-10).
COLLEGAMENTO A D UN FINALE DI POTEN ZA: Uscite UNBALANCED OUT.
Dopo aver collegato il MULTIA MP ,ot timiz zate il livello del segnale in ingresso con il puls ante PAD. Sul display
apparira’ la sezione PAD SETTING e c on i cursori e’ possibile selezionare il livello da - 6dB, 0dB, + 6dB, +12dB. Un
indicatore di livello aiutera’a trovare il giusto valore.
La funzione PAD una volta selezionata viene automatic amente associata al prese t.
Selezionare il menu’ SYSTEM sul display con i ta sti cursore,pre mere ENTER e acc edere al menu’ SYSTEM SETTING.
Selezionare AMP MODE premere ENTER e selezionare STEREO mode o MONO BRIDGE. Premere EXIT per uscire.
La mod alità MONO/ BRIDGE o STEREO non è associata al PRESE T.
PRESET E MEMORIA
Il Multiamp contien e 8 BANCHI di memoria, cias cuno con 128 PRESETS suddivisi in questa modalita’: 3 Banchi
Factory Presets e 5 USE RS Bank.
I Banchi Factory Presets sono:
LIVE MONO per collegamento mono/bridge ad un cabinet (es. 4x12).
LIVE S TEREO per collega mento stereo a due c abinet (es. 2 cab 1x12).
STUDIO P.A. per collegamento a P.A. System o a studio monitor.
Per una resa ottimale consigliamo i nostri cabinet DV Mark C412 Standard e C112 Small per i LIVE sound e le nos tre
Mark Audio P.A. high qualit y System.
Nei 5 banchi USER Preset si possono memoriz zare suoni o copiar e e modificare da qualsiasi Factory Preset
.
RICHI AMO DI UN PRESET
Per richiamare un preset premere il ta sto RECALL, sul display appariranno tutti i BANCHI, selezionare un banco
con i ta sti cursore in alto o in basso, premere il tasto ENTER. In questo modo appariranno sul display tut ti i Preset,
selezionate il suono desiderato con i cursori e premere EN TER per ascoltare.
Premere EXIT per visualizzare la configura zione degli Slot o continuare nell’ascolto dei PRESETS.
Premendo il t asto EXIT dal menù SLOT è possibile tornare al m enù PRESE T relativamente all’ultimo banco utilizzato.
6
Page 7
MULTIAMP OVERVIEW
SLOT
The SLOTs are the locations where you can put the A MP models or ef fects.Each Multiamp PRESET contains 8 SLOTs.
You can create the signal routing by putting an AMP and the effects in these loc ations as you like and need.
You can also make a chain by adding the ef fects be fore or after the A MP, and tha nks to the LOOP Send a nd Return, a dd
an outboard effect processors or pedals in serial or parallel and in the chain point wherever you like.
The SLOT # 8 is fixed for the CAB SIMULATOR, which obviously must be at the end of the chain.
It is pos sible to add one A MP at a time.
To have access to each SLOT press the SLOT SELECT button.
Each SLOT contains the following options:
NONE not effect selected
AMPLIFIER AMP models
TUBE NINE tube overdrive
B-DRIVE blues overdrive
D-PLUS distortion
META L TONE metal distortion
FUZZ RACE vintage fuzz
CHR-5 stereo chorus
WAVE FLANGER
CHORUS PHASER
JC VIBRATO popular vibrato
DIGITAL PHASER
REVERB
D-D EL AY digital delay
PATT ER N DELAY
THE GATE noise and hum suppressor
AMP TREMOLO
RSS COMPRESSOR natural compressor
AUTO WAH
SEND/RETURN
An asterisk (*) near the name signals the selected effect.
The SLOT ON/OFF button enable/disable the SLOT.
AMP MODEL
The first thing to do is to put the AMP you choose in the preferred SLOT. Do that by simply choosing with the arrow
buttons the SLOT where you like to pu t it, th en pre ss the SLOT SELECT and select AMPLIFIER from the SLOT menu.
To select an AMP model simply choose from the 3 available lists of models pressing the buttons:
CH1 Clean Sound
CH2 Crunch Sound
CH3 Distortion/Lead Sound
IMPOSTAZIONE MULTIAMP
SLOT
Gli SLOT sono locazioni dove poter inserire modelli di AMP o effetti. Ogni PRESET del MULTI AMP ne contiene 8. In
queste locazioni e’ pos sibile costr uire un routing di segnale inserendo un AMPLI ed effetti a seconda delle esigenze.
E’ pos sibile costruire una catena inserendo effetti prima o dopo l’ampli e, tramite i SEND e RETURN, colleg are
un multieffetto esterno ed inserirlo in serie o parallelo in qualsiasi po sizione. Lo SLOT N°8 è fissato per il CAB
SIMULATOR.
E’ pos sibile inserire un solo A MPLI.
Ad ogni SLOT si accede con il pulsante SLOT SELECT.
Ogni SLOT contiene le seguenti opzioni:
NONE nessun effetto selezionato
AMPLIFIER modelli di AMP
TUBE NINE tube overdrive
B-DRIVE blues overdrive
D-PLUS distortion
META L TONE metal distortion
FUZZ RACE vintage fuzz
CHR-5 stereo chorus
WAVE FLANGER
CHORUS PHASER
JC VIBRATO popular vibrato
DIGITAL PHASER
REVERB
D-D EL AY digital delay
PATT ER N DELAY
THE GATE noise and hum suppressor
AMP TREMOLO
RSS COMPRESSOR natural compressor
AUTO WAH
SEND/RETURN
Un asterisc o (*) in pro ssimita’ del nome s egnala l’ef fetto selezionato.
Il pulsante SLOT ON/OFF attiva o disattiv a lo SLOT.
AMP MODEL
La pri ma opera zione da ef fettu are è quella di p osizionar e l’AMP nello slo t desider ato. Per que sto è suff iciente muo versi
con le frecc e sullo slot, premere il pulsante SLOT SELECT e dal menu’ SLOT selezionare AMPLIFIER.
Per selezionare un modello di AMP basta scegliere fra le 3 liste di mod elli accessibili direttamente con i pulsanti:
CH1 Suono pulito.
CH2 Suono crunch.
CH3 Suono distorto/lead.
7
Page 8
MULTIAMP OVERVIEW
The available AMP models for each channel are:
CH 1 TRIPLE 6 CH1
DARKFACE ‘65 (US)
RECTO (US) CH1
BASSFACE ’59 ( US)
SLODRIVE (US)
XTC CH1
CH 2 TRIPLE 6 CH2
TOP 30 (UK)
SLODRIVE (US)
ROCK ’75 (UK)
XTC CH2
CH 3 TRIPLE 6 CH3
RECTO (US)
ROCK 900 (UK)
SLODRIVE (US)
HEAVY ’51 (US)
XTC CH3
If the A MP is already s elec ted in one of the SLOT, to have access to its parameters (if fea tured in that model), go to
SLOT AMP using the but tons and press ENTER.
SPEAKER SECTION
To have quick access to the CAB options press the S peaker button, the following m enu will appear:
RESPIRE Enhances the cabinet’s ambient/resonance
HPF Limits t he high f requ encies band
LPF Limits t he low frequencie s band
LEVEL Cabinet’s section volume
PHASE – NORM AL /REVERSE Microphone’s phase (Normal /Reverse)
MIC MODE Microphone models
CAB MODE Cabinet models
MIC POS Microphone position
Select the option you like and modif y them as you like using the VALUE control.
Multia mp state-of-the-art design allows for continual expa nsion and more and more usef ul and exciting tones and
effects.
For more info please visit www.dvmark.it
IMPOSTAZIONE MULTIAMP
Gli AMP disponibili per ogni canale sono:
CH 1 TRIPLE 6 CH1
DARKFACE ‘65 (US)
RECTO (US) CH1
BASSFACE ’59 ( US)
SLODRIVE (US)
XTC CH1
CH 2 TRIPLE 6 CH2
TOP 30 (UK)
SLODRIVE (US)
ROCK ’75 (UK)
XTC CH2
CH 3 TRIPLE 6 CH3
RECTO (US)
ROCK 900 (UK)
SLODRIVE (US)
HEAVY ’51 (US)
XTC CH3
Se l’AM P e’ gia selezionato i n uno slot, per a ccedere a i suoi param etri (se prev isti dal mod ello), porta re il cursore s ullo
SLOT AMP e premere il pulsante ENTER.
SPEAKER SECTION
Per accedere velocemente alle opzioni CA B prem ere il tasto Speaker, comparir a’ il seguente menu’:
RESPIRE Accentua l’ambiente/risonanza del cabinet
HPF Limita la banda sulle alte frequenze
LPF Limita la banda sulle basse frequenz e
LEVEL Volume della sezione Cabinet
PHASE – NORM AL /REVERSE Fa se del Mic di ripr esa
MIC MODE Modelli di Microfono di ripresa
CAB MODE Modelli di cabinet
MIC POS Posizionamento del microfono di ripresa
Selezionando le opzioni desiderate e’ possibile modific arle con il potenziometro VALUE.
L’innovati vo design de l Multiamp co nsente un a continua e spansione d i suoni ed eff etti sem pre più utili ed e mozionan ti
Per maggiori informazioni si prega di visitare il sito www.dvmark.it
8
Page 9
MULTIAMP OVERVIEW
HOW TO CREATE A SOUND
Choose the connec tion mode (LIVE with mono cab or STER EO or P.A./studio).
Set th e input level pressing the PAD but ton and select the right dB value.
In most cases 0db is the right level.
Press EXIT to go back from the PAD function.
It would be preferable to have in mind the kind of sound and ef fect routing you’d like to obt ain so you can put effects
and amp in the right chain’s location. As a sugges tion it would be preferable to add the pedal effects like overdrive,
distor tion, etc. b efore of the AMP and the modulation/am bient effects like chorus, re verb after the AMP… but feel free
to experiment with them by yourself to find dif ferent configurations as you like…
Let’s try to sculpture a clean sound using compressor, chorus and reverb.
Select a SLOT for the A MP; as we will have to select t wo ef fec ts before the amp (w e’ll add the reverb after the AMP in
the chain) select the 3rd SLOT.
Press the SLOT SELECT button to enter in the menu and s elect Amplifier, now we have an amp on the 3rd slot.
Using the but tons CH1, CH2, CH3 choose an AMP model; in this case (for example) we choose the BA SSFACE ’59
(US) model from the CH1 list, select it and press enter to confirm. He ar it and then tailor the sound using the control
pots (Gain, Ba ss, Mid, High, Presence, Level).
If we were cre ating our sound for a P.A/Studio use, we would have to enable a CAB slot.
Press the SP EAKER button and select the CA B (Mic mod, Cab Mod, Mic Pos ecc.)
We’ll use the following s etting: RESPIRE – ON
(as example) HPF – OFF
LPF – OFF
LEVEL – 5.62 dB
PHASE – normal
MIC MOD – Americ an 57
CAB MOD – 2x12 Dark
MIC POS – Off Axis
Press EXIT to go back from the CAB menu.
Equalize the sound a s for your personal preference.
Now we’ll add th e Compressor in the 1st SLOT.
Select the 1st SLOT (enable it with th e SLOT ON/OF F button, if i t is disabled), pres s SLOT SELECT and select t he RSS
Compressor, then press E NTE R. Now we have a Compressor in our chain. To acc ess t he Compres sor pa rameters,
sele ct it and pre ss ENTER . Set the pa ramete rs as you like by u sing the VALUE c ontrol; exi t by pressing t he EXIT b utton.
Go ahead adding a Chorus in the 2nd SLOT, repeating the operation w e did to add the Compressor, selecting the
CHR-5 chorus.
Add now a reverb after the AMP SLOT, repea ting the operation as for the Compressor and Chorus.
Fine tune your s elec tions with final adjustements and your sound is ready!
If the connection mode is made for a LIVE sound, for a mono cab or t wo cabs in stereo mode, it would be preferable
to disable the CAB Slot using the SLOT ON/OFF but ton, but feel free to try to give more color to the sound using a bit
of CAB emulator.
Remember t hat in the chain it is possible to add only one AMP SLOT, one DELAY SLOT and one REV ERB SLOT.
IMPOSTAZIONE MULTIAMP
COME FARE UN SUONO
Scegliere il tipo di collegamento (LIV E con cassa mono o ST EREO o P.A ./studio).
Impostare il livello di ingre sso premendo il pulsante PAD e selezionando il valore di dB ottimale.
Nella maggior p arte dei casi 0dB e’ il livello giusto. Premere E XIT per uscire dalla funzione PAD.
E’ necessario avere in mente la tipologia di suono da ottenere ed il routing degli e ffetti in modo da posizionare
correttamente gli ef fet ti e l’a mpli. E’ consigliabile inserire gli ef fet ti a pedale prima dell’Ampli e gli effetti di delay e
reverb dopo l’ampli. Ma tut to si puo’ speriment are....
Proviamo a scolpire un clean sound con compressore, chorus e reverb.
Selezionia mo uno SLOT per l’amplificatore; dovendo inserire prima dell’ampli due ef fet ti (il reverb lo metteremo
dopo l’ampli nella catena) selezioniamo il terzo SLOT. Premere il pulsante SLOT SEL ECT per accedere al menu’ slot.
Selezionare AMPLIFIER, ora abbiamo un amp sul terzo slot. Utiliz zando i ta sti CH1, CH2, CH3 s cegliere il modello
di amplificatore; in questo caso sceglieremo un BASSFACE ’59 (US) dalla lista CH1, selezionarlo e pre mere enter
per conferma. Ora e’ possibile ascoltarlo e scolpire il suono attraverso le m anopole frontali (Gain, Bass, Mid, High,
Presence, Level).
Se il nos tro suono e’ fa tto per un sistema P.A/Studio abbiamo bisogno di abilit are il CAB Slot.
Premere il pulsante SPE AKER e selezionare le opzioni Cab (Mic mod, Cab Mod, Mic Pos ec c.)
Useremo le seguenti regolazioni: RESPIRE – ON
HPF – OFF
LPF – OFF
LEVEL – 5.62 dB
PHASE – normal
MIC MOD – Americ an 57
CAB MOD – 2x12 Dark
MIC POS – Off Axis
Premere EXIT per uscire dal menu’ CA B.
Equalizzare il suono.
Ora ins eriremo il Compres sore nel primo SLOT.
Selezionare il primo SLOT (abilitarlo con il pulsante SLOT ON/OFF, nel caso fosse disa bilitato), premere SLOT
SELECT e selezionare il Compressore RSS Compressor, premere ENTER. Ora abbiamo un Comp nella nostra catena.
Per accedere ai param etri d el compres sore selezionarlo e premere ENTER. Regolare a piacimento i param etri d el
compressore usando il potenziome tro VALUE ed uscire con il tasto EXIT.
Ora nel secondo SLOT inseriamo un Chorus. Ripe tere le operazioni come per l’inserimento del compressore,
selezionare il chorus CHR - 5.
Dopo lo SLOT AMP inseriamo or a un reverbero ripetendo le operazioni come per il c ompressore ed il chorus.
Perfezionate il tutto con le regola zioni finali ed avrete il vostro suono!
Se il collegam ento e’ fat to per un LIVE sound, cioe’ con una cassa mono o due stereo, ricordate di dis abilit are lo Slot
CAB con il tasto SLOT ON/OFF, ma se volete pote te provare a colorare di piu’il suono usando un pò di CA B Slot.…
Si ricorda che nella catena audio è possibile inserire un solo SLOT AMP, un solo SLOT DELAY ed un solo SLOT
REVERB.
9
Page 10
MULTIAMP OVERVIEW
STORE A SOUND
Now that we have created our sound we can name it and memorize it in one of the USERS B anks, as following:
Pres s STORE but ton, the BA NK menu will appea r, sel ect an USE RS bank and pr ess ENTER. Cho ose the pre set locat ion
number where you want to store it and press ENTER ag ain. Now you can name it with alphanumeric characters using
the VALUE control (up to 10 chara cters). With the left /right but tons go to the following char acter and s croll the let ters,
numbers and symbols using the VALUE pot.
When your pre set name is completed, press E NTE R to confirm; it will app ear on the display with the B ank number,
Preset number, Name and its routing configuration. The preset is now stored!
SEND / RETURN
If you us e external effect processors or pedals you c an route them through the LOOP section, it can be selected in
Serial or Par allel mode, and you can set it anywhere you like in t he sign al chain.
Conne ct the LOOP SE ND to your outboard e ffe ct pro ces sor or pedal input and the LOOP RETURN to the ef fect
processor output.
Select a SLOT, pressing SLOT SELECT and go to SEND/ RETURN in t he SLOT menu using the scrolling buttons.
Press ENT ER to confirm, now th e outboard effect is enable d, press ENTER to access to the Send/Return parameters.
LEVEL – Signal Level
MODE - Serial/Parallel
Press EXIT to go back.
OTHER POSSIBLE MULTIAMP CONNECTIONS
USE THE MULTIAMP AS EFFECT PROCESSOR CONNECTE D TO AN AMP HEAD’S SEND/RE TURN.
Use the UNBA LANCED OUT, or if connected to a mixer use t he XLR BAL ANCED OUT.
Conne ct the Mult iamp INPU T to the SEND o f your amp he ad and the Mul tiamp OUT PUT to the r eturn of you r head amp.
Disable the A MP Slot a nd configure the preset with the desired ef fects.
USE THE MULTIAMP AS POWER AMP.
There are two possible options:
1. Connect your external PRE output to the Multiamp’s INPUT a nd the speaker output MONO BRIDGE (5 00W ) to the
cabinet. DISABLE ALL THE SLOT (SLOT OFF) OF THE PRESE T and the Multiamp will work only as power amp.
2. Connect your external PRE ou tput to the Multiamp’s RETURN a nd the speaker output MONO BRIDGE (5 00W ) to
the cabinet.
In this case select a SLOT with SEND/RETURN from the SLOT menu, disable the A MP and the ef fects routing, and
select SERIES and the desired output LEVEL in t he SEND/R ETURN parameters. Please remember while using the
MULTIA MP as a power amp that it works in MONO BRIDGE mode giving 5 00W of power.
IMPOSTAZIONE MULTIAMP
MEMORIZZAZIONE DI UN SUONO
Ora che abbia mo il nostro suono pos siamo dargli un nome e memorizzarlo in uno dei Banchi USERS in ques to modo:
Premere il tasto STORE, apparira’ il m enu’ BANK, seleziona re un banco US ERS, premere ENTER e scegliere il numero
di pres et dove memorizzare il suono. Premere di nuovo ENT ER, ora e’ pos sibile con il potenziometro VALUE accedere
ai car atteri a lfanume rici (mass imo 10 carat teri) per n ominare il no stro pres et. Con i ta sti scorr imento a de stra e sinis tra
possiamo passare alla lettera successiva e con il pot. VALUE possiamo fare lo scrolling delle let tere o numeri o altri
simboli.
Una volta completato il nome premere ENTE R per confer mare e sul display app arira’ il nostro preset con numero
di BANCO, numero di PRESET, NOME e la sua configura zione di routing. In qu esto modo il preset e’ memorizzato.
SEND / RETURN
Attraverso i connet tori SEND e RETURN nel pannello posteriore e’ possibile collegare un multief fet to esterno e
posiz ionarlo nella cate na degli SLOT in q ualsiasi po sizione ed avere la po ssibilita’ di inserirlo in SE RIE o PARALLELO.
Una volta collegato il multieffetto, selezionare uno SLOT, premere il tasto SLOT SELECT per accedere al menu’ SLOT
e tramite i cur sori di scorrimento sele zionare SEND/RETURN.
Premere EN TER p er confermare, ora abbiamo inserito l’ef fet to esterno, premere EN TER p er accedere ai parametri di
Send/Return.
LEVEL Livello del segnale
MODE Serial/Parallel
Premere EXIT per uscire.
ALTRI TIPI DI COL LEGAMENTO POS SIBILI CON IL MULTIAMP
COLLEGAMENTO COME MULTIEFFET TO USANDO IL MULTIA MP SUL SEND E RE TURN DI UNA T ESTATA.
Usare le uscite UNB ALANCED OUT, o se collega to ad un mixer collegarsi alle uscite XLR BALA NCED OUT.
Collegare IN del MULTIAMP a SEND della vostra testata e OUT d el Multiamp a RETURN della testata.
ESCLUDERE LO SLOT DI SIMULAZIONE AMP e configurare il Preset con gli ef fet ti voluti.
USANDO IL MULTIAMP COME FINAL E DI POTENZ A.
Le possibilit a’ sono due :
1. Collega te il vos tro PR E all’INPUT del Multiamp e l’uscita MONO BRID GE (50 0W) alla ca ssa .ESCLUDET E DAL
PRESET TUTT I GLI SLOT (SLOT OFF) e il Multiamp lavorera’solo come finale di potenza.
2. E’ anche possibile collegare l’OUT del vost ro PRE al RET URN del Multiamp ed usare l’uscita MO NO BRIDGE. In
questo caso sele zionate uno SLOT con SEND e RETURN dal menu’ slot ,escludete l’AMP e gli eff etti sul routing del
Multia mp ,e dai para metri del SEND slot selezionate SERIE e il livello (LE VEL) d’uscita voluto.
E’ importante ricordare che il MULTIAMP usato come finale di potenza lavor a in MONO BRIDGE ed eroga 500 W.
10
Page 11
MULTIAMP OVERVIEW
SD CARD
By using an SD CARD you c an recall a whole BA NK of items, m emorize a BA NK and import/expor t a single PRESET.
Select SYSTEM to go to the SD CARD menu. Press ENTER and the System SETTING menu will appear.
Select the file, press ENTER and choose the desired op eration.
Press ENT ER to re call or impor t an ite m or a BANK..
SYSTEM MENU’
FILE
AMP MODE
MIDI
FIRMWARE UPDATE
STORE TO SD
RECALL FROM SD
EXPORT PRESET
IMPORT PRESET
DELETE PRESET
STEREO
MONO/BRIDGE
MIDI ADDRESS
PRESET/PATCH MAP
IMPOSTAZIONE MULTIAMP
SD CARD
Tramite una SD CA RD e’ po ssibile richiamare un intero BANCO di suoni, memoriz zare un BANCO e importare o
esportare un singolo PRESET.
Per ac cedere a l menu’ SD Ca rd selezi onare sul dis play SYST EM, preme re ENTE R e apparir a’ il menu’ Sy stem SE TTING.
Selezionare File , premere ENTER e sceglie re l’operazione d esiderat a.
Premere EN TER per richiamare o importare un suono o un BANCO.
SYSTEM MENU’
FILE
AMP MODE
MIDI
FIRMWARE UPDATE
STORE TO SD
RECALL FROM SD
EXPORT PRESET
IMPORT PRESET
DELETE PRESET
STEREO
MONO/BRIDGE
MIDI ADDRESS
PRESET/PATCH MAP
FILE
Use this menu to STORE and RECALL in t he banks and single PRESE T.
AMP MODE
Use this menu to set the internal AMP mode configurations: S TEREO or MONO (BRIDGE).
MIDI
In the MIDI menu you can set th e MIDI address of the Multia mp and the PATCH NUMBER to the Multiamp PRESET
map.
The PROGRAM CHANGE #90 is used for TAP TEMPO.
FIRMWARE UPDATE
By selecting this option th e Firmware Update procedure from th e SD Card will be active.
For more details about Firmware Update and to check if the firmware version that is currently installed on your
Multia mp is the latest one, please visit the related section at w ww.dvmark.it.
FILE
In questo menù è possibile ef fettuare le operazioni di STORE e RECALL su BANCHI e PRESE T singoli.
AMP MODE
In que sto menù è pos sibile effe ttuare l e operazioni di con figurazione de ll’AMPLI interno: modalità STEREO o m odalità
MONO (BRIDGE).
MIDI
In questo menù è possibile definire l’indirizzo MIDI dell’unit à MULTIAMP e ge stire la tab ella che associa PATCH
NUMBER a PRESET interni.
Il PROGRAM CHANGE #90 è utilizzato per il TAP TEMPO.
FIRMWARE UPDATE
Questa selezione attiva la proce dura di aggiornamento del firmware tramite scheda SD. Per i det tagli di questa
operazione e per verificare se la tua revisione è aggiornata visita il sito ww w.dvmark.it nell’apposita s ezione.
11
Page 12
TECHNICAL SPECS
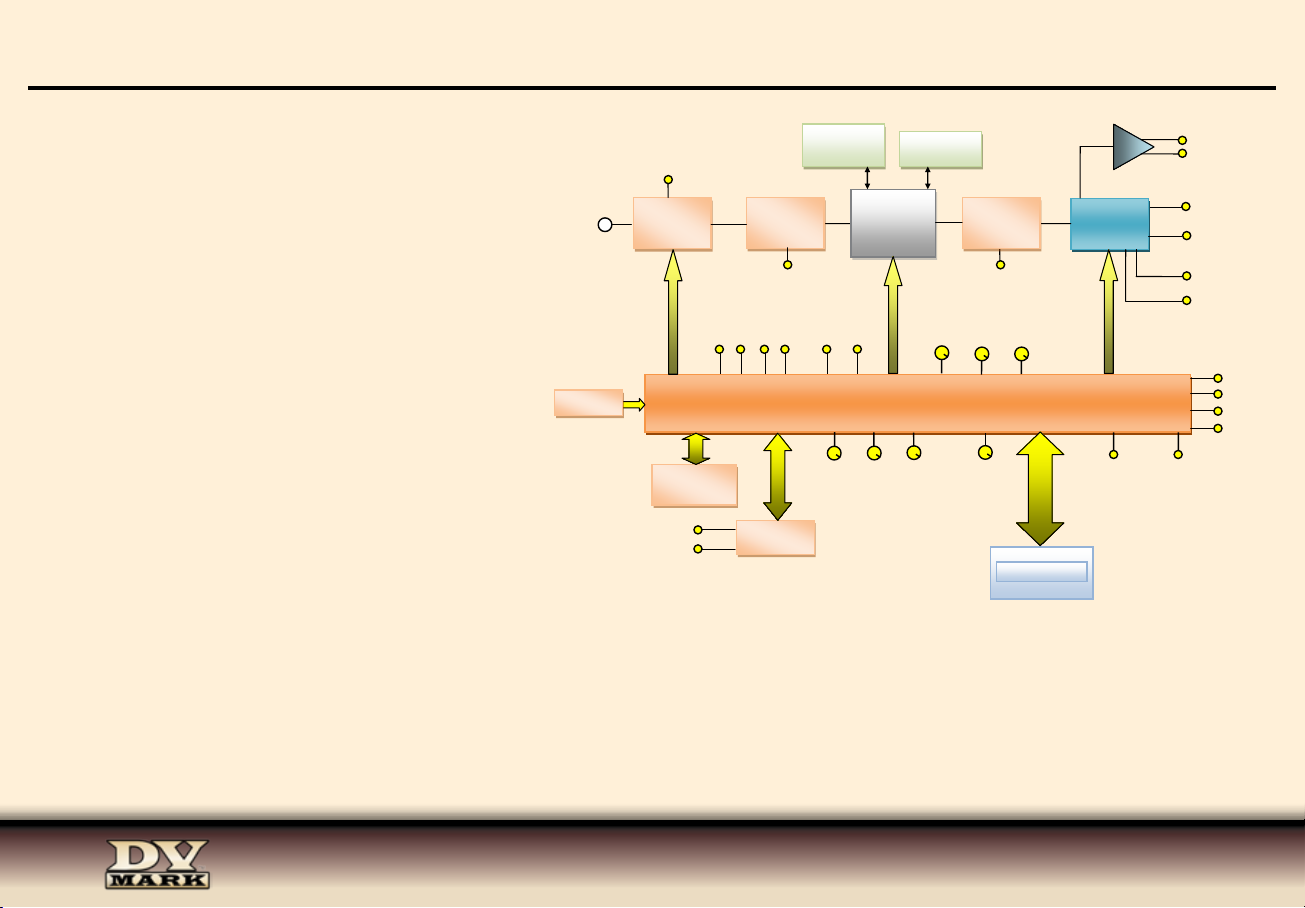
Channels: Three
Controls: Gain - Level - Presence - Master
SPI
Pad
Flash
SDRAM
EQ Controls: Low - Mid - High
Speaker Outputs:
Input
. . . . . . . .Two ¼” Jack mono out 4/16 ohm
. . . . . . . .One Neutrik Speakon/¼” Jack Combo BRIDGE out
Gain and
filtering 1
A/D
Converter
DSP
Sharch
ADSP-21489
D/A
Converter
SendRet
8/16 ohm
Power Output: 250W + 250W @ 4ohm, 150W + 150W @ 8ohm,
Enter Exit
<
v
>
^
MidLow
85W + 85W @ 16 ohm;
500W@8ohm, 300W@16ohm (BRIDGE mode)
Other Features:
SD CARD
Microcontroller
. . . . . . . .Virtual amps
. . . . . . . .Speaker cabs and microphones
. . . . . . . .Effects
. . . . . . . .External memory (SD card)
Midi In
Midi Thru
EEPROM
(24C02)
Midi
Gain
Master
Presence
Value
Dimensions: 486 x 89 x 324 mm / 19” x 3.5” x 12.76”
Weight: 4,3 kg / 9.48 lbs
POWER REQUIREMENT: 100V; 120V; 230V; 240V - 50/60Hz (Voltage is factory preset according to region of sale).
DV Mark amps/combos are manufactured to be sold and used in the country of purchase, and they are factory preset to at country’s voltage.
Due to homologation issues, the voltage may not be changed.
BLOCK DIAGRAM
PA
Output
High
Store Recall
Graphic Display
Speaker out L/R
Jack Le/Mono
Jack Right
XLR Le/Mono
XLR Right
Ch1
Ch2
3Ch
SS
12
Page 13
LIMITED WARRANTY
13
Page 14
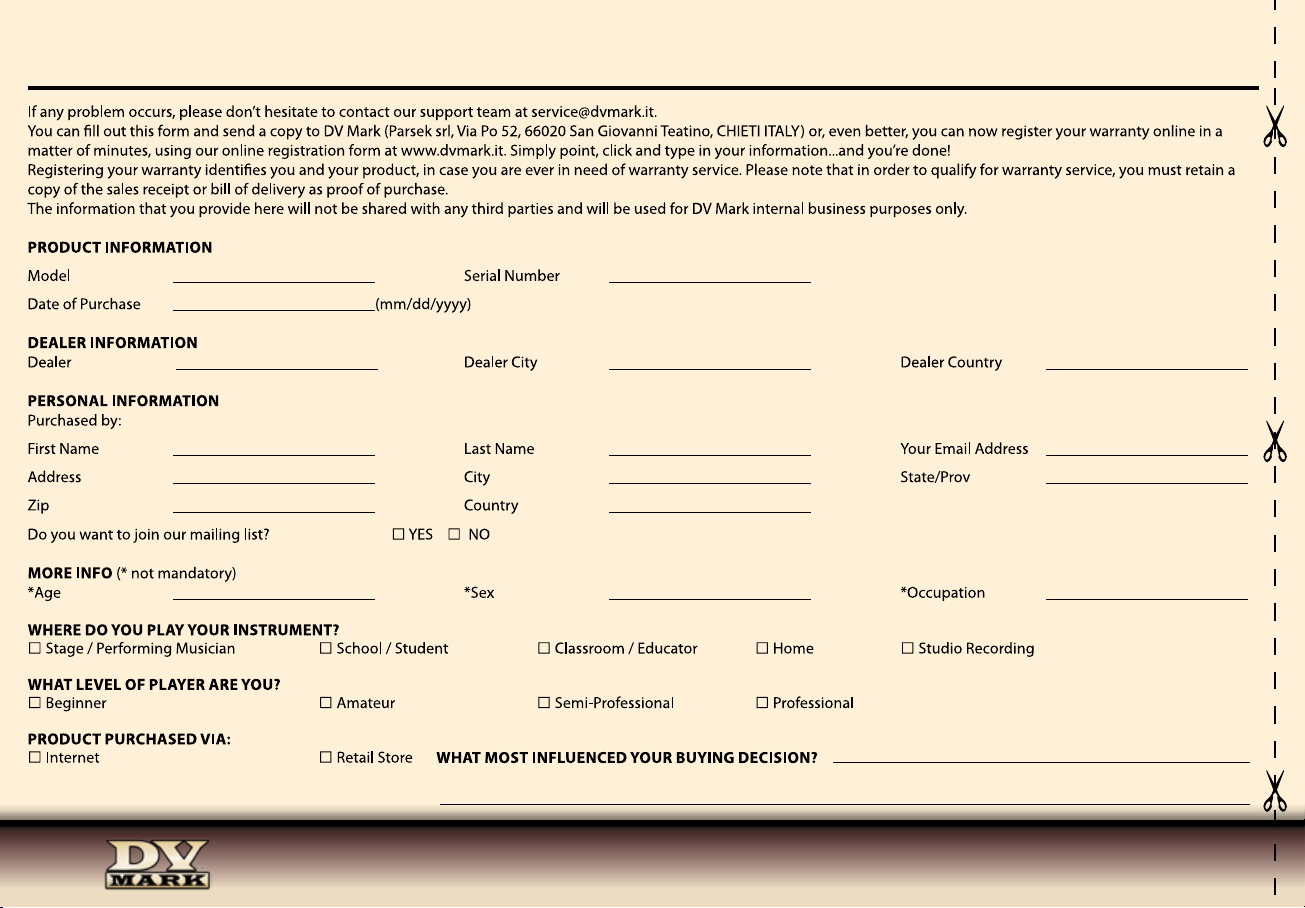
WARRANTY CARD
14
Page 15

NOTE
15
Page 16

Product specications are subject to change without notice
TM
www.markbass.it
www.momark.it
TM
www.markaudio.it
srl
Italy - 66020 San Giovanni Teatino CH - Via Po, 52
Tel: +39 0854407764 / 0854465705 - Fax: +39 0854407764 / 0854407399 - www.dvmark.it - [email protected]
 Loading...