

DVDO Quick6 User Manual

DVDO Quick
6
6x2 4K Ultra HD HDMI Switcher
User’s Guide
Version 1.0

DVDO Quick6 2 A.04
Important Safety Informati on
• Follow all instructions
• Use only a dry cloth to clean
• Use caution not to block any vents in either unit
• To reduce the risk of electric shock, do not use near water or expose to rain or moisture. Keep away
from excess moisture
• Do not use near heat sources such as room heaters, hot A/V equipment
• Read all warnings
• Use only accessories approved by DVDO including mounting brackets
• Unplug the device during lightning storms or when unused for long periods of time
• Keep away from open flames
• Protect all connected cords including power cords from being pinched, compressed, stepped on
• Do not open the case. All servicing should be done only by qualified and approved service personnel

DVDO Quick6 3 A.04
Contents
Overview ......................................................................................................................... 4
Key features ................................................................................................................. 4
In the Box ..................................................................................................................... 4
InstaPrevue Visual Switching Technology ................................................................... 5
InstaPort S Single-second Switching Technology ........................................................ 6
Input/Output .................................................................................................................... 6
Front Panel .................................................................................................................. 6
Back Panel ................................................................................................................... 7
Connections .................................................................................................................... 7
AVR via HDMI and AVR via S/PIDF Modes ................................................................. 7
Mirror Mode ................................................................................................................ 10
Audio Return Channel (ARC) ........................................................................................ 13
Remote Control ............................................................................................................. 14
On Screen Display Menu System ................................................................................. 15
Updating Firmware ........................................................................................................ 21
To upgrade firmware using the On-screen-display (preferred) ................................... 21
To upgrade firmware using the firmware update button ............................................. 22
Serial Control ................................................................................................................ 23
Troubleshooting: ........................................................................................................... 23
Specifications ................................................................................................................ 28
FCC Interference and Complia nc e Stat em ent .............................................................. 30
Warranty ....................................................................................................................... 31
General Warranty Terms ............................................................................................ 31
DVDO Products Warranty Period ............................................................................... 31
System Warranty ........................................................................................................ 31
Obtaining the Warranty Service ................................................................................. 32
International Warranty ................................................................................................ 32
Limitation of Liability ................................................................................................... 33
Disclaimer of Warranty ............................................................................................... 33
Getting Help .................................................................................................................. 34
Legal notices ................................................................................................................. 34

DVDO Quick6 4 A.04
Overview
Quick6™ is DVDO’s latest HDMI switcher for home entertainment and theater applications.
Key features
• InstaPrevue® technology
• 6 HDMI inputs, 2 HDMI outputs; 4K Ultra HD 3D capable
• MHL® capability on two inputs
• Auto Switching – three modes
• Optical and coax S/PDIF outputs
• Serial and IR remote control
• Simple Firmware update using USB flash drive
• On-screen display (OSD) for easy setup and control
• Special AVR mode for easy integration with any existing audio receiver
• Auto negotiating Mirror mode ensures compatibility
• Remote control (including discrete on and off codes)
In the Box
• Quick6 HDMI switcher
• 12 V power supply
• Remote control
• Quick Start guide
• InstaPort® S technology

DVDO Quick6 5 A.04
InstaPrevue Visual Switc hing Te chnology
Quick6 InstaPrevue technology provides the user with a simple way to view and select inputs. Instead of
choosing from a text list of input names, Quick6 offers visual input selection by displaying individual preview
windows for each active input. Activate InstaPrevue by pressing the InstaPrevue button .
Note that preview windows only display actively connected inputs.
Use the arrow buttons on the remote control to select the input you want to watch and press the ENTER
button to switch to the input
There are two modes available that are set in the InstaPrevue > Activate Names menu:
• Offset mode: In this mode, the selected window is offset to show which input is being selected
• Named mode: In this mode, the selected input name is shown above its preview window
Offset Mode Named Mode
DVDO Quick6 6 A.04
InstaPort S Single-second Switching Technology
Typically, when a source device is connected to an HDMI switcher, the HDCP authorization process is not
initialized until that source is selected as the input to be displayed on the TV. However, Quick6 InstaPort S
technology performs the HDCP authorization routine immediately when the device is connected. Then, when
a user selects that source, it outputs the content immediately, without having to wait for HDCP
authentication. This results in a better user experience. The only delay in the system is typically caused by
the TV when the user switches between sources of different resolutions and the TV needs to sync to the
new format.
Input/Output
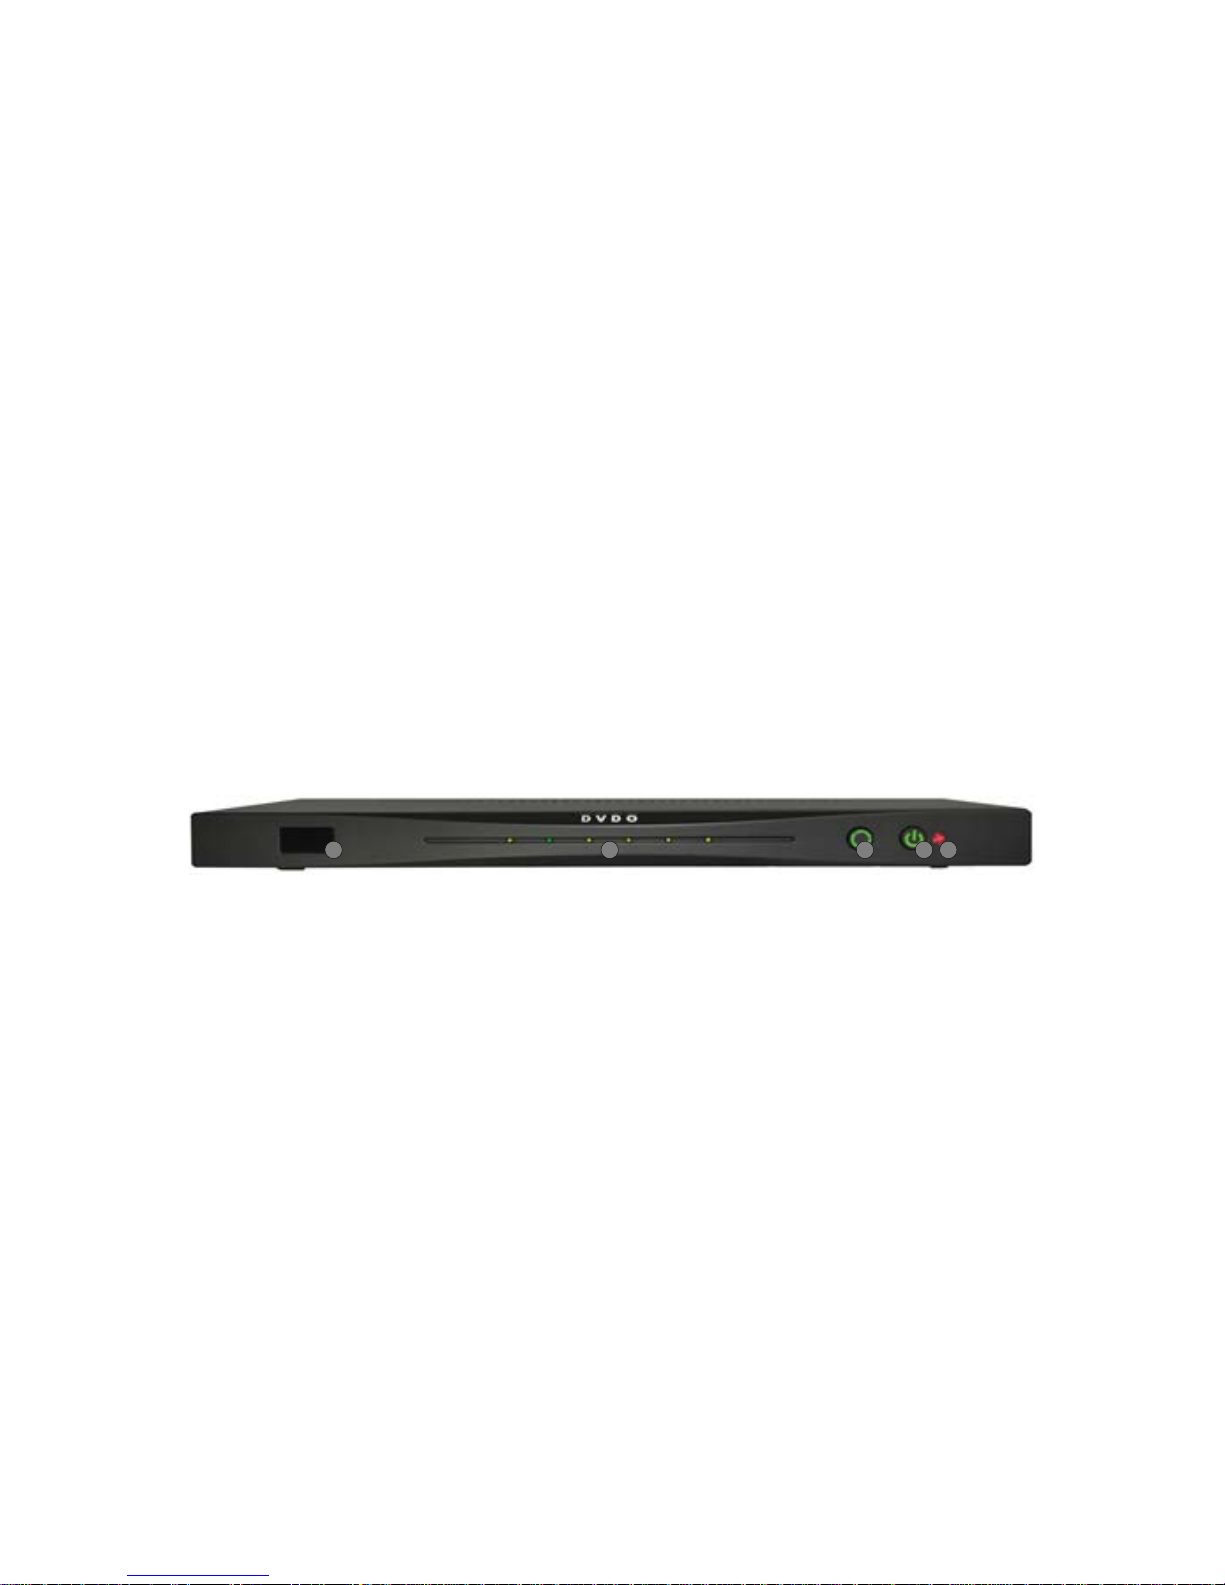
Front Panel
1 3 4 52
1. IR window – remote control receiver
2. Input indicators (Off = no connection, Amber = HDMI connected, Green = active input)
3. Input select – manually cycles through connected inputs
4. Power switch
5. Power indicator
DVDO Quick6 7 A.04
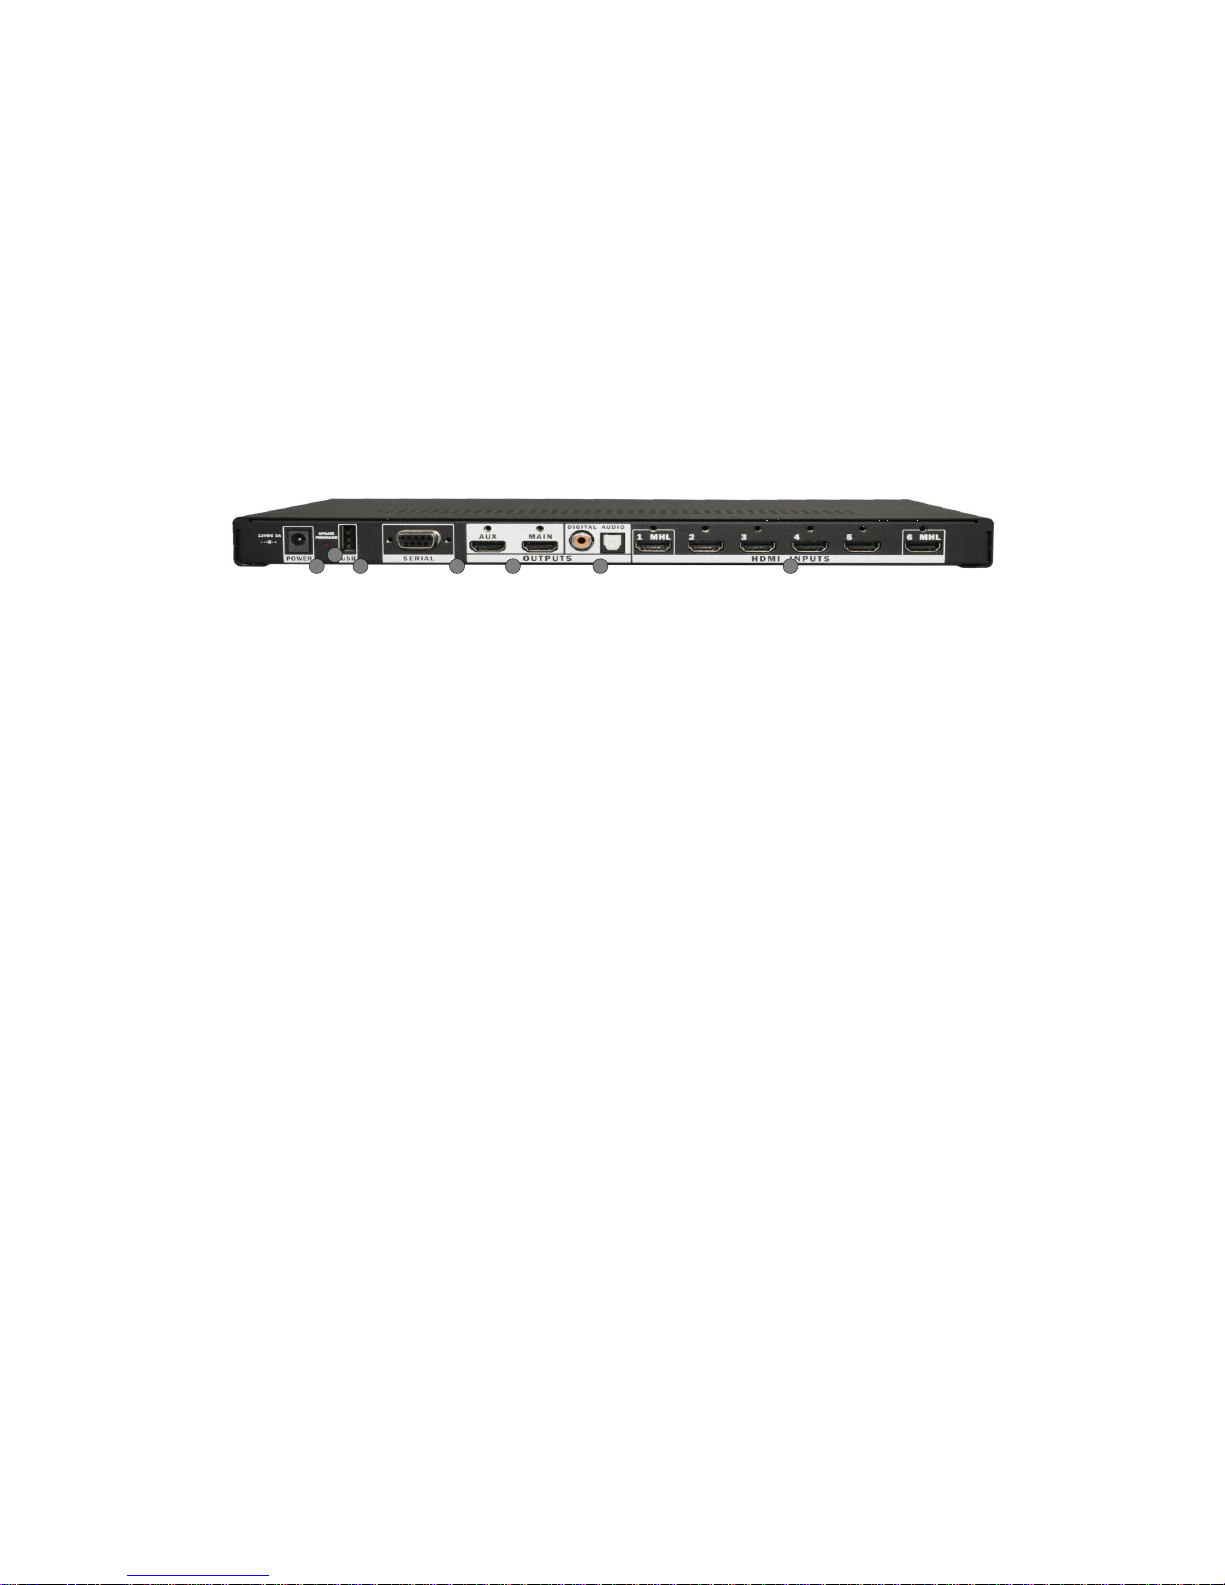
Back Panel
1
2
4
5
6
7
3
1. Power input – 12 VDC 3 A minimum
2. Update firmware button – see the firmware update section for details. This button is held during power-up
to start the firmware update process from an attached USB flash drive.
3. USB connector – Primarily used for updating firmware, but also supplies 5 V up to 1 A for accessories
4. Serial port: allows control of Quick6 by external control systems
5. HDMI outputs – Main output is always active, Aux output depends on OSD setting – The two available
modes are Mirror and AVR
6. S/PDIF audio outputs – Coax and optical: Whenever the audio stream permits, audio is extracted from
the active input and also sent to the S/PDIF outputs
7. HDMI Inputs 1–6 – Input 1 and Input 6 are each capable of connecting to a MHL mobile device as well
using only a passive cable. These ports can each supply up to 900 mA for charging the mobile device.
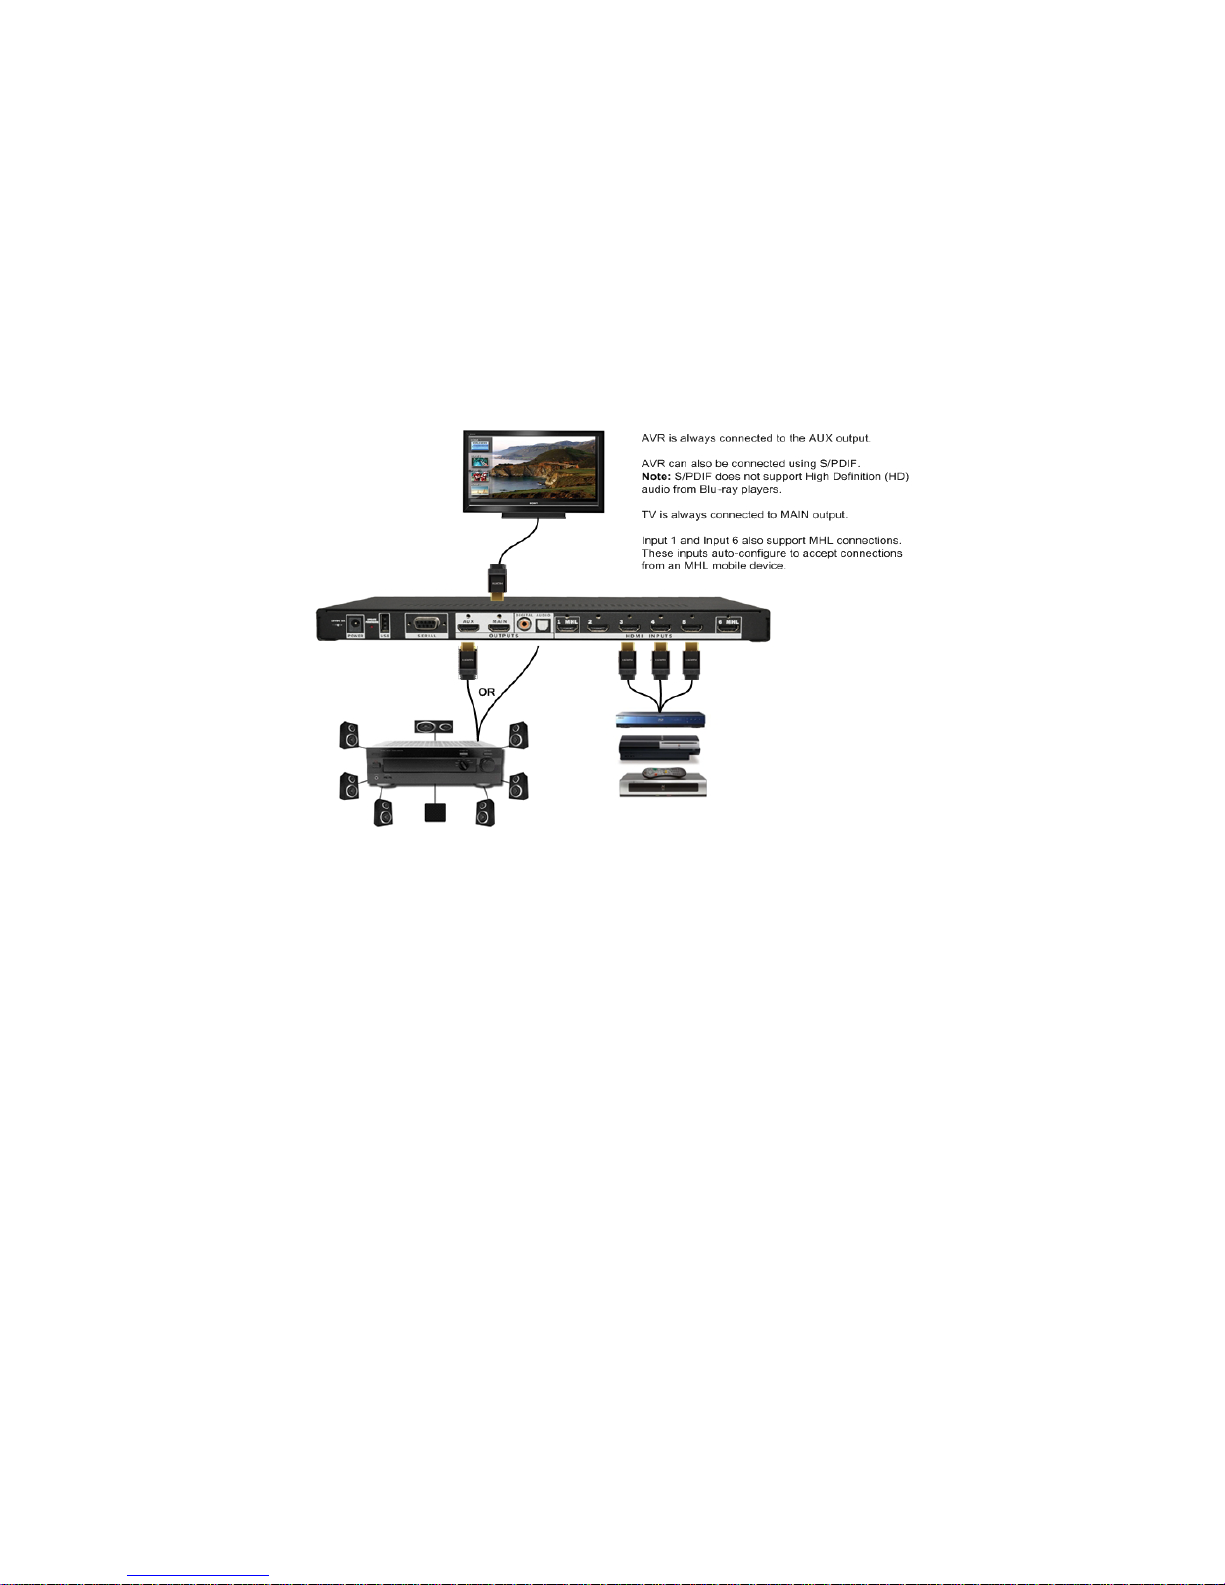
Connections
AVR via HDMI and AVR via S/PIDF Modes
In this configuration, Quick6 becomes the primary HDMI switch and control center for a home theater.
Connection to the existing AVR can be via HDMI or S/PDIF (for older AVRs with no HDMI). If the AVR has
an HDMI input, this is preferred as it provides the best overall experience. With either connection, the AVR is
then left on that input always and all switching is done with Quick6. If the Quick6 connection to the AVR is
from the Aux HDMI output, then choose “AVR via HDMI” in the output setup menu. If the Quick6 connection
to the AVR is from the optical or coax S/PDIF output, then choose “AVR via S/PDIF” in the output setup
menu.
DVDO Quick6 8 A.04
AVR Mode Routing
Why use AVR mode?
This mode is designed to extend the life of your existing AVR. In most installations, the AVR is used as not
only the audio amplifier but also the central video switch. Since the audio needs to match the v i deo being
displayed, running everything through the AVR is the simplest method. While AVRs tend to have a long life
and continue to provide basic audio functions, video standards and features change more quickly. Adding
Quick6 to an existing system upgrades the entire entertainment center to the latest features. With Quick6
installed, the AVR is used primarily as an audio processor and Quick6 becomes the primary switch in the
system. Quick6 routes the best possible audio to the AVR and the best possible video to the TV.

DVDO Quick6 9 A.04
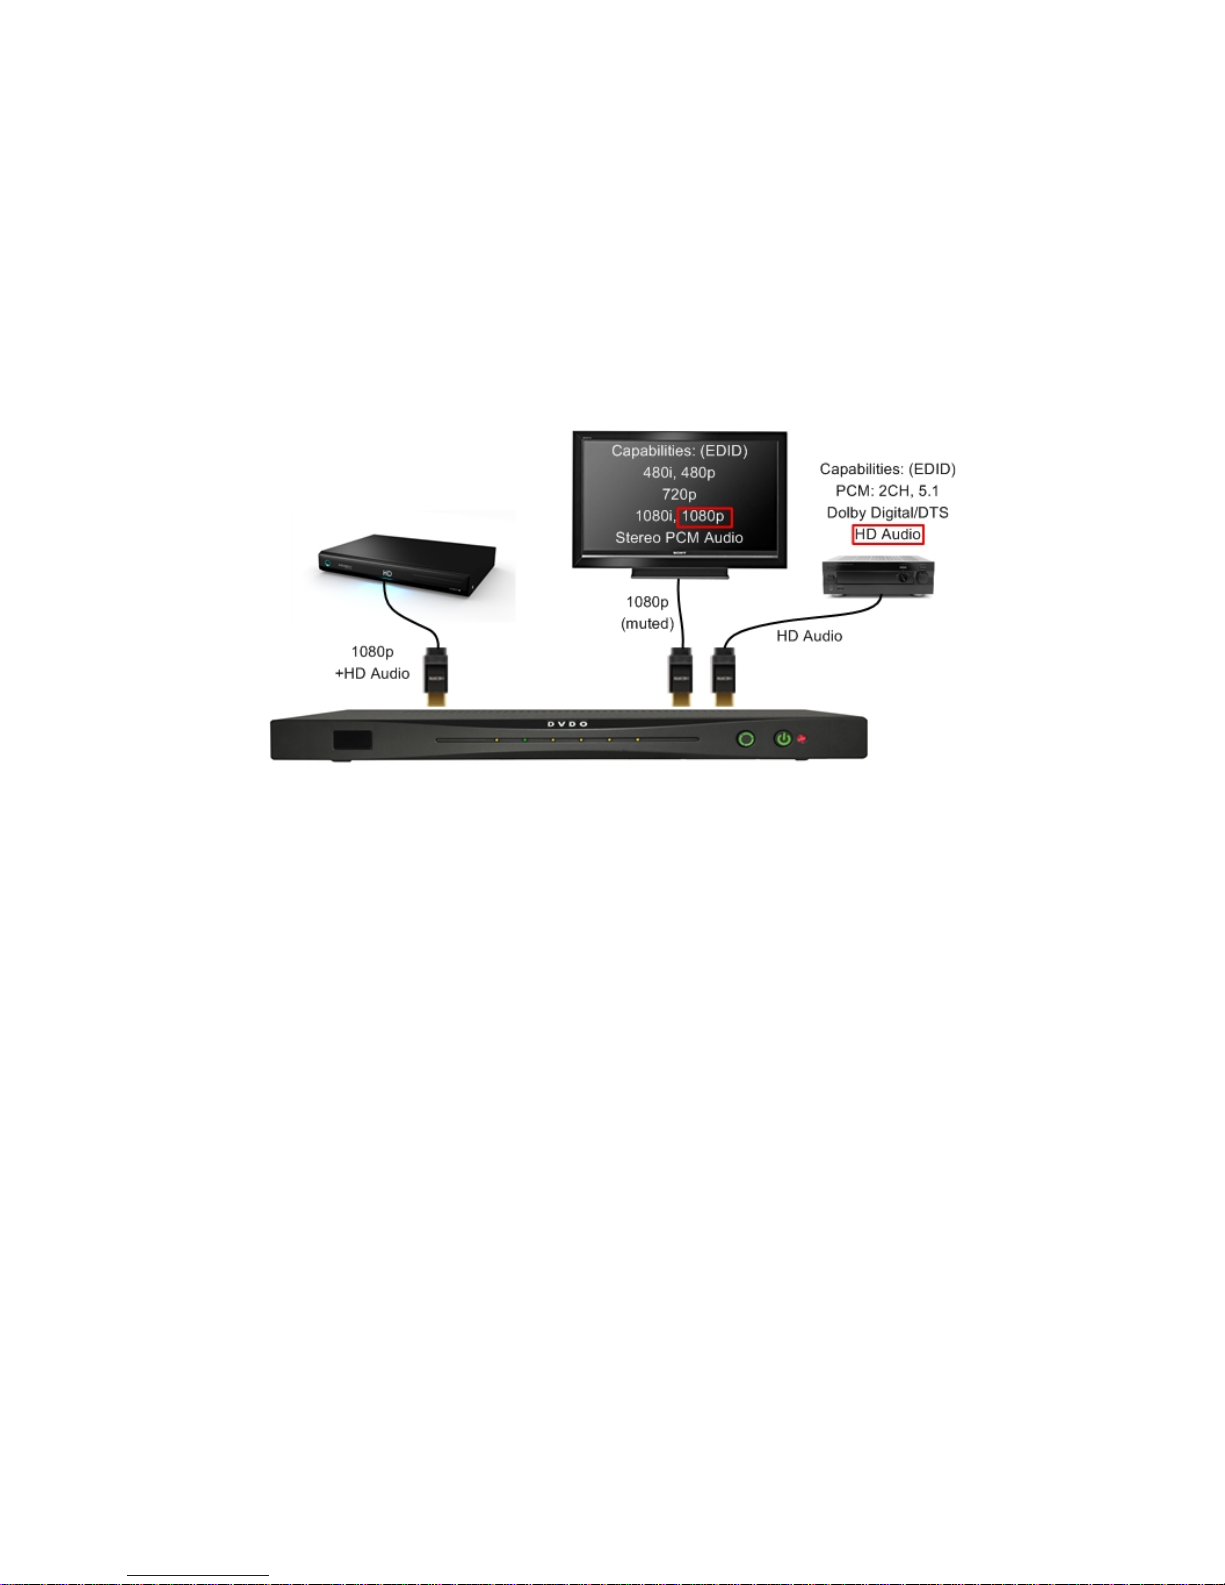
Audio and Video resolution and routing
When Quick6 is put into “AVR via HDMI” mode, the full audio capabilities of the AVR (EDID) are scanned
and combined with the best possible video capabilities of the TV (EDID) and the combination is reported
back to all the inputs. In this way, the inputs will send the best possible audio (routed to the AVR) and the
best possible video (routed to the TV). Since the input signal could have a resolution of up to 4K (Ultra HD)
with HD audio, and the TV likely cannot handle HD audio, Quick6 mutes the audio going to the TV when the
AVR is on. HD Audio includes Dolby TrueHD as well as DTS-HD Master Audio formats.
When the AVR is disconnected or power ed of f, onl y the audio capability of the TV (normall y just PCM s ter eo)
is reported back to the inputs and the TV audio i s unmuted. In this way the user can choose to watch a
program just with the TV’s audio (AVR off) or w i th full s ur r ound soun d fro m the AV R ( no a udio from the TV).
This special negotiation only happens if the AVR is connected to the Aux HDMI output.
When Quick6 is put into “AVR via S/PDIF” mode, the video capabilities of the TV (EDID) are scanned and
combined with a pre-stored capability list of a standard AVR connected through S/PDIF and the combination
is reported back to all the inputs. This is necessary since capabilities cannot be read through S/PDIF. This
allows a full TV resolution of up to 4K while delivering the full audio capabilities possible over S/PDIF
including bitstream (Dolby, DTS and oth er for mats). In this mode, Quick6 also mutes the audio going to the
TV to prevent formats unknow n to the TV fro m causi ng unw anted noise.
Since there is no way to detect if the AVR is on or off through S/PDIF, if the user wants to use the TV
speakers, the output mode must be switched back to Mirror or “AVR via HDMI” manually.
DVDO Quick6 10 A.04
AVR Mode Resolution
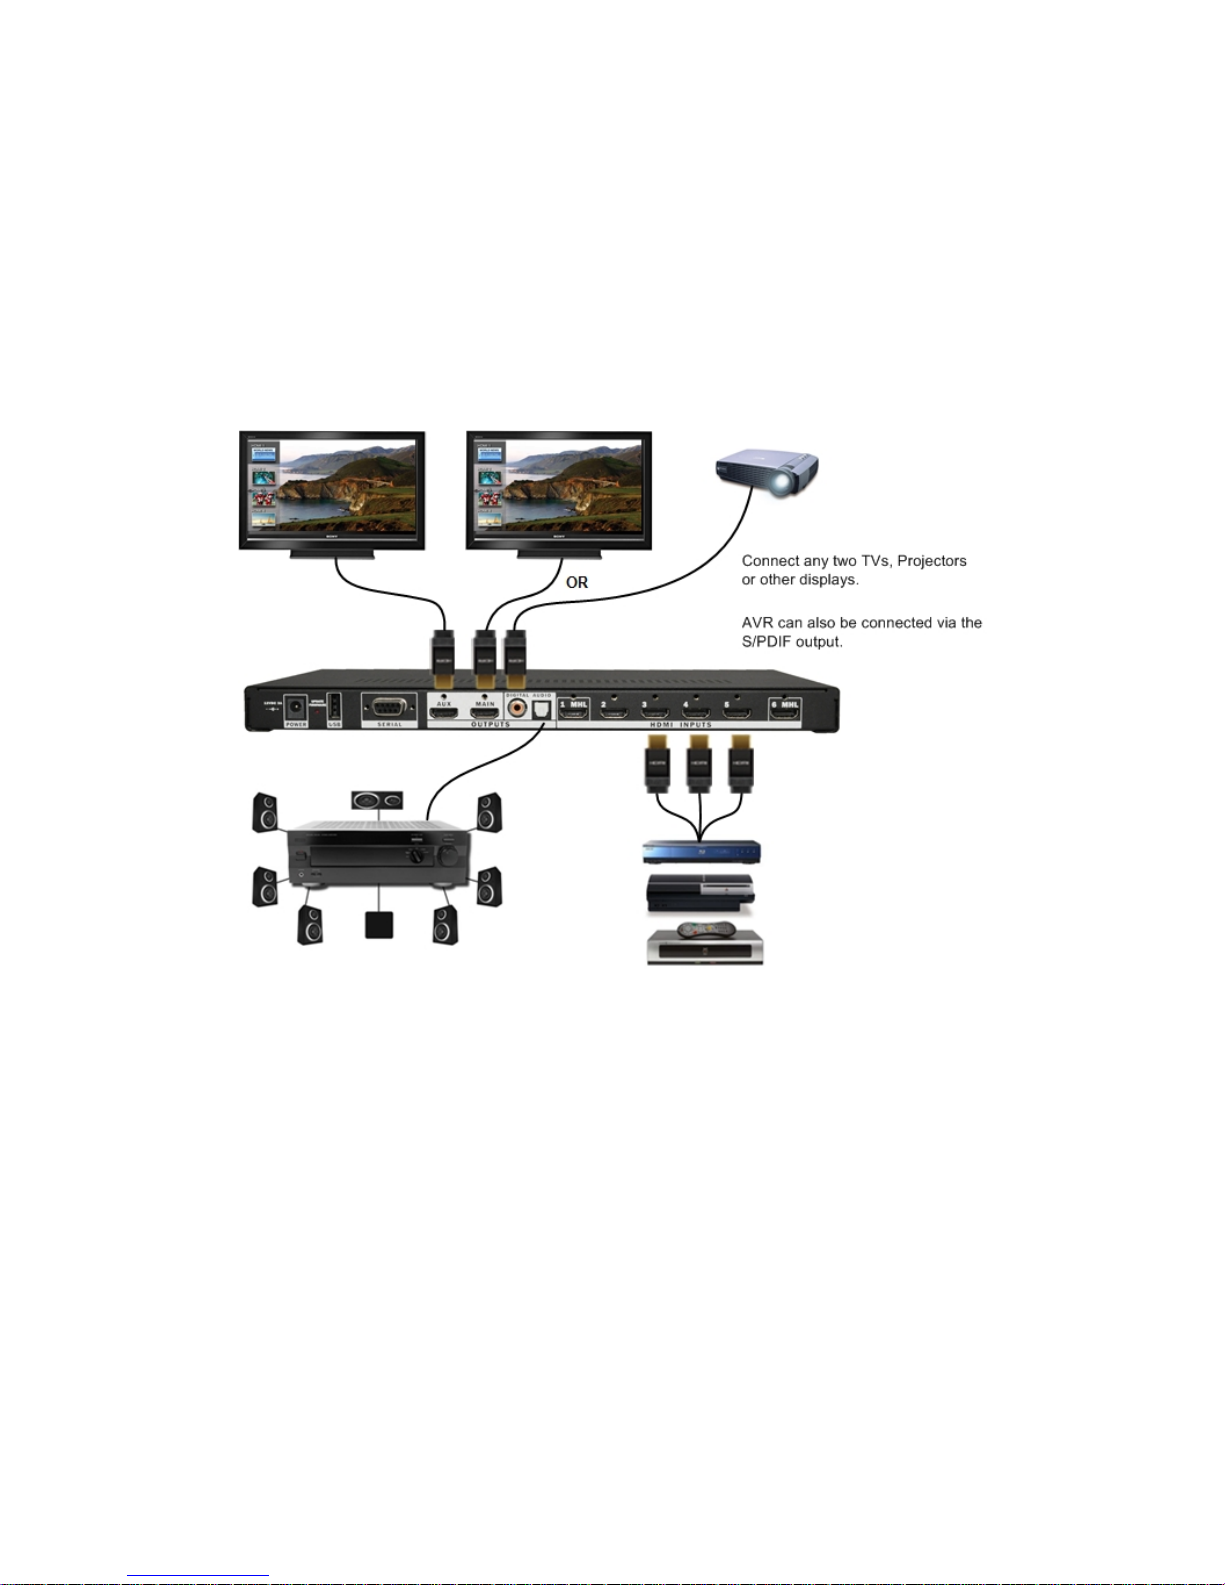
Mirror Mode
In this configuration, Quick6 allows two devices to share a single stack of equipment. This mode is normally
used to feed both a TV and video projector in the same room or for a second monitor in a close but related
area (like a bar at the back of a home theater).
DVDO Quick6 11 A.04
Mirror Mode Routing
 Loading...