

DURAVIT XL 6516 Installation Instructions Manual
X-Large
# XL 6516
Installation instructions
Leben im Bad
Living bathrooms
Instructions for use
The bathroom furniture range complies with the standards and guidelines applicable at the time of delivery and is designed for use in bathrooms.
Though designed for the wet environment, direct contact with water should be avoided, for example, when showering.
We reserve the right to make technical improvments and design modifications to the products illustrated.
MAL_X-Large_XL6516/15.04.1
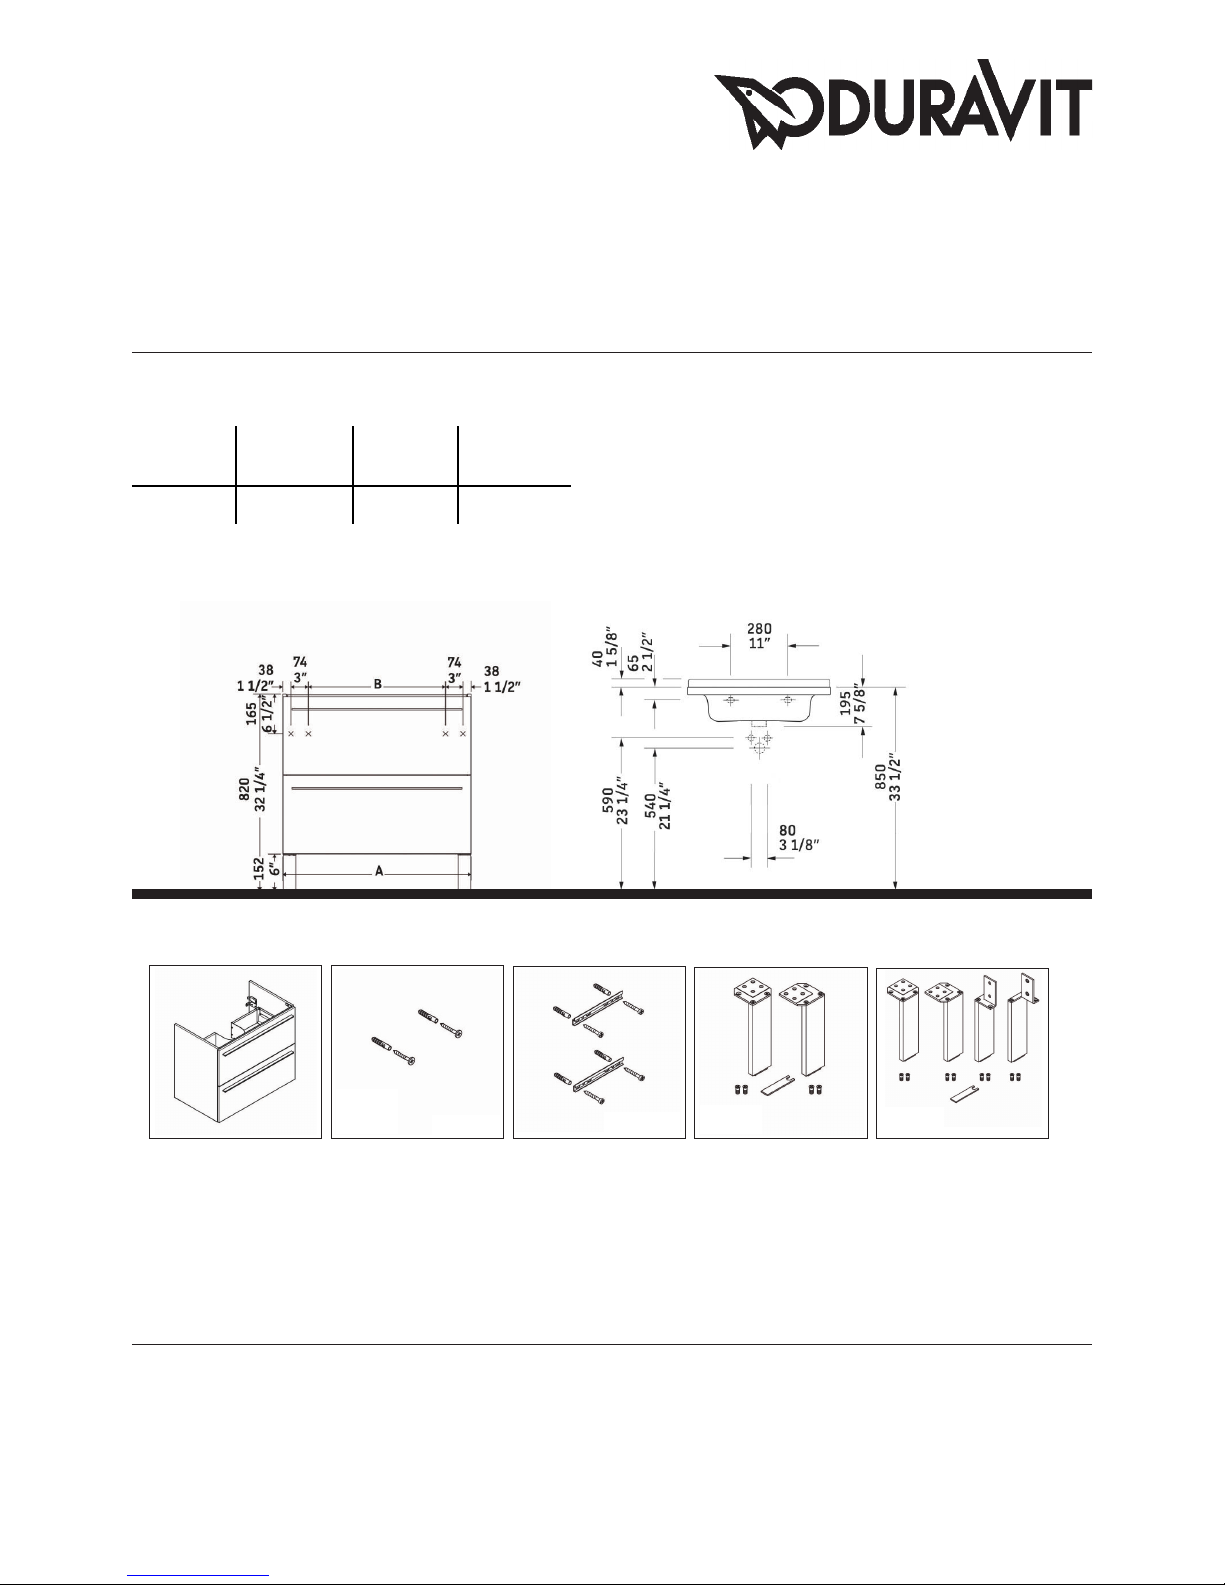
A A B B
mm inch mm inch
800 31 1/2” 576 22 5/8”
# 034285
3x S8
2x 5x50
1x 4,5x35
# UV 9991
# UV 9992
2x 100
4x S8
4x 5x50
# F23628
# F30368

MAL_X-Large_XL6516/15.04.1
1
2
3
Confirm that two legs are included,
Installation of the legs facing
forward.
Reference the vanity specification
to establish the position of
mounting bolts, mark the holes to
be drilled for the anchors.
Using a 3/8“ drilling bit, dirll the
anchor holes that have been
marked.
The plastic anchors provided are
for concrete wall applications.
4 5
6
7
For wood stud walls, bolts should
be screwed into wood backing.
Remove the vanity drawers. Attach the front legs. Attach the back legs.

MAL_X-Large_XL6516/15.04.1
8 9
10
11
Using a screwdriver adjust the
vanity mounting hinge system
clockwise.
Using supplied key, adjust the
legs height.
Check the leveling of vanity for
adjustment.
Using a screwdriver, adjust the
vanity mounting hinge system
counter-clockwise.
12 13
14
15
Screw two set screws until desired
leveling of the vanity has been
reached.
Using the appropriate bit for the
wall material, dirll pilot holes.
The plastic anchors provided are
for concrete wall applications.
For wood stud walls, bolts should
be screwed into wood backing.
MAL_X-Large_XL6516/15.04.1
16 17
18
19
Reference the washbasin
specification to establish the
position of mounting bolts, mark
the holes to be drilled for the
anchors.
Using 5/8“ drill bit, drill the
anchor holes that have been
marked.
The plastic anchor provided are
for concrete wall application.
For wood stud walls, bolts should
be screwed into wood backing.
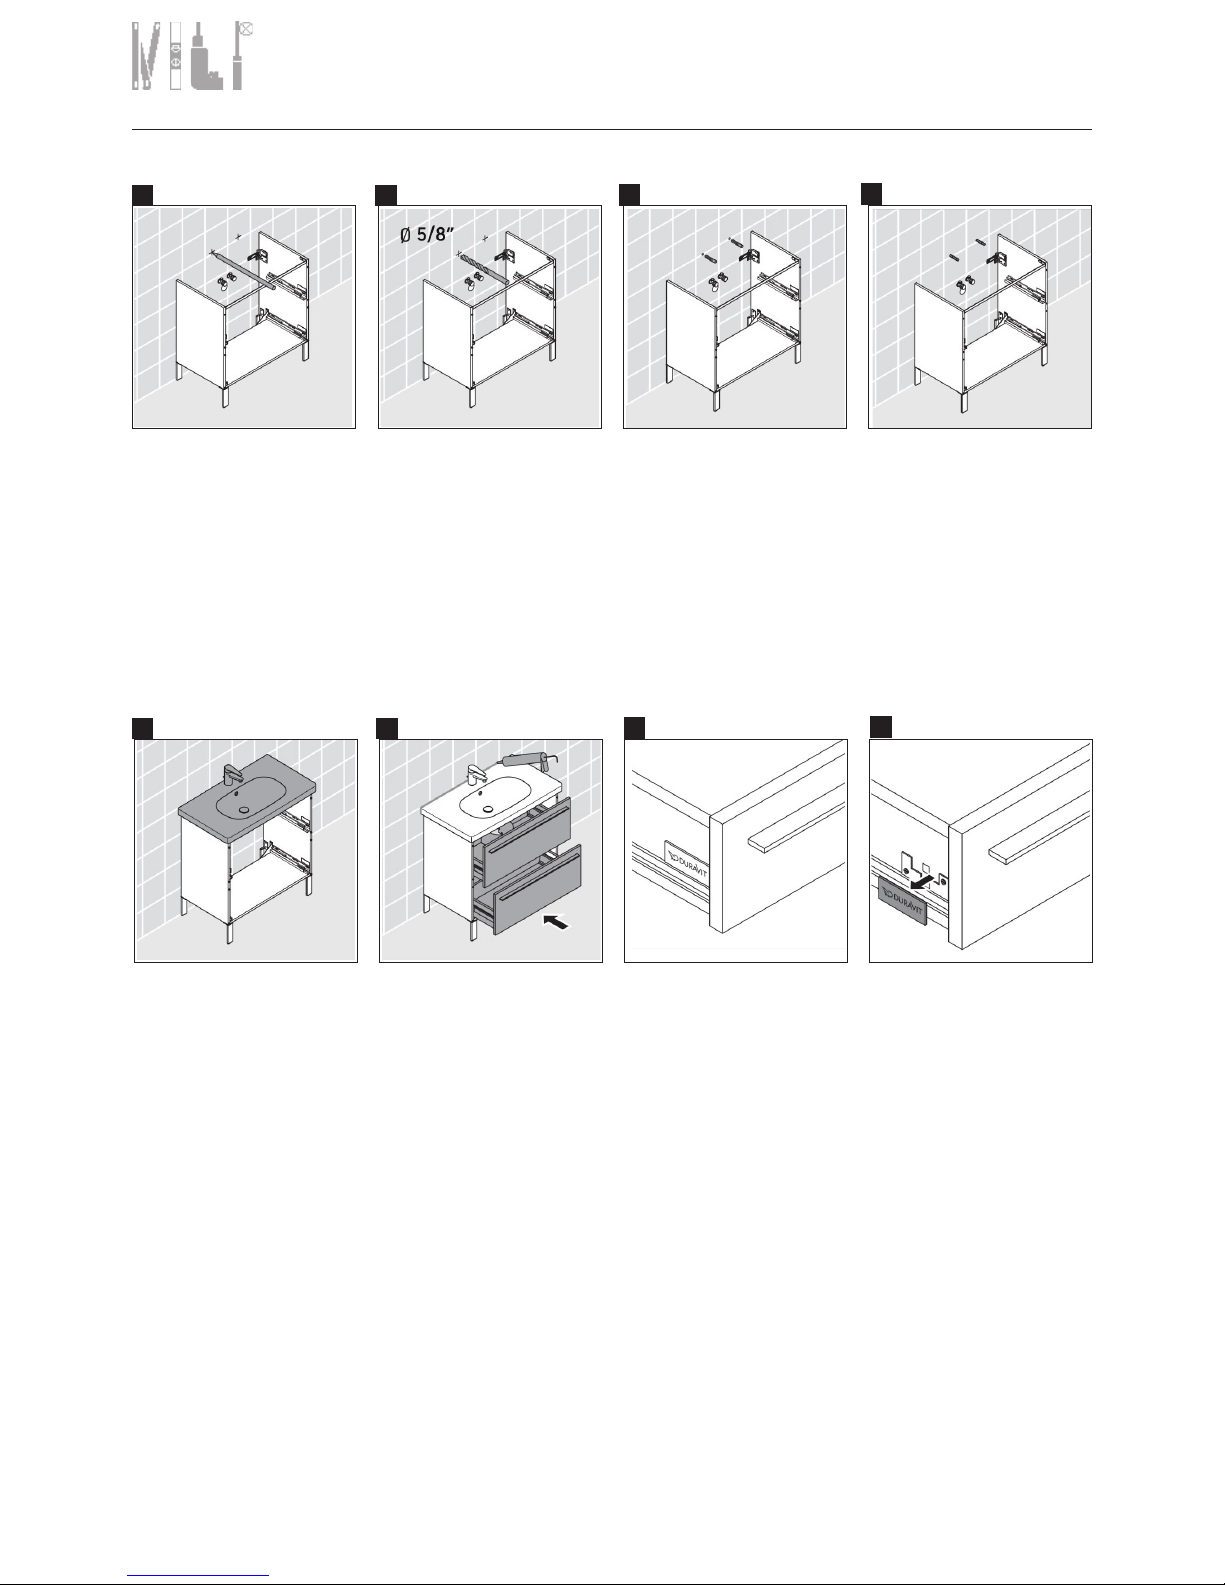
20 21
22
23
When mounting the washbasin into
the wood stud wall, there must be
adjustment bracing.
We recommend doubling 2x6‘s or
2x8‘s between the studs to form a
solid anchoring point.
Screw mounting bolts into the pre
drilled holes with an adjustable
wrench.
Screw in the full length of the
mounting bolts, so that the leg
thread is no longer visible.
Carefully slide washbasin onto the
mounting bolts. Insert the white
plastic sleeve over bolt and into the
hole in the washbasin.
Insert the provided washer and nut.
Hand tighten the nut, so the
washbasin is secure.
Install the siphon.
Install the vanity drawers. Locate the plate with Duravit logo. Remove plate with Duravit logo.
 Loading...