

DURAVIT Starck S1 9721 Installation Instructions Manual
Starck
# S1 9721
Installation instructions
Leben im Bad
Living bathrooms
Instructions for use
The bathroom furniture range complies with the standards and guidelines applicable at the time of delivery and is designed for use in bathrooms.
Though designed for the wet environment, direct contact with water should be avoided, for example, when showering.
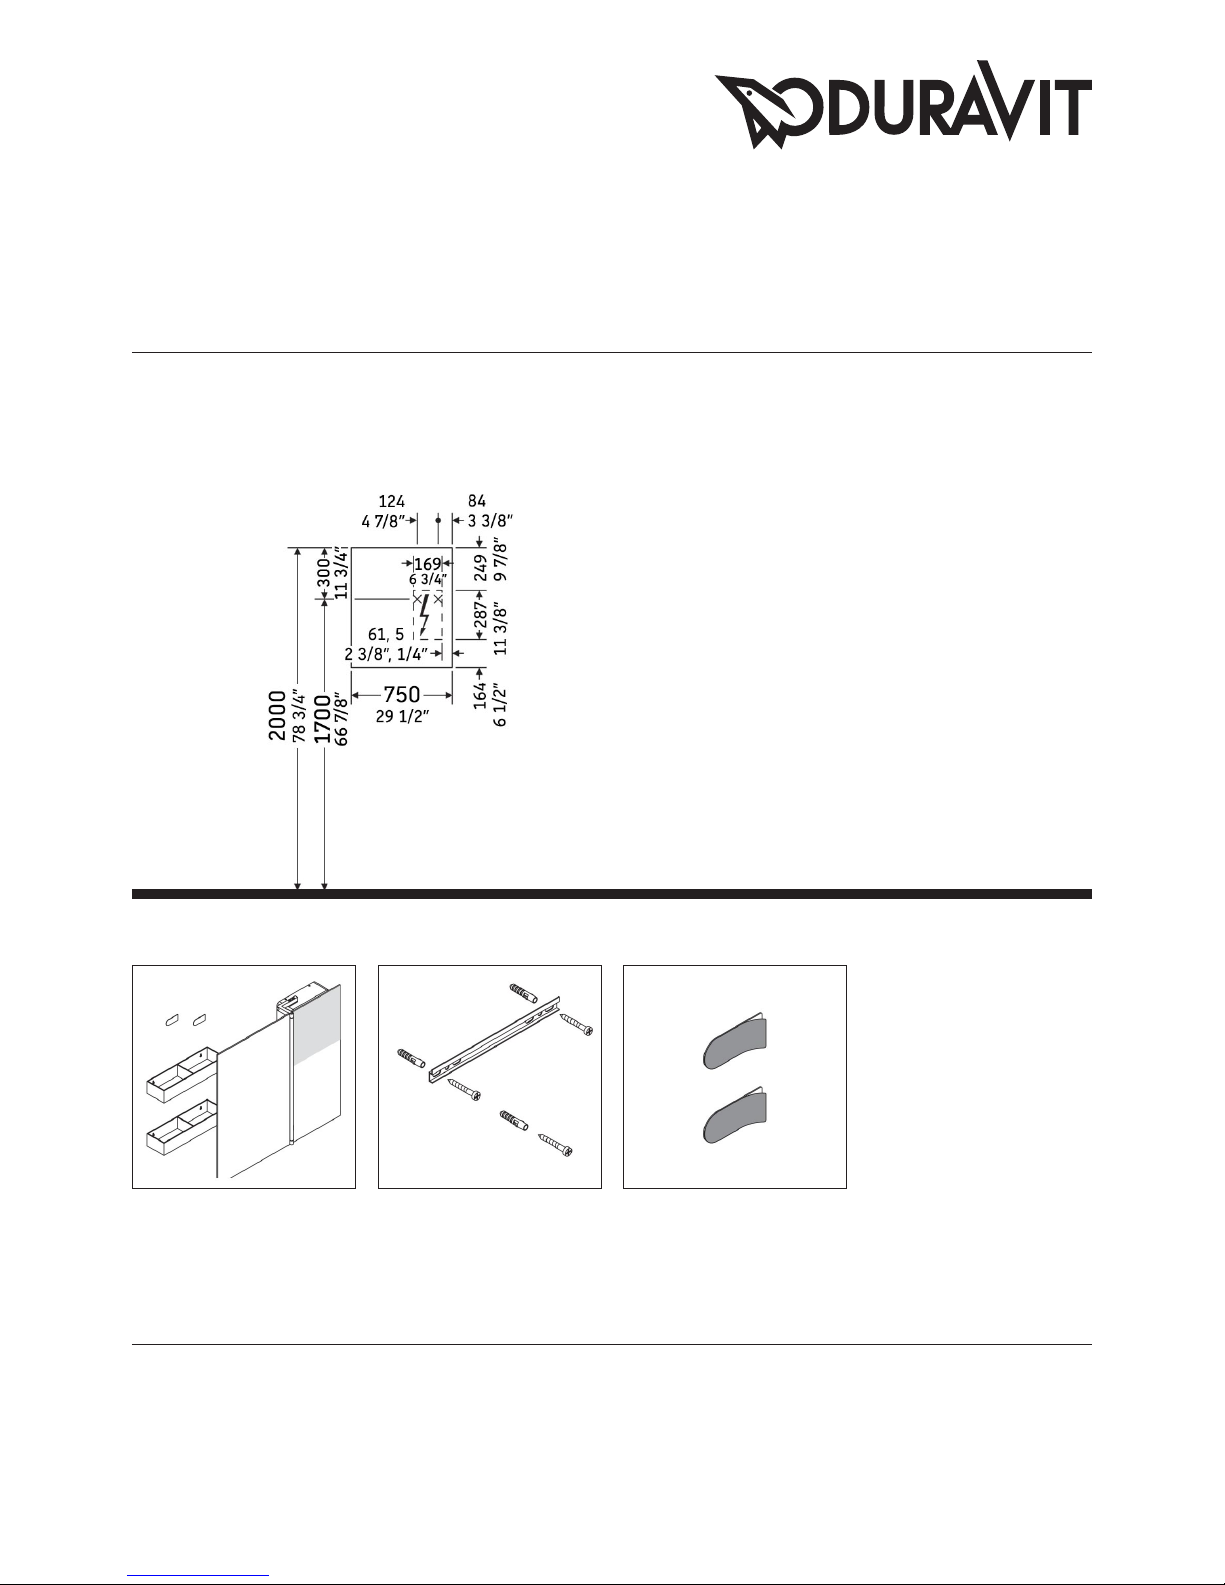
Mirrors require a GFCI 110 V 60 Hz power source. Flat plug will be supplied with mirror.
We reserve the right to make technical improvments and design modifications to the products illustrated.
MAL_Starck_S19721/16.12.1
1x 150
3x S8
3x 5,5x50
MAL_Starck_S19721/16.12.1
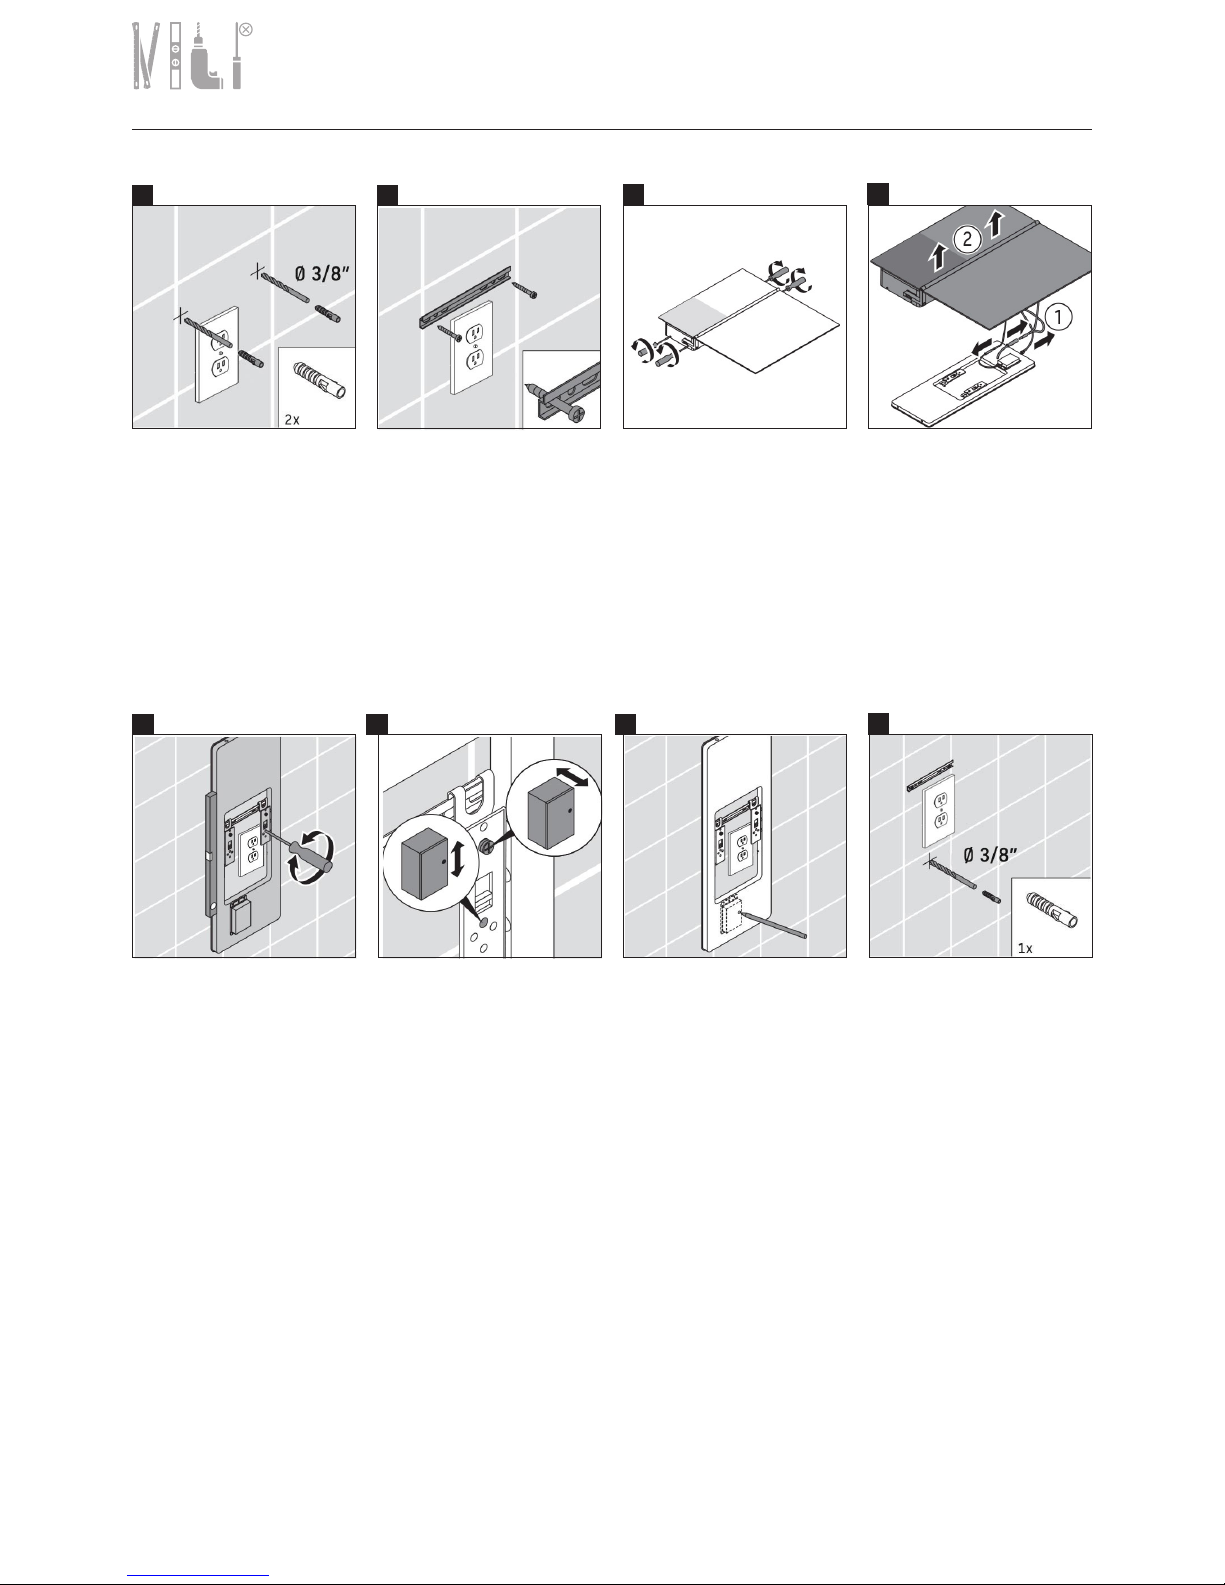
1 2
3
4
A 110V GFCI outlet is required.
Mark the holes to be drilled for
the anchors.
Using a 3/8“ drill bit, drill the
anchor holes that have been
marked.
Detach mirror front with four
screws.
Lift the mirror up and slide the
mirror backing.
LIft the mirror backing up and
onto the mountain brackets.
Check the mirror backing is
leveled.
5
6 7
8
The top screw will adjust closer
and further. From the mirror,
lower screw will adjust up and
down.
Mark the hole to be drilled.
Remove mirror backing.
Using 3/8“ drill bit, drill the
anchor holes that have been
marked. The plastic anchor
provided is for concrete wall
applications.

MAL_Starck_S19721/16.12.1
16
Close the mirror door.
13
14
Attach two hinge covers.
Do not close the mirror door. Using allen wrench, tighten the
bottom screw.
15
9
Screw the bolt to hte wall at
the spcified location. For wood
stud walls, bolts should be
screwed into wood backing.
Plug the unit into the outlet,
plug the cords (1) into control
unit. Slide the unit onto the
mirror backing.
10
11 12
Attach mirror front to mirror
backing with two top supplied
screws.
Attach mirror front to backing
with two bottom supplied
screws.
 Loading...