

Duracraft TD41 Installation Instructions Manual
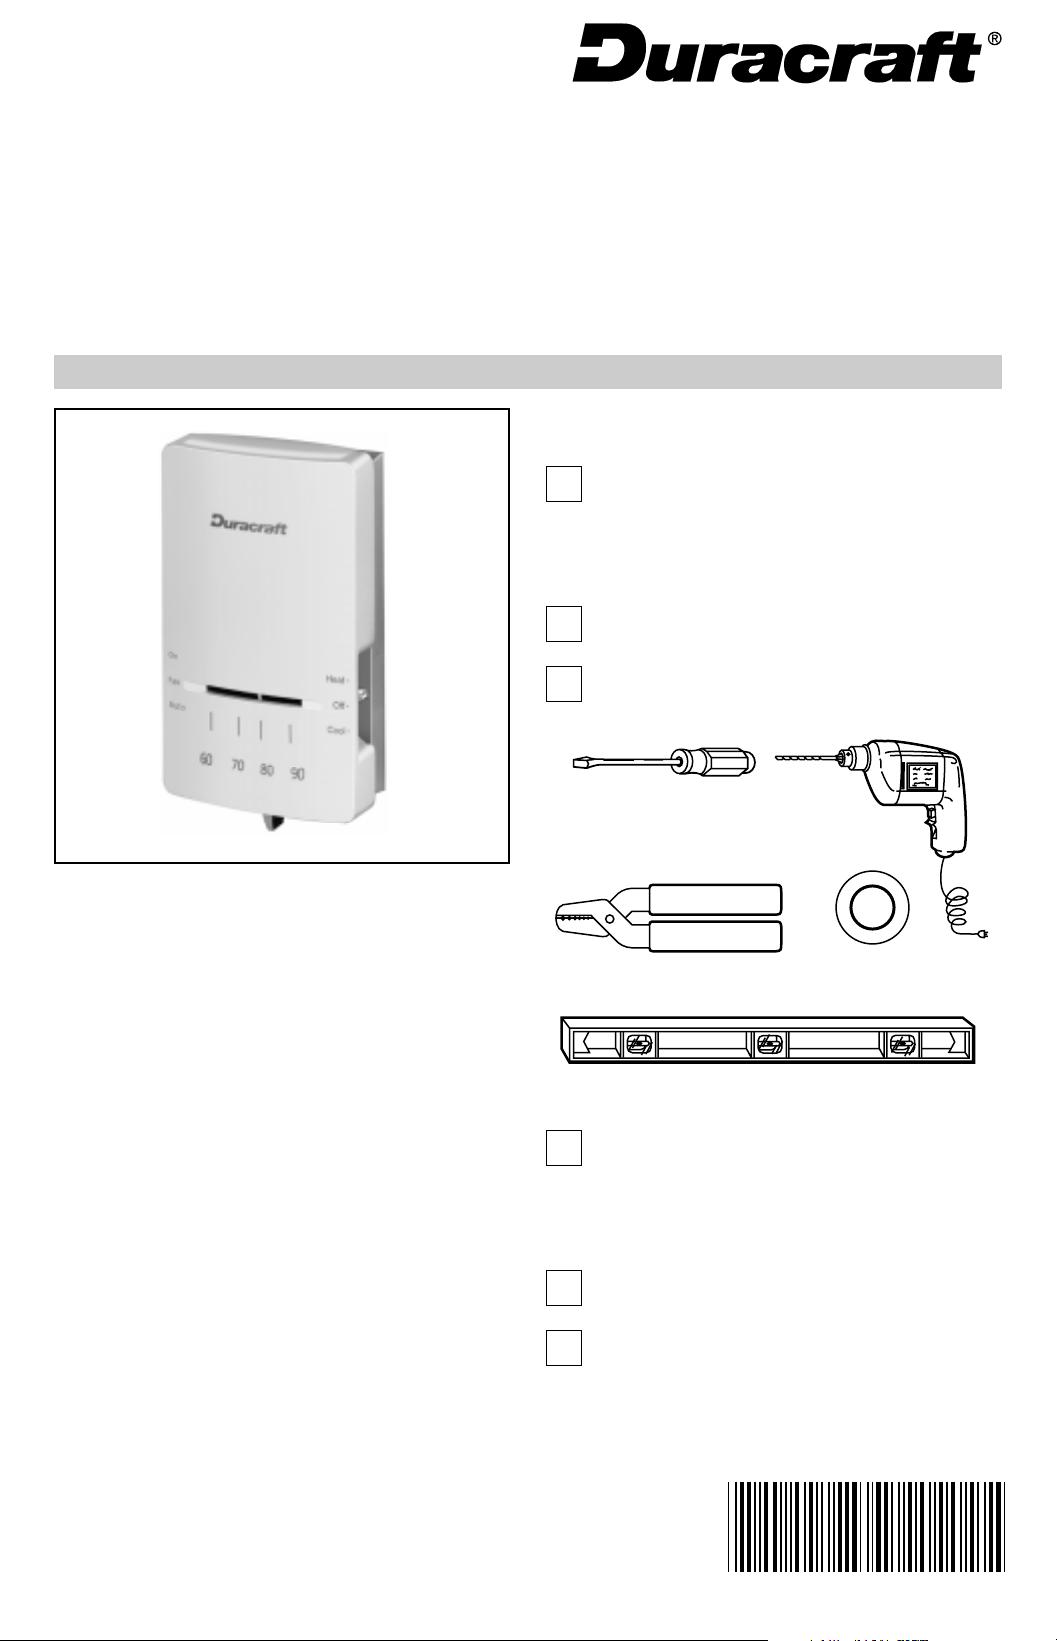
TD41
Heating/Air Conditioning Thermostat
INSTALLATION INSTRUCTIONS
1 PREPARATION
You can properly install your new thermostat if you
follow the instructions step-by-step. It is
recommended that as you read, understand and complete
each step, you check √ it off in the box with a pencil or
pen. If you are unsure about wiring procedures, please call
a qualified service technician for assistance.
Check thermostat suitability for your home’s system
by reviewing Your New TD41 Thermostat section.
Assemble tools required, as shown in illustration.
The TD41 is for most gas or oil heat/
electric air conditioning systems.
Do-it-yourself model
Your New TD41 Thermostat
Your new TD41 Heating/Cooling Thermostat replaces
most 15 to 30V, 4-wire, heating/cooling system thermostats. The TD41 is suitable for gas or oil heat/electric air
conditioning systems (not for heat pumps).
FLAT BLADE
SCREWDRIVER
WIRE CUTTER/STRIPPER OR SHARP
KNIFE, IF NEEDED TO STRIP WIRES
SPIRIT LEVEL, IF NEEDED TO LEVEL
THERMOSTAT FOR APPEARANCE
Make certain that your burner and air conditioner
(where applicable) are working, especially if they
were inoperative for any period of time. If either does not
work, contact your local heating/air conditioning dealer. Do
not operate the air conditioning system when outdoor
temperature is below 50°F (10°C).
Carefully unpack your new thermostat.
Save the package of screws and the instructions
pages.
HAND OR POWER
DRILL WITH 3/16 INCH
DRILL BIT, IF NEEDED TO
DRILL HOLES IN WALL
MASKING TAPE, IF NEEDED
TO LABEL WIRES AS THEY
ARE DISCONNECTED FROM
OLD THERMOSTAT
M849
®U.S. Registered Trademark
69-1122
TD41 HEATING/AIR CONDITIONING THERMOSTAT
2 THERMOSTAT FEATURES
MOUNTING CLIPS
(FOR COVER)
TOP
MOUNTING HOLE
(THERMOSTAT
TO WALL OR
OUTLET BOX)
.18
.9
.2
.7
.5
.25
3
ADJUSTABLE
HEAT
ANTICIPATOR
SETTING LEVER
FAN SWITCH
SYSTEM SWITCH
BOTTOM
MOUNTING HOLE
MOUNTING CLIPS
(FOR COVER)
TEMPERATURE
SETTING LEVER
M11591
3 REMOVE OLD THERMOSTAT
Begin by turning off power to the heating/air
conditioning system at the main fuse panel. Most
residential systems have a separate switch box or circuit
breaker for disconnecting power to the furnace.
4 WIRE AND MOUNT THERMOSTAT
Connect wires from the wall to the matching
terminals on the back of the thermostat. Tighten the
screws.
NOTE: If terminal designations on old thermostat do not
match those on the new thermostat, refer to the
following chart:
Old Thermostat
Terminal Marked Function
New Thermostat
Terminal Marked
G or F Fan G
Y or C Cooling Y
W or H Heating W
RC, V, VC or B Power You have a 5-wire
system and
cannot use this
thermostat; we
recommend a
CT87B instead.
RH, M, VR, 4, A
Power R
or R
Remove cover of old thermostat. Cover normally
snaps off when pulled firmly from the bottom; if it
resists, check for a screw that locks on the cover.
Before removing the old thermostat from the wall,
look at it carefully to locate the heat anticipator
adjustment mechanism. (See illustration in Step 2 to help
you recognize the heat anticipator.) Write here
the number of that anticipator setting for
future reference. The heat anticipator pointer, if adjustable,
is set at one of a series of numbers representing the
(electrical) current rating in amperes of the primary control
in your furnace. The number ranges from 0.18 to 1.0. If no
heat anticipator/indicator is showing, do not be concerned;
move on to the next step.
Loosen screws holding the thermostat base to the
subbase or wall, and lift away.
Disconnect wires from the old thermostat or
subbase. If your thermostat has more than two
wires, as you disconnect each wire, tape the end
and label it with the letter of the terminal designation
to allow easier reconnection to the new thermostat.
Take care that these wires do not fall back into the
wall opening.
R
W
G
Y
TERMINAL SCREWS
M8067A
Push excess wire back into the wall and plug the
hole with nonflammable insulation to prevent drafts
from affecting thermostat operation.
Grasp the thermostat cover at both the top and the
bottom with one hand. Pull outward on the bottom
edge of thermostat cover until it snaps free of the thermostat base.
Fasten the thermostat to the wall or vertical outlet
box with a screw through the top mounting hole.
See Step 2 for hole location.
M3775
Keep the old thermostat for reference until your new
thermostat is functioning smoothly.
69-1122
Place a bubble level or plumb line against the
thermostat to find the level position. Start a screw in
the center of the bottom mounting hole. Move the temperature setting lever, if necessary, to uncover the
mounting hole.
2
 Loading...