

Duracraft CZ-600 Owner's Manual
::Juracraft~
___
IDEAS
BUILT
TO
LAST-
OIL FILLED RADIATOR
HEATER
WITH THERMOSTAT
III
III
~
-
~
II t_
'\..J
OWNER'S MANUAL
Model CZ-600
Please Read All Instructions Before Using
E1)
'994
All rights reserved. Duracnoft Corp.
IMPORTANT INSTRUCTIONS
When using electrical appliances, basic precautions should always
be
followed
to reduce the risk of fire, electrical shock and injury to persons, including the
following:
1.
Read
all
instructions
before
using
heater.
2.
This
heaterishotwheninuse.Toavoid
bums,donot
let
bare
skin
toudlhotsurfaces.
Keep
combustible
materials
such asfurniture,
pillows,
bedding,
papers,
clothes
and
curtainsatleast3feet
(0.9M)from
the
heater.
Allow
heatertocool
before
moving
this
heater
and
then
use
the
built-in
handle
for
easy movement.
3.
Extreme
cautionisnecessary
when
any
heater
is
used
by
or
nearchik:lren
orinvalids
and
whenever
any
heater
is
left
unattended.
4.
MNays
unplug
the
heater
when
not
in
use.
5.
Do
not
operate
this
heater
with a damaged
cord,
plug
or after
the
heater
malfunctions,
has
been
dropped
or
damaged
in
any
manner.
Return
heater
to
DURACRAFT
CORPORATION
for
examination,
electrical
or
med1anical
adjustment
or
repair.
6.
Do
not
use
heater
outdoors.
7.
This
heaterisnot
intended
for
useinbathrooms,
laundlY
areas
orsimilarmoistindoor
locations
..
Never
locate
heater
where
it
may
fall
into a bathtub
or
other
water
container.
8.
Do
not
run
power
cord
under
carpeting.
Do
not
cover
cord
with
throw
rugs,
runners
orthe
like.
Arrange
cord
away
from
traffic
areas
and
where itwill
not
be
tripped
over.
9. Todisconnect
heater,
set
controlstoOFF
then
remove
plUg
from
the
power
outlet.
10. Donot
operate
the
heater
without
both
wheel
bases
installed.
The
heater
must
only
be
used
in
an
upright
position.
11.
This
heater
is
to
be
used
on
the
floor only.
Do
not
use
on ashelf,
table,
bed or
any
other
location
except a level
floor.
12.
This
heater
has
hot
and
arcing
parts
inside,
do
not
use
it
in
areas
where
gasoline,
paint
or
flammable
liquids
are
used
or
stored.
13.
Use
this
heater
only
as
described
in
this
manual.
Any
other
use
not
recommended
by
the
manufacturer
may
cause
fire,
electric
shock
or injury
to
persons.
14.
Avoid
the
use
of
an
extension
cord
because
the
extension
cord
may overheat
and
cause
riskoffire.
However.ifyou
havetouseanextension
cord,
the
cord
should
be
a
polarized
14
AWG
minimum
size
and
rated
not
less
than
1875
watts.
15.
Keep
this
heater
clean.
DO
NOT
allow
foreign
objects
to
enter
any
ventilation or
exhaust
opening asthis
may
cause
electric
shock,
fire
ordamagethe
heater.
16.
This
productisequipped
withapolarized
altemating
current
line
plug(aplug
having
one
blade
wider
than
the
other).
This
plug
will
fit
into
the power
outlet
only
one
way.
This
is a safety
feature.
If
you
are
unable
to
insert
the
plug
fully
into
the
outlet,
try
reversing
the
plug.
If
the
plug
should
still
fail
to
fit,
contact
an
electrician
to
replace
the
obsolete
outlet.
DO
NOT
defeat
the
safety
purpose
ofthe
polartzed
plug.
page 2
17. This heater draws 12.5 Amps during operation. To prevent overloading a
circuit, do
not
plug the heater into a circuit that already has other appliances
working.
It
is
normal forthe plug to feel warm to the touch, however, a loose
fit between the AC outlet
and
plug will cause overheating
ofthe
plug. Have
a qualified electrician replace the outlet.
18. The output of this heatermayvary
and
itstemperature may become intense
enough to burn exposed skin.
Use
of this heater is not recommended for
persons with reduced sensitivity to heat or an inability to react to avoid
burns.
19. SAVE THESE IMPORTANT INSTRUCTIONS.
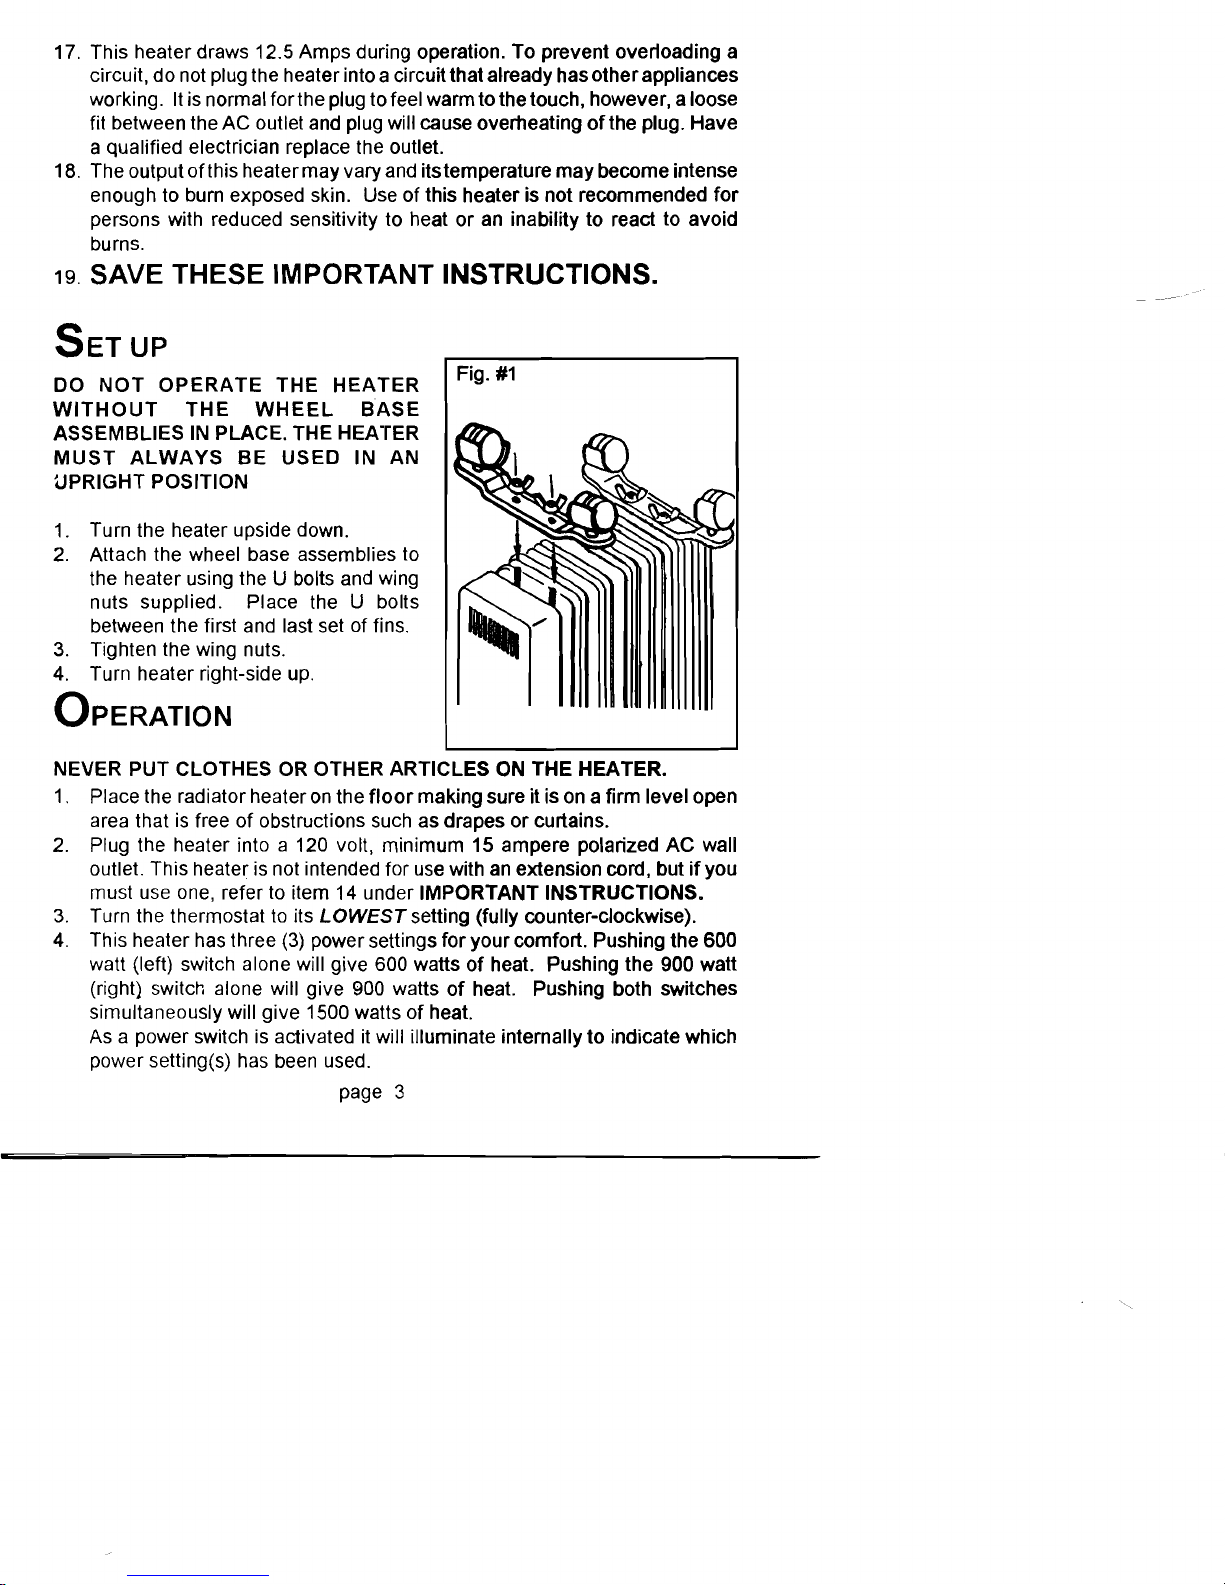
SETUP
Fig.
#1
DO
NOT
OPERATE
THE
HEATER
WITHOUT
THE
WHEEL
BASE
ASSEMBLIES
IN
PLACE. THE HEATER
MUST
ALWAYS
BE
USED IN AN
UPRIGHT POSITION
1.
Turn the heater upside down.
2.
Attach the wheel base assemblies to
the heater using the U bolts
and
wing
nuts supplied. Place the U bolts
between the first
and
last set of fins.
3.
Tighten the wing nuts.
4.
Turn heater right-side
up.
OPERATION
NEVER PUT CLOTHES
OR
OTHER ARTICLES
ON
THE HEATER.
1.
Place the radiator heater
on
the
floor
making sure it is
on
a firm level open
area that
is
free of obstructions such as drapes or curtains.
2. Plug the heater into a 120 volt, minimum 15 ampere polarized AC wall
outlet. This heater
is
not intended for
use
with
an
extension cord, but
if
you
must
use
one,
refer
to
item
14
under IMPORTANT INSTRUCTIONS.
3.
Turn the thermostat
to
its
LOWEST
setting (fully counter-clockwise).
4.
This heater
has
three
(3)
power settings for your comfort. Pushing the 600
watt (left) switch alone will give
600 watts
of
heat. Pushing the 900 watt
(right) switch alone will give
900 watts
of
heat. Pushing both switches
simultaneously will give
1500 watts of heat.
As
a power switch
is
activated
it
will illuminate internally to indicate which
power setting(s)
has
been
used.
page 3
 Loading...