

Page 1
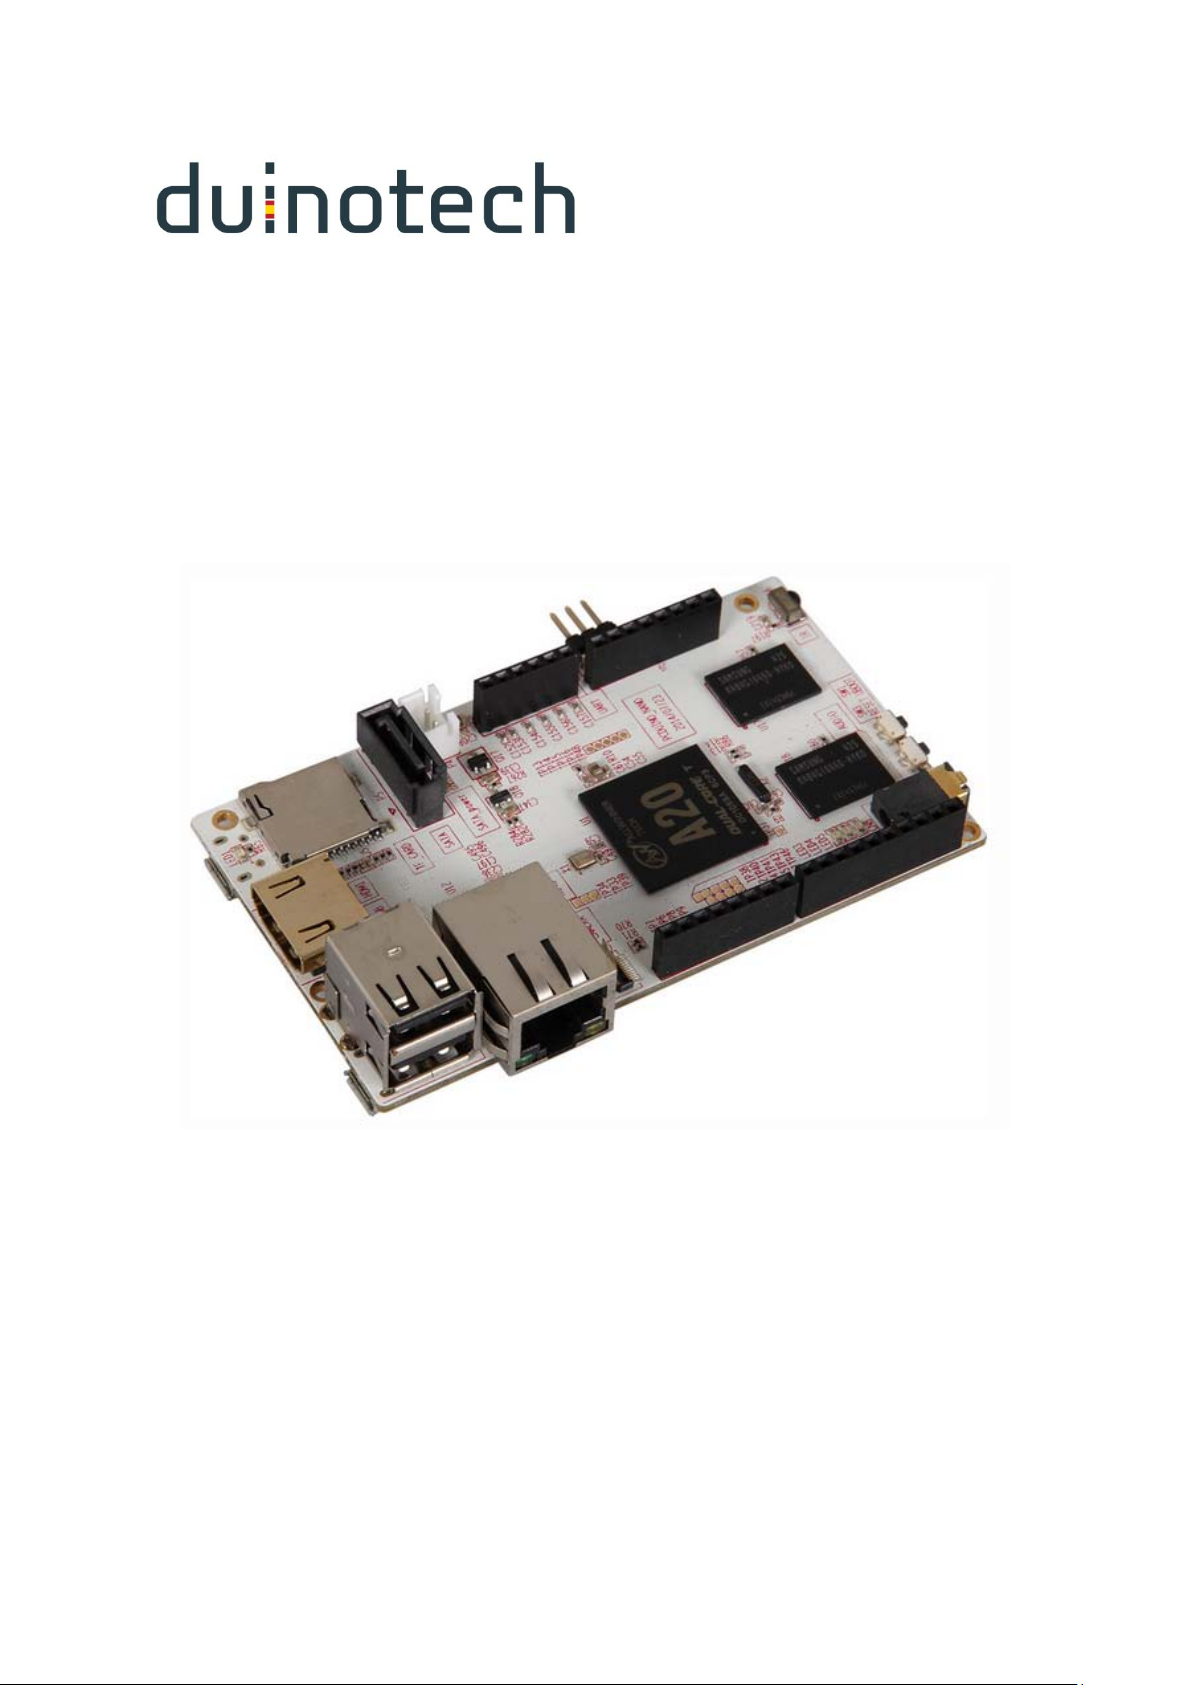
pcDuino Nano
XC4352
User Manual
1
Page 2

User Manual
Contents
Board Overview..........................................................................................2
System Features.......................................................................................3
Single-Board Computer Configuration................................ .....3
Pin Assignments........................................................................................4
Single-Board Computer Setup.......................................................6
Required Hardware...........................................................................6
Optional Hardware............................................................................6
Adjusting Screen Settings..........................................................7
The Ubuntu Operating System....................................................7
Accessing the Debug Port.............................................................8
Re-Installing the Operating System........................................8
Glossary......................................................................................................9
Board Overview
You can use the Single-Board Computer with various open-source projects, but you can d o
much more. The Single-Board Computer features a fully functional oper ating system (OS )
that can simulta neously run mu ltiple processes, giving you a much more robust a nd versatile
experience than a dedicated m ic ropr ocessor board.
The Single-Board Computer provides several ports so you c an q uickly and easily set up a
monitor, keyboard , and mouse to create a c om plete computing solution.
The HDMI port lets you connect to a ny HDTV or monitor with an HDMI port.
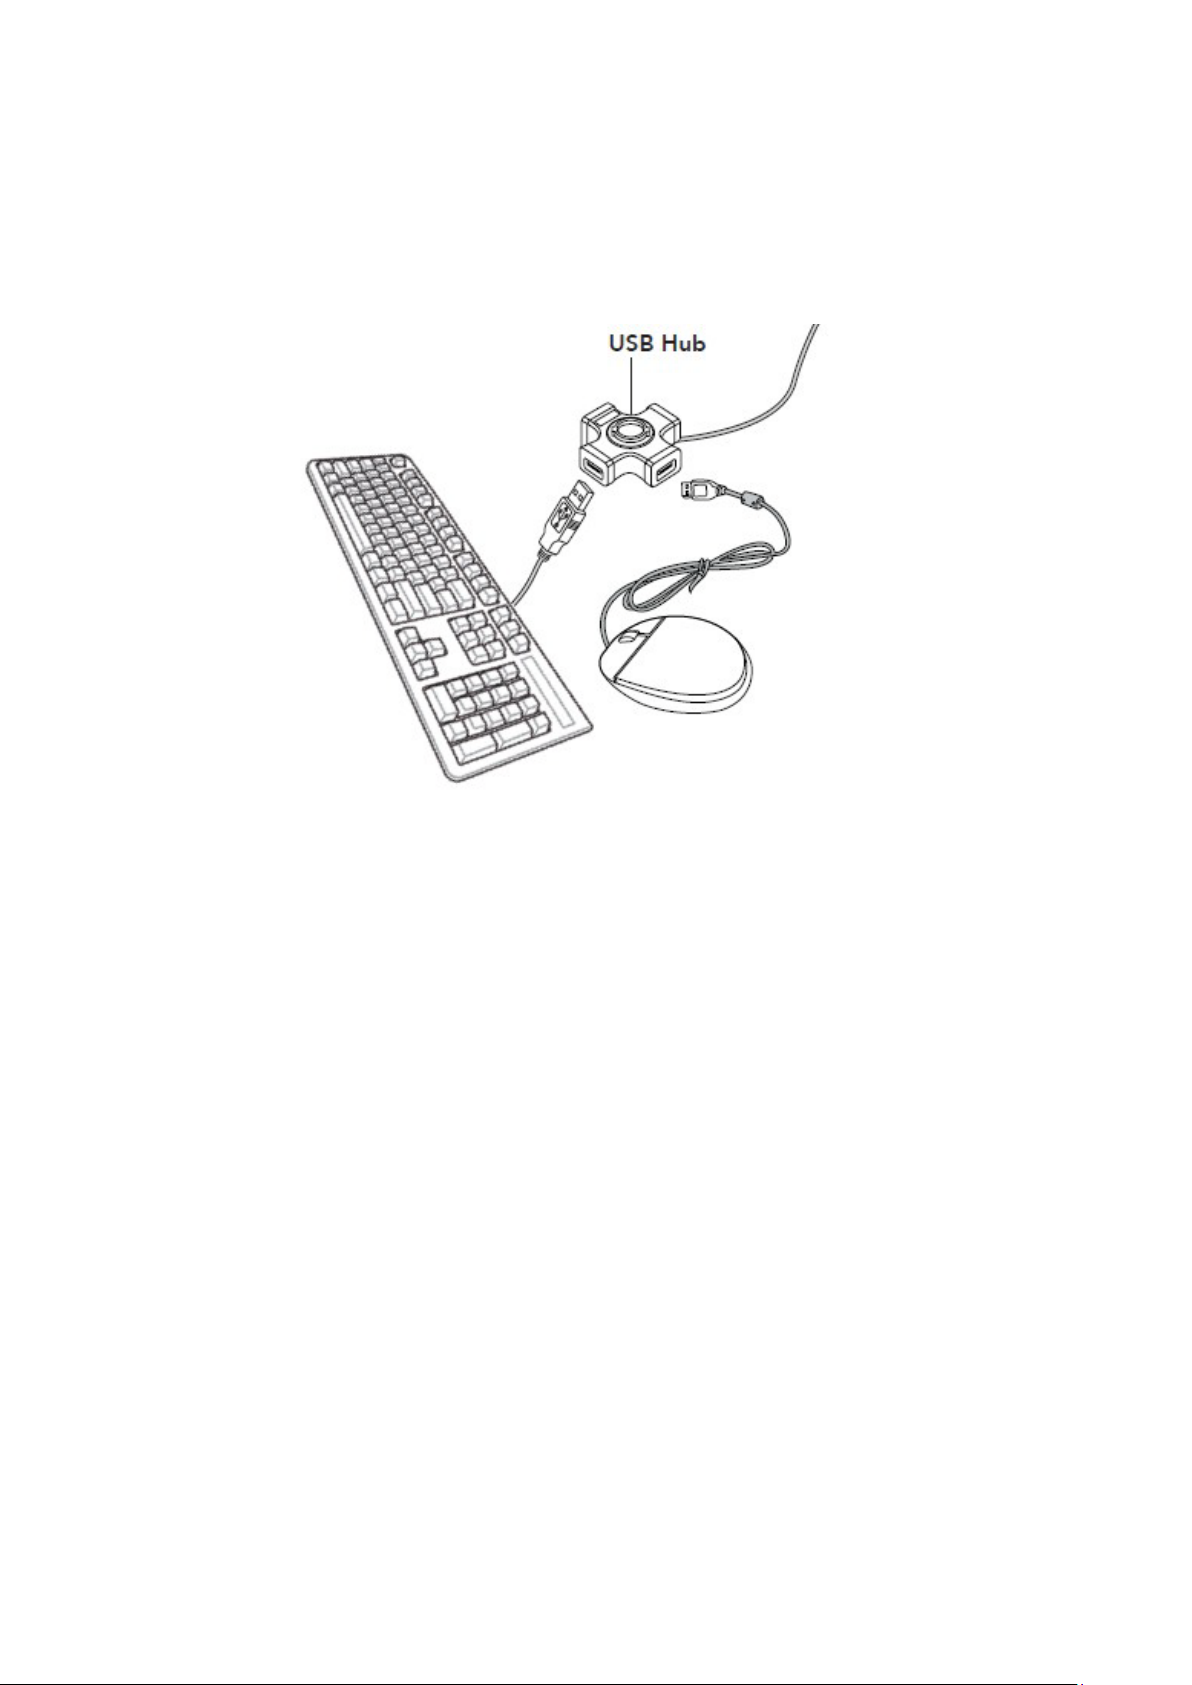
The USB A port lets you connect US B peripherals. For example, you can us e a US B hub to
connect a keyboard, mou se, and other USB devices. The Micro USB port prov ides addition al
connectivity.
2
Page 3
The MicroSD slot provides an easy way to add addition a l mem or y ( up to 32 GB).
Note: Your Single-B oard Com puter is ship ped in protec tive an ti-static packaging. The board
must not be subjec ted to high elec trostatic p otentials. A grounding strap or similar protective
device should be used when handling the board.
System Features
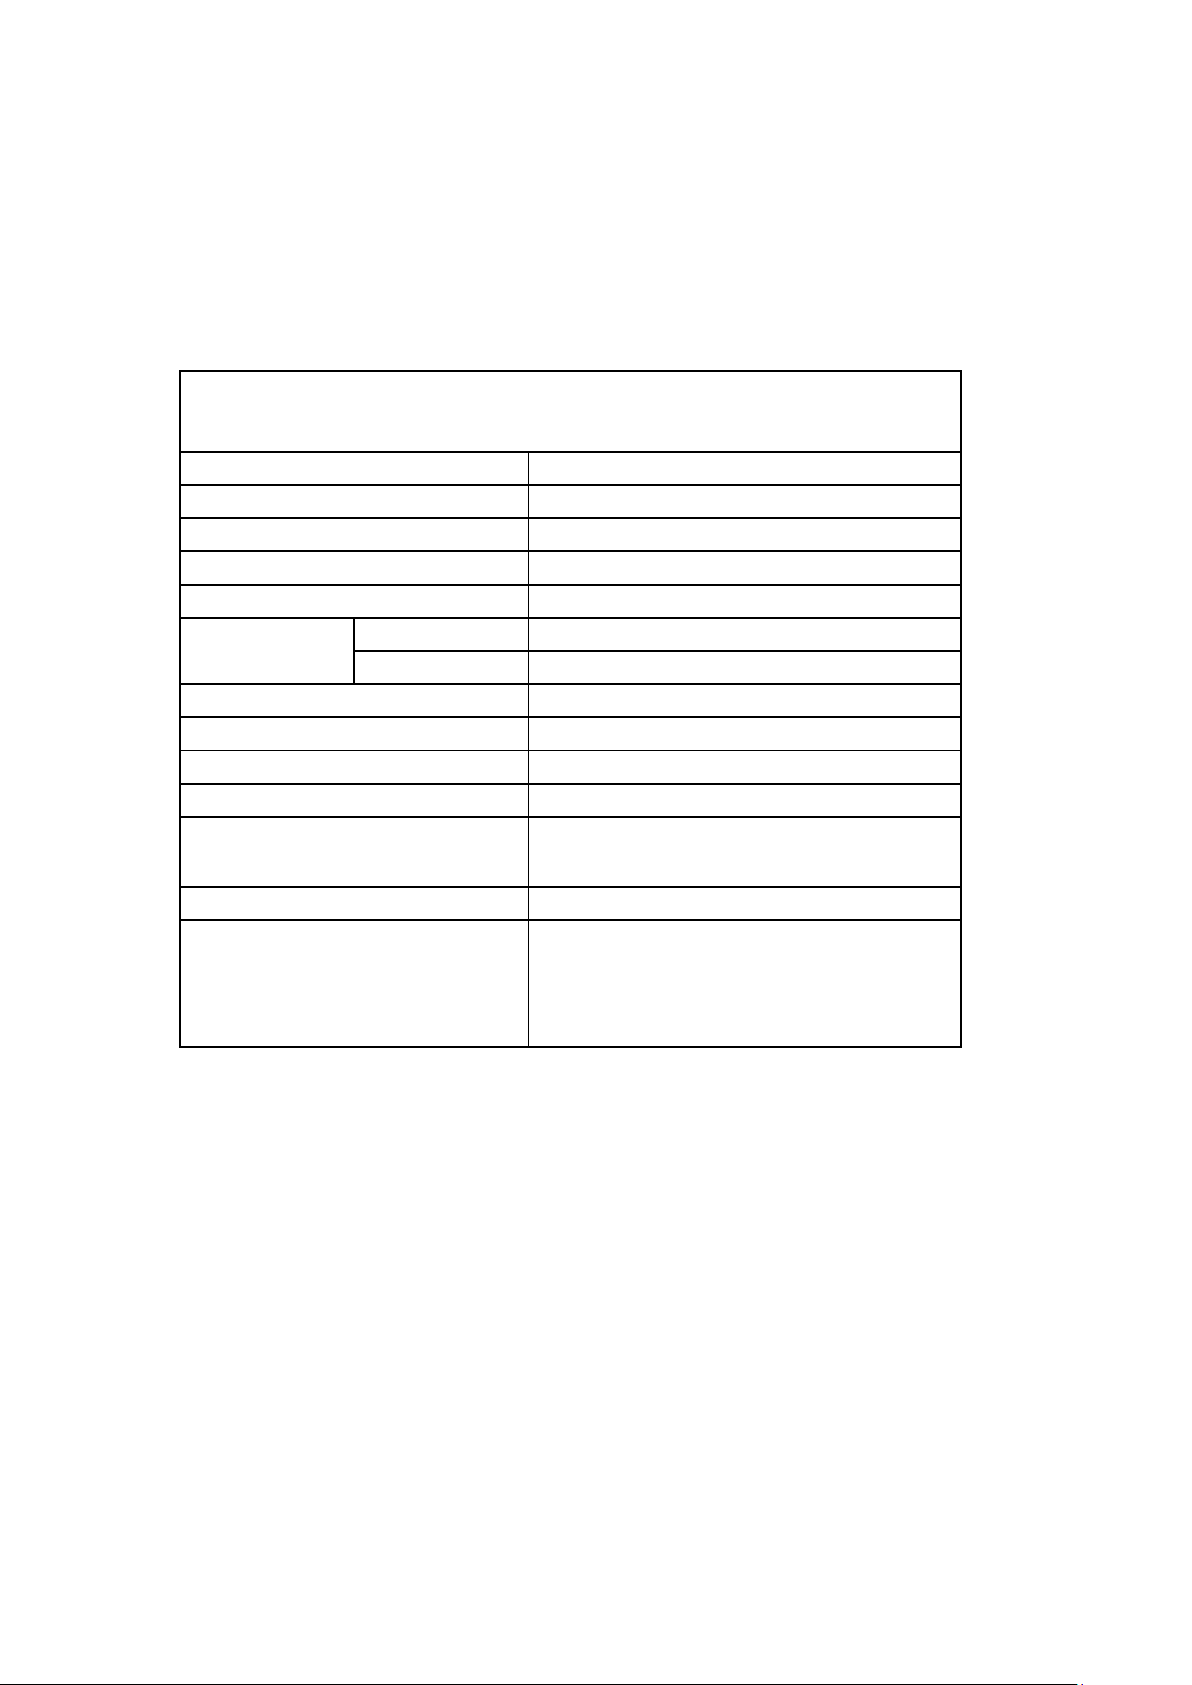
System on a Chip (SoC) All Winner A20
Central Processor (CPU) 1GHz ARM Cortex A7 Dual Core
Graphics Processor (GPU) Mali 400 Dual Core
SDRAM Memory 1 GB
Flash Memory 4 GB Flash
Mass Storage Max 32 GB
Type MicroSDHC
Video Output HDMI 1.4 with HDCP support
Network Interface Ethernet 10/100M via RJ45
Wireless Connectivity 802.11b/g/n
Communications I/O USB 2.0
Extension Interfaces ADC, UART, GPIO, PWM, I2
(via Stackable 0.100” Connection Headers)
Operating System Ubuntu
Other interfaces SATA ,
MIPI Camera ,
IR receiver,
Audio Out,
C, SPI, Power
Single-Board Computer Configuration
3
Page 4
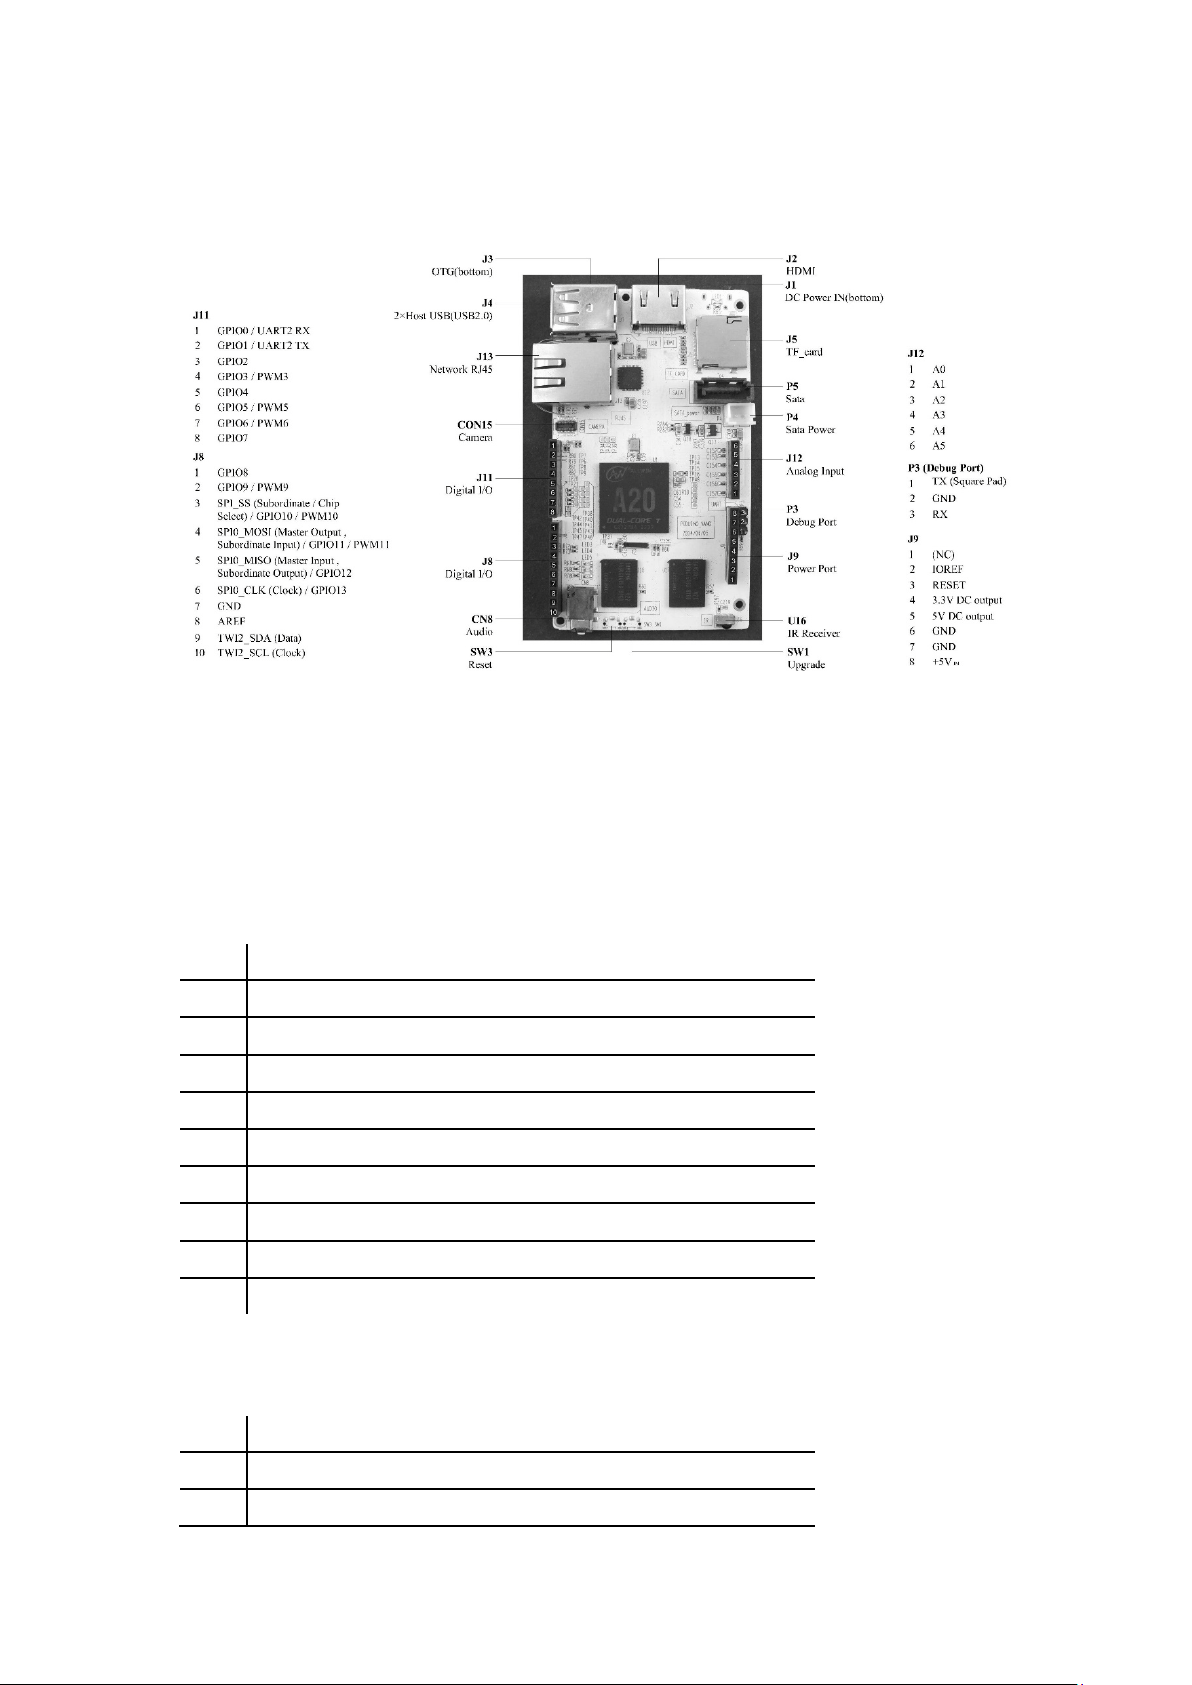
Pin Assignments
J8
1
2
3
4
5
6
7
8
9
10
J11
1
2
3
GPIO8
GPIO9/PWM9
SPI_SS (Subordinate/Chip Select)/GPIO10/PWM10
SPI0_MOSI (Master Output, Subordinate Input)/GPIO11/PWM11
SPI0_MISO (Master Input, Subordinate Output)/GPIO12
SPI0_CLK (Clock)/GPIO13
GND
AREF
TWI2_SDA (Data)
TWI2_SCK (Clock)
GPIO0/UART2 RX
GPIO1/UART2 TX
GPIO2
4
Page 5

4
GPIO3/PWM3
5
6
7
8
J9
1 (NC)
2 IOREF
3 RESET
4 3.3 VDC output
5 5 VDC output
6 GND
7 GND
8
J12
GPIO4
GPIO5/PWM5
GPIO6/PWM6
GPIO7
+5V
IN
1 A0
2 A1
3 A2
4 A3
5 A4
6 A5
P3 (Debug Port)
1 TX (Square Pad)
2 GND
3 RX
Single-Board Computer Setup
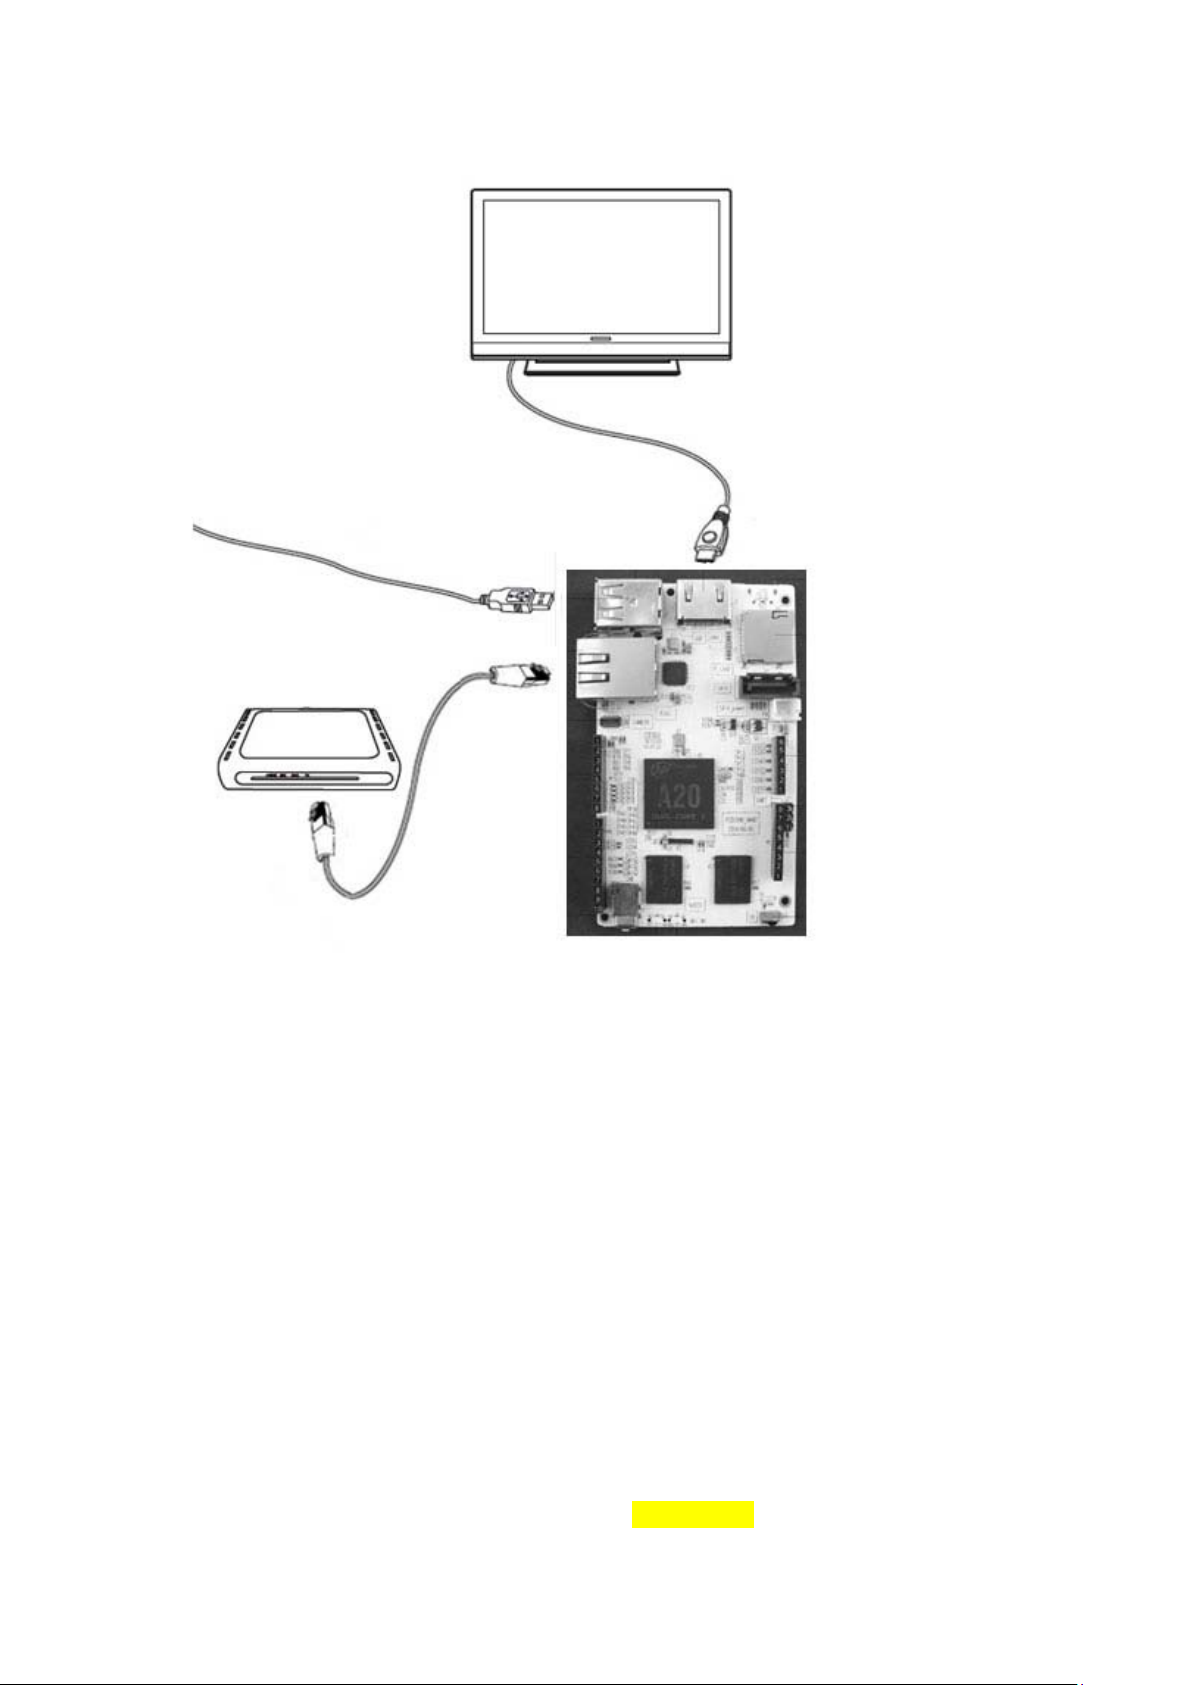
Make USB and HDMI connection s befor e conn ecting pow er to the S ingle-B oard Compu ter. If
the board does not rec ognize your k eyboard or mouse, unplug the device a nd plug it back in .
Note: To ensure that your Single-Board Computer boots properly, use a short, heavy-gauge
USB cable and a power supply that del iv er s a t leas t 2 A.
Required Hardware Optional Hardware
• Monitor
5
Page 6
• MicroSD card for additional memory storage
• HDMI cable
• USB hub
• Keyboard/Mouse
• DC power (Micro USB)
6
Page 7
Adjusting Screen Settings
In some cases, the Ubun tu desk top ma y extend beyond the visible area of your monitor.
To adjust the size of your desktop:
1. Open LX Terminal.
2. At the command prompt, type: sudo setw indow 95 1 0 0
3. Press Enter.
Note: The “95” parameter sets the percentage of screen size, and the “1” activates
auto-center; the remainin g values ar e inactive f or auto-center, but are still necessary for the
command.
12
The Ubuntu Operating System
Your Single-Board Com puter is preloaded with the Ubuntu 12.04 operatin g system. Ubu ntu is
7
Page 8

a robust, fully functional operating s ystem that provides a n open-source productivity suite.
Terminal
File browser
Internet browser
Productivity Suite
Run standard Linux commands
Launch GCC to open the C/C++ compiler
Built-in file manager
Chromium web browser
Support for HTML5
Document Viewer for PDFs
Gnumeric for spreadsheets
AbiWord for documents.
If your system as ks for an authentication password, the default password is “ubuntu.”
For full support go to www.ubuntu.com
Accessing the Debug Port
If you are a more experienced user, you can communicate with the Single-Board Computer
directly by using a USB-to-Logic Level Serial cab le to conn ect the board ’s debug port to you r
computer’s USB drive.
1. Go to the Single-Board Computer websit e a nd install the drivers onto your PC.
2. Connec t the debug cable to th e USB port on y our computer and t o the board’s debu g port
(P3). TX connects to Pin 1, which has the square pad.
3. On your PC, locate the C OM por t. For help loc atin g the CO M port, ref er to your ope rating
system’s online help.
4. After you locate th e COM port, access the serial communica tions package. Verify the
following settings :
• COM Port: 8,N,1
• Baud Rate (Speed): 115200
• All Flow Controls : Off
5. You can now access the board’s system level.
Re-Installing the Operating System
As you consider n ew projec ts, you m ay dec ide to restore your Single -Boa rd C ompu ter to its
original state. T o a ccomplish this , you may need to re-insta ll the operating sy s tem.
Note: Re-installing the Ubuntu operating sys tem will erase all sav ed d a ta from the
Single-Board Computer.
To install the operat ing system:
1. Disconnect the power to the Single-Board Com puter.
2. Insert a MicroSD c ard that contains a Lin ux kernel image into the Single-Board
Computer’s Micr oSD card slot.
3. Restore power to the board and wait at leas t 2 m inutes. During this time, the TX light
blinks as the Single-Board Computer installs the Linu x kernel.
8
 Loading...