

Ducane 688 INCH² 2-BURNER Assembly Manual
ASSEMBLY GUIDE
688 INCH² 2-BURNER & 864 INCH² 2-BURNER
DANGER
If you smell gas:
1. Shut off gas to the appliance.
2. Extinguish any open flames.
3. Open lid.
4. If odor continues, keep away from the
appliance and immediately call your gas
supplier or your fire department.
Leaking gas may cause a fire or explosion
which can cause serious bodily injury or death,
or damage to property.
WARNING
1. Do not store or use gasoline or other
flammable vapors and liquids in the vicinity
of this or any other appliance.
2. An LP cylinder not connected for use shall
not be stored in the vicinity of this or any
other appliance.
WARNING
Follow all leak-check procedures carefully
in this manual prior to barbecue operation.
Do this even if the barbecue was dealerassembled.
Customer Service: 1-800-382-2637
NOTICE TO INSTALLER
These instructions must be left with the owner
and the owner should keep them for future use.
THIS GAS APPLIANCE IS DESIGNED FOR
OUTDOOR USE ONLY.
WARNING
Do not try to light this appliance without
reading the “Lighting” Instructions section of
this manual.
NOTE: Standard LP, Natural Gas and
System LP are designed for use with a
Ducane® portable cart.
SAVE THESE INSTRUCTIONS FOR
FUTURE REFERENCE
2 www.ducane.com
Important
This grill head is designed
to be mounted only on a
Ducane® base cabinet kit.
DO NOT attempt to mount on
any other type of base or in
any other manner.
Read all instructions
before proceeding with any
assembly. For an assembly
view and verification of
parts, see the parts list
and expanded view of
pages 12-13.
Assembly
NOTE: Your model may differ from those in the assembly photos.
____________________________________________________________________
CAUTION: Although we make every effort to ensure that the assembly
process is as easy and as safe as possible, it is inherent with fabricated steel
parts that corners and edges can cause cuts if improperly handled during
assembly procedures. Be careful while handling any parts during assembly.
IT IS STRONGLY RECOMMENDED THAT HANDS BE PROTECTED WITH A PAIR
OF WORK GLOVES.
____________________________________________________________________
____________________________________________________________________
WARNING: Care must be taken to ensure that this grill is assembled
according to these instructions. Failure to assemble the grill properly could
create a fire hazard or cause burns or other bodily harm.
____________________________________________________________________
1. Assemble selected base cabinet kit before proceeding with these instructions.
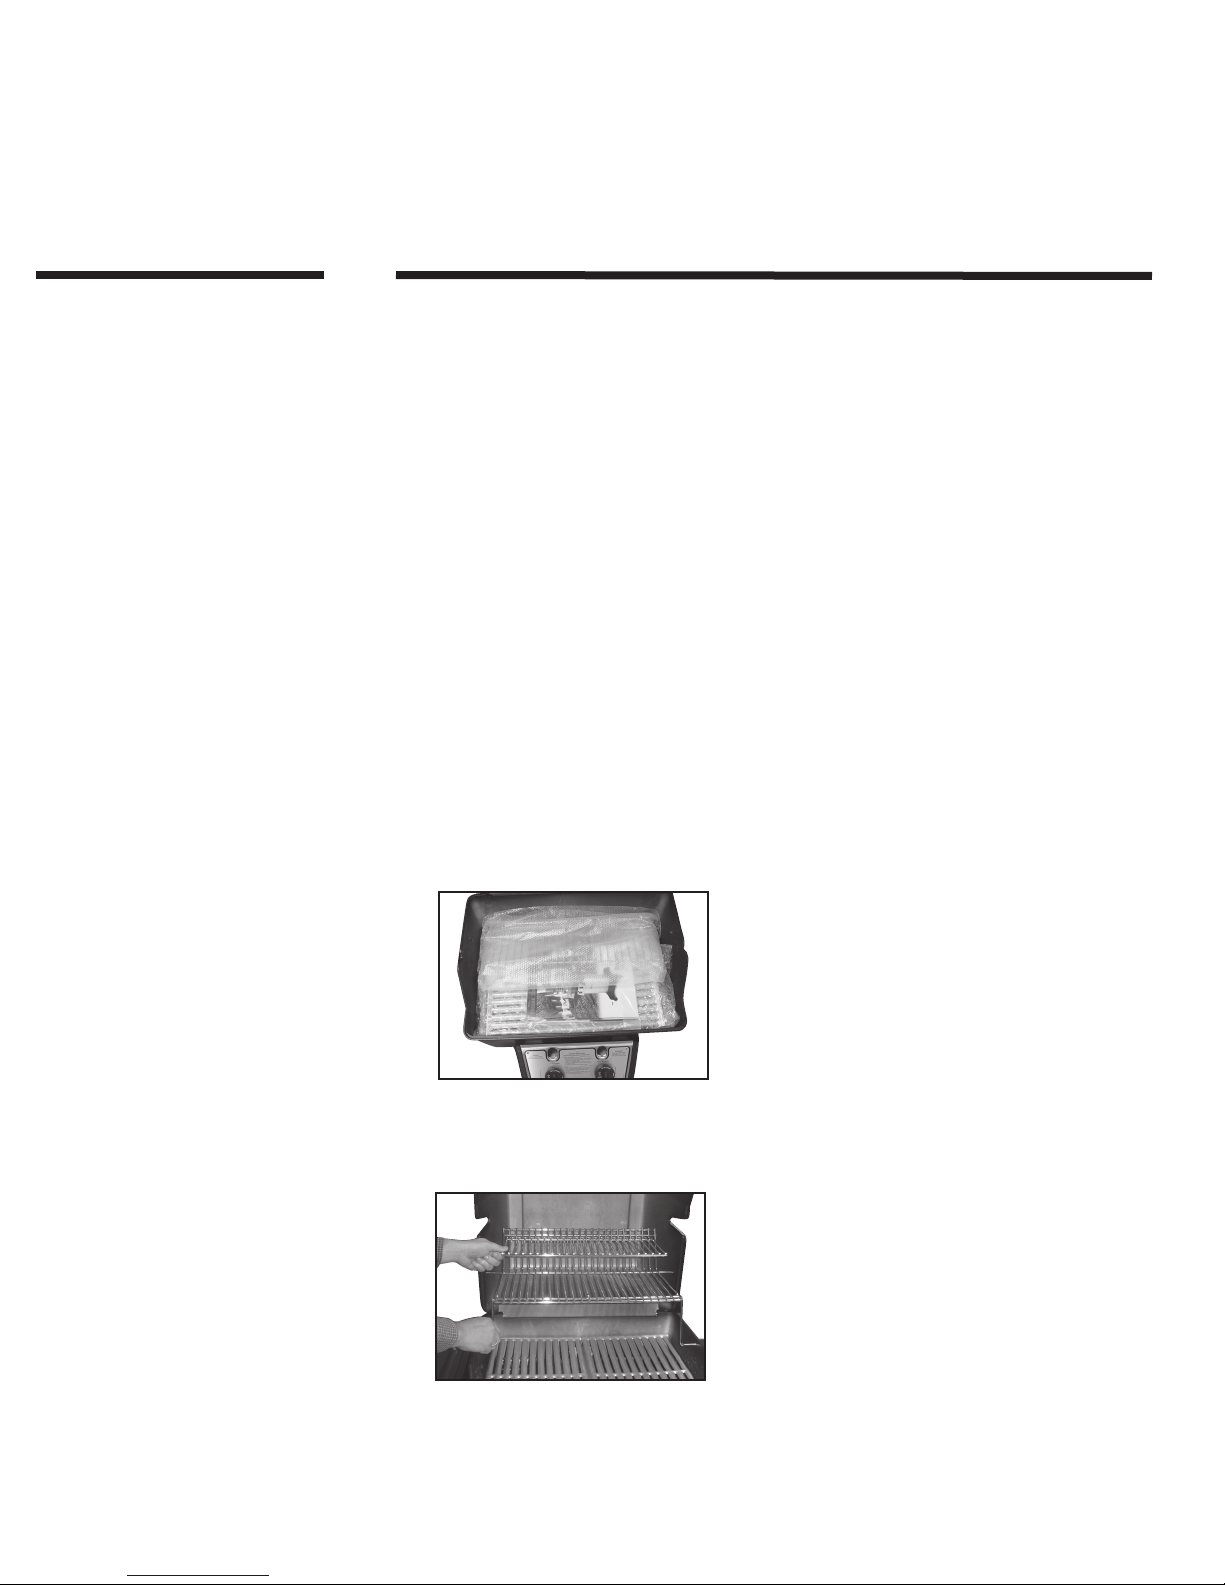
2. Open the hood and remove the bubble wrapped side shelf package(s), Sear
Grid® package, and accessory package.
2.
3. Remove the cooking rack by pushing each leg from the burner box and sliding
out of the hood.
3.
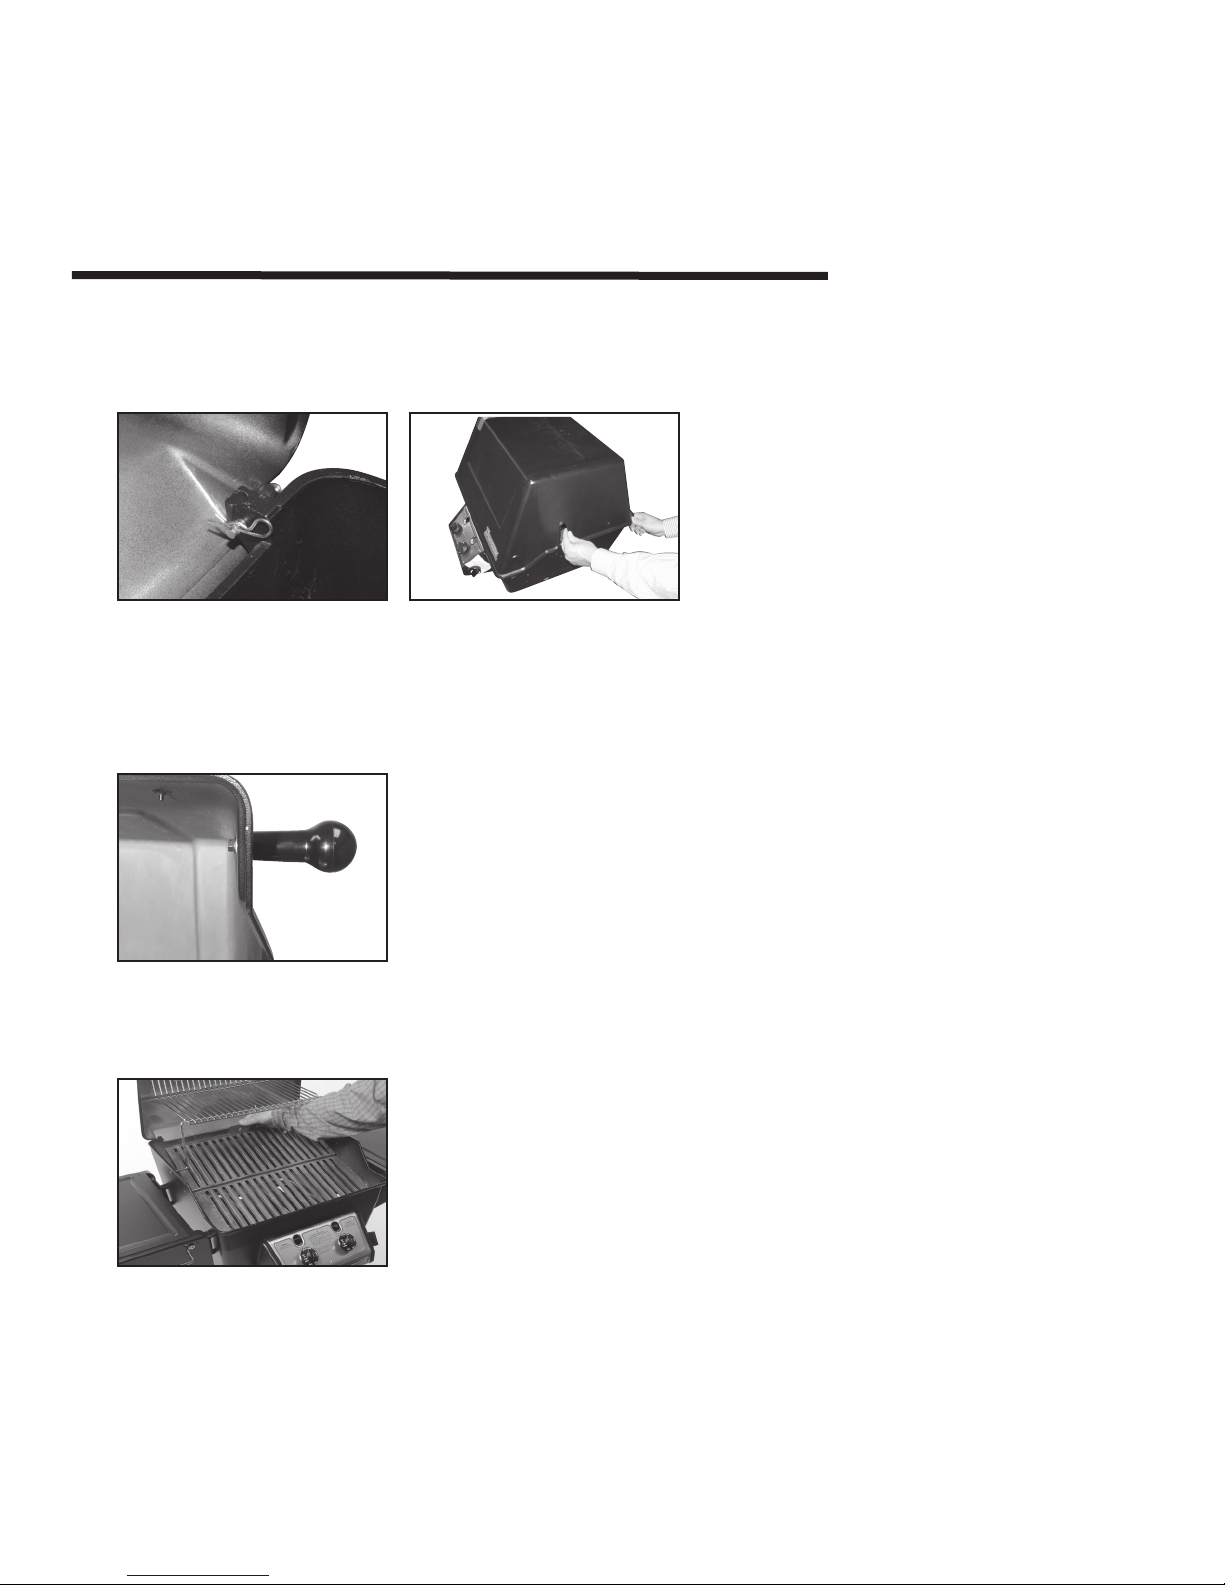
4. With the hood open, remove the hairpin clips from the hinge clevis pins (a).
Close the hood and slide clevis pins from hood hinges (b). Lift the hood from the
burner box and place it on a nonabrasive surface.
1-800-DUCANES 3
4. (a) 4. (b)
5. Using the hex head screws and split lockwashers from the hardware bag, attach
the two hood knobs to the outside of the grill hood in the locations shown.
Tighten screws from inside rather than turning the knob, to avoid scratching
paint.
5.
®
6. Remove the La-Va-Grate
from the burner box and position the box on the
previously assembled base cabinet kit.
6.
4 www.ducane.com
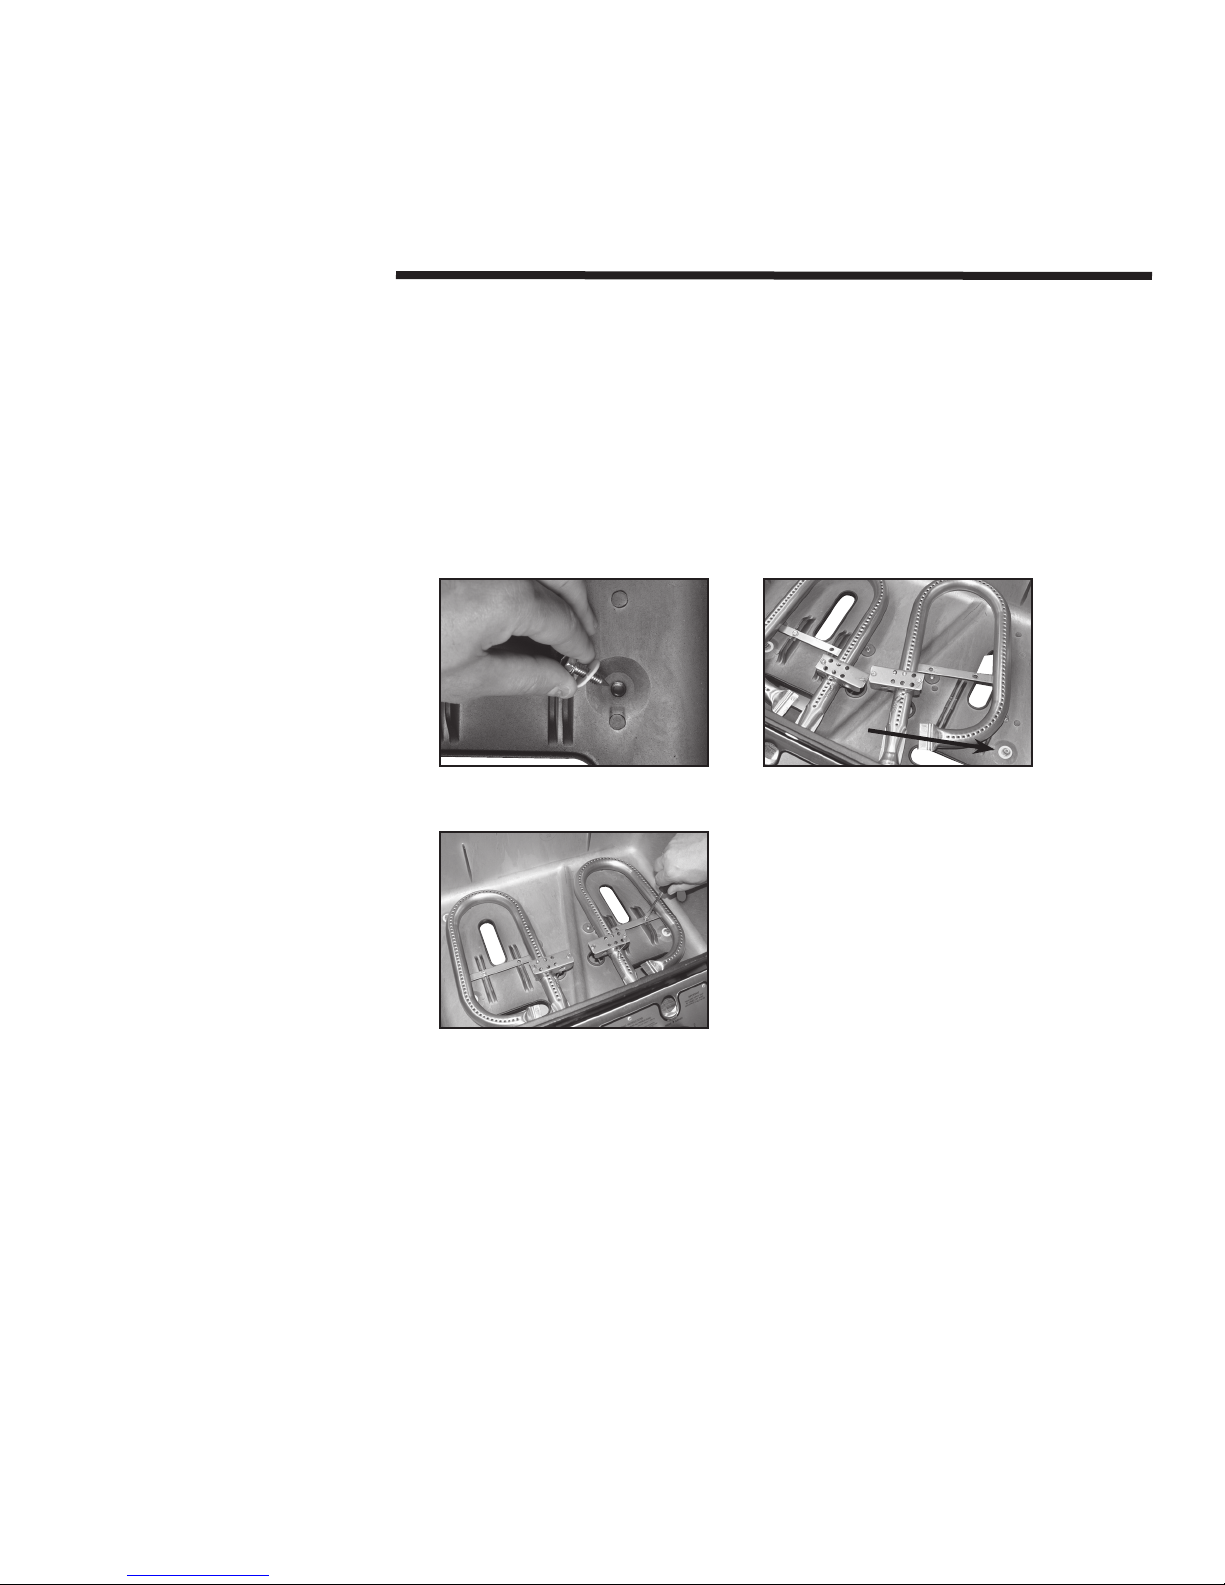
7. Attach the burner box to the base cabinet using the four (4) 1/4x20x1" pointed
"
screws and the four (4) 1/4
teflon washers from the base cabinet kit (a). The
screws with the washers directly underneath go through the four holes in the
bottom of the burner box and engage in the caged nuts in the top of the base
cabinet (b). Engage all four screws before tightening any of the four (c). In order
to get the screws in the mounting holes of some grill models, it may be necessary
to carefully rotate the burners out of the way of the holes. Unscrew the burner
locking screw to release the burner.
7. (a)
7. (b)
7. (c)
____________________________________________________________________
CAUTION: The screws used to attach the grill burner box to the base
cabinet must be tightened securely but not overly tight. The Teflon washers
used with these screws are very slippery and could lead to over-tightening
these screws. Care should be taken to avoid compressing the washer or
cracking the burner box.
____________________________________________________________________
____________________________________________________________________
CAUTION: BE CAREFUL NOT TO PULL THE BURNERS OFF THE ORIFICES OR
TO DISCONNECT THE IGNITION WIRES.
____________________________________________________________________
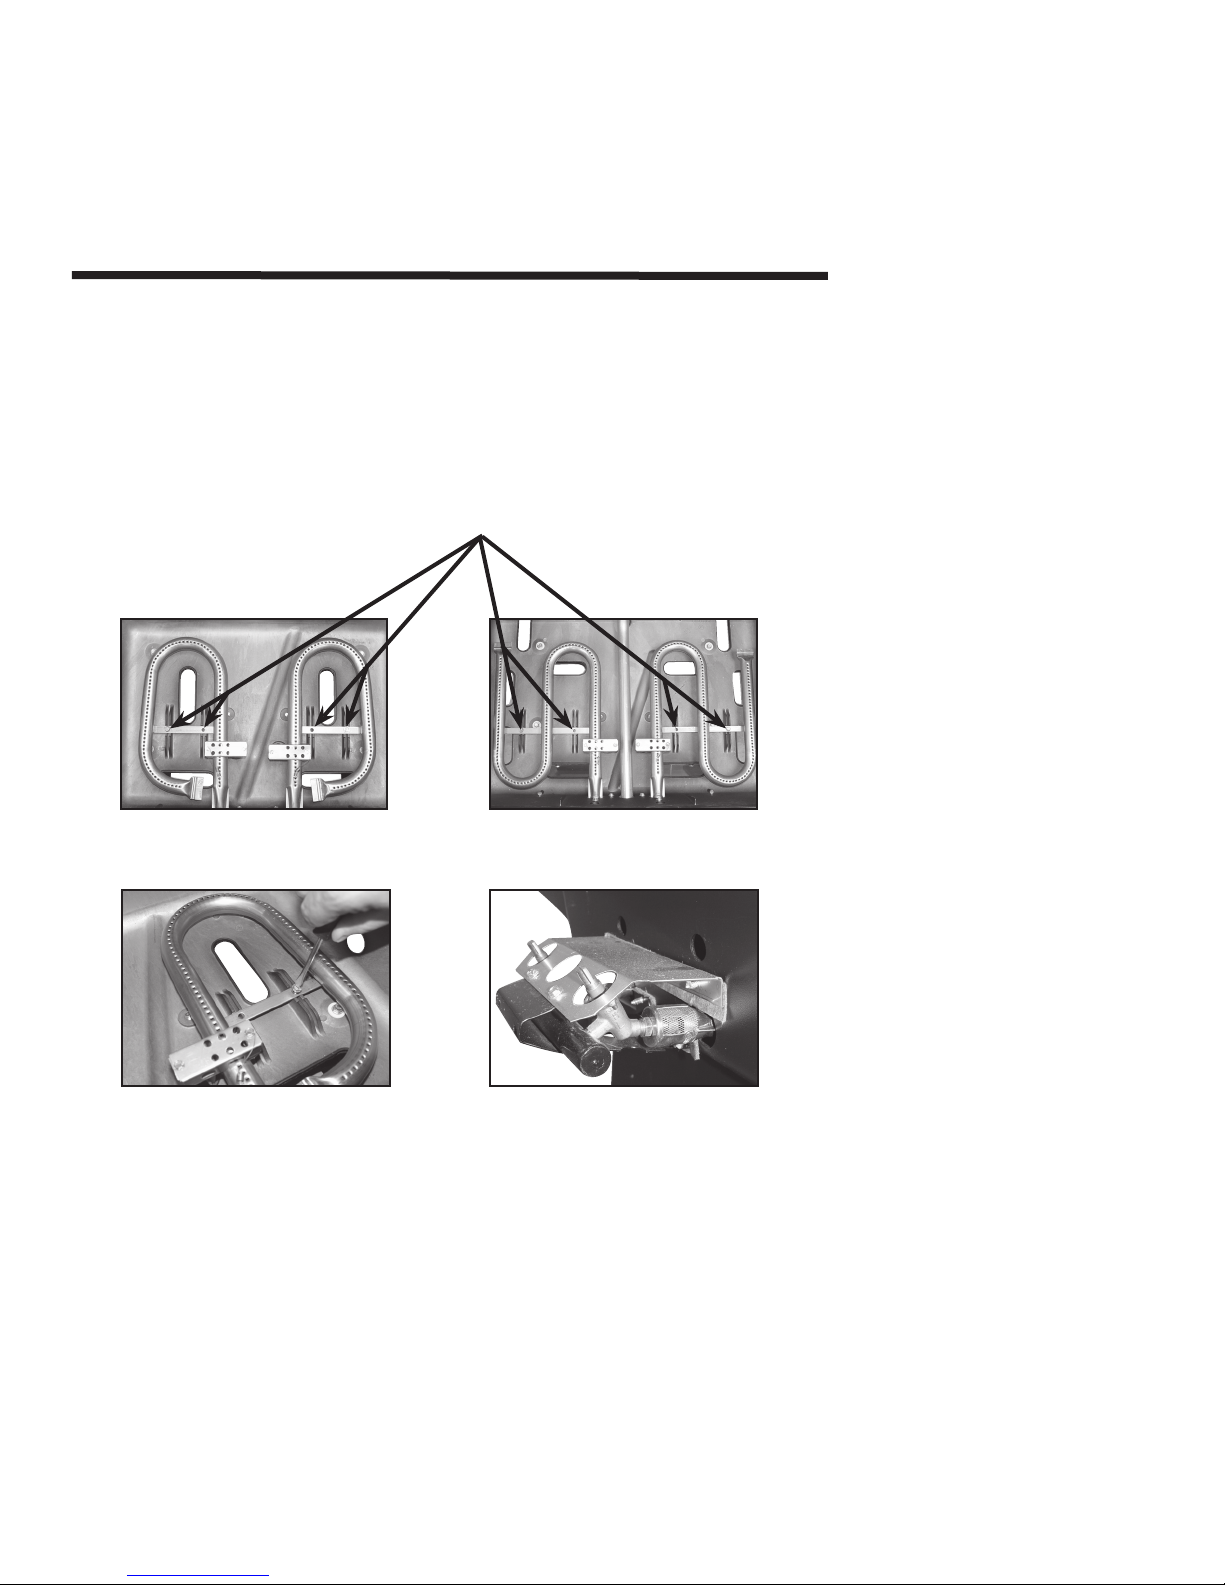
8. Before retightening the burner locking screw (a, b, c), be sure the burners are
correctly engaged over their respective orifices. This can be done by removing the
control box or by viewing the burner/orifice engagement from beneath the control
box (d).
Burner Locking Screws
1-800-DUCANES 5
8. (a)
Burner Locking Screws
8. (b)
8. (c) 8. (d)
____________________________________________________________________
WARNING: FAILURE TO CHECK PROPER BURNER ORIFICE ENGAGEMENTS
COULD LEAD TO A HAZARDOUS CONDITION AND BODILY
HARM.
____________________________________________________________________
 Loading...