

Dual WCP165GH, WSM651, MGR11BT Installation & Owner's Manual
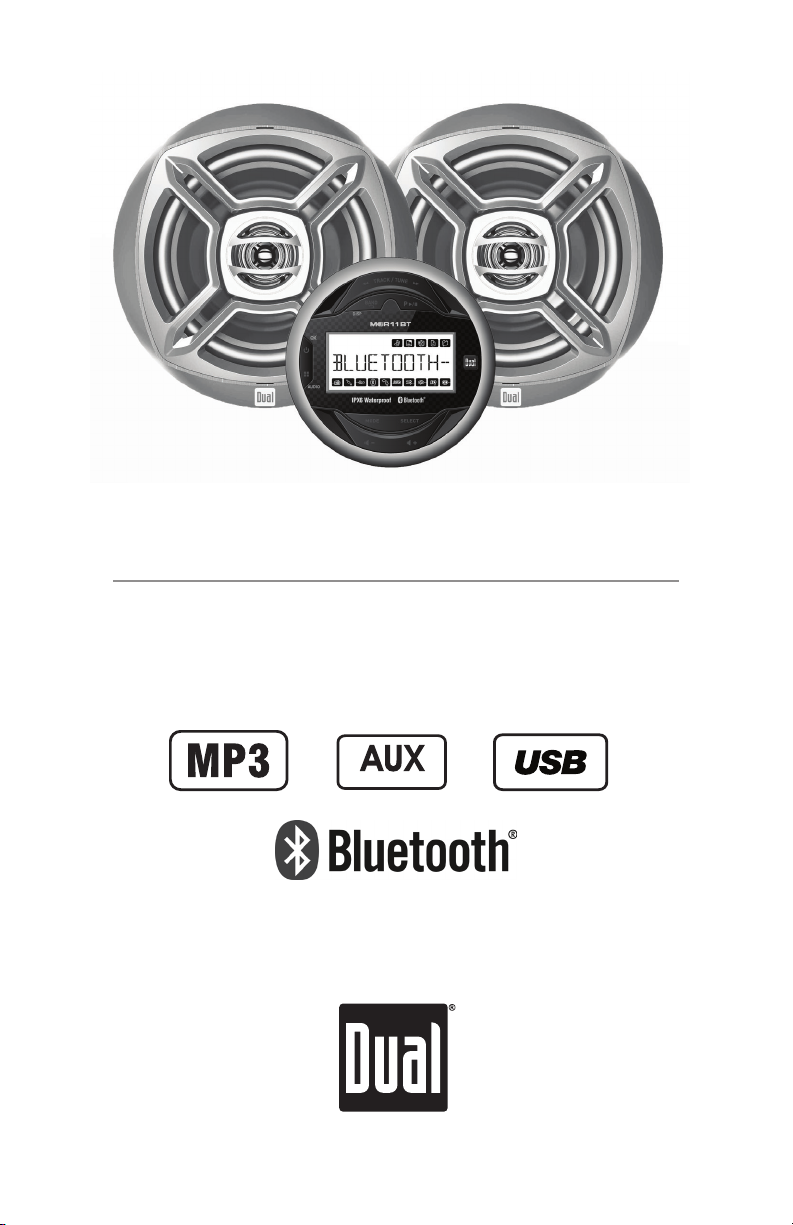
WCP165GH
Rear Inputs
INSTALLATION/OWNER'S MANUAL
MGR11BT AM/FM Gauge Hole Receiver
and WSM651 6.5" Car Audio Speakers
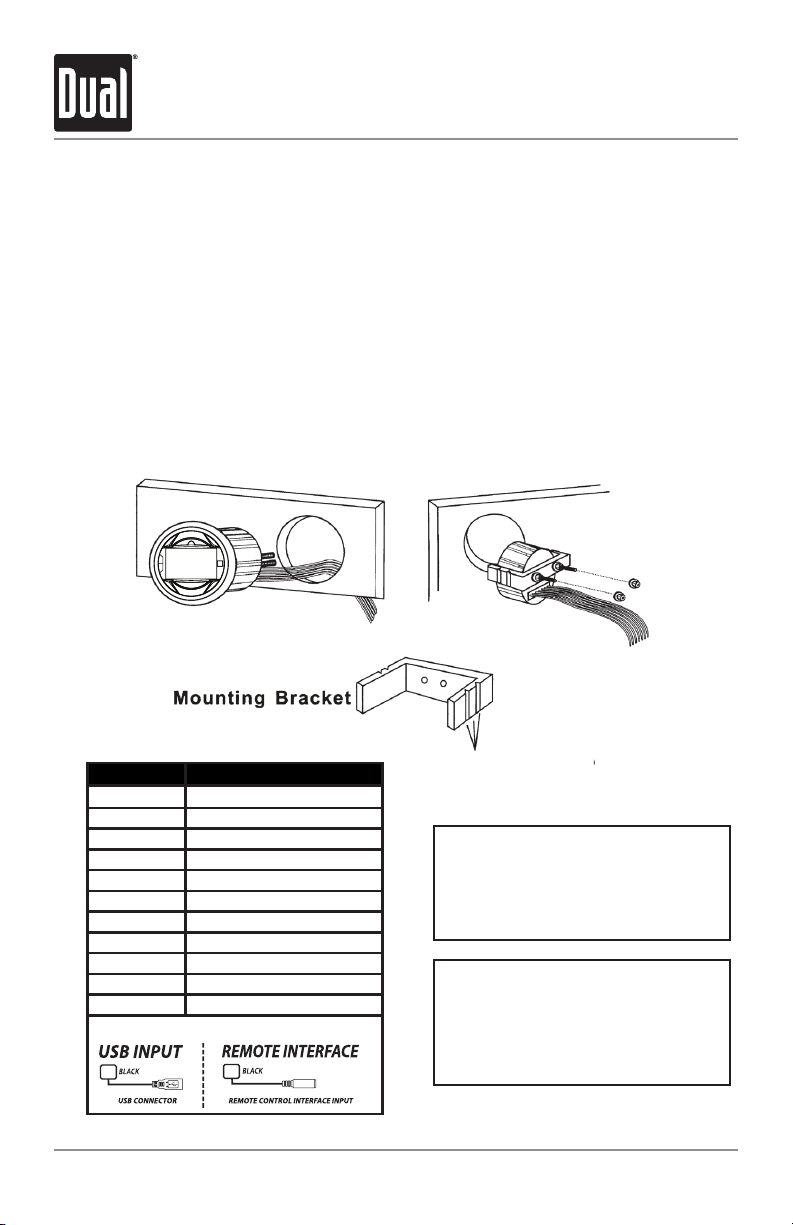
WCP165GH INSTALLATION
Mounting
Please read entire manual before installation.
Before You Start
• Disconnect negative battery terminal. Consult a qualified technician for instructions.
• Avoid installing the unit where it would be subject to high temperatures, such as from
direct sunlight, or where it would be subject to dust, dirt or excessive vibration.
Getting Started
• Once a suitable location has been determined, drill the hole and secure the stereo
using the metal mounting bracket. If the bracket needs to be shortened, remove the
appropriate number of breakaway segments using a pair of pliers.
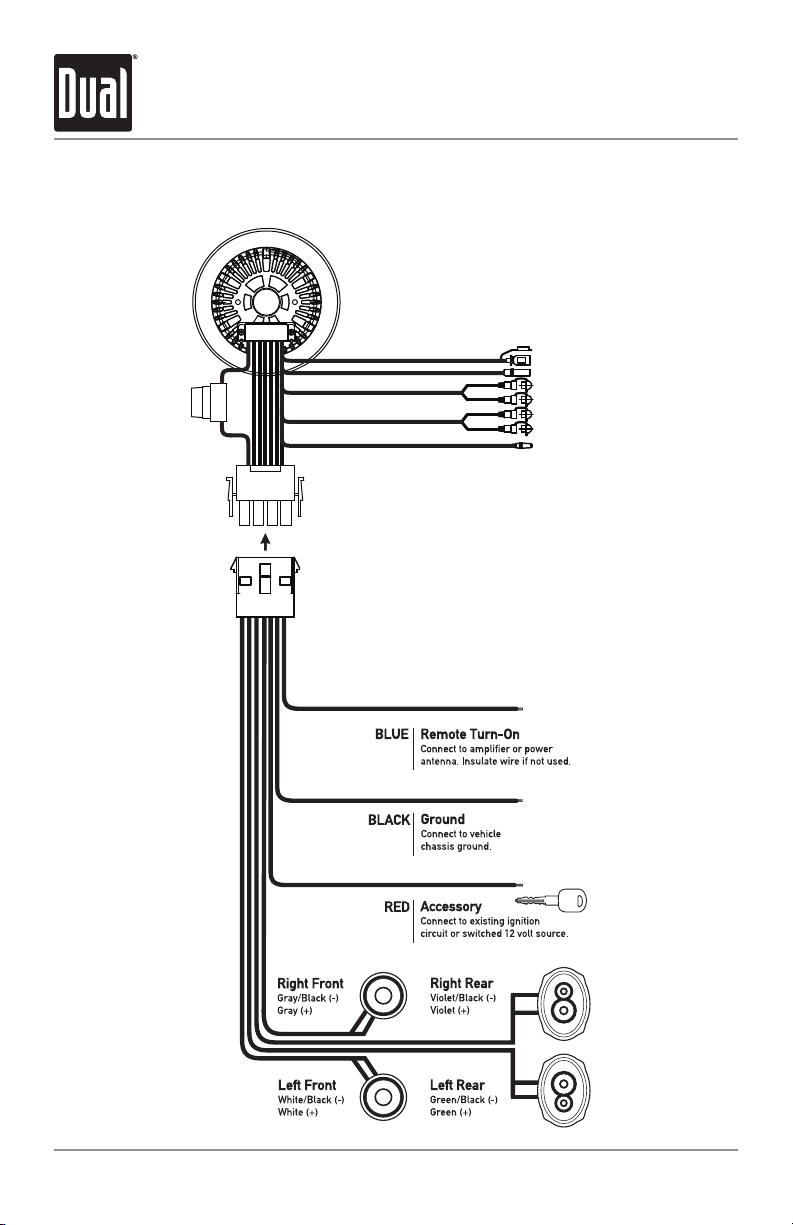
Color Connection
Red 12V Ignition / Accessory
Black Ground
Blue Remote Turn-on B (+)
Grey Right Front (+)
Grey/Black Right Front (-)
White Left Front (+)
White/Black Left Front (-)
Violet Right Rear (+)
Violet/Black Right Rear (-)
Green Left Rear (+)
Green/Black Left Rear (-)
2
Break Lines
Tip:
When a suitable ground wire is
not present in the vehicle wiring
harness, connect the black ground
wire to the vehicle chassis.
Fuse:
When replacing the fuse, make sure
new fuse is the correct type and
amperage. Using an incorrect fuse
could damage the radio.
WCP165GH INSTALLATION
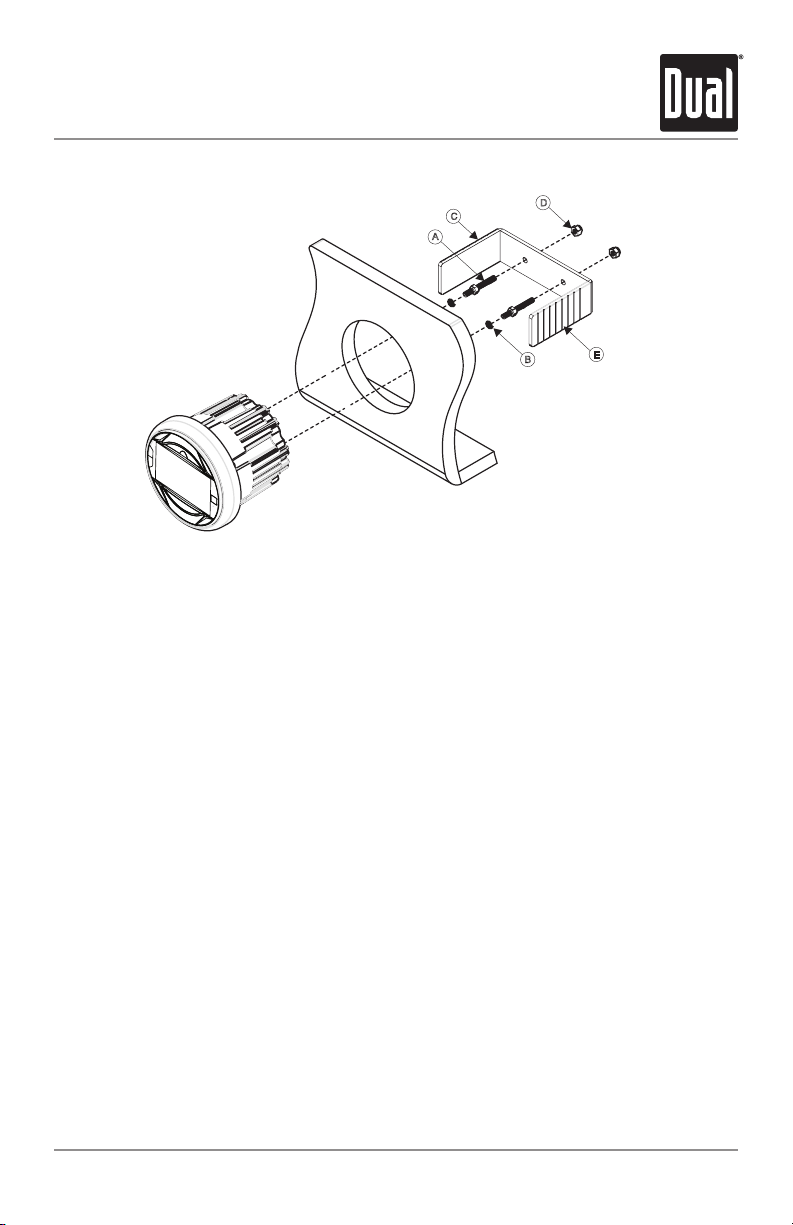
Installation
Installation
C
A
3 Inch Hole
Mounting the Radio
1. Choose a mounting location on the dash board or instrument panel that will
allow room behind to run radio cables to the power source. Consider how you will use
the AUX IN, LINE OUT and USB connectors and route the appropriate extension cables
to an accessible area.
2. Cut a hole in the dash board using the template provided in the back of this manual. At
least 3 3/4” depth is needed to mount the radio.
IMPORTANT! Do not mount this unit where it can be submerged in water.
D
B
E
3. Slide the included spring washers (B) over the screw posts (A) and attach the screw
posts to the back of the radio.
4. Place the radio in front of the dashboard opening so the wiring can be brought through
the opening.
5. After completing the wiring connections, turn the radio on to confirm operation (vehicle
accessory switch must be on). If the radio does not operate, recheck all wiring until the
problem is corrected. Once proper operation is achieved, turn the accessory switch off
and proceed with final mounting of the radio. Refer to the “Wiring Diagram” on page 5.
NOTE: Before final installation, test the wiring connections to make sure the unit is
connected properly and the system works.
6. Insert the radio into the mounting hole.
7. Place the “U” bracket (C) over the screw posts and secure the radio to the dash using
the included hex nuts (D). If necessary, cut the score marks (E) on either side of the
mounting bracket to custom fit the bracket length for your application. See Figure A.
3
WCP165GH OPERATION
Wiring
USBØ5(BLACK)
ANTØ3(BLACK)
2P RCA CABLE(GRAY)
FUSE
2P RCA CABLE(YELLOW)
WHITE MOLDING
RED MOLDNNG
WHITE MOLDING
RED MOLDNNG
USB
ANT
REAR LINE OUT
AUX
PHONE JACK(Ø3.5)
STEERING WHEEL
4
WCP165GH OPERATION
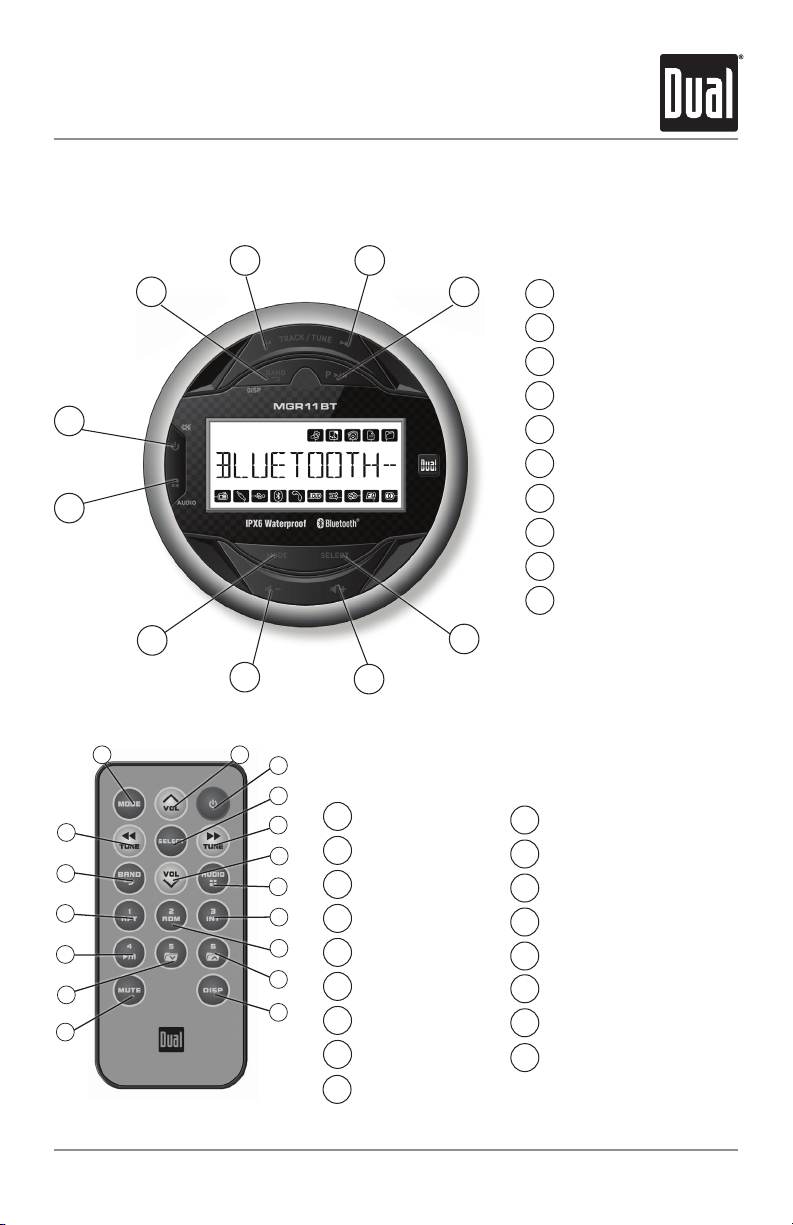
Control Locations
3
2
1
10
9
8
1
17
16
15
14
13
12
2
3
4
5
6
7
8
9
10
11
4
7
Mode
1
Volume Up
2
Power
3
Select
4
Tune / Track Up
5
Volume Down
6
Audio / Menu
7
Preset 3 / Intro
8
Preset 2 / Random
9
5
Power / Mute
1
Band / Go Back / Display
2
Tune Down
3
Tune Up
4
Play / Pause / Presets
5
Select
6
Volume Up
7
Volume Down
8
Mode
9
Audio / Menu
10
6
Preset 6 / Folder Up
10
Display
11
Mute
12
Preset 5 / Folder Down
13
Preset 4 / Play / Pause
14
Preset 1 / Repeat
15
Band / Go Back
16
Tune / Track Down
17
5

WCP165GH OPERATION
General Operation
Power On/Off
Mode
Auxiliary Inputs
Volume
Display
Reset
Setup Menu
Press to turn the unit on. Press and hold to turn the
unit off.
Press MODE to select between AM/FM, auxiliary, USB and
Bluetooth. Modes of operation are shown in the display.
NOTE: USB mode will not appear unless a USB device is
connected.
The MGR11BT offers rear RCA auxiliary input ports for
connecting an audio device, MP3 player, etc. Press MODE to
select auxiliary input mode.
Adjust volume using the VOL+ or VOL- buttons.
Press DISP to select between clock and different types of
information, such as radio frequency or MP song
information.
Press and hold the PLAY/PAUSE button for more than 10
seconds to reset the unit to default factory settings.
Press and hold AUDIO/MENU for more than 3 seconds to
access the setup menu. Press AUDIO/MENU momentarily
to select between the menu functions and use the VOL+ or
VOL- buttons to adjust or activate the desired function.
6
 Loading...