

Page 1

System Manual
• W A R N I N G •
This manual contains information on limitations regarding product use and function and information
on the limitations as to liability of the manufacturer. The entire manual should be carefully read.
®
PC4O2OKT Version 1.0CAP
Book 1
Page 2

LIMITED WARRANTY
Digital Security Controls Ltd. warrants the original purchaser that for a period of twelve months
from the date of purchase, the product shall be free of defects in materials and workmanship under
normal use. During the warranty period, Digital Security Controls Ltd. shall, at its option, repair
or replace any defective product upon return of the product to its factory, at no charge for labour
and materials. Any replacement and/or repaired parts are warranted for the remainder of the original warranty or ninety (90) days, whichever is longer. The original purchaser must promptly notify Digital Security Controls Ltd. in writing that there is defect in material or workmanship, such
written notice to be received in all events prior to expiration of the warranty period. There is
absolutely no warranty on software and all software products are sold as a user license under the
terms of the software license agreement included with the product. The Customer assumes all
responsibility for the proper selection, installation, operation and maintenance of any products
purchased from DSC. Custom products are only warranted to the extent that they do not function
upon delivery. In such cases, DSC can replace or credit at its option.
International Warranty
The warranty for international customers is the same as for any customer within Canada and the
United States, with the exception that Digital Security Controls Ltd. shall not be responsible for
any customs fees, taxes, or VAT that may be due.
Warranty Procedure
To obtain service under this warranty, please return the item(s) in question to the point of purchase. All authorized distributors and dealers have a warranty program. Anyone returning goods
to Digital Security Controls Ltd. must first obtain an authorization number. Digital Security Controls Ltd. will not accept any shipment whatsoever for which prior authorization has not been
obtained.
Conditions to Void Warranty
This warranty applies only to defects in parts and workmanship relating to normal use. It does not cover:
• damage incurred in shipping or handling;
• damage caused by disaster such as fire, flood, wind, earthquake or lightning;
• damage due to causes beyond the control of Digital Security Controls Ltd. such as excessive voltage,
mechanical shock or water damage;
• damage caused by unauthorized attachment, alterations, modifications or foreign objects;
• damage caused by peripherals (unless peripherals were supplied by Digital Security Controls Ltd.);
• defects caused by failure to provide a suitable installation environment for the products;
• damage caused by use of the products for purposes other than those for which it was designed;
• damage from improper maintenance;
• damage arising out of any other abuse, mishandling or improper application of the products.
Items Not Covered by Warranty
In addition to the items which void the Warranty, the following items shall not be covered by
Warranty: (i) freight cost to the repair centre; (ii) products which are not identified with DSC's
product label and lot number or serial number; (iii) products disassembled or repaired in such a
manner as to adversely affect performance or prevent adequate inspection or testing to verify any
warranty claim. Access cards or tags returned for replacement under warranty will be credited or
replaced at DSC's option. Products not covered by this warranty, or otherwise out of warranty due
to age, misuse, or damage shall be evaluated, and a repair estimate shall be provided. No repair
work will be performed until a valid purchase order is received from the Customer and a Return
Merchandise Authorisation number (RMA) is issued by DSC's Customer Service.
Digital Security Controls Ltd.’s liability for failure to repair the product under this warranty after a
reasonable number of attempts will be limited to a replacement of the product, as the exclusive
remedy for breach of warranty. Under no circumstances shall Digital Security Controls Ltd. be
liable for any special, incidental, or consequential damages based upon breach of warranty, breach
of contract, negligence, strict liability, or any other legal theory. Such damages include, but are not
limited to, loss of profits, loss of the product or any associated equipment, cost of capital, cost of
substitute or replacement equipment, facilities or services, down time, purchaser’s time, the claims
of third parties, including customers, and injury to property. The laws of some jurisdictions limit or
do not allow the disclaimer of consequential damages. If the laws of such a jurisdiction apply to any
claim by or against DSC, the limitations and disclaimers contained here shall be to the greatest
extent permitted by law. Some states do not allow the exclusion or limitation of incidental or
consequential damages, so that the above may not apply to you.
Disclaimer of Warranties
This warranty contains the entire warranty and shall be in lieu of any and all other warranties,
whether expressed or implied (including all implied warranties of merchantability or fitness for
a particular purpose) and of all other obligations or liabilities on the part of Digital Security
Controls Ltd. Digital Security Controls Ltd. neither assumes responsibility for nor authorizes
any other person purporting to act on its behalf to modify or to change this warranty, nor to
assume for it any other warranty or liability concerning this product.
This disclaimer of warranties and limited warranty are governed by the laws of the province
of Ontario, Canada.
WARNING: Digital Security Controls Ltd. recommends that the entire system be completely
tested on a regular basis. However, despite frequent testing, and due to, but not limited to,
criminal tampering or electrical disruption, it is possible for this product to fail to perform
as expected.
Out of Warranty Repairs
Digital Security Controls Ltd. will at its option repair or replace out-of-warranty products which
are returned to its factory according to the following conditions. Anyone returning goods to Digital
Security Controls Ltd. must first obtain an authorization number. Digital Security Controls Ltd.
will not accept any shipment whatsoever for which prior authorization has not been obtained.
Products which Digital Security Controls Ltd. determines to be repairable will be repaired and
returned. A set fee which Digital Security Controls Ltd. has predetermined and which may be
revised from time to time, will be charged for each unit repaired.
Products which Digital Security Controls Ltd. determines not to be repairable will be replaced
by the nearest equivalent product available at that time. The current market price of the
replacement product will be charged for each replacement unit.
WARNING Please Read Carefully
Note to Installers
This warning contains vital information. As the only individual in contact with system users, it is your
responsibility to bring each item in this warning to the attention of the users of this system.
System Failures
This system has been carefully designed to be as effective as possible. There are circumstances, however, involving fire, burglary, or other types of emergencies where it may not provide protection. Any
alarm system of any type may be compromised deliberately or may fail to operate as expected for a
variety of reasons. Some but not all of these reasons may be:
■■
■ Inadequate Installation
■■
A security system must be installed properly in order to provide adequate protection. Every installation
should be evaluated by a security professional to ensure that all access points and areas are covered.
Locks and latches on windows and doors must be secure and operate as intended. Windows, doors,
walls, ceilings and other building materials must be of sufficient strength and construction to provide
the level of protection expected. A reevaluation must be done during and after any construction activity.
An evaluation by the fire and/or police department is highly recommended if this service is available.
■■
■ Criminal Knowledge
■■
This system contains security features which were known to be effective at the time of manufacture. It
is possible for persons with criminal intent to develop techniques which reduce the effectiveness of
these features. It is important that a security system be reviewed periodically to ensure that its features
remain effective and that it be updated or replaced if it is found that it does not provide the protection
expected.
■■
■ Access by Intruders
■■
Intruders may enter through an unprotected access point, circumvent a sensing device, evade detection
by moving through an area of insufficient coverage, disconnect a warning device, or interfere with or
prevent the proper operation of the system.
■■
■ Power Failure
■■
Control units, intrusion detectors, smoke detectors and many other security devices require an adequate
power supply for proper operation. If a device operates from batteries, it is possible for the batteries to
fail. Even if the batteries have not failed, they must be charged, in good condition and installed correctly.
If a device operates only by AC power, any interruption, however brief, will render that device inoperative
while it does not have power. Power interruptions of any length are often accompanied by voltage fluctuations which may damage electronic equipment such as a security system. After a power interruption has
occurred, immediately conduct a complete system test to ensure that the system operates as intended.
■■
■ Failure of Replaceable Batteries
■■
This system’s wireless transmitters have been designed to provide several years of battery life under normal
conditions. The expected battery life is a function of the device environment, usage and type. Ambient
conditions such as high humidity, high or low temperatures, or large temperature fluctuations may reduce the
expected battery life. While each transmitting device has a low battery monitor which identifies when the
batteries need to be replaced, this monitor may fail to operate as expected. Regular testing and maintenance
will keep the system in good operating condition.
■■
■ Compromise of Radio Frequency (Wireless) Devices
■■
Signals may not reach the receiver under all circumstances which could include metal objects placed on or
near the radio path or deliberate jamming or other inadvertent radio signal interference.
■■
■ System Users
■■
A user may not be able to operate a panic or emergency switch possibly due to permanent or temporary
physical disability, inability to reach the device in time, or unfamiliarity with the correct operation. It is
important that all system users be trained in the correct operation of the alarm system and that they
know how to respond when the system indicates an alarm.
■■
■ Smoke Detectors
■■
Smoke detectors that are a part of this system may not properly alert occupants of a fire for a number of
reasons, some of which follow. The smoke detectors may have been improperly installed or positioned.
Smoke may not be able to reach the smoke detectors, such as when the fire is in a chimney, walls or roofs,
or on the other side of closed doors. Smoke detectors may not detect smoke from fires on another level of
the residence or building.
Every fire is different in the amount of smoke produced and the rate of burning. Smoke detectors cannot
sense all types of fires equally well. Smoke detectors may not provide timely warning of fires caused by
carelessness or safety hazards such as smoking in bed, violent explosions, escaping gas, improper storage
of flammable materials, overloaded electrical circuits, children playing with matches or arson.
Even if the smoke detector operates as intended, there may be circumstances when there is insufficient
warning to allow all occupants to escape in time to avoid injury or death.
■■
■ Motion Detectors
■■
Motion detectors can only detect motion within the designated areas as shown in their respective installation instructions. They cannot discriminate between intruders and intended occupants. Motion detectors
do not provide volumetric area protection. They have multiple beams of detection and motion can only be
detected in unobstructed areas covered by these beams. They cannot detect motion which occurs behind
walls, ceilings, floor, closed doors, glass partitions, glass doors or windows. Any type of tampering whether
intentional or unintentional such as masking, painting, or spraying of any material on the lenses, mirrors,
windows or any other part of the detection system will impair its proper operation.
Passive infrared motion detectors operate by sensing changes in temperature. However their effectiveness can be reduced when the ambient temperature rises near or above body temperature or if there are
intentional or unintentional sources of heat in or near the detection area. Some of these heat sources
could be heaters, radiators, stoves, barbeques, fireplaces, sunlight, steam vents, lighting and so on.
■■
■ Warning Devices
■■
Warning devices such as sirens, bells, horns, or strobes may not warn people or waken someone sleeping if
there is an intervening wall or door. If warning devices are located on a different level of the residence or
premise, then it is less likely that the occupants will be alerted or awakened. Audible warning devices may be
interfered with by other noise sources such as stereos, radios, televisions, air conditioners or other appliances,
or passing traffic. Audible warning devices, however loud, may not be heard by a hearing-impaired person.
■■
■ Telephone Lines
■■
If telephone lines are used to transmit alarms, they may be out of service or busy for certain periods of
time. Also an intruder may cut the telephone line or defeat its operation by more sophisticated means
which may be difficult to detect.
■■
■ Insufficient Time
■■
There may be circumstances when the system will operate as intended, yet the occupants will not be
protected from the emergency due to their inability to respond to the warnings in a timely manner. If the
system is monitored, the response may not occur in time to protect the occupants or their belongings.
■■
■ Component Failure
■■
Although every effort has been made to make this system as reliable as possible, the system may fail to
function as intended due to the failure of a component.
■■
■ Inadequate Testing
■■
Most problems that would prevent an alarm system from operating as intended can be found by regular
testing and maintenance. The complete system should be tested weekly and immediately after a breakin, an attempted break-in, a fire, a storm, an earthquake, an accident, or any kind of construction
activity inside or outside the premises. The testing should include all sensing devices, keypads, consoles, alarm indicating devices and any other operational devices that are part of the system.
■■
■ Security and Insurance
■■
Regardless of its capabilities, an alarm system is not a substitute for property or life insurance. An alarm
system also is not a substitute for property owners, renters, or other occupants to act prudently to prevent
or minimize the harmful effects of an emergency situation.
Page 3

TABLE OF
CONTENTS
Introduction _______________________________________________________________ 1
System Overview _________________________________________________________ 2
Maximum System Capabilities .................................................................................................. 2
128 Programmable Zones ......................................................................................................... 2
Voice Prompting Module (VPM) ................................................................................................ 2
LCD Keypads (LCD4500) ......................................................................................................... 2
211 Outputs ............................................................................................................................... 2
Switched Auxiliary Output ......................................................................................................... 2
4 Enclosures .............................................................................................................................. 2
Supervised Alarm Output .......................................................................................................... 2
Event Buffer ............................................................................................................................... 2
8 True Partitions ......................................................................................................................... 2
RS-232 Interface Module (PC4400) .......................................................................................... 2
PC4820 Access Control Module ............................................................................................... 2
Internal Memory ......................................................................................................................... 2
Keypad User Options ................................................................................................................ 2
Communicator ........................................................................................................................... 2
LINKS Support ........................................................................................................................... 2
Installation and Wiring____________________________________________________ 3
Suggested Wiring Procedure .................................................................................................... 3
RF Zones — Summary ............................................................................................................... 4
RF Signal Test ............................................................................................................................ 4
Wireless PIR Motion Detectors .................................................................................................. 4
Zone Supervisories .................................................................................................................... 4
Battery Troubles ........................................................................................................................ 5
Restoring Battery Troubles ........................................................................................................ 5
Default Srl #'s (4) ....................................................................................................................... 5
COMBUS Power and Operation ................................................................................................ 5
Testing The Combus ................................................................................................................. 5
Mounting the Panel .................................................................................................................... 6
Programming the System ..........................................................................................................6
Hardware Reset of Memory to Factory Defaults ....................................................................... 7
PC4020 Main Board Specifications _______________________________________ 8
Control Panel ............................................................................................................................. 8
Output Voltage ........................................................................................................................... 8
Remote Keypad ......................................................................................................................... 8
Module Specifications ____________________________________________________ 9
PC4108 Expansion Module ....................................................................................................... 9
PC4116 Expansion Module ....................................................................................................... 9
PC4164 Expansion Module ....................................................................................................... 9
PC4204 High Current Output Module ....................................................................................... 9
PC4216 Low Current Output Module ........................................................................................ 9
PC4400 RS-232 Interface Adapter Module .............................................................................. 9
PC4700 Fire Module .................................................................................................................. 9
LCD4500 Remote Keypad ........................................................................................................ 9
Escort 4580 (Voice Prompting Module) .................................................................................... 9
PC4820 Access Control Module ............................................................................................... 9
PC4020 Control Panel Wiring Diagrams _________________________________ 10
Module Hookup Diagram ......................................................................................................... 11
Terminal Connections ___________________________________________________ 13
“AC” Power Terminals .............................................................................................................. 13
Auxiliary Power Terminals “AUX” and “GND” .......................................................................... 13
Switched Auxiliary Power Terminals ........................................................................................ 13
Bell/Siren Terminals .................................................................................................................. 13
Programmable Output Terminal “PGM” ................................................................................... 13
COMBUS Terminals “RED”, “BLK”, “YEL” and “GRN” ............................................................ 13
Zone Input Terminals “Z1” to “Z16” ......................................................................................... 13
Telephone Terminals “TIP”, “RNG”, “T-1” and “R-1” ............................................................... 14
Battery Connections ................................................................................................................. 14
Page 4

System Keypad Functions _______________________________________________ 15
Introduction ............................................................................................................................... 15
Partitions ................................................................................................................................... 15
Access Codes .......................................................................................................................... 15
Global Keypads ........................................................................................................................ 15
System Master Code Functions ............................................................................................... 17
Installer’s Programming Code .................................................................................................. 17
Arming ....................................................................................................................................... 17
Disarming .................................................................................................................................. 18
Auto-bypass/Home-Away Arming ............................................................................................ 18
Zone Bypassing: [✱] + [1] ......................................................................................................... 18
Trouble Display: [✱] + [2] ......................................................................................................... 19
Alarm Memory Display: [✱] + [3] .............................................................................................. 21
Sensor Reset: [✱] + [4] ............................................................................................................. 21
User Programming Commands: [✱] + [5] + [System Master Code] or [Supervisory Code] ......... 21
Programming Additional Access Codes Using a System Master or a Supervisory Code ..... 22
User Functions Command: [✱] + [6] + [Access Code] ............................................................. 23
Quick Arm: [✱] + [6] + [Access Code] + [0] .............................................................................. 23
Quick Exit: [✱] + [6] + [Access Code] + [1] .............................................................................. 24
Auto Arm Control: [✱] + [6] + [Access Code] + [2] ................................................................... 24
Keypad Setup: [✱] + [6] + [Access Code] + [3] ........................................................................ 24
Bell/Comm Test: [✱] + [6] + [Access Code] + [4] ..................................................................... 24
Door Chime: [✱] + [6] + [Access Code] + [5] ............................................................................ 24
Spec. Messages: [✱] + [6] + [Access Code] + [6] .................................................................... 24
User Call up: [✱] + [6] + [Access Code] + [7] ........................................................................... 25
Lamp Test: [✱] + [6] + [Access Code] + [8] .............................................................................. 25
Walk Test: [✱] + [6] + [Walk Test Code] ................................................................................... 25
Utility Output: [✱] + [7] or [✱] + [7] + [Access Code] ................................................................ 25
Installer’s Programming Commands: [✱] + [8] + [Installer’s Code] ......................................... 25
“At-Home” Arming: [✱] + [9] + [Access Code] ......................................................................... 25
Quick Arm: [✱] + [0] ................................................................................................................. 25
Quick Exit: [✱] + [0] When Armed ............................................................................................ 25
Keypad Zones .......................................................................................................................... 25
Access Control Functions _______________________________________________ 26
Reader LED Flash Rates ..........................................................................................................26
Buzzer Operation ...................................................................................................................... 26
How to Setup and Use an Access Card .................................................................................. 26
Arming and Disarming Using Access Cards ........................................................................... 26
Autoarm Postponement ............................................................................................................26
Request to Exit (REX) ............................................................................................................... 26
Printer Setup _____________________________________________________________ 27
Configuring the Printer ............................................................................................................. 27
Downloading _____________________________________________________________ 28
Downloading over Phone Lines ............................................................................................... 28
Downloading with an On-site Computer .................................................................................. 28
Appendix A _______________________________________________________________ 29
List of Available ASCII Characters ........................................................................................... 29
Appendix B _______________________________________________________________ 30
List of Diagnostics .................................................................................................................... 30
Limited Warranty _____________________________________________ inside front cover
Page 5

INTRODUCTION
The PC4020 is a highly flexible and versatile control
which will enable the installer to meet the most
demanding security requirements. The heart of the
system is the main control panel, designated the
PC4020, which is connected to other system elements
using common 4 conductor unshielded station wire. The
main panel processes signal information and
communicating with the monitoring station. The main
panel is capable of supervising 16 zones, any of which
may be defined for fire or burglary applications and also
manages up to eight separate and fully independent
partitions, assigning zones and their controlling keypads
in accordance with installer programming.
The basic 16 zone capability of the PC4020 can be
expanded using either PC4108, PC4116 or PC4164
modules which provide 8, 16 or 64 zones of additional
inputs respectively up to a system maximum of 128
zones. The PC4108 and PC4116 are designed for use
within any of the cabinets and are shipped as PC boards
only. The PC4164 is designed to be placed inside the
supplied cabinet.
Programming and system operation are carried out using
the LCD4500 liquid crystal display keypad. The
LCD4500 connects at any point in the system to the four
wire communication bus or “COMBUS”, its specific
identification being determined automatically in the
process of installing it. A maximum of 16 LCD4500
keypads may be used on any one system regardless of
size.
The PC4204 relay output module is available for
installations requiring additional power beyond the 500
mA supplied by the PC4020 main panel. This module
comprises a 12 volt DC power supply of 1.5 Amp
capacity and four 12 volt relays with form C contacts
which will provide switched outputs under any of the 35
options available in the list of programmable outputs. The
PC4204 connects to the COMBUS via four wires as with
other system elements. It requires a 16 -18 volt, 40 VA
transformer and a 12 volt battery. Up to 16 PC4204
modules may be installed on any one system. The
PC4204 is shipped as a PC board only.
The use of any power source other than a PC4204 to
repower the COMBUS will result in a system
malfunction.
The PC4216 low current module provides 16 separate
outputs. Each output may be programmed to operate under
the control of 1 of 35 options as listed in the programmable
options section of the installation manual. Up to 8 other
PC4216’s may be used to provide outputs for graphic
annunciator or similar devices for the maximum of 128
zones. The PC4216 connects to the COMBUS with four
wires. A maximum of 9 PC4216’s may be connected to a
system. The PC4216 may be installed in the main cabinet or
in other cabinet options and is shipped as a board only.
The PC4020 includes the capability of driving a serial
printer using a PC4400 RS232 output module. The PC4400
connects to the COMBUS with four wires. The printer may
be located up to 200 feet (60 meters) away from the
module. The PC4400 is shipped as a board only.
The PC4820 Access Control Module provides the ability to
have 2 access card readers and 2 doors interfaced to the
PC4020KT. There can be up to 16 access control modules
enrolled on the system to make a total of 32 zones that can
be interfaced to the alarm system.
1
Page 6
SYSTEM OVERVIEW
Maximum System Capabilities
• Control Units - 1 PC4020 Main Board
• 128 Zones
PC4020 Main Board: 16 zones
PC4108 Expansion Module: 8 zones
PC4116 Expansion Module: 16 zones
PC4164 Expension Module: 64 wireless zones
• 64 High Current Outputs - Up to 16 PC4204 Modules
• 144 Low Current Outputs
- 9 PC4216 16 Output Modules
• 1 RS-232 Interface - PC4400
• PC4700 Fire Module Support
• 16 Remote LCD Keypads - LCD4500
• Escprt 4580 Voice Prompting Module
• 1 Main Board Fully Programmable Output
• 1 12 VDC Switched Fully Programmable Auxiliary Power
Supply (Main Board)
• 1 Supervised Fully Programmable Bell/Siren Output
(Main Board)
• 1 Telephone Interface (Main Board)
• 2 Telephone Interface (PC4700)
128 Programmable Zones
• 16 zones on main board expandable by using 8 and 16
zone modules
• 18 zone types including: instant, 2 types of interior, 3
delay, 3 fire, 4-24 hour, forced answer, momentary,
maintained arming, Links supervisory and Links answer.
• Zone expansion is done by enrolling a zone expansion
module
• Zones can be assigned independently to any partition(s)
• Programmable for NC loops, EOL resistor or Double EOL
resistors
Voice Prompting Module (VPM)
• All main user function accessible through the VPM
• Local and remote access abilities
• 241 word library for zone, access code and partition labelling
LCD Keypads (LCD4500)
• Total of 16 on the system
• Can be assigned to any partition
• Single keypad system control
211 Outputs
• 1 main board transistor switch to ground with 3A
capabilities (programmable for 1 of 28 options)
• 64 relay outputs programmable for 1 of 28 options each
(16-4204 modules with 4 outputs each)
• 144 switched transistor outputs programmable for 1 of
28 options each (9-4216 modules with 16 outputs)
• 1 switched Aux output
• 1 PGM switched to ground
Switched Auxiliary Output
• Programmable for 1 of 28 options
5 Enclosures
• PC4001C - PC4020 plus 2 modules
• PC4002C - 3 modules
• PC4003C - 1 module
• PC4004C - Attack resistant for PC4020 plus 2
modules
• PC3000 - PC4820
Supervised Alarm Output
• Bell Output, 700 mA fused at 5 Amps,
12 V
DC - commercial and 11.6 - 12.6 VDC - residential
• Steady or Pulsed Output
• Programmable for 1 of 28 options
Event Buffer
• 3000 events
• Date and time stamp
• Event Buffer Viewing - any System Master is able to view 2500
events through the keypad including date and time stamp
• Event Buffer Printing - the entire event buffer (3000 events)
can be printed at once through the Installer’s mode
8 True Partitions
• Separate or shared zones from other partitions
• Individual keypads per partition
• Individual access codes for each partition
• Individual keypad zones (Fire, Auxiliary, Panic)
• Individual outputs programmable per partition
RS-232 Interface Module (PC4400)
• Used to output data to a local printer
PC4820 Access Control Module
• Total of 16 on the system
• Two access card readers
• Is used to control access to secure areas of the system
• Can control two doors that may be assigned to any partition
on the system
• Can be used to arm/disarm partitions on the system
Internal Memory
• Retains programmed data even when both AC and Battery
have been removed.
• The clock will have to be reset after a power down
condition which will be indicated by an audible trouble
beep and the keypad trouble LED is on.
Keypad User Options
They are all menu driven, including:
• Programming of several types of 4 or 6 digit access codes,
128 in total
• Bypassing from the keypad by authorized personnel
• Utility functions such as remote control of lights, door
strikes, etc.
Communicator
• Communicates in all 10 and 20 BPS single line and
extended formats
• Radionics Rounds and Radionics Parity
• Sescoa Superfast format
• Ademco Contact ID format
• SIA 1986 format
• Sur-gard 4/3 DTMF format
• 3/1 and 4/2 formats
• Hexadecimal numbers
• DTMF and Pulse dialing
• DPDT line seizure
• True dial tone detect
• Anti-jam feature
• Three telephone numbers and nine account codes
LINKS Support
• 3 telephone numbers for LINKS
• Auto programming for LINKS zones
2
Page 7

INSTALLATION
AND WIRING
When designing a security system with the PC4020 that
will be larger than 16 zones or have two or more
Partitions it is best to first lay out the system on paper.
This will help determine the total number of zones,
additional expansion and power supply modules and
other system elements that may be needed.
When the location of all points of protection is known the
location of the zone expanders can be made. You will
find that working from a plan, a layout will reveal the
most economical use of system modules; two eight zone
expansion modules instead of one sixteen zone, for
example, can save long wire runs because of the
location of zones.
The plan will also enable you to make the most efficient
layout for the communications bus (COMBUS). This is
the four conductor cable which can be standard station
wire (four 22 AWG wires colour coded red, black ,
yellow and green) to which all system modules are
connected in parallel. It is not necessary to run the
COMBUS in shield unless it is being run through an area
of high electrical noise.
The COMBUS may be up to 1,000 ft (305m) from the
main board to the farthest module, with any number of
modules in between. More than one COMBUS of 1,000 ft
(305m) can run from the PC4020.
Note: Do not use shielded cable for COMBUS wire
runs.
Suggested Wiring Procedure
The first step in designing a PC4020 installation is
developing a system layout on paper. Doing this will
allow you to work from a plan and help to avoid making
mistakes and make programming easier.
Creating a System Layout
1 Draw a rough sketch of the building(s) layout in the
installation including the interior walls. Indicate on
the diagram the location of the PC4020 main panel.
The panel should be in a dry, secure location close
to a non switched AC source, a ground connection
and a telephone line connection.
2 Indicate on the diagram the location of all zones as
well as the device required such as smoke
detectors, motion detectors, door contacts etc.
3 If using the PC4700 Fire Module, indicate on the
diagram the location of the smoke detectors which
will be 2 wire and the locations of the waterflow
detector.
NOTE: The fire module is located in the Main
Cabinet with the control panel. Be sure to indicate
the location of the Bell output.
4 Zones may be grouped together into partitions. Knowing
the zone number of each zone will allow the partition
setup done without mistakes. Locate any zone
expansion modules (PC4108 or PC4116) required close
to groups of zones for easier wiring.
Decide on the order to enroll the expansion modules.
The first 16 zones (1 through 16) are on the main panel.
As each module is enrolled it will be assigned in
sequence the next available group of zones. If an 8
zone module (PC4108) was enrolled first, it would be
assigned zones 17 through 24. If then a 16 zone
expansion module (PC4116) is enrolled it would be
assigned zones 25 through 40.
Once the order to enroll the expansion modules has
been determined, number each zone accordingly.
5 Wireless zones (used with the PC4164) can be placed
anywhere within the reception range of the PC4164.
Once the zone that are planned to be used are indicated
on the diagram the location of the PC4164 can be shown
as well. For best results the PC4164 should be placed in
as central of a location as possible. Indicate next to the
zone, the serial number of that zone. This will make
placement tests easier.
6 The PC4700 Fire Module zones (2 wire smoke detector
loop and a 4 wire waterflow loop) are system zones
(zone which Belong to all partitions) a detector should
be place in each partition to allow for the most effective
use of the module.
7 Indicate each partition by boxing the area of the partition
on the diagram. From this diagram it can be quickly
determined which zones belong to that partition.
8 Determine the number of keypads (LCD4500) required
for each partition and their location on the system. The
maximum number of keypads on a system is 16. Each
keypad on the system assigned to a partition can only
be used to operate that partition. (EXCEPTION - A
System Master or a multi-partition access code can
access any partition that the code is assigned to from
any keypad). Indicate on the diagram the location and
the partition each keypad will be assigned to.
After the number of zones, keypads, and their locations,
expansion modules and separately controlled systems
(partitions) have been determined, decide other
modules required to complete the installation.
10 Siren outputs can be programmed to activate if one or
more partition goes into alarm. The main panel provides
one output (The Main Bell Output).
Additional outputs can be obtained from the PC4204
power supply/relay output module(s). Each PC4204
module has 4 form “C” relays, the last 3 of which can be
used as any one of the 28 output options (See PGM
Output List). Indicate on the diagram the location of
each of the sirens, and the location of the PC4204
module(s).
3
Page 8
11 The PC4216 module provides up to 16 programmable
outputs. Each output can be programmed for 28
different options (See PGM Output List). It is also
used to display zones/status on a graphic
annunciator. Each of the 9 PC4216 modules is
capable of being programmed in any of the 25
available ways indicating the location of the PC4216
and the module number and also be programmed as
custom groups with the 28 options available.
See “PC4216 OPTIONS” for a list of the programming
options.
12 Indicate the location of RS-232 printer module
(PC4400) on the diagram. The PC4400 provides serial
output to an on-site printer that will record the identity
of the system, description of the occurrence (alarm,
trouble etc.) by user, with date and time stamp.
1313
13 Indicate on the diagram the location of the PC4820.
1313
On the diagram also include the zones that will be
used as access control points. Indicate the door
number and the location of the card reader as well as
other devices that may be used for the other inputs
(REX - Request to Exit, Post - Postpone Arming, and
Arm - Request to Arm). Depending on the setup of the
installation, these devices may be inside or outside of
the controlled area. Be sure to locate the module
cabinets in a dry, secure location near a non-
switched AC source and ground connection.
Note: When deciding which zone to use for access
control, do not select any zones from 1 to 16.
These zones can only be used as control panel
inputs.
14 Mount the cabinet, panel (See “Mounting The Panel”)
and prepare the wires for connection to the panel.
RF Zones — Summary
Placing Components
Before permanently mounting components, each
component should be tested in its intended mounting
location to ensure it can communicate properly with the
PC4164. It is recommended that the RF Signal Test is
performed more than once for each zone.
For the best system performance, it is suggested that the
PC4164 be mounted in as central location as possible
and as elevated a location as possible.
In most installations, selecting a central location for the
PC4164 will ensure reliable system operation. When
mounting the PC4164 in a basement, it is recommended
that the PC4164 be mounted as high and as close to the
underside of the first floor as possible.
RF Signal Test
Enter installer mode and select the section RF Signal
Test. This section will help determine if the location of the
zone is good. (Be sure that the zone is enrolled before
performing an RF Signal Test). Once this section has
been selected the panel will then ask the user to select
the zone to be tested. Use the [<][>] keys to scroll the
selected zone and press the [✱] key to select the zone.
At this point the display will read "Please Activate Zone".
Open and close the zone 2 times. (Note: the zone may
require to be tripped more depending on the location of the
zone). On the restoral of the zone for the second time the
panel will display a rating of the zones placing (with
respect to RF strength). The "Placement Result" may be
Good, Fair, or Poor. A placement rating of "Good" means
that the zone is placed in a location that has strong RF
transmission strength. A placement rating of "Fair" means
that the zone is placed in a location that has passed the RF
transmission strength test. A placement rating of "Poor"
means that the zone is placed in a location that has weak
RF transmission strength and therefore should be
relocated. In most cases it should only be necessary to
move the component a short distance from is original
intended location.
After relocating the component repeat the RF Signal Test.
When the test results are satisfactory continue to test the
next component.
Note: To perform a RF Signal Test on an RF PIR Motion
Detector the zone must be tampered and restored
instead of opened and closed due to the detectors
"High Traffic Shutdown Mode".
Wireless PIR Motion Detectors
To prolong battery life of a PIR Motion Detector, the
detector features a High Traffic Shutdown Mode. If a motion
detector is activated more than once within a 6 minute
period, the detector will temporarily delay reporting activity
to the PC4164. The Motion Detector will then require a 12
minute period of no activity before it will resume
transmissions to the PC4164. Because the High Traffic
Shutdown Mode prevents Motion Detectors from being
tested during a regular walk test, the Motion Detector
features its own built-in Walk Test Mode. To activate this
mode remove the back plate from the detector to be tested,
and then re-attach it. The Motion Detector will be in Walk
Test Mode for 90 seconds. The LED will come on for 3
seconds each time the detector is tripped. (Note: The zone
will not transmit the zone trip to the PC4164 during this
mode. To perform a walk test of the Wireless PIR the zone
must be tampered and restored). At the end of the 90
second period the Motion Detector will return to normal
operation.
Zone Supervisories
A zone supervisory is a transmission sent from the wireless
zone to the PC4164 as a test transmission to ensure that
communications between the zone and the PC4164 are still
present. When the PC4164 receives the supervisory from
the zone it will then transmit this information to the control
panel. If the control panel does not get a supervisory within
the "supervision time", the zone will be considered lost and
go into the open state..(if Double EOL is being used the
zone will go into the Tamper Alarm state). If the partition
partition is armed the zone will go into alarm and transmit
the sensor fault and alarm reporting codes if programmed.
The next supervisory that the PC4164 receives for a
missing zone will restore communication with that zone and
restore the Zone Supervisory Fault.
4
Page 9
Battery Troubles
KEYPAD
R
B
Y
G
R
B
Y
G
RBYG
COMBUS
PC4020 PC4108
If a zone has a low battery trouble, then that zone does
not report in with a zone supervisory within the
"supervision time". The zone will not go into alarm. This
has been included to reduce the possibility of a false
alarm from batteries that do not get changed in the
zone, and then the zone going into sensor fault.
Restoring Battery Troubles
A wireless zone battery trouble will only be restored
after that zone has been Tampered and Restored. This
will allow the batteries to be changed without multiple
Battery trouble/Battery restoral transmissions taking
place. In order for the batteries to be changed the cover
must be removed from the back plate (tampering the
zone). When the tamper is restored and the zone sends
a battery trouble restoral (as well as the tamper restoral)
signal to the PC4164, the battery trouble will clear.
Default Srl #'s (4)
Once this selected has been made the LCD will display
the message "Confirm Default Press ✱". To abort press
any other key. Once the [✱] key has been pressed the
LCD will display the message "Resetting ". All RF zone
signatures will have been erased from the PC4164.
Note: Deleting the RF signatures from the PC4164
will not remove the zone(s) from the partition
assignment(s).
COMBUS Power and Operation
The PC4020 main board can provide up to 500 mA to
power modules, keypads and devices. A PC4204 power
module is required when additional current is needed
either for powering detection devices or operating bells
and sirens. The PC4204 requires its own transformer
and battery and can provide up to 1.5A at 12 V
relays on the module provide form C switched outputs
with contact ratings of 3 amps @ 12 VDC (10 amps @ 120
VAC) for a variety of programmable options. When used
to repower the COMBUS the PC4204 must be wired in
accordance with the instructions supplied with the unit.
Use of a power source other than the PC4204 power
supply module to supply additional power to the PC4020
system is not recommended for the following reasons:
If the main panel loses communications with a module,
within a maximum of 30 seconds the panel will perform a
system reset in which power to the COMBUS is
removed. Five seconds later power is reapplied and the
panel will attempt to communicate with the module. If
the panel is unsuccessful communicating with the
module it will display and report a COMBUS
communications fault.
When the main panel performs a reset, relay 1 when
programmed for “COMBUS POWER” will open. This will
disconnect the power supplied to the modules, resetting
them so that communications to the main panel are
reinitialized.
For example, if the microprocessor on the module has
been scrambled due to a transient, the PC4020 will
DC. Four
power down the COMBUS, the PC4204 will mimic the
PC4020 and cut off its power supply to the module. The
module will be powered down. When the PC4020 returns
power to the COMBUS, the PC4204 will reconnect its power
supply, and the power to the module will return. Because
the module was powered down and powered up, the
module is now reset, and can communicate with the
PC4020.
If a power supply other than a PC4204 was used, the
module would never power down, never reset, and the
module will stay off line requiring the attention of service
personnel.
CAUTION: When used to power a module, the “RLY 1
COM” terminal of the PC4204 must be connected to the
“RED COMBUS” terminal of the module only. The
positive (RED) conductor of the COMBUS must be left
unconnected to the module that is powered by the
PC4204. The “BLK COMBUS” of the module should be
run common to the negative (“BLK”) of the COMBUS.
Use of a power source other than the PC4204 power
supply module to supply additional power to the PC4020
system is not recommended.
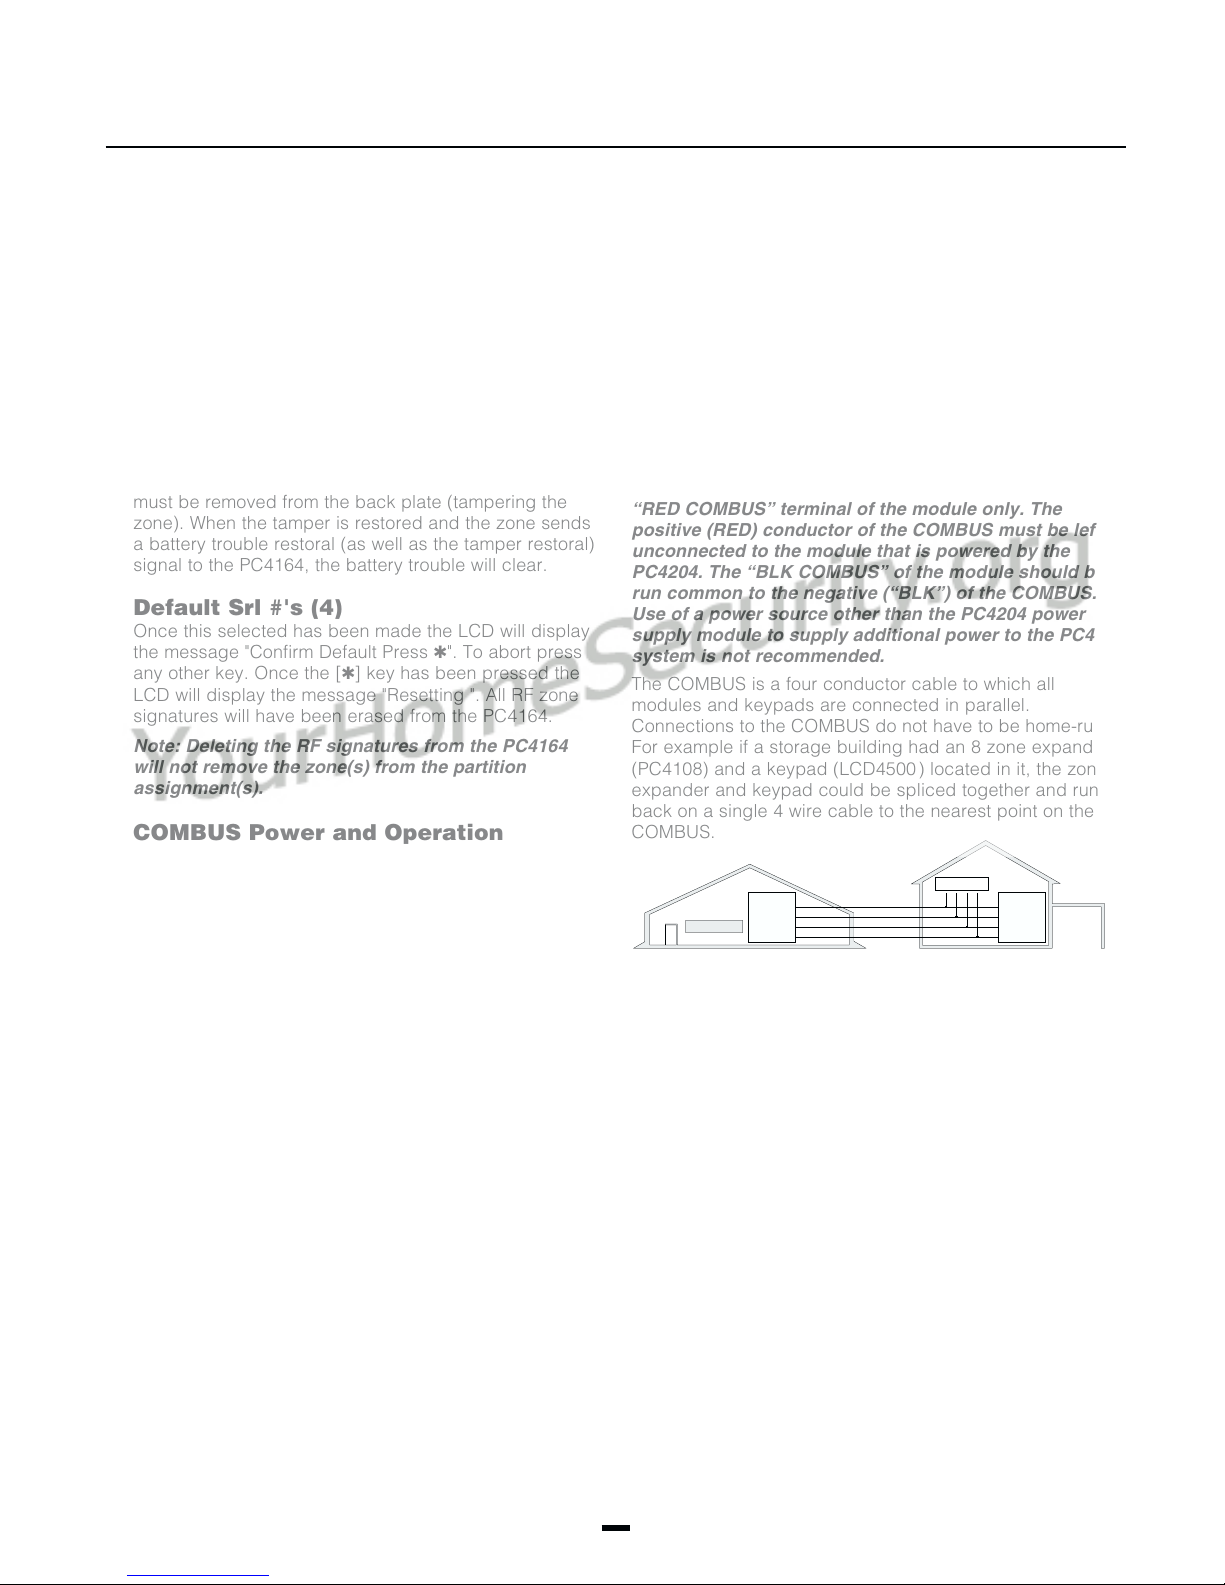
The COMBUS is a four conductor cable to which all
modules and keypads are connected in parallel.
Connections to the COMBUS do not have to be home-run.
For example if a storage building had an 8 zone expander
(PC4108) and a keypad (LCD4500 ) located in it, the zone
expander and keypad could be spliced together and run
back on a single 4 wire cable to the nearest point on the
COMBUS.
Testing The Combus
To test the Combus for a low voltage condition, connect all
devices to the system (include any motion dectectors, glass
break detectors, etc.) and enroll each of the modules. Exit
installers mode and allow the system to run normally for 5 10 minutes. This will allow time for any modules that may
have battery troubles time to report. If after this time there
are any battery troubles be sure that the batteries are
"good" by disconnecting the suspect battery and placing a
voltage meter accross the battery leads (of the module); the
output voltage should be 13.85V. If the voltage is good then
check the battery (under load), even if the battery is under
a load the voltage should still be above 12.0V. Once all (if
any) battery troubles have been taken care of, be sure that
there are no Combus Low Voltage troubles. If there are
locate the modules with the low voltage troubles by entering
Installers Mode and selecting Diagnostics. Refer to
Appendix B for the List of Diagnostics. Once the module(s)
have been isolated a PC4204 will be required to increase
the power to be module with the low voltage trouble. Now
that all trouble have been taken care of the next step is to
remove AC power from all modules and allow the panel to
5
Page 10

run for 10 minutes on battery power alone. If there are
any Combus Low Voltage troubles a PC4204 Combus
repower module may be required at the Low voltage
location to insure proper system operation. Repeat this
test as required.
Mounting the Panel
Select a dry location close to an unswitched AC source,
a ground connection and a telephone connection for
mounting the Main Control Cabinet.
Remove the PC4020 printed circuit board, mounting
hardware, and keypad from the cardboard retainer inside
the large cabinet. Before attaching the cabinet to the
wall, press the five white nylon printed circuit board
mounting studs into the cabinet from the back.
Pull all cables into the cabinet and prepare them for
connection before mounting the circuit board to the back
of the cabinet. Press the circuit board down onto the
mounting studs.
There is room in the Main Control Cabinet (PC4001C) for
any two modules (PC4108, PC4116, PC4216 or PC4400).
Modules requiring power (AC and battery PC4204) must
be installed in the large Expander Cabinet (PC4002C).
This enclosure will accommodate one module (PC4108,
PC4116, PC4216 or PC4400) and a powered output
(PC4204) or any three modules. A small Expander
Cabinet (PC4003C) is available for a single module that
does not require external power.
Once the wiring is completed power the system up by
first connecting the battery followed by the AC
transformer. All LCD4500 keypads should display the
message ‘LCD4500 DSC Ltd.’. Press a key on any
keypad that is to be assigned to Partition 1. The keypad
will beep and display the message ‘4500 Mod. #1' and
the keypad is automatically assigned to Partition 1.
Enroll every module to the system. Make sure you put
down the number of each module enrolled. Refer to the
Programming Manual for the required procedure.
When enrolling any PC4108 or PC4116 zone expander
module make sure to note the zones which you assigned
to the module.
This information is very important if it becomes necessary
to Add or Delete zones to or from a Partition. Zones 1
through 16 are assigned to Partition 1 by default. This
can be changed later in Installer Programming.
In Book 4 (Programming Work Sheets) you will find a
System Overview section. Fill in the information as each
module is enrolled. These sheets are designed to be left
in the panel so if future service is required, the location
and assigned number of each module will be readily
available.
Once all modules are enrolled perform a diagnostics
check on the panel to determine if any problems are
present (see “Diagnostics”).
Programming the System
The PC4020 has the capability to operate as 8 separate
alarm systems called Partitions. Dividing the panel into
Partitions will allow you to control access to specific areas.
When the PC4020 is first powered up all zones on the main
board and User Codes are assigned to Partition 1. If no
other Partitions are required the entire system will be
considered Partition 1. This is important to keep in mind as
often in programming the panel will require you to enter the
Partition to program.
For example, when programming entry and exit times, you
must select the menu option ‘ADD/EDIT PAR’. The keypad
will then prompt you for the Partition to add or edit. You
must select Partition 1 for a system that has no additional
Partitions.
The factory default setting for all options is provided in the
Programming Work Sheets as well as programming
‘HOTKEYS’ for the option to allow quick programming.
Complete the Programming Work Sheets located in Book 4.
Having this information prepared before programming the
panel will speed up the process considerably.
All information for the panel may be entered in the
Programming Work Sheets.
Any zone expanders on the system will include a similar
sheet and the information should be completed for these as
well.
There is no set order in which the panel must be
programmed, however, if you use the following guideline it
may simplify the programming of the panel for the first time.
Step 1 - Define all Partitions
When the panel is first powered up the 16 zones on the
main panel are assigned to Partition 1. Additional zone
expanders enrolled to the system are NOT assigned to any
Partition.
Any zones from 1 through 16 that are required on a different
Partition must be DELETED from Partition 1 before they are
ADDED to another Partition. Any zones above Zone 16 must
be ADDED to the proper Partition. See “Zone Assignment”
in the Programming Manual (Book 3) for the procedure to
add and delete zones.
When you ADD each zone to the proper Partition it will save
time if you also program the Zone Label, Zone Type and
Zone Options. All of this information may be entered in the
Programming Work Sheets located in Book 4 and in the
programming work sheet included with each Zone
Expansion module.
Note: Do not program any of the system outputs until all
partitions have been added to the system. All output
types that are selectable by partition will only allow the
choice of enabled parts.
6
Page 11

Step 2 - Program the System
Now that the Partitions have been defined and zones
programmed, you are ready to program the rest of the
system. It is best to follow the Programming Work Sheets
starting at the beginning and carefully programming
each section. Having the required information entered
ahead of time will speed up this process considerably.
Once the Installer Programming is complete you can
program user functions ([✱][6][Master Code]). Next,
features on each partition can be enabled. Go to a
keypad assigned to the desired partition and enable the
features through [✱][6][Master Code] commands.
Step 3 - Program user Codes
From default the PC4020 comes with one user code
assigned as a Grand Master Code (‘1234’ for 4 digit
option, or ‘123456’ for 6 digit option). The other 999
user codes, 4 digit or 6 digit, may be programmed by
entering User Programming Commands ([✱][5][Access
Code]). See ‘Programming Additional Access Codes
Using a System Master Code or a Supervisory Code’
section in this manual.
Step 4 - Testing the System
See “Bell/Comm Test” under [✱][6] User Functions or do
the following. Contact the monitoring station to request a
transmission test. Plug the telephone cord into the RJ31-
X jack. If a DTS-1 is being used to monitor communicator
transmissions, connect it to the telephone line and place
the DTS-1 in the line mode by pressing the red “LINE/
LOCAL” button. Arm the panel, wait for the exit delay to
expire and trip a detector on an instant circuit. Wait for
the communication to complete. Disarm the panel and
check with the monitoring station to confirm acceptance
of the transmission. Perform additional transmissions
required by the monitoring station.
Check the “TROUBLE” light on the keypad. If it is on,
press [✱] then [2] to determine the trouble. The “Trouble
Display” section in “Keypad Functions” gives a
description of the different trouble conditions.
Hardware Reset of Memory to Factory
Defaults
If the Installer’s Code is lost through inadvertent
programming, the only means of reprogramming the system
is by a hardware reset. If the Installer’s Lockout is enabled,
there is no way to reprogram the system without entering
the correct Ianstaller’s Code.
The PC4020 can also be reset through software in the
installer’s programming. See “Factory Default” in the
Programming Guide.
Note: Panels returned to DSC with the Installer’s
Lockout feature enabled and no other apparent
problems will be subject to an additional service charge.
To reset the panel to factory default conditions:
1. Power the system down by removing both AC and
battery power to the main panel.
2. Short the zone 1 terminal and the PGM terminal on the
main panel.
3. Restore power to the main panel.
4. Wait for 20 seconds then remove the short between
the PGM and zone 1.
5. The system will have reloaded the memory with
factory defaults. All modules will have to be enrolled
again. The event buffer is the only part of memory that
is retained during a factory default.
Step 5 - Instructing the End User
Describe system operation to authorized users.
Provide user with the instruction manual and instruct
them to read it to become familiar with the system
operation.
Instruct the user to test the system on a regular basis as
described in the Instruction Manual. The Master Code
should be changed from the default setting and
recorded.
There is a wide range of possible uses for the [✱][4] and
[✱][7] commands which are not described in the
instruction manual. Be sure to explain the functions of
the [✱][4] Sensor Reset and the [✱][7] Utility Output to
the user if they are incorporated into the system.
7
Page 12

PC4020 MAIN BOARD
SPECIFICATIONS
Control Panel
16 zones
• 16 fully programmable supervised zones (EOL
resistor)
• Programmable for Double EOL resistors
Audible alarm output
• Bell output
700 mA, fused at 5 Amps, 12 V
11.6 - 12.6 V
• Steady or pulsed output
DC - residential
Non-volatile RAM (Internal Memory)
• Does not lose codes or system status on complete AC
and battery failure
Programmable output
• Transistor switch sinks 3A to ground
• Programmable for 1 of 35 options
Powerful 1.5 amp regulated power supply
• 500 mA auxiliary supply, 11.6 - 12.6 VDC
• Separately fused for battery, auxiliary supply and bell
output
• Electronic shut down protection of the COMBUS
• Supervision for loss of AC power, low battery, electronic
shut down of modules
• Internal clock locked to AC power frequency or optional
crystal time base
DC - commercial
Output Voltage
Typically, with normal AC on and a fully charged battery,
the output voltage will be 13.8 VDC. With AC off and the
battery discharging, the voltage will go below 10 volts and
then battery cutoff will occur preventing further discharge.
Devices that require power from the control panel should
be capable of operation over the voltage range of 10 to 14
DC.
V
Remote Keypad
• Four wire (QUAD) hook-up
• Alphanumeric liquid crystal display
• Built-in piezoelectric buzzer
• Full annunciation of zones and system status
• Dimensions 5.5” x 4.5” x 1” deep (150 x 114 x 25 mm)
• Maximum current draw of 55 mA
Switched Auxiliary Supply Output
• Programmable for 1 of 35 options
• 11.6 - 12.6 V
• 300 mA maximum
DC
Battery
• 12 volt 4 Ah minimum rechargeable gel-cell or sealed
lead-acid battery
Transformer
• 16.5 VAC, 40VA
8
Page 13

MODULE
SPECIFICATIONS
PC4108 Expansion Module
• Up to 128 zones total on system
• 8 zone expansion module
• Normally closed loops, EOL resistor, Double EOL
resistor support
• 4-wire (QUAD) hook-up to COMBUS
• Nominal current draw of 25 mA
• Provides Tamper Reporting Codes
• Low COMBUS supervision to PC4020 Main Board
PC4116 Expansion Module
• Up to 128 zones in total on system
• Normally closed loops, EOL resistor, Double EOL
resistor support
• 16 zone expansion module
• 4-wire (QUAD) hook-up to COMBUS
• Nominal current draw of 30 mA
• Provides Tamper Reporting Codes
• Low COMBUS supervision to PC4020 Main Board
PC4164 Expansion Module
• Up to 64 zones in total on the system
• One module per system
• 64 zone wireless expansion module
• Support for Universal transmitters and PIRs
• Normally closed and zone module tamper support
• 4-wire quad hookup to the PC4164
• Nominal current draw of 110mA
• Provides zone alarm/zone low battery/zone tamper
reporting codes
• Low Combus supervision to the PC4010
PC4204 High Current Output Module
• 4 output high current module
• Up to 16 modules on system
• Minimum 40 VA 16-18 volt transformer required
• Minimum 4 Amp-Hour, 12 volt battery required
• Each output programmable for 1 of 35 options
• 4-wire (QUAD) hook-up to COMBUS
• Nominal current draw of 25 mA
• Provides Tamper and Trouble Reporting Codes
• Low COMBUS supervision to PC4020 Main Board
• 1.5 Amp output
PC4216 Low Current Output Module
• 16 output low current module
• Up to 9 modules on system
• All module programmable for all 16 outputs, 1 of 35
options for each
• 8 modules programmable as alarm annunciators or
zone followers
• 4-wire (QUAD) hook-up to COMBUS
• Nominal current draw of 35 mA
• Provides Tamper Reporting Codes
• Low COMBUS supervision to PC4020 Main Board
PC4400 RS-232 Interface Adapter Module
• True RS-232 technology
• Handshake software switches
• Protocol XON/XOFF or DTR
• 4 possible baud rates 300, 600, 1200 and 2400
• 4-wire (QUAD) hook-up to COMBUS
• Nominal current draw of 35 mA
• Provides Tamper Reporting Codes
• Low COMBUS supervision to PC4020 Main Board
PC4700 Fire Module
• One module per system
• 2 wire Class B/Style B smoke detector circuit (20 detectors
maximum)
• 4-wire Class D/ Style D waterflow circuit (5 sensor
maximum [NFPA 3-8-6-3])
• 1 fully programmable supervised bell output. (Controlled
via the Main Bell Output)
• Dual supervised Telco lines - With the ability to switch to
the second line in the event of a line failure.
• Ground fault detection
• Nominal current draw of 35mA
• 4-wire quad connection to Combus
• Low Combus supervision to the Main Board
• Reporting codes for:
- Bell CCT Trouble
- Waterflow Alarm/Trouble
- 2 Wire smoke Alarm/Trouble
- TLM trouble/restoral for line 1 and line 2
- Ground Fault
LCD4500 Remote Keypad
• Up to 16 keypads on system
• Alphanumeric liquid crystal display
• Built-in piezoelectric buzzer
• Full annunciation of zones and system status
• 4-wire (QUAD) hook-up to COMBUS
• Nominal current draw of 25 mA (maximum 55 mA)
• Provides Tamper Reporting Codes
• Low COMBUS supervision to PC4020 Main Board
• Dimensions 5.75" x 4.5" x 1" deep (144 x 114 x 25 mm)
Escort 4580 (Voice Prompting Module)
• One module per system
• Full voice prompts for all major user accessible sections
• 4-wire quad connection to Combus
• 70ma - 140 ma
• Automation Control capabilities - up to 32 Automation
Module per system
• Low Combus supervision to the main board
PC4820 Access Control Module
• Up to 16 access control modules on the system
• 4-wire (QUAD) hookup to the COMBUS
• 2 access card readers supported per module (total of up to
32 access card readers)
• 2 door inputs that may be assigned to partitions per
module (total of up to 32 door inputs)
• Nominal current draw of 35mA
• Provides tamper supervision and reporting codes
• Low COMBUS supervision to the PC4020KT
• AUX output provides 125mA supply power at 13.8V
• Provides Lock output supervision to the PC4020
• Provides Reader power supervision to the PC4020
9
Page 14

PC4020 CONTROL PANEL
WIRING DIAGRAMS
●
●
●
●
P
P
AUX
1 AM
P
BELL
BATT
5 AM
5 AM
+RED
120 V
40 VA
TRANSFORME R
16-18 V @ 40 VA
DO NOT CONNECT TO
RECEP TACLE
-
BLK
BATTERY
12 VDC
MINIMUM
4Ah
BELL LOOP
700 mA MAX
BE SURE TO OBSERVE
POLARITY WHEN
CONECTING POLARIZED
SIRENS O R BELLS
TYPICAL ZONE CIRCUITS
ANY Z
ANY COM
TERMINAL
TERMINAL
NORMALLY CLOSED
CONTACT;
NO END OF LINE
RESISTOR
ANY Z
ANY COM
TERMINAL
TERMINAL
1 NORMALLY OPEN
CONTACT AND
1 NORMALLY CLOSED
CONTACT WITH
END OF LINE
RESISTOR
ANY Z
TERMINAL
2 NORMALLY OPEN
CONTACTS WITH
5600Ω END OF LINE
ANY Z
*
TERMINAL
ALARM
CONTACT
DOUBLE EOL CIRCUIT
2 NORMALLY CLOSED
CONTACTS WITH
5600ΩEND OF LINE
*
Recommended use with Double EOL Resistors.
5600Ω End Of Line resistor colour bands: Green/Blue/Red/Gold
RESISTOR
RESISTORS
ANY COM
TERMINAL
ANY COM
TERMINAL
COMBUS TO
ALL MODULES
TAMPER
CONTACT
ANY Z
TERMINAL
2 NORMALLY CLOSED
CONTACTS WITH
END OF LINE
RESISTOR
ANY Z
*
TERMINAL
ALARM
CONTACT
DOUBLE EOL CIRCUIT
1 NORMALLY CLOSED
CONTACT WITH
5600Ω END OF LINE
ANY COM
TERMINAL
TERMINAL
RESISTORS
ANY COM
GROUND CONNECTION
Nut
Wash er
Cabinet
Bolt
Ground
Rod
TELEPHONE CONNECTION
GRY
R-1
BRN
T-1
RED
RNG
GRN
TIP
TO GROUND
CONNECTION
OUT TO TELEPHONE
EQUIPMENT ON
PREMISES
INCOMING LINE
FROM TELEPHONE
COMPANY
10
Page 15

Module Hookup Diagram
11
Page 16

●
●
●
●
●
PGM CONNECTIONS
LED INDICATOR RELAY OUTPUT
680 Ω
RESISTOR
(TYPICAL VALUE)
LED
INDICATOR
RED BLK
DSC
RM-1
WHT YEL GRN
Loop
Current
mA
50 2750/838
100
200
300
400
Maximum wire run to EOL relay in feet/meters
AWG14 AWG16 AWG18 AWG19 AWG22
1375/419
690/210
460/140
345/105
1740/530
870/265
435/132
290/88
215/65
1090/332
545/166
270/82
180/55
135/41
869/264
435/132
217/66
144/33
108/33
433/131
217/66
108/33
144/43
54/16
SW AUX CONNECTION
SENSOR RESET FOR SMOKE DETECTOR
TO ANY
"COM" TERMINAL
TO ANY ZONE
"Z" TERMINAL
OUT
IN
ALARM
CONTACT
IN
Notes: 5600 Ω applies only to the PC4020
main board. Use 2200 Ω (red, red, red, gold)
for the expansion modules.
Do NOT connect Fire zones or Links Supervisory
zone for Double EOL resistors.
OUT
RED
BLK
5600 Ω
END OF LINE RESISTOR
(EOLR-2)
MULTIPLE SMOKE DETECTORS ON ONE ZONE
TO ZONE "Z"
TERMINAL
PROGRAMMED
FOR "FIRE"
TO ANY "COM"
BELL LOOP
700 mA MAX
OUT
IN
ALARM
CONTACT
OUT
4-WIRE SMOKE
DETECTOR POWER
11 V
DC
400 mA MAX
Note: Do NOT connect Fire zones or Links
Supervisory zone for Double EOL resistors.
IN
TERMINAL
IN
ALARM
CONTACT
IN
OUT
OUT
RED
BLK
COM N.C. N.O.
●
ZONE INPUT MUST BE
PROGRAMMED FOR FIRE
ALARM INPUT: STANDARD FIRE
●
SW AUX PROGRAMMED FOR
SENSOR RESET
WHT
GRN
●
ZONE INPUT MUST BE
PROGRAMMED FOR FIRE
ALARM INPUT: STANDARD FIRE
●
MINIMUM 18 AWG WIRING IS REQUIRED
FOR RESIDENTIAL FIRE ALARM SYSTEMS
END OF LINE RESISTOR
POWER
SUPERVISORY
RELAY
(DSC RM-1)
5600 Ω
(EOLR-2)
DELAYED FIRE
AUTO VERIFY FIRE
DELAYED FIRE
AUTO VERIFY FIRE
WHT
POWER
SUPERVISORY
RELAY
(DSC RM-1)
GRN
Bell
Current
mA
50 2750/838
100
200
300
400
500
600
700
Maximum wire run to EOL resistor in feet/meters
AWG14 AWG16 AWG18 AWG19 AWG22
Wire
Gauge
1375/419
690/210
460/140
345/105
275/83
230/70
195/59
1740/530
870/265
435/132
290/88
215/65
170/52
140/43
125/38
Maximum Run to End of Line Resistor
1090/332
545/166
270/82
180/55
135/41
105/32
90/27
80/24
(feet / meters)
AWG14 15500 / 4724
AWG16
AWG18
AWG19
AWG20
AWG21
AWG22
9740 / 2968
6120 / 1865
4860 / 1481
3840 / 1170
3060 / 932
2420 / 737
869/264
435/132
217/66
144/33
108/33
86/26
72/22
62/19
433/131
217/66
108/33
144/43
54/16
43/13
36/11
30/9
12
Page 17

TERMINAL
CONNECTIONS
This “Terminal Connections” section only refers to the
main board of the PC4020 system. Other connections
are shown in the module wiring diagrams.
“AC” Power Terminals
Use a 16.5 VAC transformer with a minimum 40 VA
rating to supply AC power to the PC4020. The
transformer should not be connected to an outlet that is
controlled by a switch. If AC failure occurs, it will be
displayed as a trouble on the keypad (see “Keypad
Commands, [✱][2] Trouble Conditions”). It can also be
transmitted to the monitoring station as a trouble
condition (see “Programming Manual”).
Auxiliary Power Terminals “AUX” and
“GND”
The auxiliary power supply can be used to power motion
detectors and other 12 V
(positive) and “GND” (negative) terminals provide 500
mA when the PC4020 is used with one keypad. For each
additional keypad the auxiliary supply rating must be
reduced by 25 mA (maximum current draw is 55 mA).
The auxiliary supply is fused at 1 amp and a Main Aux
Trouble Reporting Code can be transmitted if the fuse
fails. (See “Programming Manual”.)
DC devices. The “AUX”
Switched Auxiliary Power Terminals
“SW AUX” and “GND”
The “SW AUX” terminal is positive while the “GND”
terminal is negative. The 500 mA auxiliary supply rating
must be reduced by any current taken from the switched
auxiliary supply which shares the same fuse as the
auxiliary supply. This output is fully programmable, but
is most commonly used with the “Sensor Reset” option,
allowing the user to control the switch from the keypad.
(See “Sensor Reset”.)
Bell/Siren Terminals
“BELL +” and “BELL -”
These terminals are for powering bells or other devices
requiring a steady output voltage on alarm. The bell
output is fused for 5 amps. When connecting sirens
(speakers with siren driver already built-in), be sure to
observe the correct polarity. Connect the positive lead
to the “BELL +” terminal and the negative lead to the
“BELL -” terminal.
If no siren or bell is used, connect a 1000 ohm resistor
(brown, black, red and gold) between “BELL +” and
“BELL -”.
Programmable Output Terminal “PGM ”
The operation of the Programmable Output depends
upon which option is selected in the programming table.
See the Programming Manual for a list of options for the
“PGM” output. The “PGM” is a 3A (maximum) switch to
ground. A small relay, a buzzer or other DC operated
device may be connected between the “AUX” (positive)
terminal and the “PGM” (switched negative) terminal to
interface with controlled devices.
COMBUS Terminals
“RED”, “BLK”, “YEL” and “GRN”
Connect the red wire of the COMBUS to the “RED” terminal,
the black wire to the “BLK” terminal, the yellow wire to the
“YEL” terminal and the green wire to the “GRN” terminal.
The COMBUS is wired in the same manner on all modules.
The COMBUS is used by the main panel to communicate
with and supply power to the modules.
The COMBUS power supply terminals are fused
electronically.
Note: When connecting modules to the COMBUS the
system must not be powered.
Zone Input Terminals “Z1” to “Z16”
Zone inputs “Z1” to “Z16” can be supervised End of Line
(E.O.L.) resistor circuits, Double EOL circuits or normally
closed loops. If E.O.L. are used, each input must be
terminated with a 5600 ohm E.O.L. resistor (green, blue, red
and gold). An alarm condition will be created if a normally
open contact is used to short across the E.O.L. resistor. A
trouble is created if normally closed contacts, wired in
series with the E.O.L. resistor, are opened. See “Zones
E.O.L.” in the Programming Manual. See the wiring diagram
for normally open and normally closed contact connections.
If Double EOL circuits are being used, all zones will use
Double EOL resistors, except Standard Fire zones, Auto
Verify Fire zones, Delay Fire Zones, Links Supervisory
Zones, Links Answer, and Forced Answer zones. These
zones must only be connected using the EOL resistor.
Double EOL resistors allows the zone to be capable of
detecting zone tampers. The tamper resistor (5600 Ohm) is
placed across the alarm activating device, and the single
EOL resistor (5600 Ohm) is placed between the alarm
contact and the tamper contacts. This configuration will
allow the panel to detect Zone faults (zone shorted) , zone
tampers (open zone), open zones (alarm condition of 11200
Ohms), and restored zones (5600 Ohms).
If the zone is disarmed and the tamper (open) or fault
(short) condition is tripped a buzzer will sound from all
partition keypads for the length of Bell Time Out or until an
access code is entered. A zone tamper will be sent to the
monitoring station if programmed. See Reporting Codes for
details.
If the zone is armed and the tamper is activated, it will
transmit and log both the tamper alarm and the zone alarm.
There will be no buzzer sounded if the zone is armed
(unless the zone is programmed as a 24 hour buzzer zone).
See the “Control Panel Wiring Diagram” for detail on the
hookup procedure.
The type of circuit or zone definition (delay, instant, 24 hour,
silent, audible, etc.) is programmed from the keypad using
the installers programming commands.
13
Page 18

Telephone Terminals
“T I P ”, “RNG ”, “ T-1” a n d “R-1”
The wires from the RJ31-X telephone jack are connected
to these terminals in the following way.
Note: For proper operation, there must be no other
telephone equipment connected between the
control panel and the telephone company’s
facilities.
Ensure that plugs and jacks meet the dimension,
tolerance and metallic plating requirements of 47
C.F.R. Part 68 Subpart F.
Battery Connections
Do not connect the battery or the transformer until the
wiring is complete. Connect the red battery lead to the
positive battery terminal and the black lead to the negative
battery terminal. If the connection is reversed the battery
fuse will blow.
TIP Green wire
RNG Red wire
T-1 Brown wire
R-1 Grey wire
Incoming line from
telephone company
Outgoing line to
house telephone(s)
14
Page 19

SYSTEM
KEYPAD FUNCTIONS
Many of the functions in the PC4020 have limited access
so that only certain users may have control of special
functions. The installer can program the 2nd Master
Code to enable it and have access to the entire panel’s
operations the same as the Grand Master.
• System Master Code users can have access to all enduser options.
• Supervisory Code users can have access to options
related to their partition.
• All other types of users have options available to them
for their partitions.
All of the above mentioned keypad functions are listed
in the following pages.
Introduction
The LCD4500 remote keypad provides complete
information and control of the PC4020 control panel.
• The panel can be fully programmed from any keypad.
• The LCD display provides alarm and status indication
for the alarm circuits as well as guiding the user in
operating the system.
• The built-in buzzer lets the user hear correct key entries
and other alert signals.
• The 12 digit keypad is used for code entry and other
programming functions. All keypad entries are made by
pressing one key at a time.
The keypad is normally in the arm-disarm mode. In this
condition, the LCD message indicates the status of the
system. The “Enter Code to Arm System” message
comes on when all zones are closed. The system can
be directed to perform other functions such as zone
bypassing, displaying trouble conditions, displaying
alarm memory and programming by entering one of the
various [✱] commands described below. Pressing the
[#] key or not making any key entry for 2 minutes always
returns the keypad to the arm-disarm mode.
Partitions
The PC4020 can have up to 128 zones. These zones
can be divided by the installer into 8 separate partitions,
that can be armed and disarmed separately. Zones can
be assigned to more than one partition. Keypads can be
individually assigned as a global keypad or to a specific
partition. More than one keypad can be global, or can
be assigned to each partition. User codes can be
enabled to work on one or multiple partitions in the
access code partition mask. System Master codes can
arm and disarm any partition from any keypad. The
default setting for the PC4020 has only partition 1
enabled with zones 1 to 16 assigned to it. To enable
more partitions, enter the Partition Area menu of the
Installer’s Programming section, and select to add/edit
the partition to be enabled.
Access Codes
An access code is a 4 or 6 digit (optional) number which
will permit access to the system, i.e. Arm/Disarm
control, Installer’s Programming etc. User access codes
are programmed in the User Programming section
[✱][5]. The default access code is ‘1234’ for 4 digit option,
and ‘123456’ for 6 digit option. See ‘User Programming
Commands’ for details on programming access codes.
Global Keypads
What is a Global Keypad?
A global keypad is a keypad which belongs to all partitions
and may be accessed by all users on the system with valid
access codes. The keypad will prompt the user to select
the partition to edit, the keypad is then “loaned” to the
partition selected by the user. The user can only access
partitions which his/her code is assigned to.
Why should a Global Keypad be used?
Global keypads allow the entire system to be controlled by
one keypad. This is beneficial if the keypad is to be located
in a central area, for example, the lobby of an office
building where the zones are common to all partitions and
each office contains individual zones.
How to create a Global Keypad?
The global keypad may be any keypad on the system. The
first keypad on the system is enrolled as a Partition 1
keypad. It may be made into a global keypad by selecting
the option, “KYPD #1 Global” found in the system toggle
options of Installers Mode. If multiple partitions are enabled
on the system this will assign the keypad to all active
partitions.
When the next keypad is enrolled onto the system the
keypad will prompt with the message “Select (01) <>”,
options 01 - 08 are the usual partition assignments, the last
option (09) is “Global Keypad”.
How to use a Global Keypad?
The default message displayed on the keypad is “Enter
Your Access Code”, or the clock display if the option is
enabled. From this state any user entering a valid access
code may access the system.
The global keypad will display message
ENTER YOUR
ACCESS CODE
or will be the clock display if the option is enabled. From
this state any user with a valid access code may access the
system. The system can be directed to perform functions
such as arming/disarming and all [✱] mode functions. No
function can be performed without first entering a valid
access code.
• Single Partition
If a single partition access code is entered the user will
be prompted with the message
SELECT (0) < >
ARM PARTITION R
if the partition is already disarmed. The lower right hand
corner of the display will show the partition status using
the letter R for Ready, and N for Not ready.
To arm the partition press [✱] or [0] the message
EXIT DELAY
IN PROGRESS...
15
Page 20

will be displayed for 3 seconds. Then the display will
return to
ENTER YOUR
ACCESS CODE
If the partition is armed the message on the LCD will be
SELECT (0) < >
DISARM PARTITION
Pressing the right arrow key displays the message
SELECT (1) < >
FOR OPTIONS
If option (0) is selected the panel will disarm the
partition and display the message
KEYPAD LOANED TO
(Partition Label)
for 2 seconds on the LCD display. If the user chooses
(1) “For Option” the LCD will display the message
KEYPAD LOANED TO
(Partition Label)
The user will be able to perform all [✱] functions (e.g.
[✱] [7] Door Strike) and disarm the panel using
conventional methods. Once the [#] key is pressed or
20 seconds of idle time (no key presses made or not
active in a submenu) the keypad will return to its
normal state displaying the message
EXITING FROM
(Partition Label)
• Multi-partition
If a multi-partition access code is entered the user will
be prompted with the message
SELECT (1) < >
(Partition Label) R
The lower right hand corner of the display will show the
partition status using the letter “R” for Ready, “A” for
Armed and “N” for Not ready. The user can select the
partition to access by using the [<] [>] keys. Only
partitions which the access code belongs to will be
displayed on the LCD.
If the selected partition is disarmed the message
SELECT (0) < >
ARM PARTITION R
will be prompted on the LCD. The lower right hand
corner of the display will show the partition status.
Using the letter “R” for Ready, and “N” for Not ready.
To arm the partition press [✱] or [0] the message
EXIT DELAY
IN PROGRESS...
will be displayed for 3 seconds. Then the display will
return to
SELECT (1) < >
(Partition Label)
Pressing the right arrow key displays the message
SELECT (1) < >
FOR OPTIONS
If the selected partition is armed the LCD will prompt with
the message
SELECT (0)
DISARM PARTITION
If option (0) is selected, the panel will disarm the partition
and display the message
SYSTEM DISARMED
NO ALARM MEMORY
for 2 seconds. Then the display will return to
SELECT (1) < >
(Partition Label)
If the user chooses (1) “For Option” the LCD will display
the message
KEYPAD LOANED TO
(Partition Label)
for 2 seconds. The user will be able to perform all [✱]
functions (e.g. [✱] [7] Door Strike) and arm the panel
using conventional methods. Once the [#] key is pressed
or 20 seconds of idling time (no key presses made or not
active in a submenu) the keypad will return to its normal
state displaying the message
EXITING FROM
(Partition Label)
At any time pressing pound will take the user back to the
“Enter Your Access Code” message.
The Armed LED of the Global keypad will activate when
any activated partitions is armed. The last partition armed
from a Global keypad will display
EXIT DELAY
IN PROGRESS
and countdown timer if it is enabled. At the end of the exit
delay the Global keypad will return to the message
ENTER YOUR
ACCESS CODE
with the Armed LED on.
Audible entry delay will only be heard on the Global keypad
when all activated partitions are armed. Disarming any one
partition will stop the entry delay. If the disarmed partition
contains the zone that initiated Entry Delay, all other
partitions which contain the same zone will end as well.
The Trouble LED of the Global keypad will activate for all
troubles, including fire zones that belong to just one
partition. The user must enter a valid access code and then
loan the keypad to their partition. From here the user can
enter [✱] [2] to view the trouble, if it belongs to their
partition.
16
Page 21

To access the System Master Menu from a global
keypad, select a partition, re-enter the System Master
Code, then press [9] or use the [<][>] keys to scroll
through the menu. Press [✱] to select the System Master
options.
System Master Code Functions
System Master Codes may perform any function for any
partition on the system except change or delete the
System Grand Master Code. Enter [System Master Code]
[9] to display the System Master Code Function Menu:
[0] View Event Buffer [1] Set System Time
[2] Set System Date [3] Enable DLS Window
[4] System Reset [5] Previous Menu
[0] View Event Buffer - This function allows any Master
Code to review the Event Buffer on the keypad
display. The first line of the display will show the
event number and the partition on which the event
occurred; the second line of the display will show the
date and time of the event. Press the [✱] key to
display a description of the event. Use the [<] [>]
keys to scroll through the list of events in the Event
Buffer. Event 001 is the most recent event and 512 is
the oldest one.
[1] Set System Time programs the system’s 24 hour
clock. Enter 4 digits in 24 hour time to set the clock,
the first 2 digits are the hour, the last 2 digits are the
minutes. For example, to program 2:35 pm, type
1435.
[2] Set System Date programs the system’s calendar.
Enter 6 digits, the first two digits are the month, the
middle 2 digits are the day, and the last two digits
are the year. For example, to program Feb 14, 1994
type 021494.
[3] Enable DLS Window - The end user can enable ring
detect for 60 minutes to allow a computer to call the
panel. The installer can disable this function in the
DLS section of the installer’s programming.
[4] System Reset - A System Reset turns off the power
to the COMBUS for 5 seconds. No programming will
be lost and the time will not have to be
reprogrammed. A system reset should be done if
there is a COMBUS Communications fault or an
Internal fault.
[5] Previous Menu - If the user decides to do nothing,
either select this option, or press the [#] key to return
to the arm/disarm menu.
Installer’s Programming Code
A default installer’s programming code “4020” is
programmed into the PC4020. This code is used with
the [✱][8] command by the installer to gain access to
the system in order to enter panel or communicator
program information. The installer’s program code may
be changed by the installer.
Arming
Close all protected doors and windows and stop movement
in areas covered by motion detectors.
The “Enter Code To Arm System” message should be on
the LCD display. The system cannot be armed unless the
“Enter Code to Arm System” or “Secure System or Enter
Code” message is displayed.
If Double EOL resistors are being used, 3 different
messages can be displayed when viewing open zones,
Zone Open, Zone Tamper and Zone Fault. Zone Open will
be displayed if the zone is in the alarm state (total
resistance between the zone terminal and common is
11200 ohms), Zone Fault will be displayed if the zone is
shorted, and Zone Tamper will be displayed if the zone is
open.
The “Secure System or Enter Code” message is used to
indicate to the user that a force armable zone is open, and
the partition can still be armed. After the partition is armed,
if the force armable zone is secured it will become an active
zone, and will cause an alarm if the zone opens again.
To program a zone as force armable, see “Zone Options” in
the Programming Manual.
Enter a 4 digit or 6 digit access code. As each digit is
entered the keypad will beep.
• If the access code was entered incorrectly, the
keypad will beep steadily for 2 seconds.
• If the code was entered correctly but the message
“Secure System Before Arming” is on the display,
the keypad will beep quickly followed by a steady tone.
• When the correct code is entered, the “Exit delay in
Progress” message will come on and the keypad will
beep quickly.
If enabled, a timer will appear in the right side of the display
indicating the remaining time in the exit delay. Exit the
premises through the designated exit-entry door. At the end
of the allowed exit time the message on the keypad will
change to “Enter Code to Disarm System”. See the
“Installer’s Programming [✱][8] Command” section on how
to change the exit time. Also see “Quick-arm” and “At-home
Arm”.
If a multi partition access code is entered the keypad will
display the message
(0) TO ARM < >
(Partition Label) R
The lower right hand corner of the display will show the
partition status using the letter “R” for Ready, “A” for Armed
and “N” for Not ready.
Use the [<] [>] keys to scroll though the assigned
partitions. Only partitions to which the access code is
assigned will be displayed. The message
(2) TO SELECT < >
(Partition Label) R
with the partition status at the lower right hand side of the
LCD.
17
Page 22

To arm the partition which you are at simply press [
✱✱
✱] or
✱✱
use the hotkey (0). The message
EXIT DELAY
IN PROGRESS
will appear on the keypad with the exit delay timer if it is
enabled. Instead of arming their own partition, if the user
decides to select another partition to arm the message
SELECT (0) < >
ARM PARTITION R
Use the arrow keys to scroll to the “For Options” menu.
Selecting (0) “To Arm” will arm the selected partition and
display the message
EXIT DELAY
IN PROGRESS
for 2 seconds and then return the user to the arming
menu of their own partition.
If (1) “For Options” is selected the user will be prompted
with the message
KEYPAD LOANED TO
(Partition Label)
From here the user is capable of performing all [
functions (e.g. [
✱✱
✱] [7] Door Strike) and arm the panel
✱✱
✱✱
✱]
✱✱
using conventional methods.
Once the [#] key is pressed or 20 seconds of idle time
(no key presses made or not active in a submenu) the
keypad will return to its normal state displaying the
message
RETURNING TO
(Partition Label)
Disarming
Enter the premises through the designated exit-entry
door. The keypad buzzer will be on. Go to the keypad
and enter the 4 digit or 6 digit access code. If an error is
made in entering the code, press the [#] key and enter
the code again. The “Armed” light will go out and the
keypad buzzer will stop. The correct access code must
be entered before the allowed entry time expires. To
change the entry time see “Installers Programming
Command”, [
was armed, the “View Memory” message will be on the
display with the zone name for the zone that caused the
alarm. The display will keep those messages on for two
minutes or until the [#] key is pressed to return the panel
to the normal arm-disarm mode.
To disarm by using a multi partition access code the
keypad will display the message
(0) TO ARM < >
(Partition Label) R
The lower right hand corner of the display will show the
partition status using the letter “R” for Ready, and “N” for
Not ready.
Use the [<] [>] keys to scroll though the assigned
partitions. Only partitions to which the access code is
✱✱
✱][8]. If an alarm occurred while the panel
✱✱
assigned will be displayed. The message
(2) TO SELECT < >
(Partition Label) A
will be displayed with the partition status at the right corner
of the LCD.
To disarm the partition being viewed simply press [✱] or
use the hot key (0). If (1)“For Options” is selected the user
will be prompted with the message
KEYPAD LOANED TO
(Partition Label)
on the LCD display. From here the user is capable of
performing all ✱ functions (e.g. [✱] [7] Door Strike) and arm
the panel using the conventional methods.
Once the [#] key is pressed or 20 seconds of idling time (no
key presses made or not active in a submenu) the keypad
will return to its normal state displaying the message
RETURNING TO
(Partition Label)
Auto-bypass/Home-Away Arming
If a correct access code is entered and you do not exit the
premises, the system will, at the end of the Exit delay time,
arm with interior zones automatically bypassed if those
interior zones have been programmed as “Home-Away”
zones. These zones will remain bypassed until [
✱✱
✱][1] is
✱✱
entered to reactivate bypassed home-away zones.
This is a convenience feature for the user who wishes to
remain on the premises with the system armed. The user
does not have to manually bypass the Home-Away zones.
To reactivate the Home-away zones that have been
automatically bypassed, press [
✱✱
✱][1]. This command is a
✱✱
quick method of fully arming the system in residential
applications before going to bed.
Note: The auto-bypassed zones will only send a tamper
alarm when the tamper condition is activated, using
Double EOL resistors.
Zone Bypassing
[✱]+[1]
A bypassed zone will not cause an alarm. If a zone is
bypassed the panel may be armed even if the zone is open.
Use zone bypassing when access is needed to part of the
protected area. Also, damaged wiring or contacts on a
zone may be temporarily bypassed until repairs can be
made so that the panel can be armed.
To bypass zones, enter [
required if the installer has enabled that option. A menu will
appear.
[0] Bypass Open Zones [0] Bypass Open Zones
[0] Bypass Open Zones allows the user to bypass only the
[0] Bypass Open Zones [0] Bypass Open Zones
open zones that are on that partition. Use the [<][>] keys to
scroll through the open zones. Next to the zone label will
the a [!] this character is used to indicate that the zone is
open. To select the open zone to be bypassed press the
✱✱
[
✱] key. A [
✱✱
✱✱
✱] will appear next to the zone label to indicate
✱✱
that the zone has been bypassed.
✱✱
✱] [1]. An access code may be
✱✱
18
Page 23

[1] Bypass Zones takes you immediately to bypassing
zones. Use the [<] [>] to select the zones to be
bypassed and press the [✱] key to select the zone. A
“✱” will appear beside the zone label to indicate the
zone will be bypassed when the partition is armed.
A zone search routine allows the user to find the desired
zone to bypass by entering in the first letter of the zone
to search for, and pressing one of the [<][>] keys. The
[<] key will search for the first zone on the partition that
begins with the letter selected. The [>] key will search
for the next zone on the partition that begins with the
letter selected.
The letters of the alphabet have been divided up among
the 1 to 9 number keys on the keypad.
123
ABC1 DEF2 GHI3
456
JKL4 MNO 5 PQR6
789
STU7 VWX 8 YZ90
0
Clear
For example, to search for the first zone that begins with
the letter “R”, press the [6] key three times until the letter
“R” is displayed on the keypad between the “< >”.
Press the [>] key, the first zone that begins with the
letter “R” will then be displayed.
[2] Clear Bypasses removes all bypasses from all the
zones in your partition and then takes you to bypassing
zones. None of the zones will have a “✱” beside them.
[3] Recall Bypasses will bypass all the same zones that
were selected the last time zones were bypassed. This
is for users that are always bypassing the same zones.
[4] Previous Menu takes you back to the “Enter Code to
Arm System”.
When the PC4020 is programmed, the ability to bypass
certain zones may be eliminated. In this case, the “✱”
indicator for those zones will not come on in response to
the bypass command. Zone bypasses are automatically
cancelled when the panel is disarmed.
The installer can choose by partition if a code must be
entered with [✱]+[1] to bypass zones. Only the zones
assigned to the same partition of the system as the
keypad can be bypassed. Only certain types of access
codes can be used to bypass (See [✱][5]).
Note: At no time can any armed zone be bypassed.
Trouble Display
[✱]+[2]
The PC4020 continuously monitors a number of possible
trouble conditions. If one of these conditions occurs, the
keypad “TROUBLE” indicator will light and the audible
indication will sound (two short beeps every 10 seconds).
When the [#] key is pressed the audible indication will stop,
but the trouble indicator light will remain ON until the trouble
is cleared. Trouble conditions can also be transmitted to the
monitoring station. Press the [✱] then [2] keys to display the
types of trouble conditions.
• Battery Trouble • COMBUS Low Pwr
• AC Trouble • Internal Fault
• Aux Supply Troub • 4204 Battery TBL
• TLM Trouble • 4204 AC Trouble
• TLM TBL Line #1 • 4204 Aux Trouble
• TLM TBL Line #2 • Ground Fault
• FTC Trouble • Waterflow TBL
• Bell CCT Trouble • Cellular Trouble
• Fire Trouble • DLS Fault TBL
• Fire Trouble 2WS • Zn Sensor Fault
• Loss of Time • Zn LwBatt Fault
• Module Com Fault • Automation Fault
• 4820 Battery Tbl • 4820 AC Trouble
• 4820 Lock Tbl • 4820 Aux Tbl
• 4820 Rdr Pw Tbl
To view partition troubles from a global keypad, enter a
valid access code and select a partition. If (1) “For Options”
is selected the user will be prompted with the message
KEYPAD LOANED TO
(Partition Label)
Once the message has cleared, press [✱][2] to view the
trouble on that partition.
Press [#] to return to “READY”.
Battery Trouble - A battery trouble will be displayed and
can be reported if the battery is 11.3 volts or less,
disconnected or the battery fuse fails. Battery voltage is
checked once every 4 minutes, so the battery trouble may
not restore instantly when the battery is restored. Initiating a
bell/comm test will check the battery voltage. When DC
Inhibit Arm is enabled the panel will check the condition of
the batteries on the system (main panel, PC4204 and
PC4820) when an access code is entered. If during this
check the battery shows a low voltage condition the arming
will be inhibited. The LCD will display the message "Fail To
Arm... Battery Trouble" when this occurs.
AC Trouble
power failure. The system “Trouble” light will come ON but
the audible indication will not sound until there is a low
battery condition. Transmission delay can be programmed
for 000 to 255 minutes.
Aux Supply Troub fuse on the main panel opens, or if the Aux or SW Aux
terminals are overloaded.
-
There is no audible annunciation on AC
An Aux trouble is generated if the aux
19
Page 24

TLM Trouble - A telephone line trouble is generated
when the line voltage drops below 3 volts for more than
30 seconds. A keypad trouble is generated when the
system is disarmed and if selected, a local alarm sounds
when the panel is armed.
TLM TBL Line #1 - When using the PC4700 Fire Module
a telephone line trouble is generated when the line
voltage drops below 3 volts for more than 30 seconds on
line one. A keypad trouble is generated when the system
is disarmed and if selected, a local alarm sounds when
the panel is armed.
TLM TBL Line #2 - When using the PC4700 Fire Module
a telephone line trouble is generated when the line
voltage drops below 3 volts for more than 30 seconds on
line two. A keypad trouble is generated when the system
is disarmed and if selected, a local alarm sounds when
the panel is armed.
FTC Trouble -
in communicating with the monitoring station after 10
attempts, a Fail to Communicate trouble is generated. If a
later attempt to communicate is successful the trouble is
cleared.
Bell CCT Trouble - If the bell fuse opens or the bell
circuit is open, a keypad trouble and a Bell Circuit
trouble transmission are generated.
Fire Trouble -
trouble and a Fire Loop trouble transmission are
generated. A trouble on the FIRE loop will unconditionally
initiate an audible and visual (trouble light) indication on
the keypad. This means that even if any other previous
trouble has been silenced, a FIRE loop trouble will restart
the keypad buzzer.
If the PC4010 loses communication with any expansion
module, all Fire/Burglary outputs will “squawk” once
every 10 seconds until a key press is detected on a
keypad, or module communication is restored.
Fire Trouble 2WS - If the fire zone on a PC4700 Fire
Module is opened, a visual keypad trouble (trouble LED
will come on) with audible indication and a fire zone
trouble transmission is generated. The LCD will show the
message "FIRE TROUBLE!! 2 Wire Smoke", until the fire
zone trouble is restored. If there is more than one
PC4700 trouble condition present these trouble
messages will scroll every 3 seconds to the next
message.
Loss of Time internal time of day clock needs to be set to the correct
time. This trouble is cleared when an attempt is made to
reset the internal time of day clock. See “System Master
Codes” for resetting the time of day clock.
Module Com Fault with a module and cannot recover it. Check to see if the
module is connected properly, then do a system reset.
See “Diagnostics” in the Programming Manual to
determine which module is not communicating.
If the digital communicator is unsuccessful
If a FIRE loop is open circuit, a keypad
When the PC4020KT is powered up, the
The panel has lost communications
-
COMBUS Low Pwr
voltage from the COMBUS. Check for proper connection of
COMBUS, or the COMBUS needs to be repowered. See
4204 modules and the 4204 PGM COMBUS power option
for supplying voltage to the COMBUS. See “Diagnostics” in
the Programming Manual to determine which module has
low voltage.
Internal Fault
microprocessors. If this trouble occurs, check connections
to the COMBUS and do a system reset.
4204 Battery TBL
battery drops below 11.3 volts, a battery trouble is
generated.
To determine which of the PC4204’s has the low battery,
check the reporting code transmitted to the monitoring
station or check the event buffer printout if there is a printer
attached, or through downloading. The battery voltage is
checked once every 4 minutes. So the battery trouble may
not restore instantly when the battery voltage is restored.
4204 AC Trouble
incoming AC power, the keypad trouble light will indicate a
4204 AC trouble. But there will be no audible annunciation
until there is also a low battery condition.
The PC4204 AC troubles will be transmitted to the
monitoring station immediately.
4204 AUX Trouble
module should open or if the Aux supply is overloaded, a
4204 Aux trouble is generated.
Ground Fault - A Ground Fault trouble condition will occur
if the Earth Ground (EGND) connection is shorted to a
positive voltage source or shorted to a non-earth ground
potential. This trouble will generate an audible and visual
trouble as well as a Ground Fault reporting code
transmission.
Waterflow TBL - If the Waterflow zone on a PC4700 Fire
Module is opened (WFA or WFB), a visual keypad trouble
(trouble LED will come on) with audible indication and a
Waterflow trouble transmission is generated. The LCD will
show the message "FIRE TROUBLE!! Waterflow TBL", until the
Waterflow zone trouble is restored. If there is more than one
PC4700 trouble condition present these trouble messages will
scroll every 3 seconds to the next message.
Cellular Trouble one or more of the following trouble conditions: AC, battery,
loss of cellular or a tamper fault.
DLS Fault TBL - This trouble condition will generate an
audible and visual trouble when the control panel fails to
complete communications with the downloading computer.
Zn Sensor Fault - This trouble condition will occur when a
wireless zone fails to report a zone supervisory for 6 hours.
To view which zone has the trouble press the [✱] key while
viewing the trouble condition. The zone(s) with the trouble
condition will be displayed in numerical order on the
display. A keypad trouble is generated when the system is
disarmed and a visual "Zn Sensor Fault" trouble and trouble
reporting code will be transmitted.
-
Modules are not getting enough
A problem has occurred with the COMBUS
-
If any PC4204 relay output module’s
-
If any PC4204 relay output module loses
-
If the Aux fuse on any PC4204 relay
This indicates that the LINKS unit has
20
Page 25

Zn LwBatt Fault - This trouble condition will occur when
a wireless zone has a low battery condition. To view
which zone has the trouble press the [✱] key while
viewing the trouble condition. The zone(s) with the
trouble condition will be displayed in numerical order on
the display. A keypad trouble is generated when the
system is disarmed and a visual "Zn Low Batt Fault"
trouble and trouble reporting code will be transmitted
Automation Fault - This trouble condition will occur well
the Escort 4580 losses communication with the Automation
Output control module. An audible trouble (VIA keypad
buzzer) will be generated as well as the trouble LED
activating for the keypads. An Automation Fault trouble
reporting code will be sent to the monitoring station if
programmed. If there is an AC trouble present at the time
the panel will not transmit the Automation Fault reporting
code.
4820 Battery Trouble - A battery trouble will be
displayed and reported to central station if the battery
voltage drops below 11.5V. Battery voltage is checked
every 4 minutes, so the battery trouble and restoral may
not occur as soon as the battery is disconnected and
reconnected. When DC inhibit arm is enabled, the panel
will check the condition of the battery when an access
code is entered.
4820 AC Trouble - If any PC4820 module loses AC
power, the keypad trouble LED will activate, but there
will be no audible annunciation until another trouble
condition occurs. The 4820 AC trouble will be
transmitted at the end of the AC TX Fail Delay.
4820 Lock Trouble - If any PC4820 module has a lock
device trouble, the keypad trouble LED will activate and
the keypad trouble “beeps” will begin. A Lock Trouble
occurs when the lock power output is overloaded or the
lock power fuse goes open.
4820 Aux Trouble - If the Aux fuse on any PC4820
opens or the Aux supply is overloaded, this trouble
conditio will occur. The Trouble LED will activate and
trouble “beeps” will begin.
4820 Rdr Pw Tbl - If any PC4820 module has a read low
power trouble, the keypad trouble LED will activate and
the keypad trouble “beeps” will begin. A reader low
power trouble occurs when the reader power output
(12V or the 5V output) is overloaded or the reader power
fuse goes open.
Alarm Memory Display
[✱]+[3]
Press [✱] then [3] to enter the alarm memory mode. Any
zone alarm caused during the last armed period will be
displayed in this menu. Any 24 hour alarms (including
fire zones, zone tampers and zone faults) will also
appear in the alarm memory. The View memory
message will only be displayed when the partition is
disarmed and there was an alarm during the last armed
period.
Any zone that has gone into zone alarm will be
displayed as "Zone Alarm <>" with the zone label on the
bottom line of the LCD. Any zone that has gone into
zone Fault will be displayed as "Zone Fault <>" with the
zone label on the bottom line of the LCD. Any zone that
has gone into zone Tamper will be displayed as "Zone
Tamper <>" with the zone label on the bottom line of the
LCD.
Note: The special messages for 2 Wire Smoke Alarm
and Waterflow Alarm will only display the bottom line of
the message in the alarm memory section. Be sure that
these special event messages include an event
description on the second line of the display.
Press [#] to return to "Ready".
Sensor Reset
[✱]+[4]
The Main Bell, Switched Auxiliary Supply and pgm outputs
can be programmed by the installer to be a ‘Sensor Reset’.
(See ‘Sensor Reset’ in the programming guide). This option
allows the user to activate these outputs from the keypad
by pressing [✱][4]. The keypad will display ‘Sensor Reset in
Progress..’ and a countdown timer will show how long the
sensor reset will be active. The Sensor Reset can be from 0
to 255 seconds, which is programmed by the installer. (See
PGM Pulse Times, Utility/Sensor section in the Programming
Guide).
Note: To perform a sensor reset from a global keypad a
partition must first be selected.
User Programming Commands
[✱]+[5]+[System Master Code] or [Supervisory Code]
The [✱] [5] [System Master Code] or [✱] [5] [Supervisory
Code] command is used to program the Master Codes and
regular access codes.
The first access code is the System Grand Master Code.
Normally, only the installer can change the System Grand
Master Code. The installer may also program the system to
allow the user to change the System Grand Master Code.
Note: When using the global keypad the System Master
should assign access codes to prevent duplicate access
codes being used.
The System Grand Master Code has no limitations to its
use. It may be used to create or delete other System Master
Codes or to perform any user function on the system. Note
that only to the first access code can be the System Grand
Master Code.
Each access code may be programmed as one or a
combination of the following options:
System Master Codes may perform any function for any
partition on the system except change or delete the System
Grand Master Code, and change or delete other System
Master Codes.
Supervisory Codes allow the user to program and edit
other access codes, except System Master and Duress
codes, for any partitions the access code belongs to. It is
also used for arming, disarming, bypassing and all other
functions that a System Master Code is capable of.
Arm Only Code allows the user to arm only the partitions to
which the code is assigned.
Disarm Only Code allows the user to disarm only the
partitions to which the code is assigned.
21
Page 26

Bypass Only Code allows the user to bypass zones on
partitions to which the code is assigned.
Door Strike Code allows the user to operate door strikes
only within the partition to which the code is assigned.
Duress Codes will send a duress code transmission to
the monitoring station whenever it performs a function. A
user would enter a Duress Code to indicate that they are
forced by an intruder to perform the functions on the
system. When a Duress Code is entered, the partition or
partitions to which it is assigned will function normally,
and a Duress Code transmission will be sent to the
monitoring station. Also, any outputs programmed as
“Duress Outputs” will be activated when the Duress
Code is entered. A Duress Code may be programmed for
any functions except being a System Master Supervisory
or One-Time Use Code.
Note: When using the Duress code feature from the
Escort 4850, the Duress alarm logs and transmissions
will only be performed when a partition is armed or
disarmed.
One-Time Use Codes are used to allow infrequent users
of the system, such as service personnel, to disarm then
arm the system. When the system is armed using a One -
Time Use Code, the code will be erased once the Exit
Delay expires; after this time, the code may not be used
again. If the One -Time Use Code is entered before the
Exit Delay expires, arming of the system will be
cancelled; the One -Time Use Code may then be entered
again later to arm the system.
Note: Do not program One-Time Use Codes without
arming or disarming enabled.
Log Only Codes are used strictly for logging to the event
buffer. The system master can log the time, date and
location which they were at with the Log Only codes. To
enable this code type, enable just door strike or disable
all options.
4580 Access allows the user to access the Escort 4580
(Voice Prompting Module) via the in house telephone or
remotely through a telephone. The user will have the
same abilities through the VPM-2 as they would through a
regular keypad (See Programming Manual - Module
Hardware for more Detail).
Card Valid This option allows the user access card to
become active on the system.
Prvleged Card This option, when enabled, will give the
user the ability to grant access to users who have a Wait
For Privilege access card. Users who have this function
enabled on their cards will function as a normal card
users, with the additional ability to grant access to other
users.
Wait for Prvl This option, when enabled, will restrict the
user’s access to areas of the system (doors) when the
Second Card Schedule window is active unless a user
with a Privileged card grants the user access to the
system. When the Second Card Schedule is not active
(out of window) the user will be able to access the
assigned door(s) on the system.
Programming Additional Access Codes
Using a System Master or a Supervisory
Code
Press [✱] then [5] to enter the User Programming
Commands; the keypad will display the message “Enter
Your Access Code”. Any System Master Code or Program
Code may be entered.
• If the Grand Master Code is entered, System Master
Codes and regular access codes for any partition will be
able to be programmed.
• If a System Master Code is entered, regular access
codes for any partition will be able to be programmed. A
System Master Code can also create Supervisory and
Duress Codes.
• If a Supervisory Code is entered, only access codes
belonging to the partition to which the Supervisory Code
is assigned may be changed.
When a valid access code is entered, the keypad will
display the number of available access codes on the
first line of the screen.
1 User No. Search [0]
Selecting this option will allow the user number to be
entered directly or scrolled to in order to program the
user information. The keypad will display the message
“Sel Code (0001) <>”. Use the [<][>] keys to scroll
through the list of access codes, or enter the user
number directly and press [✱] to program the user
information. When the user is selected for editing, a
menu will be displayed. Enter one of the menu items by
selecting a number on the keypad.
[0] Program Code - When [0] is pressed, the keypad
will display the message “Enter Digits” and the
presently-programmed access code. Enter the new 4
digit or 6 digit access code. Do not press [✱] or [#]
while entering the access code. If you do not wish to
change the code, press [#] key.
[1] Erase Code - If an access code is no longer needed,
this selection will erase the code, but not the user’s
name.
[2] Edit Access Code Name - When a PC4400 RS-232
module is enrolled on the system, the name of the
code which is used to arm and disarm will be printed
out. Also, the access code name helps keep track of
the code when programming codes. Move the cursor
to left or right by pressing the [<][>] keys. The letters
of the alphabet have been divided up among the 1 to
9 number keys on the keypad as below:
[1] = A, B, C, 1 [2] = D, E, F, 2 [3] = G, H, I, 3
[4] = J, K, L, 4 [5] = M, N, O, 5 [6] = P, Q, R, 6
[7] = S, T, U, 7 [8] = V, W, X, 8 [9] = Y, Z, 9, 0
[0] = Space
For example, if you press the [4] key once, the letter
‘J’ will appear above the cursor on the display. Press
the [4] key again, the next letter ‘K’ will appear, and
so on. If a different number key is pressed, e.g. the
[6] key, the cursor will automatically move to the right
one space, i.e. the letter ‘P’. To erase a character,
use the [<] [>] keys to move the cursor under the
character, then press the [0] key.
22
Page 27

While programming the access code label, press
the [✱] key to call up an options menu. To select
an option, press the corresponding number key
or scroll through the options using the [<][>]
keys, then press the [✱] key to select.
[0] Clear Display [1] Clear to End
[2] Change Case [3] ASCII Entry (See appendix A)
[0] Clear Display will clear the entire code label.
[1] Clear to End will clear the display from the
character where the cursor was located to the
end of the display.
[2] Change Case will toggle the letter entry
between upper case letters (A, B, C...) and
lower case letters (a, b, c...).
[3] ASCII Entry is for entering uncommon
characters. There are 255 characters, but 000
to 031 are not used. Use the [<][>] keys to
toggle through the characters or enter a 3
digit number from 032 to 255. Press the [✱]
key to enter the character into the code label.
[3] User Card Number - This 7 digit entry is the
Access card number. The first two digits of the
access card are the identification number. Thses
two digits can be any HEX character, the next 5
digits are decimal (0-9) entries.
[4] Access Level - Each user can be assigned to an
access level from 01 to 63. Access level 00 will
disable the access card from use on the system.
Access level 01 will allow that user to access any
door at any time. Access levels 02 to 63 will
follow the assigned schedule programming.
Note: If the System Master should be given a
list of the schedules used and which access
levels are assigned to the schedules for each
area of the system.
[5] Edit Access Code Options - When [3] is
pressed, the keypad will display the message
“Select toggle < >”. Use the [<] [>] keys to scroll
through the list of options:
.......................................................... Default
• System Master? ................................... N
• Supervisory Codes?............................ N
• Arm? .................................................... Y
• Disarm? ............................................... Y
• Bypass?............................................... Y
• Door Strike? ......................................... Y
• Duress Pulse? ..................................... N
• One Time Use? ................................... Y
• 4580 Access? ..................................... Y
• Card Valid?.......................................... Y
• Prvleged Card? ................................... N
• Wait For Prvl? ...................................... N
[6] Edit Partition Mask - The Partition Mask is used
to assign the access code to one or more
partitions. In order for an access code to function,
the Partition Mask must be assigned to the access
if no partition mask is assigned, the code
code;
will not operate on any partition.
[7] To Exit the menu, press the [#] key.
2 User Name Search [1] This option will allow selection of
the user to be programmed by searching using the user
name. To do this, enter the first letter of the user’s name
[eg. for John, enter the letter J (press the [4] key once)]
and press either arrow key [<] or [>]. This will find all
users whose names begin with the selected letter (upper
or lower case). Continue pressing the arrow key until the
user name is found and then press the [✱] key. This will
bring up the programming information for that user.
Select the option to be edited by selecting the number on
the keypad. If there are a large number of user names
that begin with the selected letter, press the next letter in
the user’s name three times [in our example, the letter O
([5] key)] and then press the arrow keys. This will bring
up user names beginning with the two selected letters.
This process can be repeated as many times as desired.
If there are no user labels found that begin with the first
selected letter, then the message “No Users Found” will
be displayed.
3 User Card Search [2] This option will allow selection of
the user to be programmed by entering the user’s access
card number. To do this enter the number on the back of
the user’s card, when the last digit is entered the user
programming information will automatically be brought
up. Select the option to be edited by selecting the
corresponding number on the keypad.
4 To exit the Access Code Programming Mode, press [#].
User Functions Command
[✱]+[6]+[Access Code]
Enter [✱] [6] [Access Code] and then use the [<] [>] keys
to display the items of the function menu. Press [✱] to
select an item.
[0] Quick Arm
[1] Quick Exit
[2] Auto Arm Control
[3] Keypad Setup
[4] Bell / Comm Test
[5] Door Chime
[6] Spec. Messages
[7] User Call Up
[8] Lamp Test
Item [0], [1], [5] and [6] turn on and off various functions. To
enable or disable these functions, press the [✱] key to
toggle “Y ”or “N” on the keypad.
Y - The function is enabled
N - The function is disabled
Quick Arm
[✱]+[6]+[Access Code]+[0]
The “Quick Arm” feature is enabled by toggling to “Y” on
the keypad. When enabled the panel can be armed by
entering [✱][0]. Users with a One Time Use access code
should not use this feature because the OTU code is only
erased when used to arm.
23
Page 28

Quick Exit
[✱]+[6]+[Access Code]+[1]
The “Quick Exit” function is enabled by toggling to “Y”
on the keypad. When enabled the user can exit through
any delay zone without altering the status of the system,
by entering [✱]+[0] on the keypad while the system is
armed.
Auto Arm Control
[✱]+[6]+[Access Code]+[2]
The Auto Arm Control options can only be accessed if
Auto Arm is enabled for the partition. The PC4020 can
be programmed to arm a partition at the same time each
day, by enabling the Auto Arm function and
programming the Auto Arm time.
At the selected Auto Arm time, the system will give a
pre-alert. The keypad buzzer begins to sound and the
Bell/Siren will pulse once every 10 seconds to alert
anyone on the premises that the system is about to arm.
The Bell/Siren pulse can be disabled in Installer’s Mode.
The keypad buzzer will sound for one minute before
Auto Arming unless the Auto Arm is aborted. To abort
the Auto Arm and silence the keypad press any key
during the pre-alert. The Auto Arm will be attempted at
the same time the following day. The PC4020 can be
programmed to require a code to be entered for a user
to abort the Auto Arm.
Upon selecting the Auto Arm Control function, the Auto
Arm Control menu will appear on the LCD keypad.
[0] Auto Arm [1]Schedule Arm [2] Auto Arm Time
[3] Sched Disarm
[0] Auto Arm toggles “Y” or “N” to enable or disable
the Auto Arm/Auto Disarm function.
[1] Schedule Arm when this toggle option is enabled
the partition will follow the Auto Arm schedule
programmed (by the installer) for that partition. When
this option is enabled the partition will not follow the
Auto Time (programmed in section 2). For the Auto Arm
Time to function this option must be disabled.
[2] Auto Arm Time is the time the partition will
automatically arm itself every day.
[3] Sched. Disarm when this toggle option is enabled
the partition will follow the Autodisarm schedule
programmed (by the installer) for that partition.
Note: The Auto Arm time is a 24 hour clock and times
must be entered as two digit numbers.
E.g. HH - 01, 02,.....10,11,.....23,24
MM - 00, 01,.....35,36.....58,59
Enter 4 digits representing the time in hours and minutes
(HH:MM) based on 24 hour or military time. Always enter
a leading zero where only one digit is required, 8:05 am
would be entered as 0805, 1:30 pm would be entered as
1330.
Keypad Setup
[✱]+[6]+[Access Code]+[3]
This function allows the user to adjust the backlighting
and contrast of each LCD4500 keypad. When this
function is selected, the Keypad Setup menu will appear on
the keypad.
• Bright Control adjusts the level of backlighting on
the LCD display and the backlighting on the keys.
• Contrast Control adjusts the contrast of the lettering
on the LCD display.
Use the [<][>] keys to toggle through the eight different
settings, and press [✱] to select the level of preference.
Note: To adjust the keypad brightness and contrast
control of a global keypad, the keypad must first be
loaned to a partition.
Bell / Comm Test
[✱]+[6]+[Access Code]+[4]
This option allows the end user to test the system. This
option activates all outputs programmed for ‘Fire and Burg’,
‘Inv Fire/Burg’, ‘Burg Only’ and ‘Inv Burg Only’ for two
seconds, sounds the keypad’s for 2 seconds, tests the
main board and PC4204 battery voltage, and sends a test
code transmission to the monitoring station.
Door Chime
[✱]+[6]+[Access Code]+[5]
The Door Chime feature is enabled or disabled on a
partition by pressing the [✱] key to toggle from “N” to “Y”
or “Y” to “N”. When the door chime feature is enabled, any
zone that has been selected as chimeable will cause the
keypad to beep 5 times each time the zone opens or
restores while the partition is disarmed (Note that Fire zones
and 24 hour zones are never disarmed, therefore they can
never chime).
See “Chime Function” in the Programming Manual to enable
a zone to use the chime function. While disarmed zone
bypass may be used to eliminate the beeping.
Spec. Messages
[✱]+[6]+[Access Code]+[6]
This function enables 4 special event messages to be
displayed when one of the special events occurs.
The first message is “System Has Failed To Arm”. It will be
displayed if the user is unable to arm the partition after
entering a valid code (E.g. Because of activity on the
zones.).
The second message is “Alarm Occurred While Armed”. It
will be displayed if an alarm occurred during the previous
armed period.
The third message is "Fire Alarm !!! 2 Wire Smoke", this
message will only be displayed if the 2 wire smoke detector
on the PC4700 fire module goes into alarm.
The fourth message is "Fire Alarm !!! Waterflow Sensor", this
message will be displayed if the waterflow detector on the
PC4700 fire module goes into alarm.
Note: If there is more than one of these fire messages to
be displayed at once the messages will scroll one every
three seconds to the next message.
Once any fire alarm has been silence a message "Fire Bell
Has Been Silenced" will be displayed on the partition and
global keypads until the partition is armed.
The fifth message is “Zone Fault will occur”. It will be
displayed if the zone loop is shorted while using Double
EOL resistors.
24
Page 29

The sixth message is “Zone Tamper”. It will be
displayed if the zone is opened while using Double EOL
resistors.
See “Event Messages” in the Programming Guide.
Note: The Zone Fault and Zone Tamper event
messages will only be displayed when Double EOL
resistors are being used.
User Call up
[✱]+[6]+[Access Code]+[7]
This function must be enabled by the installer. When
selected, the panel will call the downloading computer.
The downloading computer must be waiting for the
panel to call before downloading can be performed.
Lamp Test
[✱]+[6]+[Access Code]+[8]
This option allows the user to test the lamp output of the
PC4216. If the module is programmed to be included in
the Lamp Test then selecting this option will activate all
output on the module reguardless of the programming.
Walk Test
[✱]+[6]+[Walk Test Code]
There are 2 different types of walk test modes, Local
Walk Test and Local + Comm Test.
[0] Local Walk Test sounds when there is All Fire/
Burg, Invert Fire Burg or Burg + Inv Burg for 2
seconds regardless of the zone type tripped.
[1] Local + Comm Test will function the same as Local
Walk Test, but the programmed reporting code will
be sent with each zone tripped.
[2] Disable Walk Test Mode, either arm the partition or
enter [✱][6][Walk Test Code] and select ‘Disab
Walk Test’.
Note: When Double EOL resistors are being used
during walk test, a zone tamper and alarm will always
be logged/transmitted.
Utility Output
[✱]+[7] or [✱]+[7]+[Access Code]
The Bell output terminals, switched auxiliary terminals or
any pgm terminals can be programmed for Utility Output
(see Utility Output in the installer’s programming guide).
Any output that is programmed for utility output will be
activated when the user enters [✱] [7]. See ‘Pgm pulse
times’ for programming how long the outputs are activated
and see ‘Util Req Code’ for programming whether a utility
output requires an access code to be activated.
Notes: Regardless of the time remaining for the Door
Strike, it will be deactivated at the end of the
standard exit delay.
To perform a utility output from a global keypad a
partition must first be selected.
Installer’s Programming Commands
[✱]+[8]+[Installer’s Code]
The PC4020 is completely programmed from the keypad
by using commands in the [✱][8] section. The commands
are described in detail in the Programming Manual.
Note:
DLS IN PROGRESS
LOCKOUT
will be displayed on the keypad when the downloading
computer is On Line with the panel. Installer’s Mode
programming will be inhibited.
“At-Home” Arming
[✱]+[9]+[Access Code]
Entering [✱] [9] before the arming code, arms the panel
without any entry delay on the delay zones and bypasses
zones that are defined as “Home-Away”. This command is
used for arming the system while at home. Once the panel
is Armed in this mode, using [✱] [1] will remove the bypass
from those zones defined as “Home-Away” if they have
NOT been manually bypassed. The [✱] [1] command, as
used here, only removes the bypass from zones that were
automatically bypassed with the [✱] [9] command.
The “Armed” light will flash to indicate the partition is “At-
Home” armed.
Quick Arm
[✱]+[0]
Entering [✱] [0] is accepted as a valid arming code when
the “Quick Arm” feature is activated. This command is often
used when individuals are required to arm the system but
not disarm it. This could be used with home visitors in the
case of a residential alarm or junior employees and
maintenance staff in the case of a commercial alarm. See
instructions in the “[✱] [6] User Functions Command”
section for activating the “Quick Arm” feature.
Quick Exit
[✱]+[0] When Armed
Entering [✱] [0] when the system is fully armed will allow the
user 2 minutes to exit the premises through any delay zone
without altering the status of the system if the “Quick Exit”
feature is enabled. After [✱] [0] is entered into an armed
system, one and only one delay loop may be tripped. Any
additional activity on any other active loop will cause that
loop to begin its alarm sequence. Quick exit activation will
be logged onto the event buffer.
Keypad Zones
There are three zones which can be activated from the
keypad. The alarm and restoral codes for keypad zones are
programmed using the [✱] [8] command.
Pressing the [F] key for 2 seconds activates a fire alarm.
The fire alarm sounds the siren/bell in a pulsed fashion.
Pressing the [A] key for 2 seconds activates a silent
auxiliary keypad zone.
Pressing the [P] key for 2 seconds activates a silent panic
keypad zone.
Programming for the [F], [A], and [P] keys for the global
keypad can be found under the System Toggle Options.
The global keypad will always send (if programmed) the
system area account code. The [F], [A], and [P] keys will
activate for all active partitions, any valid access code from
any partition may silence the alarm.
Note: See ‘KEYPAD TOG OPT’ in the Programming
Guide for changing keypad zones options.
25
Page 30

ACCESS CONTROL
FUNCTIONS
Reader LED Flash Rates
Most access card readers will have an LED output to
provide visual feedback from the reader to the user when
a valid access card has been accepted or denied. The
PC4820 is capable of displaying many different statuses
at once. The different flash rates are described below.
The colour of the LED may be different depending on the
manufacturer and some options that may be changed
within the PC4020 programming.
LED State Description of Function
Steady Red Door is locked
Steady Green Door is unlocked -
Access granted
Slow flash (state change The partition the Arm/
every half second) Disarm mask is
assigned to is armed
Medium Flash (state Waiting for a Privilege
change twice every second) card to be swiped
Fast flash (State Access denied/Time
change three times expired waiting for
every second) a privilege card.
Buzzer Operation
Most access card readers will have a buzzer output to
provide audible feedback from the reader or Request to
Exit device. The Buzz output may be connected to
operate local warning devices for the following
conditions.
• The access controlled door has been forced open
(door opened without a Request to Exit or an
access card used). When the Door Forced Open
event occurs, the buzzer will activate and remain
active until the door has been closed.
• The access controlled door has been left open too
long. If a door is left open past the Door Open Time
the buzzer will activate and remain active until the
door has been closed. Before the door open too
long event will occur the PC4820 will provide an
audible warning. This will consist of a single pulse
from the Buzz output once every second for the last
half of the programmed Door Open Time.
How to Setup and Use an Access Card
In order for an access card to function on the PC4820,
the card must first be programmed into the PC4020.
Once the user has been selected and the card number
programmed, select an Access Level for that user. The
Access Level will allow the user to enter through doors
that have the same access level enabled on them.
Access Levels are enabled on doors by the installer
assigning the level to a schedule. When the schedule
becomes active the access level will be valid on that
door. The Access Level can be programmed for each
door to allow access at only specific times of the day. If
the user is to have arming/disarming abilities the user
must be assigned to a partition, and the installer must
assign the door’s arm/disarm mask to the same
partition(s).
To gain access to a locked access control door first swipe the
card in the method indicated by the access card reader
installation manual. When the LED on the reader changes
state, the door has been unlocked and can be opened.
Arming and Disarming Using Access
Cards
The PC4820 can be used to arm and disarm any active
partition on the system.
To arm the partition, first ensure that the partition area to be
armed is secure. Close all protected doors and stop
movement in areas covered by motion detectors. Swipe the
user card and activate the ARM input. Exit delay will begin.
NOTE: To arm a partition the user must be assigned to
the partition and the Arm attribute must be enabled
To disarm the partition, first swipe the user card and open
the door input. The partition will be disarmed if the Disarm
Request schedule is active. If the time is outside of the
Disarm Request schedule window the door will unlock, but
the partition will not be disarmed when the door input is
opened. The user must enter their access code at the
keypad.
NOTES: To disarm a partition or enter a partition which
is armed, the user must be assigned to the partition and
the Disarm attribute must be enabled.
Autoarm Postponement
To postpone an autoarm, the user must swipe their access
card (during the autoarm pre-alert) and activate the Post
input. The Autoarm will restart at the end of the Postpone
Arm time unless the partition has been manually rearmed.
The autoarm may be postponed as many times as desired.
Note: To postpone an Autoarm, the user must be
assigned to the partition and the Disarm attribute must
be enabled.
Request To Exit (REX)
When enabled, this PC4820 input will be able to unlock the
door when the REX input is tripped. The door will remain
unlocked for the duration of the Door Unlock Time. This will
be used on the inside of the secured area to provide a
method of unlocking the door without the need for an
access card reader on the inside of the door. This will also
allow the door to be opened without the door being “Forced
open”. Request To Exit devices can be of many different
types. Be sure to read the installation sheets provided with
each unit for proper installation of REX devices.
26
Page 31

PRINTER SETUP
The PC4400 module is used for sending serial
communications through an RS232 port to a local printer
for on site monitoring of the PC4020.
All programming of the PC4400 is done through the
PC4020.
The printer can be located up to 200 ft (61 m) away from
the PC4400.
An 80 character printer is strongly recommended.
Configuring the Printer
1. Serial interface
2. Baud rate = 300, 600, 1200 or 2400 (PC4020 default
setting = 1200 baud)
3. Parity = None
4. Character length = 8 bits
5. Auto line feed = Off
6. American/Canadian character set
7. DTR Protocol or XON/XOFF (by default the PC4020
sends DTR protocol)
The PC4400 comes complete with a DB-25 (male)
modular jack adapter, and a 6 ft (2 m) six wire extension
cord. A longer extension cord can be used if required,
up to 200 ft (61 m) maximum.
Power down the PC4020, PC4400 and the printer.
Connect one end of the extension cord into the PC4400,
and the other end into the DB-25 modular jack adapter.
Connect the DB-25 modular jack into the RS232 serial
port of the printer.
See the PC4400 wiring diagram.
Most actions on the PC4020 that require an access code
are logged to the event buffer, and are sent to the printer
(see Sample 2).
The partition labels, access code names and zone labels
can be changed in the PC4020. See “PAR NAME LABEL” in
the Programming Manual for programming partition labels.
See “EDIT CODE NAME” in the System Manual under [✱][5]
commands to program the access code names. See “ZONE
LABEL” in the Programming Manual for programming zone
labels. The printout will then be as Sample 3.
The PC4400 sends events to the printer as they occur.
If the printer is off line or disconnected, the PC4020 keeps
new events in memory until they are ready to be printed.
When the printer is brought back on line, the PC4400 will
send the new events to the printer. If 450 new events occur
before the printer is brought back on line (450 events =
75% of the buffer), the PC4020 will send the “Buf Near Full”
reporting code to the monitoring station. (See ‘Maint Rep
Codes” in the Programming Flow Charts for programming
the “Buf Near Full” reporting code). If over 600 events occur
before the printer is brought back on line, the oldest events
will be overwritten.
The PC4020 contains an event buffer which stores the last
600 events.
To print out the entire event buffer, enter the “Prn Entire
Buff” section in installers programming [✱][8][Installer’s
Code][3][0].
The printout will begin with the oldest event in memory and
end at the most recent one.
Power up the printer, then the PC4020 and PC4400. If
the PC4400 is already enrolled and the printer is on line,
the PC4400 will begin transmitting to the printer.
Sample 1 is a printout from the serial printer.
Partition Label Date Time Event
Sample 1 System Area 05/27/94 13:25 RS232 PRINTER ON LINE
Partition...2 05/27/94 15:00 ALARM ZONE 008
System Area 06/01/94 08:10 4204 #005 BATTERY TBL ALARM
System Area 06/02/94 08:13 TAMPER LCD #001
Sample 2 Partition...1 05/27/94 13:40 OPENING ACCESS CODE 001
System Label 05/27/94 13:51 INSTALLER LEAD IN
System Label 05/27/94 13:53 INSTALLER LEAD OUT
Partition...4 05/29/94 15:30 UTIL OUTPUT CODE ACCESS CODE 054
Partition...1 06/01/94 08:05 SW AUX CODE ACCESS CODE 008
Partition...8 06/01/94 08:01 SYS MASTER MENU ACCESS CODE 002
Partition...1 06/02/94 23:59 BYPASS WITH CODE ACCESS CODE 004
Sample 3 West Plaza 06/04/94 02:05 CLOSING Head Custodian
Assembly Plant 06/04/94 02:09 ALARM Front Office
27
Page 32

DOWNLOADING
Downloading is the use of an IBM compatible computer
to program the PC4020 system. The computer can be
located either on site, or communicate over the phone.
The DSC downloading package version 5.3 or later
supports downloading to the PC4020.
See the downloading manual for details on specific
capabilities and the “DLS” section in the PC4020
Programming Guide for programming DLS options.
Downloading over Phone Lines
Make sure the “TIP” and “RNG” terminals are connected
to the phone line. Program the access code and the
panel I.D. code in the PC4020.
The PC4020 panel can call the computer, or vice versa.
“Ring Detect” or “User enabs DLS” must be enabled for
the PC4020 to detect when the phone line is ringing, the
time the computer is calling the panel.
The number of times the panel allows the phone line to
ring before answering is programmable, and the default
setting is 8 rings.
If the panel calls the computer, enable “User call up” and
program the phone number of the computer. Initiate the
call by entering [✱][6][Master Code][7].
Downloading with an On-site Computer
Phone lines are not necessary to download to the panel if
the computer is at the same location as the PC4020. The tip
and ring lines of the modem can be directly connected to
the tip and ring terminals on the panel.
A DTS-1 must be connected to the lines and in the local
mode.
Program the downloading access code and panel I.D.
code.
Program a zone for “Forced Answer”. See “Zone Type” in
the Programming Guide. This zone is only meant to be
temporary, to initiate downloading. It can later be changed
back to the required zone type.
Make sure the access code and panel I.D. code are the
same in the panel and computer. A telephone number must
be programmed into the computer to initiate
communications, and any number entries are accepted.
Activate the computer to call the panel. When the computer
indicates “Dialing...No dial tone”, press the dial tone button
on the DTS-1 until the modem dialing the phone number is
heard. Trip the zone programmed for “Forced Answer”. The
panel will seize the phone line and initiate communications
with the computer. The computer will then display the
message “Connected to panel...” and continue with
communications.
The DTS-1 must remain connected to the phone line in local
mode during the downloading.
The TM1 or RJ31-X jack connects single wires into one
end, and a telephone cord into the other end. Although
this jack is not necessary, it simplifies the connection of
the PC4020 to a modem. If a TM1 or RJ31-X is not readily
available, use a telephone cord. Plug one end into the
modem, cut off the other end, and wire the green and red
wires into the TIP and RNG on the PC4020.
28
Page 33

APPENDIX A
List of Available ASCII Characters
032
033
034
035
036
037
038
039
040
048
049
050
051
052
053
054
055
056
064
065
066
067
068
069
070
071
072
080
081
082
083
084
085
086
087
088
096
097
098
099
100
101
102
103
104
112
113
114
115
116
117
118
119
120
160
161
162
163
164
165
166
167
168
176
177
178
179
180
181
182
183
184
192
193
194
195
196
197
198
199
200
208
209
210
211
212
213
214
215
216
224
225
226
227
228
229
230
231
232
240
241
242
243
244
245
246
247
248
041
042
043
044
045
046
047
057
058
059
060
061
062
063
073
074
075
076
077
078
079
089
090
091
092
093
094
095
105
106
107
108
109
110
111
121
122
123
124
125
126
127
29
169
170
171
172
173
174
175
185
186
187
188
189
190
191
201
202
203
204
205
206
207
217
218
219
220
221
222
223
233
234
235
236
237
238
239
249
250
251
252
253
254
255
Page 34

APPENDIX B
List of Diagnostics
E = Communication error
T = Tamper open
LV = Low voltage to module
Indicated # For Future Use
Number
1
2
3
4
5
6
7
8
Indicated LCD4500
Number Module Number
91
10 2
11 3
12 4
13 5
14 6
15 7
16 8
17 9
18 10
19 11
20 12
21 13
22 14
23 15
24 16
Indicated PC4400 RS-232
Number Module Number
25 1
Indicated PC41XX Zone
Number Module Number
26 1
27 2
28 3
29 4
30 5
31 6
32 7
33 8
34 9
35 10
36 11
37 12
38 13
39 14
40 15
41 16
Indicated PC4216 O/P
Number Module Number
42 1
43 2
44 3
45 4
46 5
47 6
48 7
49 8
50 9
Indicated PC4204 O/P
Number Module Number
51 1
52 2
53 3
54 4
55 5
56 6
57 7
58 8
59 9
60 10
61 11
62 12
63 13
64 14
65 15
66 16
Indicated PC4700
Number Fire Module
67 1
Indicated VPM-2
Number Voice Prompting
Module
68 1
Indicated PC4820
Number Access Control
69 1
70 2
71 3
72 4
73 5
74 6
75 7
76 8
77 9
78 10
79 11
80 12
81 13
82 14
83 15
84 16
30
Page 35

Page 36

© 1997, 2002 Digital Security Controls Ltd.
Toronto, Canada • www.dsc.com
Technical Support: 1-800-387-3630
Printed in Canada 29002586 R0
 Loading...