

Page 1
14639 Arminta Street * Panorama City, CA 91402
Data Support Co., Inc.
Data Support Co., Inc * Toll Free: 800-726-5883 * Tel: 818-988-7499 * Fax: 818-988-7671 * website: www.dsctest.com
DSC 500
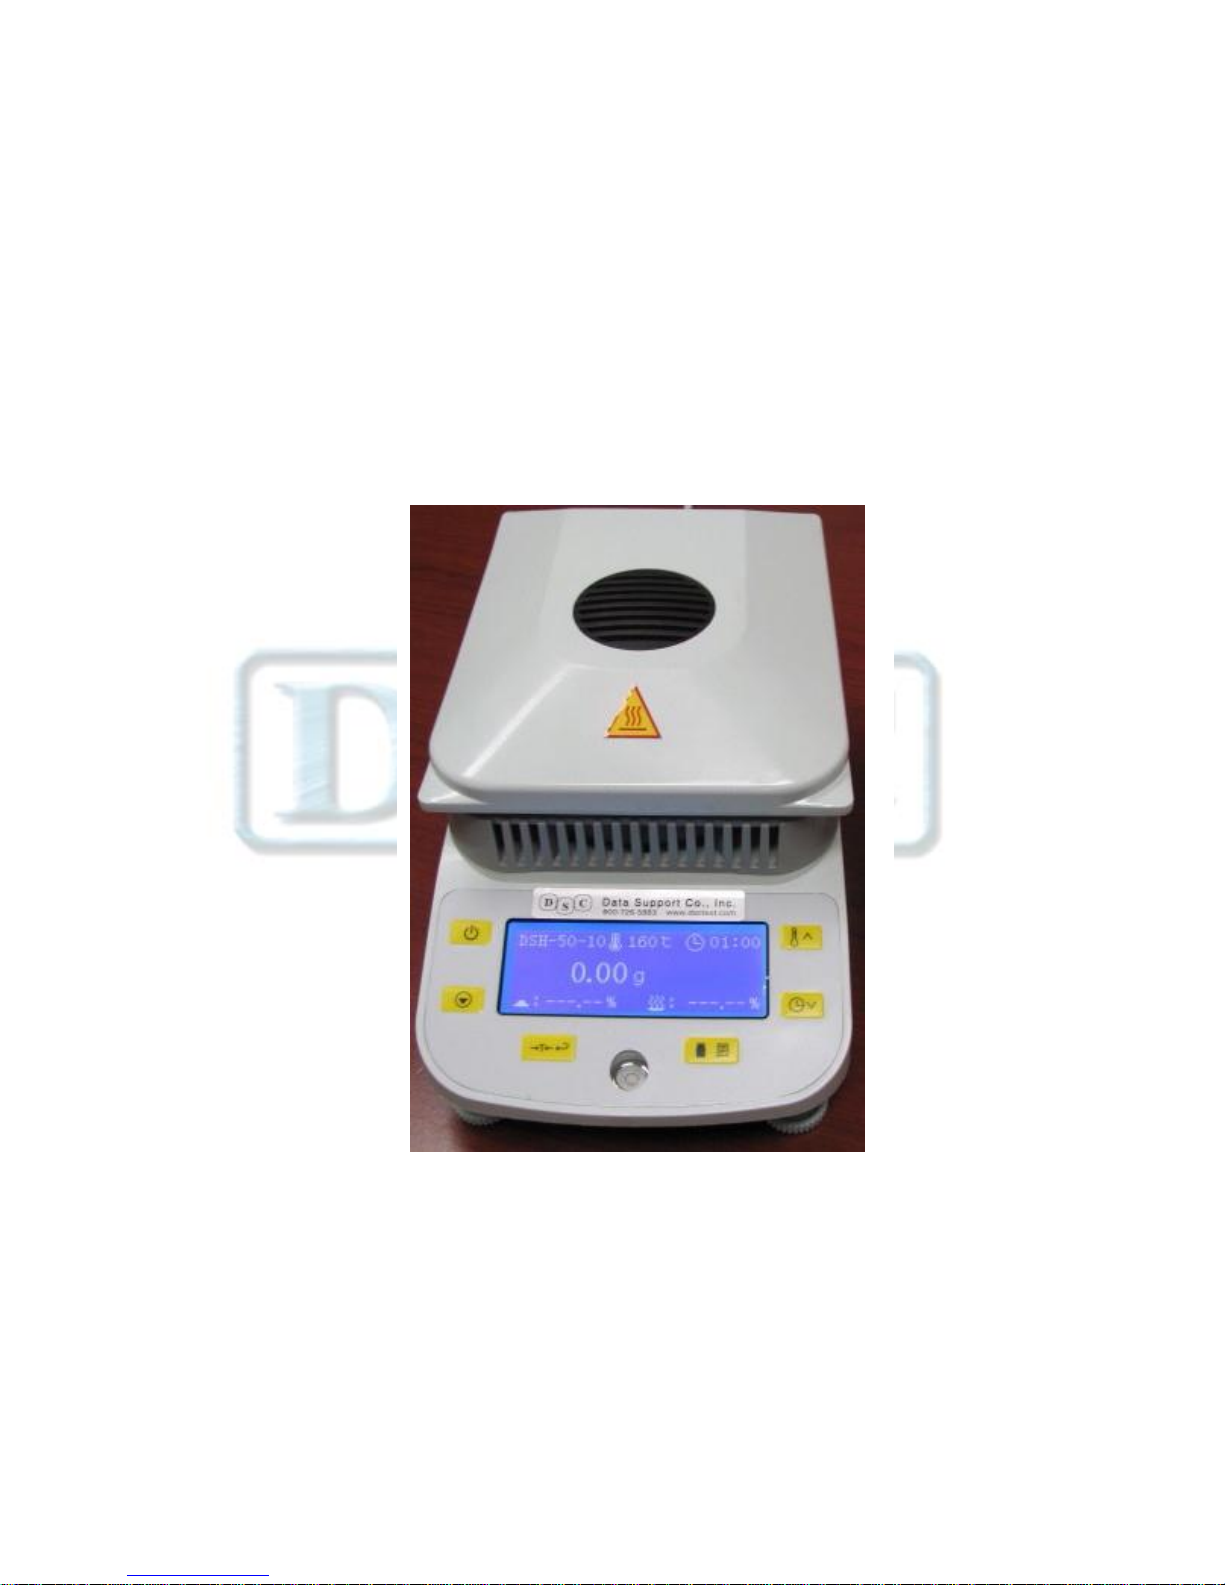
Digital Moisture Analyzer
Quick Guide
Simple to Use
Compact & Easy to Clean
No Complicated Buttons or Menus
Page 2
Data Support Co., Inc.
DSC 500 Quick Reference Operating Instructions.
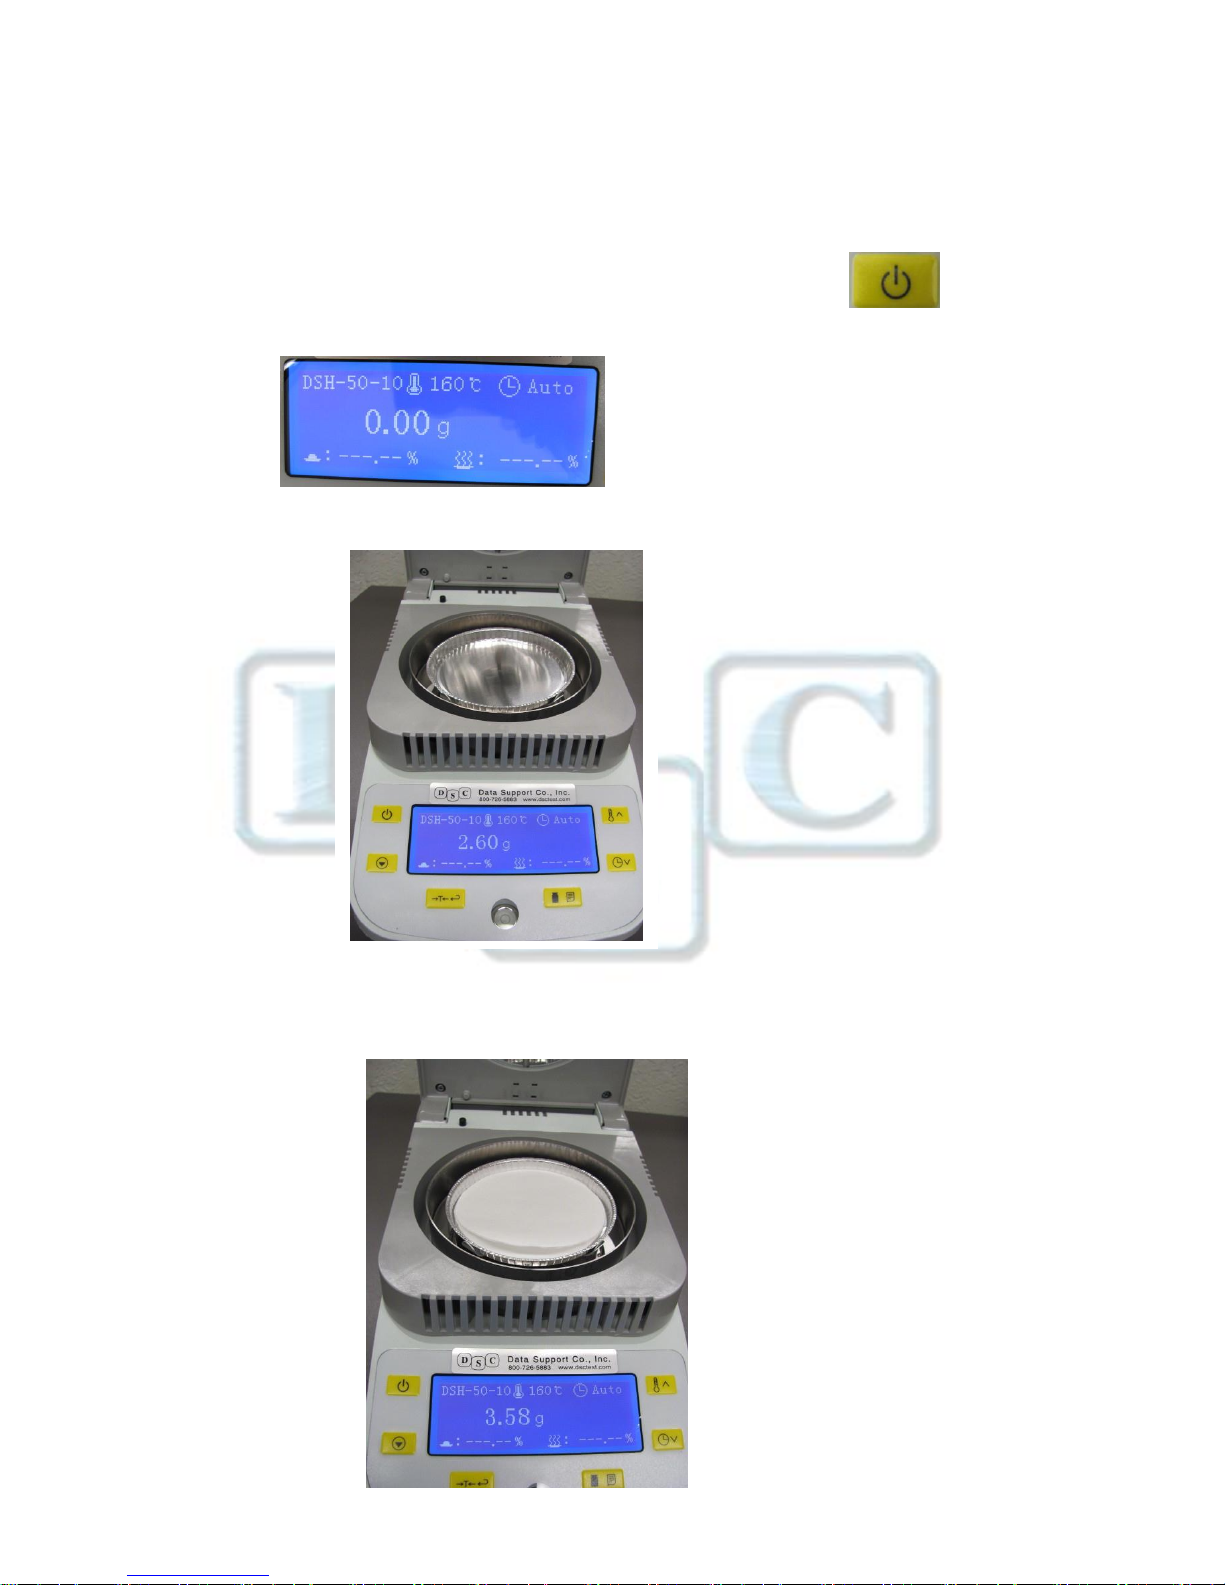
1. Turn on the unit by pressing the “On/Off” Button.
(This will be displayed on the screen)
2. Open up the hood and place (1) Aluminum Dish on the pan
support.
3. Place one (1) or two (2) Glass Fiber Pads in the Aluminum Dish (if
necessary)
Page 3
Data Support Co., Inc.
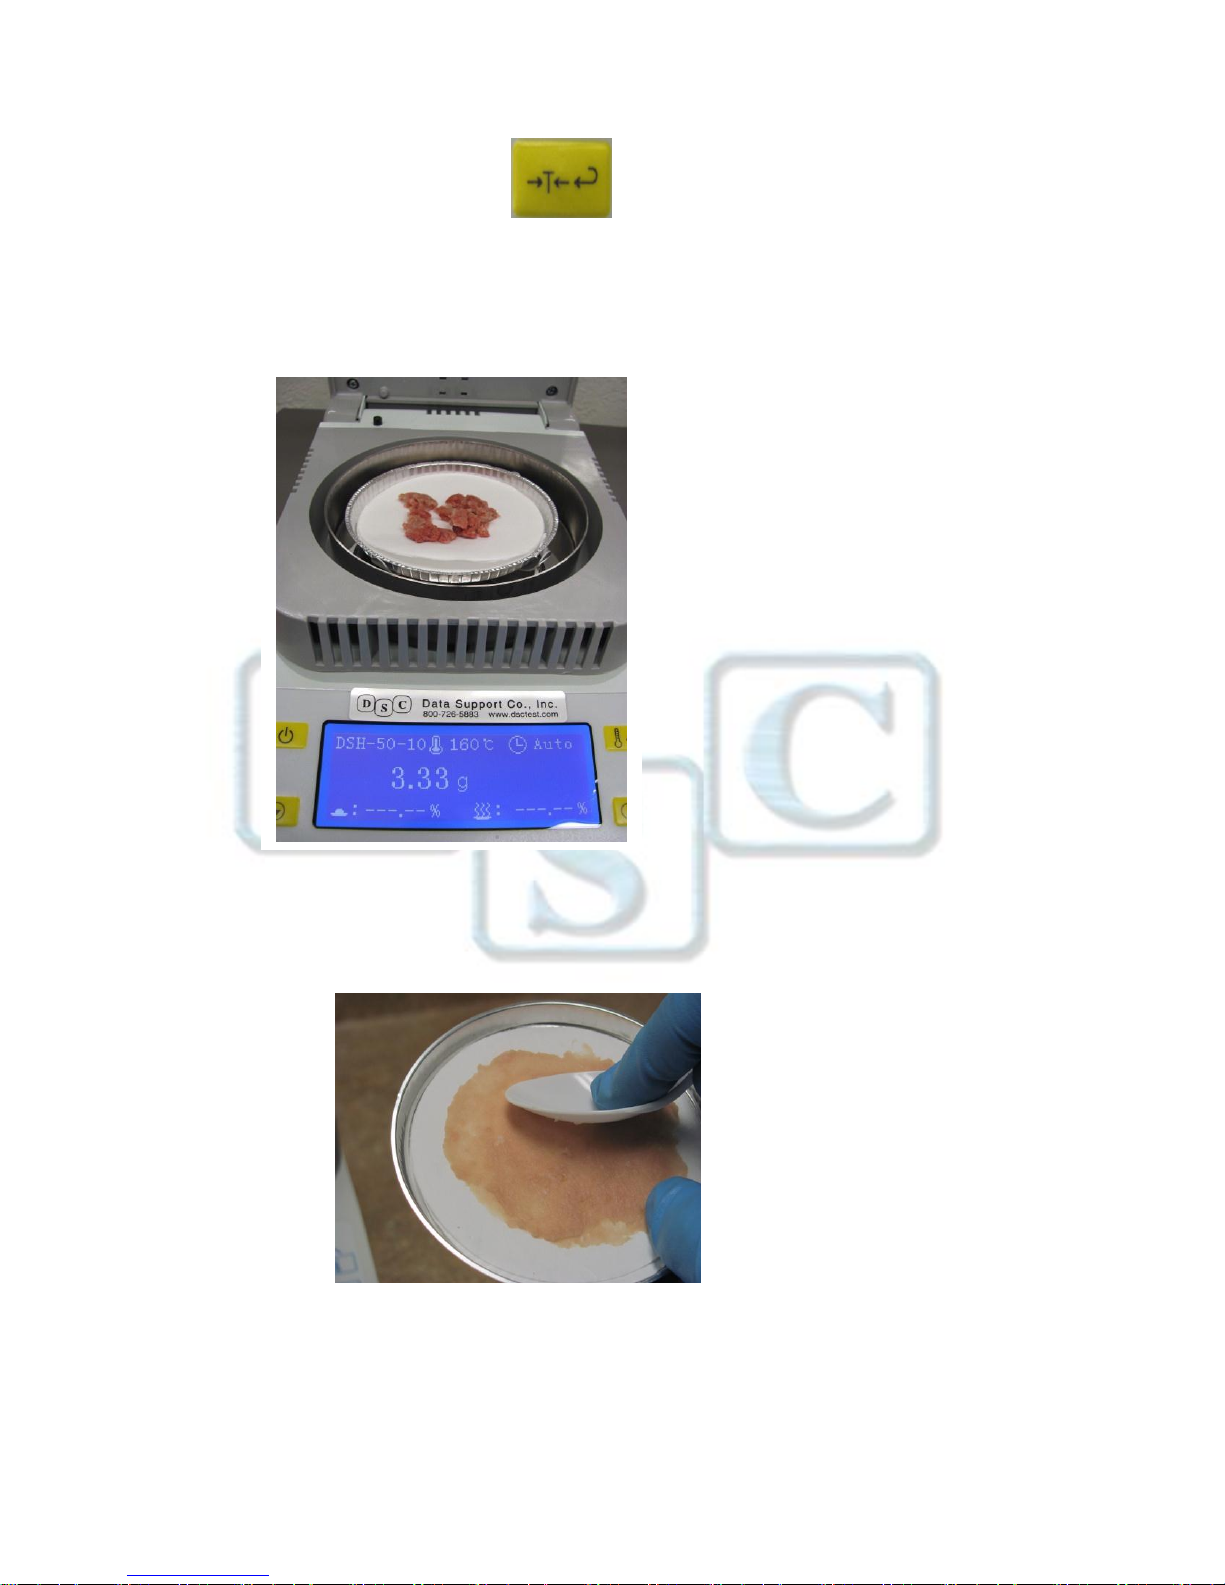
4. Press the Tare Button to zero-out the reading.
5. Place 3~5 grams of sample on the pad.
(The weight will be displayed on the screen)
6. Remove the (2) Glass Fiber Pads from the Aluminum Dish. Spread
the sample as evenly and as thinly as possible.
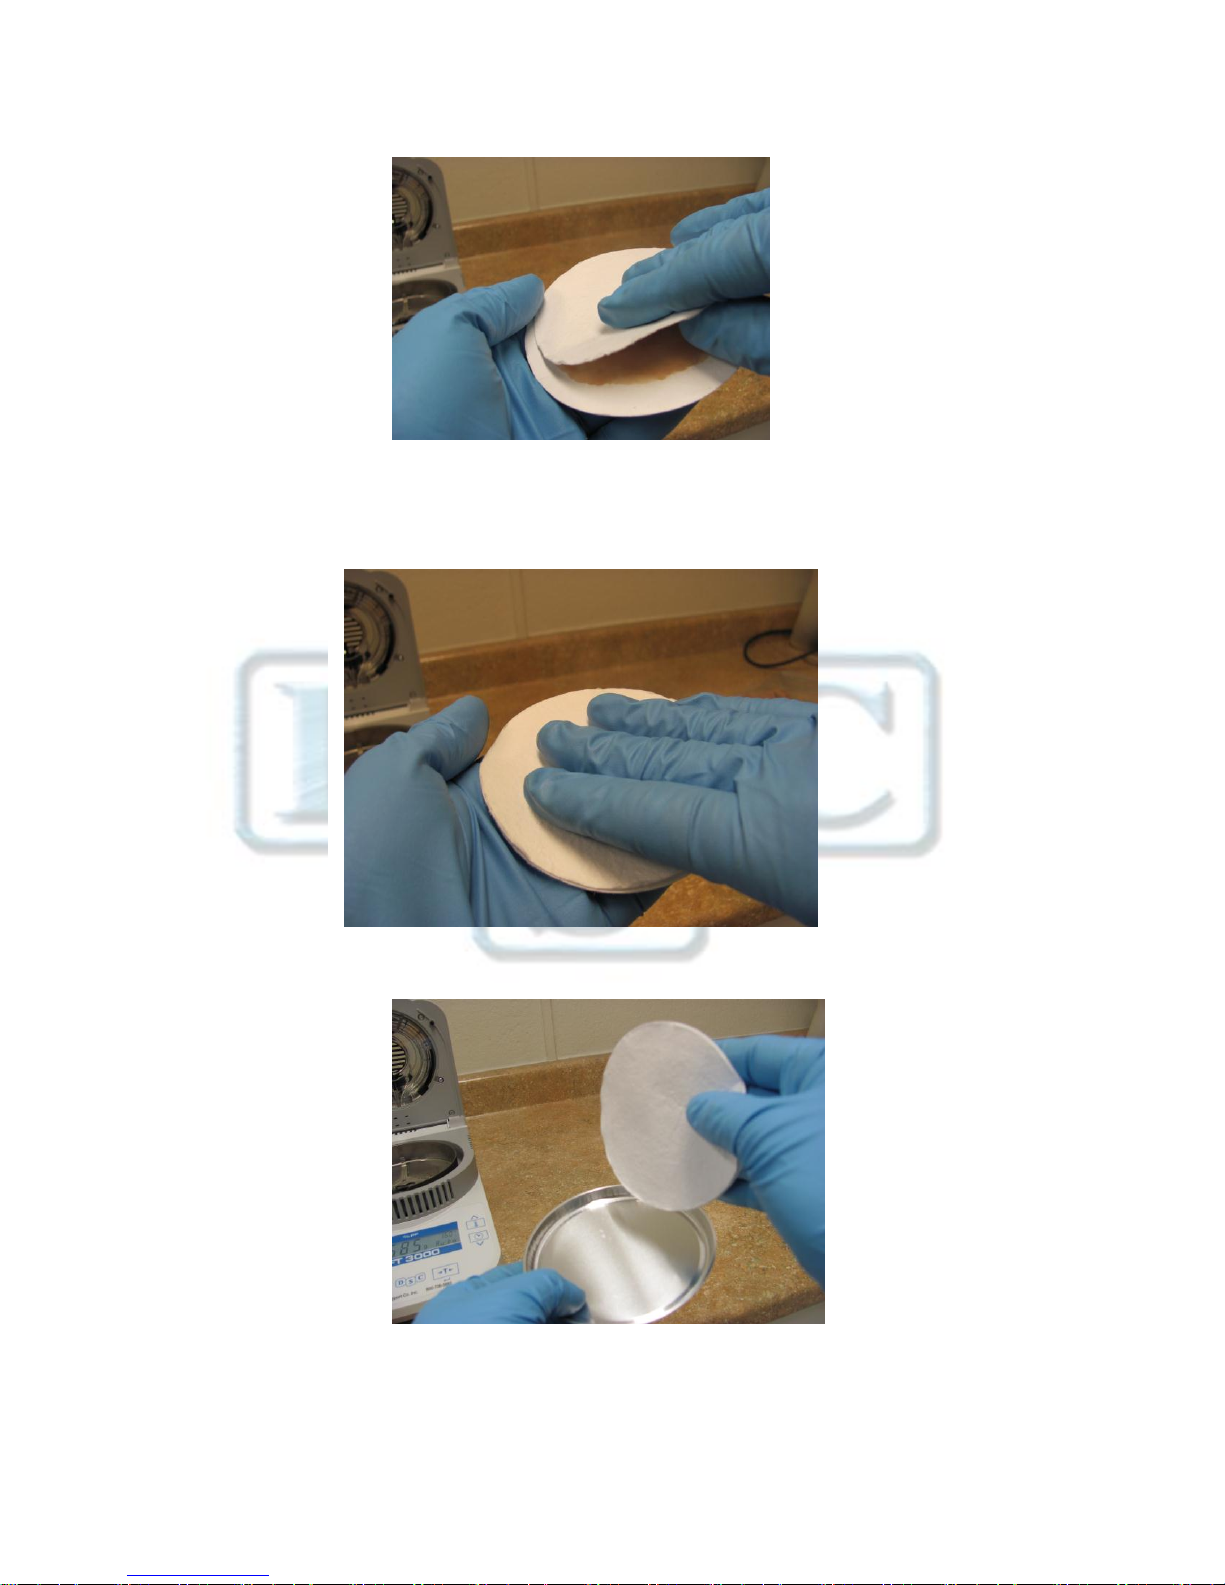
7. Place the other pad on the bottom on top of the meat to sandwich
the sample between the pads.
Page 4
Data Support Co., Inc.
8. Press the pad gently together with the palms of your hands
to avoid separation or curling during the test.
9. Flip the pads over in such a way that the pad where the sample
was spread will be on top.
10. Place the sandwiched pads back onto the Aluminum Dish.
Page 5
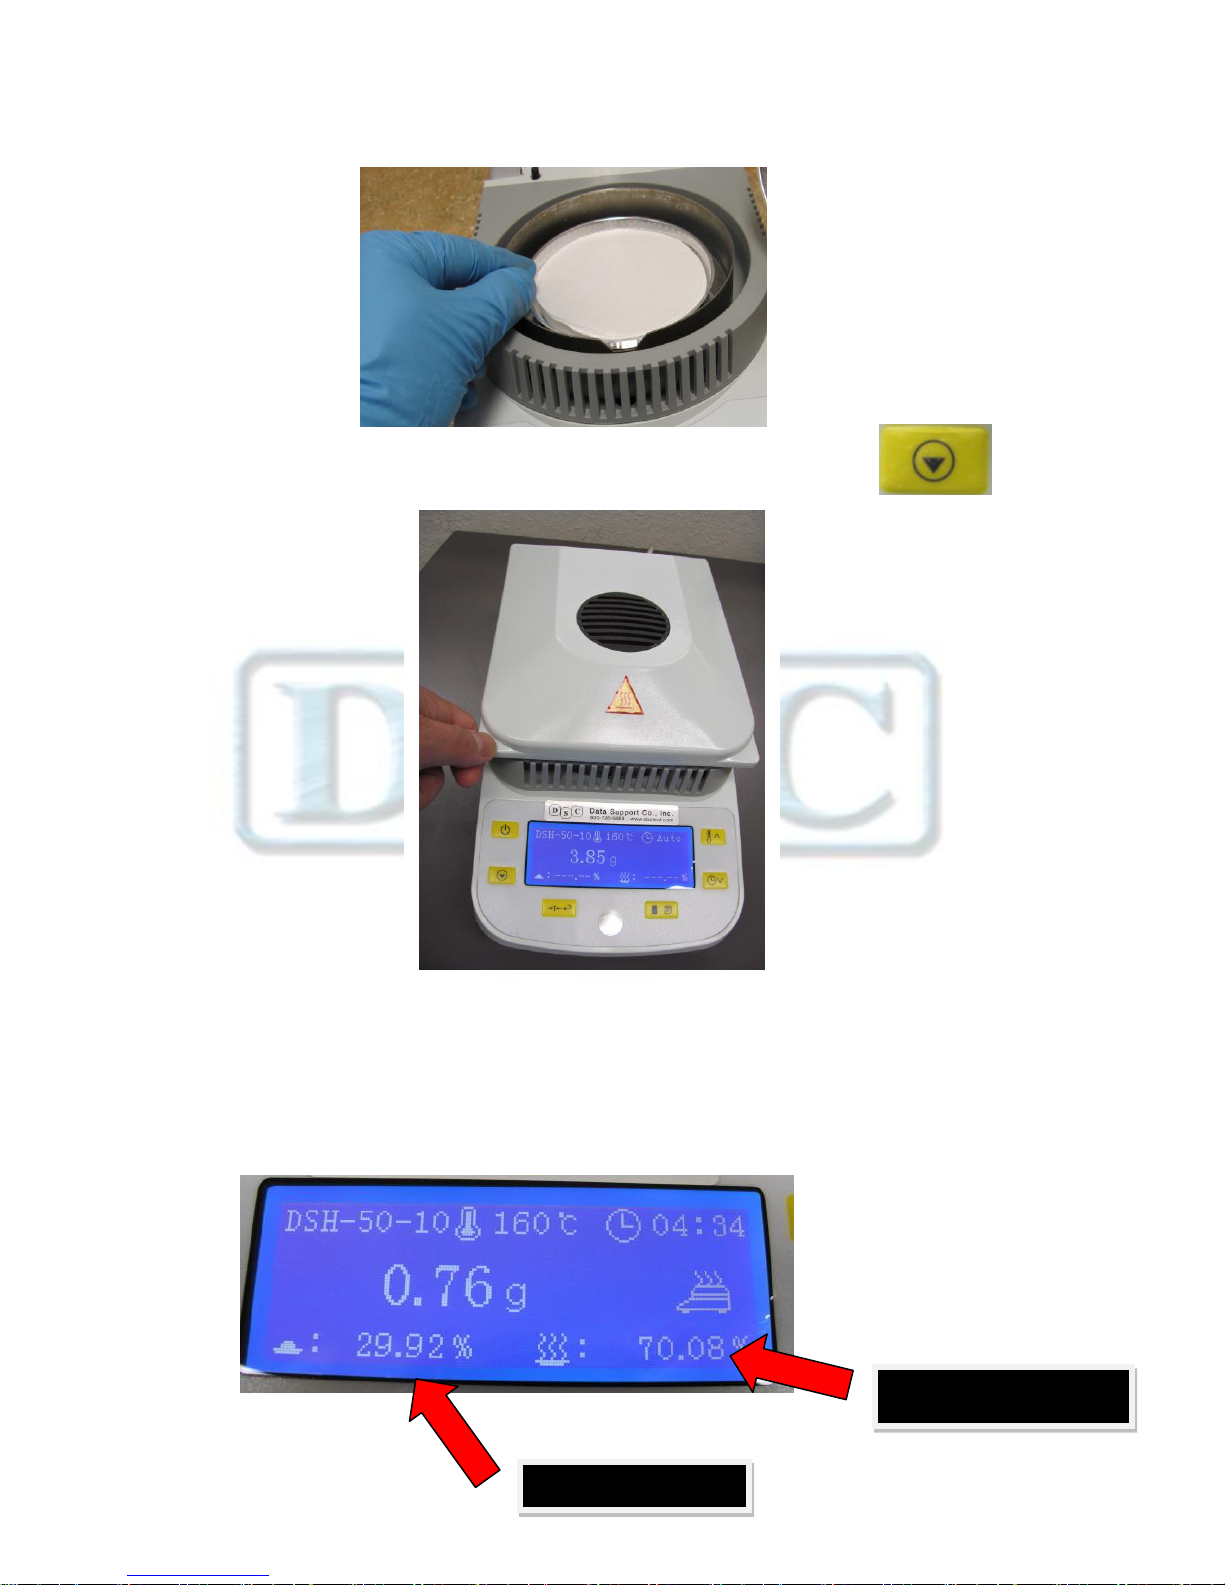
70.08 % Moisture
29.92 % Solids
11. Close the cover and Press the “Start / Stop button
12. Once the test is done, the %Moisture and %Solids Reading will
be displayed on the screen and a beeping sound will be heard.
(Average test time is about 18 minutes).
Page 6

4. To run another test, press the TARE button to reset the
machine, then follow the steps above. Be sure to record the reading
before pressing the tare button as it will clear the reading on the
screen. WARNING: Use the tweezers to remove the hot aluminum
dish after a test to prevent any burn injury.
(Remember to use a new Aluminum Dish and (2) Glass Fiber Pads for every test. Used
pads and dishes should be discarded after each test)
Page 7
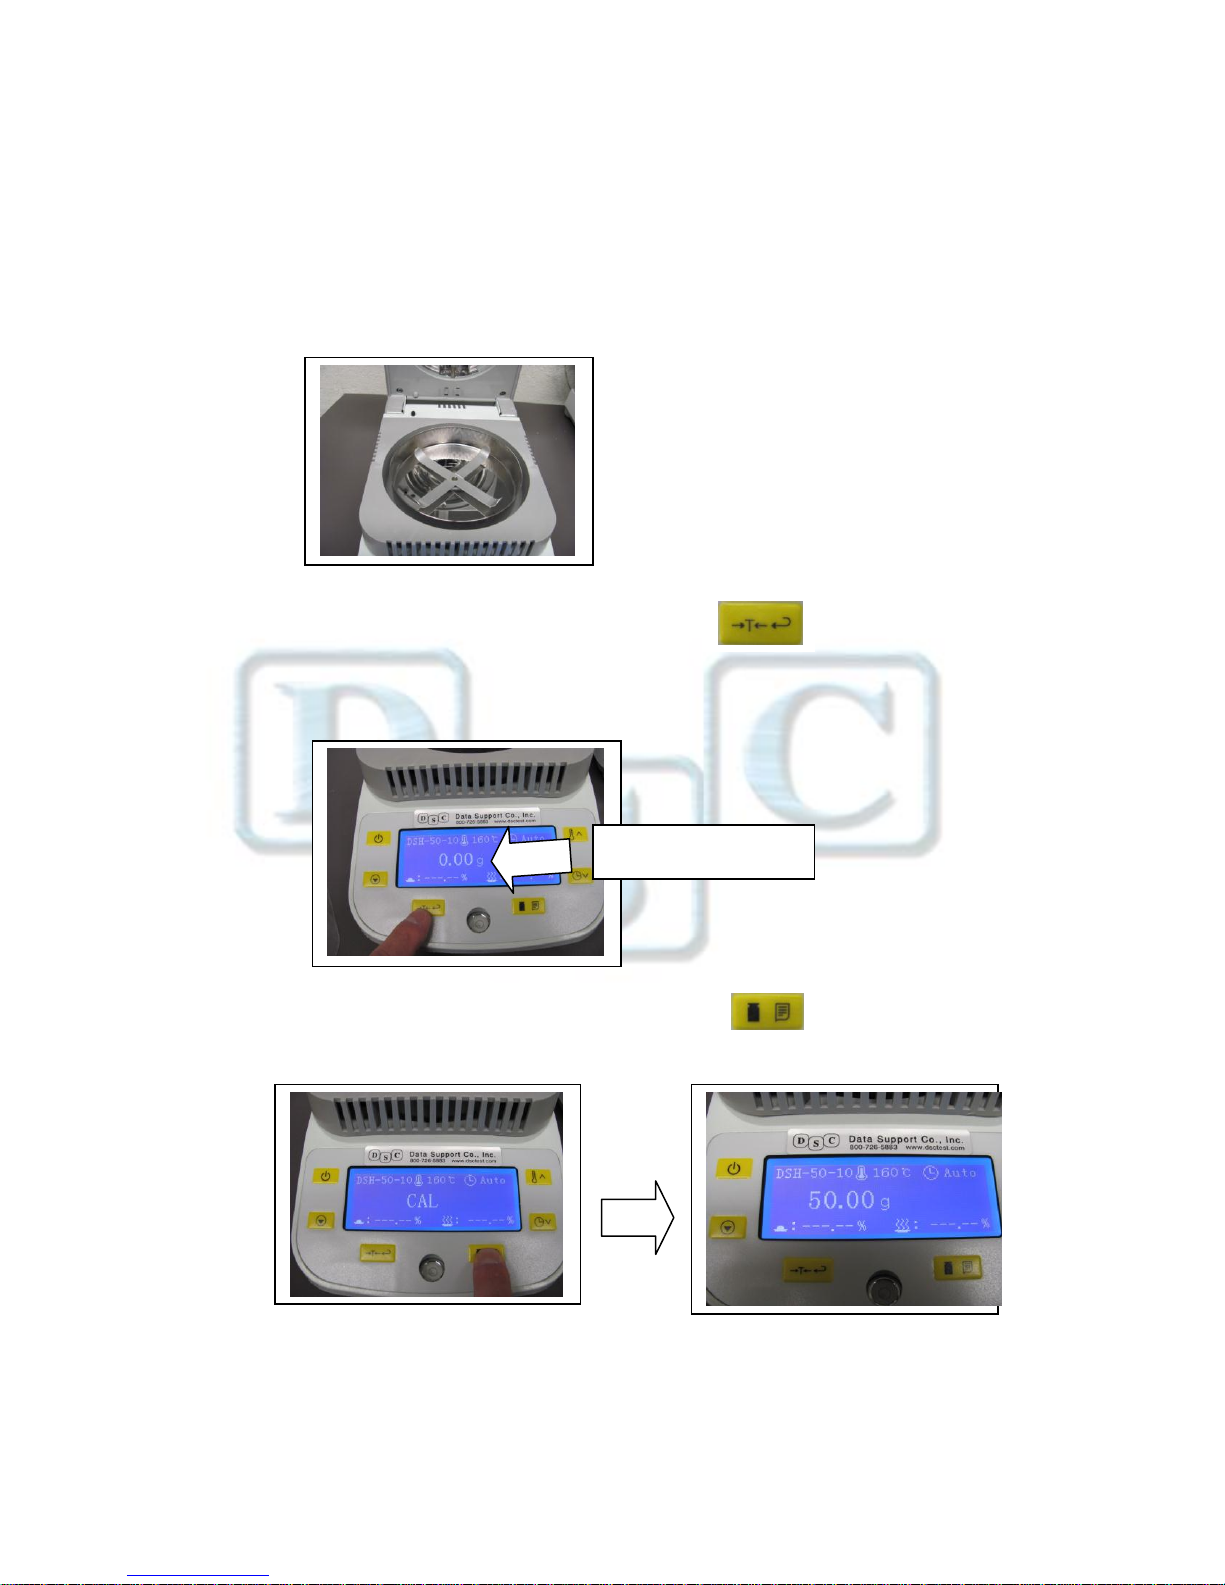
Zero-out Reading
DATA SUPPORT COMPANY, INC.
HFT 500 Weight Calibration Procedure
1. Make sure nothing in on the pan support.
2. Press and Release the TARE button to zero-out the
reading.
3. Press and Hold the calibration button until “CAL” is
displayed. Then release the button, and a blinking “50.00 g” will
appear.
Page 8
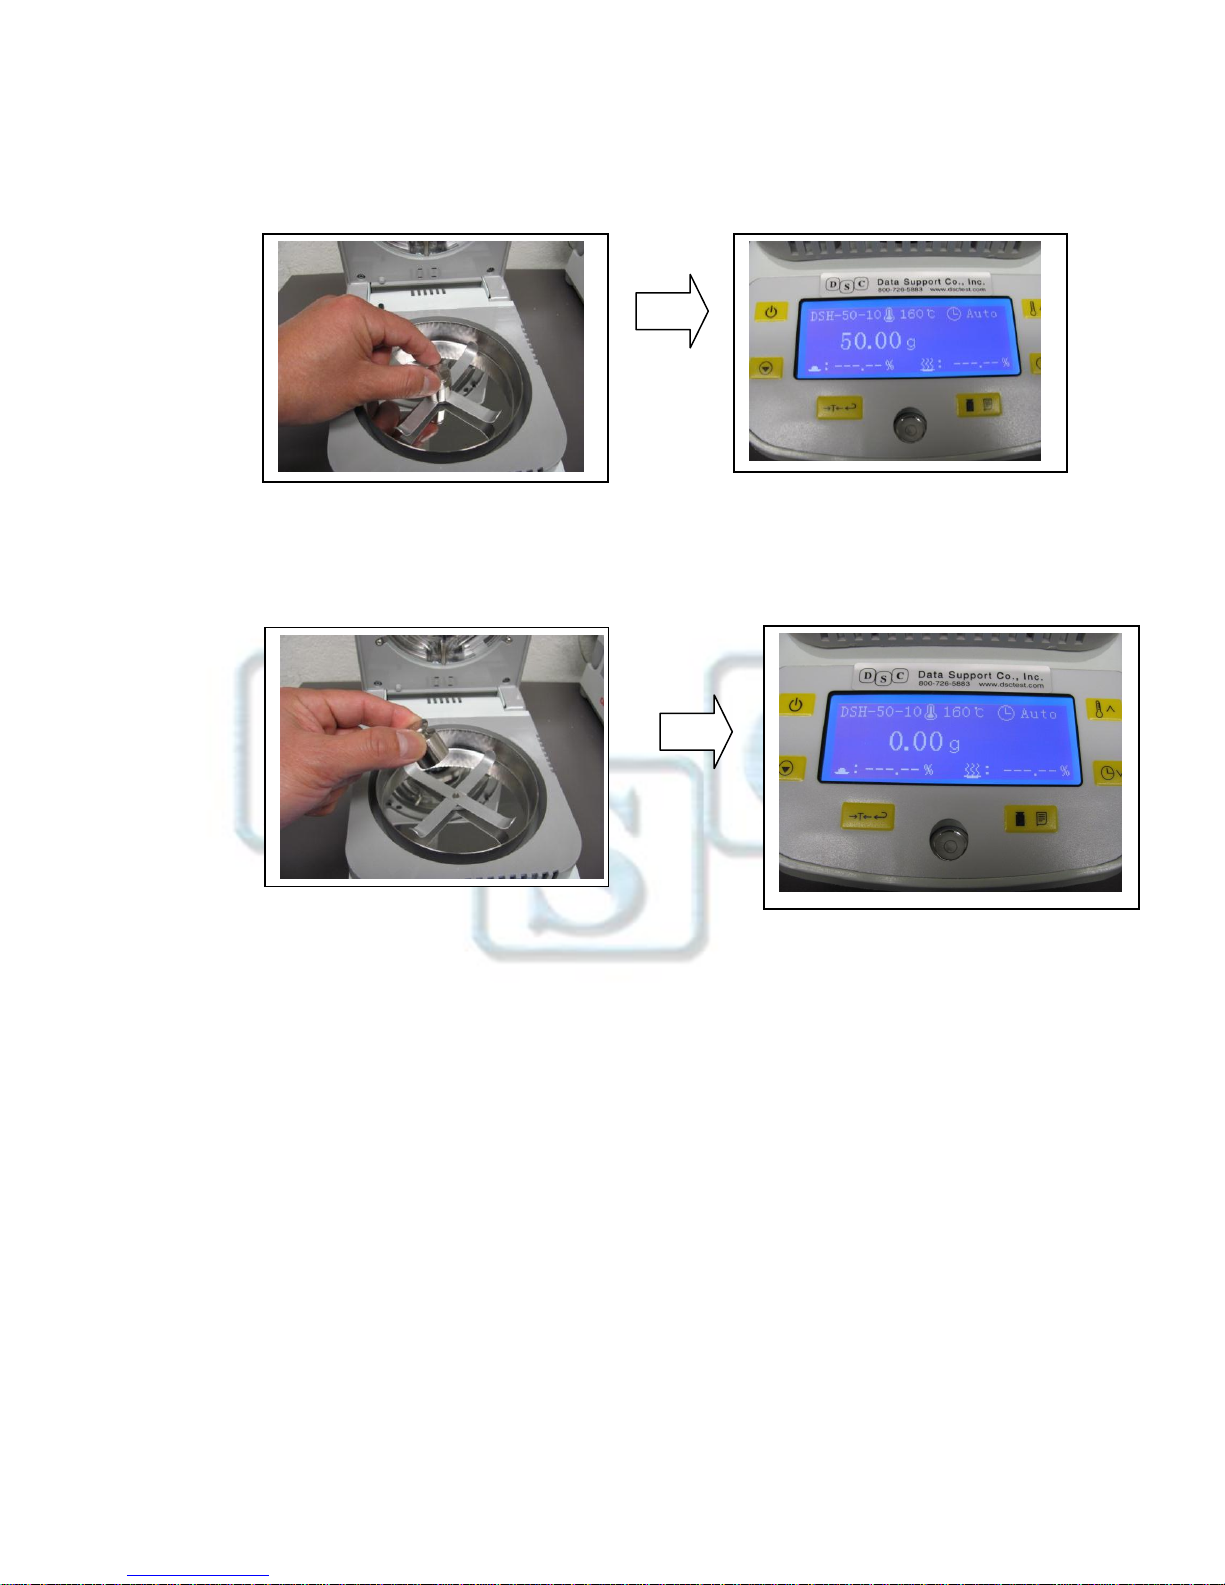
4. Place the 50 gm calibration weight at the center of the pan
support. The 50.00 g display will stop blinking.
5. Remove the 50 g calibration weight, and the reading will show
0.00g.
6. Weight Calibration is now complete.
 Loading...