

Page 1
In Service Training CD
Dräger UCF 1600 or UCF 3200 Thermal Imaging Cameras
TIC Orientation/Greg Sesny/ 5/25/20081 | 37
Page 2

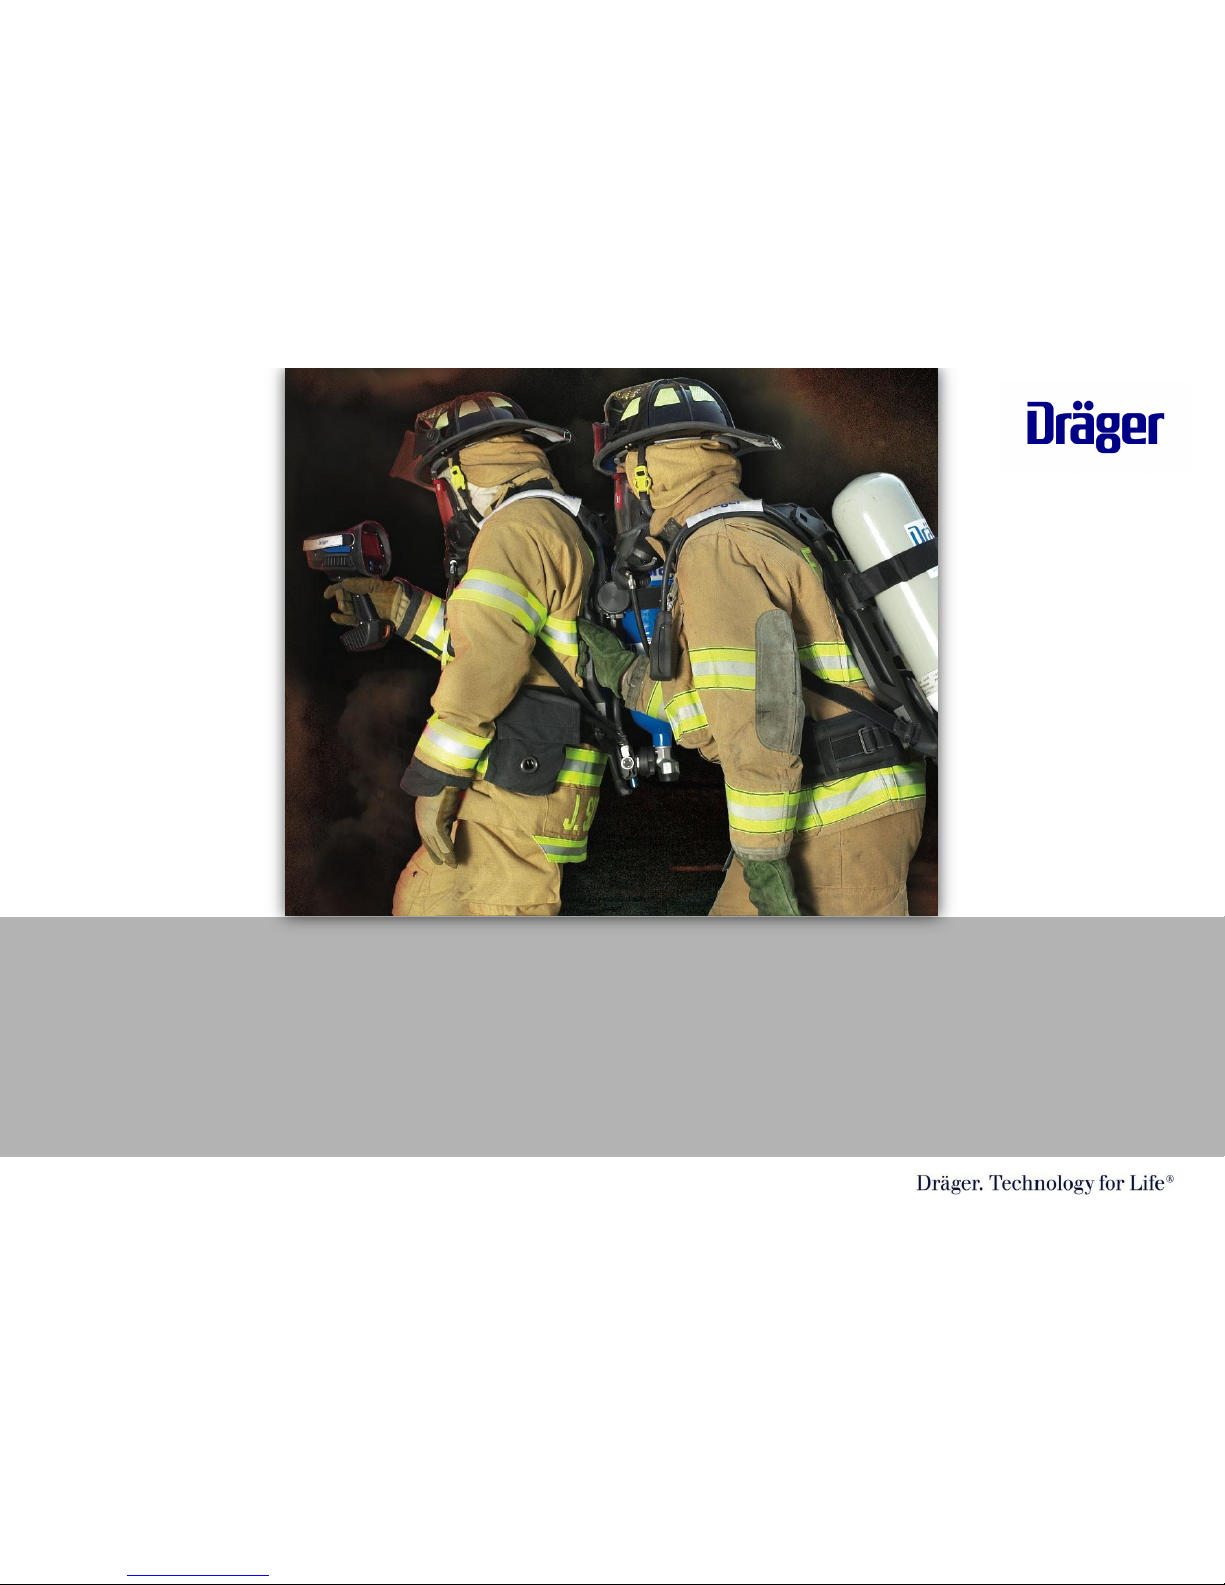
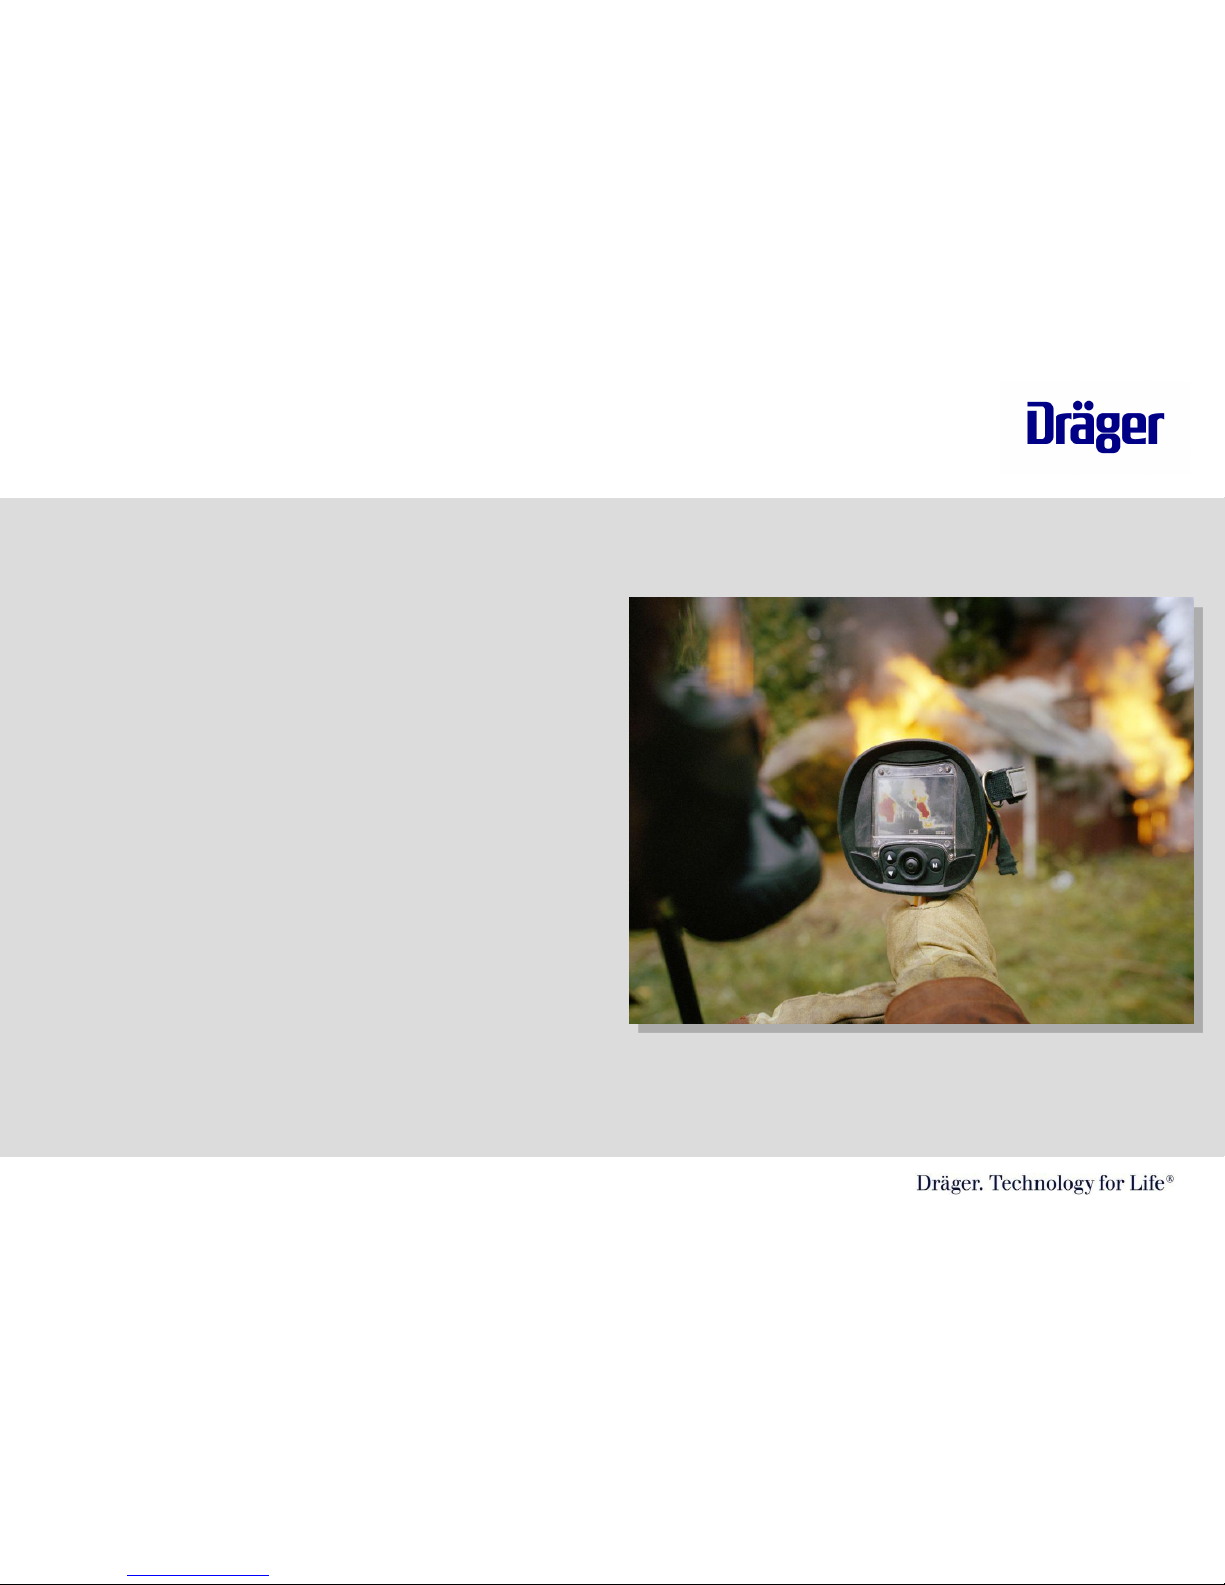
Thank you for purchasing the Dräger Thermal imaging
Camera. We know you will be delighted with its many
unique capabilities.
This is CD is intended to provide you with information on how to operate,
maintain and get the most out of your new thermal imaging camera.
Thermal Cameras are a tool and should never deviate from departments
Standard operating procedures, fire experiences, training and overall common
sense. Be sure to get refresher courses and train all shifts on the camera and
be sure to debrief after training and incidents requiring the use of the thermal
imaging camera.
Please remember that thermal imaging cameras are very useful in the fire
service and we have made great strides to make the UCF 1600 and UCF 3200
very robust and durable. It is however, an electronic device and should be used
and not abused. For more technical information, please refer to your
“Instructions For Use Manual” that came with the camera.
TIC Orientation/Greg Sesny/5/25/20082 | 37
Page 3

Table of Contents
1. Introduction the Infrared Technology
2. Applications
3. Getting to know your Camera
4. Operation of the camera
5. Care and cleaning
6. Battery Procedure
7. Crawling handles and Accessories
TIC Orientation/Greg Sesny 5/25/20083 | 37
Page 4
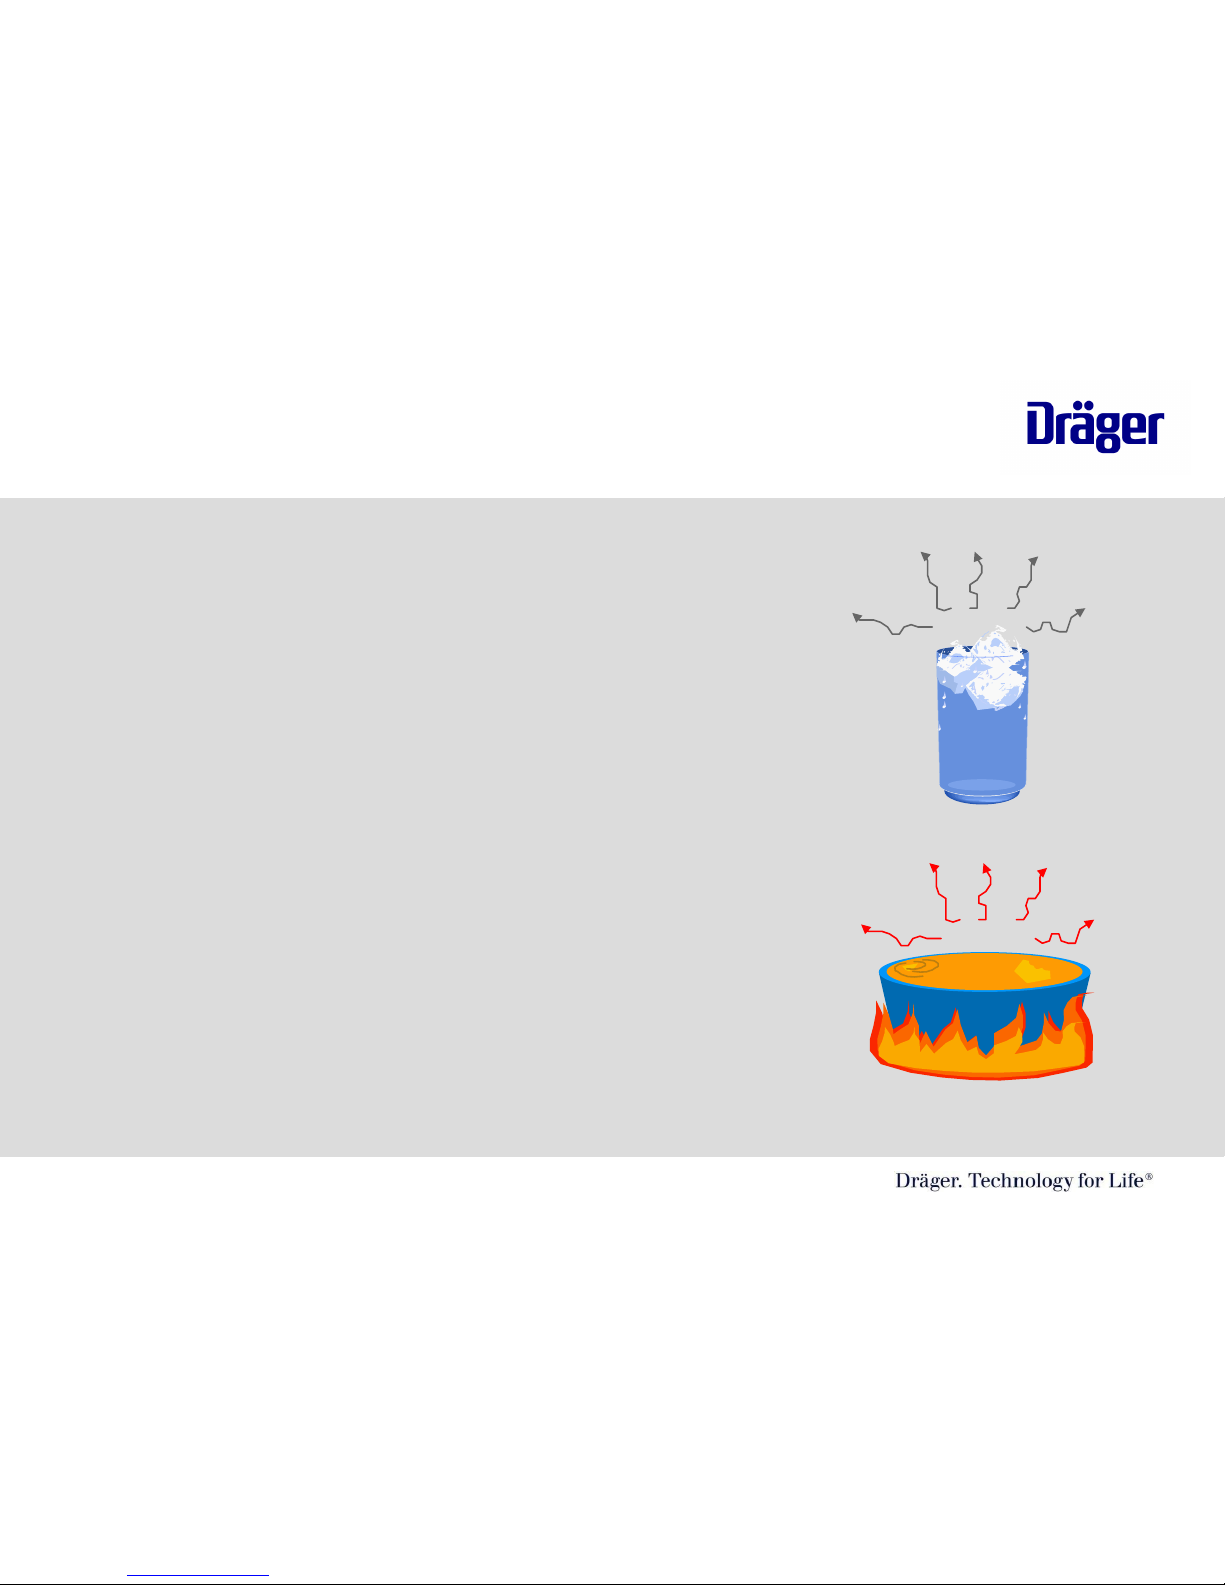
What is Infrared Radiation?
Infrared Radiation is a portion of the
Electromagnetic Spectrum
It is a form of energy which we perceive as
heat
All bodies above the absolute zero ( -273° C)
of temperature absorb and radiate infrared
radiation
Infrared Radiation
TIC Orientation/Greg Sesny/ 5/25/20084 | 37
Page 5
© 17
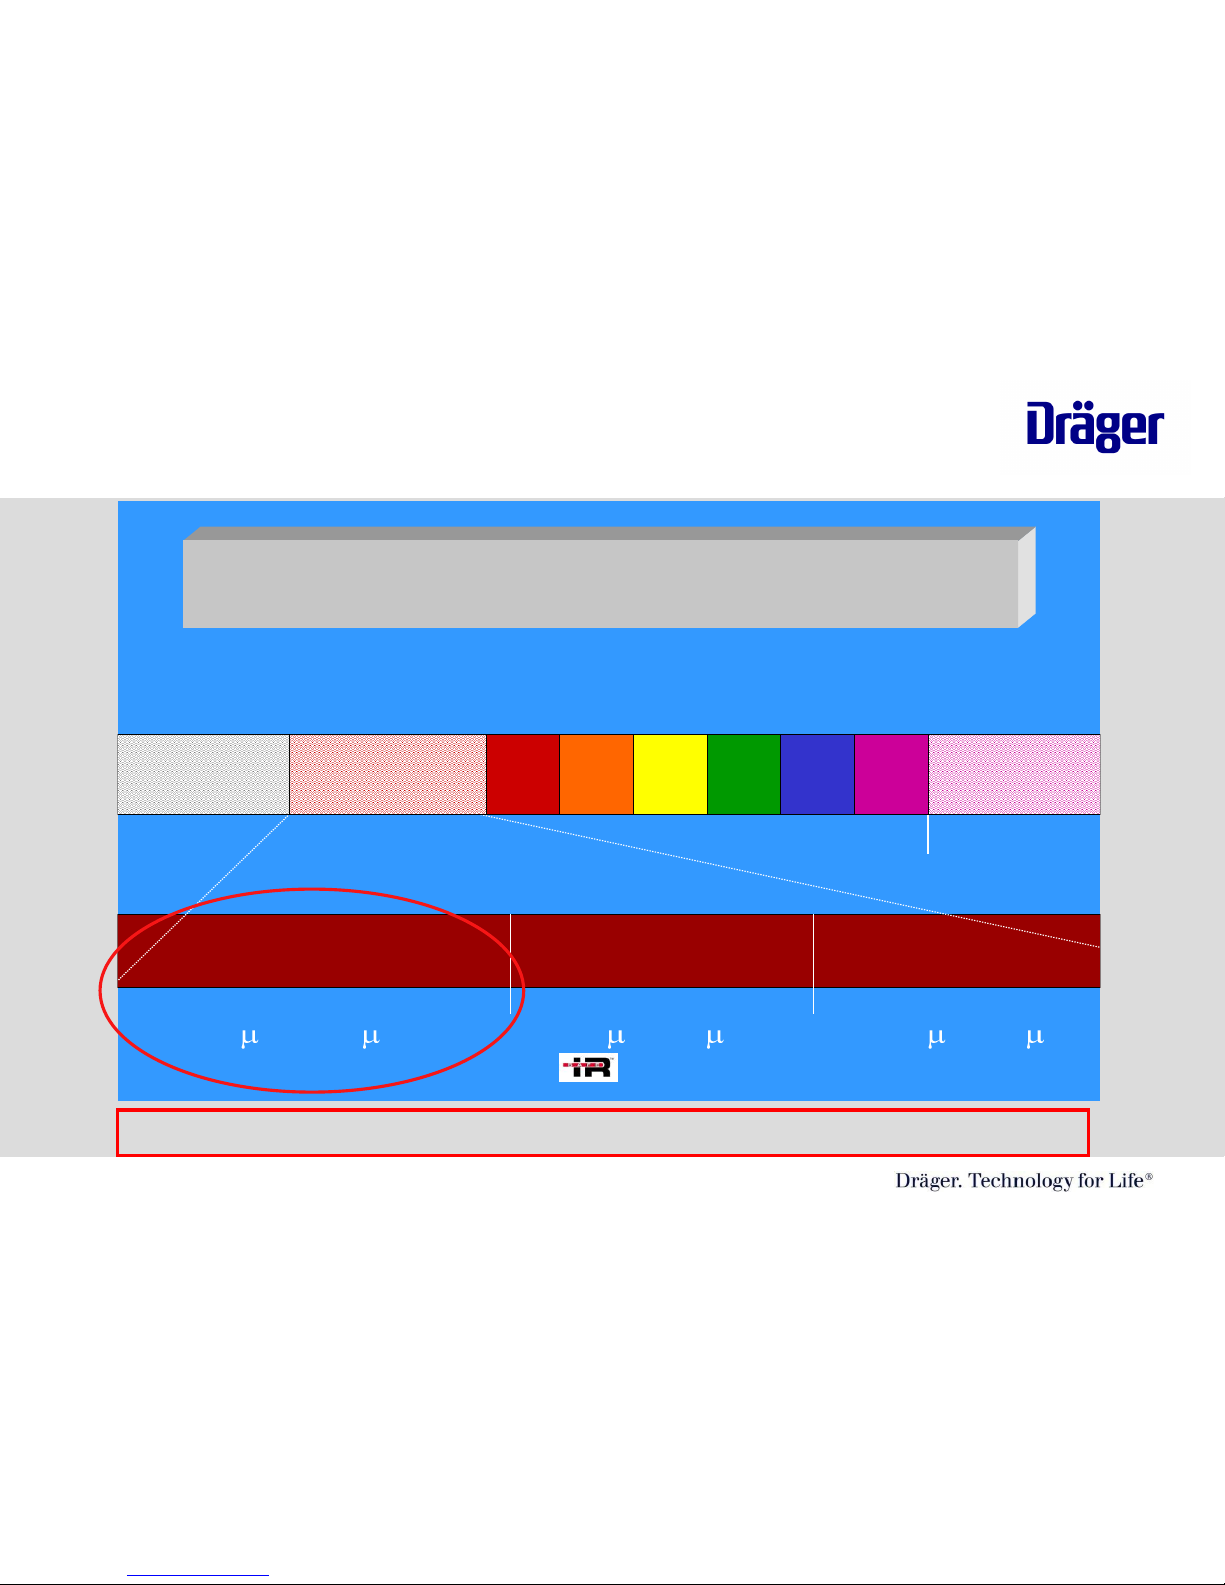
Infrared Band Widths
Infrared Band Widths
The electromagnetic spectrum
The electromagnetic spectrum
ultraviolet
visible light
infrared
micro-
wave
near infrared
.9 to 2
mid infrared
2 to 7
long wave infrared
7 to 14
Long Wave IR 7-14 microns (where thermal imagers operate)
Thermal Imaging Technology
TIC Orientation/Greg Sesny/ 5/25/20085 | 37
Page 6
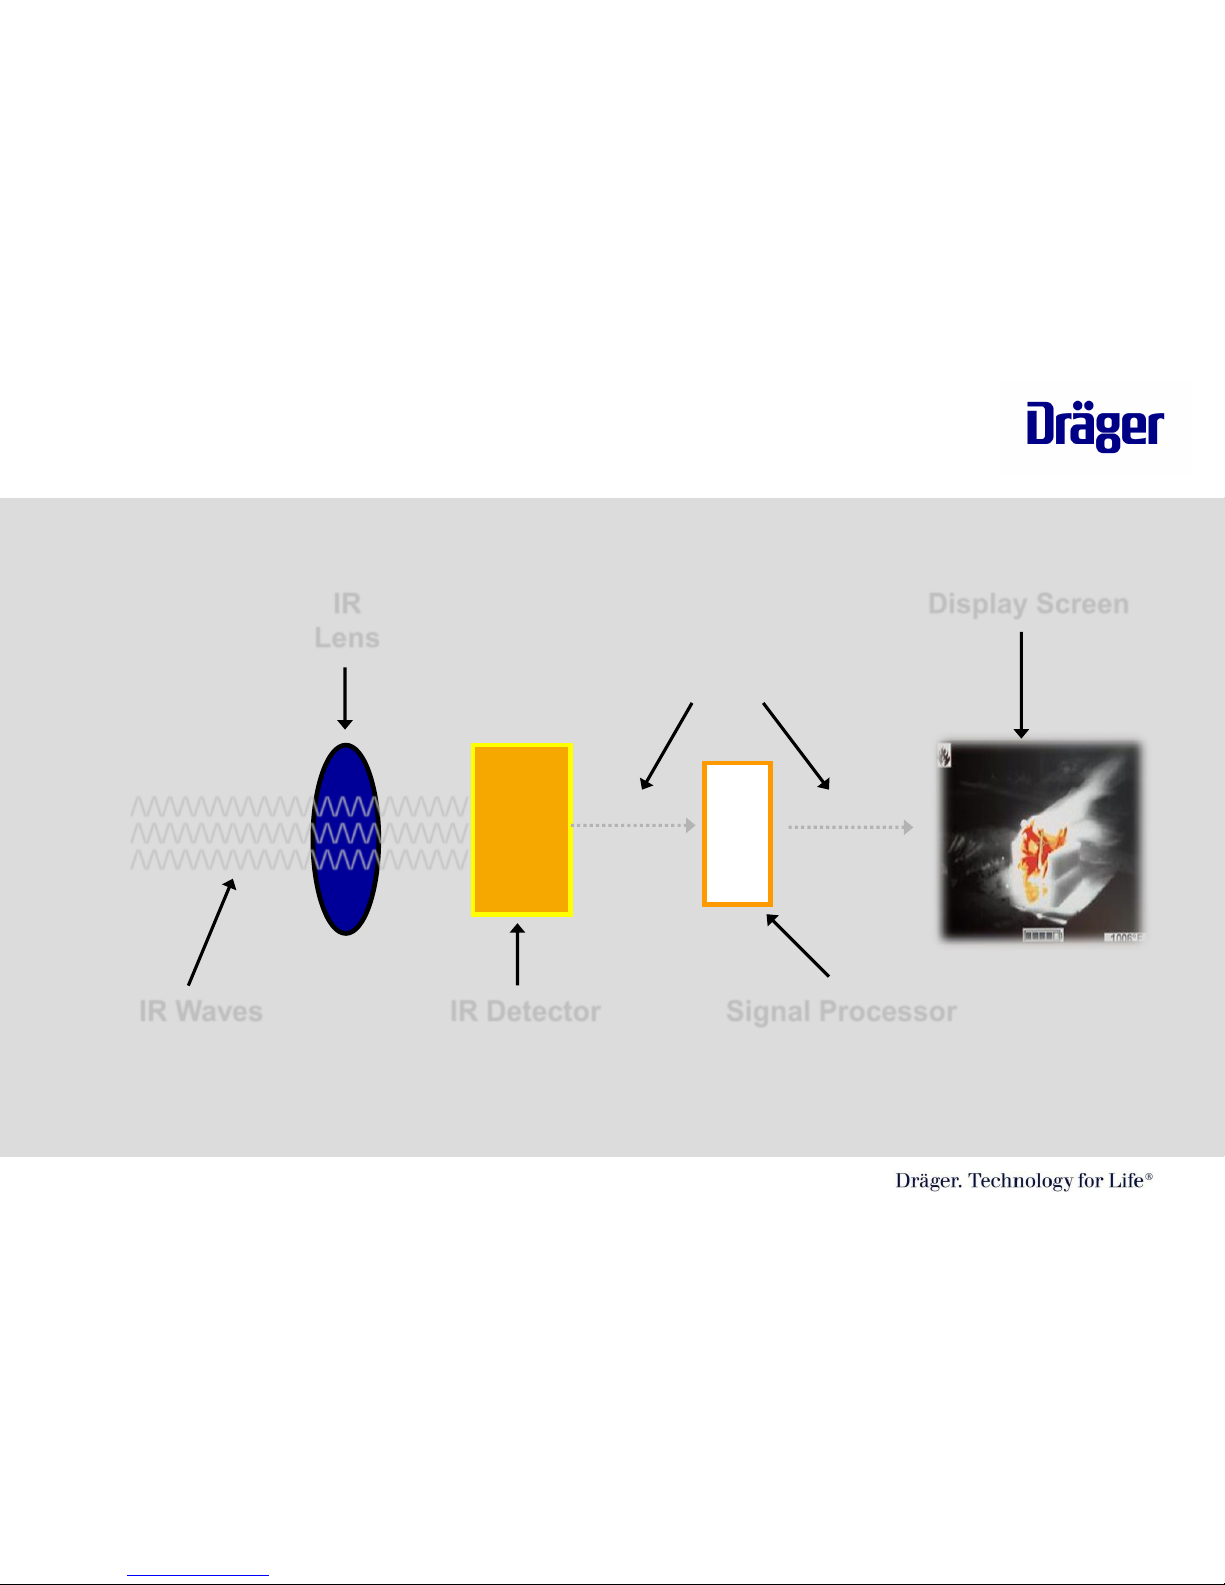
How does Thermal Imaging works?
/\/\/\/\/\/\/\/\/\/\/\/\/\/\/\/\/\/\/\/\/\/
/\/\/\/\/\/\/\/\/\/\/\/\/\/\/\/\/\/\/\/\/\/
/\/\/\/\/\/\/\/\/\/\/\/\/\/\/\/\/\/\/\/\/\/
IR Waves IR Detector Signal Processor
Electronic Signal
Display ScreenIR
Lens
Thermal Imaging Technology
TIC Orientation/Greg Sesny/ 5/25/20086 | 37
Page 7

Thermal Imaging Technology
Since thermal imagers sense infrared energy which varies with the temperature of
objects in a scene, the image generated provides a thermal signature of the
scene. This image can be displayed on a standard video monitor.
Infrared energy from objects in a scene is focused by optics onto an infrared
detector. The infrared information is then passed to sensor electronics for image
processing. The signal processing circuitry translates the infrared detector data
into an image that can be viewed on a standard video monitor.
All that means is that IR to a thermal camera is like light to your eyes.
TIC Orientation/Greg Sesny/ 5/25/20087 | 37
Page 8

Table of Contents
1. Introduction the Infrared Technology
2. Applications
3. Getting to know your Camera
4. Operation of the camera
5. Care and cleaning
6. Battery Procedure
7. Crawling handles and Accessories
TIC Orientation/Greg Sesny/ 5/25/20088 | 37
Page 9
Thermal Imaging Applications
• Search and Rescue
• Initial Size-up and Overhaul
• Fire Scene Assessment
• Locating the Source of the Fire
• Identifying Hot Spots
• Identifying Potential Flashover Situations
• Locating Entry, Exit and Ventilation points
• Handling Hazardous Material
• Vehicle Accidents
• Wild Land Fires
• Law Enforcement Procedures
• Training
TIC Orientation CD/ Greg Sesny 5/25/089 | 37
Page 10

Table of Contents
1. Introduction the Infrared Technology
2. Applications
3. Getting to know your Camera
4. Operation of the camera
5. Care and cleaning
6. Battery Procedure
7. Crawling handles and Accessories
TIC Orientation/Greg Sesny/ 5/25/200810 | 37
Page 11
Getting to Know your Camera
Scope of Delivery
• The Dräger UCF 1600/3200 basic device comes with the following components:
– UCF 1600/3200 Thermal Imaging Camera
– Rechargeable Camera Battery
– Hard Shell Pelican Carrying Case
– Instructions for Use Manual
– AC Battery Charger
– AC Charging Cords
– AC Charging Adapter
TIC Orientation CD/ Greg Sesny / 2/25/0811 | 37
Page 12
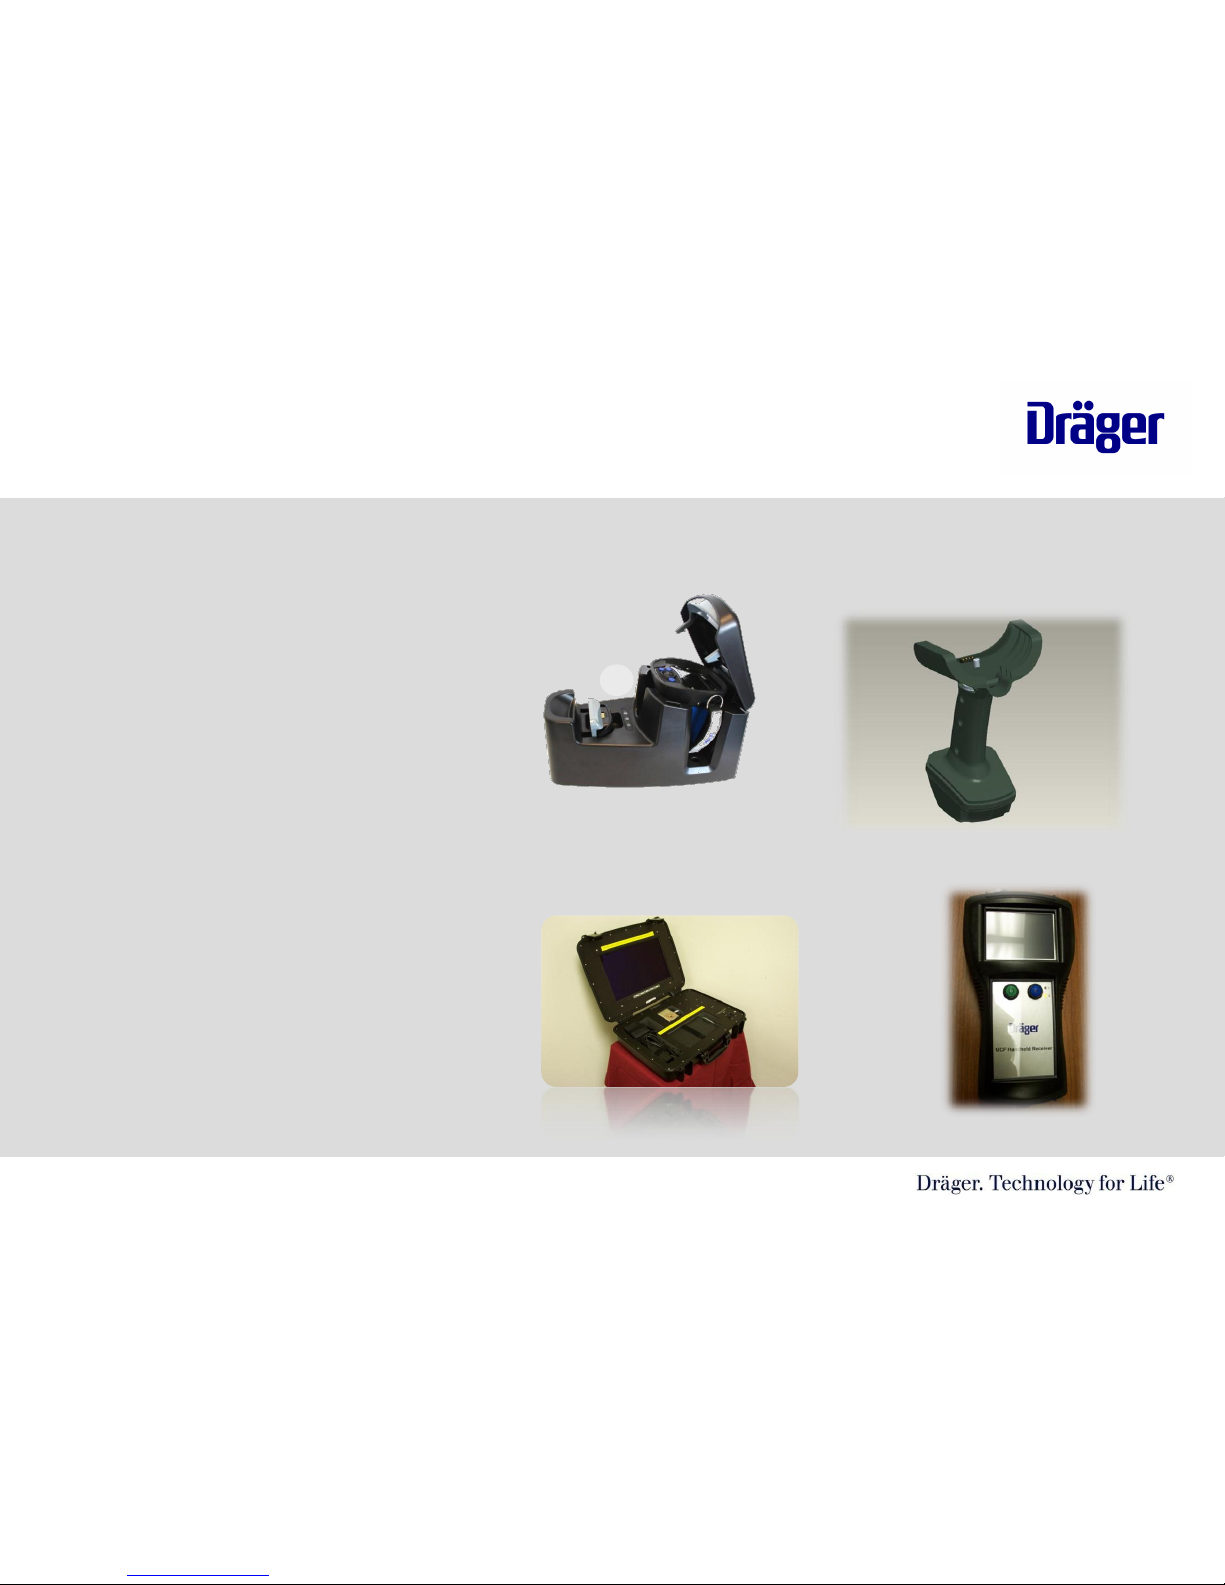
Getting to Know your Camera
Additional Options
• The Dräger UCF 1600/3200 has available additional accessories that could
include the following:
– Truck Charger
– ThermalScan™
– Crawling Handle
– Transmit Handle
– Handheld Receiver
– Command Center Receiver
– Video/Picture Capture Handle
– Retractable Lanyard
TIC Orientation CD/ Greg Sesny / 2/25/0812 | 37
Page 13
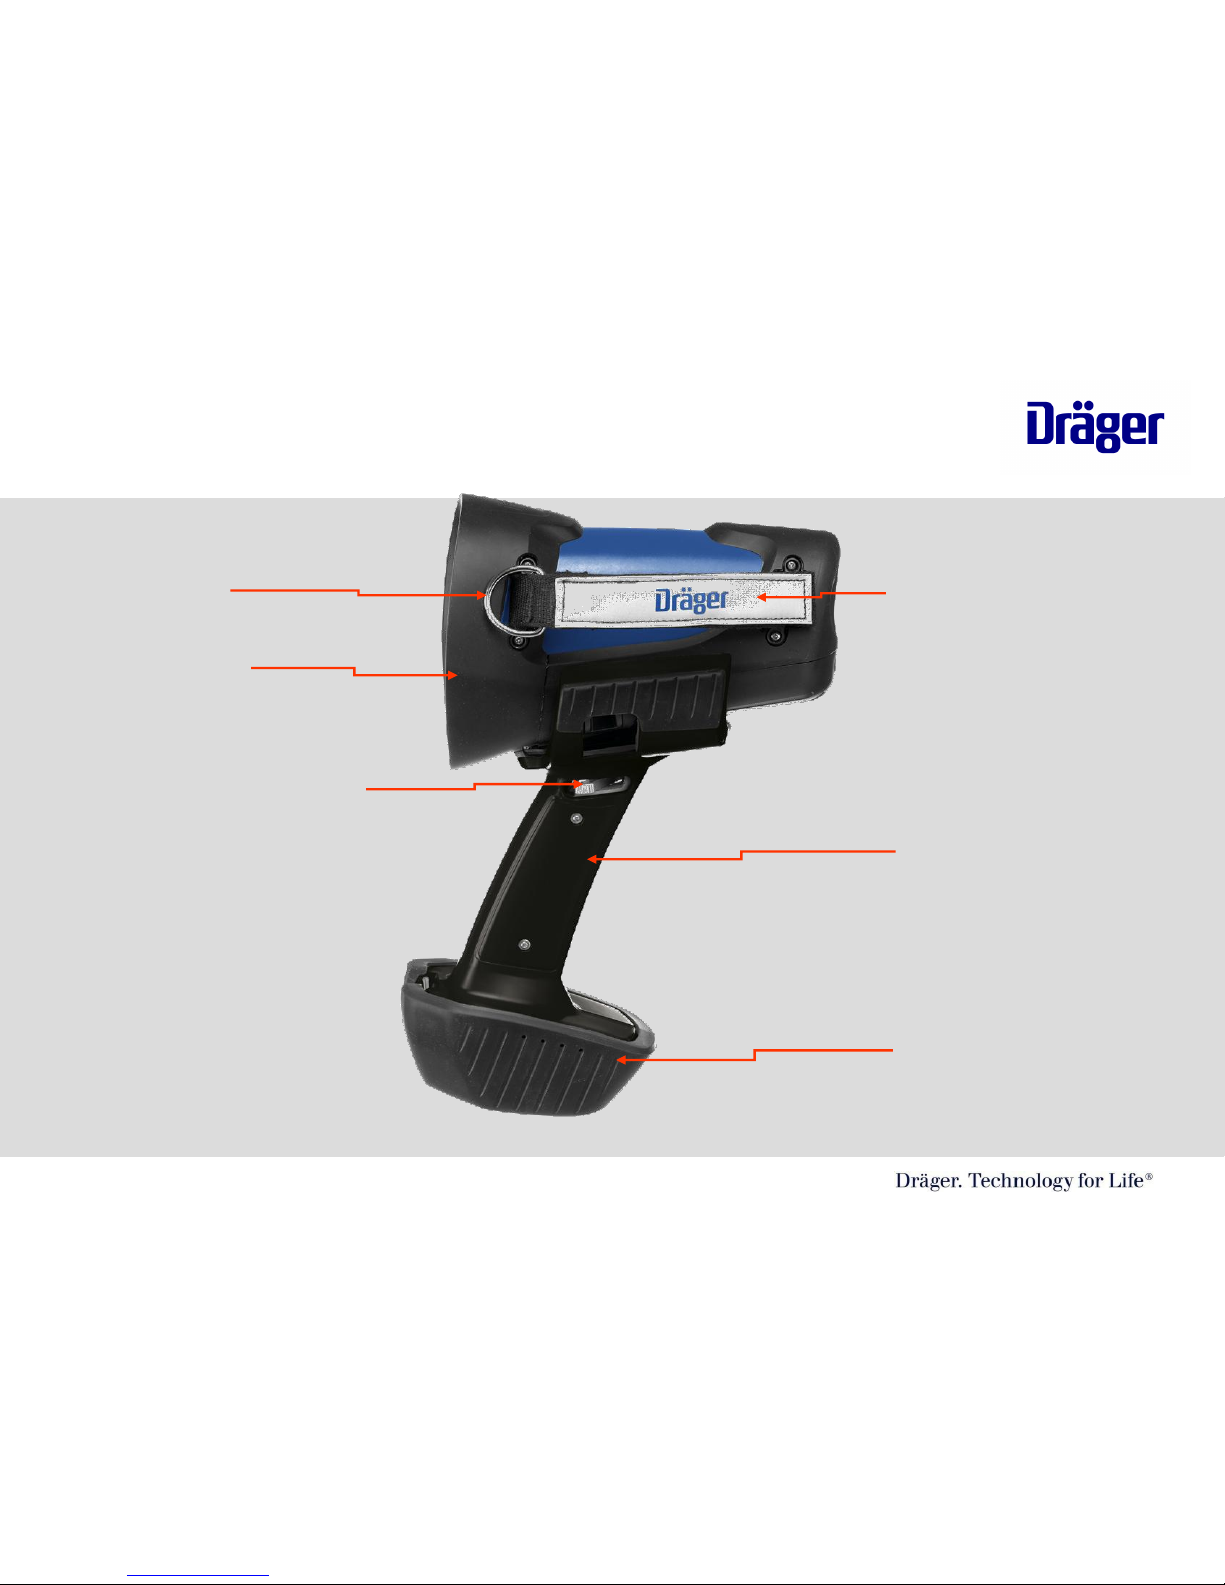
Sun Visor
Silicone rubber
D-ring (L&R)
Locking screw for handle
Handle (3 types)
Handle Base
Silicone rubber
Hand straps
Getting to Know your Camera
Different Parts
TIC Orientation/Greg Sesny/ 5/25/200813 | 37
Page 14
ThermalScan buttons
On / OFF/ Stand-by
button
Multi-function button
• On / Off button
• Channel selection
Poly carbonate lens
Polished finish
Anti-scratch coating
Mode Button
• Color Palettes selection
• 2 x zoom
Getting to Know your Camera
Different Parts
TIC Orientation/Greg Sesny/ 5/25/200814 | 37
Page 15

Front Nose Protection
(Silicone Rubber)
Battery Housing
Front lens
Charging contacts
Ultem (Camera Body)
High impact strength
Excellent heat and
chemical resistance
Getting to Know your Camera
Different Parts
TIC Orientation/Greg Sesny/ 5/25/200815 | 37
Page 16

Handle Support
Battery Latch
Battery Pac
TIC Orientation/Greg Sesny/ 5/25/2008
16 | 37
Page 17

Table of Contents
1. Introduction the Infrared Technology
2. Applications
3. Getting to know your Camera
4. Operation of the camera
5. Care and cleaning
6. Battery Procedure
7. Crawling handles and Accessories
TIC Orientation/Greg Sesny/ 5/25/200817 | 37
Page 18

TIC Orientation/Greg Sesny/2/25/200818 | 37
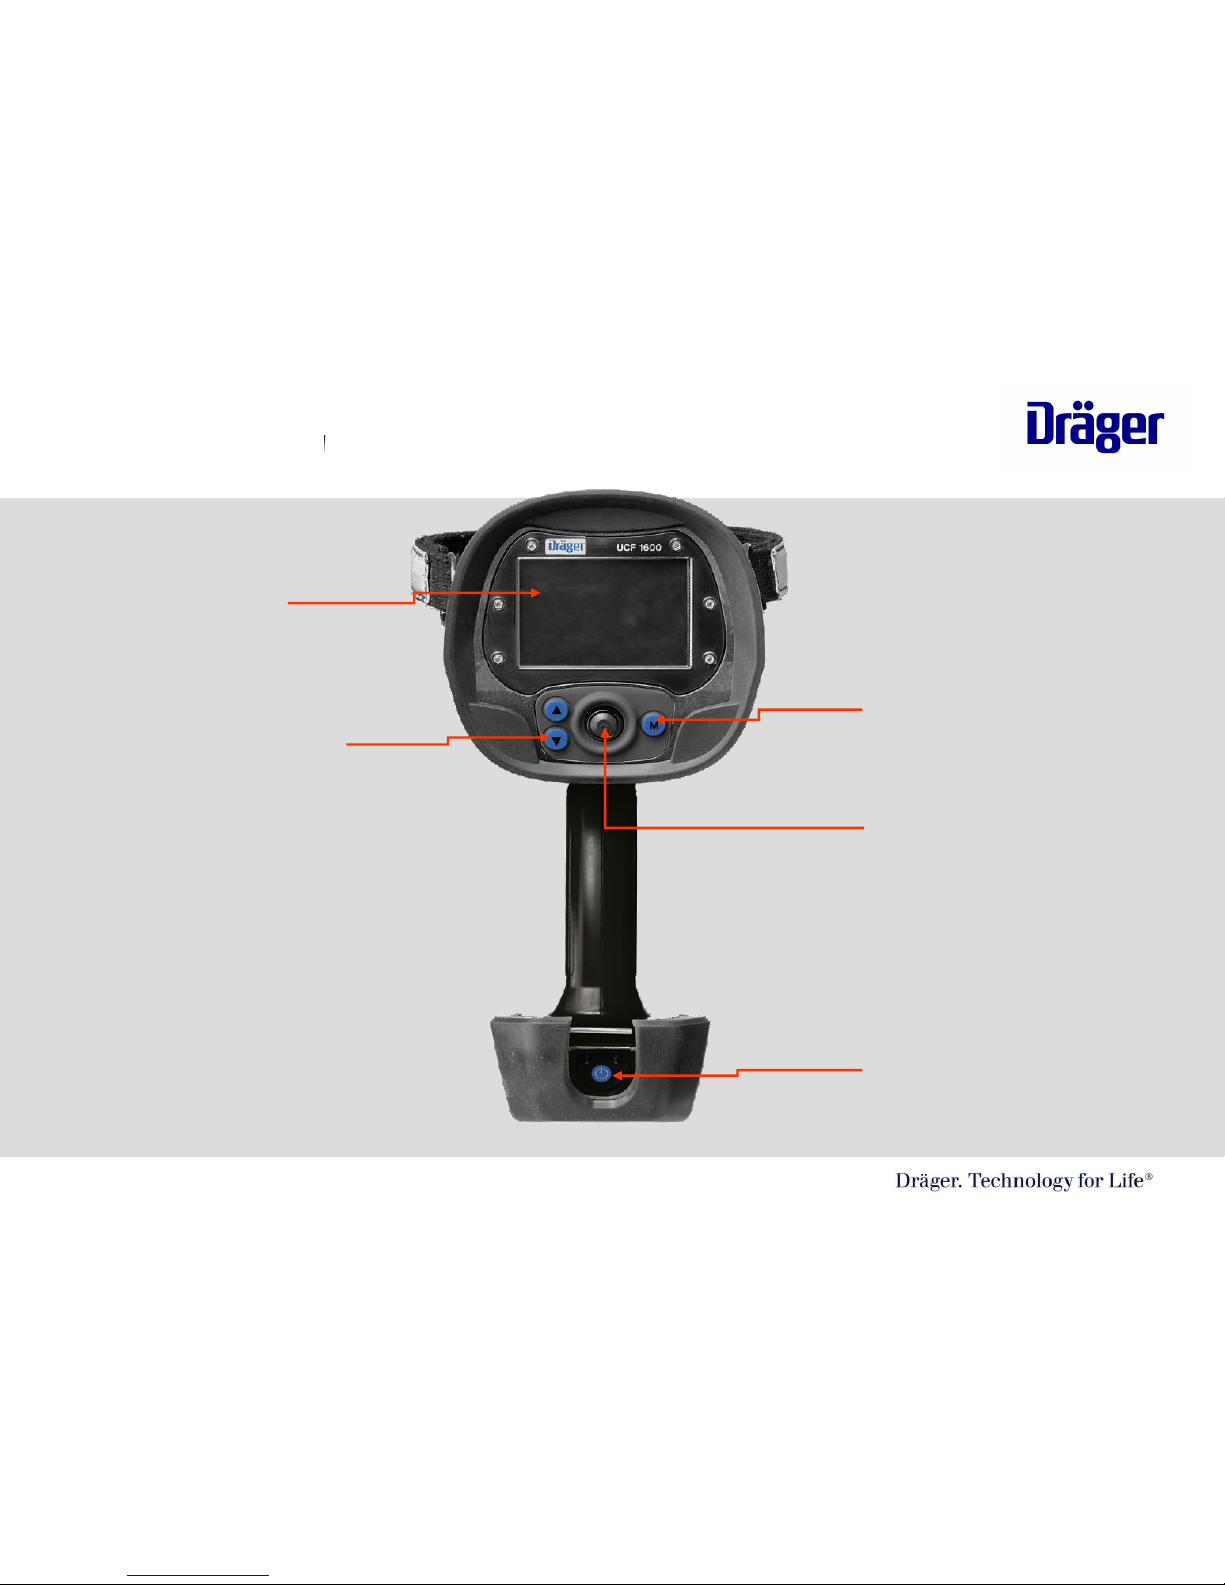
Dräger UCF Thermal Camera
On/Off and Stand-by Button
The UCF 1600 and the UCF 3200
thermal cameras On/Off button is
the black or green button in the
center of the camera.
• To activate the camera press the button and a
solid green LED light will appear along with the
Dräger logo. The thermal image will appear in 8
to 10 seconds.
•To turn Off the camera, press and hold the
On/Off button for 5 seconds or until the camera
LCD screen turns off and green LED light isn’t on.
Page 19

TIC Orientation/Greg Sesny5/25/2008
19 | 37
Dräger UCF Thermal Camera
On/Off and Stand-by Button
On/Off and Stand-by Button
The UCF 1600 and the UCF 3200 thermal
cameras On/Off button is the black or green
button in the center of the camera.
• To activate the camera press the button and a
solid green LED light will appear along with the
Dräger logo. The thermal image will appear in 8
to 10 seconds.
• To put the camera in stand-by mode, press and
hold the On/Off button for 1 ½ to 2 seconds.
The on screen indicator will appear and release
the button. The On/Off button’s green LED light
will blink, that will indicate that the camera is
now in “Stand-by” mode. Press the on/off
button to take the camera out of “stand-by”
mode and a thermal image will instantly appear.
*Note: The camera will shut off in “stand-by”
mode if no battery life remains.
Hold to turn off
Release for Standby
Page 20

TTIC Orientation/Greg Sesny/5/25/0820 | 37
Mode Button
Mode Button
The UCF 1600 and the UCF 3200 thermal
cameras mode button is located on the right
side of the camera control panel. The button
that has an “M” on it.
• The mode button performs two operations: 2X
Zoom and changes camera to different color
palettes
•Press and hold the mode button once quickly
will put the camera in to 2X zoom. A zoom icon
will appear in the bottom left side of the screen
to let the user know that they are in 2X zoom.
• To put the camera back into normal mode,
press the “M” button once and will return the
screen to normal mode.
Page 21

TTIC Orientation/Greg Sesny/5/25/0821 | 37
Mode Button Functions
Mode Button
The UCF 1600 and the UCF 3200 thermal
cameras mode button is located on the right
side of the camera control panel. The button
that has an “M” on it.
• To activate the different Color Palette modes,
press and hold the “M” button for 1 ½ to 2
seconds
•An icon will appear in the lower left side of the
screen to tell the user what Color Palette they
are currently in.
*Note: If the camera goes into an area of high
heat to where the camera goes into EI mode, the
camera will automatically default to CP01.
Page 22

Page 23

Operation of the Camera
UCF 1600 / 3200 Color Palettes
TTIC Orientation/Greg Sesny/5/25/0823 | 37
Autumn Color Palette
•Great for providing more detail
•Can be found in CP 02 (Color Palette 2)
•Uses include: Outdoor use when overcast
skies. Hot Spot and Overhaul
Page 24

Operation of the Camera
UCF 1600 / 3200 Color Palettes
TTIC Orientation/Greg Sesny/5/25/0824 | 37
Black/Yellow Color Palette
•Great for providing more detail to your
thermal camera
•Can be found in CP 03 (Color Palette 3)
•Uses include: Checking ballasts, HAZMAT
applications, industrial applications, and many
more.
Page 25

Operation of the Camera
UCF 1600 / 3200 Color Palettes
TTIC Orientation/Greg Sesny/5/25/0825 | 37
Yellow Color Palette
•Great for providing more detail to your
thermal camera
•Can be found in CP 04(Color Palette 4)
•Uses include: gives greater detail for
electrical applications, overhaul and many
more.
Page 26

Operation of the Camera
UCF 1600 / 3200 Color Palettes
TTIC Orientation/Greg Sesny/5/25/0826 | 37
Grayscale Color Palette
•Can be found in CP 05(Color Palette 5)
•Uses include: in any environment that is 32
degrees Fahrenheit or colder. Takes away the
blue color and keeps it in a grayscale.
•Example: Top picture is CP 05 and bottom
picture is CP 01.
Page 27

Operation of the Camera
UCF 1600 / 3200 Color Palettes
TTIC Orientation/Greg Sesny/5/25/0827 | 37
Reverse Polarity/ White Hot Black Cold
Color Palette 6
•Can be found in CP 06(Color Palette 6)
•Uses include: Outdoor use, Vehicle accidents,
Search and Rescue operations, Law
Enforcement Applications
•Can you spot the person in the woods from
500 feet away in the picture below?
Page 28

TIC Orientation/Greg Sesny5/25/2008
28 | 37
Dräger UCF Thermal Camera
Normal Mode/EI Mode
Normal Mode
The UCF 1600 and the UCF 3200 thermal
cameras have two modes that they will
operate in.
•In normal mode, the user can select
between several color palettes and use the
ThermalScan™ feature.
•Dräger UCF cameras come standard with 4
colors.
•Blue color is when the temperature is 32° or
below.
•Grayscale color is when the temperature is
32°- 230°
•Yellow Color is when the temperature is 230°
•Orange Color is when the temperature is 284°
•Red Color is when the temperature is 325°+
Page 29

TIC Orientation/Greg Sesny5/25/2008
29 | 37
Dräger UCF Thermal Camera
Normal Mode/EI Mode
EI Mode
Electronic iris or Firefighting Mode occurs
when the temperature of more than
approximately 10% of the objects in the
scene is higher than 266°. The camera will do
this automatically.
•The camera will also default you out of any
color palette or ThermalScan mode and put
you into firefighting mode in CP 01.
•Yellow Color is when the temperature is 572°
•Orange Color is when the temperature is 800°
•Red Color is when the temperature is 1020°
Page 30

TIC Orientation/Greg Sesny5/25/2008
30 | 37
Dräger UCF Thermal Camera
Normal Mode/EI Mode
EI Mode
•The camera will automatically go out of EI
mode and into normal mode once 10% of the
pixels go below 266°
•The intent for EI mode is to extend your
cameras dynamic range.
Page 31

TIC Orientation/Greg Sesny/2/25/200831 | 37
Dräger UCF Thermal Camera
Optional Additional Features
ThermalScan™ Buttons
The UCF 1600 and the UCF 3200 thermal
cameras offer the optional Thermal Scan
(TS) technology for highlighting areas above
a set ambient temperature in a yellow color.
Ideal for use of smell of smoke calls and
overhaul.
• To activate the ThermalScan™ press either
the UP or DOWN arrows for approximately 1
second to raise or lower your desired
ambient temperature range. Ranges can go
from 244 degrees Fahrenheit to -33 degrees
Fahrenheit. Holding down the arrow button
will change the desired temperature faster.
• To deactivate the ThermalScan™ press
and hold both arrows for approximately 2
seconds. The ThermalScan threshold will
disappear from the screen and return to
normal mode.
*Note: if you are in ThermalScan mode and in extreme temperatures, the camera
will automatically go into EI Mode and deactivate the ThermalScan.
Page 32

32 | 37
Table of Contents
1. Introduction the Infrared Technology
2. Applications
3. Getting to know your Camera
4. Operation of the camera
5. Care and cleaning
6. Battery Procedure
7. Crawling handles and Accessories
TIC Orientation/Greg Sesny/ 5/25/2008
Page 33

Cleaning and Care for Camera
UCF 1600 / 3200 Color
TTIC Orientation/Greg Sesny/5/25/0833 | 37
Cleaning the camera after use.
•Once back in the station be sure to check the
camera for any defects or damage to the camera.
•DO NOT use solvents or paint thinners to clean
the camera, The housing could degrade over
time
•Wipe the TIC with a damp, lint free cloth. If
necessary, clean with warm soapy water.
•Dry with a soft, lint free cloth. Allow the TIC to
dry before putting it back into the carrying case
•NEVER REMOVE OR UNSCREW ANY PARTS ON
THE TIC. COULD CAUSE SEVERE DAMAGE TO
YOUR TIC AND VOID YOUR WARRANTY
Page 34

TTIC Orientation/Greg Sesny/2/25/0834 | 37
Daily Inspection
*At the beginning of every
shift be sure to check:
1. Battery Life
2. Camera picture quality
3. ThermalScan feature
4. Go through the different color
palettes
5. Make sure the camera accessories a
clean and working properly.
6. Check front lens to make
sure there is no debris on
it
7. Check spare battery if
applicable
8. 8. Make sure camera is off
and return it to its location.
Page 35

TTIC Orientation/Greg Sesny/2/25/0835 | 37
Service Return Authorization Policy
*Something wrong with your
camera?
1. Locate the serial number of your
camera which is under the battery
on the camera (i.e. ERZD-0000)
2. Contact Draeger Safety customer
service at 1-800-858-1737
3. They will ask you what is wrong
with your camera, the serial
number and give you an Service
Return Authorization (SRA)
number.
4. Ship the camera back to Draeger
Safety, Inc. 101 Technology Drive,
Pittsburgh, PA 15275 and include
SRA# on shipping label
Page 36

36 | 37
Table of Contents
1. Introduction the Infrared Technology
2. Applications
3. Getting to know your Camera
4. Operation of the camera
5. Care and cleaning
6. Battery Procedure
7. Crawling handles and Accessories
TIC Orientation/Greg Sesny/ 5/25/200836 | 37
Page 37

Simply slide the battery into position in the direction of the arrow
TIC Orientation/Greg Sesny/ 5/25/200837 | 37
Page 38

A loud “click” will indicate that the battery is correctly locked into positioned. The
battery cannot be accidentally dislodged
TIC Orientation/Greg Sesny/ 5/25/200838 | 37
Page 39

To release the battery place your finger under the locking latch as shown and slightly
lift the latch up, slide the batter backwards to disengaged the battery
TIC Orientation/Greg Sesny/ 5/25/200839 | 37
Page 40

TIC Orientation/Greg Sesny/ 5/25/2008
40 | 37
Desk Charger
Charges single battery
pack
Yellow light tells you the
charger has power
Red light
constant on tell
you the battery is
charging. Red
light blinking
means there is a
problem
Green light tells
you that the
battery is fully
charged.
Page 41

Truck Charger
Protect the entire camera
5-G rollover capacity
Charges both camera battery
and spare battery
Separate battery charging
indicators
Extra battery charging slot
Positive locking system
Shown without handle
Page 42

Table of Contents
1. Introduction the Infrared Technology
2. Applications
3. Getting to know your Camera
4. Operation of the camera
5. Care and cleaning
6. Battery Procedure
7. Crawling handles and Accessories
42 | 37
TIC Orientation/Greg Sesny/ 5/25/2008
Page 43

Video & Stills Picture Capture:
System will provide:-
Over 300 still images
or 30 mins of video
3 Different handles available
Basic handle
Video/stills handle
RF handle
Crawling Handles
43 | 37
TIC Orientation/Greg Sesny/ 5/25/2008
Page 44

Thank you for
your attention.
44 | 37
TIC Orientation/Greg Sesny/ 5/25/2008
 Loading...