

Dräger Seattle PAP plus Quick Start Manual
QUICK START GUIDE –
3
3
330
0
1
1
0
3
3
,
2
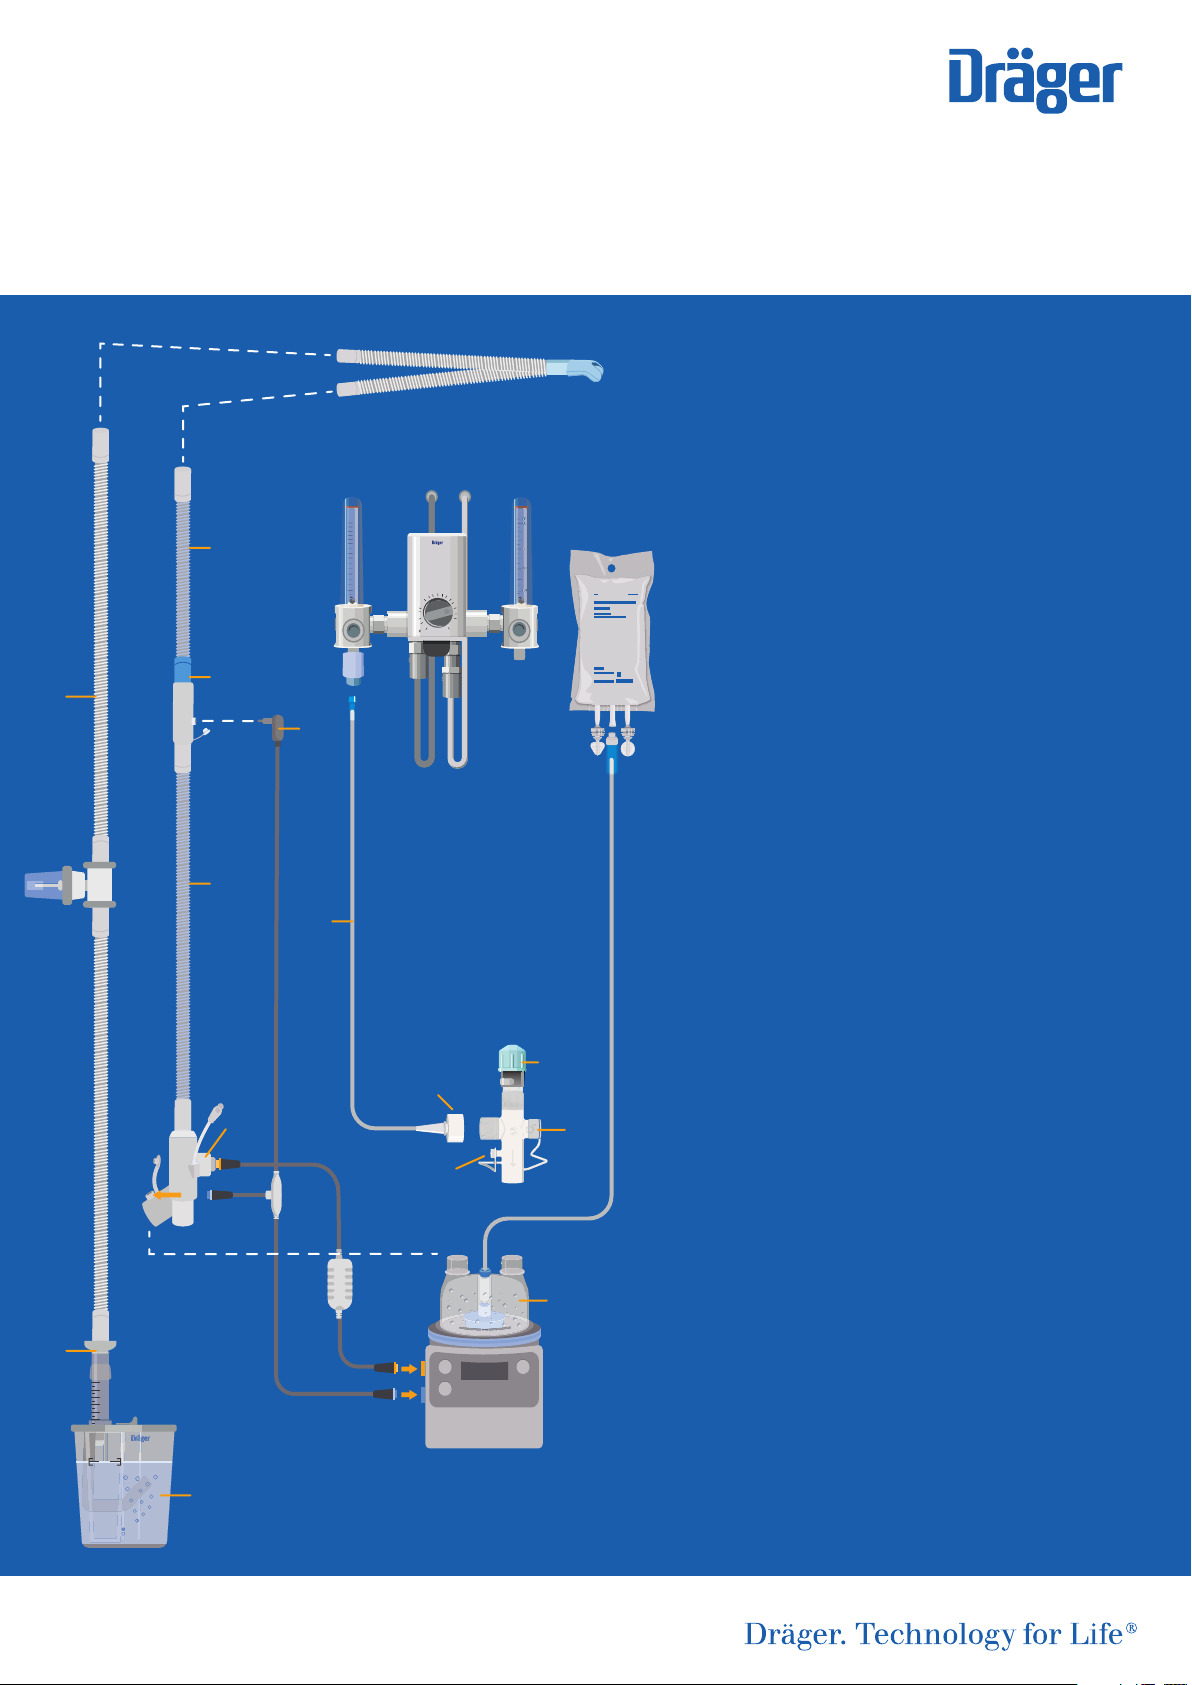
Seattle PAP plus – Bubble CPAP System
P
A
B
B
G
D
Q
A Hose extention
B Heated inspiratory hose (blue)
C Connector for inspiratory hose
15
14
13
12
11
10
9
8
7
6
5
4
3
2
1
0
60
70
50
80
40
90
30
100%
O
21
32
30
20
10
3,2
J
D Patient-side temperature sensor
E Humidifi er-side temperature sensor
F Connector for inspiratory hose
heater
G O
H Connector for attaching the O
hose
2
2
hose to the blender
I Connection port for a pressure
measuring line
J Water bag port
O
> 80 cm (31,5 in)
K Connector with premounted
pressure relief valve
K
H
F
(Opening pressure at 8 L/min
17+-3 mbar)
L
C
I
E
M
10
9
8
7
6
5
Correct Water Level
N
L Connector for an oxygen
measurement device
M Humidifi er chamber
N Bubble CPAP chamber
O Swiveling fi lling funnel and
connector for expiratory hose
P Expiratory hose with water trap
Q BabyFlow plus
Please note: This Quick Reference Guide is not a replacement or substitute for the
instructions for use. Any use of the medical device requires full understanding and
strict observation of the instruction for use
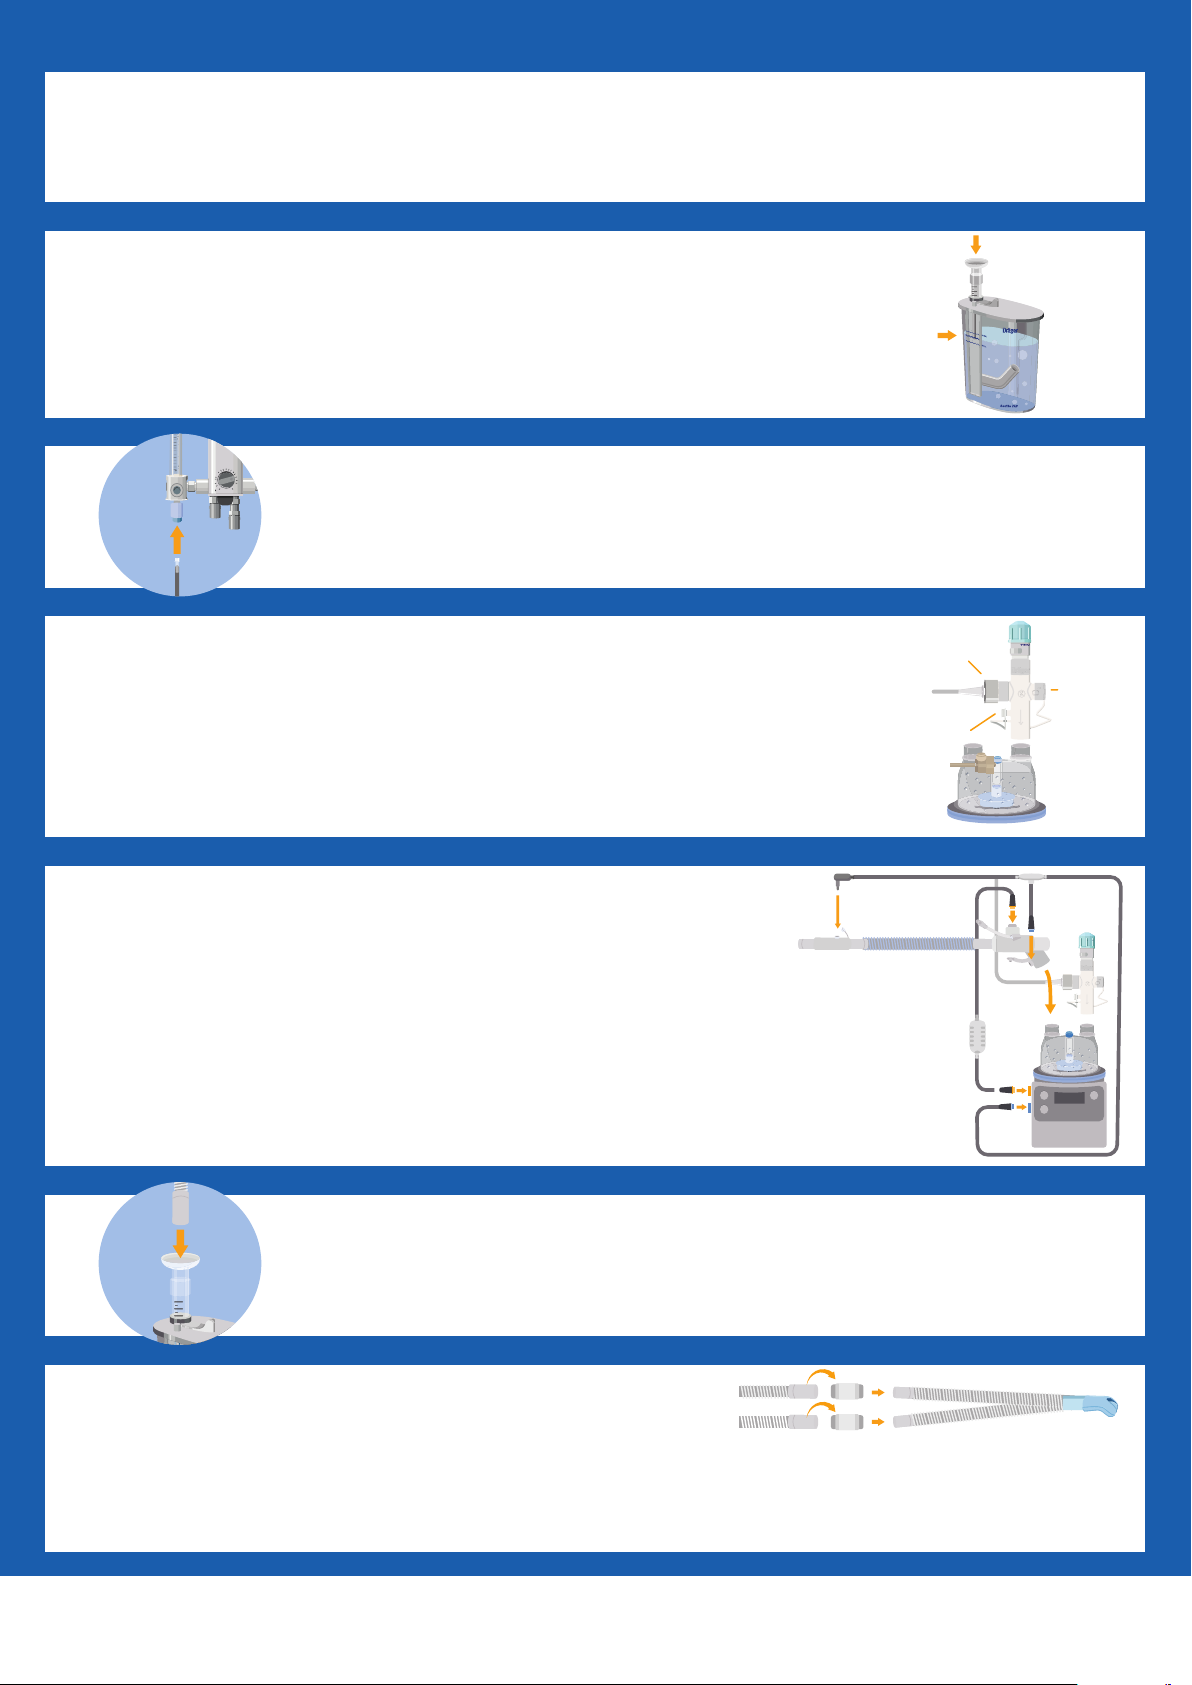
Insert the humidifi er chamber in the Fisher & Paykel humidifi er MR850 and remove the caps.
O
21
30
40
50
60
70
80
90
100%
13
12
11
10
9
8
7
6
5
3
4
1
2
0
112
11111
0
9
8
6
5
3
4
2
0
17 cm H
17 cm H
2
2
O
O
Puncture the water bag with distilled water and open the vents of the water supply hose.
Ensure that the humidifi er chamber fi lls with water.
Use the funnel to fi ll the water reservoir with max. 0.9 l of distilled water.
To adjust the water level, use a syringe to add or remove distilled water until the
correct water level line is reached.
10
9
8
Connect the O
Connect the adapter of the O
hose (H) to the lateral opening of the connector
2
hose to the blender.
2
with the pressure relief valve (fi xed limit of 17 cm H2O).
The lateral opening (L) of the connector can be used for oxygen measurement
if necessary. The opening (I) can be used for external pressure measurement.
Connect the heated inspiratory hose (B) to the humidifi er chamber.
D
Connect the two temperature sensors (D, E) to the inspiratory hose (B).
Set the fl ow and the oxygen concentration to the required values.
Permitted fl ow limits: 4 to 12 l/min. Recommended 8 l/min.
H
L
I
E
B
Connect the expiratory hose of the breathing circuit to the fi lling funnel.
Set the CPAP value at the bubble CPAP chamber and lock it in place
10
9
8
with the safety tube lock.
Connect BabyFlow plus directly to the breathing hoses.
Performing a leakage test by closing the BabyFlow adapter for prongs or neo masks using the thumb.
Set the CPAP value to 10 cm/H
Start CPAP therapy.
O and the fl ow to 1 l/min. Bubbles must rise in the bubble CPAP device.
2
PDF-9508 | 19.07-2 | AW | LE | Subject to modifi cations | © 2019 Drägerwerk AG & Co. KGaA
 Loading...