

Drolet NORDIC, SAWMAN Owner's Manual
CONVENTIONAL WOOD STOVES
OWNER’S MANUAL
NORDIC AND SAWMAN
STOVE BUILDER INTERNATIONAL INC.
250, de Copenhague, Saint-Augustin-de-Desmaures (Quebec), Canada G3A 2H3
Tel: (418) 878-3040
Fax: (418) 878-3001
www.drol et.ca
This manual is available for free download on the manufacturer’s web site. It is a copyrighted
document. Re-sale is strictly prohibited. The manufacturer may update this manual from time
to time and cannot be responsible for problems, injuries, or damages arising out of the use
of information contained in any manual obtained from unauthorized sources.
45030A
Printed in Canada 07-03-2012

TABLE OF CONTENTS
INTRODUCTION ..................................................................................................................................... 3
THE DROLET WOOD STOVE MANUAL ........................................................................................... 3
WOOD HEATING .................................................................................................................................. 3
THE CONTROLLED COMBUSTION WOOD STOVE ....................................................................... 3
ASSEMBLING THE STOVE .................................................................................................................. 4
INSTALLING THE FIREBRICKS ........................................................................................................ 5
INSTALLATION OF YOUR DROLET WOOD STOVE ...................................................................... 6
POSITIONING THE STOVE ........................................................................................................... 6
CLEARANCES TO COMBUSTIBLES AND FLOOR PROTECTOR ............................................ 6
CHIMNEY ............................................................................................................................................ 13
STEP BY STEP INSTALLATION OF YOUR CHIMNEY ........................................................... 13
COUPLINGS .................................................................................................................................... 19
DRAFT ................................................................................................................................................. 21
AIR CIRCULATION SYSTEM ........................................................................................................... 21
BAFFLE BRICK INSTALLATION (SAWMAN STOVE ONLY) ...................................................... 22
OPERATING YOUR DROLET WOOD STOVE ................................................................................ 23
FUEL ................................................................................................................................................ 23
IGNITION ........................................................................................................................................ 24
MAINTENANCE OF THE HEATING SYSTEM ................................................................................ 26
MAINTENANCE OF THE STOVE ............................................................................................... 26
MAINTENANCE OF THE CHIMNEY ......................................................................................... 27
PROCEDURES IN CASE OF FIRE ..................................................................................................... 27
DROLET LIMITED LIFETIME WARRANTY ................................................................................... 28
REGISTER YOU WARRANTY ONLINE
To receive full warranty coverage, you will need to show evidence of
the date you purchased your stove. Keep your sales invoice. We
also recommend that you register your warranty online at
http://www.drolet.ca/en/service-support/warranty-registration
Registering your warranty online will help us track rapidly the
2
information we need on your insert.
INTRODUCTION
THE DROLET WOOD STOVE MANUAL
SBI INC., one of the most important wood stove and fireplace manufacturers in North America, congratulates you on
your purchase and wishes to help you get maximum satisfaction from the wood stove you have selected. In the
pages that follow, we will give you advices on wood heating and controlled combustion as well as technical
specifications regarding installation, operation and maintenance of the model you have chosen.
The instructions pertaining to the installation of your wood stove comply with ULC #S627 standards. You must follow
them very carefully in order to eliminate any chance of encountering major problems.
We recommend that our wood burning hearth products be installed and serviced by professionals who are certified
in the United States by NFI (National Fireplace Institute
or in Quebec by APC (Association des Professionnels du Chauffage).
Read this entire manual before you install and use your new stove. If this stove is not
properly installed, a house fire may result. To reduce the risk of fire, follow the installation
instructions. Failure to follow instructions may result in property damage, bodily injury or
even death.
PLEASE CONSULT LOCAL AUTHORITIES, BUILDING DEPARTMENT OR FIRE
MARSHALL ABOUT RESTRICTIONS, INSTALLATION REQUIREMENTS AND
FOR THE NEED TO OBTAIN A PERMIT BEFORE YOU INSTALL YOUR WOOD
STOVE.
ATTENTION :
®
) or in Canada by WETT (Wood Energy Technical Training)
THE INFORMATION GIVEN ON THE CERTIFICATION LABEL AFFIXED TO THE APPLIANCE ALWAYS
OVERRIDES THE INFORMATION PUBLISHED, IN ANY OTHER MEDIA (OWNER’S MANUAL, CATALOGUES,
FLYERS, MAGAZINES AND/OR WEB SITES).
KEEP THIS INSTRUCTION MANUAL FOR FUTURE REFERENCE.
WOOD HEATING
Many consumers choose wood as the main or auxiliary energy source for heating their dwelling or secondary
residence. This source of energy has the advantage of being abundant, relatively cheap and easy to store so that
you are assured of energy autonomy for more of less longer periods.
THE CONTROLLED COMBUSTION WOOD STOVE
The main feature of a controlled combustion wood stove is an air tightness that is the most perfect possible, and
must of course be equipped with the most efficient heat exchanger possible in order to transfer maximum heat to the
ambient air. It is generally doubled with firebricks, and it may have a glass door, with steel or cast iron frame. The
main feature that makes it a controlled combustion wood stove remains its air tightness, which allows the user to
control the quantity of oxygen admitted into the wood stove.
The wood will burn slowly if the wood stove draught keys are adjusted in order to reduce the oxygen supply in the
combustion chamber to minimum; on the other hand, wood will burn quickly if the draught keys are adjusted to admit
a larger quantity of oxygen in the combustion chamber.
3

ASSEMBLING THE STOVE
Note: This section applies to Nordic model only.
1- Mount the 4 legs using 2 screws per leg.
3- Install the heat shield between the front legs,
just above the leg supports.
2- Mount the ash lip with two screws.
4- Bend the heat shield slightly to make it fit
between the back legs.
4
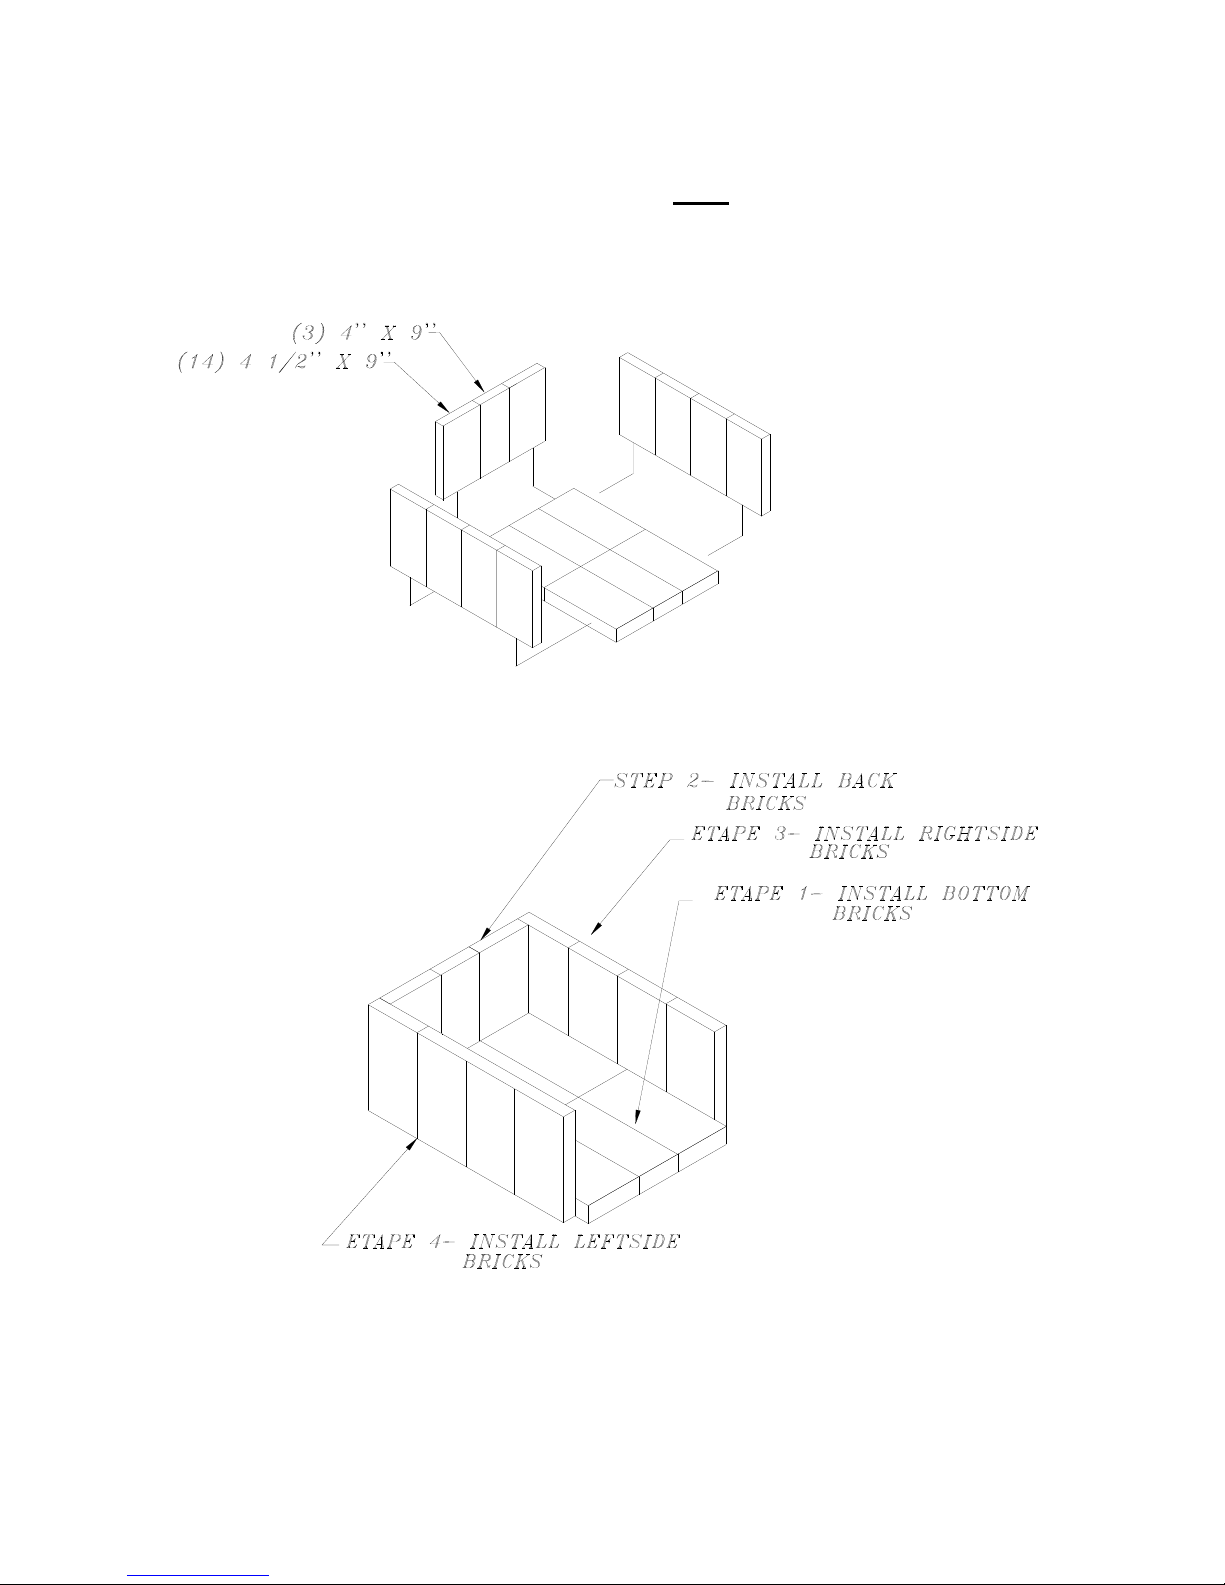
INSTALLING THE FIREBRICKS
Note: This section applies to Nordic model only.
5

INSTALLATION OF YOUR DROLET WOOD STOVE
POSITIONING THE STOVE
It is very important to position the wood stove as close as possible to the chimney, and in an area that will favor the
most efficient heat distribution possible throughout the house. The stove must therefore be installed in the room
where the most time is spent, and in the most spacious room possible. Recall that wood stoves produce radiating
heat, the heat we feel when we are close to a wood stove. A wood stove also functions by convection, which is
through the displacement of hot air accelerated upwards and its replacement with cooler air. If necessary, the hot air
distribution from the stove may be facilitated by a blower or the installation of floor or wall grids. It is strictly
forbidden to install your wood stove in a mobile home.
Important:
A wood stove must never be installed in a hallway or near a staircase, since it may block the way in case of fire or fail
to respect required clearance. The wood stove must not be hooked up to a hot air distribution system since an
excessive accumulation of heat may occur.
CLEARANCES TO COMBUSTIBLES AND FLOOR PROTECTOR
To install your appliance correctly, it is extremely important to respect all clearances to any
combustibles as indicated on your stove’s certification label.
Clearances to combustible materials
(See figure 1.3 to match each letter to a clearance)
MODEL A B C D E F K L
Sawman
32"
(815 mm)
32"
(815 mm)
CLEARANCES (SINGLE WALL PIPE)
CANADA / USA
22"
(560 mm)
35"
(890 mm)
40"
(1020
mm)
40"
(1020
mm)
48"
(1220
mm)
84"
(213 cm)
Nordic
MODEL A B C D E F K L
Sawman
Nordic
16"
(406 mm)
32" (815
mm)
16"
(406 mm)
16"
(406 mm)
32" (815
mm)
16"
(406 mm)
16"
(406 mm)
CLEARANCES (DOUBLE WALL PIPE)
22" (560
mm)
16"
(406 mm)
18”
(460 mm)
CANADA / USA
35" (890
mm)
18”
(460 mm)
(560 mm)
40" (1020
(560 mm)
22”
(560 mm)
40" (1020
mm)
22”
(560 mm)
22”
mm)
22”
48"
(1220
mm)
48" (1220
mm)
48"
(1220
mm)
84"
(213 cm)
84" (213
cm)
84"
(213 cm)
6
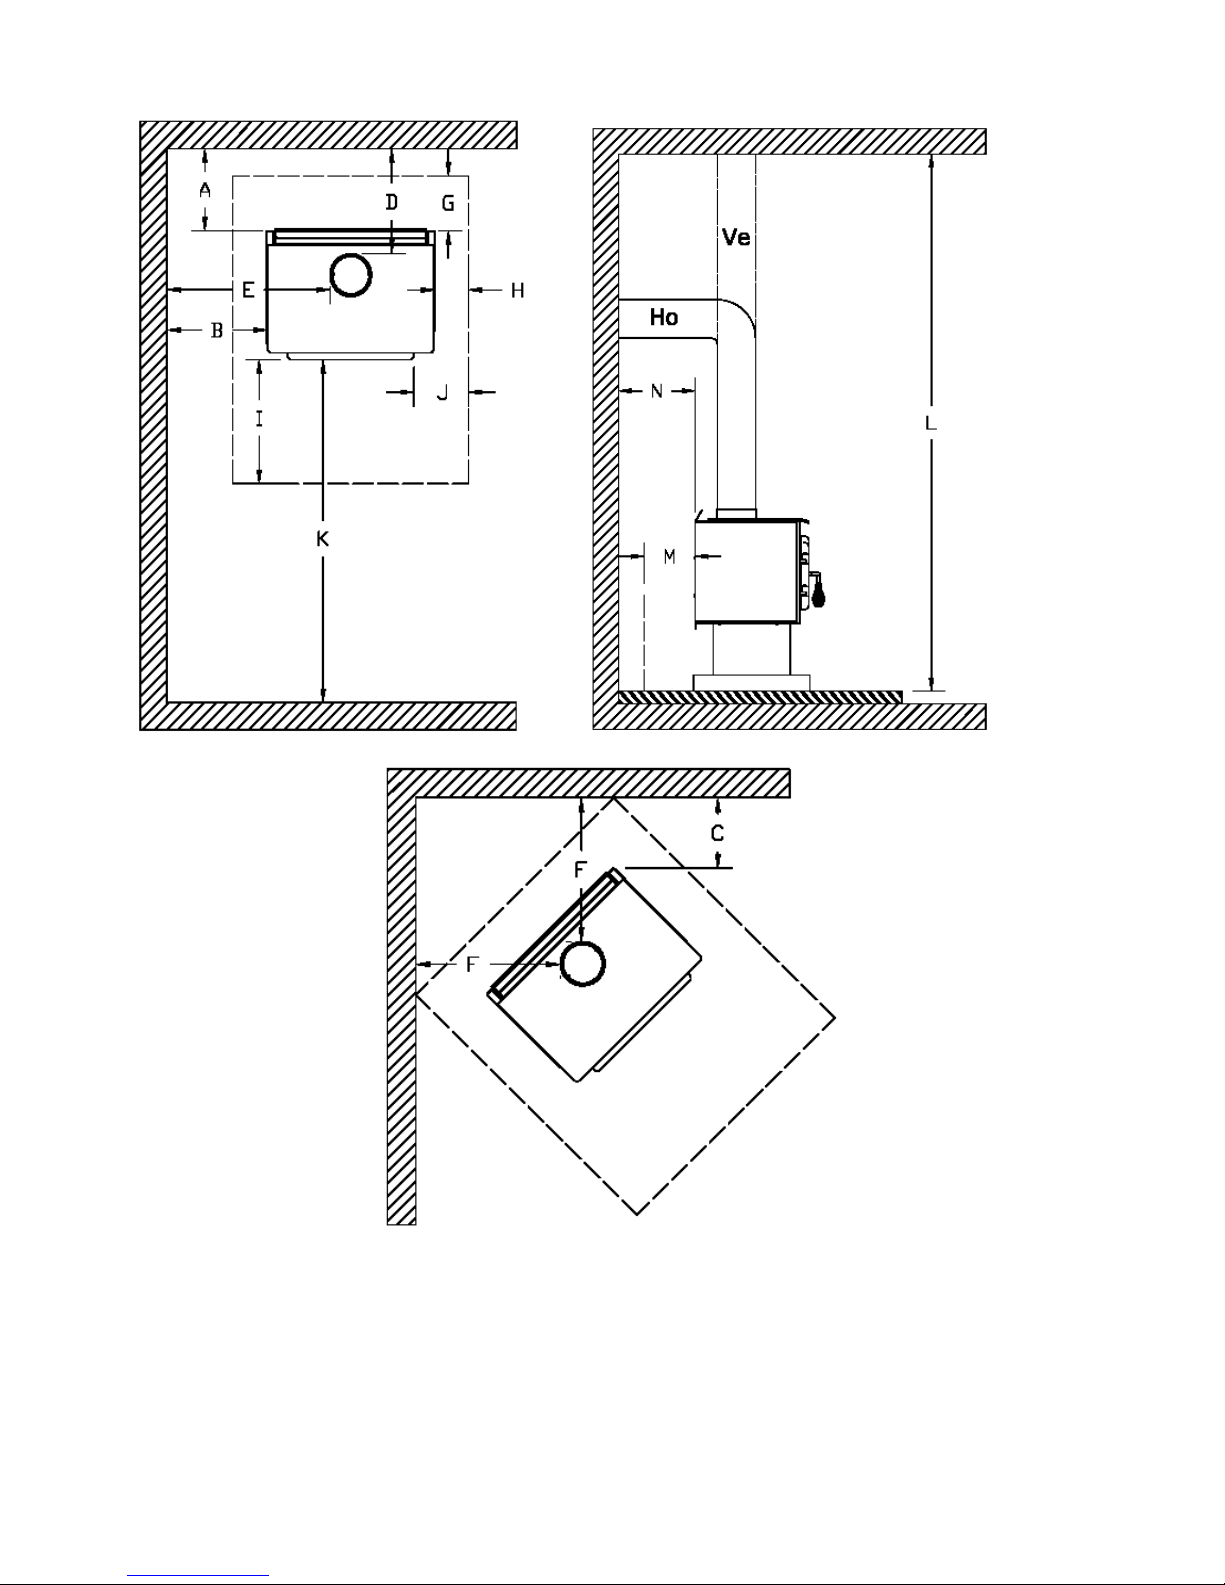
FIGURE 1.3 Clearances to combustible materials and floor protection
7
Floor protector
If the stove is to be installed on top of a combustible floor, it must be guarded by a non
combustible material as shown on figure 1.3 (see the dotted line area).
CANADA USA
FLOOR PROTECTOR*
G
H
J
M
N
8’’ (205 mm) – Note 1 N/A (Canada only)
8’’ (205 mm) N/A (Canada only)
I
18’’ (460 mm)
From door opening
16’’ (410 mm)
From door opening
N/A (USA only) 8’’ (205 mm)
8’’ (205 mm) N/A (Canada only)
N/A (USA only) Note 2
*Steel with a minimum thickness of 0.015’’ (0.38 mm) or ceramic tiles sealed together with
grout. No protection is required if the unit is installed on a non-combustible floor (ex:
concrete).
Note 1: The floor protection at the back of the stove is limited to the stove’s required
clearance if such clearance is smaller than 8 inches (205 mm).
Note 2: Only required under the horizontal section of the connector. Must exceed each
side of the connector by at least 2 inches (51 mm).
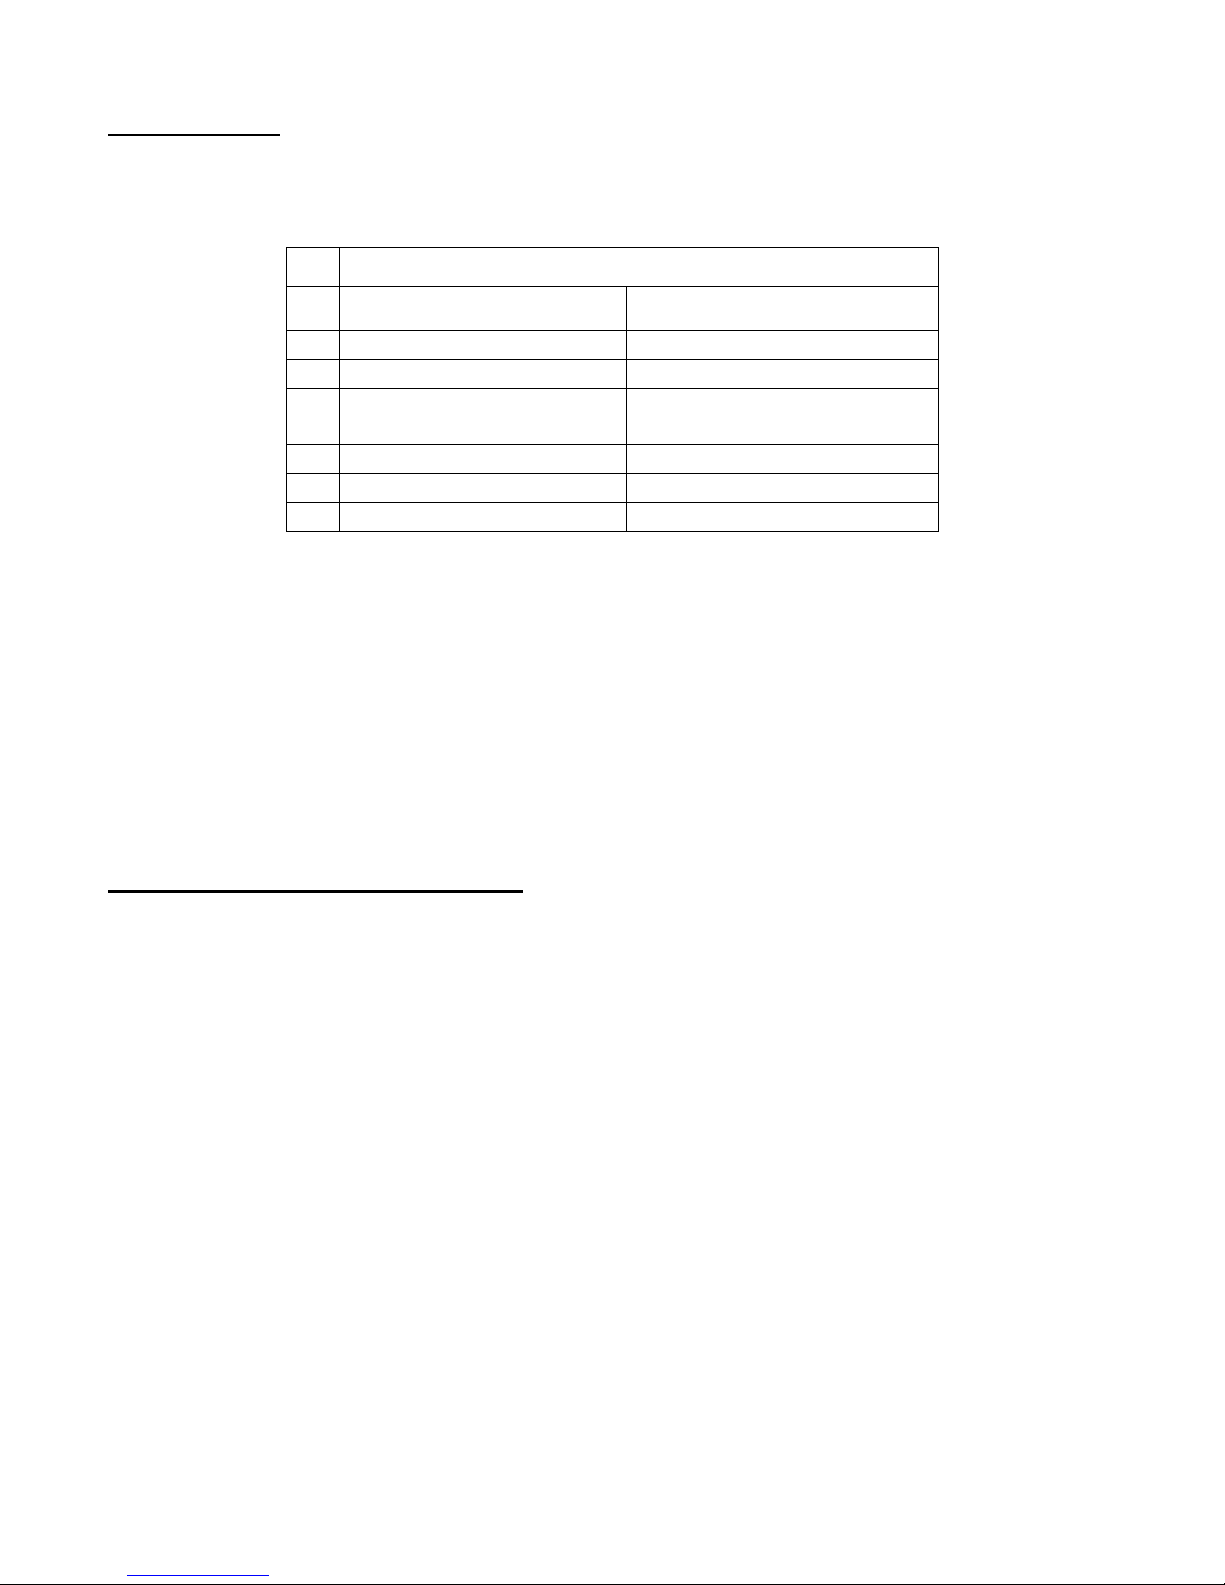
Reduced clearances using shielding
You may decrease the clearances by installing heat radiation shields between the walls or the
ceiling and the stove. These heat radiation shields must be installed permanently, and can
include sheet metal, a rigid non-combustible sheet or a masonry wall.
Clearances of not less than 1" (25 mm) and not more than 3" (76 mm) between the bottom of
the shield and the floor and not less than 3" (76 mm) between the top of the shield and the
ceiling must be respected to allow vertical air circulation behind the shield. The shield must
extend 20" (500 mm) above the stove top and 18" (450mm) to each side of the stove (see
graphic 1).
Following the installation of such a heat radiation shield, the clearances mentioned on the
stove certification plate may be reduced as stated in the following table.
8
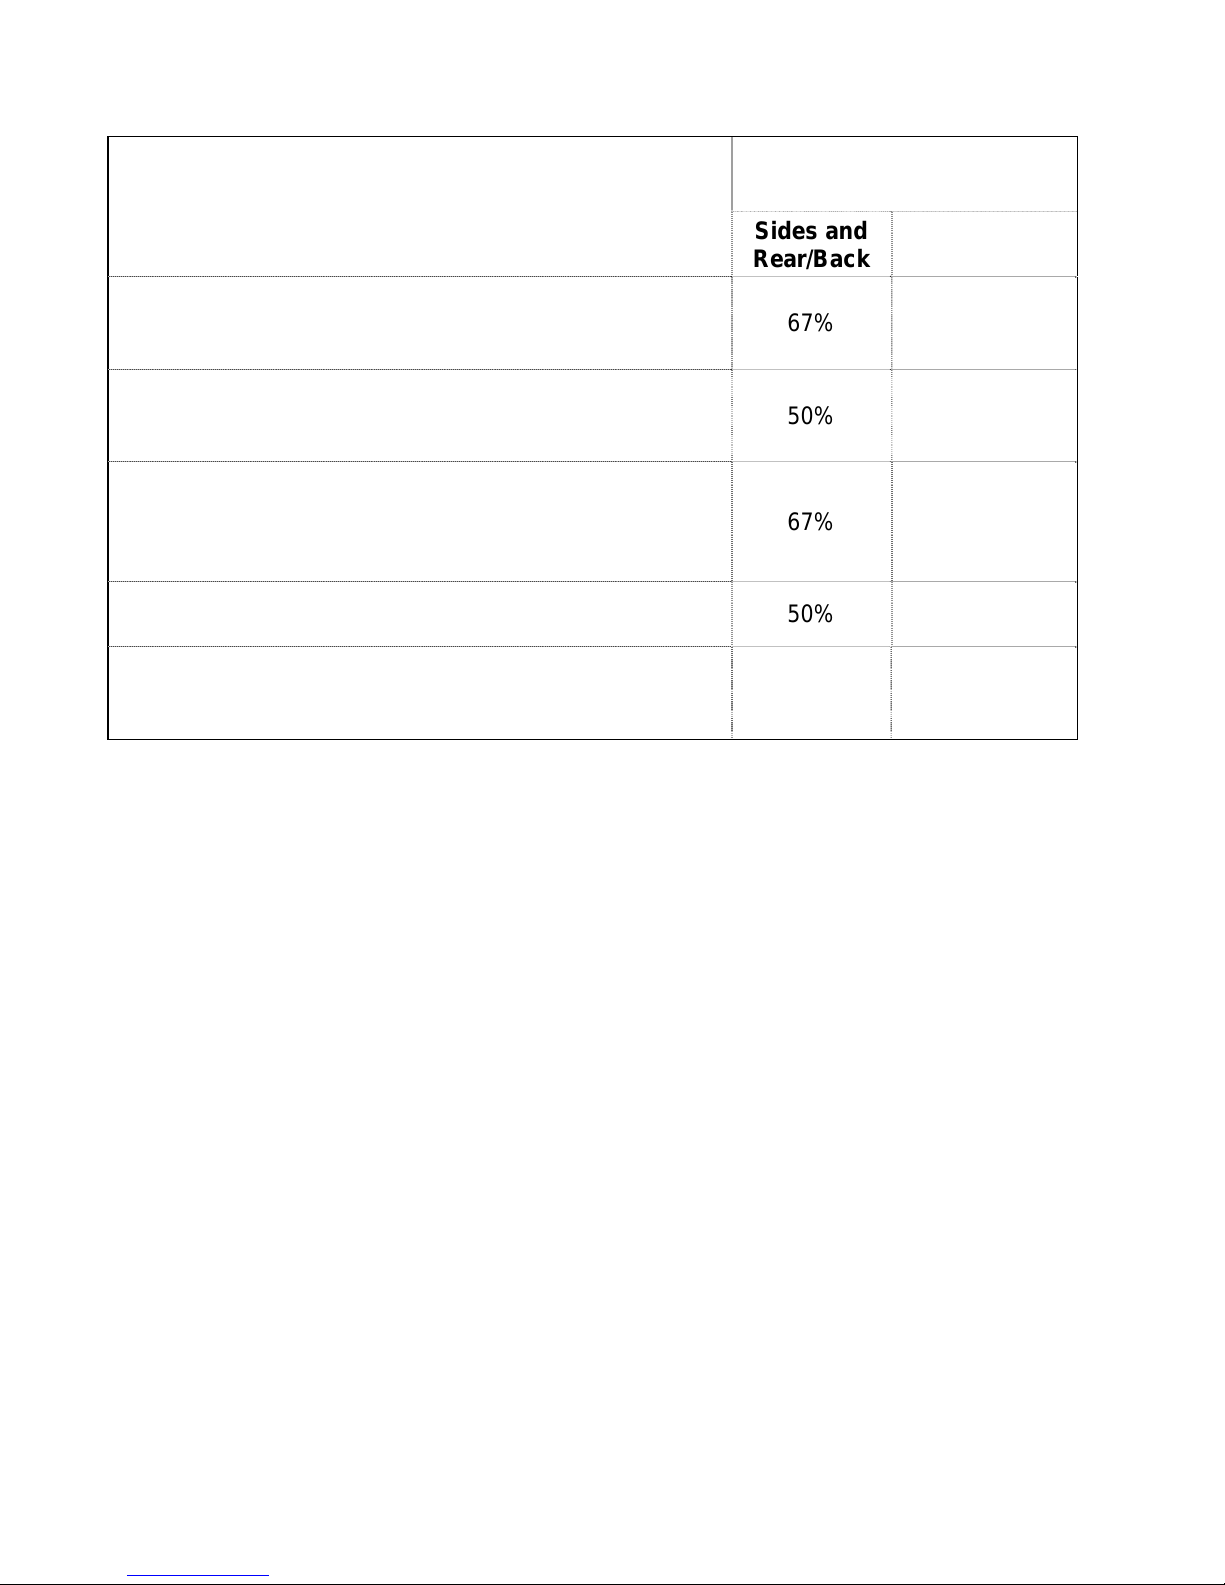
TYPE OF PROTECTION
Sheet metal, a minimum of 0,024" (0,61mm) spaced out
at least 1" (25mm) by non-combustible spacers
(see graphic 2).
Ceramic tiles or an equivalent non-combustible material
on fire-proof supports spaced out at least 1" (25 mm) by
non-combustible spacers (see graphic 3).
Ceramic tiles, or an equivalent non-combustible material
on fire-proof supports with a minimum of 0,024" (0,61
mm) sheet metal backing spaced out at least 1" (25 mm)
by non-combustible spacers (see graphic 4)
Reducing Clearances
With Shielding
Sides and
Rear/Back
67% 50%
50% 33%
67% 50%
Top
Brick spaced out at least 1" (25 mm) by non-combustible
spacers (see graphic 5)
Brick with a minimum of 0,024" (0,61 mm) sheet metal
backing spaced out at least 1" (25 mm) by noncombustible spacers (see graphic 6).
50% N/A
67% N/A
9
 Loading...