

-1-
DVD burning manual

-2-
You have a few recordings on the hard disk of your Dreambox that you want to archive for later viewing on a
DVD player? You can do just that with your Dreambox 8000 HD PVR DVD.
The only limitation are recordings made from a HDTV service. They cannot be converted into a DVD compliant format to be viewed on a DVD player. You still can burn your HDTV recordings on DVD for later viewing on
a Dreambox 8000 HD PVR DVD or a PC.
Preparations
To process a recording for later burning on a DVD follow these steps:
1. Press the
2. Select the desired recording and press the MENU-Button.
3. Select the "Burn to DVD..." option and press the OK-Button.
The cutlist editor will now open. You can remove commecials from the recording or cut excess material from
the beginning or end of the recording. The cut marker set by you will be processed later while burning the
recording to DVD. You can find further information in the next section If you do not wish to set any marker
press the
PVR-Button to open the movie list.
EXIT-Button.
Setting cut markers
Example: A recording containing commercials
1. As best practice use the pause mode (Pause-Button) and jump to the beginning of the movie. Ideally you
can use the numeric keypad for this. Information on the times can be found in the picture on the next
page. You will find it easier to find the beginning of the recording than in fast forward mode.
2. Press the
marked spot.
3. Jump to the beginning of the first commercial as described above. Press the
"Start cut here" option. A start marker is now set.
OK-Button and select the "Remove before this position" option. The movie will now start at the
OK-Button and select the
4. Jump to the end of the commercial and press the OK-Button. Select the "End cut here" option. An end
marker is now set and the commercials will not be shown any more.
5. Repeat steps 3 and 4 for all commercials in the recording. If you want to undo a cut press the
and select the "Delete cut" option.
6. Jump to the end, press the
OK-Button and select the "Remove after this position" option.
OK-Button
Note: All cuts made by you are only done virtually. The data on the hard disk will remain untouched. They
will however be considered during playback, DVD burning and viewing the fill level of the DVD.
Once you are done press the
EXIT-Button.
-3-
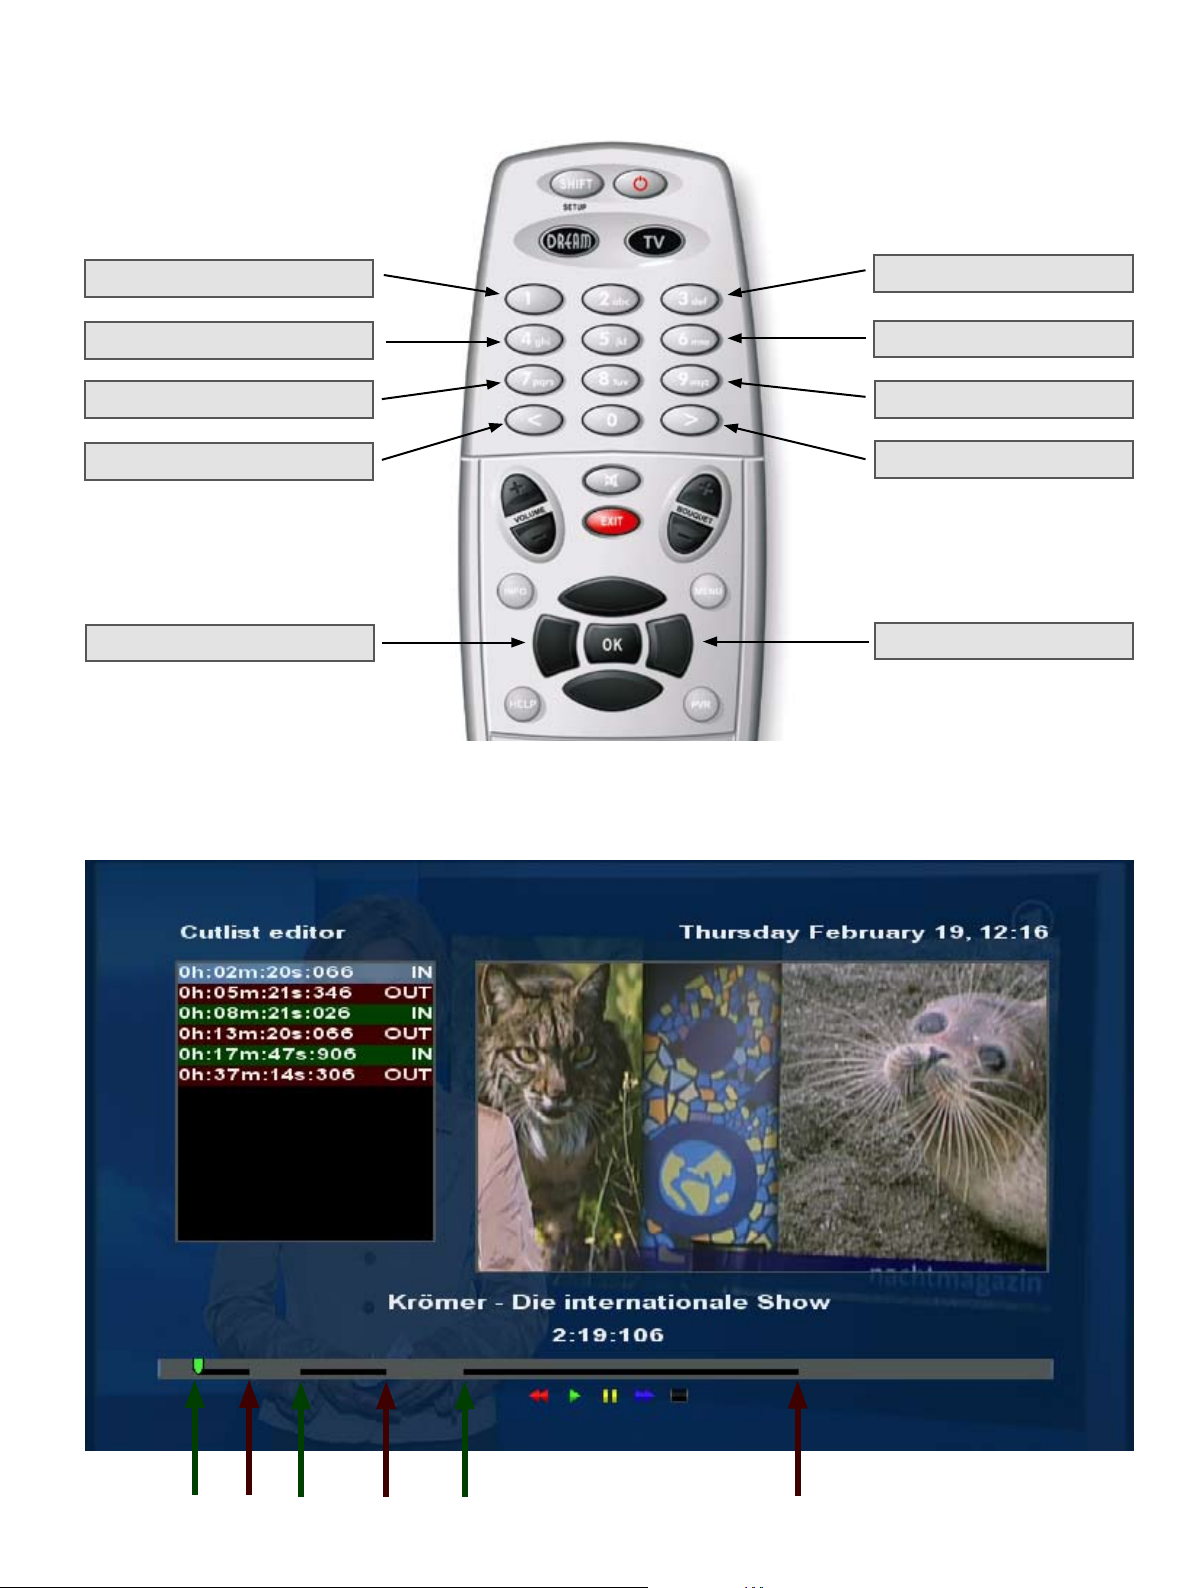
Mapping of the remote control buttons while setting cut markers
10 sec. back
30 sec. back
90 sec. back
5 min. back
one step back
Cutlist editor
10 sec. foward
30 sec. foward
90 sec. foward
5 min. forward
one step forward
IN
OUT
IN
OUT
IN
OUT
 Loading...