


D r e a m b o x D M 7 0 2 5 OLED-Upgrade-Kit
Dreambox DM 7025
OLED-Upgrade-Kit
OLED-Upgrade-Kit mounting guidelines
This describes how to change your DM 7025 with a LCD to a DM 7025 with an OLED.
Please note that you have to abide the rules for electronic discharge when handling
electronic equipment. Make sure that you are grounded. Do not open the device in your
living room or in any other room with carpet or statically chargeable flooring. You have to
disconnect all cables from the device. Only open the device with the tools listed in this
document. Avoid any contact with the components of the main board. Please contact your
dealer or TV technician if all of this above does not mean anything to you or if you have too
many questions.
Required parts
¾ 1 Dreambox DM 7025
¾ 1 Phillips screwdriver
Requirement
¾ Current software: Release 2.3 - 25.10.2007 available under www.dm7025.de
1
D r e a m b o x D M 7 0 2 5 OLED-Upgrade-Kit
Performance
1. First of all remove all the CI-Modules, CF-Cards and Smartcards from the slots on the
front.
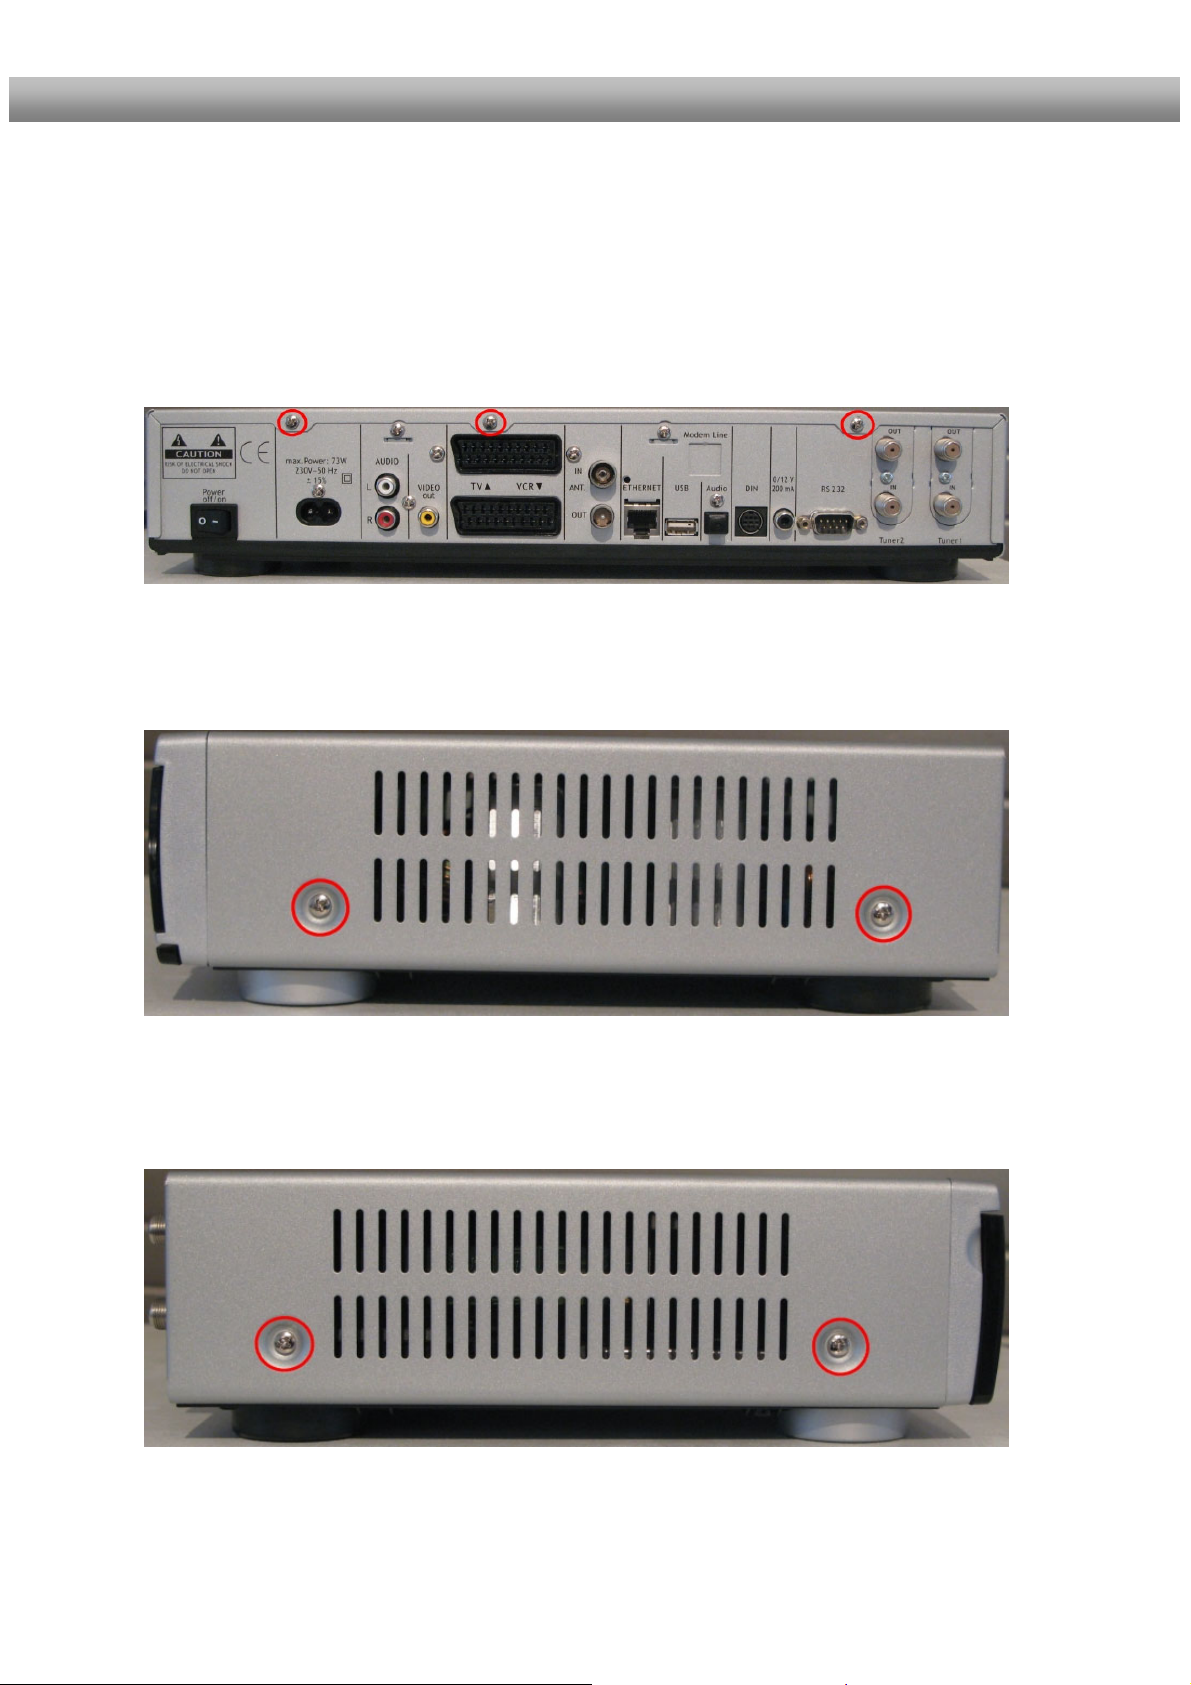
2. Unscrew these three Phillips screws on the rear of the device.
3. Unscrew these two Phillips screws on the right side of the device.
4. Unscrew these two Phillips screws on the left side of the device.
2

D r e a m b o x D M 7 0 2 5 OLED-Upgrade-Kit
5. Lift up the case lid on the sides slide it backwards.
6. Very carefully and slightly bend the plastic clips on the right and left side backwards. Now
you should be able to flip the front cover down. Please beware that there still is a cable
connected on the back, therefore you cannot remove the display completely.
Right side
Left side
3

D r e a m b o x D M 7 0 2 5 OLED-Upgrade-Kit
7. Carefully disconnect the plug on the front panel and put it aside.
8. Carefully pull the black lid from the old front cover down on the marked spots. Please
ensure that you are pulling with even force.
9. Attach the black lid from the old front cover to the new front cover of the OLED-UpgradeKit.
10. Reconnect that plug which you have disconnected from the back side of the old front
cover to the back side of the new front cover of the OLED-Upgrade-Kit.
11. First attach the new front cover on the bottom and then on the sides until it snaps into
place.
4

D r e a m b o x D M 7 0 2 5 OLED-Upgrade-Kit
12. Slide the case lid onto the device from the back. Please ensure that the plastic clips do
not stick out while you are doing so.
13. Screw the four Phillips screws (left, right) and the three Phillips screws (back) back into
place.
14. Reconnect all cables to your Dreambox. Reconnect the power plug as the last thing.
You can turn your Dreambox on again. We wish you a lot of fun with your new display.
5
 Loading...